The Octopus Authenticator User Portal is a platform from which users can access services to which they are assigned and perform various self-service operations. The Portal menu of the Octopus Management Console enables you to control Portal settings, including the self-service actions that are available, the users who are authorized to access the Portal, and more.
The following sections describe how to work with the Portal menu:
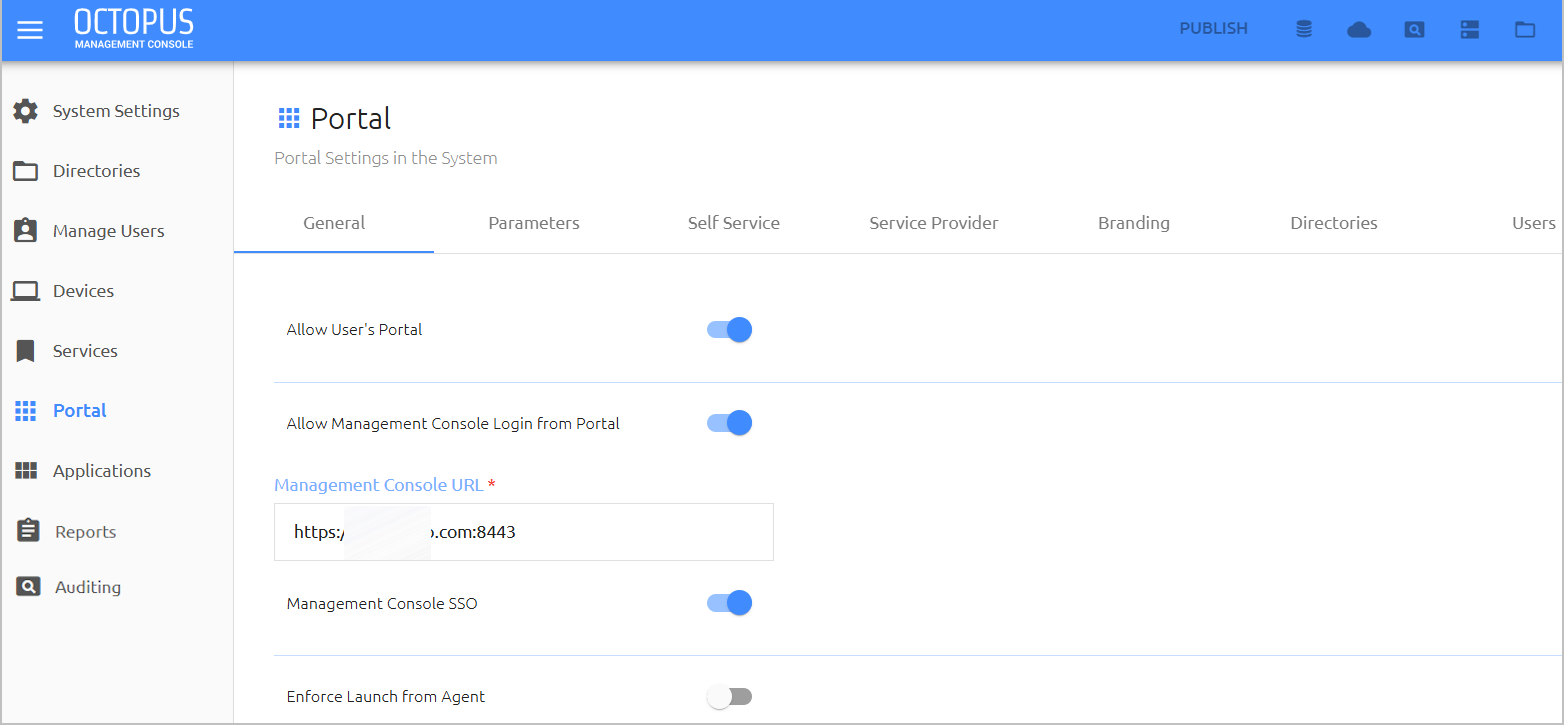
The General tab, which is displayed by default when you open the Portal menu, contains settings related to Portal access, session timeout and Management Console access details.
After updating settings in the General tab, click Save. Then, from the toolbar at the top of the page, click PUBLISH and publish your changes.
Management Console Access Settings
The following settings are related to the Octopus Management Console (MC):
Management Console URL: This setting is required.
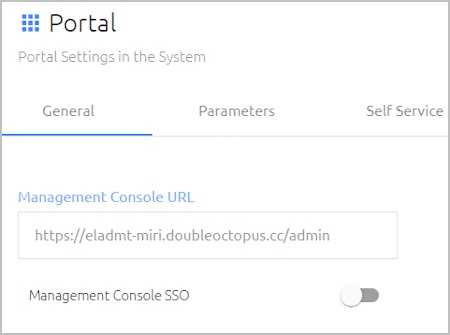
Management Console SSO: When this setting is enabled, users logging into the MC from the Portal do not need to reauthenticate to access the MC.
Portal Security and Authentication Settings
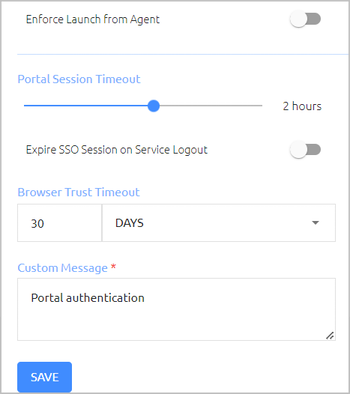
The following settings appear at the bottom of the General tab:
Enforce Launch from Agent: When this setting is enabled, the Portal can be accessed only from the user's workstation, via the Windows / Mac Agent. (Manual Portal login through a browser is disabled.)
Portal Session Timeout: Determines the maximum length of a User Portal session. The session timeout can range from 1 minute to 24 hours (default is 1 hour). To update the setting, drag the slider to specify the desired value and then click Save.
Expire SSO Session on Service Logout: When this setting is enabled, the entire SSO session ends automatically when the user logs out of an SSO service.
Browser Trust Timeout: This setting, which is relevant when Adaptive Authentication is enabled, determines the period of time for which strong authentication is not required on browsers that are designated as Trusted devices. When the specified timeout elapses, users will be prompted to enter a verification code when authenticating from these browsers. Valid timeout periods range from 1 hour to 12 months (default is 30 days).Managing Workstation and Browser Settings
Custom Message: The message displayed to users on successful authentication to the Portal. Enter the text of your choice in the field.
The Parameters tab contains settings related to the process of authenticating to the User Portal.
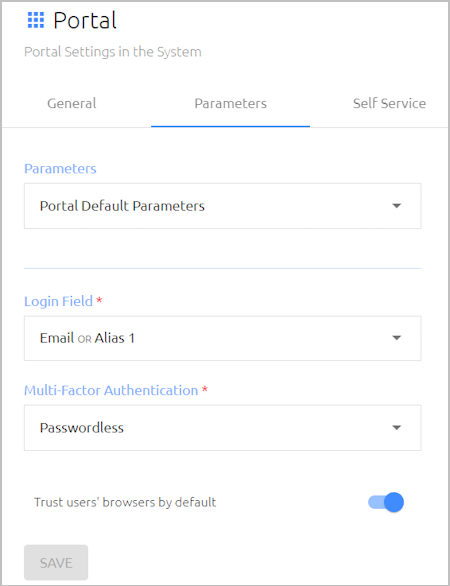
The settings are:
Login Field: The identifier that the user enters on the Login screen of the User Portal (email, username, etc.). You may select more than one identifier type.
Note: If you select a field that is not unique (e.g., a user may have the same username in multiple directories), users need to enter <domain>\<username> on the Login screen.Multi-Factor Authentication: The MFA method used for Portal authentication:
Passwordless: Users enter only the Login parameter and MFA is done in the background.
Username + Password (MFA): Users provide the Login parameter as well as a password.
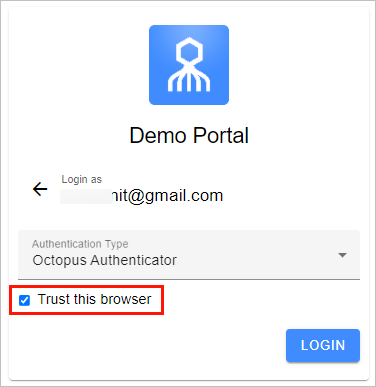
Trust users' browsers by default: This setting is relevant when Adaptive Authentication is enabled. When the toggle is selected, the Trust this browser checkbox on Login screens of the User Portal and SAML services will be selected by default. (When this checkbox is selected, the browser will be marked as a Trusted device after the first successful strong authentication.)
The Parameters dropdown list at the top of the tab enables you to define directory-specific parameters that override the Portal default parameters.
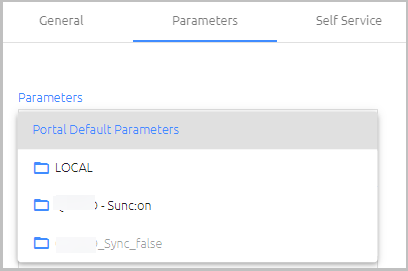
For more details and instructions for overriding parameters, refer to the Overriding Default Service Parameters section in the Integrating Services chapter.
The Self Service tab contains settings that determine which self-service actions are available in the User Portal. Actions are enabled and disabled by clicking the relevant toggle buttons.
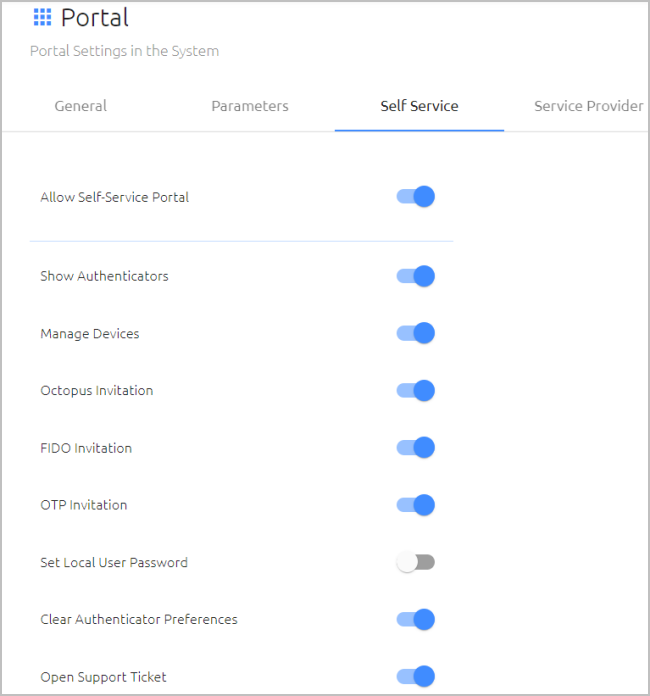
The Allow Self-Service Portal toggle is a global setting that determines whether any self-service actions appear in the Portal. When this setting is off, all other toggles in the tab are disabled.
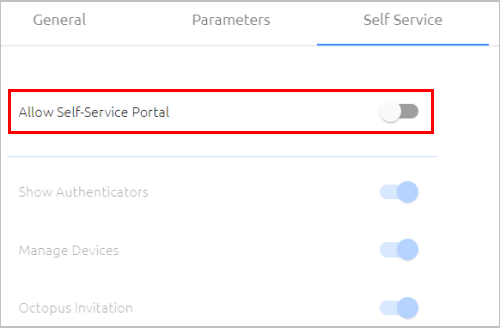
When the Allow Self-Service Portal setting is on, the actions that are currently activated in the Self Service tab are displayed to users when they click the Actions icon of the User Portal.
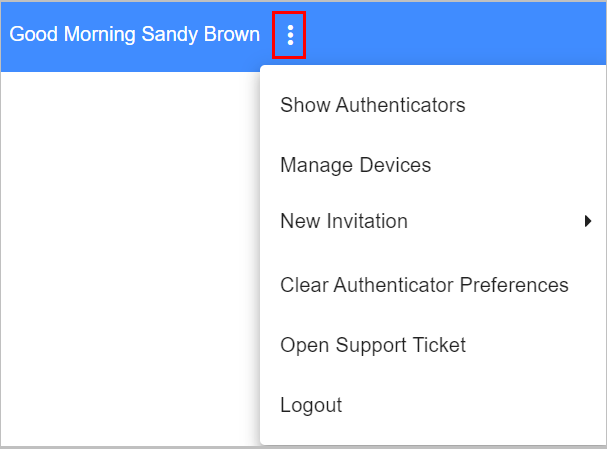
The self-service actions are:
Show Authenticators: When this setting is enabled, users are able to open a popup displaying basic information about all the devices they have used for authentication.
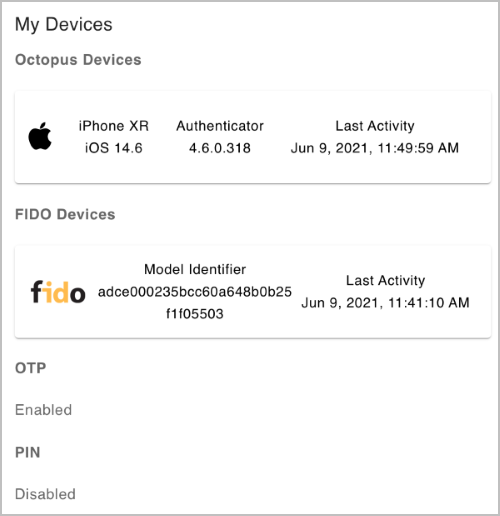
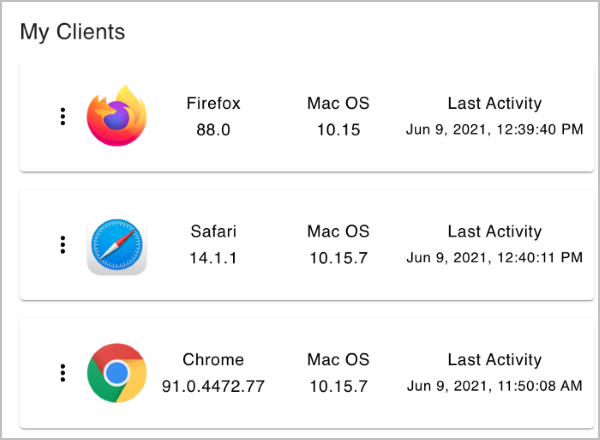
Manage Devices: When this setting is enabled, users are able to view a popup displaying basic information about all the browsers they have used for authentication. Users are able to remove the browser from the list by clicking the Actions icon and selecting Delete.
New Invitation: This action enables users to send enrollment invitations to themselves so they can enroll additional devices in the system. The invitation types that are available in the User Portal are determined by the Invitation settings that are enabled in the Self Service tab (Octopus, FIDO and OTP).
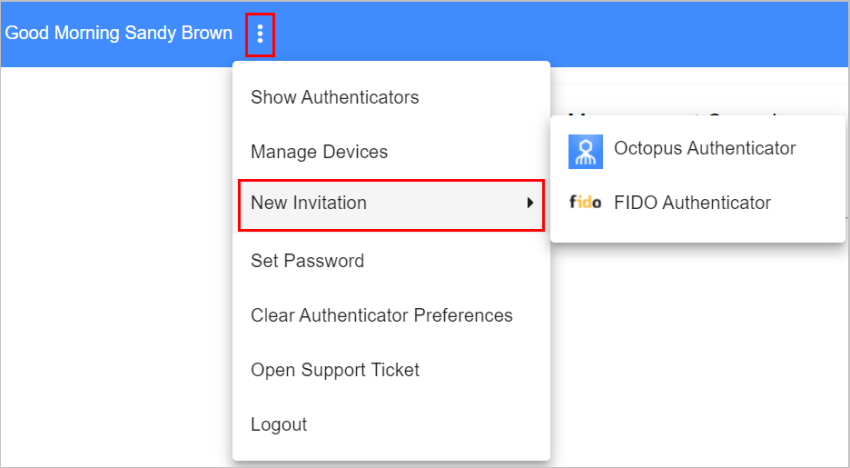
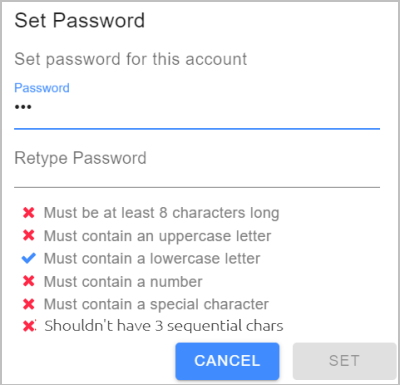
Set Password: When this setting is enabled, users in the LOCAL directory have the option to reset the password required for user verification in services that utilize multi-factor authentication. To reset the password, users select the Set Password self-service option and enter the new password in the Set Password popup. Password requirements are displayed as the password is entered.
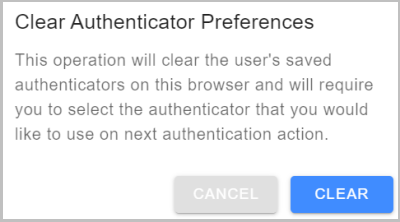
Clear Authenticator Preferences: This action enables users to remove data stored on the browser, such as the previously selected authentication method for accessing SAML services. After clearing preferences, users will need to specify an authentication method when they next access the service.
To clear stored data, users select the Clear Authenticator Preferences self-service option and then click Clear in the confirmation popup.
Open Support Ticket: When users select this action, an email message to the Support Email address (specified in System Settings > General Settings) is automatically created in the user's default email client.
When a secondary Portal Service Provider is defined, users are able to authenticate to the User Portal through an external SAML service provider (such as Okta). The external service provider is configured in the Service Provider tab of the Portal menu.
By default, there is no external service provider, and the components of the Service Provider tab are disabled. To successfully use this feature, you need to establish integration between the Portal and the service provider. This integration involves obtaining the Metadata URL from the service provider, and providing the required Portal parameters to the external service.
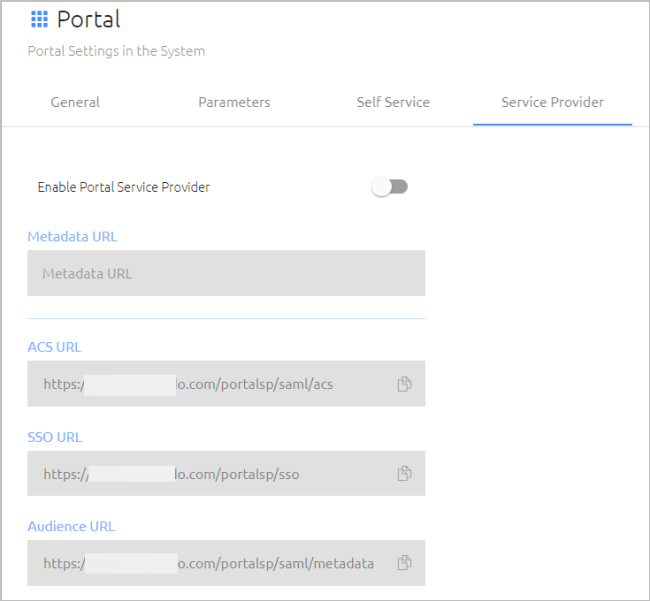
The following procedure explains how to configure an external service provider, using Okta as an example.
To configure Okta as a Portal Service Provider:
From the Okta Admin Console, navigate to and select the relevant app.
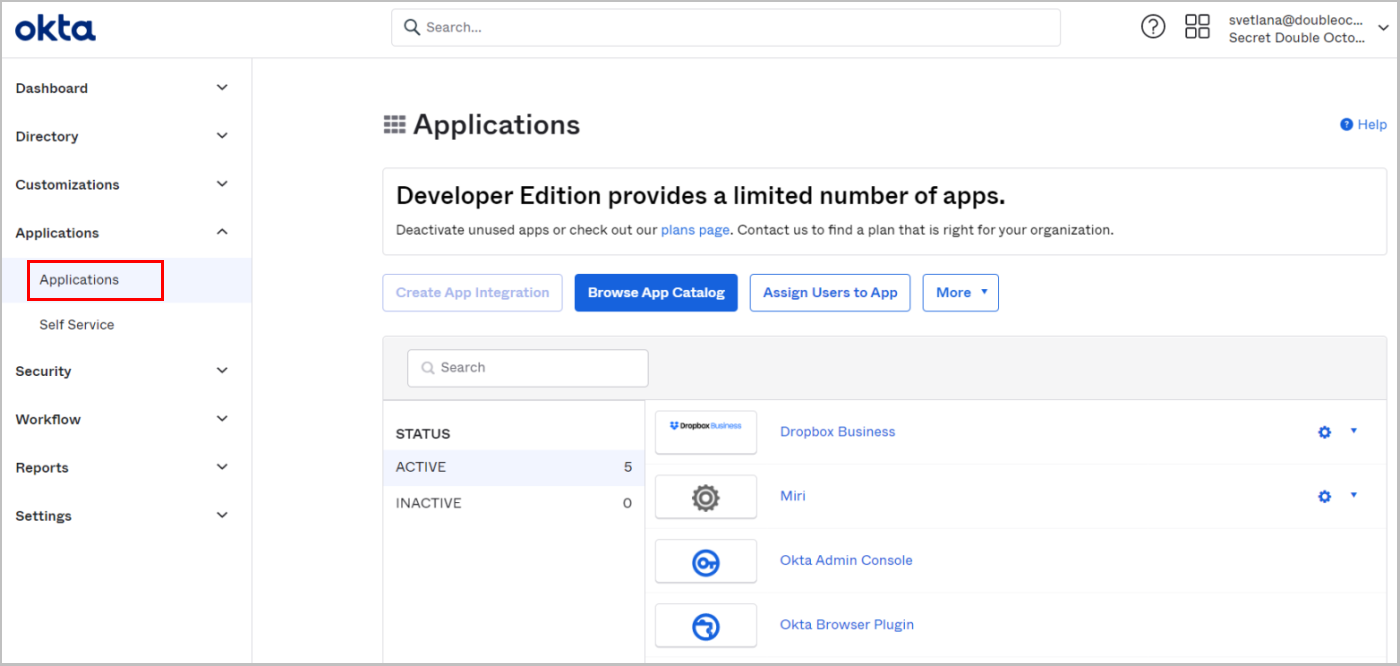
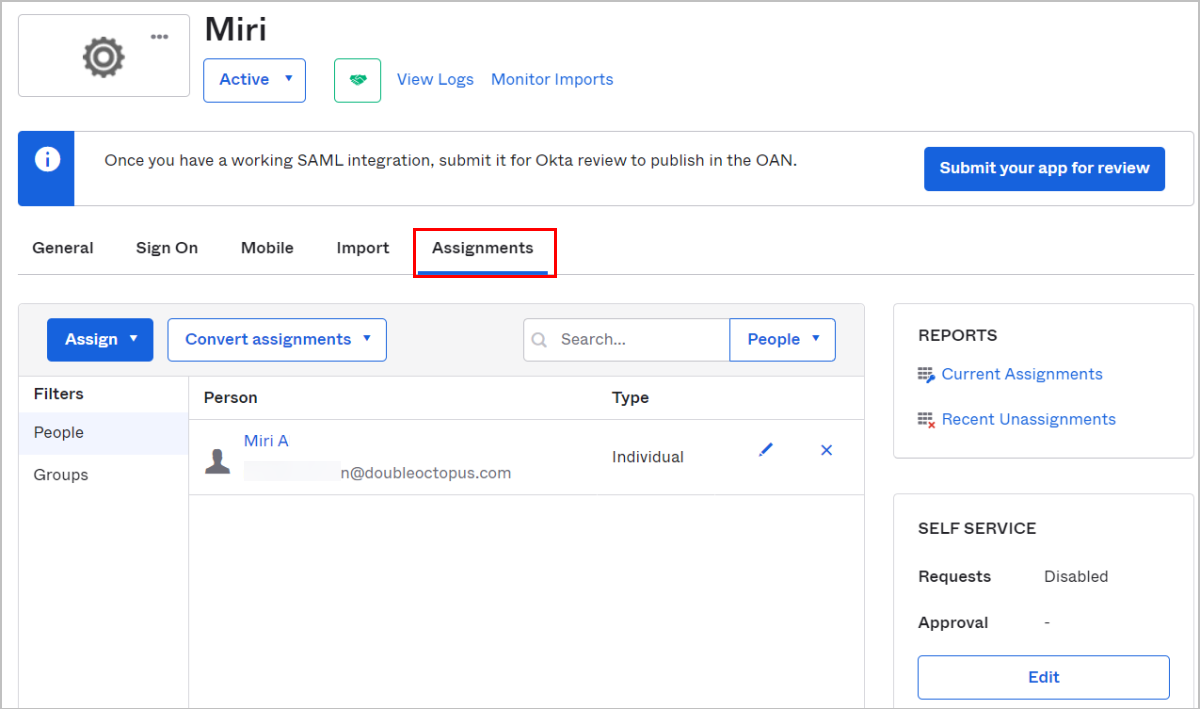
From the Assignments tab, assign groups and users to your app.
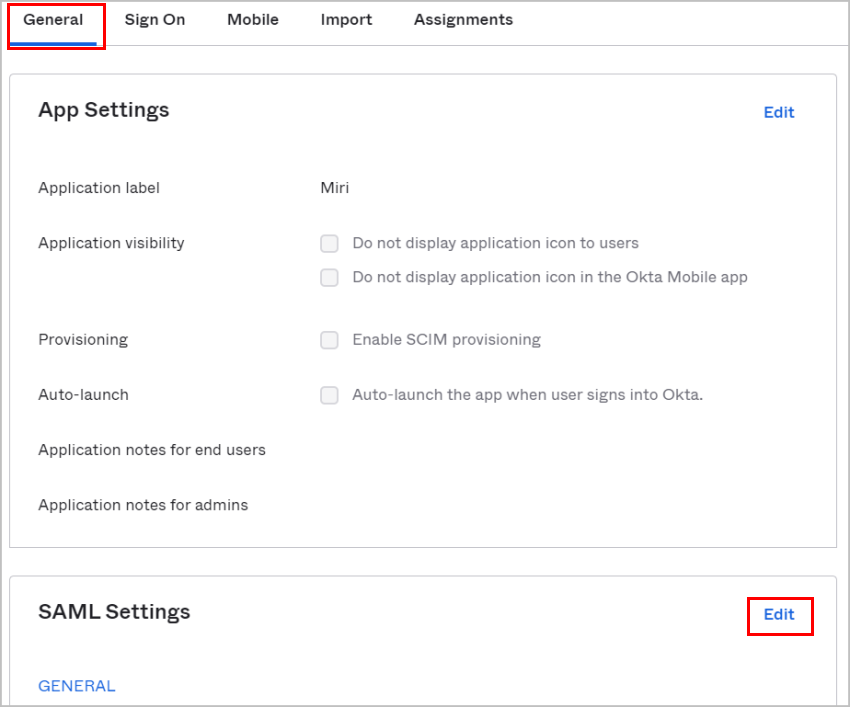
Select the General tab. Under SAML Settings, click Edit.
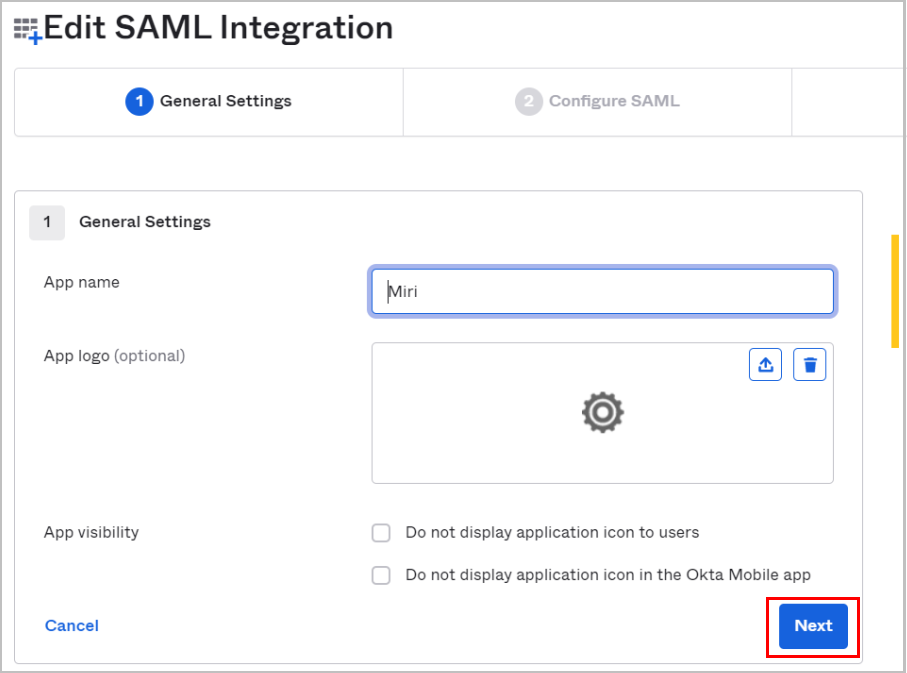
Then, under General Settings, click Next.
Configure the following settings. All settings can be copied from the Service Provider tab in the Octopus Management Console by clicking the Copy icons.
Setting
Description
Single sign on URL
The ACS URL in the Service Provider tab.
Requestable SSO URL
The SSO in the Service Provider tab.
Audience URI
The Audience URL in the Service Provider tab.
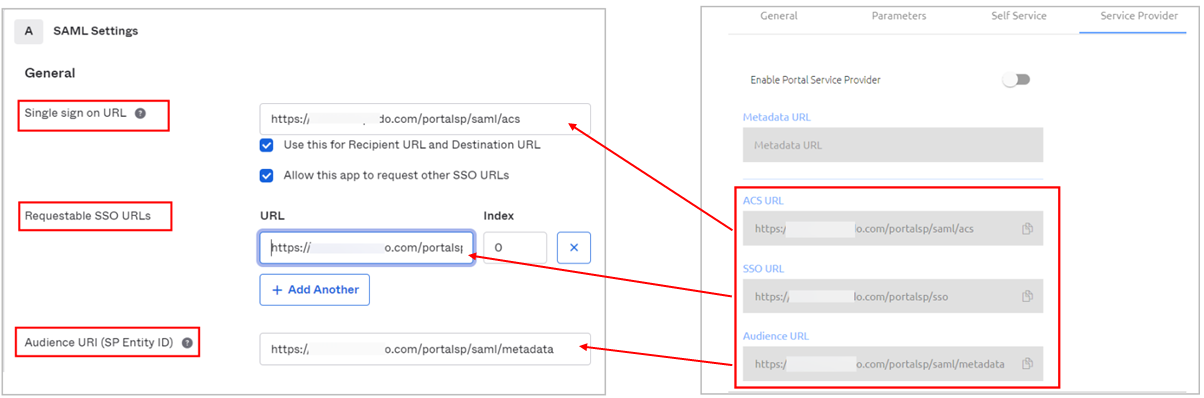
Click Next, and then click Finish.
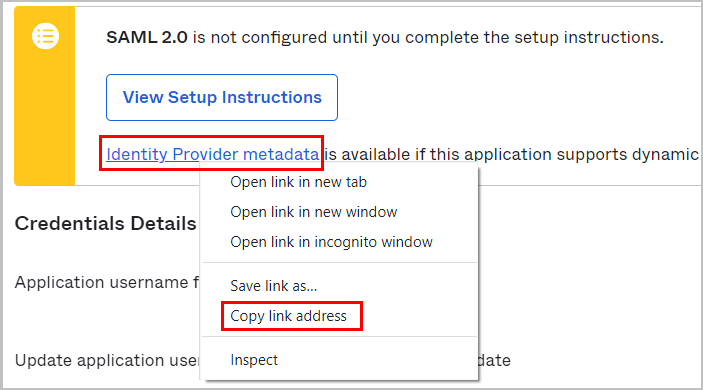
In your app, open the Sign On tab. Right-click on Identity Provider metadata, and select Copy link address.
In the Service Provider tab of the Octopus Management Console, click the Enable Portal Service Provider toggle to enable the feature. Then, paste the Identity Provider metadata link that you copied into the Metadata URL field.
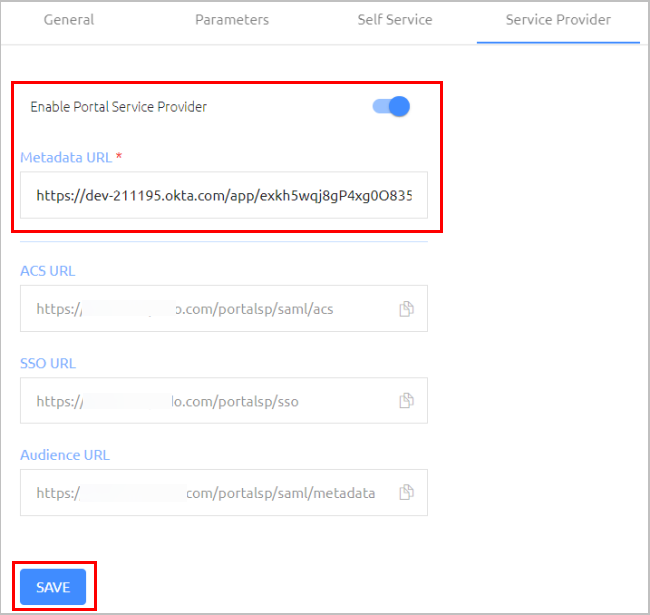
Click Save. Then, from the toolbar at the top of the page, click PUBLISH and publish your changes.
The Branding tab allows you to create a customized look and feel for the Portal using colors, images and texts that are specific to your organization.
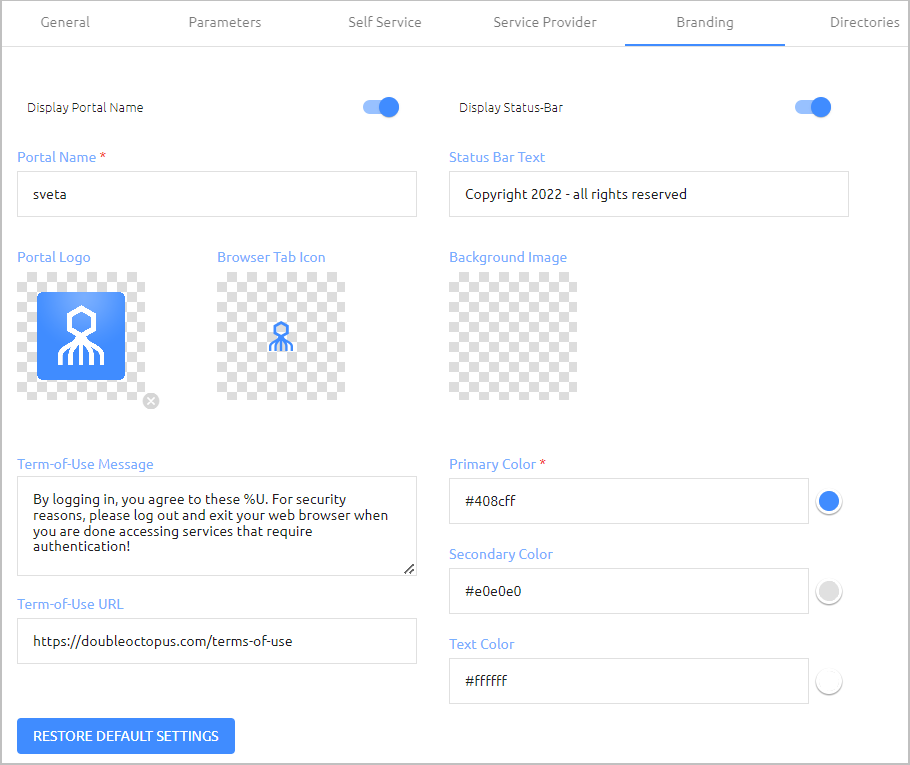
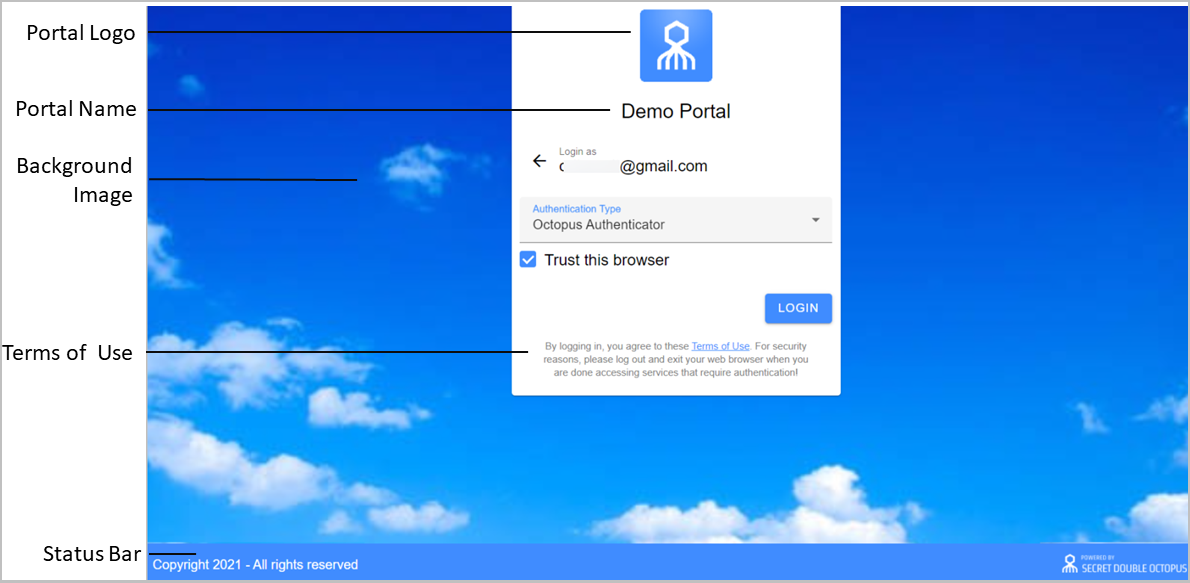
The following figure shows an example of how you can use branding to design your User Portal. All available branding settings are described in the table below the diagram.
Setting | Description / Notes |
|---|---|
Display Portal Name / Portal Name | When the toggle is enabled, the name entered in the Portal Name field appears on the Login screen and in the upper left corner of the User Portal. |
Display Status Bar / Status Bar Text | When the toggle is enabled, the text in the Status Bar Text field appears on the bottom of both the Login screen and the User Portal. |
Portal Logo | This image appears at the top of the Login screen for the Portal. To update the logo, hover over the area, click Upload Image and select the JPG or PNG file of your choice. Supported image size is 488x488 pixels. |
Browser Tab Icon | The favicon for the browser tab in which the Portal is displayed. To update the image, hover over the area, click Upload Image and select the icon of your choice. Supported image formats are PNG, GIF, and ICO. Image size should be 16x16 or 32x32 pixels, using either 8-bit or 24-bit colors. |
Background Image | This image is displayed across the Login screen. To update it, hover over the area, click Upload Image and select the image of your choice. |
Term-of-Use Message / URL | This text appears on the Login screen for the Portal. %U is a link to the Term-of-Use URL. |
Primary Color | Color of the status bar, the Login button, and other major components. To change the color, enter the code in the field or click the circle on the right to open the color picker. |
Secondary Color | Color of non-primary components, such as Cancel buttons. To change the color, enter the code in the field or click the circle on the right to open the color picker. |
Text Color | Color of the text in the header and the status bar. To change the color, enter the code in the field or click the circle on the right to open the color picker. |
Restore Default Settings | Click to revert all branding settings to the default values. |
After updating branding settings, click Save. Then, from the toolbar at the top of the page, click PUBLISH and publish your changes.
In order to work with the User Portal, users need to be assigned access privileges to the Portal. This is done in the Directories and Users tabs of the Octopus Management Console's Portal menu. Any user who is not assigned Portal access will not be able to successfully log into the Portal.
The following procedure explains how to grant Portal access by selecting the appropriate directories, groups and users.
To assign access privileges to the Portal:
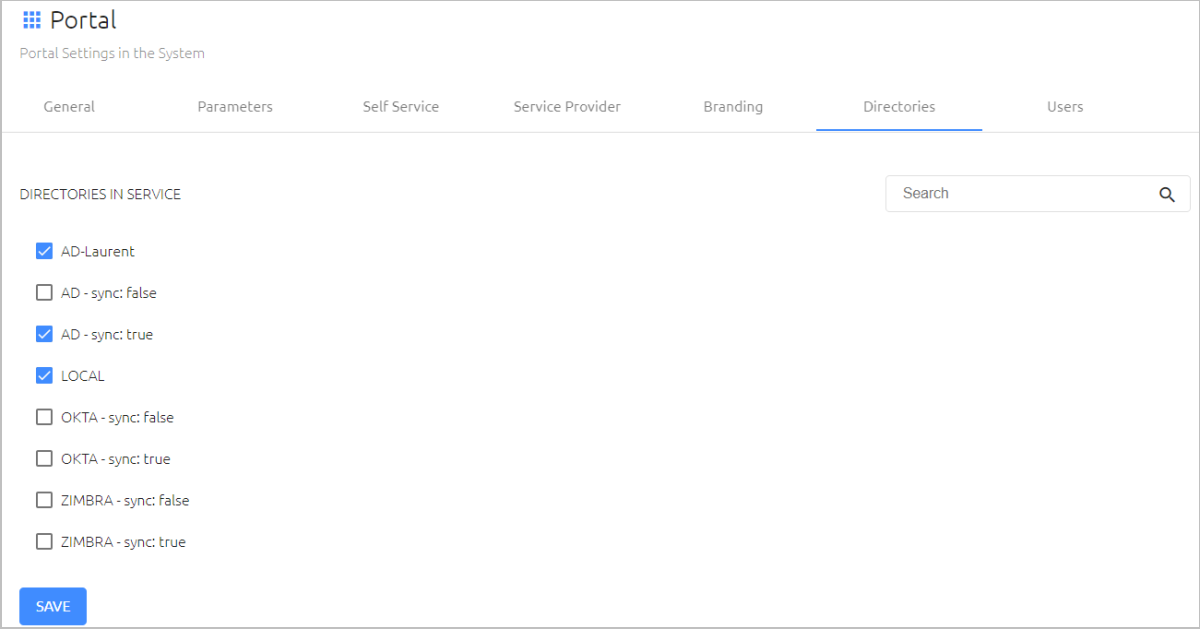
From the Portal menu, open the Directories tab. Select the checkboxes of the directories that you want to integrate with the User Portal, and then click Save. You can filter the Directories list by entering a keyword in the Search field.
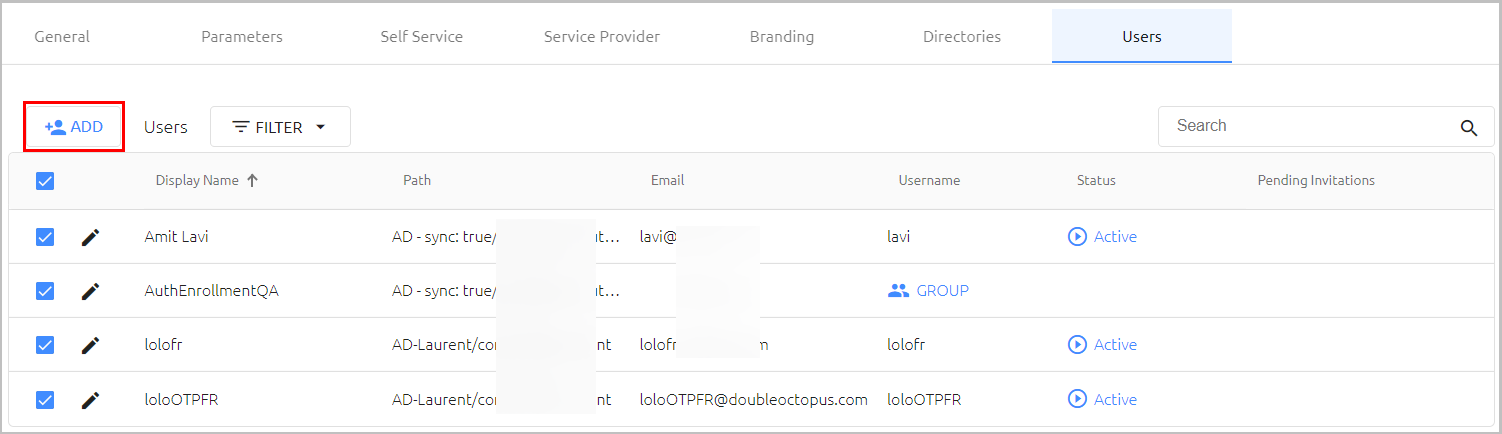
After selecting directories, open the Users tab and click Add.
The Add Users To popup opens. A list of directories integrated with the Management Console appears on the left side of the popup.
Expand the directories tree and select the checkboxes of the users and Groups to which you want to grant Portal access. If a user or Group already has Portal access, the checkbox is disabled.
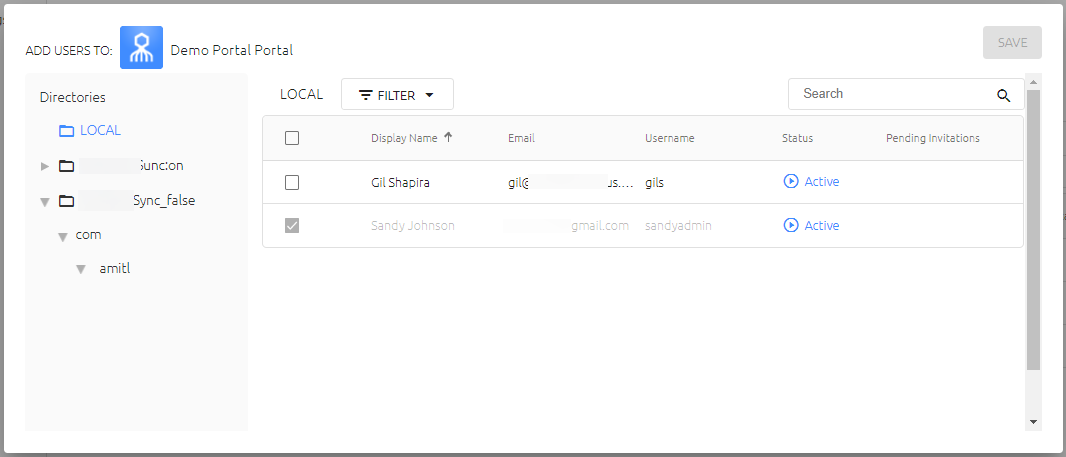
When you have finished making your selections, click SAVE (in the upper right corner of the popup).
The popup closes, and the selected Groups and users are listed in the Users tab.
From the toolbar at the top of the page, click PUBLISH and publish your changes.
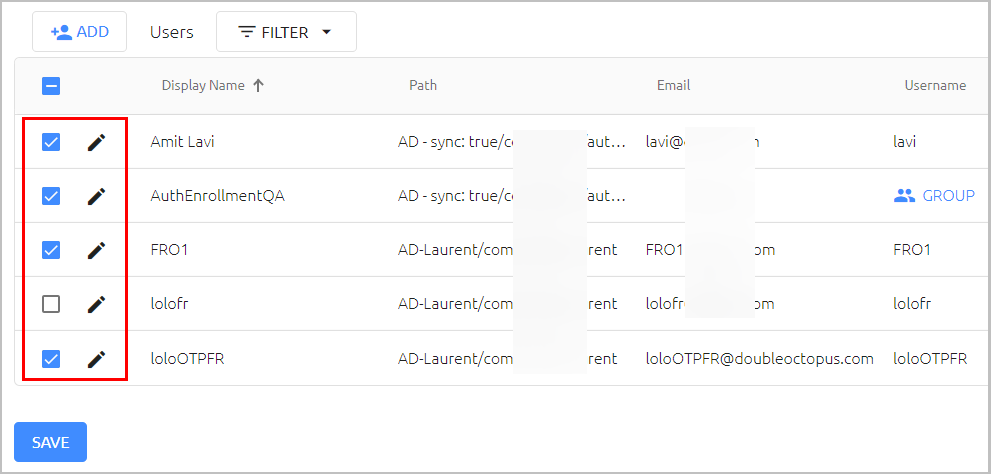
After adding users to the list, you can manage them directly from the Users tab. To enable or disable Portal access for a specific user, toggle the checkbox on the left side of the row. Clicking the Edit icon next to the checkbox opens the individual settings for that user.