Octopus Authentication 6.8.4 allows upgrading from versions 4.4.1 and higher. Before starting the upgrade process, verify your Octopus Authentication Server version.
IMPORTANT: This article is relevant for upgrading from versions 5.0 and higher. If you are working with version 4.8.4 or lower, please refer to the article Performing Upgrade from Older Server Versions.
The upgrade is available for Authentication Servers and Management Console servers. Upgrade of an All-in-One environment is NOT supported.
In distributed server configurations, it is recommended to follow the steps described in the sections below, according to your current version. These upgrade processes perform a full backup of the current Octopus system, ensuring no loss of data or settings:
Note: When upgrading to version 6.8.4, there is no need to rename the certificate file after completing the upgrade. The name of your file will be maintained automatically during the upgrade process.
IMPORTANT: If your environment includes a DMZ Server, upgrade it after performing the distributed server upgrade described in the following procedures. For instructions about DMZ upgrade, refer to Upgrading DMZ Servers.
To perform upgrade for distributed servers:
From the Octopus Management Console (System Settings > Auth Servers), detach the Authentication Server from the Management Console. If you have more than one Authentication Server, detach all of them.
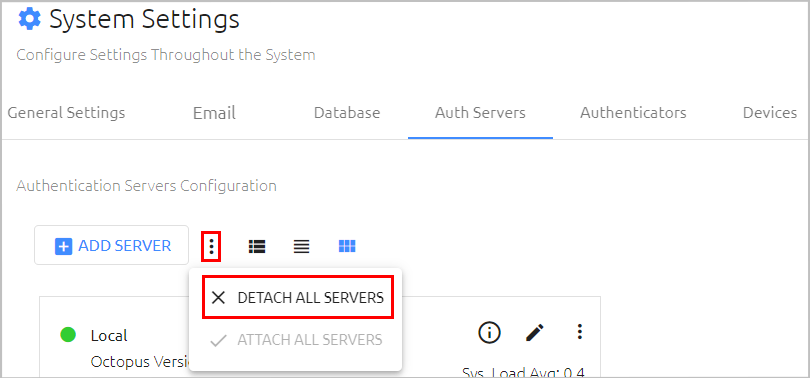
After you detach the servers, they will continue to authenticate users, and the Management Console will be ready for upgrade.
Run the Management Console upgrade by by executing the Octopus Authentication Server upgrade script:
sudo ./octopus-####.run
The installation will display the currently running version and prompt you to confirm that you want to proceed with the upgrade.

Specify the setting for firewall configuration (default = yes).
Verify that the installation completed successfully.
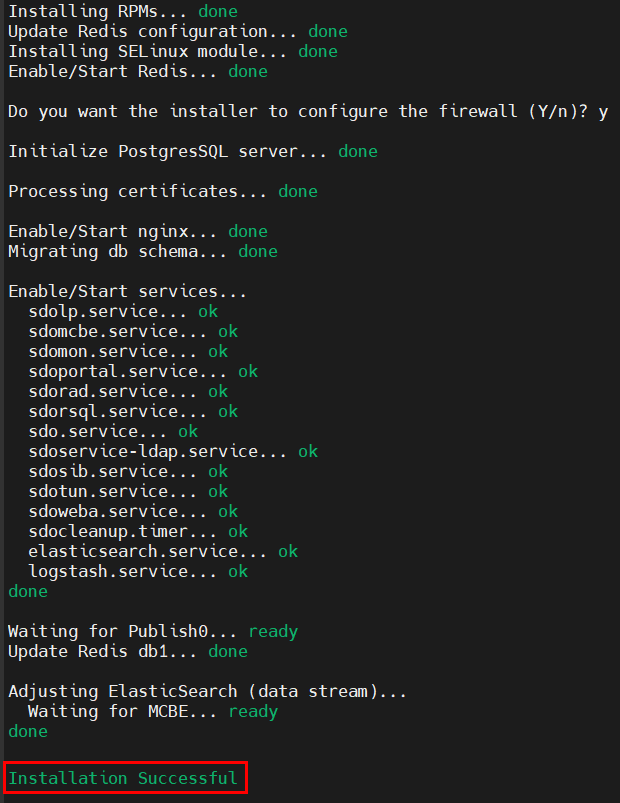
If you have a Secondary Management Console (MC), upgrade it by executing the Octopus Authentication Server upgrade script, as described in Steps 2-4 above.
If you do not have a Secondary MC, continue with Step 6.
Disconnect the first Authentication Server from the load balancer. Run the upgrade script on the server, and verify that the installation completed successfully.
From the Octopus Management Console (System Settings > Auth Servers), attach the Authentication Server back to the MC.
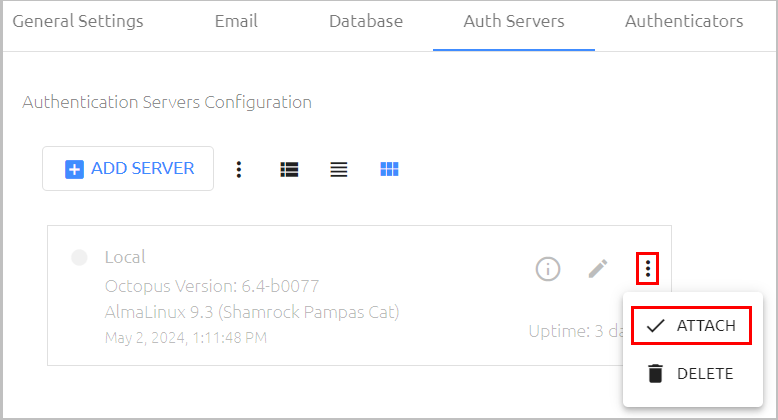
Connect the first Authentication Server back to the load balancer.
Repeat Steps 6-8 for all additional Authentication Servers.
When the upgrade process is complete, restart the server.
To enable the new Management Console GUI and the User Portal interface to be uploaded, perform a hard refresh to the browser (Ctrl + F5), or clear the browser cache.
Note that a license warning ("Error reading license") will appear in the MC until the first Authentication Server is reattached. If you continue to see this error, verify that all Authentication Servers are reconnected. The connection process may take several minutes.
To complete the upgrade, reboot the Authentication Servers.
Note: After upgrade, if you need to change the port number for the SSH connection between the Management Console and the Authentication Server, run the following script: change_tun_port.sh
This script is located in the /opt/sdo/scripts folder.
Post-upgrade Procedures
After upgrading to version 6.8.4, it is recommended to perform the following steps to enable successful integration of Octopus SQL Agents and Remote AD Agents:
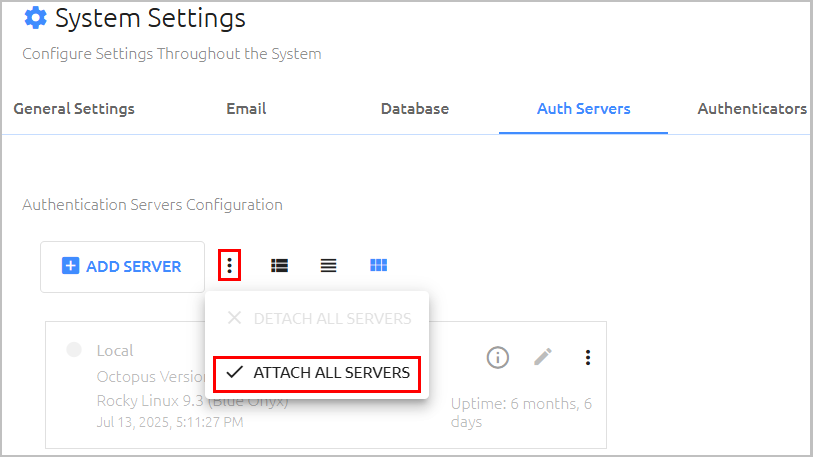
- From the System Settings menu of the Octopus Management Console, select the Auth Servers tab and detach all Authentication Servers.
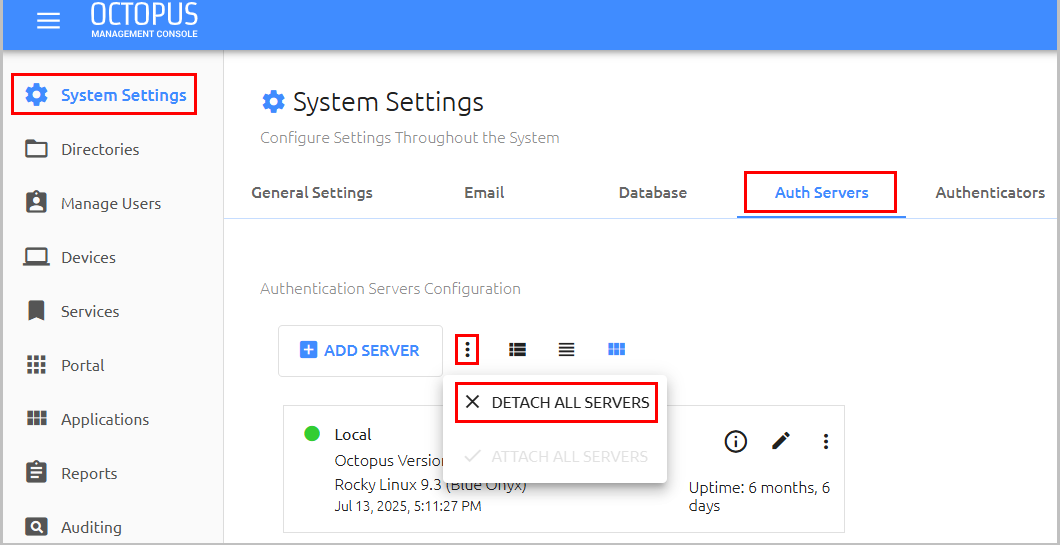
Run the update_remote.sh script.
At the top of the Auth Servers tab, reattach all Servers to the Management Console.
Upgrading DMZ Servers
If your configuration includes a DMZ Server, follow the procedure below to upgrade this server.
IMPORTANT:
- The DMZ Server upgrade should be done after completing the distributed server upgrade described above.
- There is no need to detach servers from the Management Console before performing DMZ Server upgrade.
When upgrading to version 6.8.4, there is no need to rename the certificate file after completing the upgrade. The name of your file will be maintained automatically during the upgrade process.
To upgrade a DMZ Server:
Run the upgrade by executing the Octopus Authentication Server upgrade script:
sudo ./octopus-####.run
To obtain the public key for the DMZ server, execute the (update_remote) script:
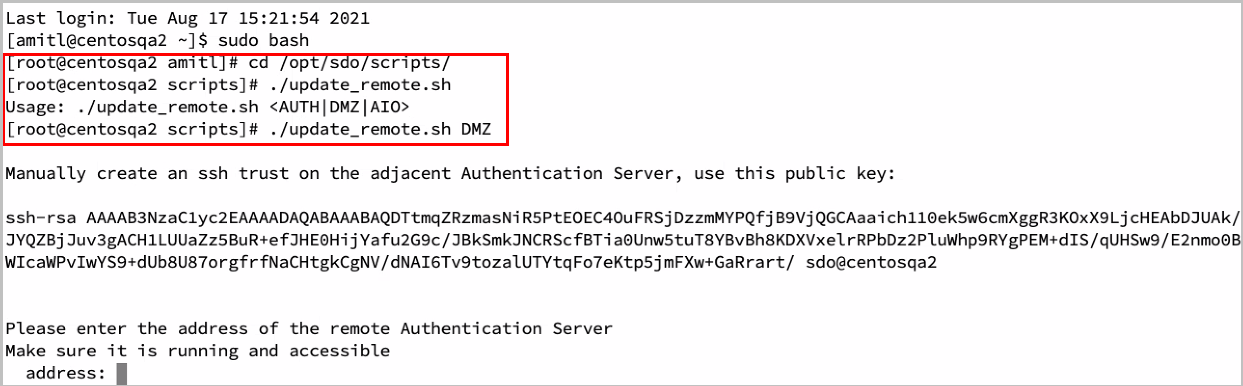
Manually create an SSH trust on the Octopus Authentication Server, using the public key generated:
In the Octopus Authentication Server, move to the ‘Superuser’ shell, change user to sdo, change directory to .ssh, and open an editor. (For details, see commands a-d in Step 1 above.)
Copy the public key from the Octopus DMZ Server, and paste it into the Octopus Authentication Server. Save and then exit editing mode.
Change permissions to remove group write permissions:
chmod g-w authorized_keys
Verify that there is communication between the DMZ Server and the Octopus Authentication Server.
Verify that the installation completed successfully.
To complete the upgrade, reboot the Authentication Server.
Note: After upgrade, if you need to change the port number for the SSH connection between the Management Console and the Authentication Server, run the following script: change_tun_port.sh
This script is located in the /opt/sdo/scripts folder.