The following sections describe the configurations required for basic setup of the Octopus Authentication Management Console:
Configuring General Settings: Uploading the activation file, entering the Enterprise Base URL, specifying organization name and logo, and setting various global parameters related to authentication sessions
Configuring Mail Server Settings: Setting SMTP server information and other required email parameters
Adding Directories: Integrating the Management Console with one or more corporate directories
To log into the Octopus Authentication Management Console:
From your desktop browser, launch the Management Console. (e.g., https://myorg.com:8443 or http://myorg.com:8008).
Note: For HTTPS secure connection (SSL/TLS), you will need to enforce an SSL certificate (RootCA, IntermediateCA or Self-Signed CA) for the Octopus Authentication’s Nginx engine (Red Hat Linux Web Server).The Login screen opens.
Make sure that the Login with Octopus Authenticator toggle button is inactive. Then, enter your Octopus Authentication Super Administrator’s email address and password, and click LOGIN.
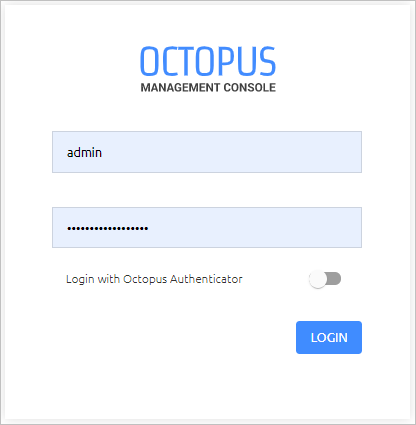
Following successful authentication, the Management Console opens.
Basic system configurations that need to be done following installation include setting the Enterprise Base URL, specifying the organization name and logo, uploading the activation file and setting global parameters related to authentication sessions.
These settings are configured in the General Settings tab of the System Settings menu.
Setting Organization Name, Enterprise Base URL, and Logo
The default Organization Name is the one entered during installation of the Octopus Authentication Server. You may change the name, as necessary.
Your Enterprise Base URL is the URL of the main server used for communications. The organization name and logo you set in the Management Console are displayed to users in the Octopus Authenticator mobile app.
The Organization Logo setting is empty by default. To upload a logo, hover over the area, click Upload File and select the PNG or JPG file of your choice. Supported image size is 128x128 pixels.
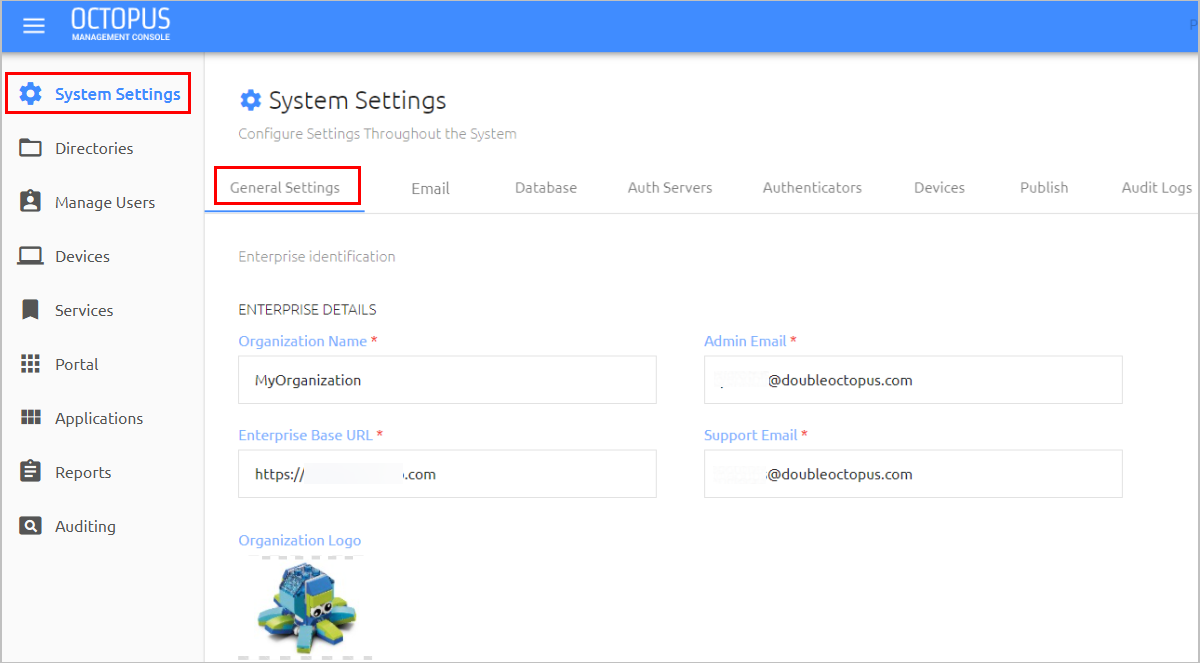
After updating the settings, click Save (in the lower right corner of the tab).
Uploading the Activation File
The activation file is the system’s license. After a first installation, you need to upload the activation file to set the connection between the Octopus Authentication Server and the Octopus Cloud. The activation file is provided by Secret Double Octopus as part of the licensing agreement.
IMPORTANT: A unique license file is required for each environment. Using the same license for multiple environments can cause enrollment disruptions and authentication failures.
To obtain additional licenses for staging, development or other environments, please contact support@doubleoctopus.com
Until you upload this file, your license information will not be displayed in the Management Console, and you will be prompted to activate the system each time you log in.
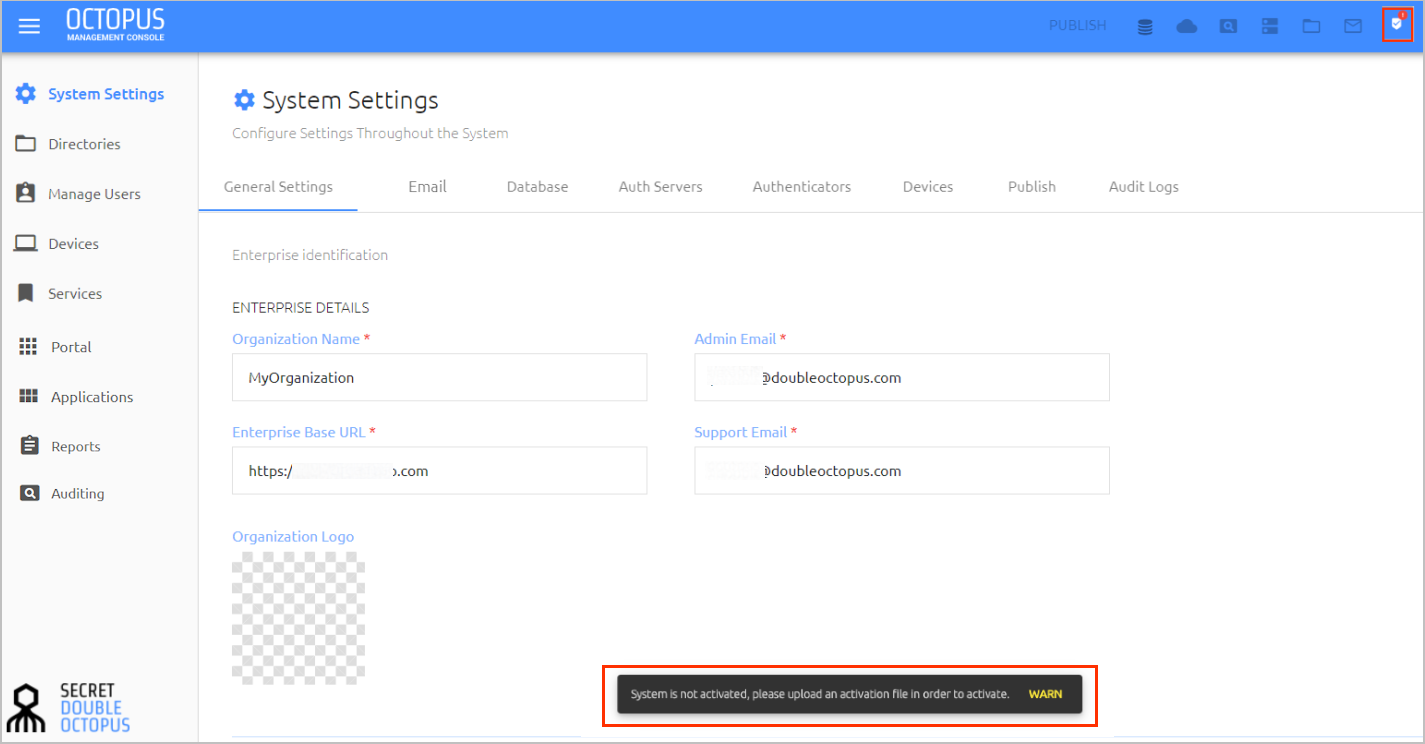
To upload the activation file:
Select System Settings > General Settings. Scroll to the License frame and click Upload Activation File.
The End-User License Agreement popup opens.
Review the content of the agreement. Then, at the bottom of the popup, select the I agree checkbox and click OK.
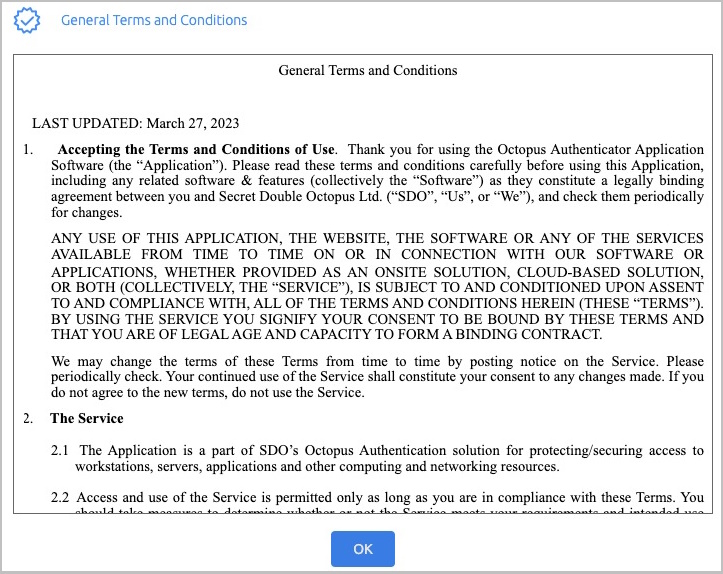
The popup closes, and the Open dialog is displayed.
From the Open dialog, browse to the relevant license file and click Open.
You will be prompted to enter the activation file password that was sent to you together with the license file.
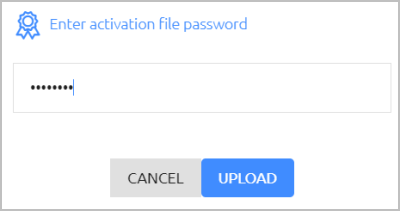
After entering the password, click Upload.
Following a successful upload, a confirmation message is displayed and your license information is displayed in the License frame.
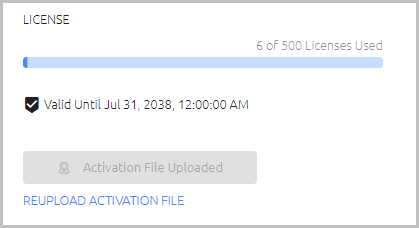
If it becomes necessary to upload the file again or to upload a new license file, click Reupload Activation File and repeat Steps 2-4.
IMPORTANT: In distributed deployments, the license warning ("Error reading license") will continue to appear (even after uploading an activation file) until the first Authentication Server is connected.
Setting Authenticator Limit, MC Session Timeout and System Failure Mode
The lower portion of the General Settings tab contains various settings related to authentication sessions.
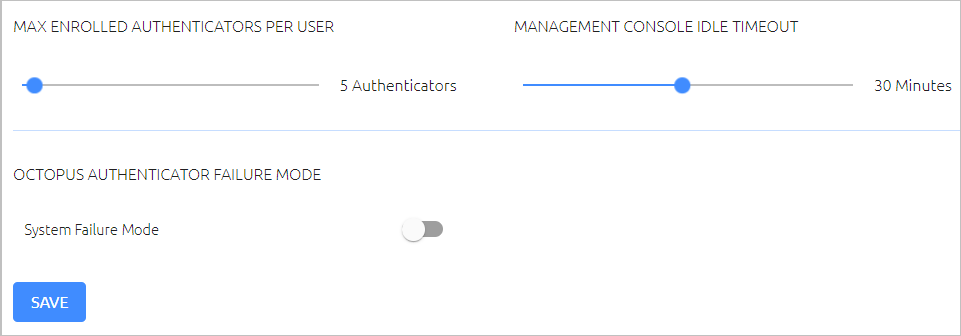
The settings are:
Max Enrolled Authenticators Per User: The maximum number of mobile and FIDO devices that can be enrolled in the system for each user. Valid values can range from 1-99. Drag the slider to adjust the value.
Management Console Idle Timeout: The length of time (in minutes) during which no actions are performed in the Octopus Management Console before the session is automatically ended. Values can range from 1-60 (default is 10).
Octopus Authenticator Failure Mode: This setting determines the behavior of the system in situations of network failure or unavailability of the Octopus Authentication Server. When System Failure Mode is enabled, authentication for all services is done with a username and password in the event of system failure.
After updating these settings, click Save.
SMTP configuration is required to allow the Octopus Authentication’s Administrator to send emails inviting users to enroll in the Octopus Authentication system. It is also used to enable system alert notification emails to the administrator.
To view the configuration settings, open the System Settings menu and select the Email tab.
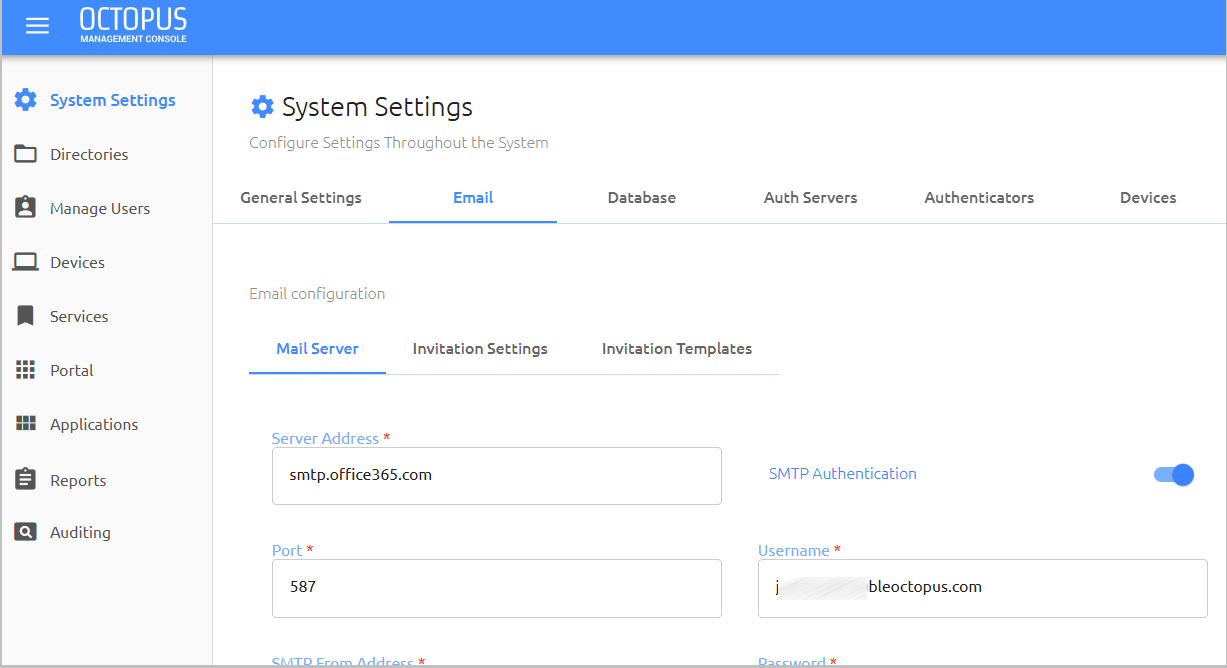
The Mail Server sub-tab contains SMTP server information and other required email parameters.
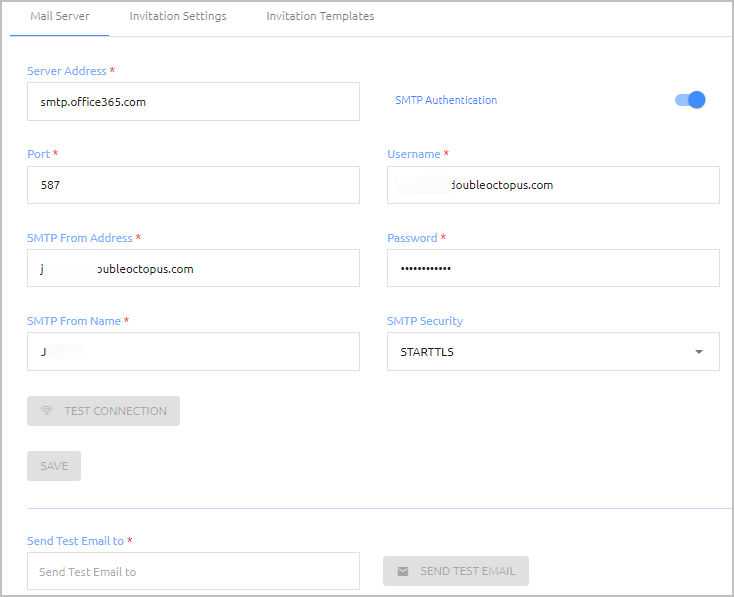
To set up SMTP server details:
Enter the following parameters in the appropriate fields:
Server Address: IP address or hostname of the SMTP server
Port: Port number for SMTP connection
SMTP From Address: The From email address that appears in system-generated emails
SMTP From Name: The name of the sender that appears in system-generated emails
Select the appropriate SMTP Security method: SSL/TLS or STARTTLS
If you want to use SMTP authentication, click the toggle button at the upper right corner of the tab (by default authentication is inactivated), and enter the authentication username and password.
Click Test Connection.
Following the test, a confirmation message is displayed at the bottom of the page.
Click Save. Then, from the toolbar at the top of the page, click PUBLISH and publish your changes.
To verify expected performance, enter a valid email address in the Send Test Email To field and click Send Test Email. Then, check that an email message was sent and received correctly.
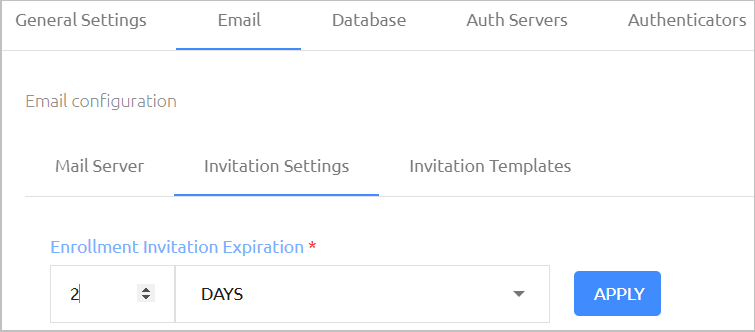
The Invitation Settings sub-tab contains the Enrollment Token Expiration setting, which determines the maximum period of time for which an invitation email is valid. If a user does not use the invitation to enroll within this time period, the invitation is deleted from the system and a new email needs to be sent.
The Enrollment Token Expiration can range from 1 hour to 3 weeks (default setting is 3 days). To update the setting, specify the desired timeframe and then click Apply.
The Octopus Management Console supports integration with Active Directory, Entra ID, Oracle/Open LDAP, ForgeRock, ForgeRock Cloud, Okta, Zimbra and Google. You can configure integration with more than one directory type.
Note: The Octopus platform supports two kinds of Entra ID directory types:
- Entra ID: Uses the Microsoft Graph API. Does not require LDAP or P1 Entra ID license.
This directory type supports O-365 federation with Secret Double Octopus while using Entra ID.
- Entra ID (LDAP): Uses the LDAP API, which requires a P1 Entra ID license.
To add a new directory:
Open the Directories menu and click Create Directory.
The Select Directory Type dialog opens.
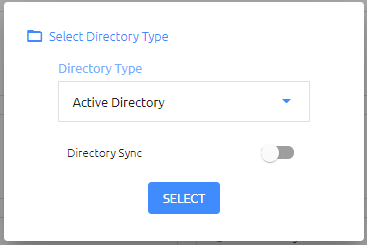
From the Directory Type list, select the type of directory that you want to add.
Click the Directory Sync toggle button to enable and disable automatic syncing. When automatic directory syncing is NOT enabled, after adding the directory you will need to select users from the folders within the directory and manually import them.
IMPORTANT: You will NOT be able to change the Directory Sync setting after adding the directory.Click SELECT.
The Create New Directory page opens. For example:
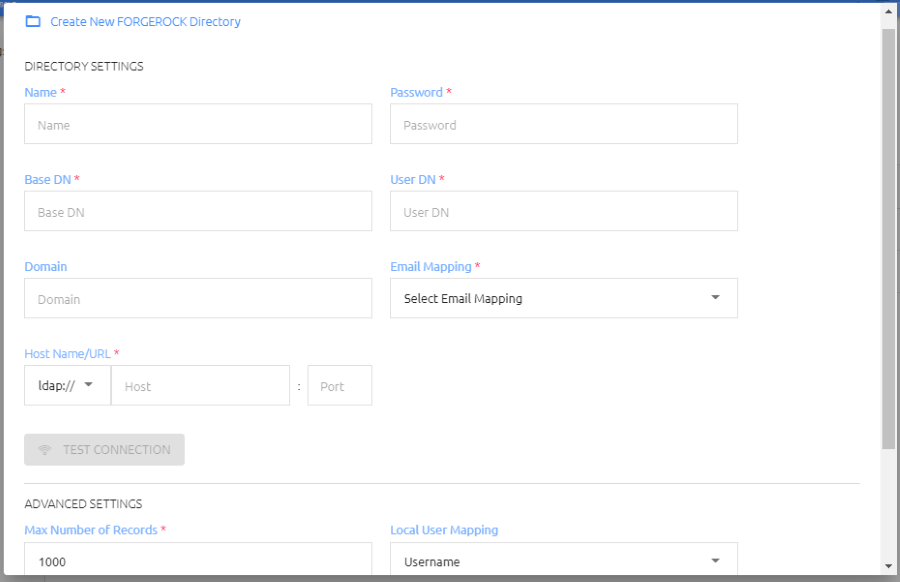
Configure the following Directory Settings:
Name: Name by which the directory is known.
Password: The password for the administrative user account.
Base DN: The distinguished name of the directory from which users will be added to Octopus Authenticator. If you want to add only a specified set of users, enter the relevant node(s) of the directory.
User DN: The username and distinguished name of the administrative user account that allows access to import from the directory.
Domain: The IP address or NetBIOS domain name of the domain.
For AD only: A domain value must be entered in order to enable users to authenticate to Windows using a FIDO key..
Email Mapping: The field in the corporate directory used to retrieve the emails of users. Select the mapping source from the list. Keep in mind that you will NOT be able to update the mapping source after directory settings are saved.
Host Name/URL: Select LDAP or LDAPS. Then, in the Host field, enter the FQDN of the domain. In the Port field, enter 389 for LDAP or 636 for LDAPS.
Note: For Google directories, the default setting is prepopulated and is not editable.Certificate: If you are using LDAPS, click Upload Certificate and select the relevant certificate file.
If you are adding an Entra ID directory, enter these settings in the appropriate fields:
User Principal Name (UPN): The user account used for connecting to the directory.
This setting is relevant to Entra ID (LDAP) directory types only.Application (Client) ID and Directory (Tenant) ID: Copy these values from your Entra ID application. (They are displayed in App registrations, under the relevant app.)
Client Secret: Copy the Secret Value only (NOT the Secret ID) from your Entra ID application after creating the secret. (To create the secret, navigate to Certificates and Secrets, click New Client Secret and name the new secret.)
Federated To Octopus (Entra ID types only): If you have a federated Entra ID domain, click this toggle button to enable the setting.
When this setting is enabled, you will be able to add users directly to the remote Entra ID directory, and then import or synchronize them into the Octopus platform.
If you are adding a ForgeRock Cloud directory, enter these settings in the appropriate fields:
Service Account Id: Copy this value from the Service Accounts page of the ForgeRock Identity Cloud Admin UI (under Tenant Settings).
Service Account Private Key: Copy this value from the Service Accounts page of the ForgeRock Identity Cloud Admin UI (under Tenant Settings).
Service Account Access Token URL: Enter the Oauth2 access token URL in the following format:
https://<tenant-env-fqdn>:443/am/oauth2/access_token
For further information please refer to this article.
ForgeRock AM URL: The public AM URL.
ForgeRock IDM URL: The public IDM URL.
Realm: The IDM realm being used.
Group Object Name: Use the value set in your ForgeRock environment. (The default setting is Role.)
If you are adding an Okta directory, enter these settings in the appropriate fields:
Okta API Token: The API token for authentication requests (created in your Okta Admin account).
Okta URL: Your access URL to Okta.
If you are adding a Google directory, enter these settings in the appropriate fields:
Client Certificate: Upload the ZIP file from your Google Admin console.
Service Key: Upload the JSON file from your Google Admin console.
Domain Admin Email: Email address of the administrative user account that allows access to import from the directory.
Click Test Connection to perform a validity check.
At the bottom of the page, click Create. Then, from the toolbar at the top of the page, click PUBLISH and publish your changes.
For AD directory types with Automatic Sync, it is recommended to enable Selective Sync in the directory settings:
a. From the Directories menu, click
 in the row or tile of the relevant directory to open the directory settings.
b. Scroll to the bottom of the Details tab. Under Directory Sync, enable the Selective Sync toggle button.
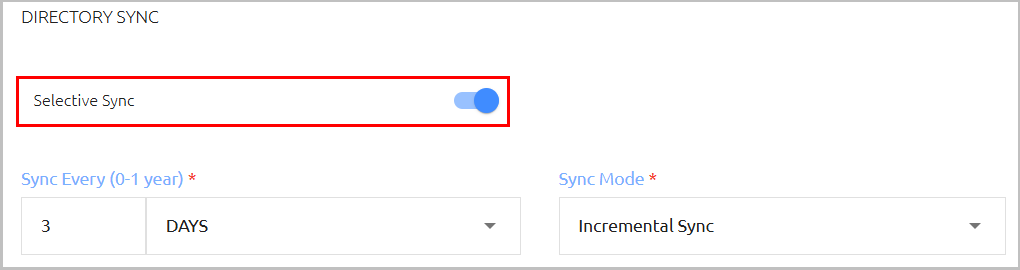
c. Click Save.
For more information about Selective Sync, refer to the Octopus Management Console Admin Guide.
Installation and basic configuration of the Octopus Authentication system is now completed. Your next step is to add new services and invite users to enroll.
To continue to configure your Octopus Authentication system, refer to the Octopus Management Console Admin Guide or contact the Octopus support team.