This installation option installs a stand-alone Management Console without an Authentication Server. It is intended to provide a standby (ready to run) Octopus Management Console.
The secondary (standby) Management Console is not an active component of the distribution but it continuously runs in the background and is synchronized with the primary Octopus Management Console. It can therefore be quickly changed to act as the primary Management Console when necessary.
IMPORTANT: Secondary Management Console (MC) Server installation can be done only in a distributed installation, where the secondary MC Server communicates with and uses the installed database.
A secondary MC Server cannot be installed for All-in-One (AIO) installations, since the database is internal on the AIO machine.
After reviewing the list of prerequisites, follow the procedure below to install a secondary Octopus Management Console Server.
IMPORTANT: Before beginning the installation, make sure that the primary Management Console is installed and configured. For details, refer to Octopus Management Console: Basic Configuration.
To install a secondary Management Console Server:
Run the Octopus Authentication Server installation package:
sudo ./octopus-####.run
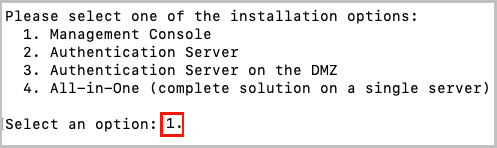
To choose the Management Console installation option, enter 1.
Specify the setting for installing as a secondary Management Console:

Change the default setting by typing y .
When prompted, enter the port number to be used for the SSH connection between the Management Console and the Authentication Server.

Specify the setting for firewall creation (default = yes).

To skip firewall creation, type n. It will then be necessary to ensure that the Linux firewall is configured correctly, according to the chosen configuration:
With SSL: Ports 443 and 8443 are enabled
Without SSL: Ports 80, 8008 and 8009 are enabled accordingly
Enter Administrator login details for the Management Console.

Delete the default email setting and enter the correct email address. Then enter and retype the password.
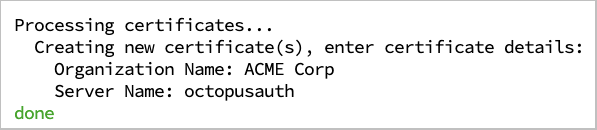
Enter details for the self-signed certificate:
Organization name: Delete My Org and enter the correct name.
Server name: Enter the server name for the certificate. (The name will appear as known on the Linux server. Change it if necessary.)
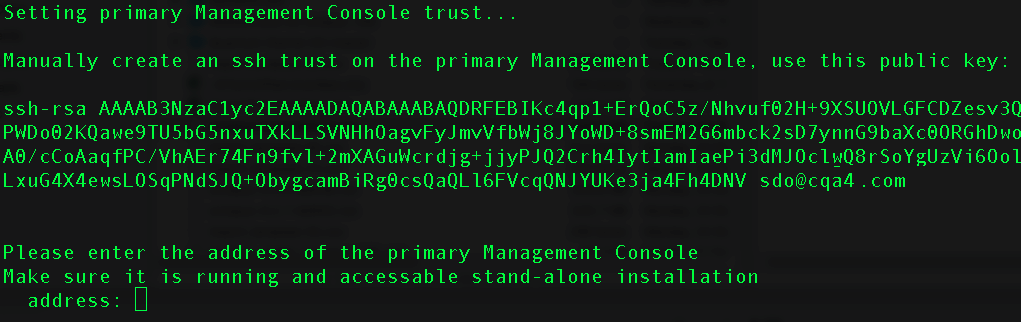
Manual create an SSH trust on the primary Management Console, using the public key that is generated by the installation:
In the primary Octopus Management Console Server, move to the ‘Superuser’ shell:
sudo bash
Change user to sdo:
su – sdo
Change directory to .ssh:
cd /opt/sdo/.ssh/
Open an editor to edit / create a file:
vi authorized_keys
Copy the public key from the secondary Octopus Management Console Server, and paste it into the primary Octopus Management Console Server. Save and then exit editing mode.
Change permissions to remove group write permissions:
chmod g-w authorized_keys
In the secondary Octopus Management Console Server, enter the IP address or FQDN of the primary Octopus Management Console Server.

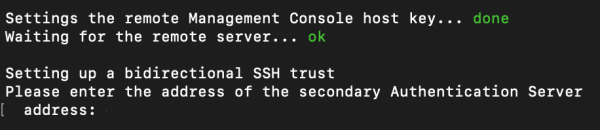
When prompted, enter the address of the secondary MC Server, as seen from the primary MC Server. (This creates a bidirectional SSH trust, which allows syncing between the servers when the primary MC Server is toggled to become secondary.)
Verify that the installation completed successfully.
To enable the new GUI to be uploaded, perform a hard refresh to the browser, or clear the browser cache.
Switching Between Primary and Secondary Management Consoles
Follow these steps to change the secondary Management Console to the main one:
On the primary Management Console, run the toggle_mc.sh:
cd /opt/sdo/scripts
sudo toggle_mc.sh
Update the DNS record of the Management Console to reflect the IP switch (from primary to secondary).
On the secondary Management Console, run the toggle_mc.sh:
cd /opt/sdo/scripts
sudo toggle_mc.sh
systemctl restart nginx