Installation of an Octopus Authentication Server in the DMZ may be required in configurations where users need authentication to services while outside the enterprise’s network and there is a preference not to use a VPN connection.
An Octopus Authentication Server in the DMZ may only be installed and added to an Octopus system that already has at least one Authentication Server running. Due to security considerations, the Authentication Server in the DMZ does not have its own database. It must be connected to a system that already has an Authentication Server and database.
IMPORTANT: A DMZ Server connects directly to ONE (and only one) corresponding internal Authentication Server via an SSH tunnel. Do NOT use a load balancer to connect a DMZ Server with its Authentication Server.
Installation Flow for POC Environments
In POC environments, the DMZ Server must be connected to an additional Authentication Server that has been installed separately (not the Authentication Server set up in the All-in-One installation). To add a DMZ Server to an All-in-One installation environment, do the following:
- Install an additional Authentication Server.
- Install the Authentication Server in the DMZ, and connect it to the new Authentication Server, as
described in the following sections.
.
Preparing for Installation
Before beginning the installation, take the following steps:
Review the list of prerequisites.
Open two SSH terminal connections in parallel:
DMZ Octopus Authentication Server terminal window
Octopus Authentication Server terminal window
In the DMZ Octopus Authentication Server, go to the home directory.
Installing an Octopus Authentication Server in the DMZ
Follow the procedure below to install an Octopus Authentication Server in the DMZ.
To install an Octopus Authentication Server in the DMZ:
Run the Octopus Authentication Server installation package:
sudo ./octopus-####.run
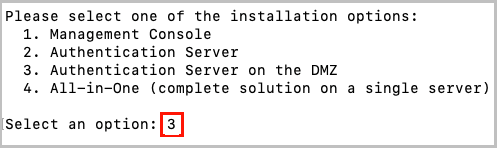
To choose the Authentication Server in the DMZ installation option, enter 3.
Specify the setting for proxy configuration (default = no).

For network setups in which HTTPS to the internet is accessed through a proxy server, type y and enter the URL or IP address of your proxy server.
Specify the setting for firewall creation (default = yes).

To skip firewall creation, type n. It will then be necessary to ensure that the Linux firewall is configured correctly, according to the chosen configuration:
With SSL: Ports 443 and 8443 are enabled
Without SSL: Ports 80, 8008 and 8009 are enabled accordingly
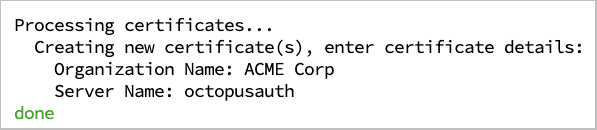
Enter details for the self-signed certificate:
Organization name: Delete My Org and enter the correct name.
Server name: Enter the server name for the certificate. (The name will appear as known on the Linux server. Change it if necessary.)
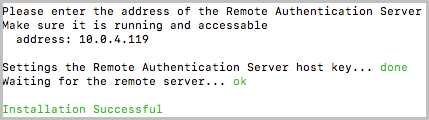
Manually create an SSH trust on the Octopus Authentication Server, using the public key that is generated by the installation:

In the Octopus Authentication Server, move to the ‘Superuser’ shell:
sudo bash
Change user to sdo:
su – sdo
Change directory to .ssh:
cd /opt/sdo/.ssh/
Open an editor to edit / create a file:
vi authorized_keys
Copy the public key from the Octopus DMZ Server, and paste it into the Octopus Authentication Server. Save and then exit editing mode.
Change permissions to remove group write permissions:
chmod g-w authorized_keys
Verify that there is communication between the DMZ Server and the Octopus Authentication Server.
Verify that the installation completed successfully.