A Remote AD connects the cloud-based Octopus Management Console with a corporate on-premise Active Directory. The Remote AD contains a local Replica that represents the domain and a specified Base DN of the on-premise AD. The Replica is updated by means of a Remote AD Agent which is installed on a domain-joined on-premise Windows server or workstation.
Each Remote AD can work with only one Replica, but that Replica can be connected to multiple Agents.
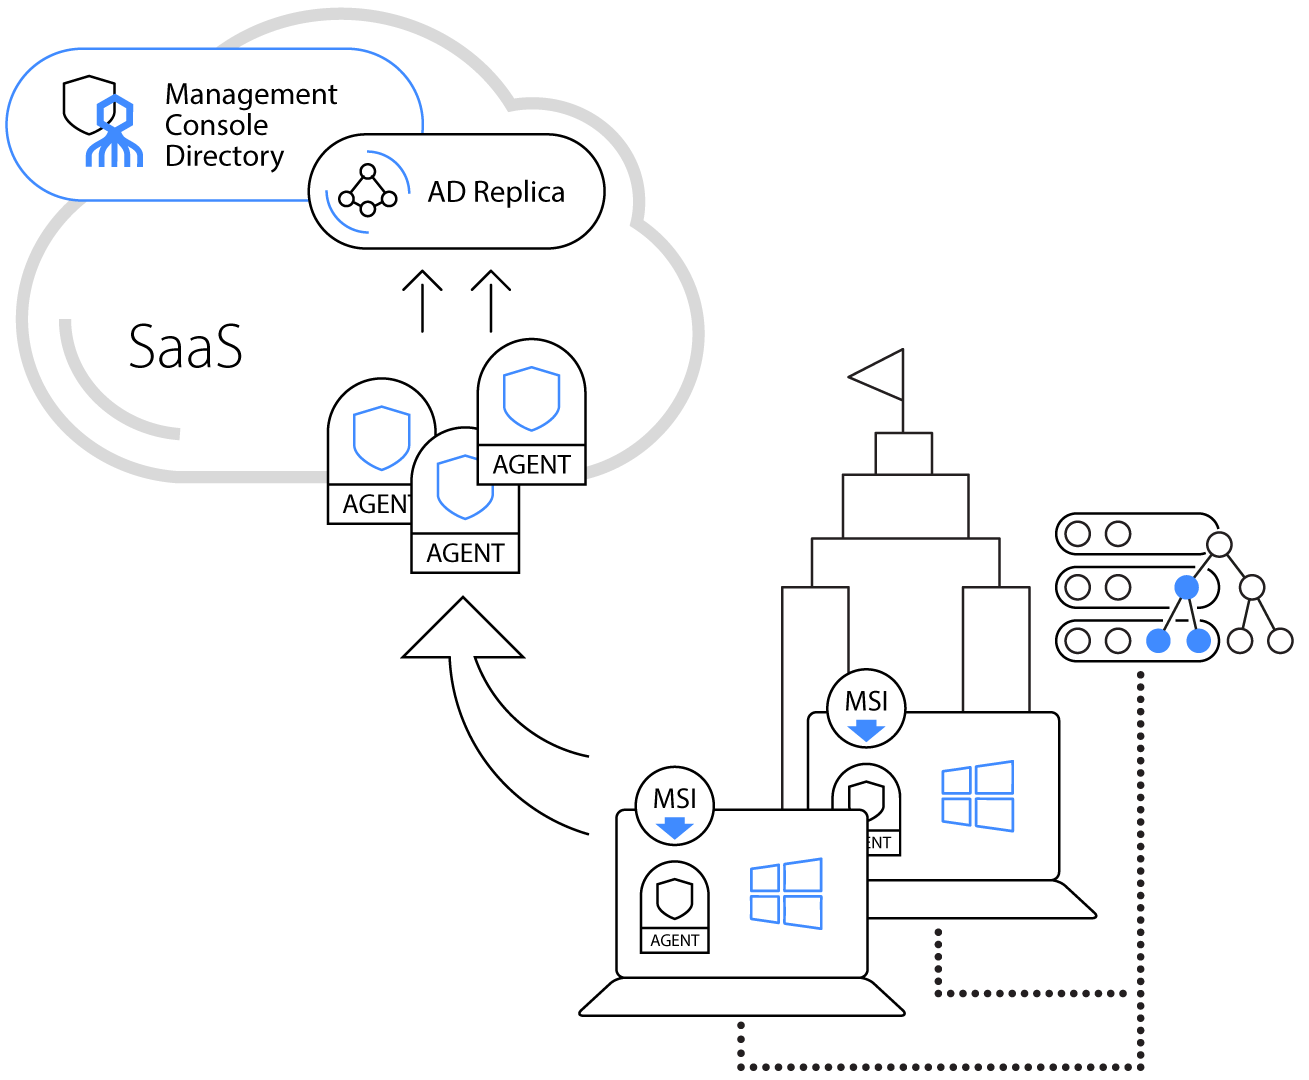 |
This document details the end-to-end process for creating, downloading and installing a Remote AD Agent. A Remote AD directory and a Replica are created automatically as part of the Agent installation process.
Prerequisites
The Octopus Remote AD Agent can be installed on the following operating systems:
- Window Server 2016
- Windows Server 2019
- Windows Server 2022
- Windows 10
- Windows 11
Minimum hardware requirements for the target machine are a 4-core CPU and 8GB of RAM.
Before beginning the installation, verify that user permissions are configured as described in Appendix A: Remote AD Permissions Configuration.
A number of ports are required for normal operation of the Remote AD Agent. The ports that need to be open between the Remote AD Agent and the AD Server are listed in the table below.
| Remote AD Agent Port(s) | AD Server Port(s) | Service |
|---|---|---|
| 49152-65535 TCP | 464 TCP/UDP | Kerberos password change |
| 49152-65535 TCP/UDP | 49152-65535 TCP | RPC for LSA, SAM, NetLogon |
| 49152-65535 TCP | 389 TCP/UDP | LDAP |
| 49152-65535 TCP | 636 TCP | LDAP SSL |
An Agent and a Replica are prerequisites for adding a Remote AD directory to the Management Console. If you try to create a Remote AD Directory without first adding an Agent, the following popup opens:
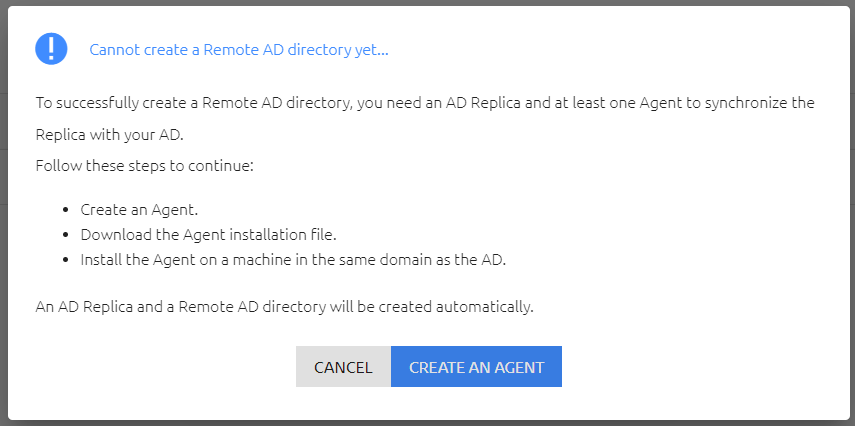 |
The best practice for adding your first Remote AD is to create an Agent and then install it on a domain-joined machine, as described in the following procedures.
To create a Remote AD Agent:
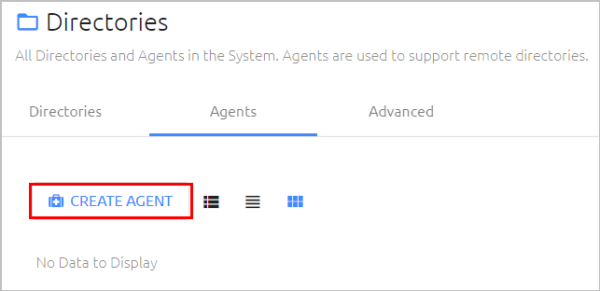
From the Octopus Management Console, open the Directories menu and select the Agents tab. Then, click Create Agent.
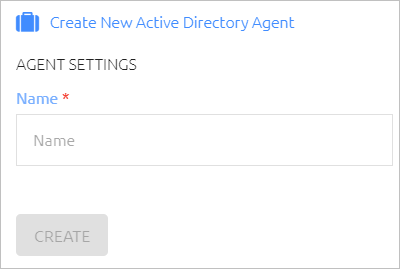
In the popup that opens, enter a name for the Agent and click Create.
The new Agent is displayed in the Agents tab. The orange connection status icon indicates that the Agent has not yet been installed in the on-premise environment.
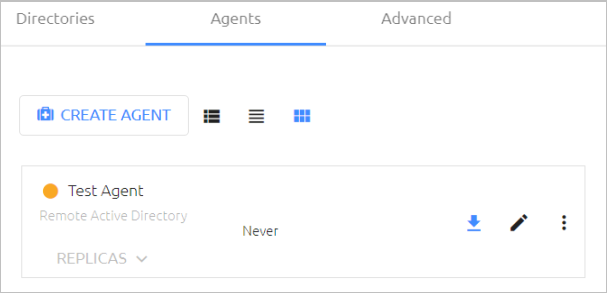
Follow the steps below to download and install the Remote AD Agent. The Agent should be installed on a domain-joined on-premise Windows server or workstation.
To download and install the Agent:
From the Agents tab, click the Download icon to download the Agent installation file.
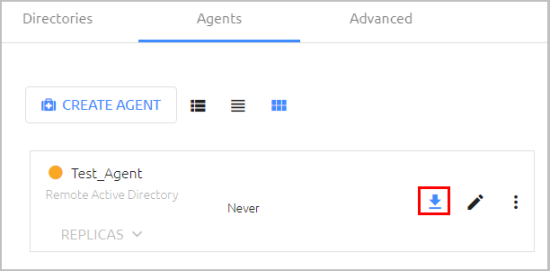
In the popup that opens, copy the Installation Code and Server URL to a secure location. (You will need them later, during the installation process.) Then, click Download Installation File.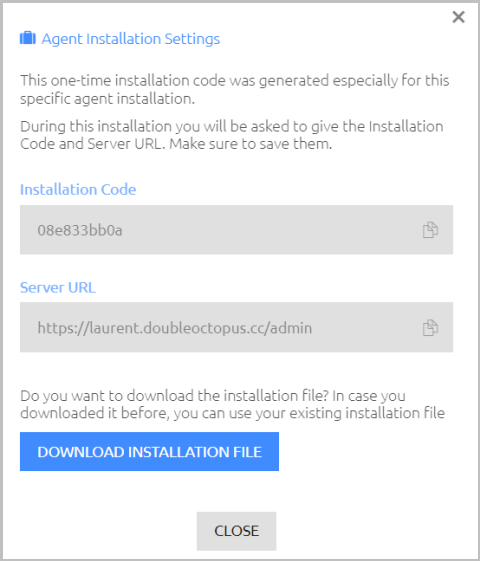
On a domain-joined Windows server or workstation, run the installation file.
The Octopus Remote AD Agent installation wizard opens.
On the Welcome page, click Next.
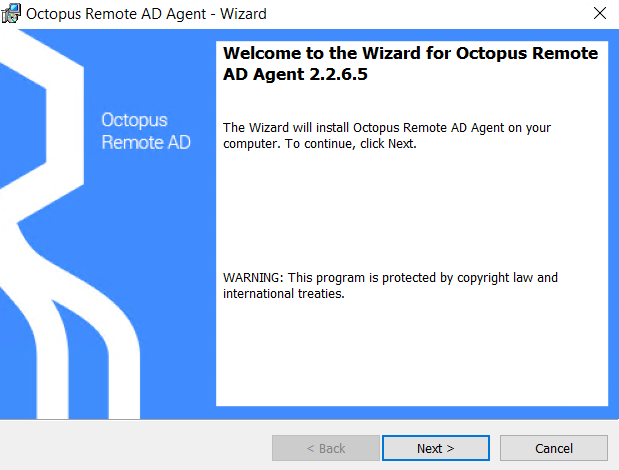
On the License Agreement page, accept the terms and click Next.
On the Server Parameters page, configure the following settings:
Installation Code: Enter the code you copied in Step 1 above.
Management Console URL: Enter the Server URL you copied in Step 1 above.
Use Proxy (optional): If your internet access requires a web proxy, select the checkbox. Then, enter the address of the Proxy Server in the following format: https://proxy.acme.com:1234
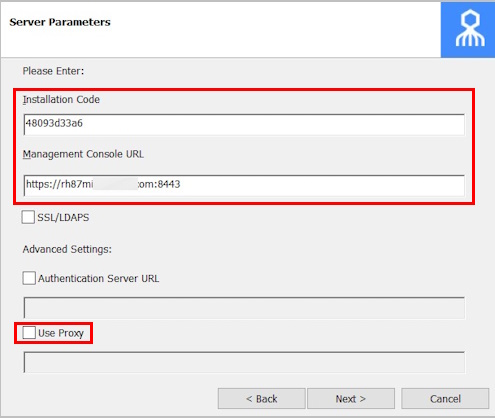
Click Next.
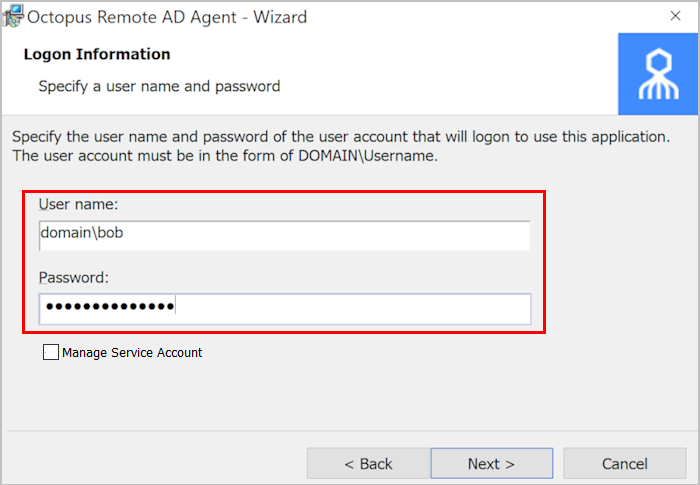
On the Logon Information page, complete the settings according to the type of user account to be configured:
For a specific user account: Enter the credentials for the account. You can use the Super Admin credentials for the AD directory, or those of a user with Change Password privileges.
It is recommended to use the credentials of the Domain Admin. If you use those of another user, verify that the user has all the required permissions. For details, refer to Appendix A: Remote AD Permissions Configuration.
Important: Enter the user name in the DOMAIN\Username format.
For a Managed Service Account: Select the Manage Service Account checkbox. (When the checkbox is selected, the Password field is disabled.)
Enter the user name using the syntax DOMAIN\<Service Account Name>$
In the following example, the name of the Managed Service Account is gMSAtest4.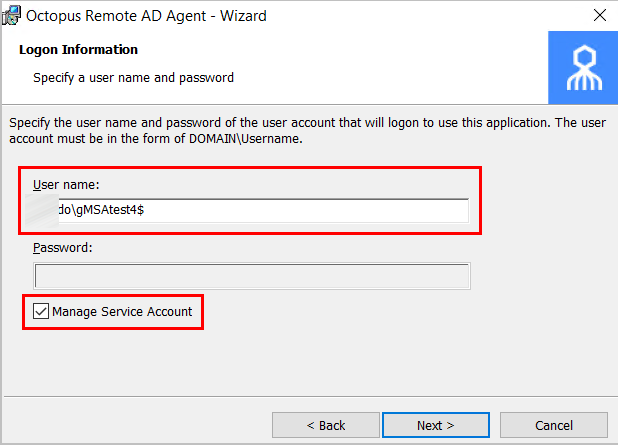
Click Next.
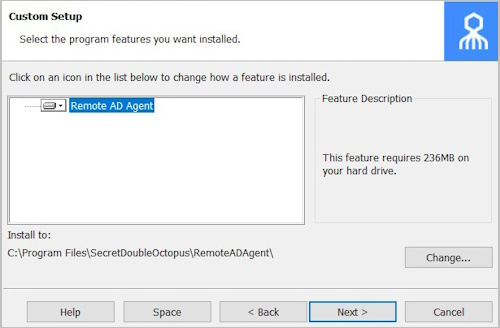
On the Custom Setup page, review the settings and installation path. Then, click Next.
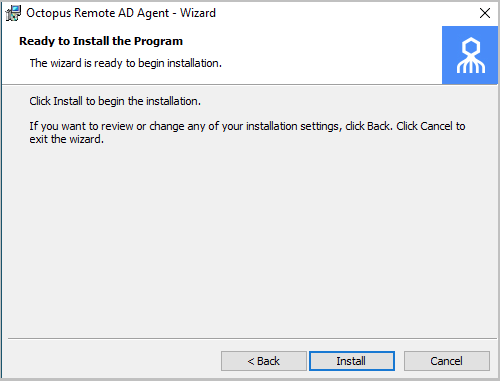
On the page that opens, click Install to begin the installation.
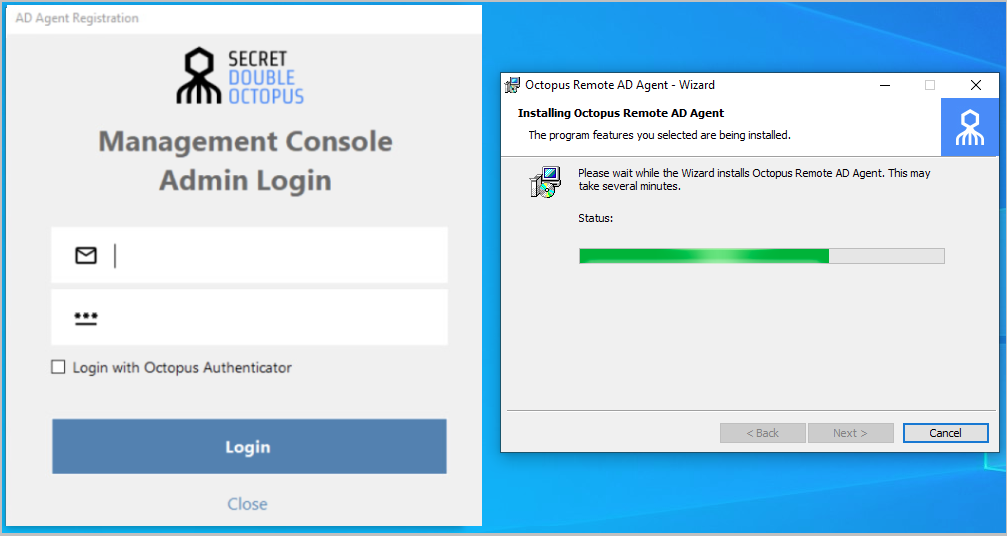
During the installation, you will be prompted to start the AD Agent registration process.
On the Management Console Admin Login page, enter the Super Admin login credentials for the Octopus Management Console, and click Login.
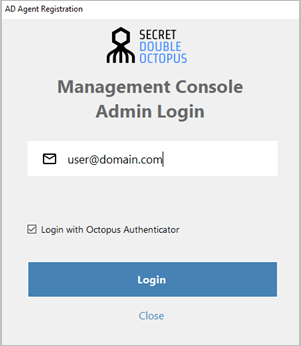
Alternatively, select the Login with Octopus Authenticator checkbox. Then, enter your username, click Login and authenticate using the Octopus Authenticator mobile app.
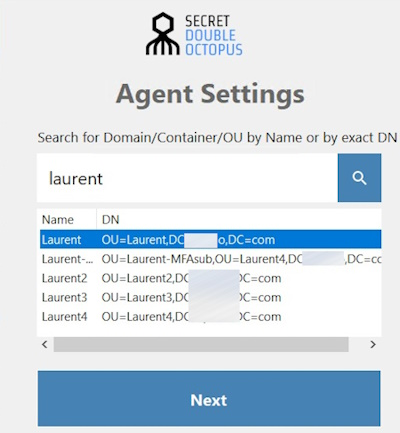
On the Agent Settings page, specify the relevant OU or Domain. You can search according to name or DN.
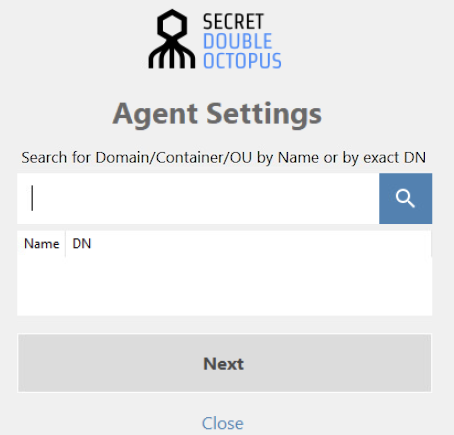
Then, select the DN from which the Replica will begin the sync, and click Next.
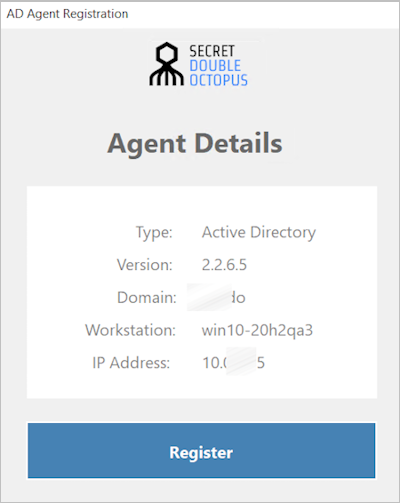
On the Agent Details page, review the information and then click Register.
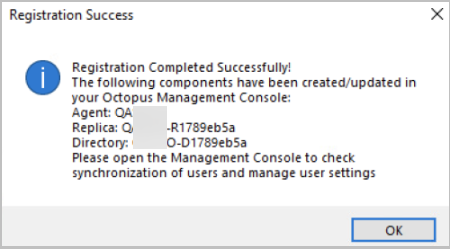
After the Agent is successfully registered, a confirmation message is displayed. Note that a Remote AD and Replica are created as part of the Agent registration process.
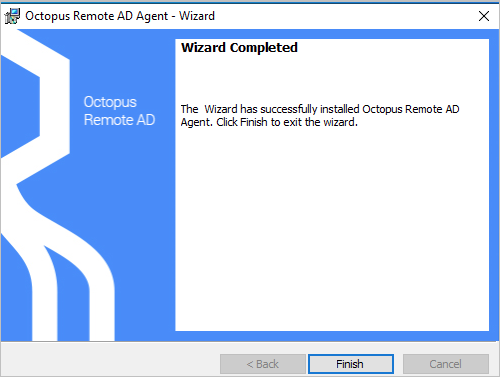
To exit the wizard, click Finish.
After successful installation of the Remote AD Agent, you can view the Remote AD directory and Replica that were automatically added to the Directories menu. For example:
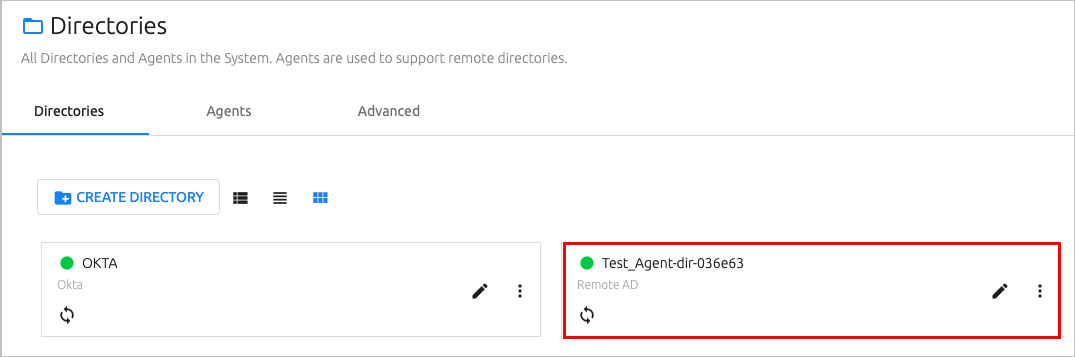 |
The Replica and its details are displayed in the Advanced tab.
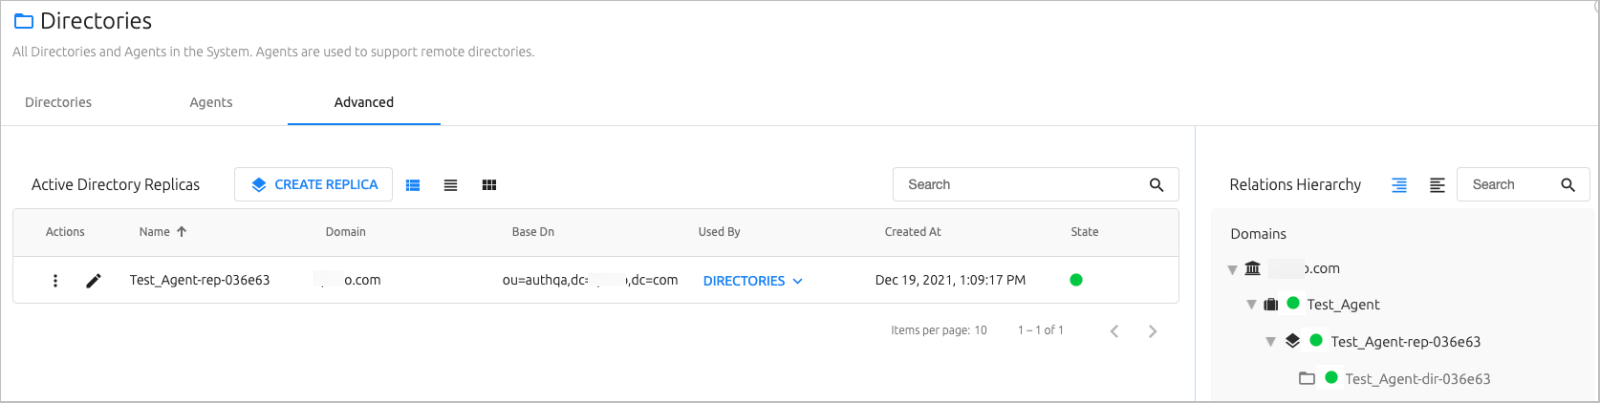 |
For complete information about managing the directory and its users, please refer to the Octopus Management Console Admin Guide.
Before installing the remote AD agent, make sure the user is configured with the following permissions:
The user should have read, execute, list and write permissions to the c:\windows\temp folder. For more details about assigning these permissions, please click here
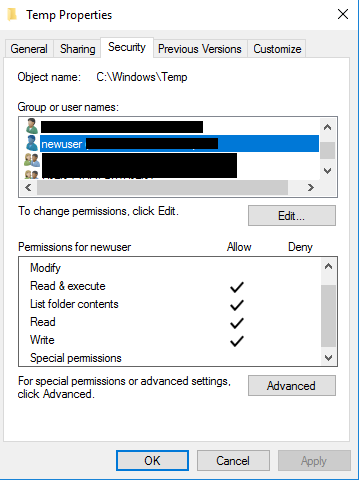 |
The user should have both these permissions prior to the AD Agent installation.
These permissions are required for the installation process only and can be removed afterwards.
Follow these steps to enable the permissions:
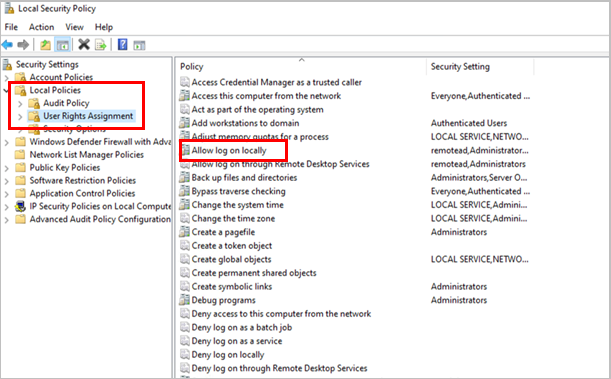
Open Administrative Tools and select Local Security Policy.
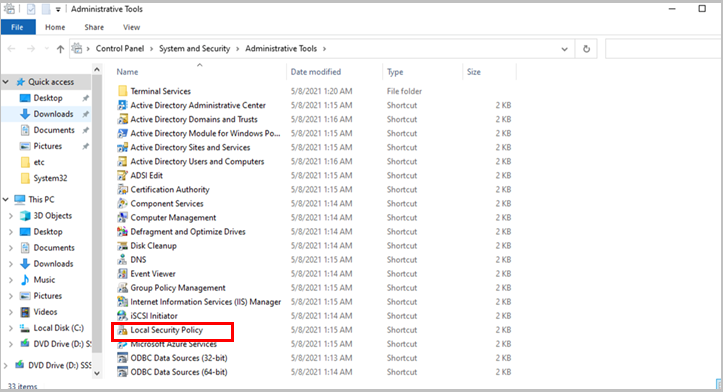
Navigate to Local Policies > User Rights Assignment, and select Allow log on locally.
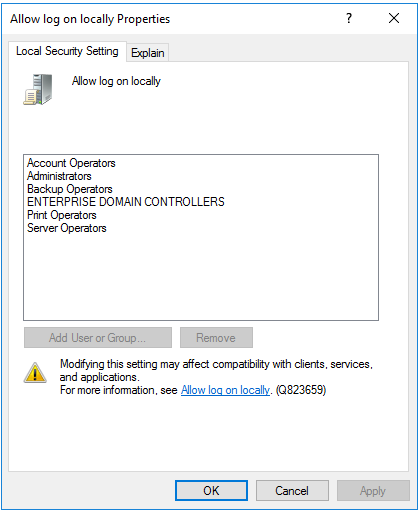
In the window that opens, add the new user created for the remote AD. Then, click OK.
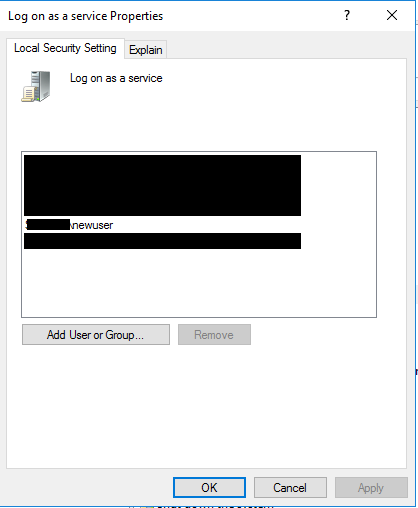
Navigate to Local Policies > User Rights Assignment, and select Log on as a service. Then, add the new user created for the remote AD and click OK.
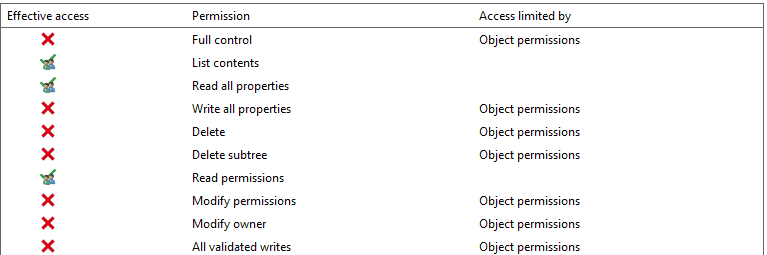
The user should have the appropriate search permissions (read properties, group memberships, etc.). These permissions are granted for each domain user by the default policy. For example:
 |
The user should have reset password permissions for the required scope (domain, OU, etc.). Follow these steps to configure the required parameters:
Open Active Directory Users and Computers. Then, right click on the domain name and select Delegate Control.
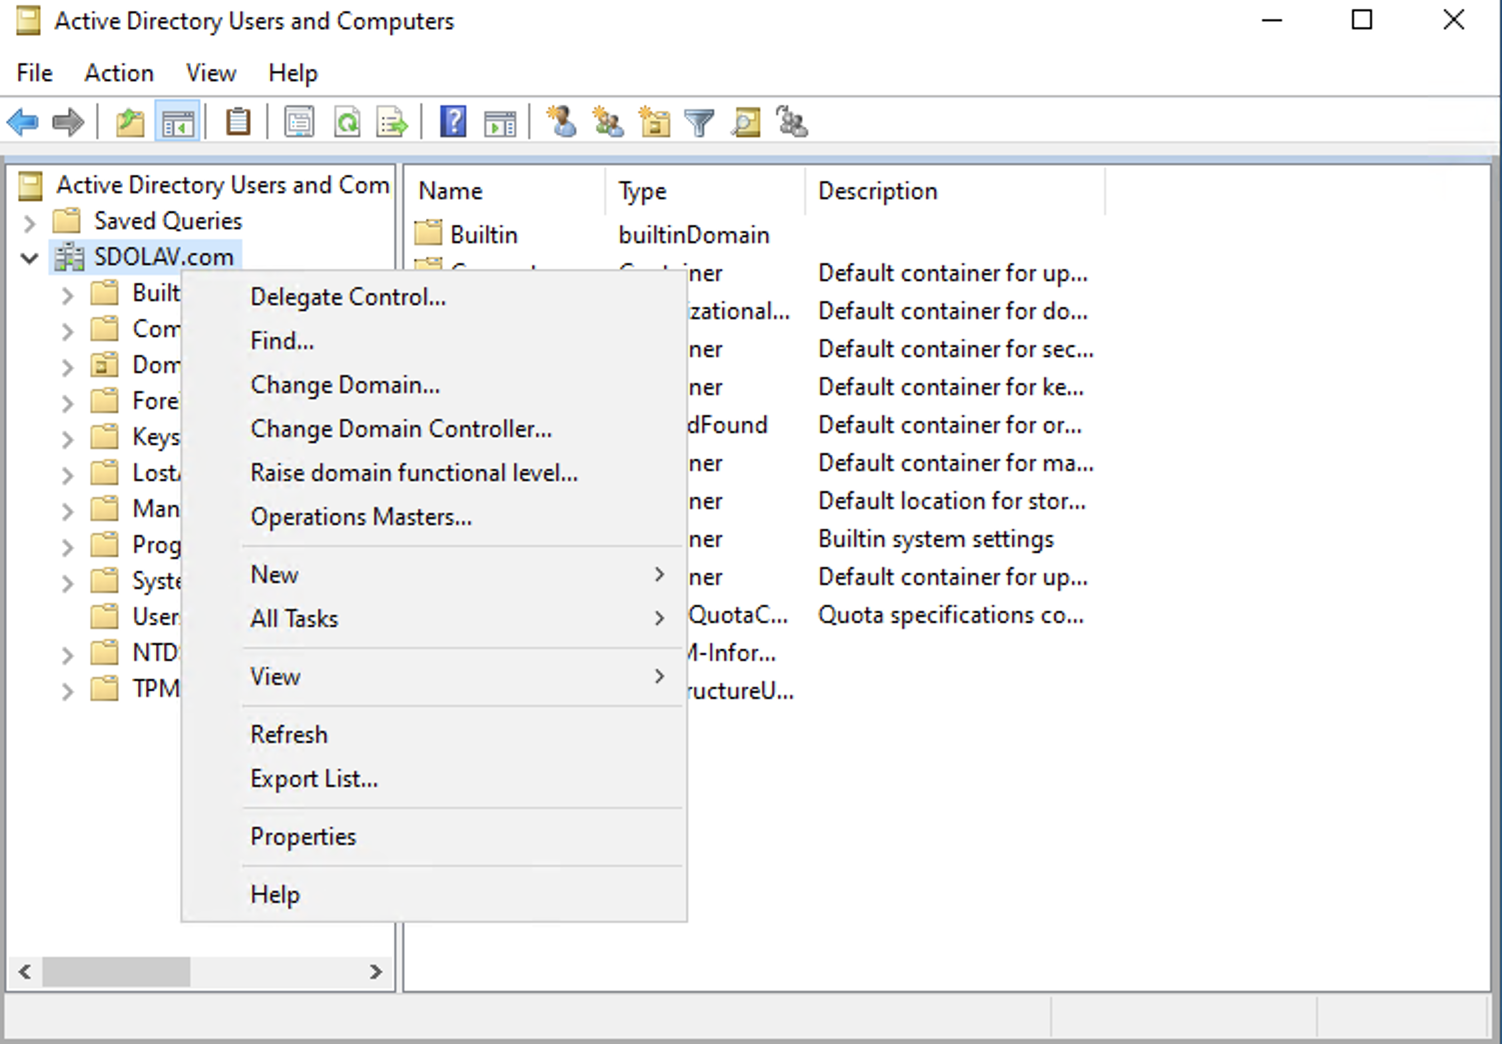
The Delegation of Control wizard opens.
On the User or Groups screen, add the required user.
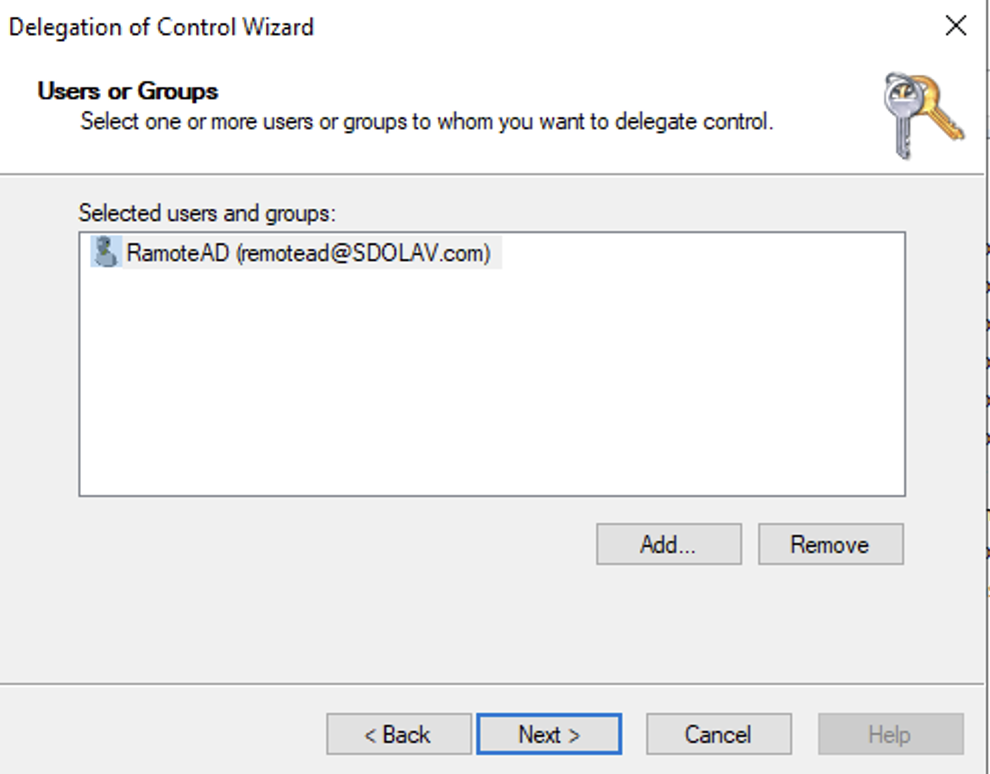
On the Tasks to Delegate screen, select the Reset user passwords and force password change at next logon checkbox.
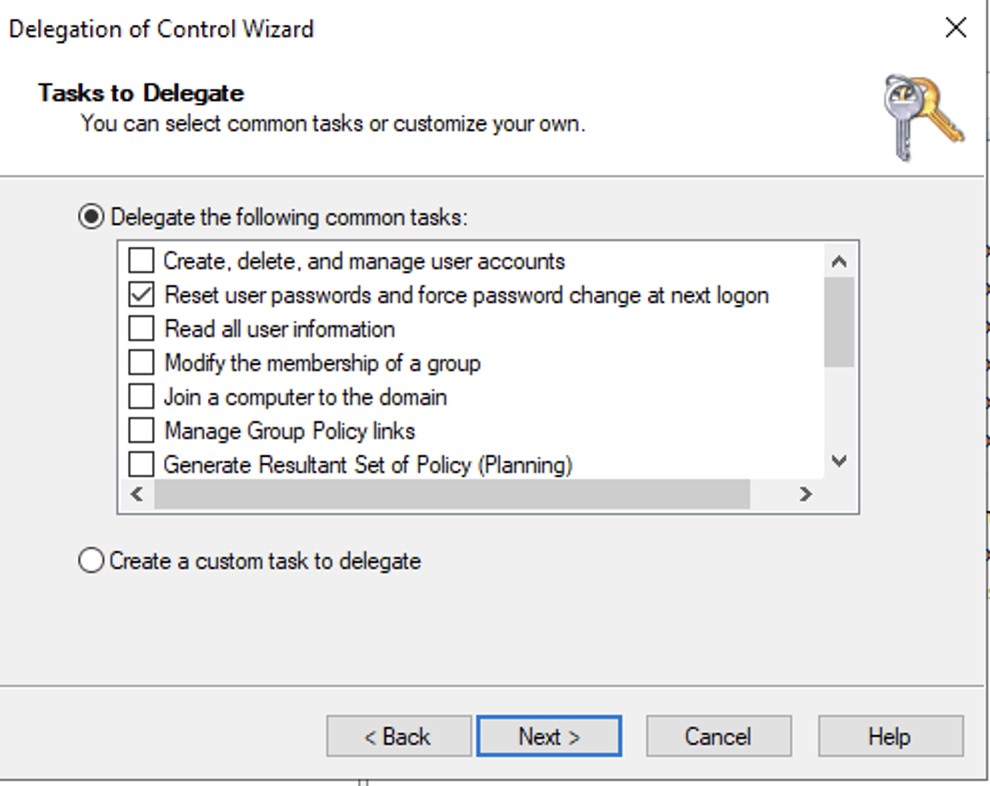
To close the wizard, click Finish.
The user should have read/write lockoutTime permission for the required scope (domain, OU, etc.). Follow these steps to configure the required parameters:
Open Active Directory Users and Computers. Then, right-click on the domain name and select Delegate Control.
The Delegation of Control wizard opens.
On the User or Groups screen, add the required user.
On the Tasks to Delegate screen, select the Create a custom task to delegate radio button. Then, click Next.
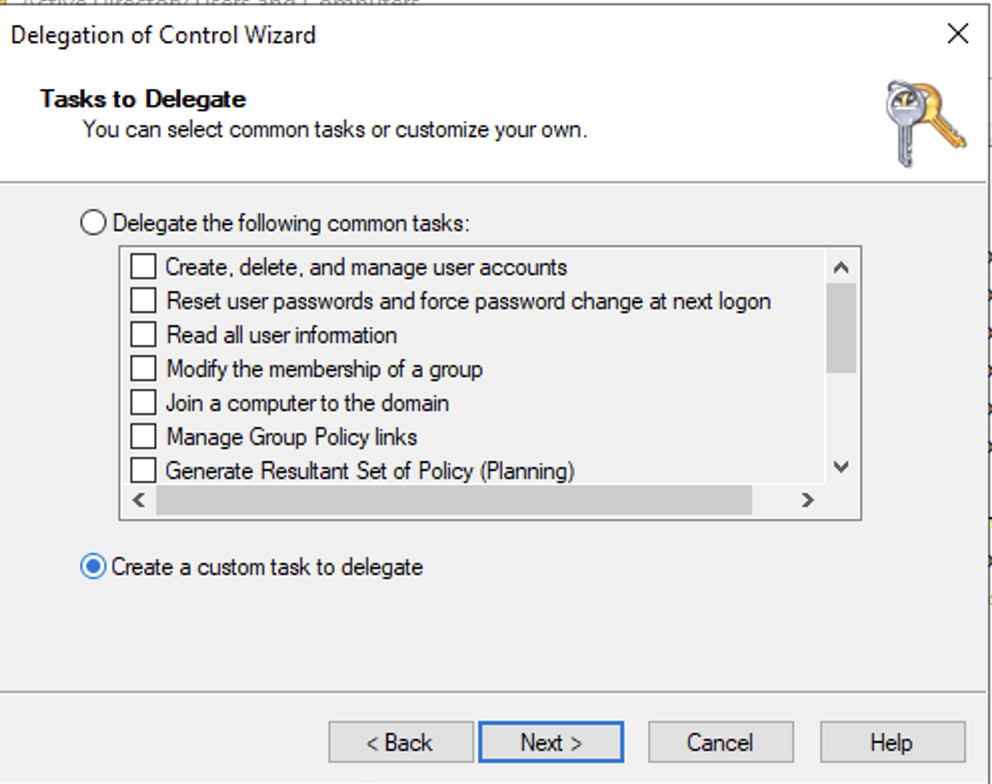
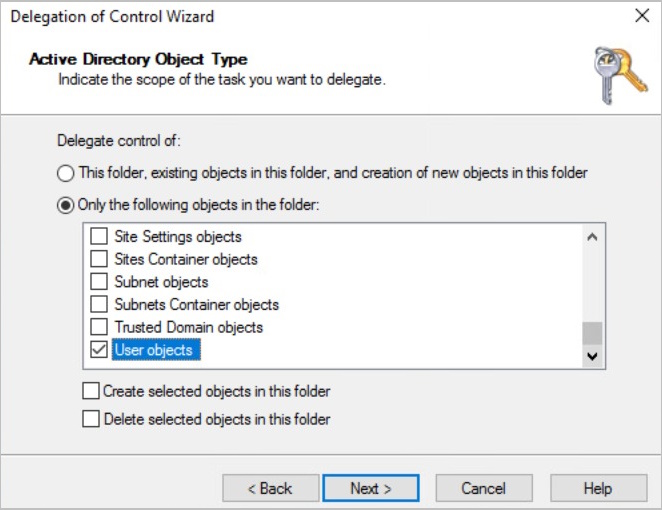
On the screen that opens, select the Only the following objects in the folder radio button, and in the list below, select User objects. Then, click Next.
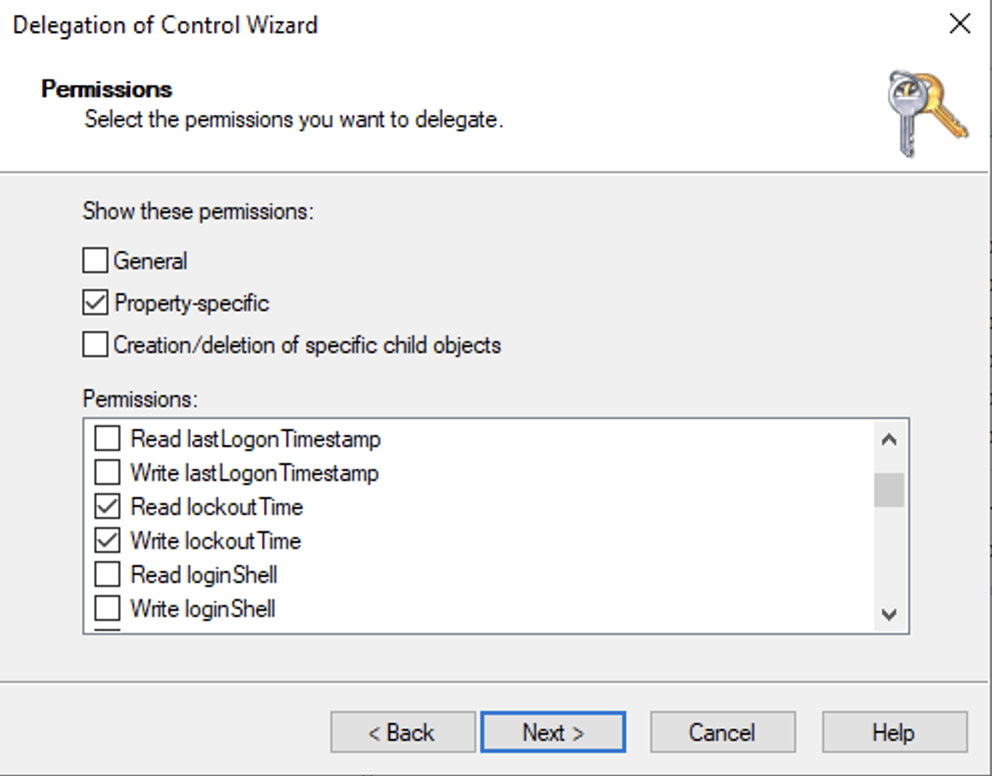
On the Permissions screen, select the following checkboxes:
Property-specific
Read lockoutTime
Write lockoutTime
To close the wizard, click Finish.
Follow these steps to grant the user the required permissions for the Remote AD:
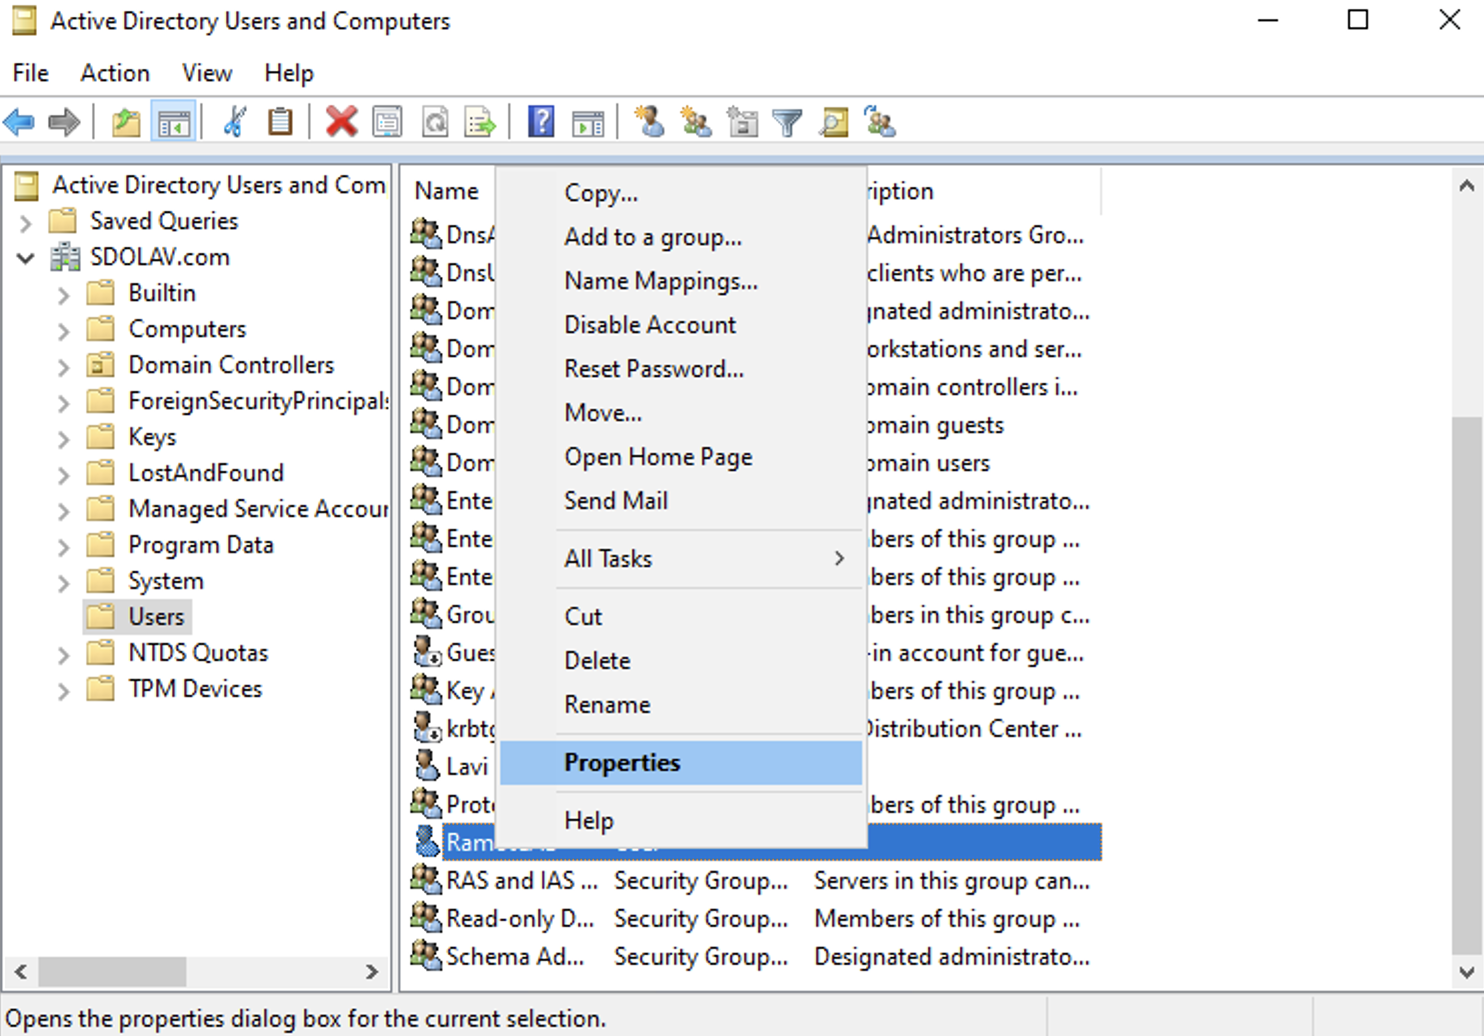
Open Active Directory Users and Computers and navigate to Users.
Right-click on the RemoteAD user and select Properties.
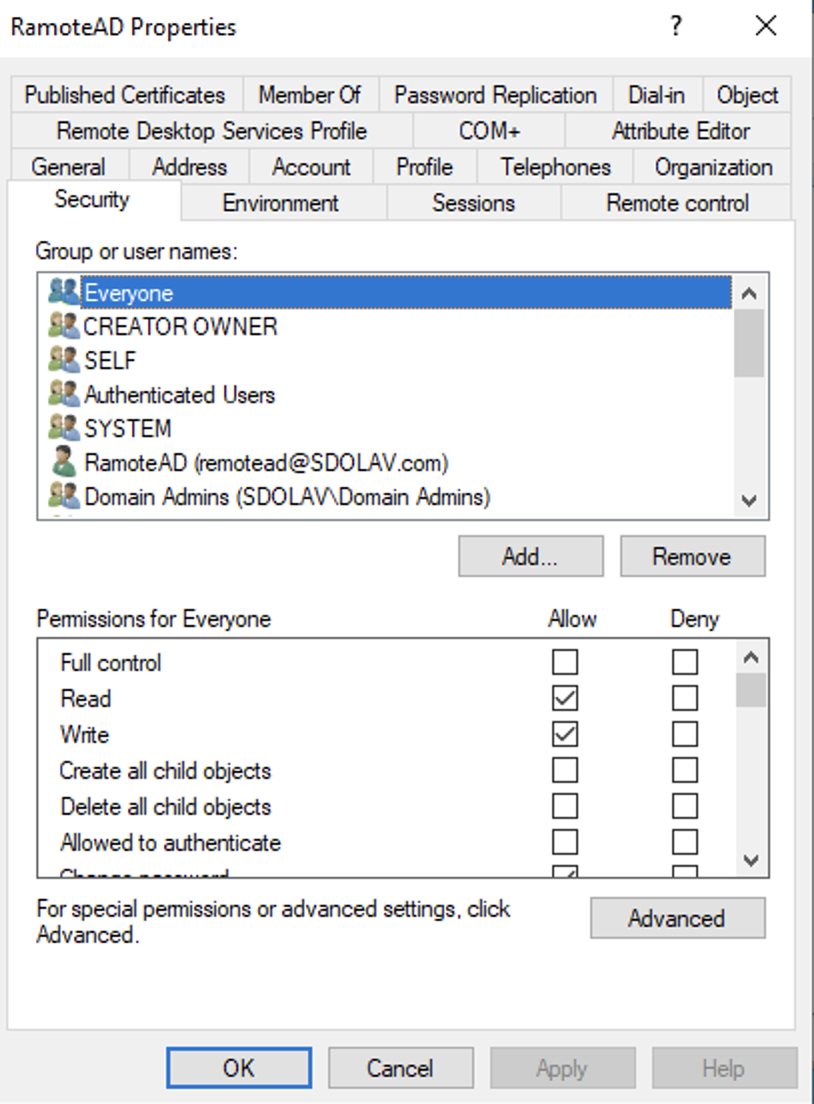
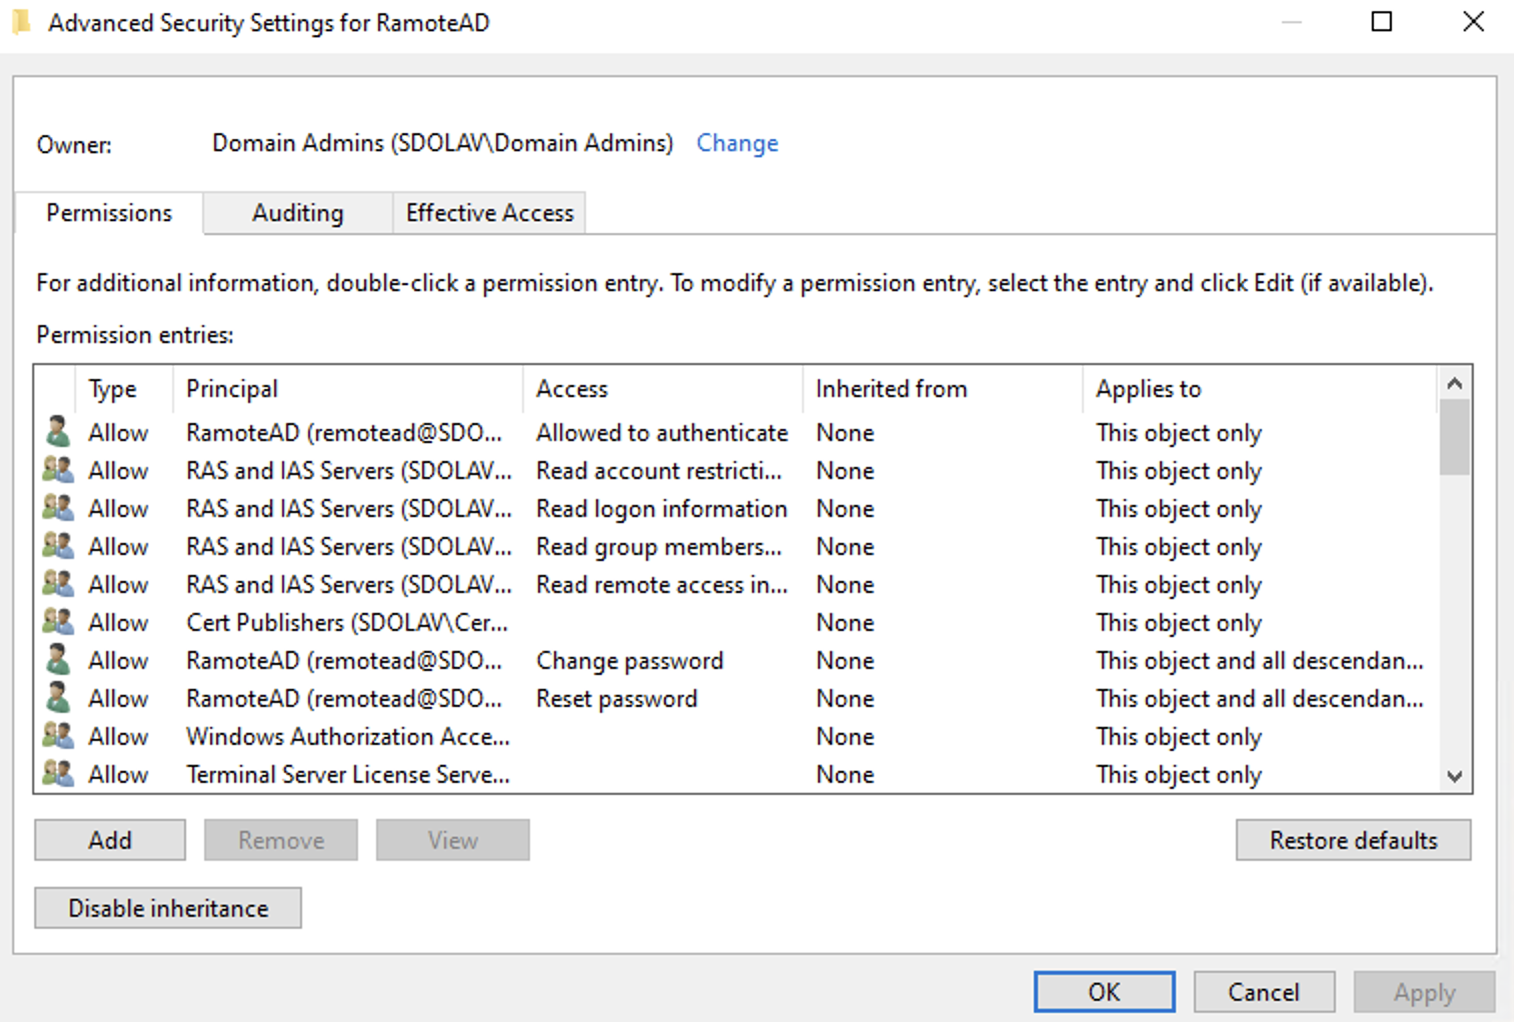
From the RemoteAD Properties dialog, select the Security tab. Then, at the bottom of the tab, click Advanced.
In the Advanced Security Settings for RemoteAD dialog, select the user (Principal) and click Add.
In the Permission Entry for RemoteAD dialog, select the following permissions:
List Content
Read permission
Reset password
Read lockoutTime
Write lockoutTime
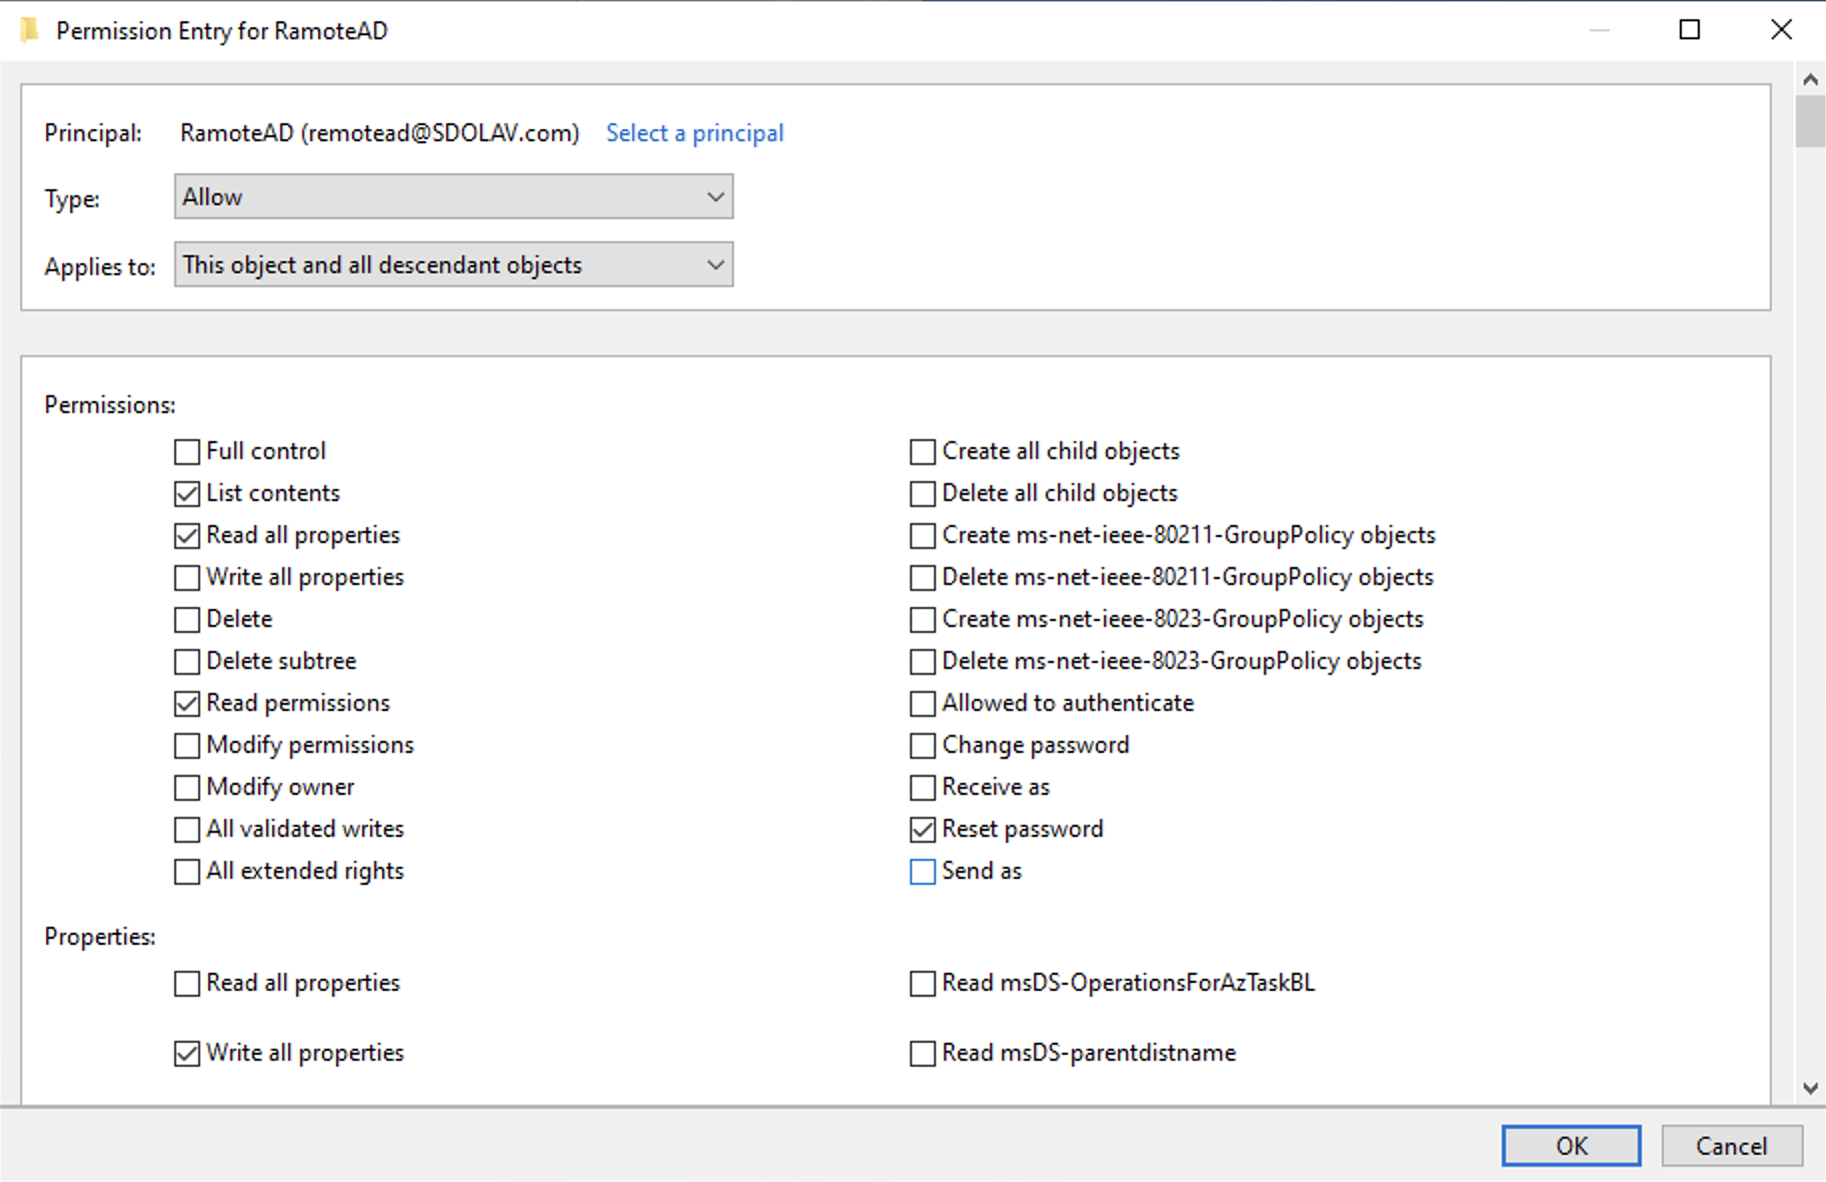
To save your settings, click OK.
List / Read AD deleted objects container
Follow these steps to grant list and read permissions to the Active Directory deleted objects container. For further information, please refer to this article.
Log on using a user account that is a member of the Domain Admins group.
Click Start and navigate to All Programs >ADAM > ADAM Tools Command Prompt.
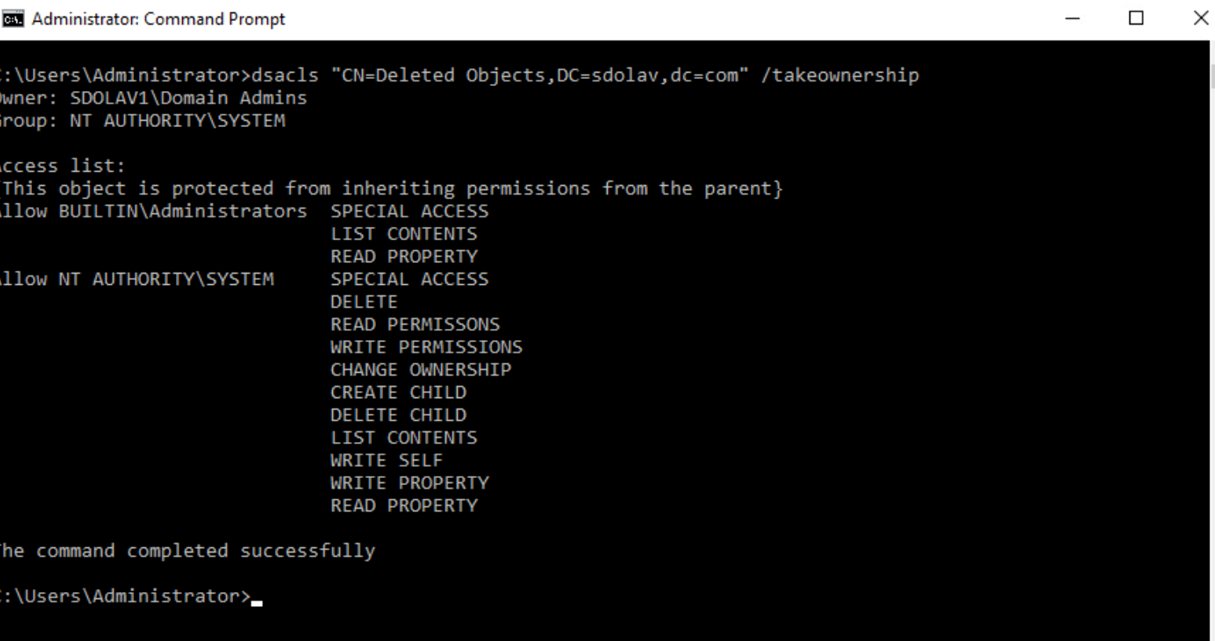
At the command prompt, enter a command similar to the example below.
When typing the command, use the name of the deleted objects container for your domain.
dsacls "CN=Deleted Objects,DC=Contoso,DC=com" /takeownership
Each domain in the forest has its own deleted objects container. The output displayed should be similar to that shown in the following example:
Upgrading the Remote AD Agent
To upgrade the Remote AD Agent, create a new agent using the Create Agent button.
Download the Agent and re-run it, without uninstalling the existing Remote Agent.
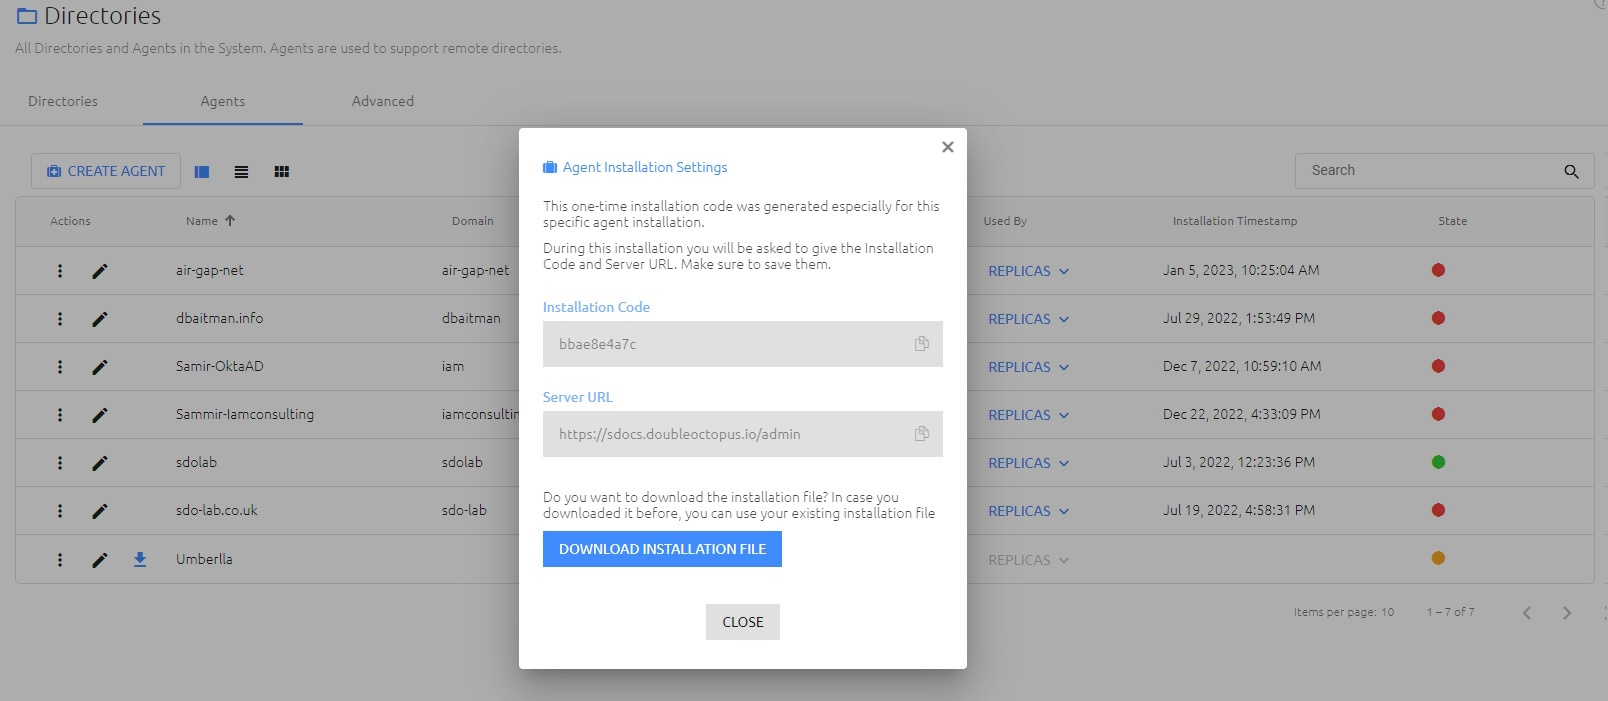
Once you are finished and the green indicator appears, you can remove the old Agent from the grid on the Directories page.