This document describes the user interface of the Secret Double Octopus Management Console and how to work with it. The content is intended for administrators of the Octopus Authentication Solution. Additionally, individual topics can be used as an overview of the system for management and non-technical staff.
To get started, refer to the following sections:
Solution Overview
The Octopus Authentication solution is a high-assurance, passwordless authentication system engineered to address the diverse authentication needs of a real-world, working enterprise. The Octopus Authentication Server uses a variety of state-of-the-art authentication methods, such as OKTA, ForgeRock, FIDO, OTP and Octopus Authenticator. Once the authentication is verified, the user is authenticated. The Authentication Server can then provide attestations to relying parties (such as SAML services, Windows/Mac, the User Portal and more) for the user's identity.
In a Software-as-a-Service deployment, the Octopus solution is installed in the SDO cloud (hosted by Secret Double Octopus), where a new private instance is created for every customer. The Octopus SaaS is then configured to access directory services and to work with relying parties. Directory integration allows the administrator to assign Octopus Authenticators to users and define authentication policies. Connecting with the relying parties can be done by configuring standard interfaces (e.g., RADIUS, SAML, etc.) or by defining a non-standard interface.
The administrator configures the system settings from the Secret Double Octopus Management Console.
Additional system components are required to allow users to work with the solution. These components include the Octopus Authenticator mobile app on iOS / Android and the User Portal and integrated web services on a supported browser. The following tables list supported mobile operating systems and browser versions.
Supported Mobile Devices
Supported Browsers: Management Console UI and User Portal
Browser | Supported Versions | Notes |
|---|---|---|
Chrome | 30 and higher | |
Safari | 13.1.2 and higher | |
Firefox | 25 and higher | |
Edge | 41 and higher | Supported for User Portal only |
Supported Browsers for SAML Authentication
Browser | Supported Versions |
|---|---|
Chrome | 30 and higher |
Edge | 41 and higher |
Firefox | 25 and higher |
Internet Explorer | 11.0 |
The Octopus Management Console is accessed via the User Portal, as described in the procedure below. Before attempting to log into the User Portal, make sure you have downloaded the Octopus Authenticator mobile app and enrolled your device. (For full instructions, please refer to your enrollment invitation email.)
Note: To access the Management Console, users must be enrolled with the Octopus Server and have a role of Admin, Helpdesk or Auditor.
To access the Management Console:
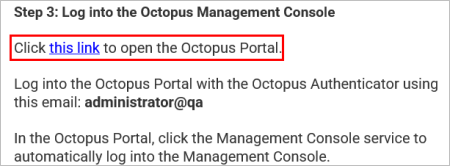
Open the Login screen for the Octopus User Portal by clicking the link provided in your enrollment invitation email.
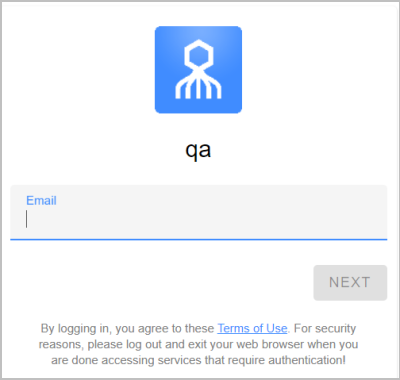
On the Login screen, enter the email address provided in the enrollment email. Then, click Next.
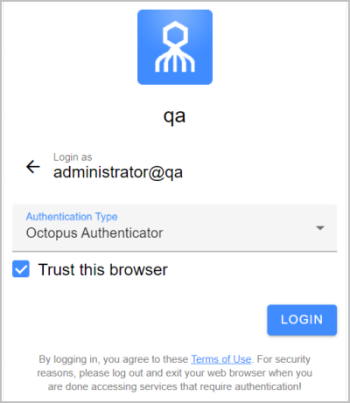
Note: After the first login, the system stores your login details and automatically displays the Login screen shown in Step 3 for subsequent logins.
On the screen that opens, click Login.
An authentication request is sent to your mobile device.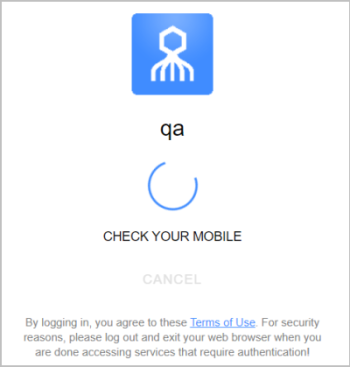
From your mobile device, click Approve.
If you are prompted to provide a verification code, enter the digits displayed on your mobile device.
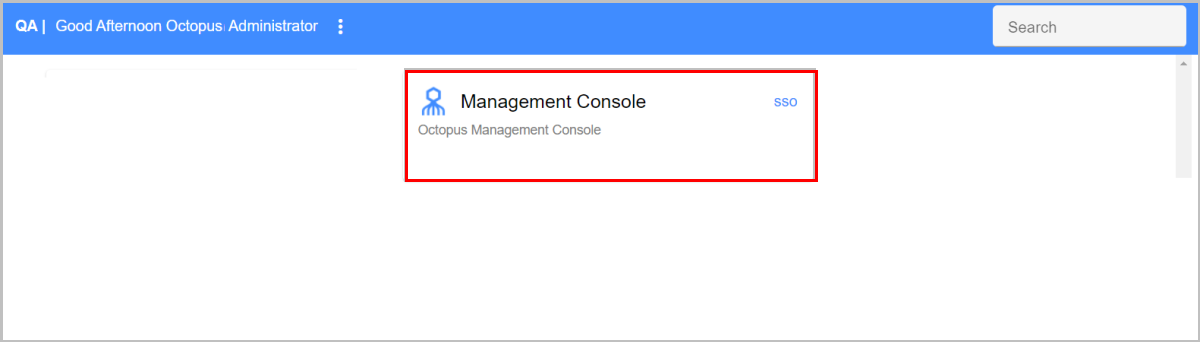
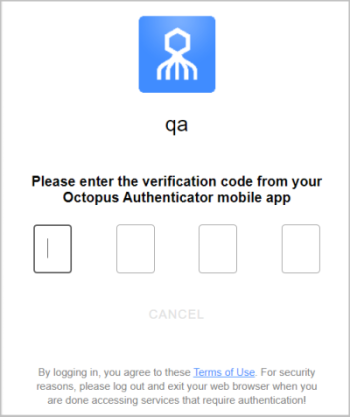 Following successful authentication, the User Portal opens.
To open the Octopus Management Console, click the Management Console card.
The main features that appear on most pages of the Management Console are described in the table below the diagram.
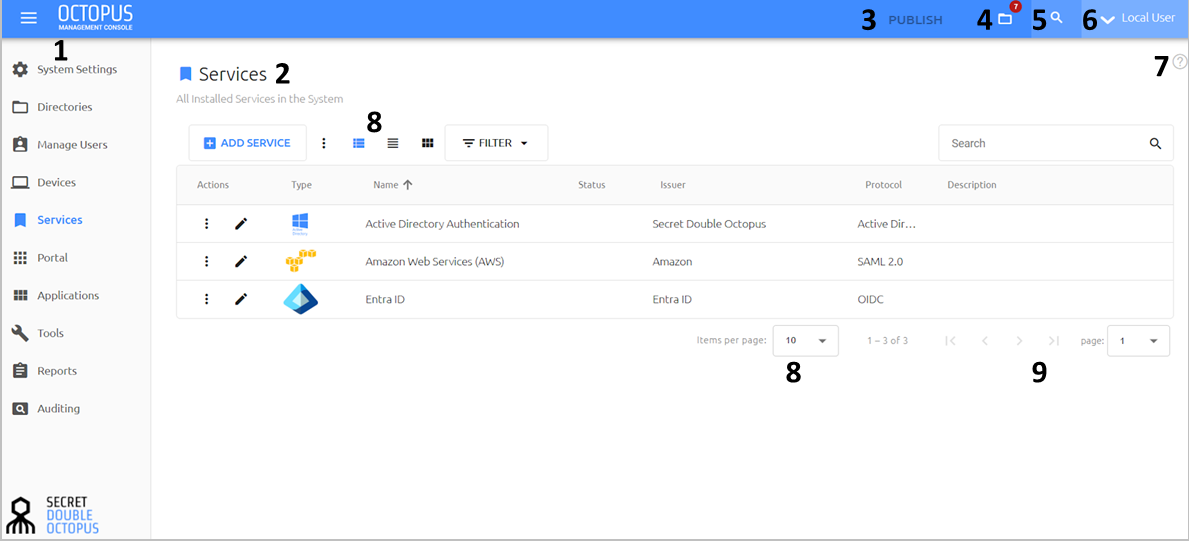
Number | Feature | Description / Notes |
|---|---|---|
1 | Menu bar | Provides access to the various menus of the Management Console. For more information, refer to Menu Bar. |
2 | Menu title | Name and description of the currently displayed menu. |
3 | Publish button | Shows information about publishing status and provides quick access to the Publish dialog. For more details about publishing, refer to Configuring System Settings (Publish tab). |
4 | Alert icons | These icons, which are normally hidden, appear when system components are not operating as expected.  Indicates an issue involving one or more directories. To view and troubleshoot directory settings, go to the Directories menu.  Indicates a connection problem or other issue involving one or more system components. Indicates a connection problem or other issue involving one or more system components.If you see this warning icon, contact Secret Double Octopus support. |
5 | Search by ID tool | Opens the page displaying details about any user, group or workstation in the system. For more information, refer to Using the Search By ID Tool (below). |
6 | Username options menu | Click your username to display the following options:
|
7 | Help access | Click this icon to open an article describing the current page and how to work with its features. |
| 8, 9 | Item presentation and navigation tools | These components, which generally appear on main menu screens, enable you to control the number of items displayed on the page and scroll to other pages of the list. For details, refer to Page Presentation and Navigation Tools (below). |
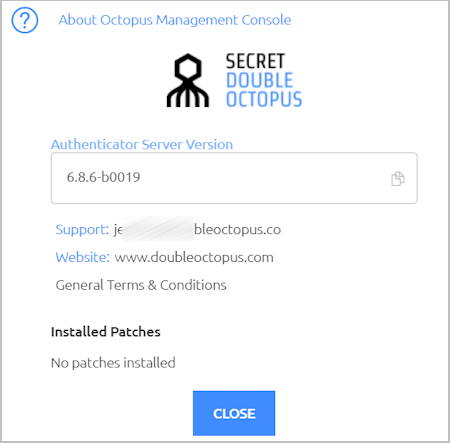
Using the Search By ID Tool
This tool helps administrators easily locate and view details for users or workstations with identified issues, so the issues can be quickly resolved. The unique ID of the user, group or workstation is presented in the Auditing tab as part of the issue summary.
To use the Search By ID tool:
Click
 to open the Search by Id popup.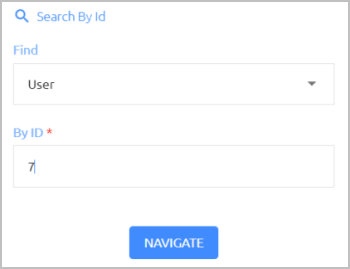
From the Find dropdown list, select User, Group or Device.
In the By ID field, enter the entity's unique ID.
Click Navigate.
The Details page for the user, group or workstation is displayed.
Page Presentation and Navigation Tools
Menus that display lists of many items (such as Devices, Services, etc.) feature components that allow you to more easily view the list and quickly navigate through multiple-page lists. The icons at the top of these pages enable you to control the display of page content:
 | Items are presented in separate cards. |
 | Items are presented in standard list form, with up to 10 items on a page. |
 | Items are presented in compact list form, with up to 20 items on a page. |
When items are presented in list view, the Items per page feature (at the bottom of the page) allows you to select the number of items displayed on each page of the list (10, 20. 50 or 100).

The navigation toolbar at the lower right corner of the page enables you to easily scroll to the next page, previous page, or first / last page of the list. In addition, you can immediately view any page of the list by selecting the page number from the page list, at the far right of the navigation toolbar.

Menu Bar
The menu bar is located on the left side of the Management Console. It can be collapsed and expanded by clicking the icon at the top of the bar.
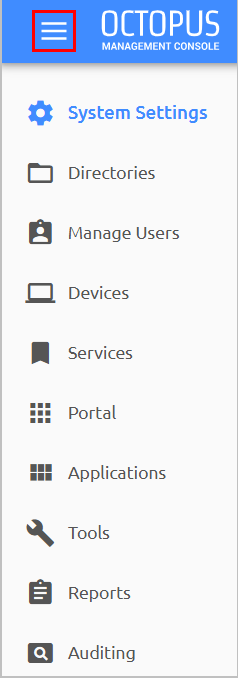
The menus are:
System Settings: Enable you to view and update system configuration settings, such as authenticators, email settings and more.
Directories: Allows you to integrate corporate directories with the system and configure settings for each directory.
Manage Users: Lists all users according to their associated directories and enables you to add, remove and perform other administrative actions on users.
Devices: Lists all workstations in the system, provides detailed information about them and allows you to perform administrative operations on them.
Services: Lists all services integrated with the Octopus Management Console and enables you to add and update services.
Portal: Allows you to control settings for the User Portal.
Applications: Enables integration of applications with the Authentication Server and the Windows Agent, so users can access the applications with single sign-on.
Tools: This menu is used to provide AD schema customization and support of additional hidden features. Parameters should be added and configured only with guidance from the Secret Double Octopus support team.
Reports: Provides a variety of out-of-the-box report templates that enable tracking and monitoring of user status, enrollment trends, authentication events and more.
Auditing: Displays a log of every administrative action performed by the system or by users.