Preface
This comprehensive guide provides step-by-step instructions for integrating Microsoft Entra ID (formerly Azure Active Directory) with your Secret Double Octopus (SDO) tenant. The integration enables secure directory synchronization and enterprise-grade authentication capabilities for your organization.
Microsoft Entra ID serves as the foundation for identity and access management in modern enterprise environments. By connecting your Entra ID directory to SDO, you enable seamless user provisioning, centralized authentication, and enhanced security controls across your applications and services.
The configuration process involves several key phases: setting up an application registration in Microsoft Entra ID, configuring the necessary API permissions, establishing directory synchronization, and finally connecting users to your authentication services. Each step has been carefully documented with screenshots and practical tips to ensure a smooth implementation.
Important: This integration requires administrative privileges in both Microsoft Entra ID and your SDO tenant. Please ensure you have the necessary permissions before proceeding with the configuration.
SDO Remote AD Agent - Install and Configure
Secret Double Octopus Active Directory Integration
Download PDFPrerequisites
- Administrator access to Microsoft Entra admin center
- Appropriate permissions to create and manage app registrations
- Ability to grant admin consent for API permissions
- Access to SDO tenant with directory management permissions
- Basic understanding of identity and access management concepts
Navigate to App Registrations
Go to https://entra.microsoft.com and click on 'App registrations' from the navigation menu.

Create or Select App Registration
Click on an existing App or create a 'New registration' to proceed.

Copy Application (Client) ID
Locate and copy the 'Application (client) ID' from the overview page.

Copy Directory (Tenant) ID
Locate and copy the 'Directory (tenant) ID' from the same overview page.

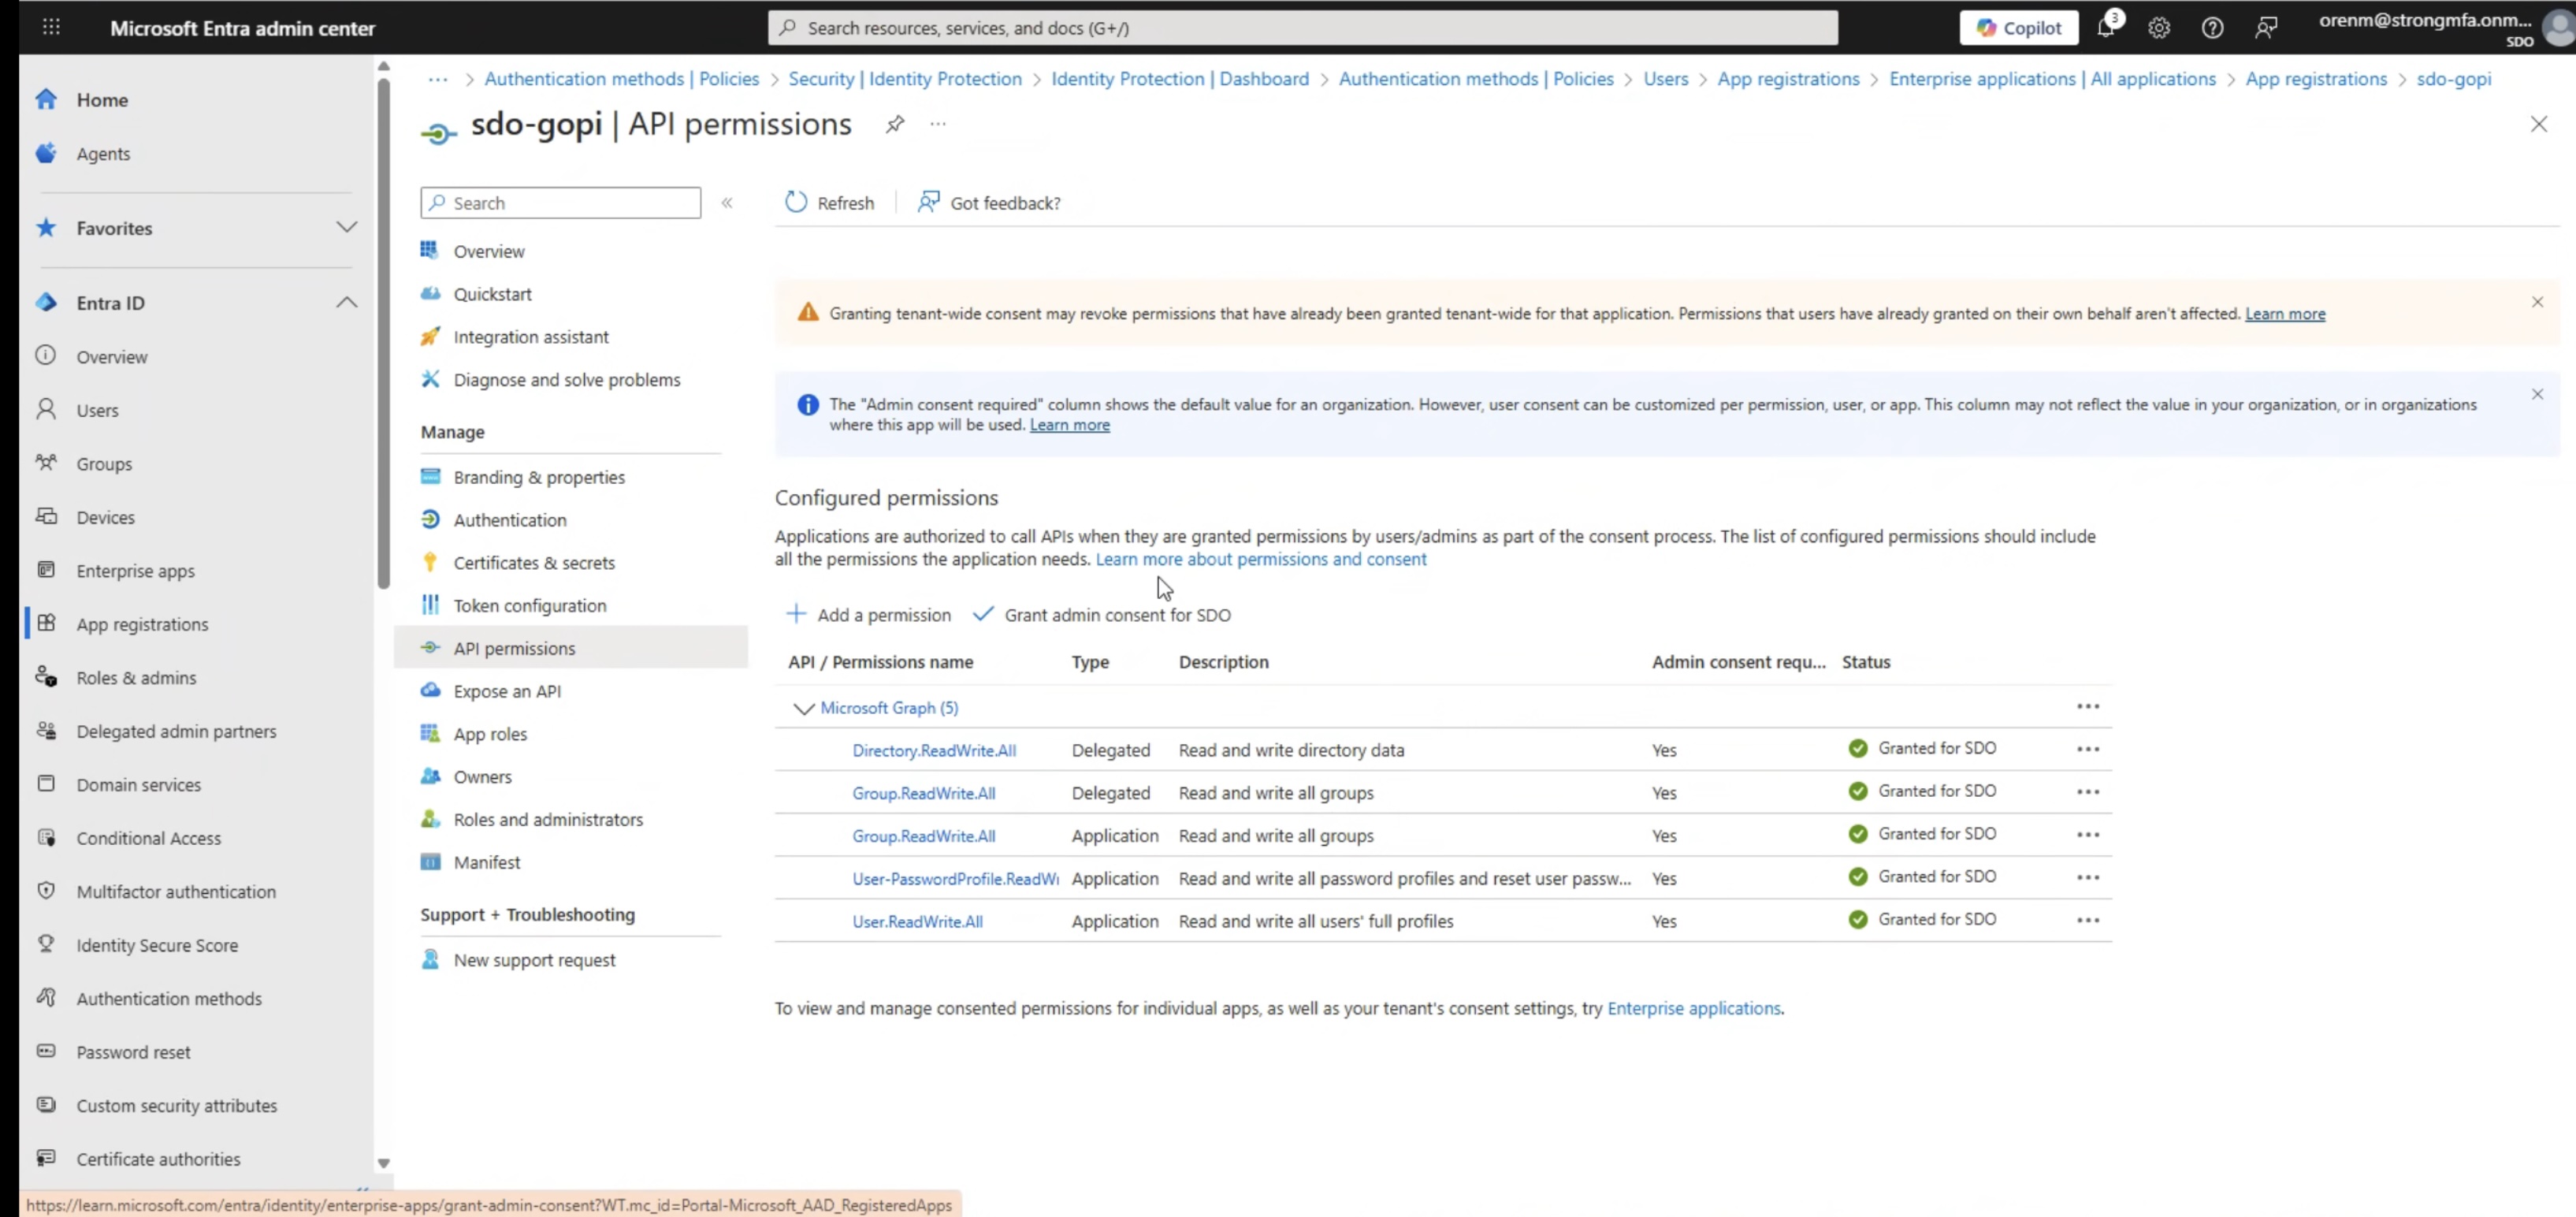
Configure API Permissions
Click 'API permissions' and add the required Microsoft Graph permissions: Directory.ReadWrite.All (Delegated), User.ReadWrite.All (Application), User.PasswordProfile.ReadWrite (Application), Group.ReadWrite.All (application), Group.ReadWrite.All (Delegate) and Directory.ReadWrite.All (Application).
Create Client Secret
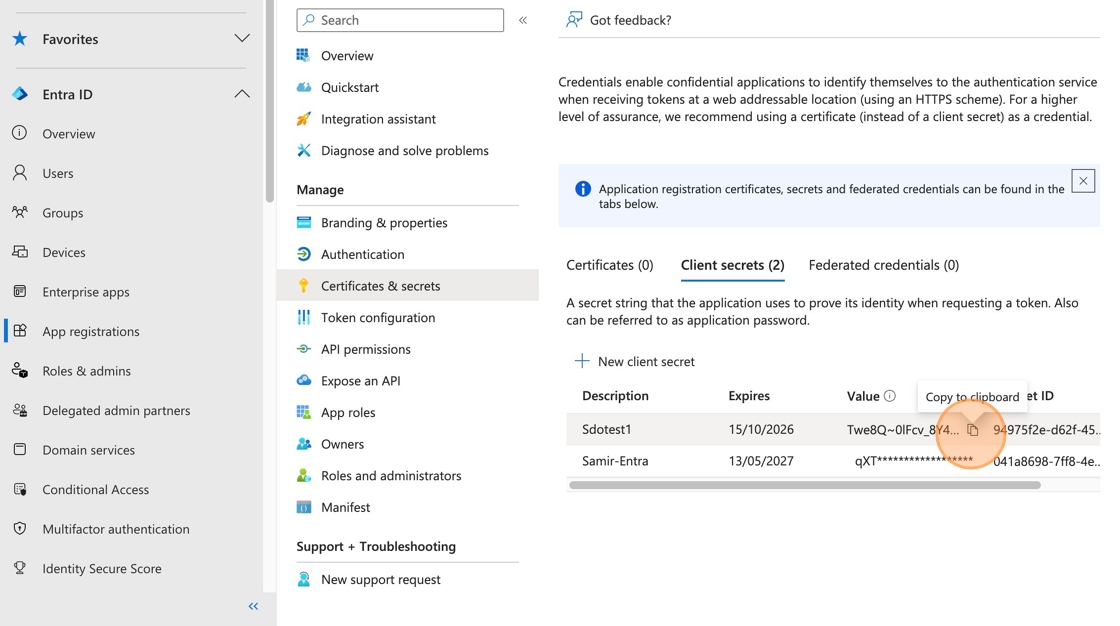
Navigate to 'Certificates & secrets' and create a new client secret. Copy the value immediately as it won't be shown again.
Grant Admin Consent
In the API permissions section, click 'Grant admin consent' for your organization.
Navigate to Directories
Navigate to SDO client tenant and click on 'Directories'.

Create New Directory
Click on 'CREATE DIRECTORY' to start the directory creation process.

Select Directory Type
Click on the drop down arrow to select the directory type.

Choose Entra ID
Select 'Entra ID' (not the Entra ID LDAP option) from the available choices.

Select Directory Sync
Click on the 'Directory Sync' button to enable directory synchronization.

Select Directory
Click 'SELECT' to confirm your directory selection.

Configure Directory Name
Click the 'Name' field and type a descriptive name for your directory.

Configure Directory Settings
Paste the previously copied values from Notepad into the Tenant ID, Client ID, and Client Secret fields. Then click on 'Select Email Mapping'.

Select Email Mapping
Select 'mail' as the email mapping option.

Test Directory Connection
Click 'TEST CONNECTION' to verify the directory connection settings.

Create Directory
If 'TEST CONNECTION' is successful, click 'CREATE' to finalize the directory setup.

Monitor Directory Sync
Once the Directory icon goes green, click on the sync icon to monitor the synchronization process.

Publish Directory
Click 'PUBLISH' to make the directory available to your application.

Publish Directory
Click 'PUBLISH' again to confirm the directory publication.

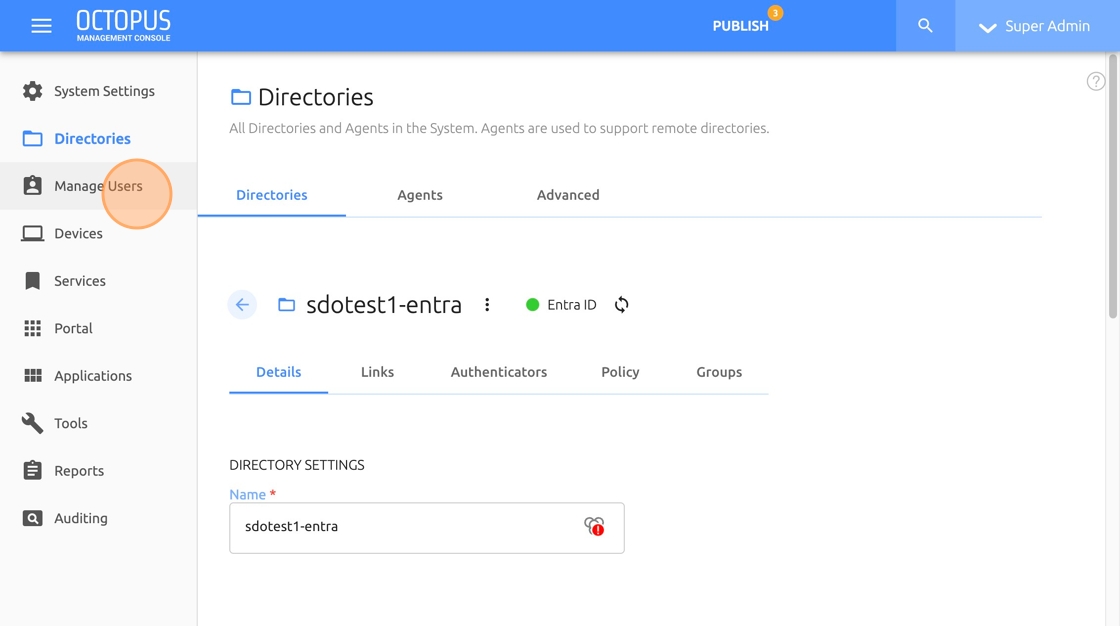
Manage Users
Click 'Manage Users' to access the user management interface.
Expand Directory
Expand your directory to view all available users and groups.

Select Users
Click 'users' to view the list of users in your directory.

View User List
A list of all users will be shown here, including their directory information.

Access Services
Click 'Services' to configure directory services for your application.

Add Service
Click 'ADD SERVICE' to create a new service configuration.

Configure Active Directory
Click 'ADD' next to 'Active Directory Authentication' to configure the authentication service.

Configure Service Settings
Enter desired names for 'Service Name' and 'Issuer'. Then click 'CREATE'.

Access Directories
Click 'Directories' to verify your directory configuration.

Select Directory
Select your configured directory field from the list.

Save Configuration
Click 'SAVE' to save your directory configuration settings.

Access Users
Click 'Users' to view the list of users in your directory.

Add User
Click 'ADD' to add a new user to the service configuration.

Expand Directory
Expand your directory to view the complete user hierarchy.

Select Users
Click 'users' to view the list of users in your directory.

Select Users to Add
Select the users you want to add to this service configuration.

Save Service Configuration
Click 'SAVE' to save your service configuration with the selected users.

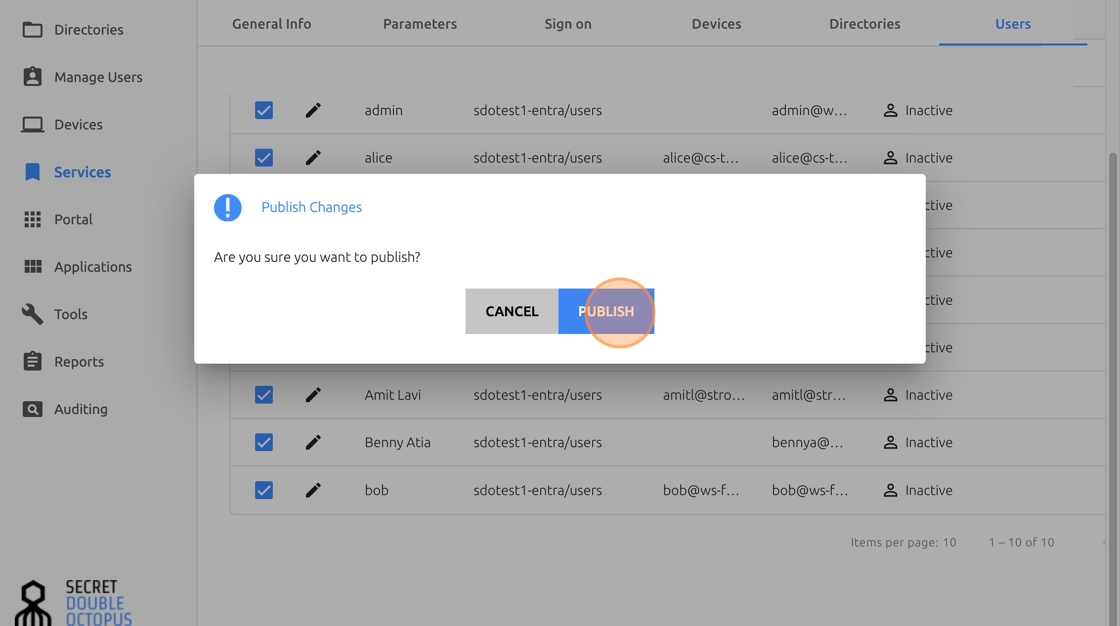
Publish Service
Click 'PUBLISH' to make the service configuration available to users.

Finalize Setup
Click 'PUBLISH' again to complete the final configuration steps.
✅ Setup Complete!
Your Microsoft Entra ID directory is now configured and ready to use. All users have been synchronized and assigned to the authentication service.