Configuring Office 365 Federation with WS-Federation
Complete Step-by-Step Implementation Guide with SDO Integration - All 44 Steps
Last Updated: November 2024 | Estimated Time: 30-45 minutes
⚠ Prerequisites
Before starting, ensure you have:
- ✓ Office 365 Global Administrator access
- ✓ SDO (Secret Double Octopus) admin credentials
- ✓ PowerShell with administrative privileges
- ✓ SDO federation script downloaded
- ✓ Domain ownership verified in Office 365
- ✓ Create Immutable IDs if you have an Entra-only Environment - Instructions
- ✓ Enabling staged rollout groups (optional) - See Video
- ✓ Octopus Authenticator app installed on mobile device
Tip: Click on any image to open it in a new tab for a larger view. Use Ctrl+Scroll to zoom in for details.
Section 1: Initial Setup and Script Preparation (Steps 1-9)
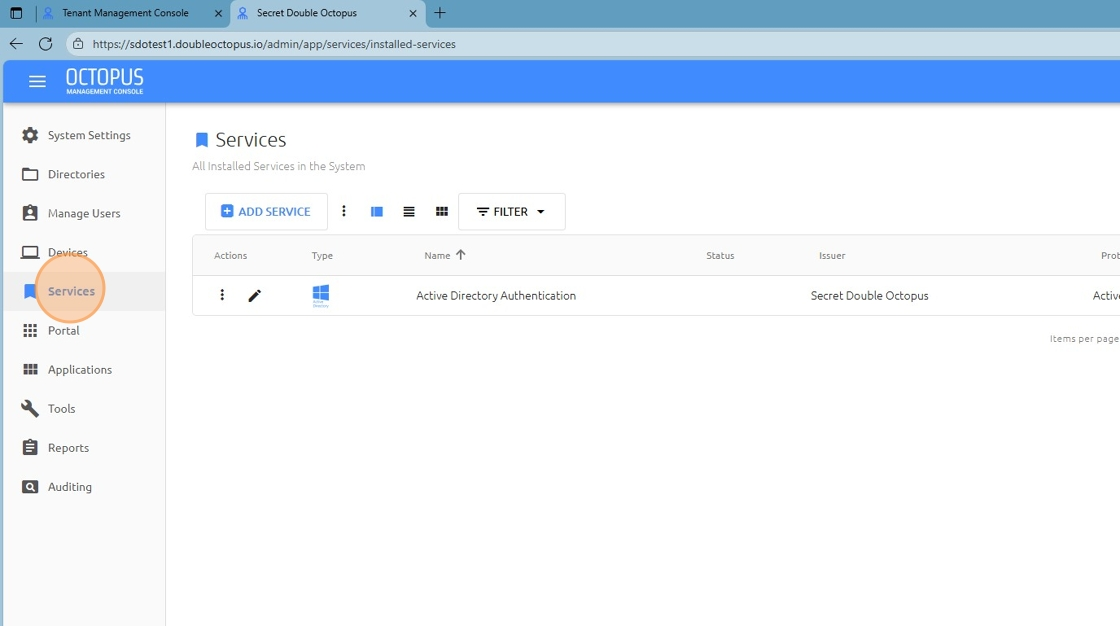
1 Check that you don't already have a WS-Fed service
Verify no existing WS-Federation service is configured before proceeding.
Click image to view full size
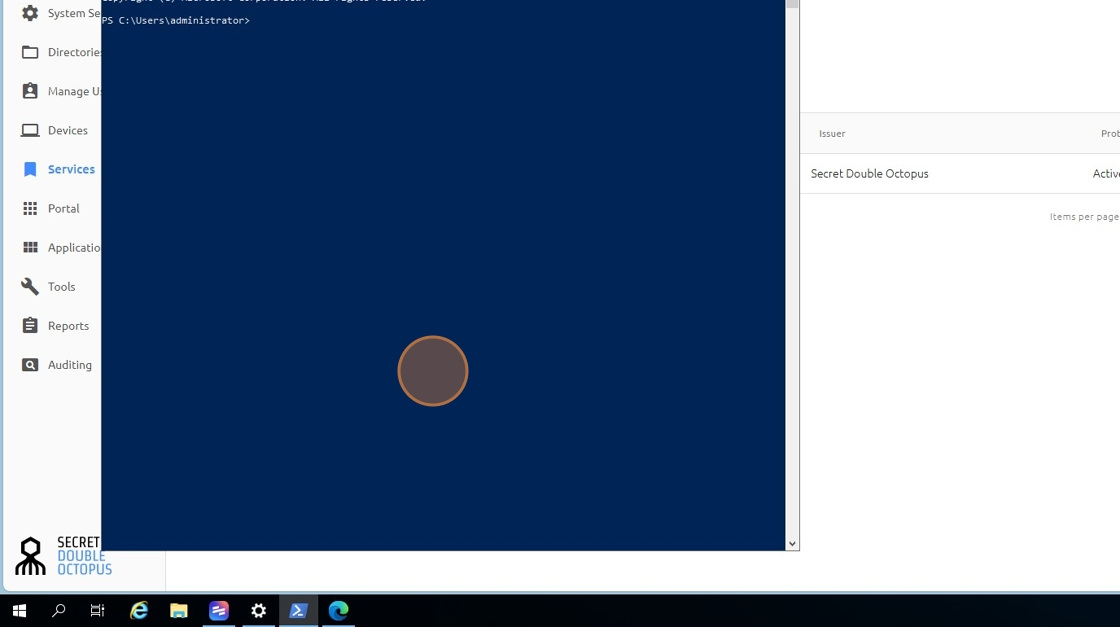
2 Run PowerShell as an Administrator
Right-click on PowerShell and select "Run as Administrator".
Click image to view full size
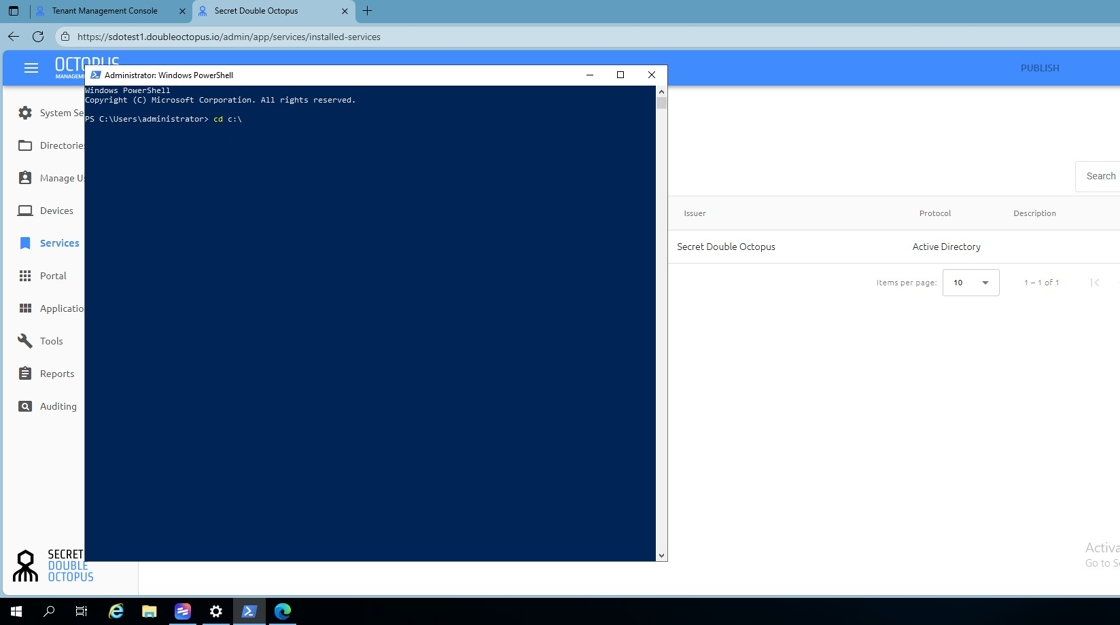
3 Change to the directory where you downloaded SDO federation script
Navigate to the folder containing your SDO federation script using the cd command.
Click image to view full size
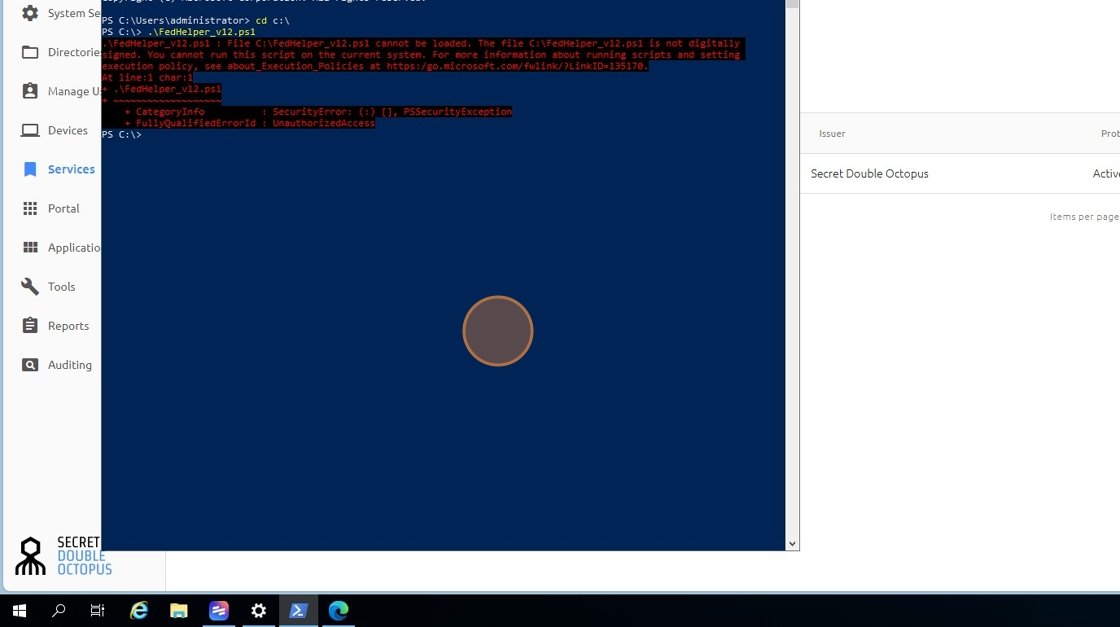
4 Run the SDO federation script
Execute the SDO federation PowerShell script.
Click image to view full size
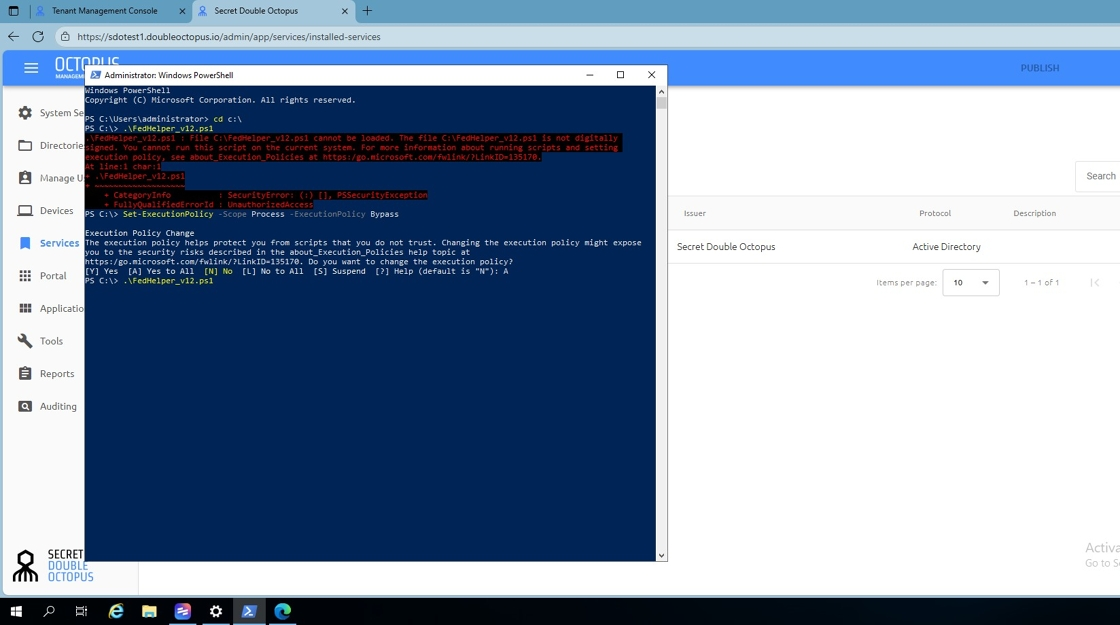
5 Set PowerShell execution policy
Run the command: Set-ExecutionPolicy -Scope Process -ExecutionPolicy Bypass
Note: This temporarily allows the unsigned script to run in the current PowerShell session only.
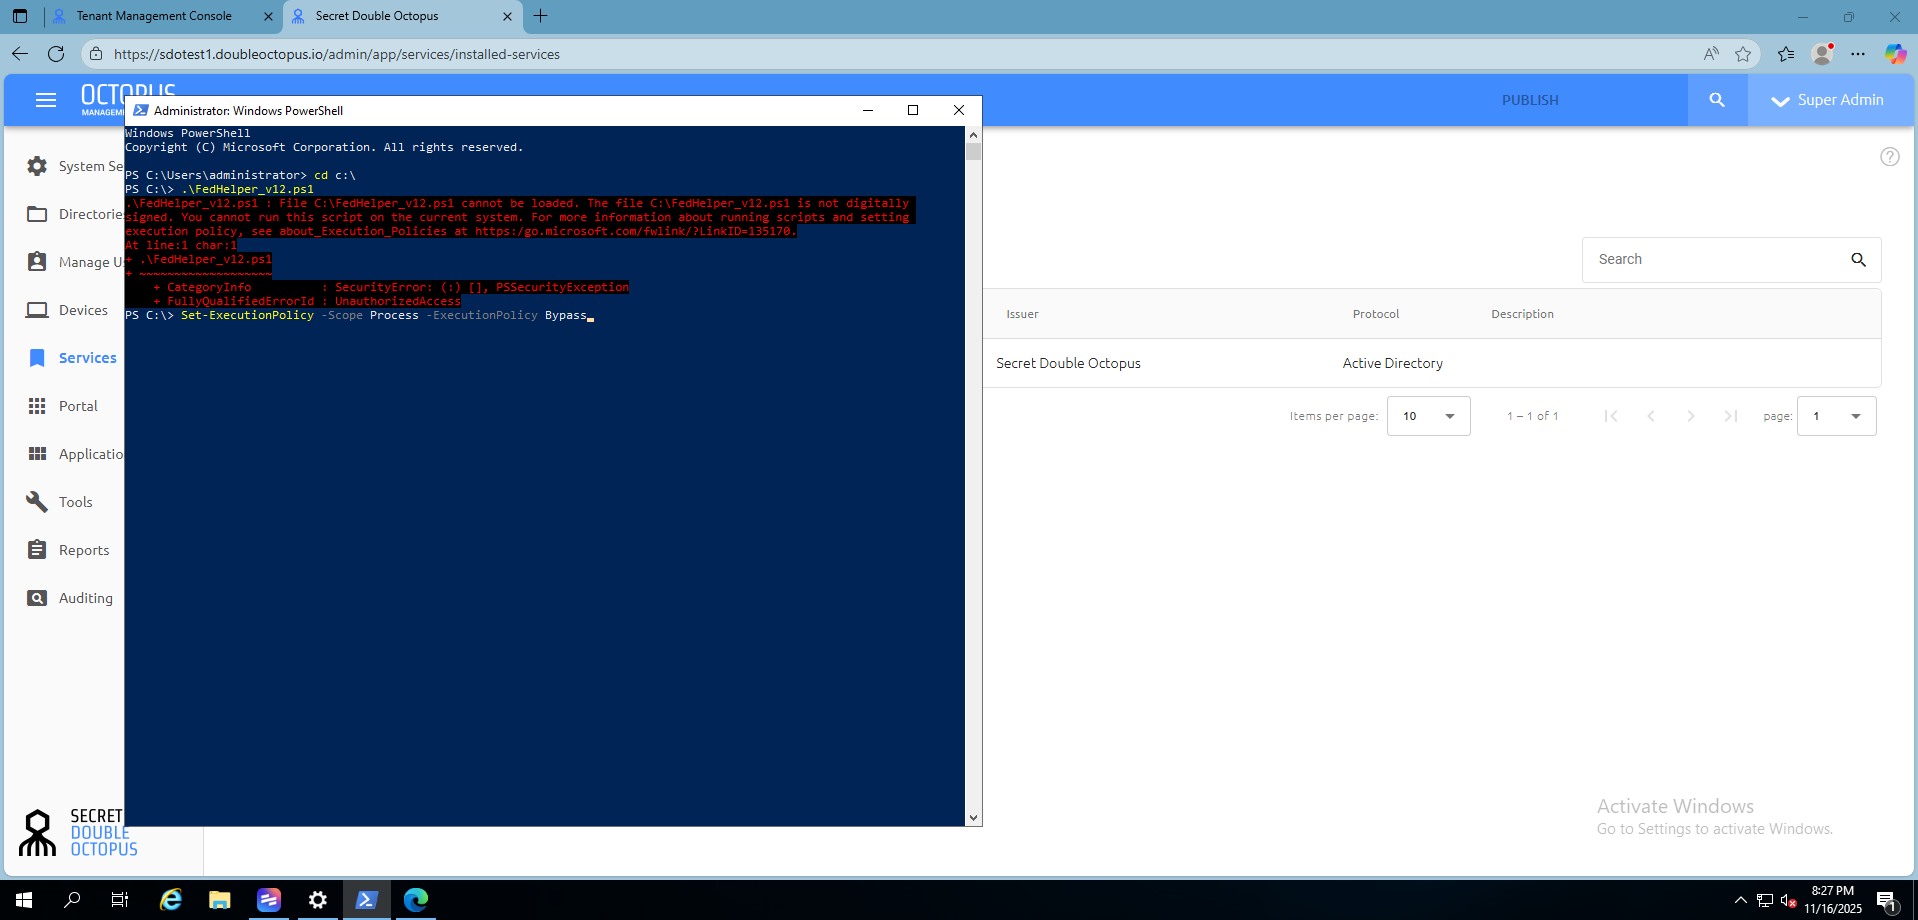
Click image to view full size
6 Type A to accept All
When prompted, type 'A' to accept all execution policy changes.
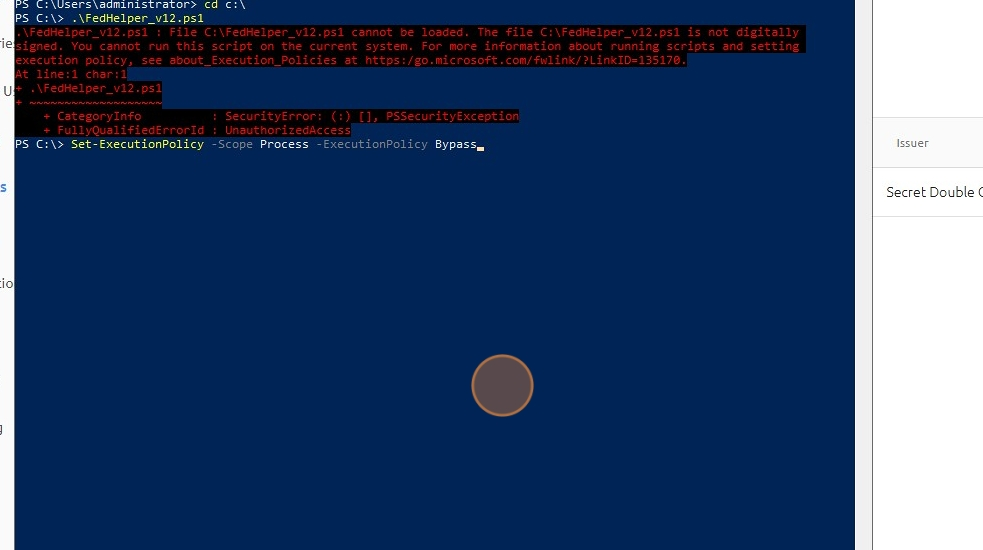
Click image to view full size
7 Press [Return]
Press the Enter key to continue.
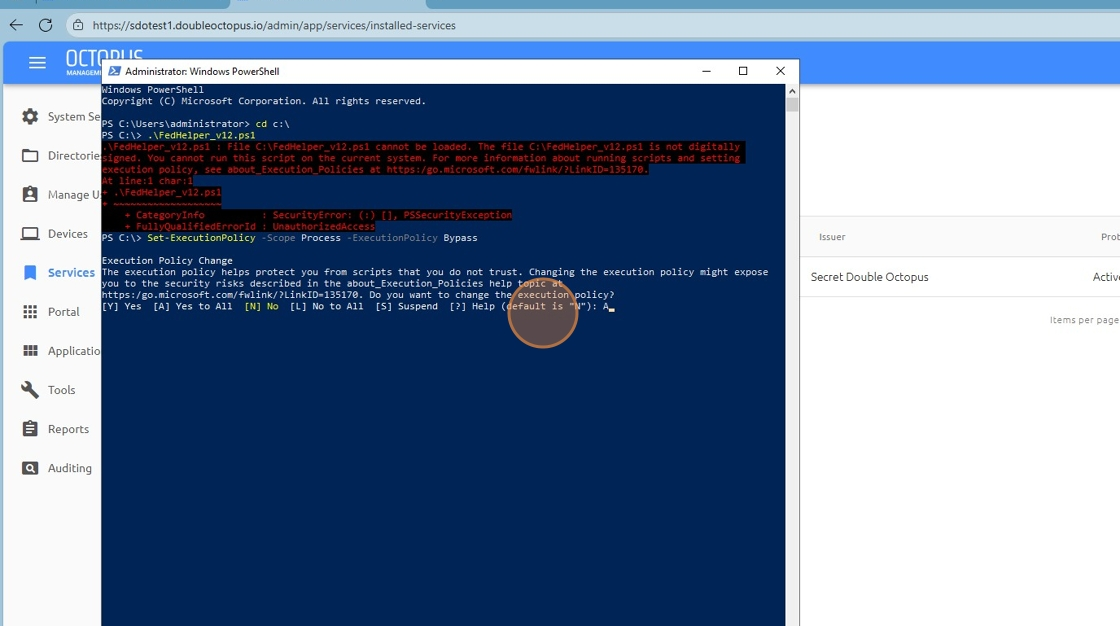
Click image to view full size
8 Run the SDO federation script again
Run the SDO federation script again now that the execution policy is set.
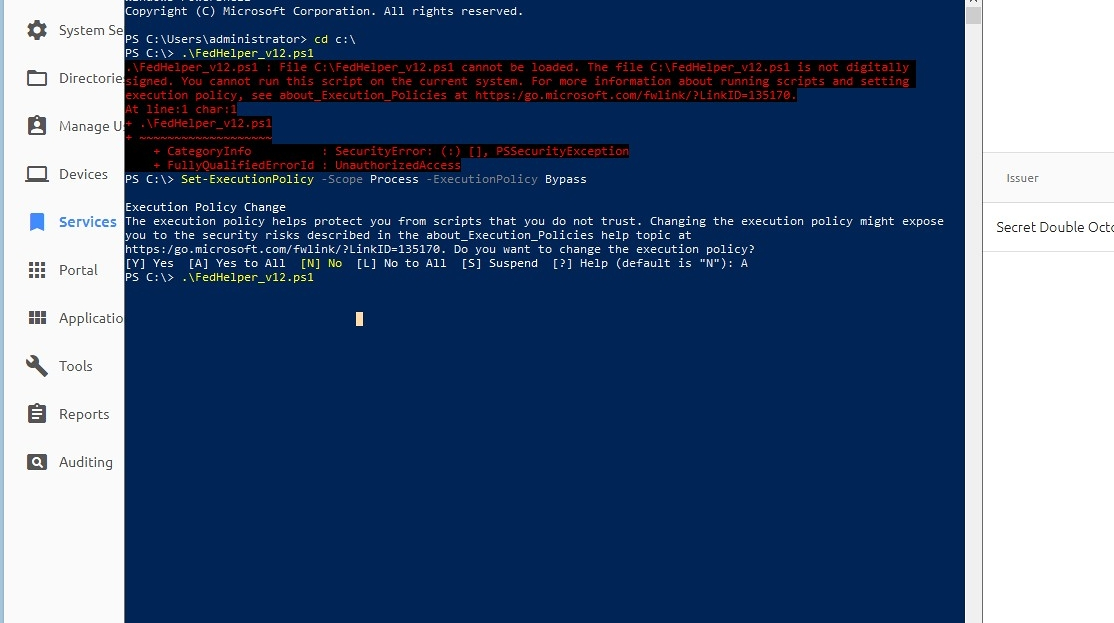
Click image to view full size
9 Press [Return]
Press Enter to proceed to the main menu.
Click image to view full size
Section 2: SDO Service Creation (Steps 10-16)
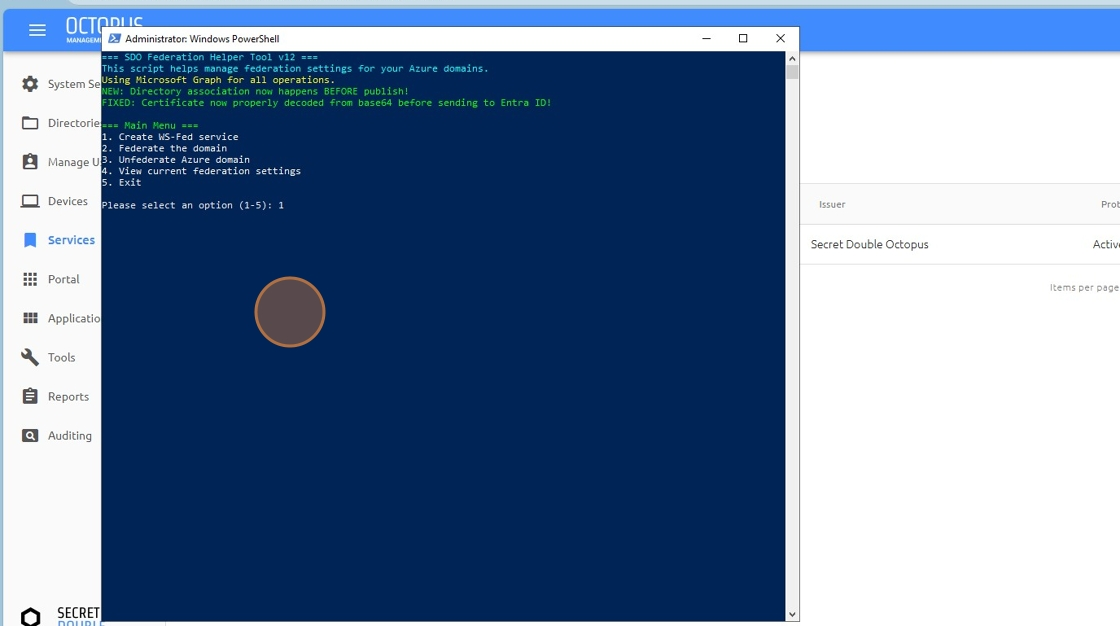
10 Type 1 from the selection menu
Type 1 to select "Create New Service" and press Enter.
Click image to view full size
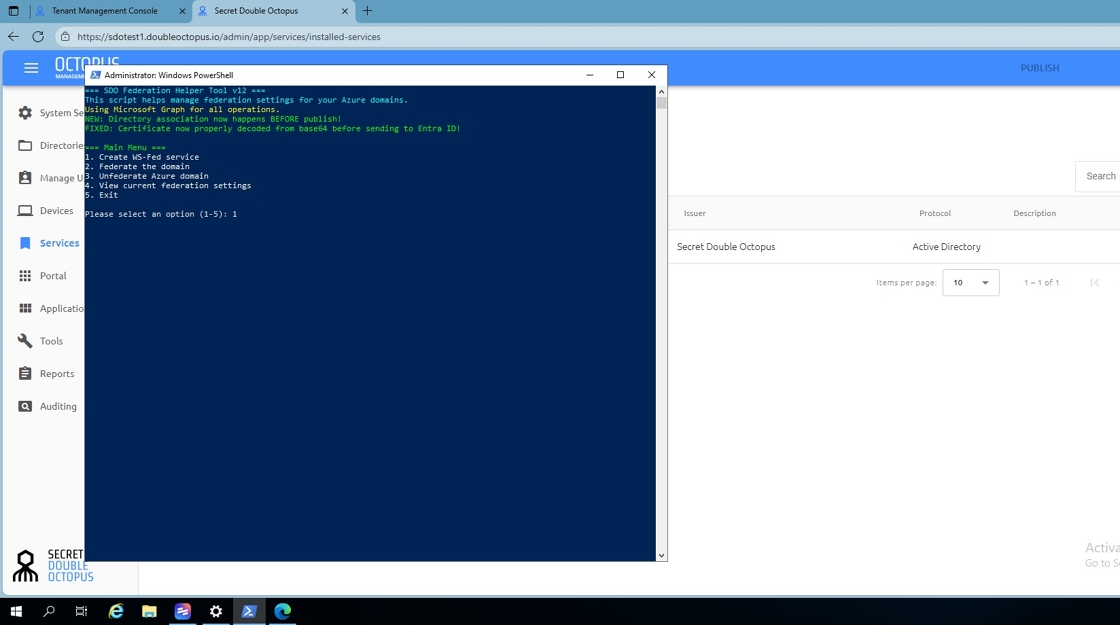
11 Press [Return]
Press Enter to confirm your selection.
Click image to view full size
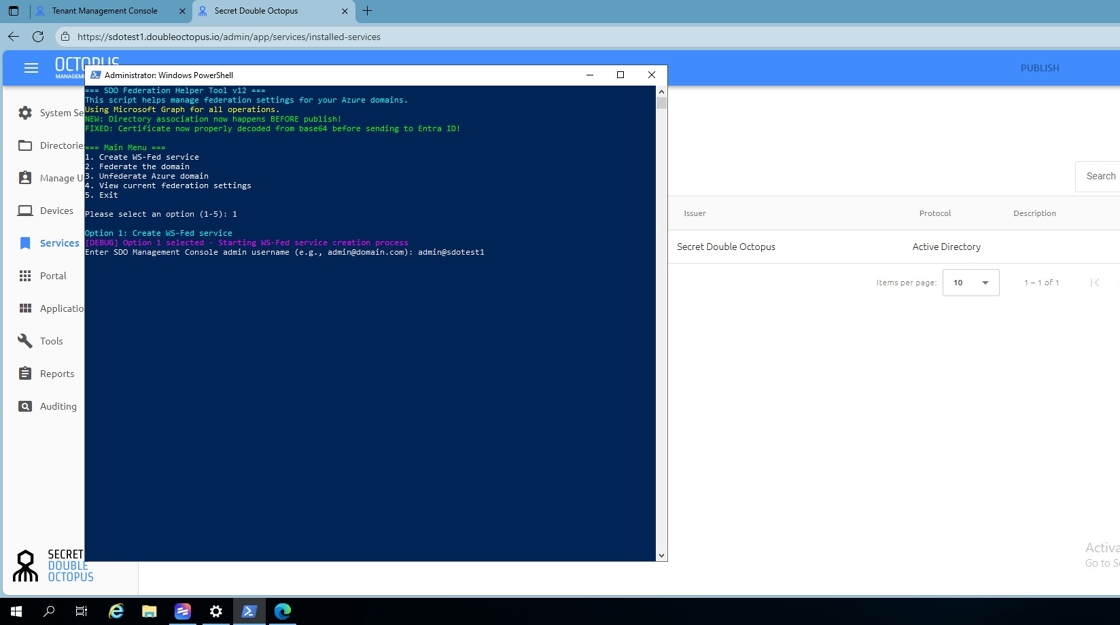
12 Type your SDO admin user and press [Return]
Enter your SDO administrator username and press Enter.
Important: Use your SDO administrator account credentials.
Click image to view full size
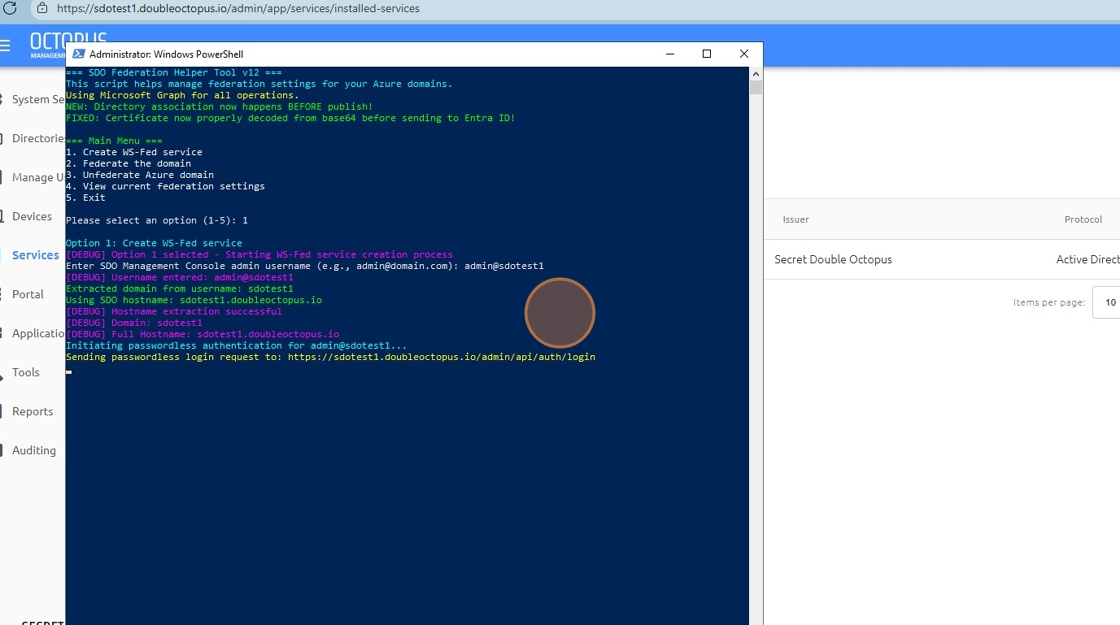
13 Approve the push on your mobile
Check your mobile device for the SDO authentication push notification and approve it.
Click image to view full size
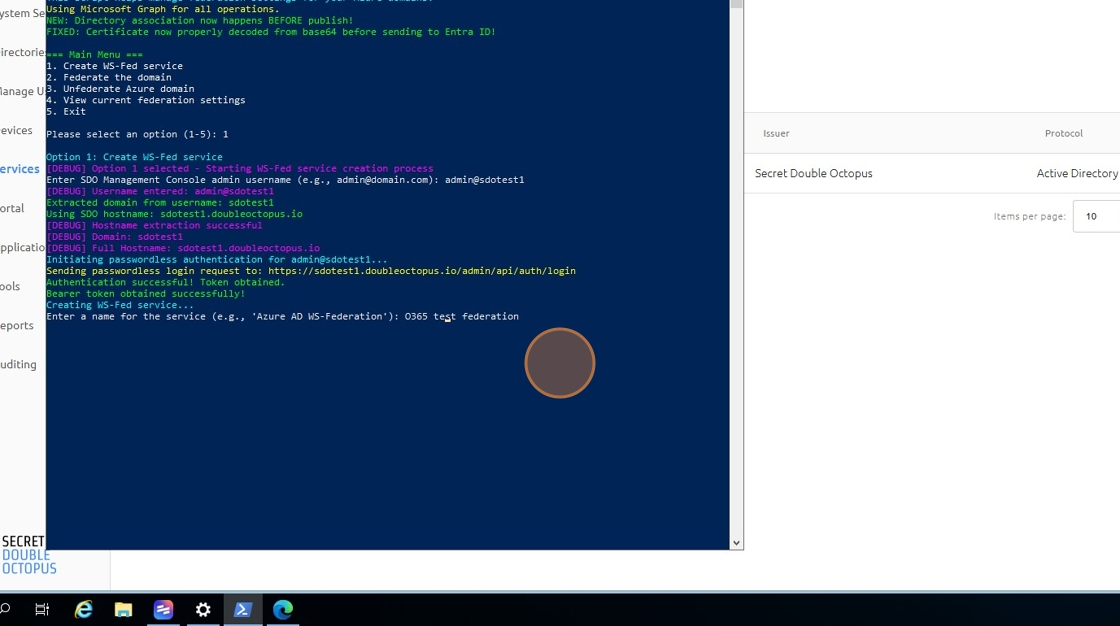
14 Type the name of the O365 service you want to create and press [Return]
Enter a descriptive name for your Office 365 service (e.g., "Office365-Production") and press Enter.
Click image to view full size
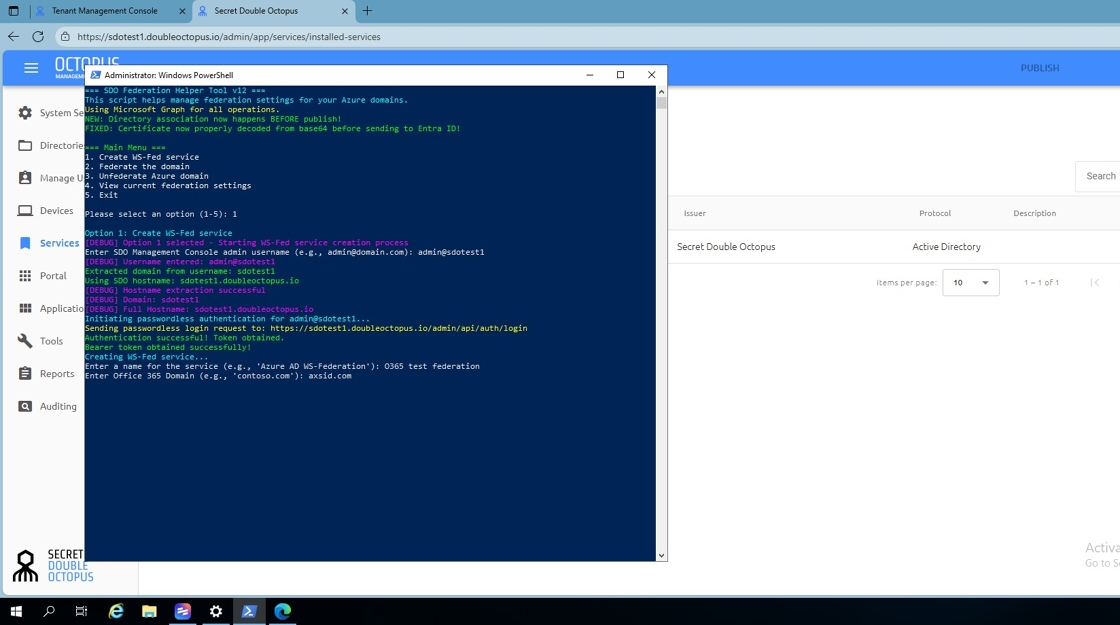
15 Type your O365 domain name you want to federate and press [Return]
Enter the domain you want to federate (e.g., yourdomain.com) and press Enter.
Note: Ensure this domain is verified in your Office 365 tenant.
Click image to view full size
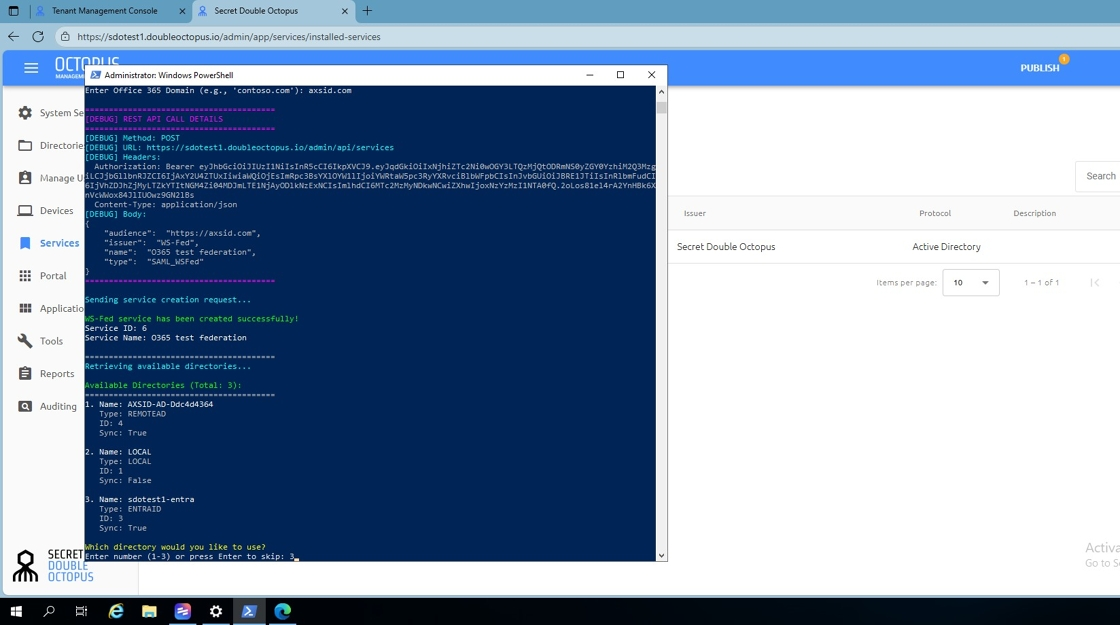
16 Select the directory you want to assign to the service and press [Return]
Choose the appropriate directory from the list and press Enter.
Click image to view full size
Section 3: SDO Management Console Configuration (Steps 17-30)
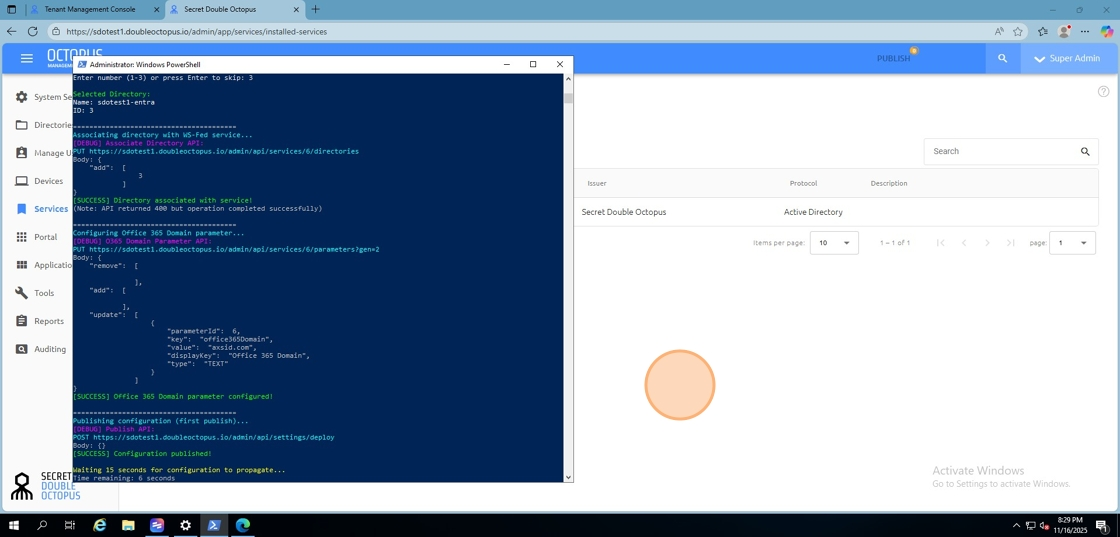
17 Open SDO Management console
Navigate to the SDO Management Console in your web browser.
Click image to view full size
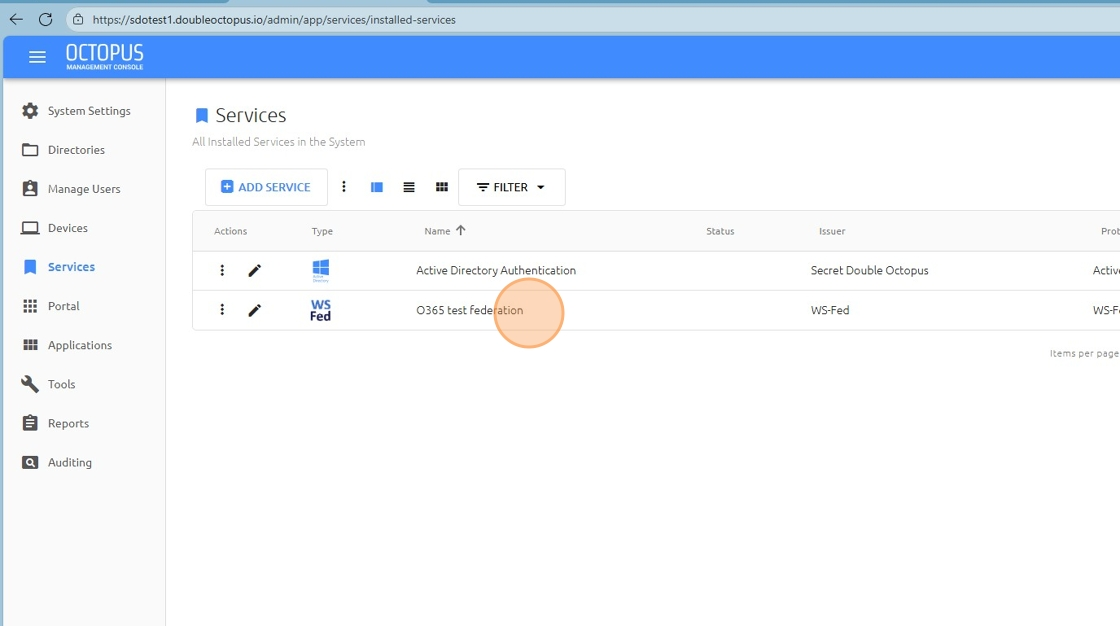
18 Under "Services" you should see the new service created
Verify that your newly created service appears in the Services list.
Click image to view full size
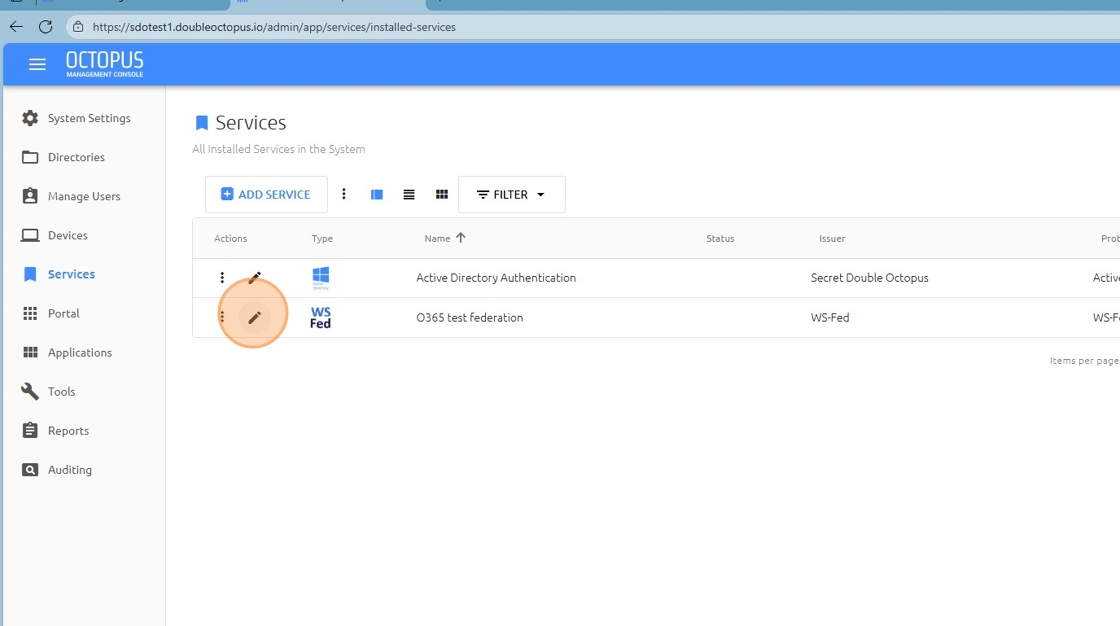
19 Click "edit" on the newly create service
Click the Edit button for the service you just created.
Click image to view full size
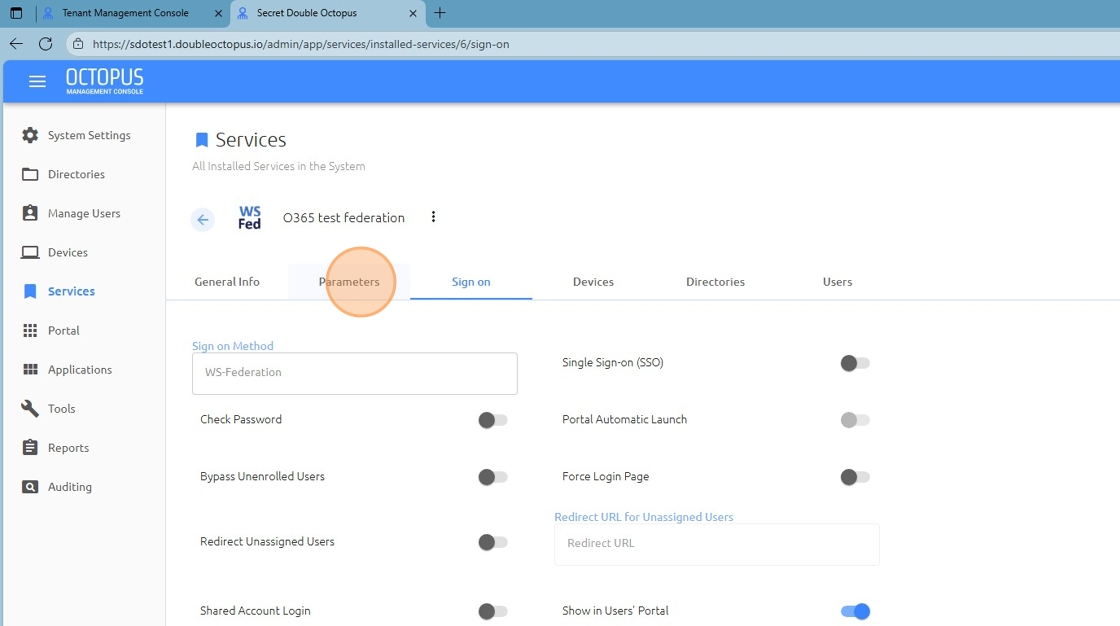
20 Click "Parameters"
Navigate to the Parameters tab in the service configuration.
Click image to view full size
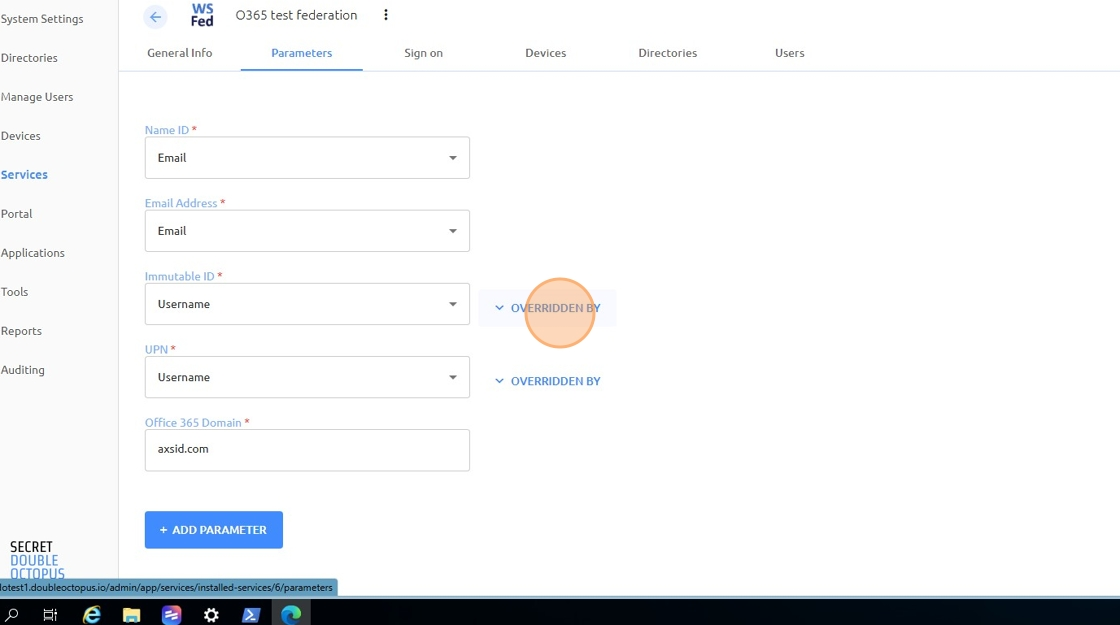
21 Click "OVERRIDDEN BY"
Click on the OVERRIDDEN BY option to configure domain-specific settings.
Click image to view full size
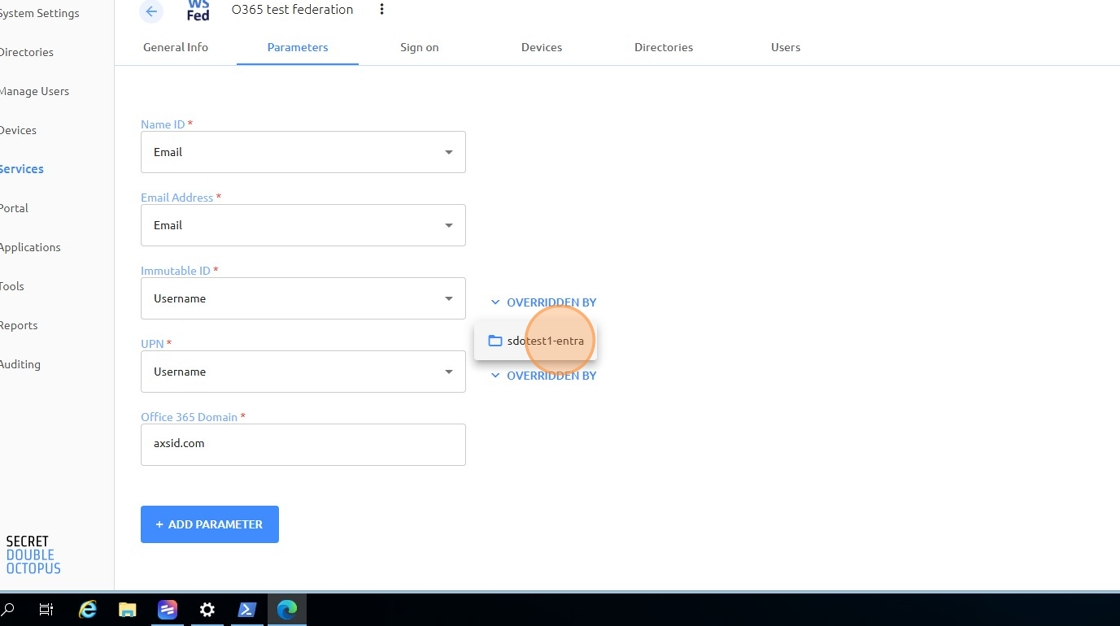
22 Click "your domain"
Select your domain from the list.
Click image to view full size
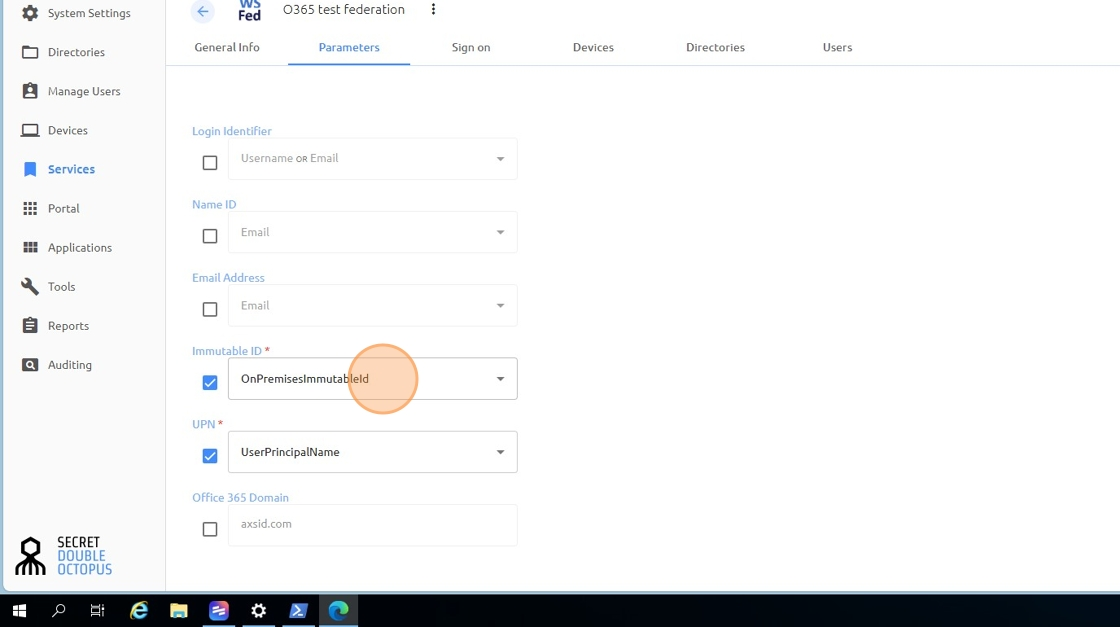
23 Verify fields are populated for EntraID Directory
Make sure the below fields are populated for EntraID Directory. For On-prem Directory it should be "ObjectGUID" under Immutable ID.
Important: Ensure the correct Immutable ID field is configured based on your directory type.
Click image to view full size
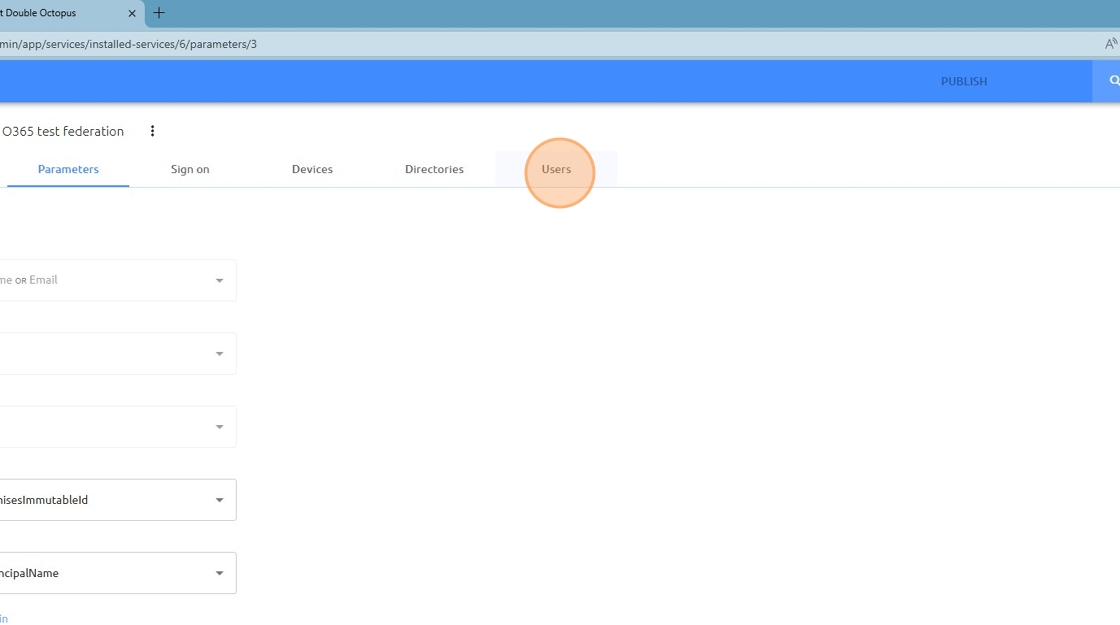
24 Click "Users"
Navigate to the Users tab to assign users to the service.
Click image to view full size
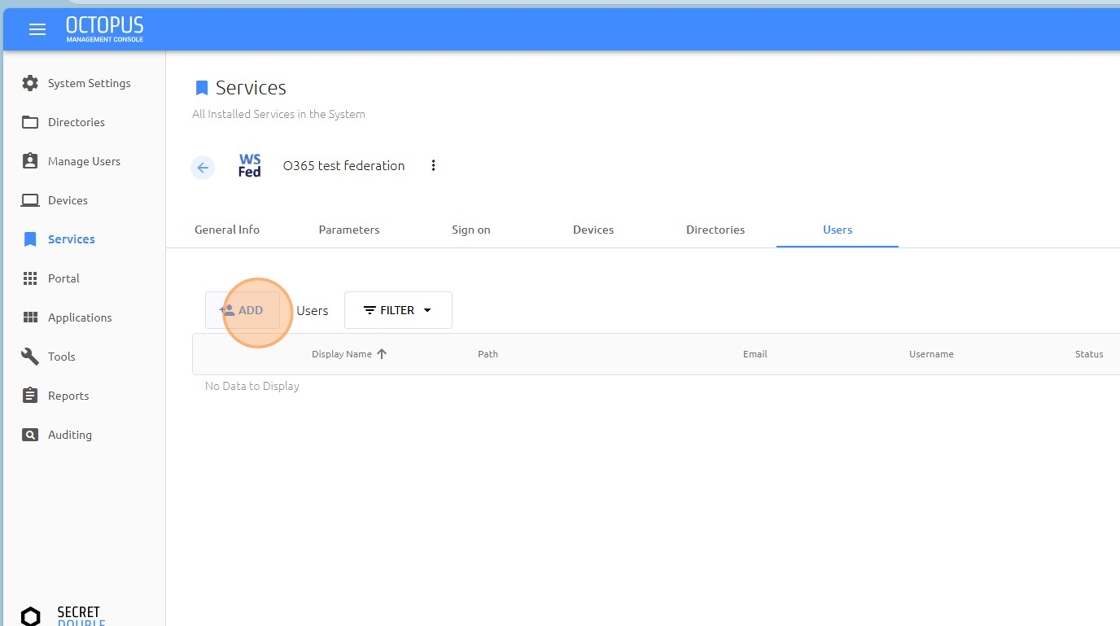
25 Click "ADD"
Click the ADD button to start adding users to the service.
Click image to view full size
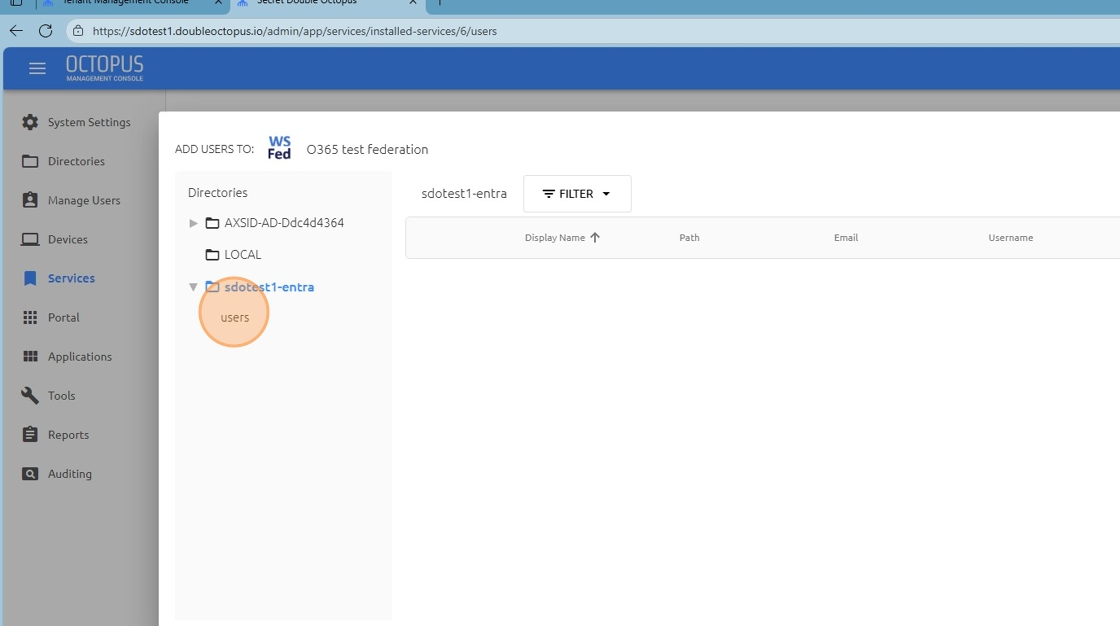
26 Click "users"
Select the users option to view available users.
Click image to view full size
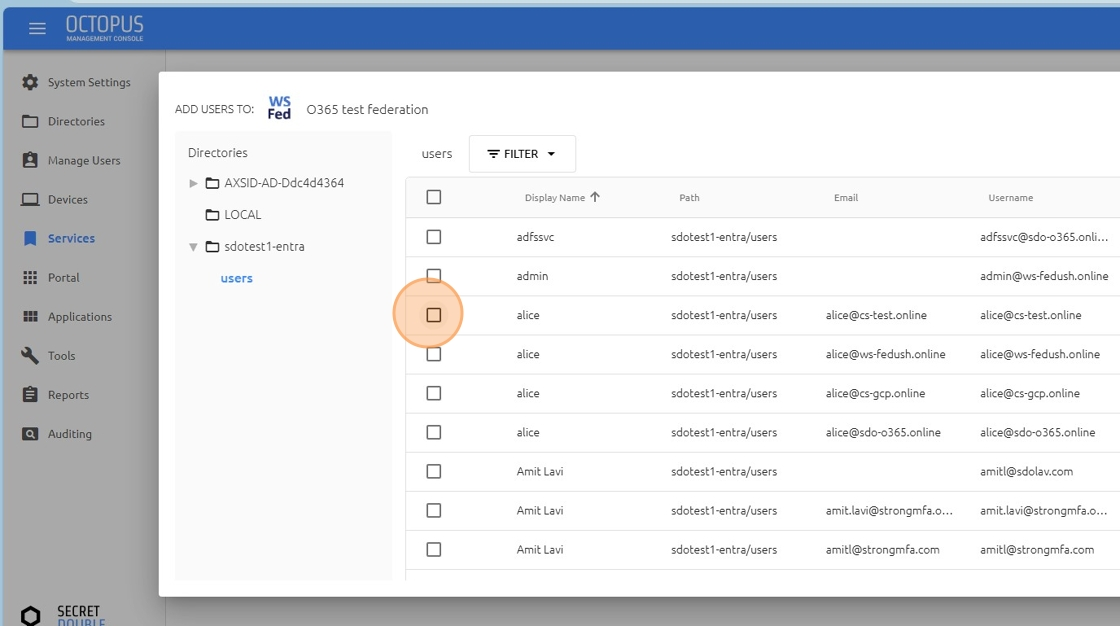
27 Select the users you want to assign to the service
Check the boxes next to the users you want to assign to this Office 365 service.
Click image to view full size
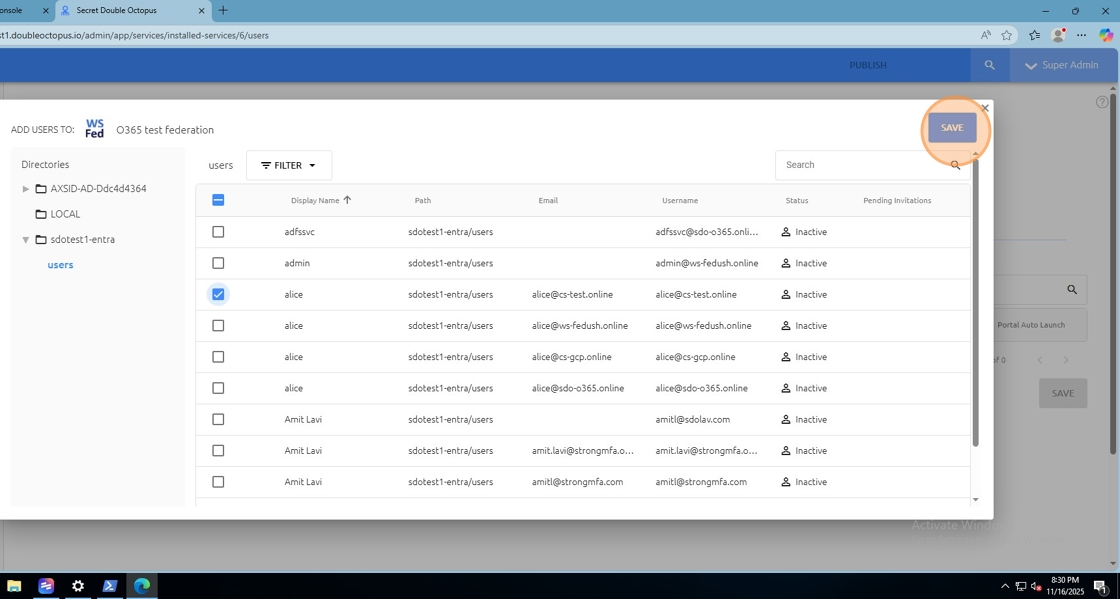
28 Click "SAVE"
Save your user selections.
Click image to view full size
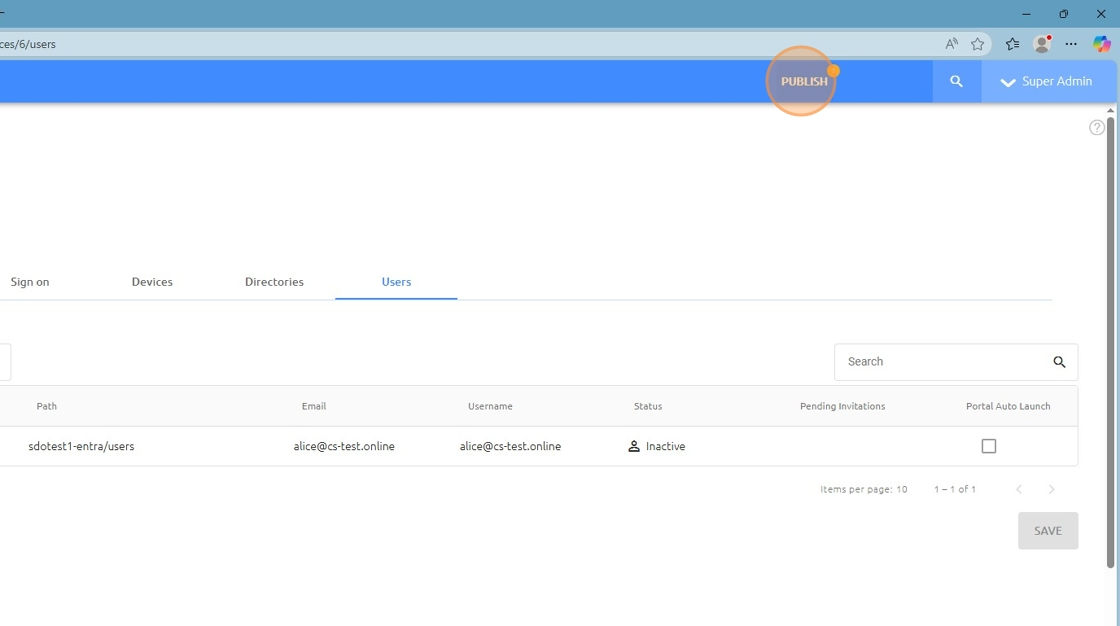
29 Click "PUBLISH"
Click PUBLISH to apply your configuration changes.
Click image to view full size
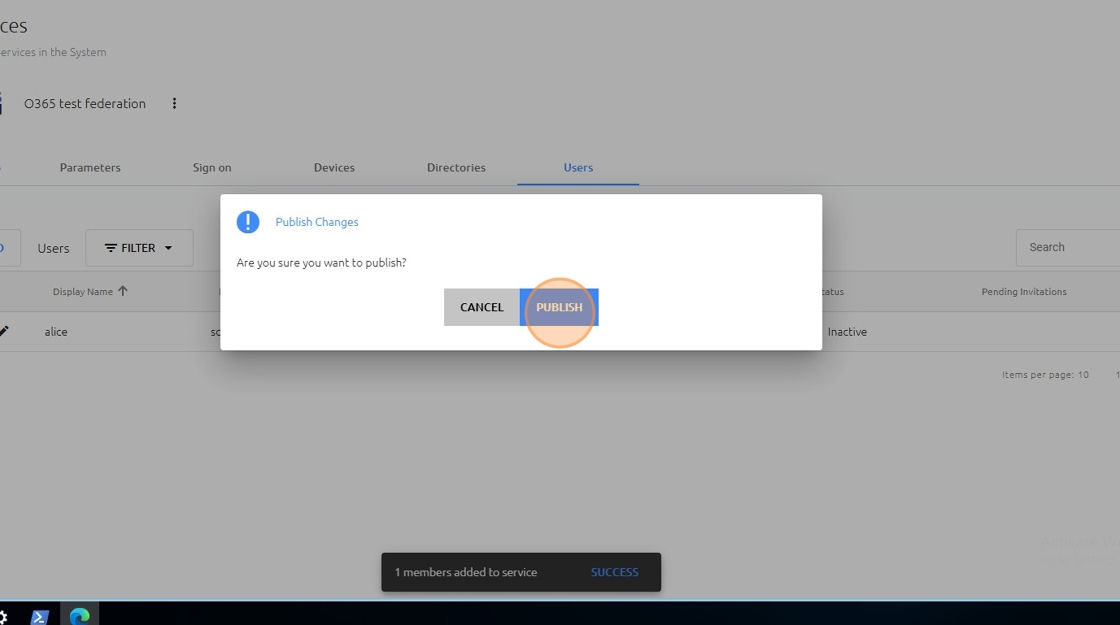
30 Click "PUBLISH" to confirm
Confirm the publish action when prompted.
Click image to view full size
Section 4: Office 365 Federation Setup (Steps 31-39)
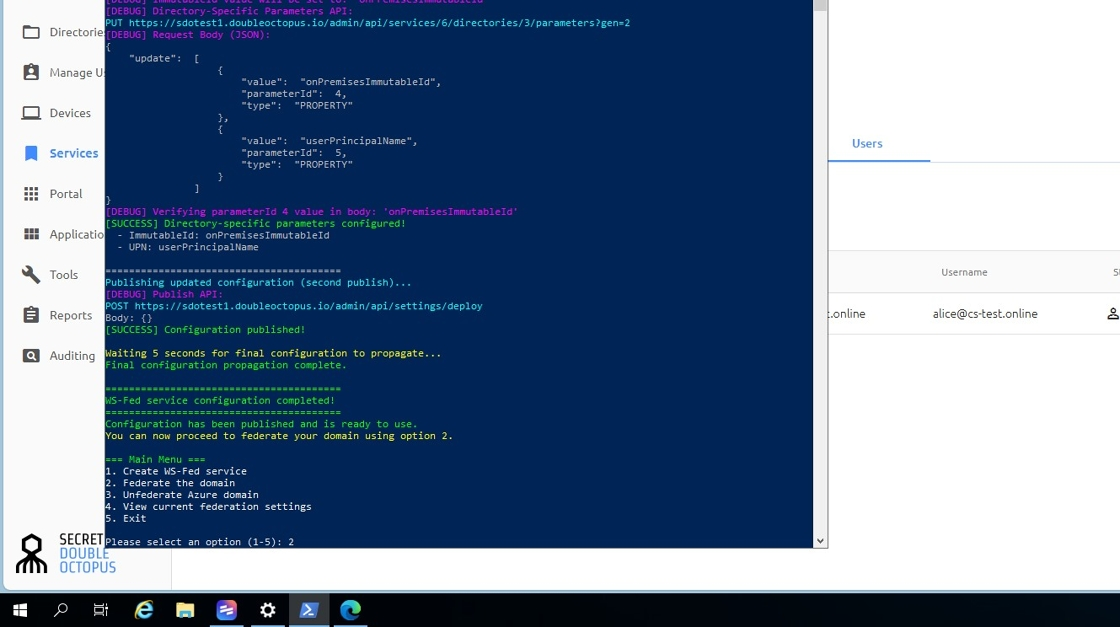
31 Go back to the SDO script in PowerShell and type 2, press [Return]
Return to PowerShell and type 2 to proceed with federation setup.
Click image to view full size
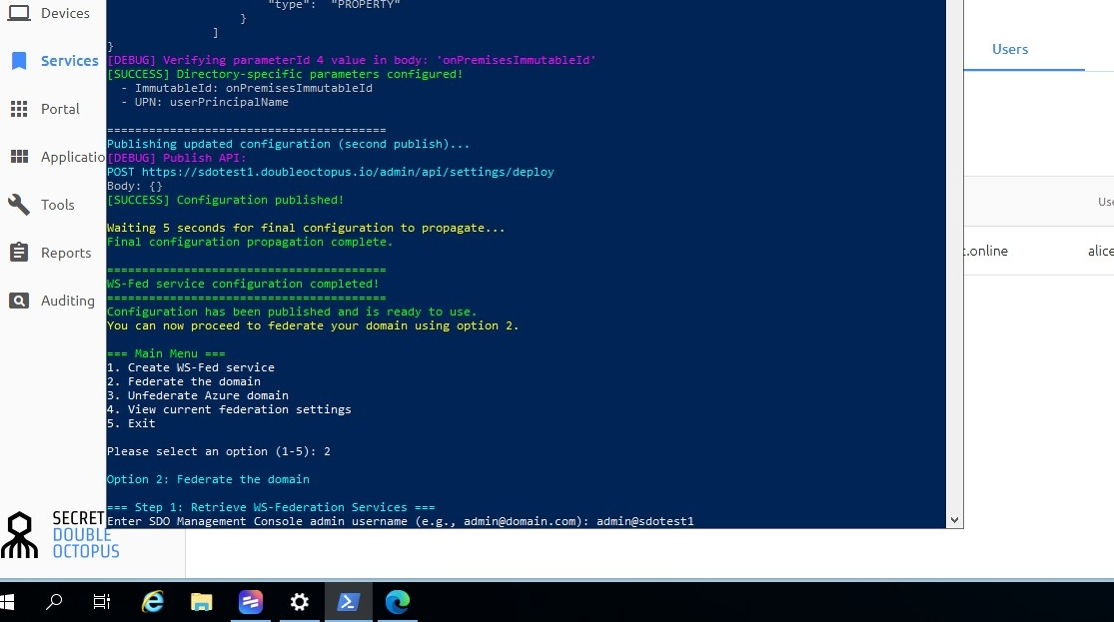
32 Type your SDO admin user and press [Return]
Re-enter your SDO admin username and press Enter.
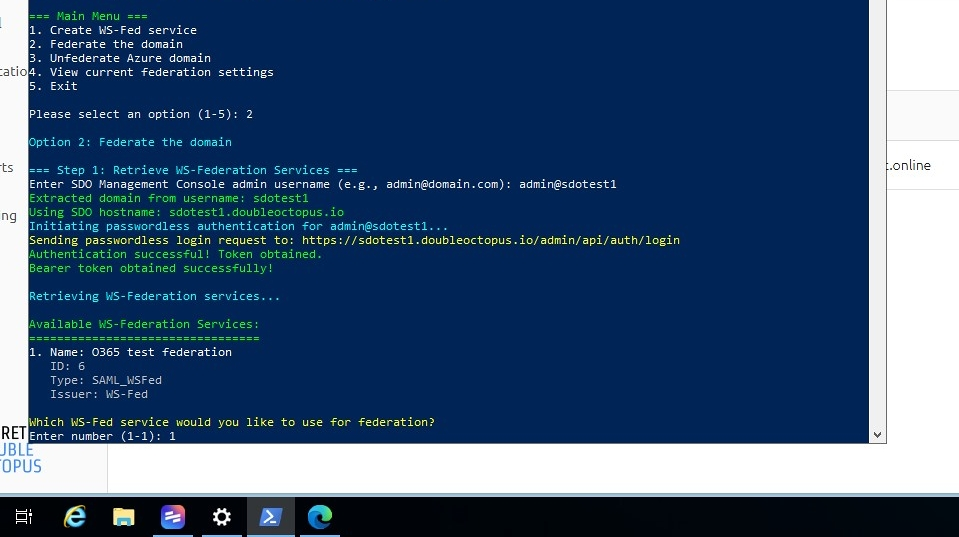
Click image to view full size
33 Type the service number you created earlier and press [Return]
Enter the service number that was assigned to your Office 365 service.
Click image to view full size
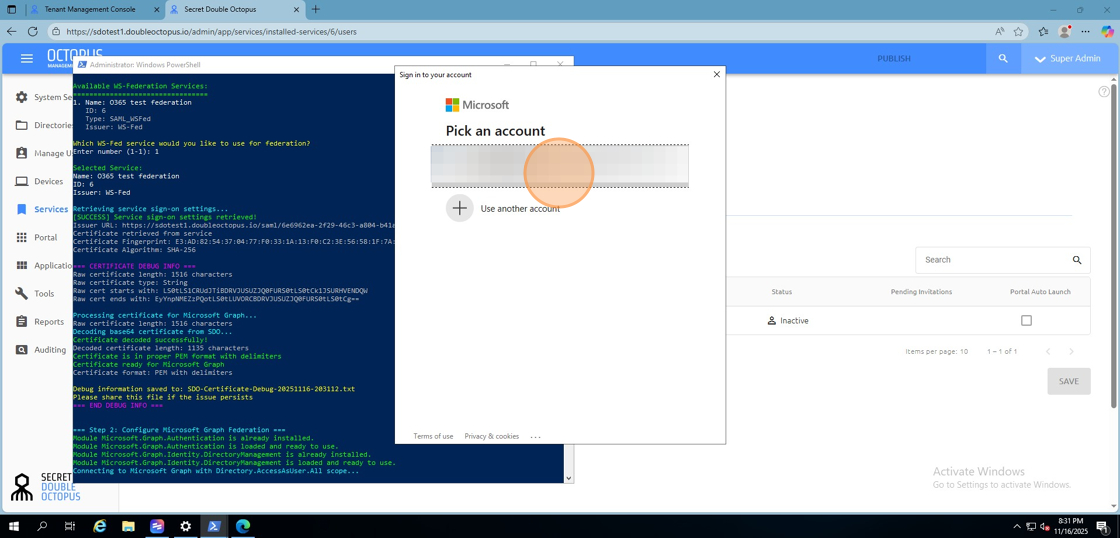
34 Enter your O365 admin "Email"
Enter your Office 365 Global Administrator email address.
Click image to view full size
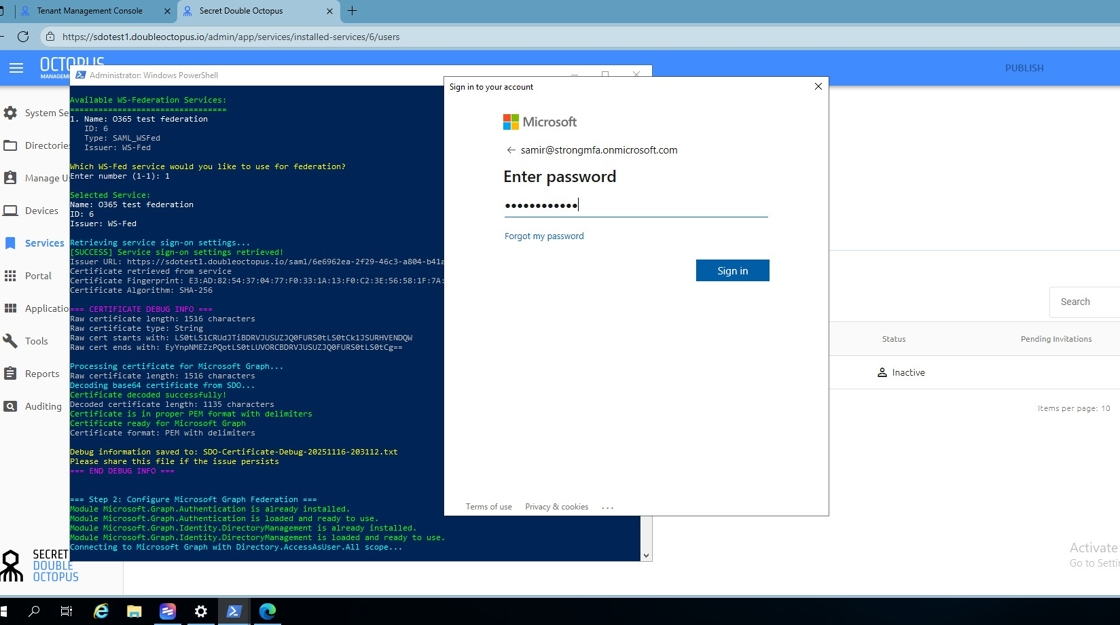
35 Enter your O365 admin [Password]
Enter your Office 365 Global Administrator password.
Click image to view full size
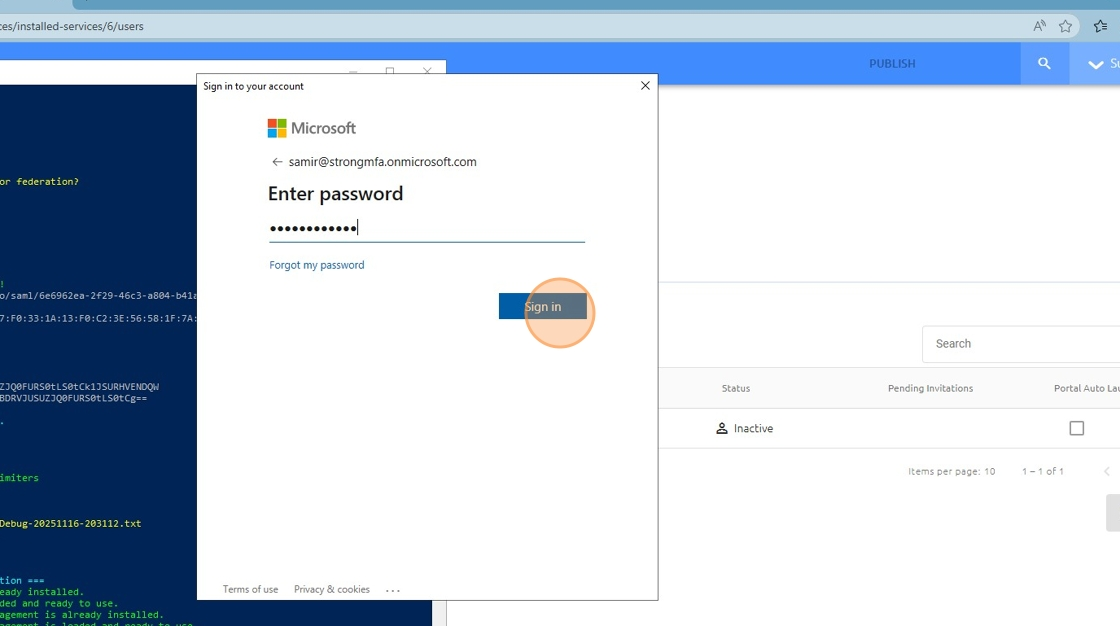
36 Click "Sign in"
Click the Sign in button to authenticate with Office 365.
Click image to view full size
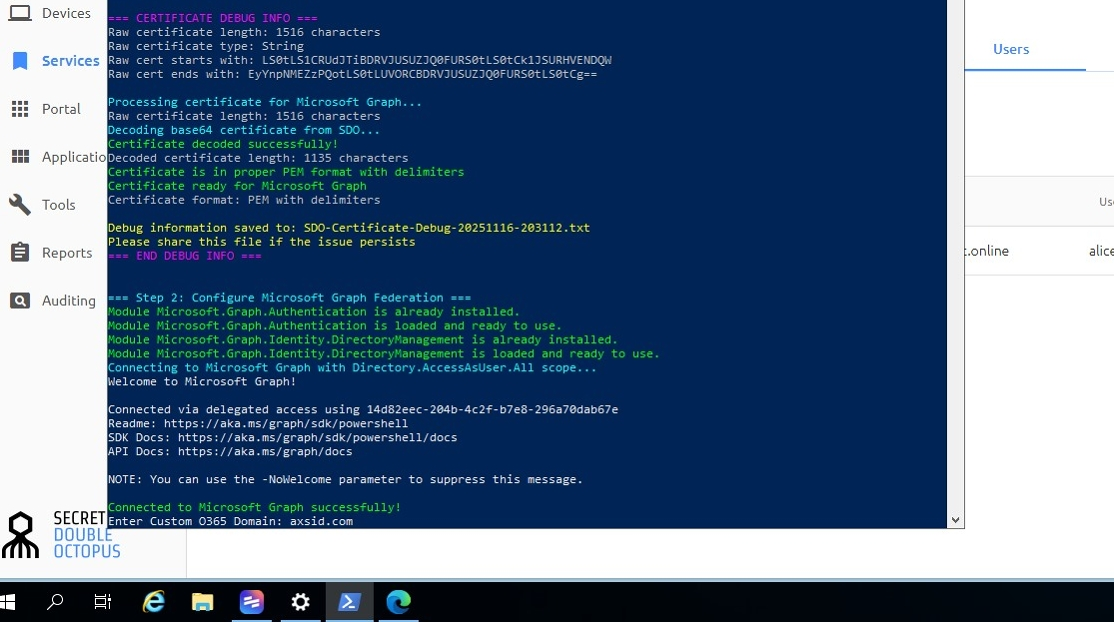
37 Type your domain and press [Return]
Enter your domain name that you want to federate and press Enter.
Click image to view full size
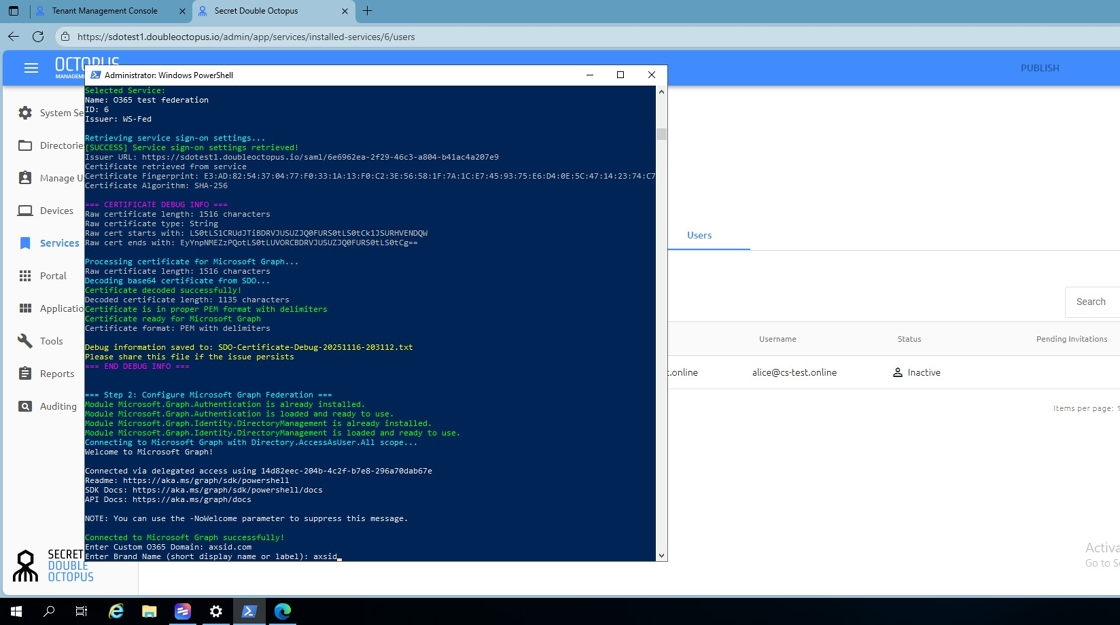
38 Type Short Display Name and press [Return]
Enter a short display name for the federation (e.g., "SDO") and press Enter.
Click image to view full size
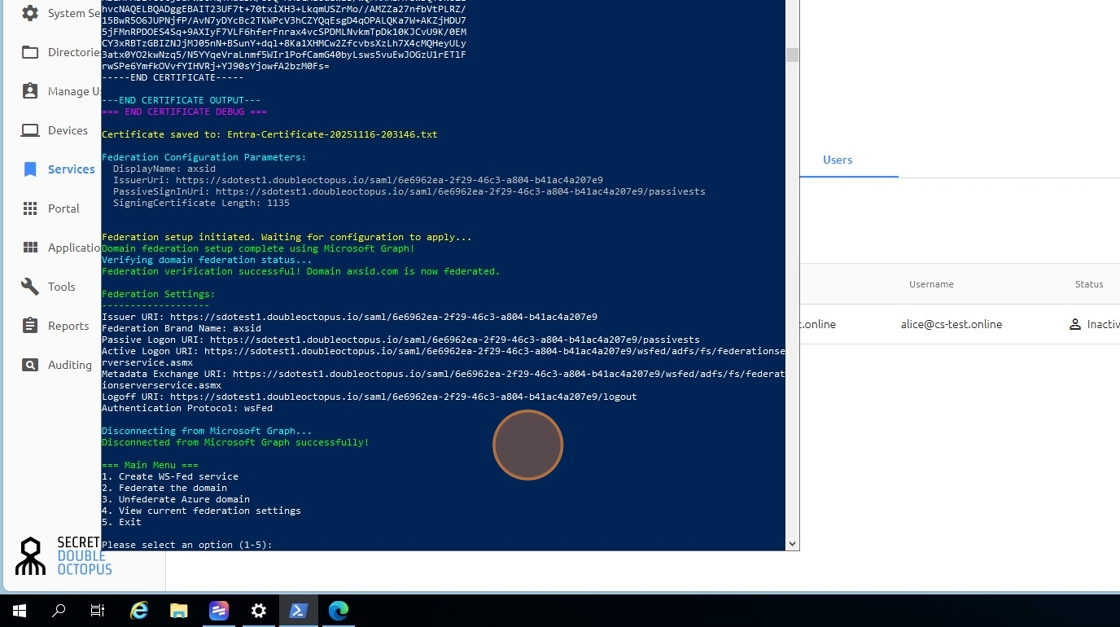
39 A message display will show successful federation of your domain
The script will display a success message confirming your domain has been federated.
Success! Your domain has been successfully federated.
Click image to view full size
Section 5: Verification and Exit (Steps 40-44)
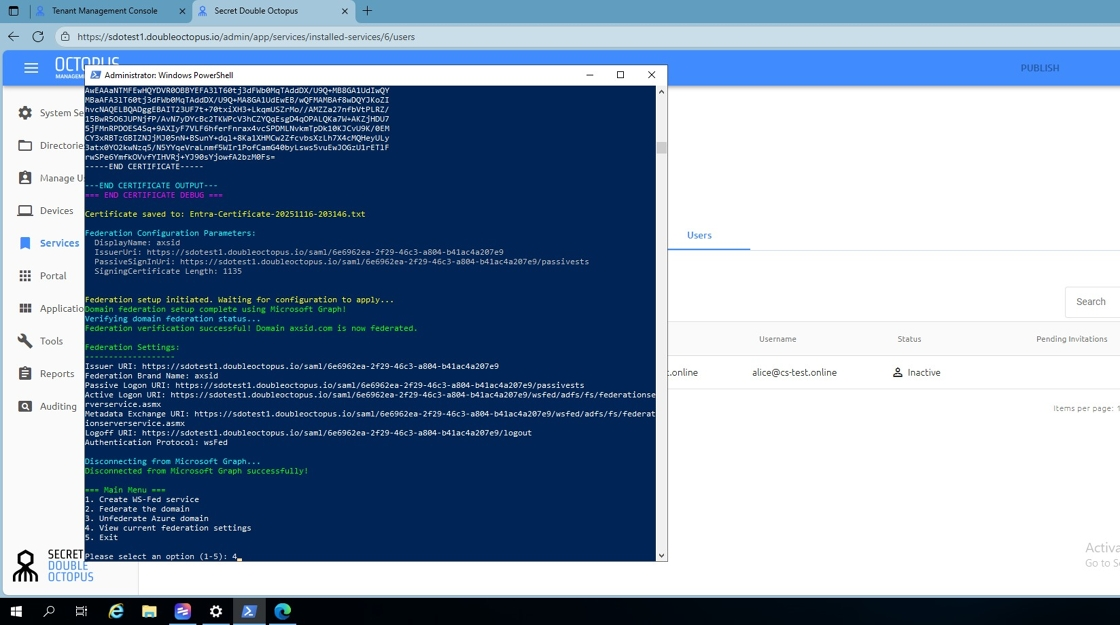
40 Type 4 and press [Return]
Type 4 to verify the federation status and press Enter.
Click image to view full size
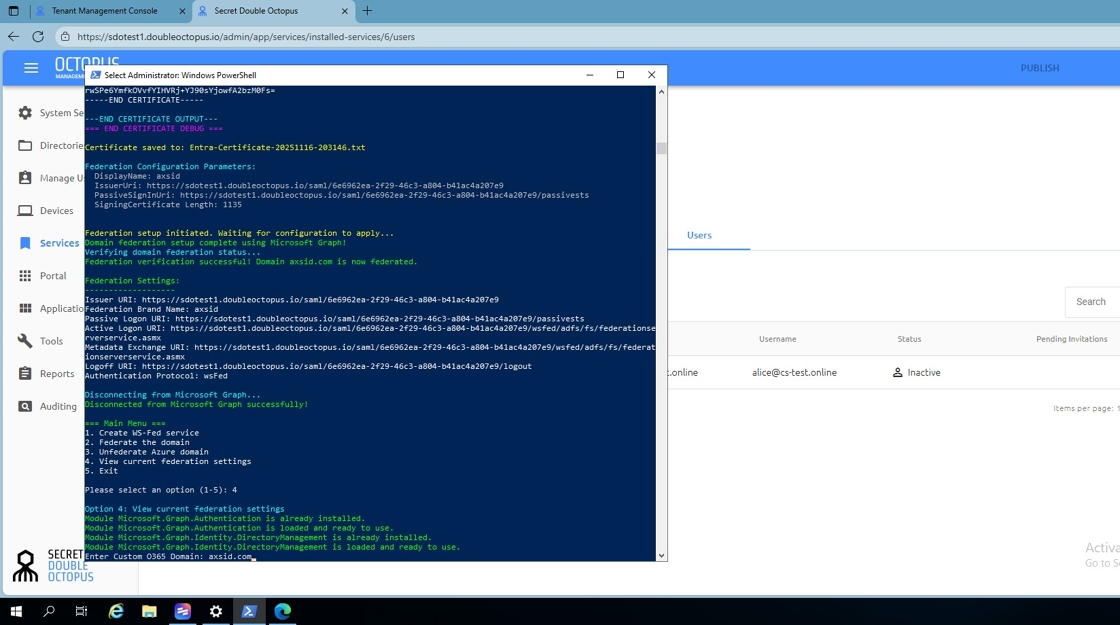
41 Type your domain you just federated and press [Return]
Enter the domain name you just federated to verify its status.
Click image to view full size
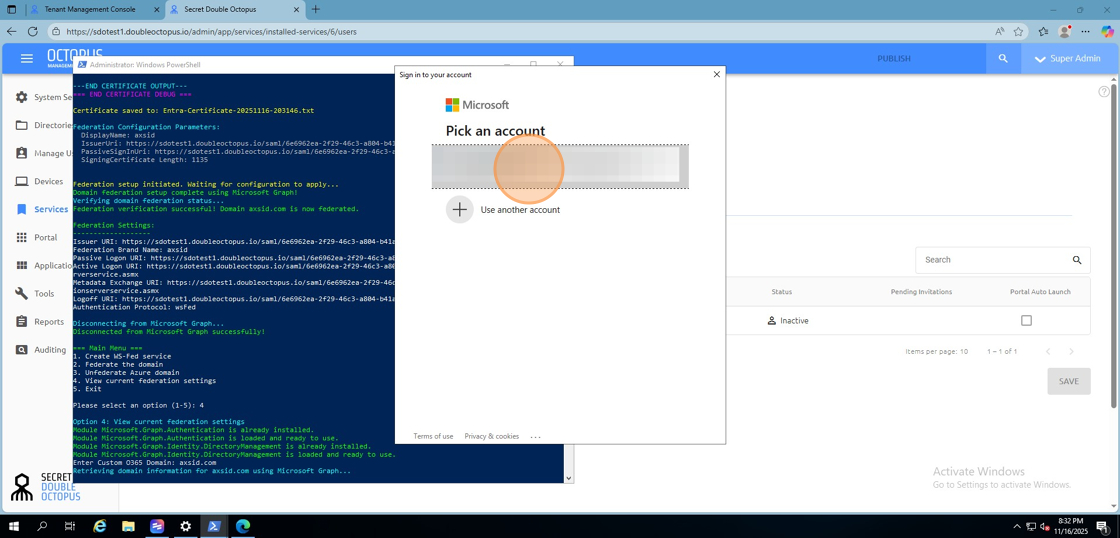
42 Enter your O365 admin email and password if asked
If prompted, re-enter your Office 365 admin credentials for verification.
Click image to view full size
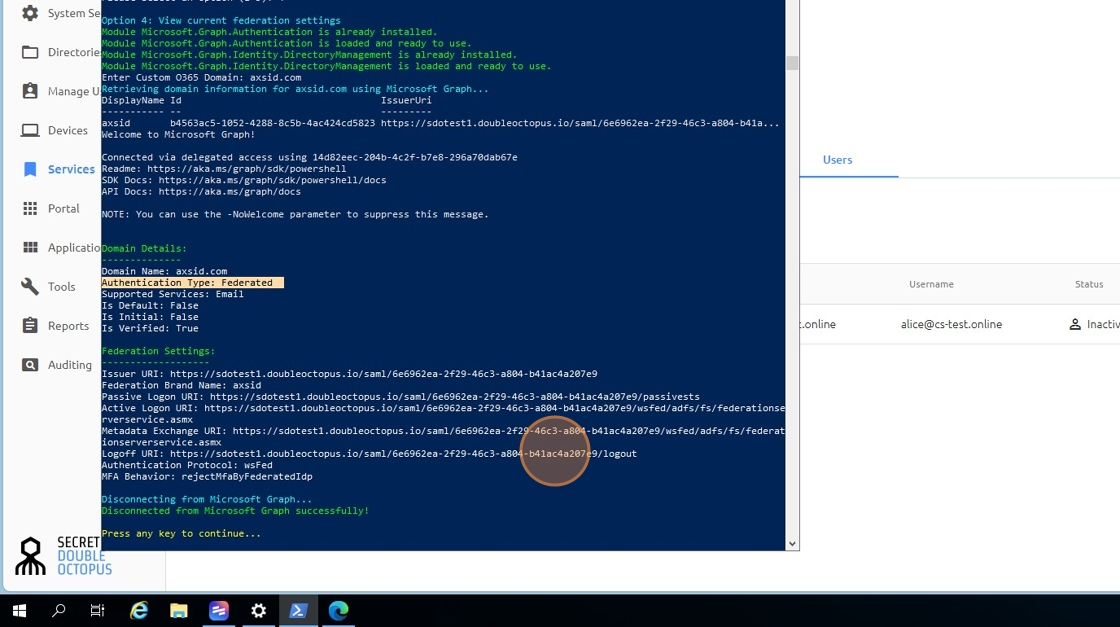
43 Make sure the Authentication type is showing federated
Verify that the Authentication type displays as "Federated" to confirm successful configuration.
Verification: This confirms your domain is now federated successfully.
Click image to view full size
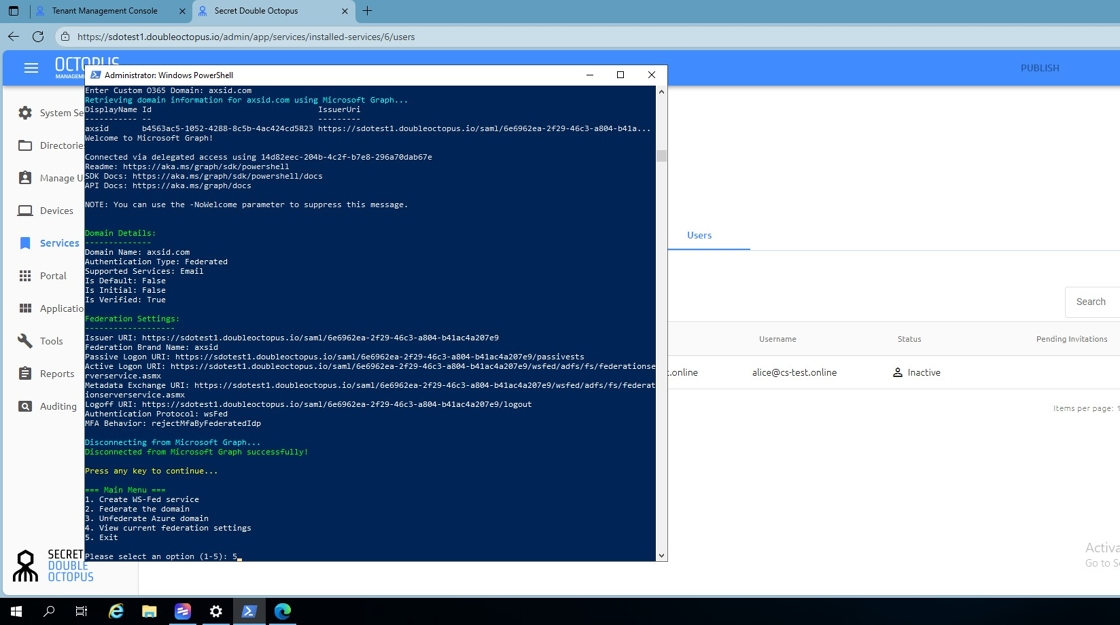
44 Type 5 and press [Return to exit]
Type 5 and press Enter to exit the federation script.
Click image to view full size
✓ Federation Configuration Complete!
Your Office 365 domain has been successfully federated with WS-Federation using SDO.
Users can now authenticate using SDO's passwordless authentication methods.
★ Next Steps
- Test user authentication with a federated domain account
- Configure conditional access policies if required
- Set up additional domains for federation as needed
- Review SDO authentication policies and settings
- Document the configuration for your organization
⚙ Troubleshooting Tips
- Script execution fails: Ensure PowerShell is running as Administrator
- Authentication issues: Verify your SDO admin credentials are correct
- Domain not federating: Confirm domain ownership in Office 365
- Mobile push not received: Check Octopus Authenticator app is installed and logged in
- Federation status not showing: Wait 5-10 minutes for changes to propagate
☎ Need Help?
If you encounter any issues during the federation process:
- Contact your SDO support team
- Review the SDO Federation Documentation
- Check Office 365 service health dashboard
- Submit a support ticket with error screenshots
This guide contains ALL 44 steps for configuring Office 365 Federation with WS-Federation.
Follow each step carefully to ensure successful federation.
© 2024 - Office 365 Federation Guide | SDO Integration