This document describes the configurations required for SAML 2.0 integration between the Octopus Authenticator and the Microsoft Office 365 web service.
Office 365 integration is supported by configuring the Octopus Authenticator Server as a 3rd party SAML Identity Provider. A common challenge here is the lack of support for gradual migration. Unlike other SAML services that typically offer alternative authentication methods, the transition to SAML affects all Office365 users at once. Secret Double Octopus solves this challenge by offering some approaches that gradually allow customers to migrate Office365 users to SAML and password-free authentication.
Staging mode allows you to configure a group in the Azure AD to login with Microsoft as the IdP, although the domain is federated. This enables testing during the POC period. In addition, when going to production, the organization can federate its domain while controlling user transition to Secret Double Octopus as an IdP.
For more details about the login flow during Staged Rollout, please watch this demo video.
For information about implementing this approach, refer to Federating the Entire Domain with Staged Rollout.
This approach allows you to federate a domain that is not the default company domain to Secret Double Octopus, thus simulating a real federation without impacting the organization’s domain/environment.
The Intermediate Domain method supports SAML authentication to the “additional Office 365 Intermediary email domain” while using NameID and email from the Active Directory to log in. Thus, in the end, you can log in directly with the real user with ADFS (using username and password) and with SAML pointing to the “additional Office 365 Intermediary domain” but using the real email address and NameID to get to the same Office 365 account.
The login flow using an intermediate domain is shown in the diagram below.
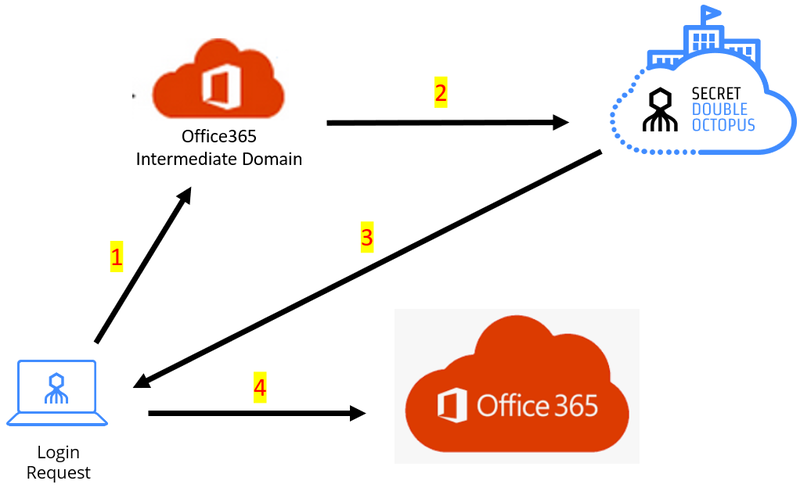 |
The user (Bob) logs into O365 with an intermediate domain address.
Since the domain is federated to SDO, Bob redirects to SDO to do an authentication.
Bob successfully authenticates.
After successful authentication, Bob will log into his company domain (which was not federated to SDO).
For information about implementing this approach, refer to Federating an Intermediate Domain.
In this method, SDO is configured as the IdP for Azure, and ALL USERS access their Azure applications (e.g., O365) using SDO as the authenticator. Use this approach when you are ready to migrate all users to the production environment.
For information about implementation, refer to Federating the Entire Domain.
Before beginning the integration process, verify that the following requirements are met:
Operating system: Windows 10 or above
Microsoft Azure Active Directory Module for Windows PowerShell is installed
Exchange Online Remote PowerShell Module is installed
Microsoft Online Services Sign-In Assistant for IT Professionals (latest version) is installed on the machine from which you will be configuring Office 365
The SDO Federation_Helper script is copied to the device with the Azure Active Directory module
For Intermediate Domain approach only: Users have an email address using the intermediary domain name set in Active Directory, either as the UPN, ProxyAddress or another custom AD field
In addition, make sure that you have:
Administrative access to the Secret Double Octopus Management Console
Global Admin privileges within your Microsoft Office365 environment
A secondary domain name to use as your username during the rollout (*.onmicrosoft.com name cannot be used)
The source anchor of your Azure AD tenant is the value of the NameID parameter sent by the Octopus SAML service. Follow the steps below to check the source anchor using the Federation Helper utility.
To check the anchor attribute:
Open the PowerShell window as an administrator.
Run the Fed Helper v3.ps1 script.

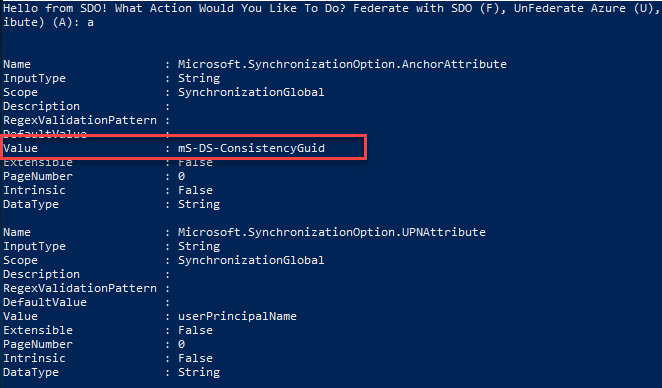
Select A for attribute. The AzureAD tenant attribute will be displayed after logging into the Azure account.
Check the Anchor attribute value. It can be ConsistencyGuid (as shown in the example below) or objectGUID.
When configuring the O365 SAML service in the Octopus Management Console (as described in the next section), use the proper anchor to be sent for the NameID parameter.
Follow the procedure below to create the required SAML service in the Octopus Management Console.
To add and configure the SAML service:
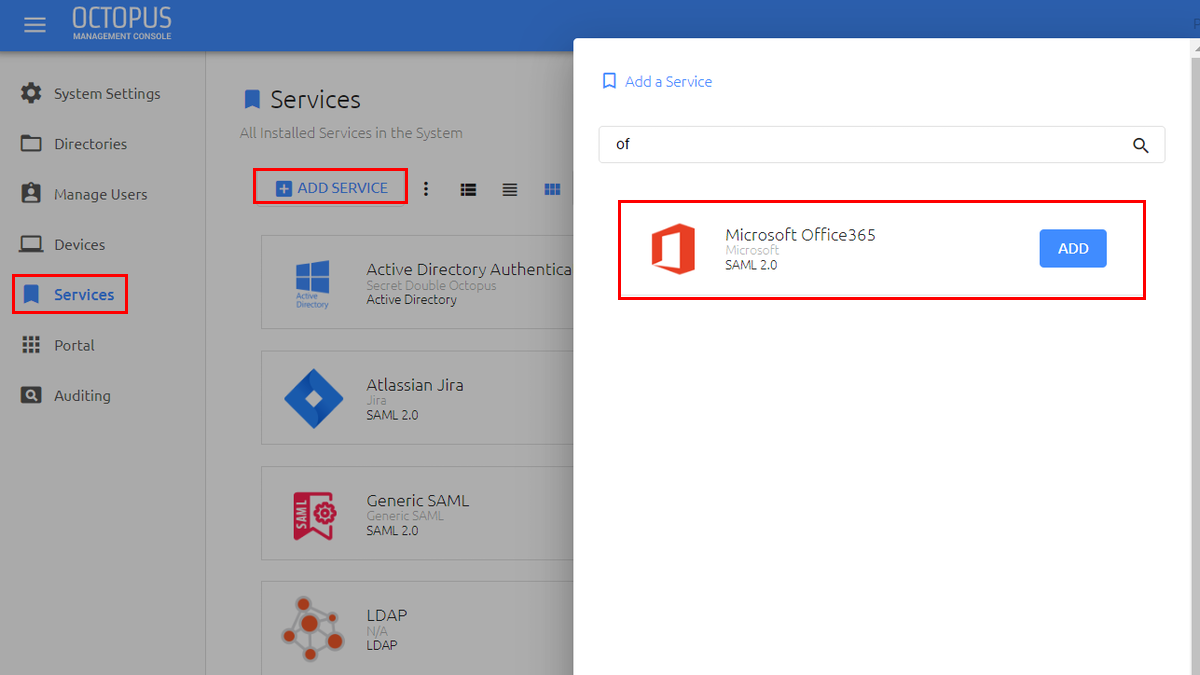
From the Octopus Management Console, open the Services menu and click Add Service. In the Microsoft Office 365 tile, click Add.
Then, in the dialog that opens, click Create.
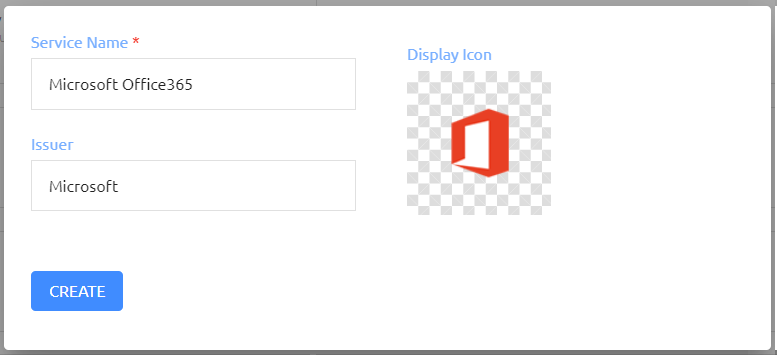
Review / update the following settings in the General Info tab:
Setting
Value / Notes
Service Name
Microsoft Office365
Issuer
Microsoft
Description
Enter a brief note about the service, e.g., Octopus Authenticator authentication for Microsoft Office365
Display icon
This icon will be displayed on the Login page for the service. To change the default icon, click and upload the image of your choice (supported size 488x488 pixels).
Login Page URL
<https://<Enterprise Base URL>/saml/<random UUID>/login>
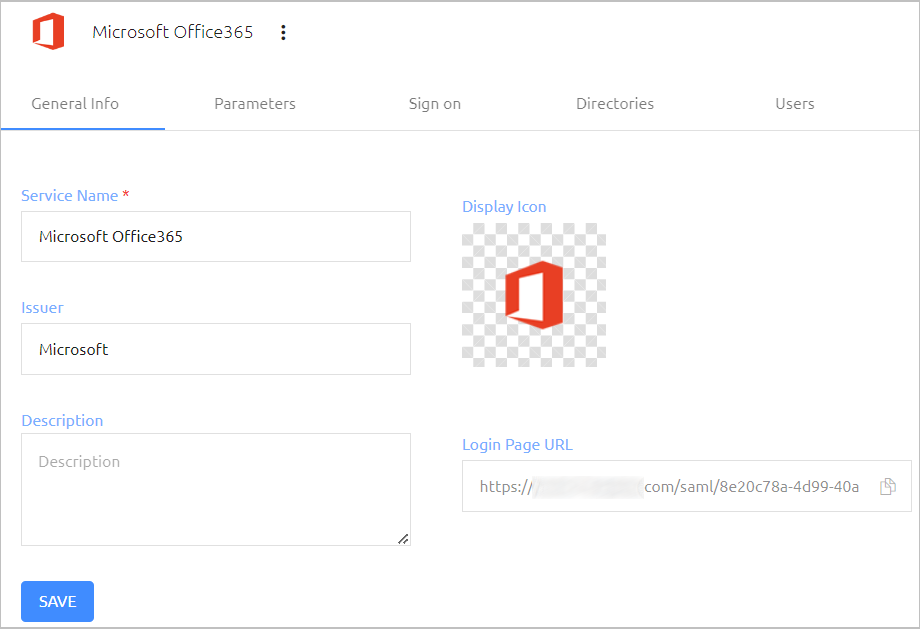
Then, click Save.
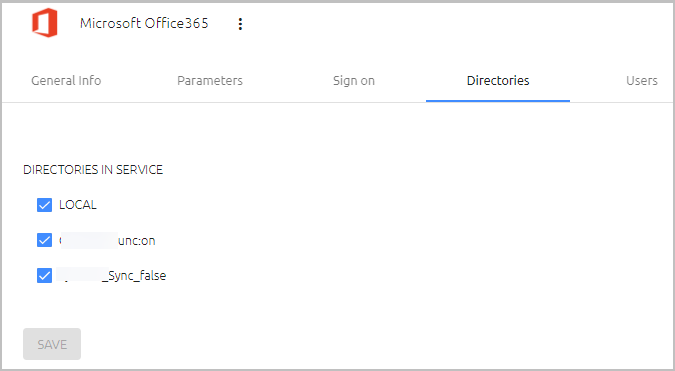
Open the Directories tab and select the checkbox(es) of the directory / directories to be integrated with the service. Then, click Save.
Open the Parameters tab and configure the following settings:
Setting
Value / Notes
Login Identifier
Select Email
Office 365 Email
Select Email
Office 365 Domain
Enter the Office 365 or Intermediate domain
Microsoft MFA
The default value is FALSE. When set to TRUE, after the user is successfully authenticated by Octopus Authenticator, Microsoft will request additional authentication on the Microsoft authenticator.
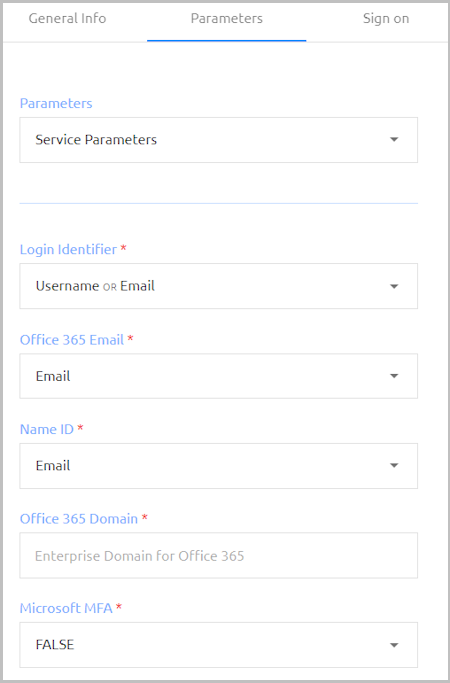
At the bottom of the Parameters tab, click Save.
Configure the Name ID parameter:
At the top of the Parameters tab, open the Parameters list and select the relevant directory.
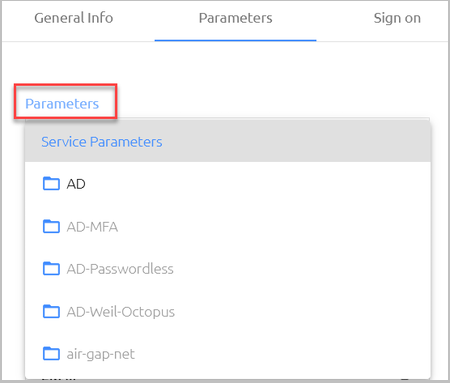
Select the checkbox next to the Name ID parameter. Then, open the dropdown list and select ConsistencyGuid or ObjectGUID, according to the Azure AD anchor attribute (Checking the Anchor Attribute).
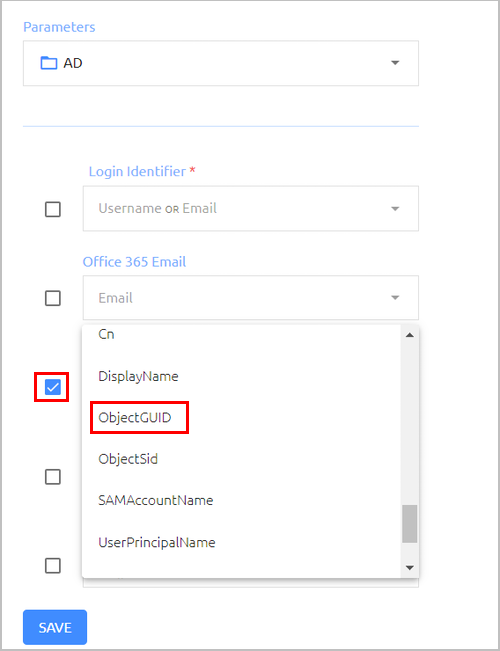
Click Save.
The service parameters should now appear as follows:
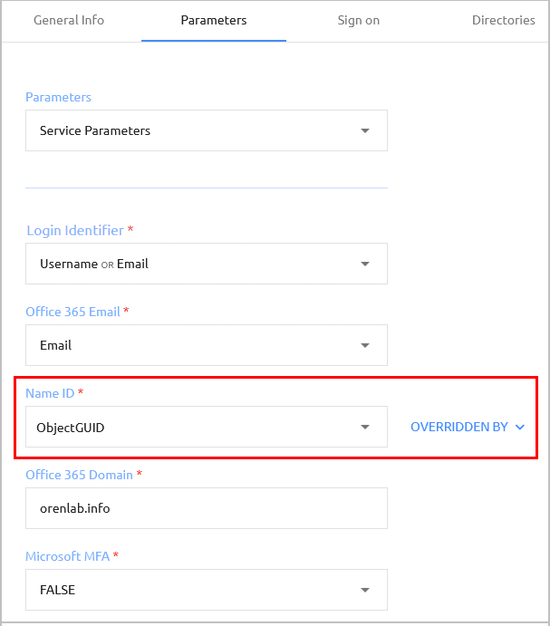
Open the Sign on tab. At the bottom of the tab, click SAML METADATA to download the metadata.xml file for the service.
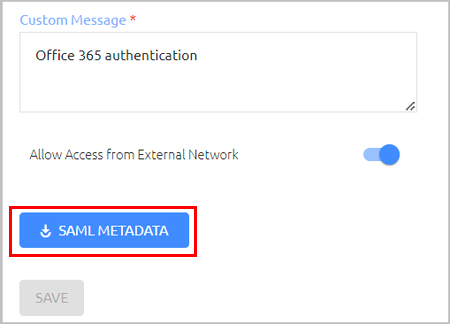
Store the file in a secure location. You will need it later to federate the domain.
Open the Users tab and click Add.
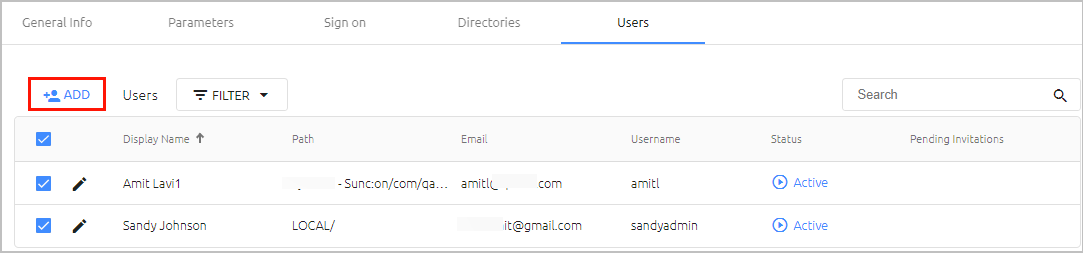
A popup opens, with a list of directories displayed on the left.
Expand the directories list and select the checkboxes of the groups and users that you want to add to the service. Then click Save to close the popup.
The groups and users you selected are listed in the Users tab.
At the bottom of the Users tab, click Save. Then, from the toolbar at the top of the page, click PUBLISH and publish your changes.
The sections below explain how to set up SSO for the Office 365 Web Service and the Mobile Outlook App using Octopus Authenticator as a third party IDP. There are three different ways to federate the domain (as described in the beginning of this document):
Staging mode allows you to configure a group in the Azure AD to login with Microsoft as the IdP, although the domain is federated. This enables testing during the POC period. In addition, when going to production, the organization can federate its domain while controlling user transition to Secret Double Octopus as an IdP.
Prerequisites
Before you begin, complete the following requirements:
- The Staged Rollout feature requires some configuration in Azure. To prepare the infrastructure, follow the instructions in the article Migrate to cloud authentication using Staged Rollout.
- To use staged rollout, you need to install the Azure AD Connect authentication server (when using pass-through authentication). For more details, refer to this article.
Configuring the Azure Portal
When the infrastructure is ready, follow these steps to configure Staged Rollout:
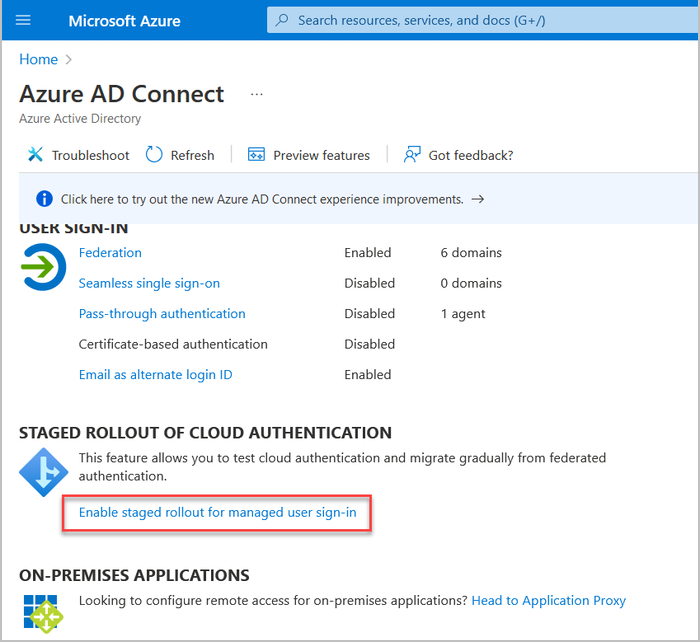
Open your Azure Portal and go to Azure AD Connect.
Click Enable staged rollout for managed user sign-in.
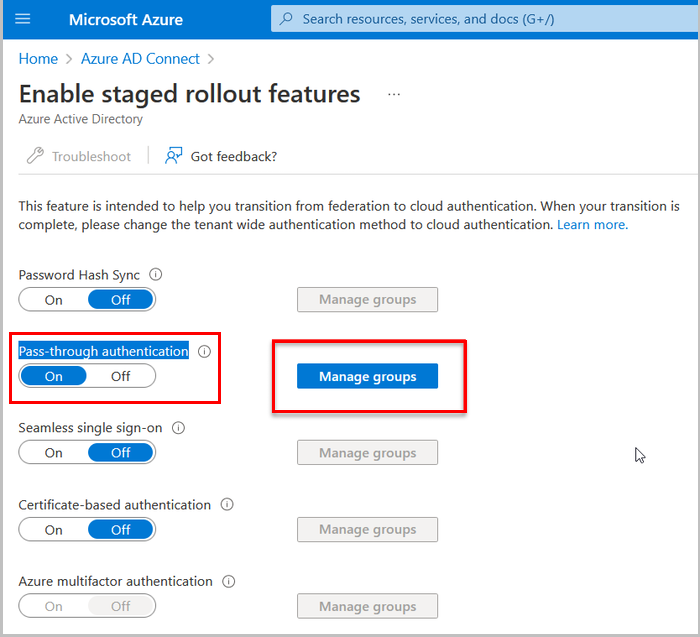
In the window that opens, set Pass-through authentication to On. Then, click Manage groups.
In the window that opens, add the group whose members will be authenticated with Microsoft as the IdP.
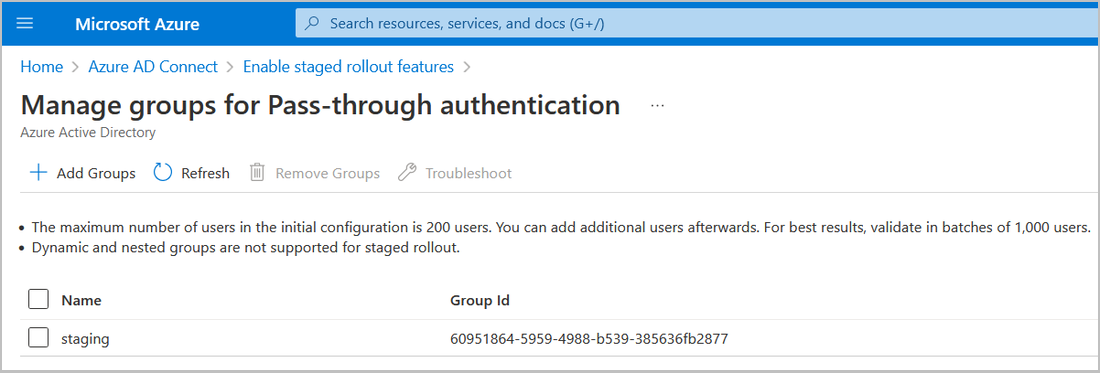
IMPORTANT: The maximum number of users in the initial configuration is 200. After adding the group to the staged rollout, you can add more users.If the domain has not yet been federated, you can federate it now as explained in the Stage 2 section of Federating an Intermediate Domain.
This approach allows you to federate a domain that is not the default company domain to Secret Double Octopus, thus simulating a real federation without impacting the organization’s domain/environment.
Setting up the intermediate domain mechanism is done in three stages.
Choose a valid domain that is not being used. Import the domain to your Azure tenant and validate it through the domain supplier.
Follow these steps to federate your domain:
Verify that you have access to the metadata.xml file that you downloaded from the Sign on tab of the Octopus O365 SAML service.
Open an elevated PowerShell window on the server where you installed both Microsoft Azure Active Directory Module for Windows and the Azure AD Connect tool.
In the PowerShell window, run the SDO Federation Helper utility and select F (to federate).

The Microsoft Sign in window opens.
Log in with your Azure administrator account.
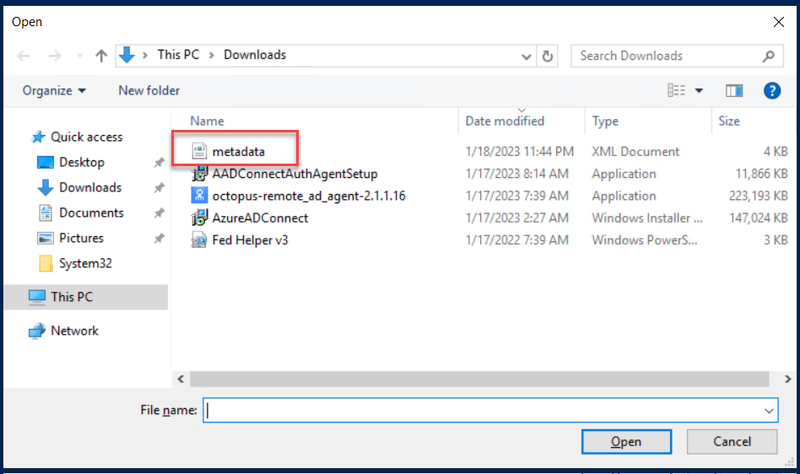
After logging in, the file selection window opens.
Select the medatada.xml you downloaded from the Octopus Management Console and click Open.
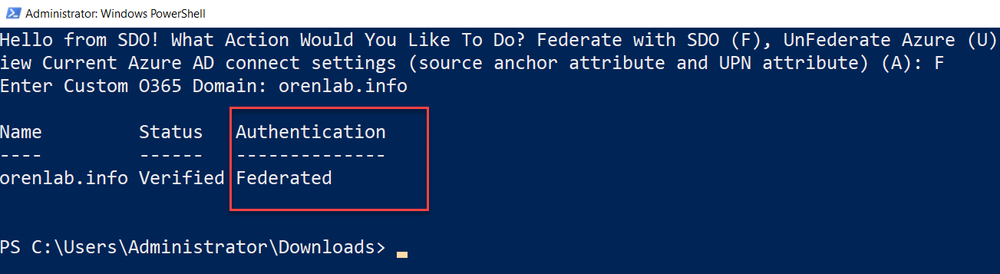
In the PowerShell window, enter the O365 domain to federate. be sure to use your intermediate domain name.

The domain is federated. It can take up to two hours for the changes to affect Microsoft.
Log into the Octopus Management Console and perform the following steps:
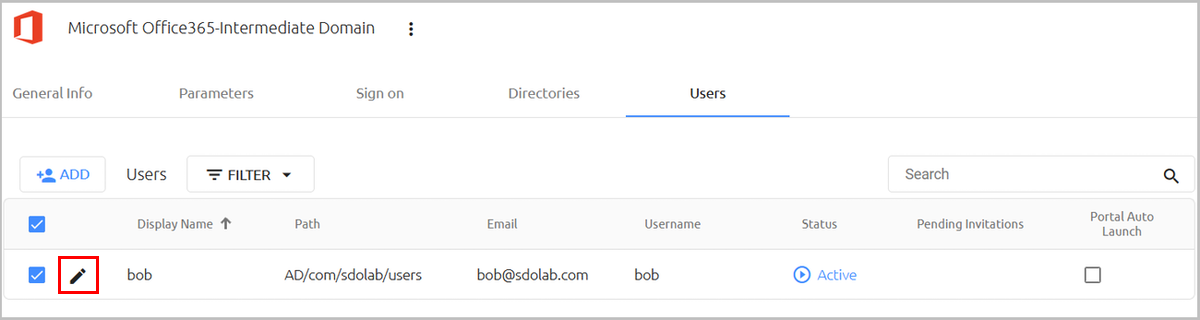
Select the Services menu. Then, in the card or row of the O365 SAML service, click the Edit (pencil) icon to display the service settings.
Select the Users tab. Then, in the row of the relevant user, click the Edit (pencil) icon to display the user’s details.
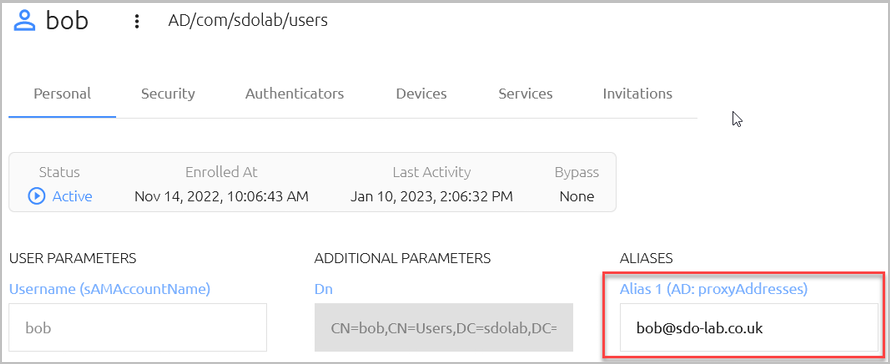
On the right side of the Personal tab, click ADD ALIAS. In the Alias 1 field, enter the user’s intermediate domain email (e.g., bob@intermediatedomain).
At the bottom of the Personal tab, click Save.
Select the Services menu. In the card or row of the O365 SAML service, click the Edit (pencil) icon to display the service settings.
Select the Parameters tab. Then, open the Login Identifier list and select Alias 1.
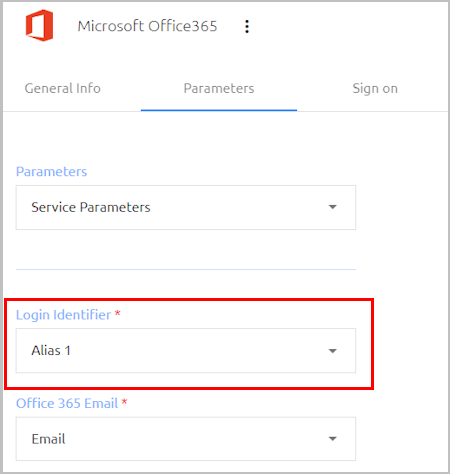
At the bottom of the Parameters tab, click Save. Then, at the top of the page, click PUBLISH and publish your changes.
In this federation method, SDO is configured as the IdP for Azure, and ALL USERS access their Azure applications (e.g., O365) using SDO as the authenticator.
Users not yet enrolled in SDO can authenticate by means of the Bypass Unenrolled Users feature. When this option is enabled, unenrolled users are redirected to a page prompting them to enter a username and password. After successful authentication, they can log into Azure. For more details, refer to Bypassing Unenrolled Users.
Federate your intermediate domain using the same process described in the Federating an Intermediate Domain section (Stage 2: Federate the Domain). When entering the domain to federate (Step 6), be sure to use your production domain name.
The Bypass Unenrolled Users feature allows you to federate the entire domain but still be able to onboard users to the service in batches. When the feature is enabled, users not yet enrolled in Secret Double Octopus will be presented with a username/password window for authentication to O365.
To see how the login flow works with enrolled and unenrolled users, please watch this demo video.
To enable bypass of unenrolled users:
From the Octopus Management Console, select the Services menu.
In the card or row of the O365 SAML service, click the Edit (pencil) icon to display the service settings.
From the Sign on tab, click the Bypass Unenrolled Users toggle button to activate the feature.
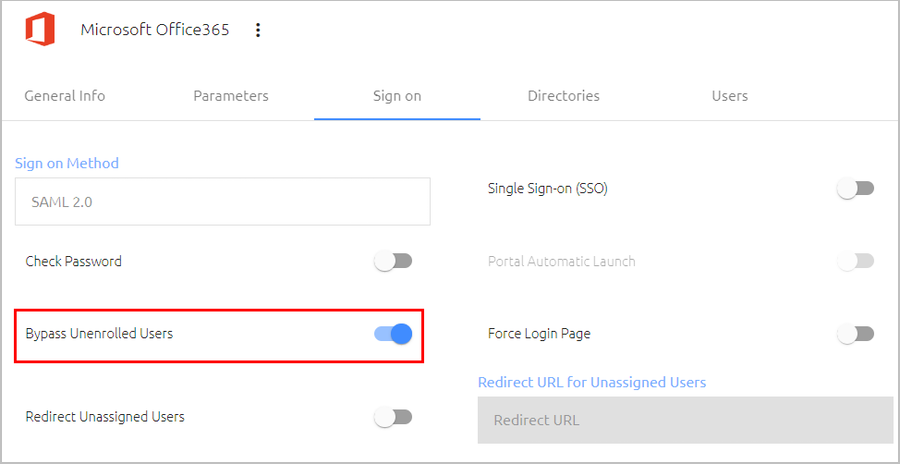
At the bottom of the Sign on tab, click Save. Then, from the toolbar at the top of the page, click PUBLISH and publish your changes.
Appendix B: WS-Federation
WS-Federation provides a general language and mechanism for connecting users and resources across security boundaries in different security realms, resulting in creation of a federation of security realms. For more details, please refer to this article.
The following sections describe how to enable and configure WS-Federation with Secret Double Octopus.
Follow the procedure below to create an additional SAML service in the Octopus Management Console to support WS-Federation.
To add and configure the generic SAML service:
From the Octopus Management Console, open the Services menu and click Add Service. In the Generic SAML tile, click Add.
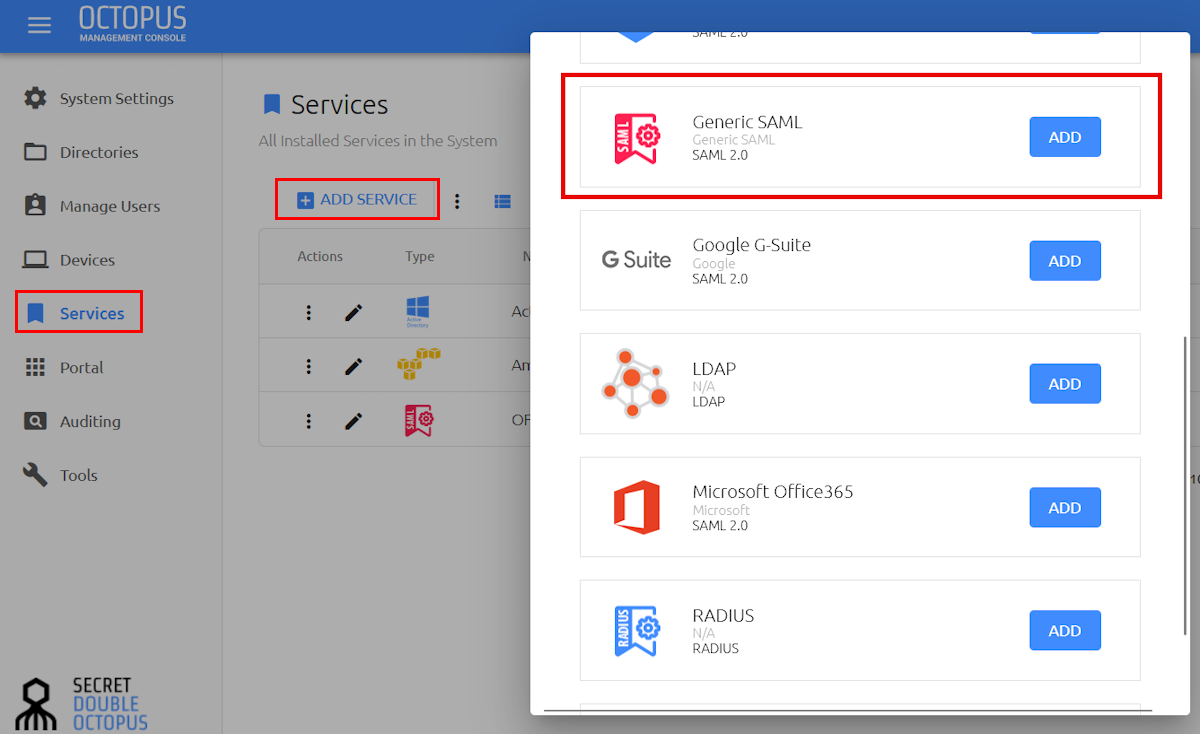
Then, in the dialog that opens, click Create.
Open the Parameters tab and configure the following settings:
Setting
Value / Notes
Login Identifier
Select Username and Email
Name ID
Select Email
Method
Select GET
ACS URL
https://login.microsoftonline.com/login.srf
Audience
urn:federation:MicrosoftOnline
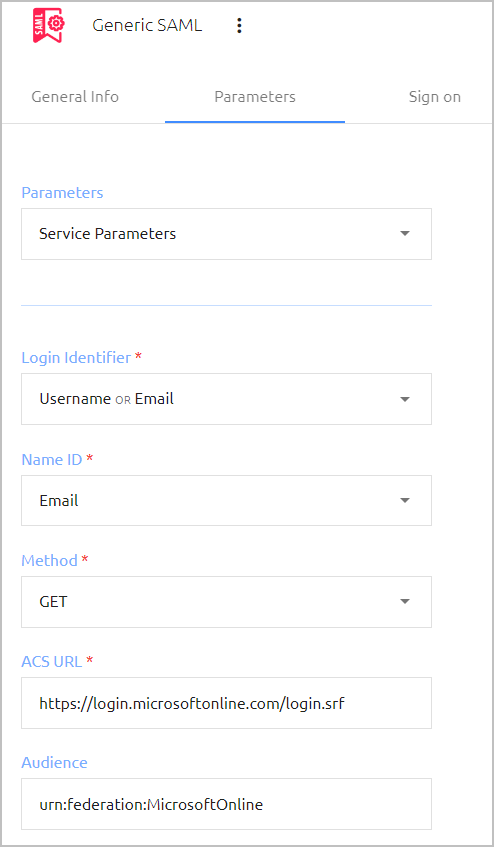
At the bottom of the Parameters tab, click Save.
Open the Directories tab and select the checkbox(es) of the directory / directories to be integrated with the service.
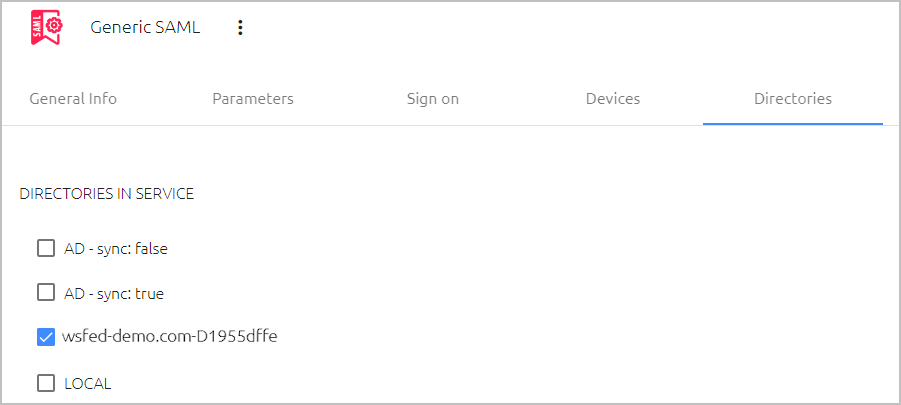
Then, at the bottom of the tab, click Save.
Select the Parameters tab again. At the bottom of the tab, click Add Parameter and create the following parameters:
Parameter Key
Parameter Value
http://schemas.xmlsoap.org/ws/2005/05/identity/claims/emailaddress
Email
enableWsfed
Select Free Text. Then, in the field to the right, enter true.
http://schemas.microsoft.com/LiveID/Federation/2008/05/ImmutableID
Username
http://tempuri.com/objectGUID
Username
http://schemas.xmlsoap.org/claims/UPN
Username
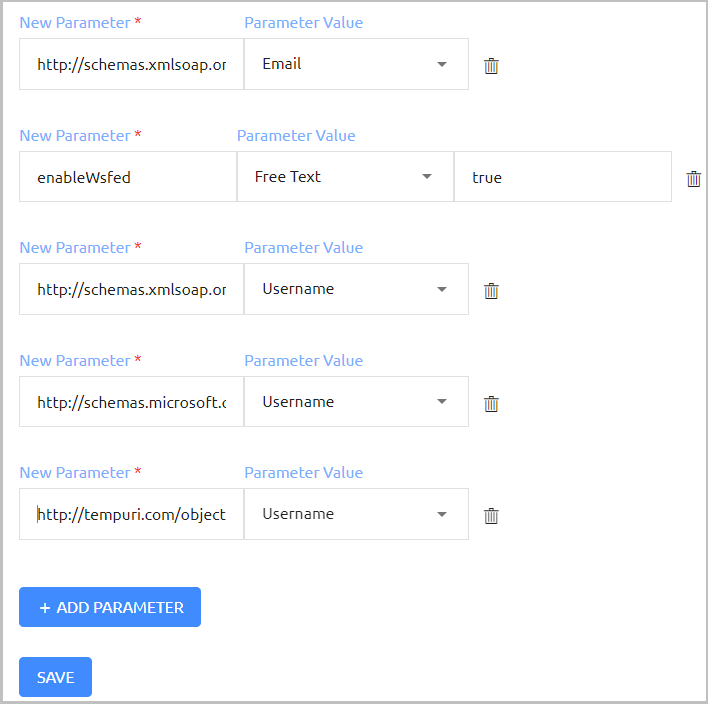
Override the default value (Username) of the last three parameters:
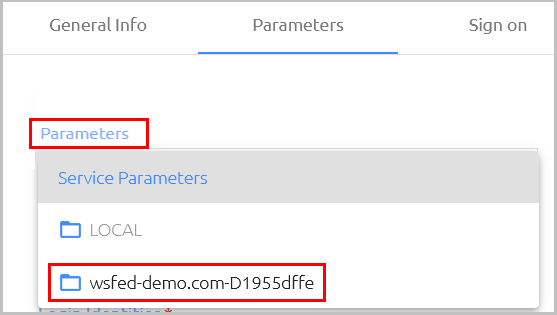
At the top of the Parameters tab, open the Parameters list and select the relevant directory.
Select the checkboxes of the relevant parameters and choose the following values:
Parameter
Value
http://schemas.xmlsoap.org/claims/UPN
UPN
http://schemas.microsoft.com/LiveID/Federation/2008/05/ImmutableID
ObjectGUID
http://tempuri.com/objectGUID
ObjectGUID
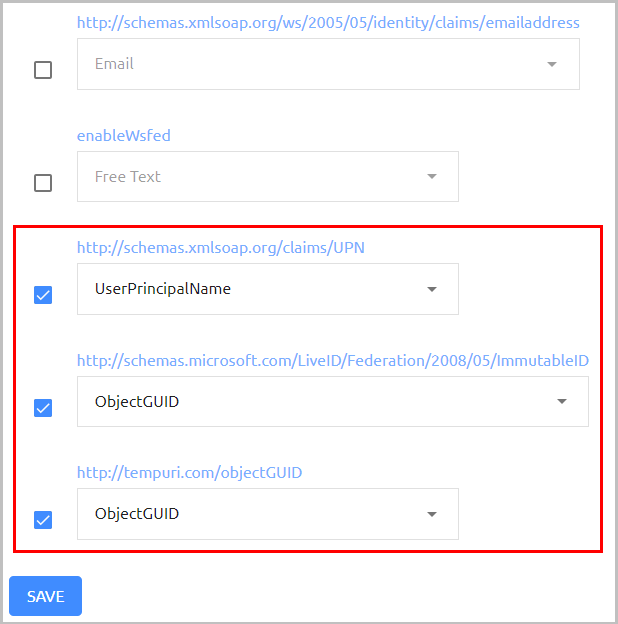
Click Save.
From the toolbar at the top of the page, click PUBLISH and publish your changes.
Follow the steps below to federate the Azure domain with WS-Federation to Secret Double Octopus.
If your domain is already federated using SAML 2.0, unfederate the domain before starting the procedure (change the status from Federated to Managed).
Before you begin, copy the following settings from the Sign on tab of the Generic SAML service that you created in the Octopus Management Console:
Issuer URL
X.509 Certificate
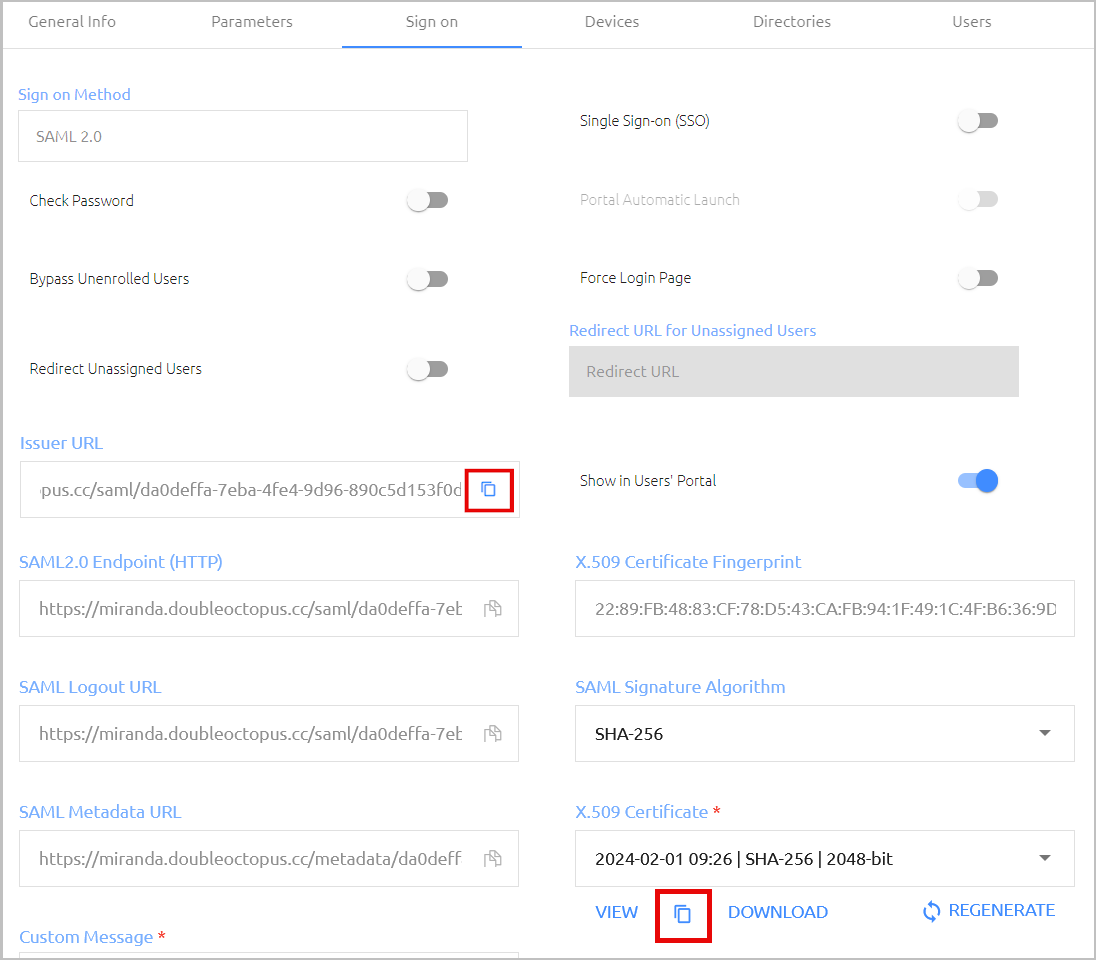 |
To federate the Azure domain:
Open Windows PowerShell and connect to Azure:
Connect-MsolService
Set the domain name:
$dom = “<domain_name>”
Set the Active Logon URI:
Paste the Issuer URL (from the Octopus generic SAML service) into a text editor.
Add the following to the end of the URL:
/wsfed/adfs/fs/federationserverservice.asmx
Set the value of the activelogonuri parameter:
$activelogonuri = “<Issuer URL>/wsfed/adfs/fs/federationserverservice.asmx”
Set the Issuer URI to be the Issuer URL:
$issuerUri = “<Issuer URL>”
Set the Signing Certificate by pasting the certificate you copied from the Octopus service into the certificate parameter:
$cert = “<Paste the certificate>”
Set the Passive Logon URI by adding /passivests to the Issuer URL:
$passiveLogonUri = “<Issuer URL>/passivests”
Set the Brand Name (text parameter):
$brandname = “<brand name>”
Set the MetaExchange URI:
$mex = “<Issuer URI>/wsfed/adfs/fs/federationserverservice.asmx”
After setting all the parameters, run the following command to federate the Azure domain to Secret Double Octopus using WS-Federation:
Set-MsolDomainAuthentication -DomainName $dom -Authentication Federated -ActiveLogOnUri $activeLogonUri -IssuerUri $issuerUri -SigningCertificate $cert -LogOffUri $passiveLogonUri -FederationBrandName $brandname -MetadataExchangeUri $mex -PassiveLogOnUri $passiveLogonUri -PreferredAuthenticationProtocol WsFed