Download the Staged Rollout Configuration Guide
Download the complete guide as a PDF for offline use.
Download PDF ↓Configuration Guide
Configuring Staged Rollout Group with Secret Double Octopus for existing customers
Learn how to register an application in Microsoft Entra ID, configure the required API permissions, enable staged rollout, and connect the environment to Secret Double Octopus for controlled user migration.
Microsoft Entra ID Secret Double Octopus Existing Customers
Before you begin
This guide applies to existing Microsoft Entra ID hybrid environments where Secret Double Octopus is integrated with the local Active Directory through remoteAD. Make sure you have administrator access to Microsoft Entra ID and the SDO Management Console.
Information to retain
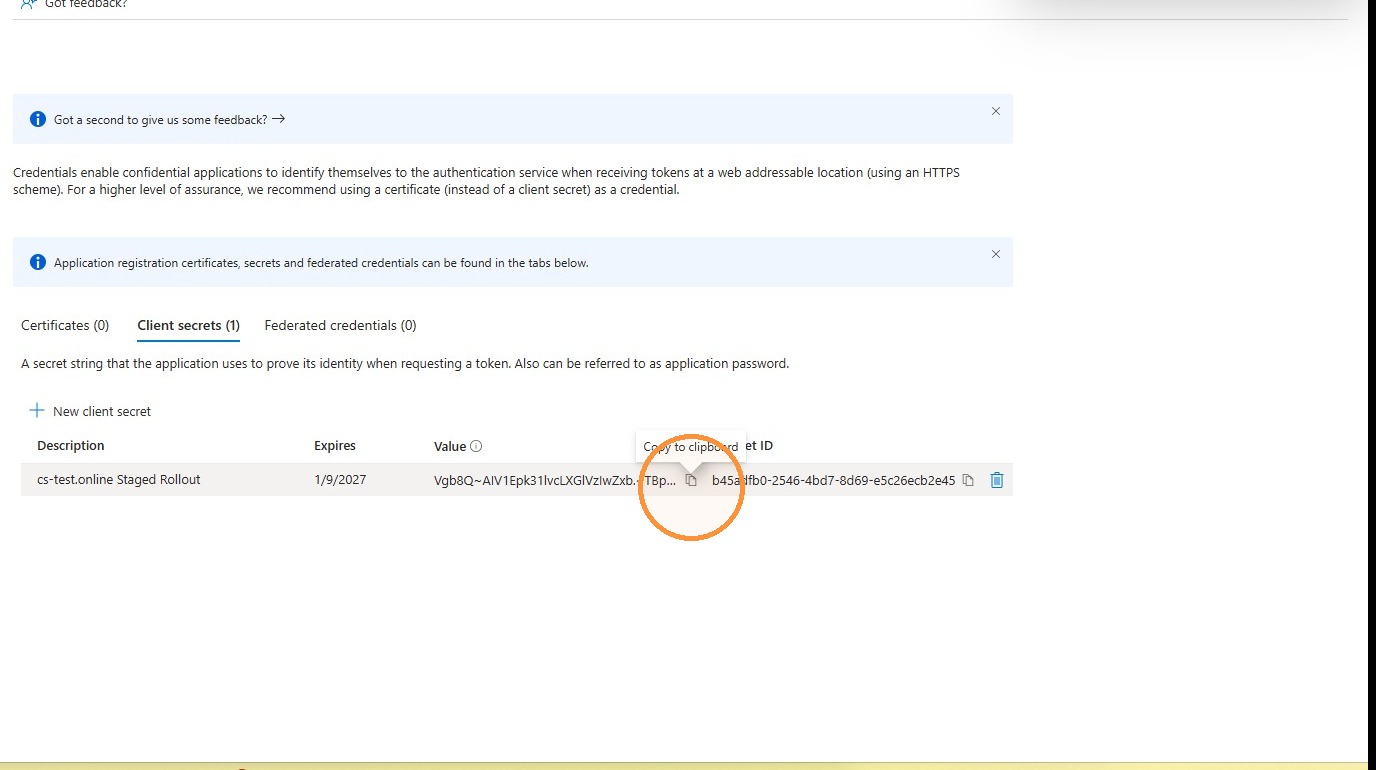
Keep the Application (client) ID, Directory (tenant) ID, and client secret available. You will enter all three values when creating the Entra ID directory in the SDO Management Console.
Contents
01 Microsoft Entra App Registration
02 Authentication and Secrets Configuration
03 API Permissions and Consent
04 Entra Tenant Configuration
05 SDO Directory Integration
06 Group Sync and Assignment
Section 01
Microsoft Entra App Registration
1
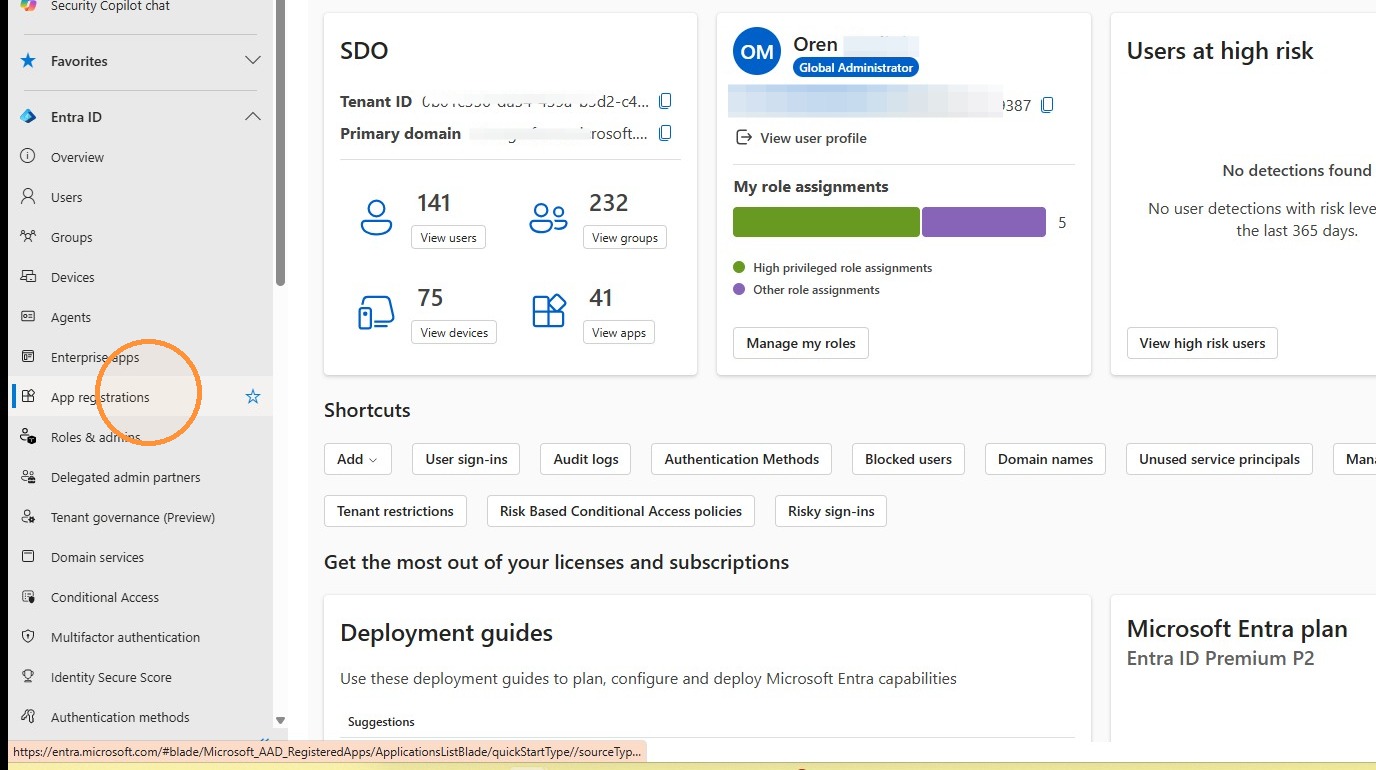
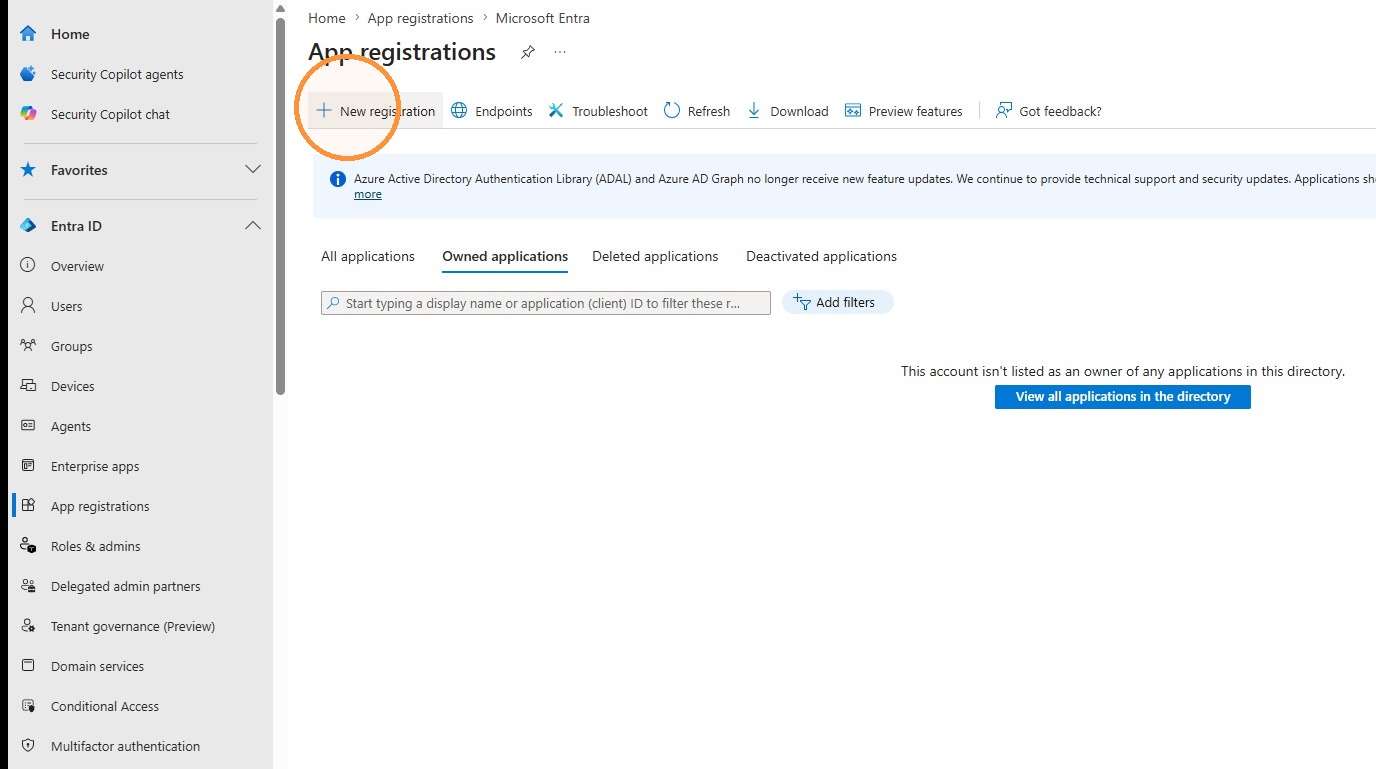
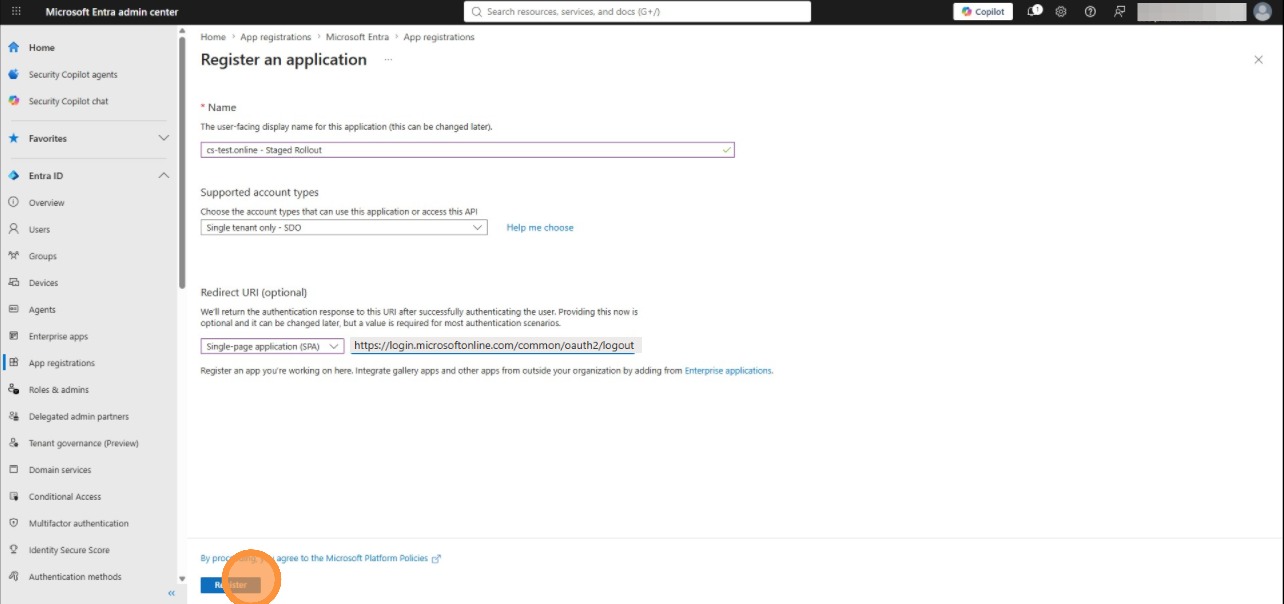
In the Microsoft Entra admin center, open App registrations.
3
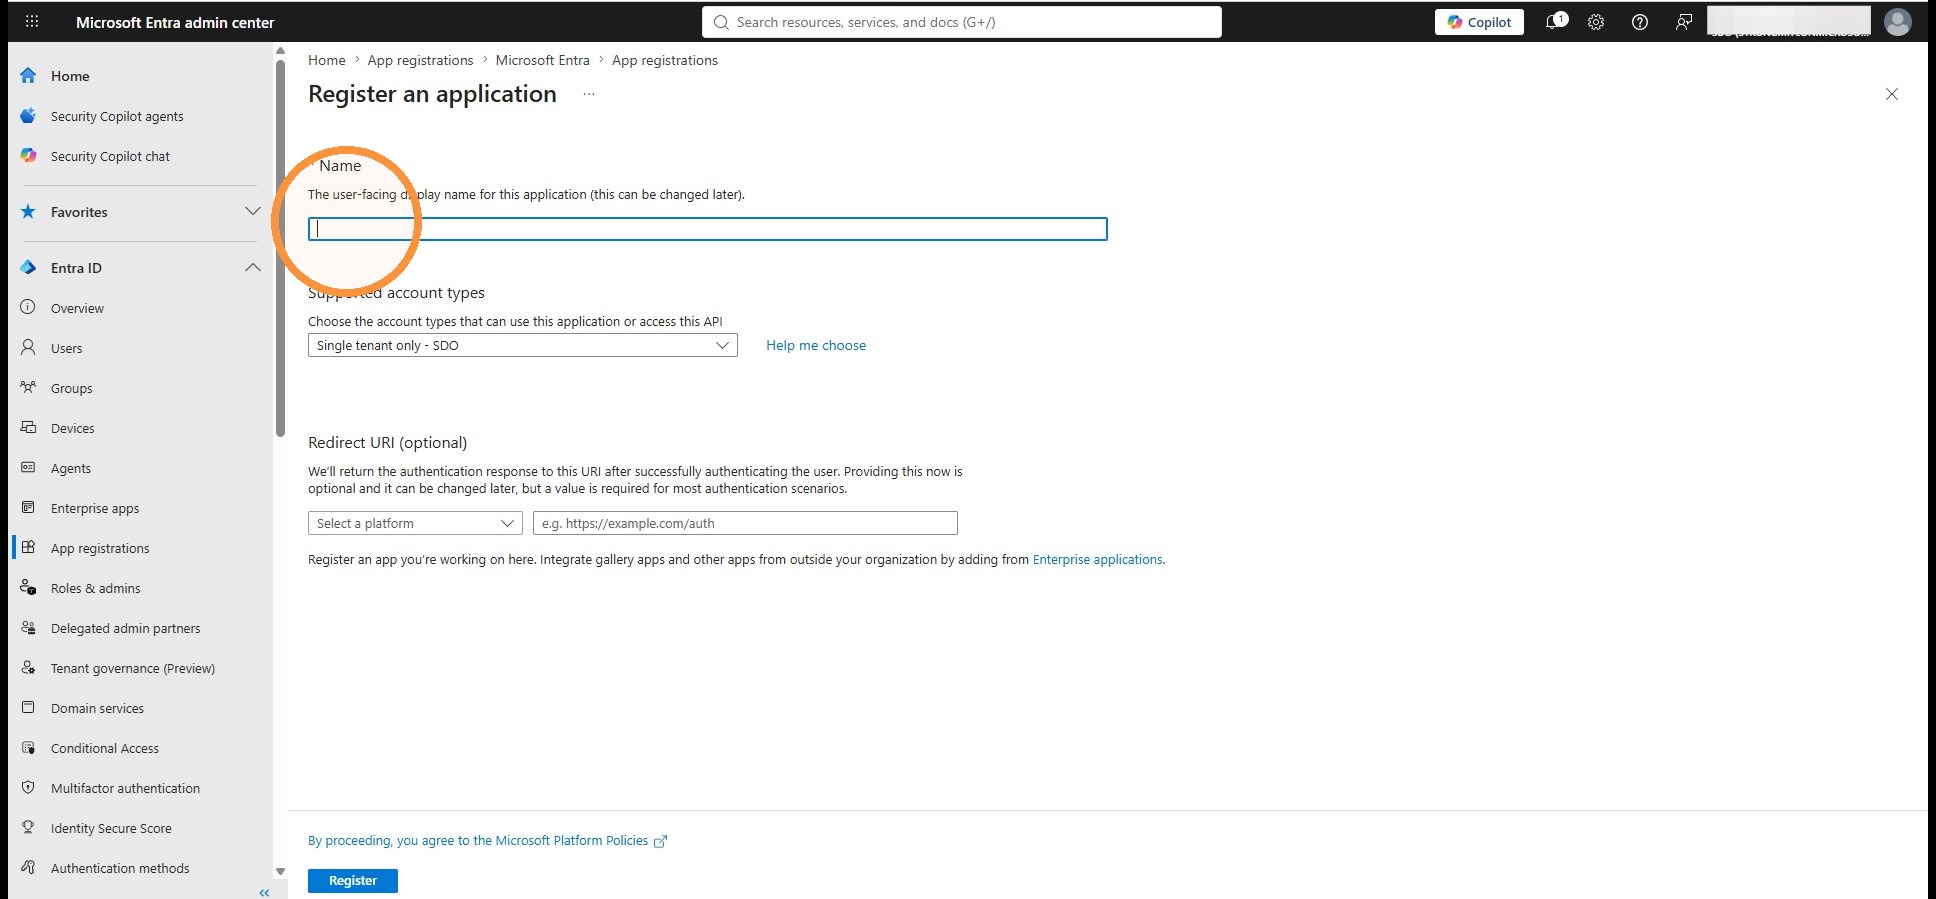
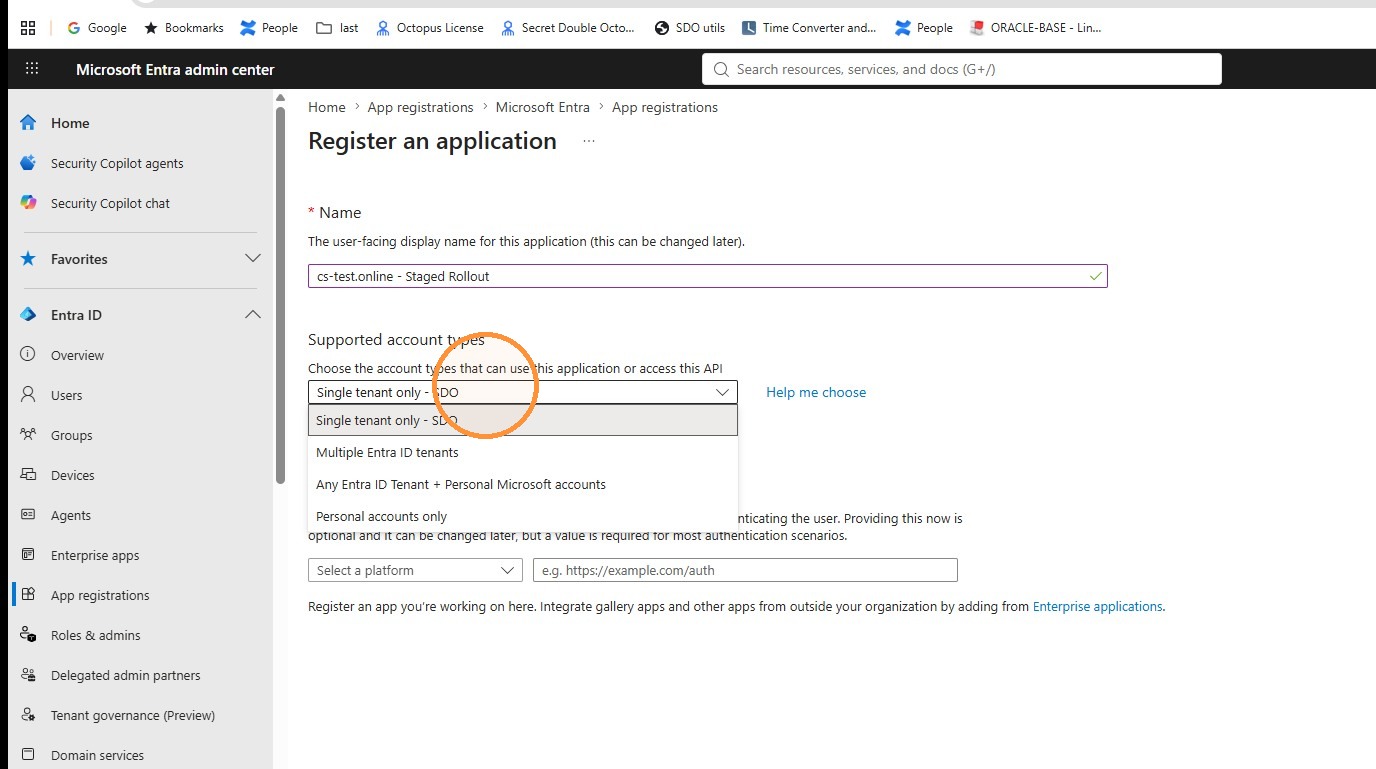
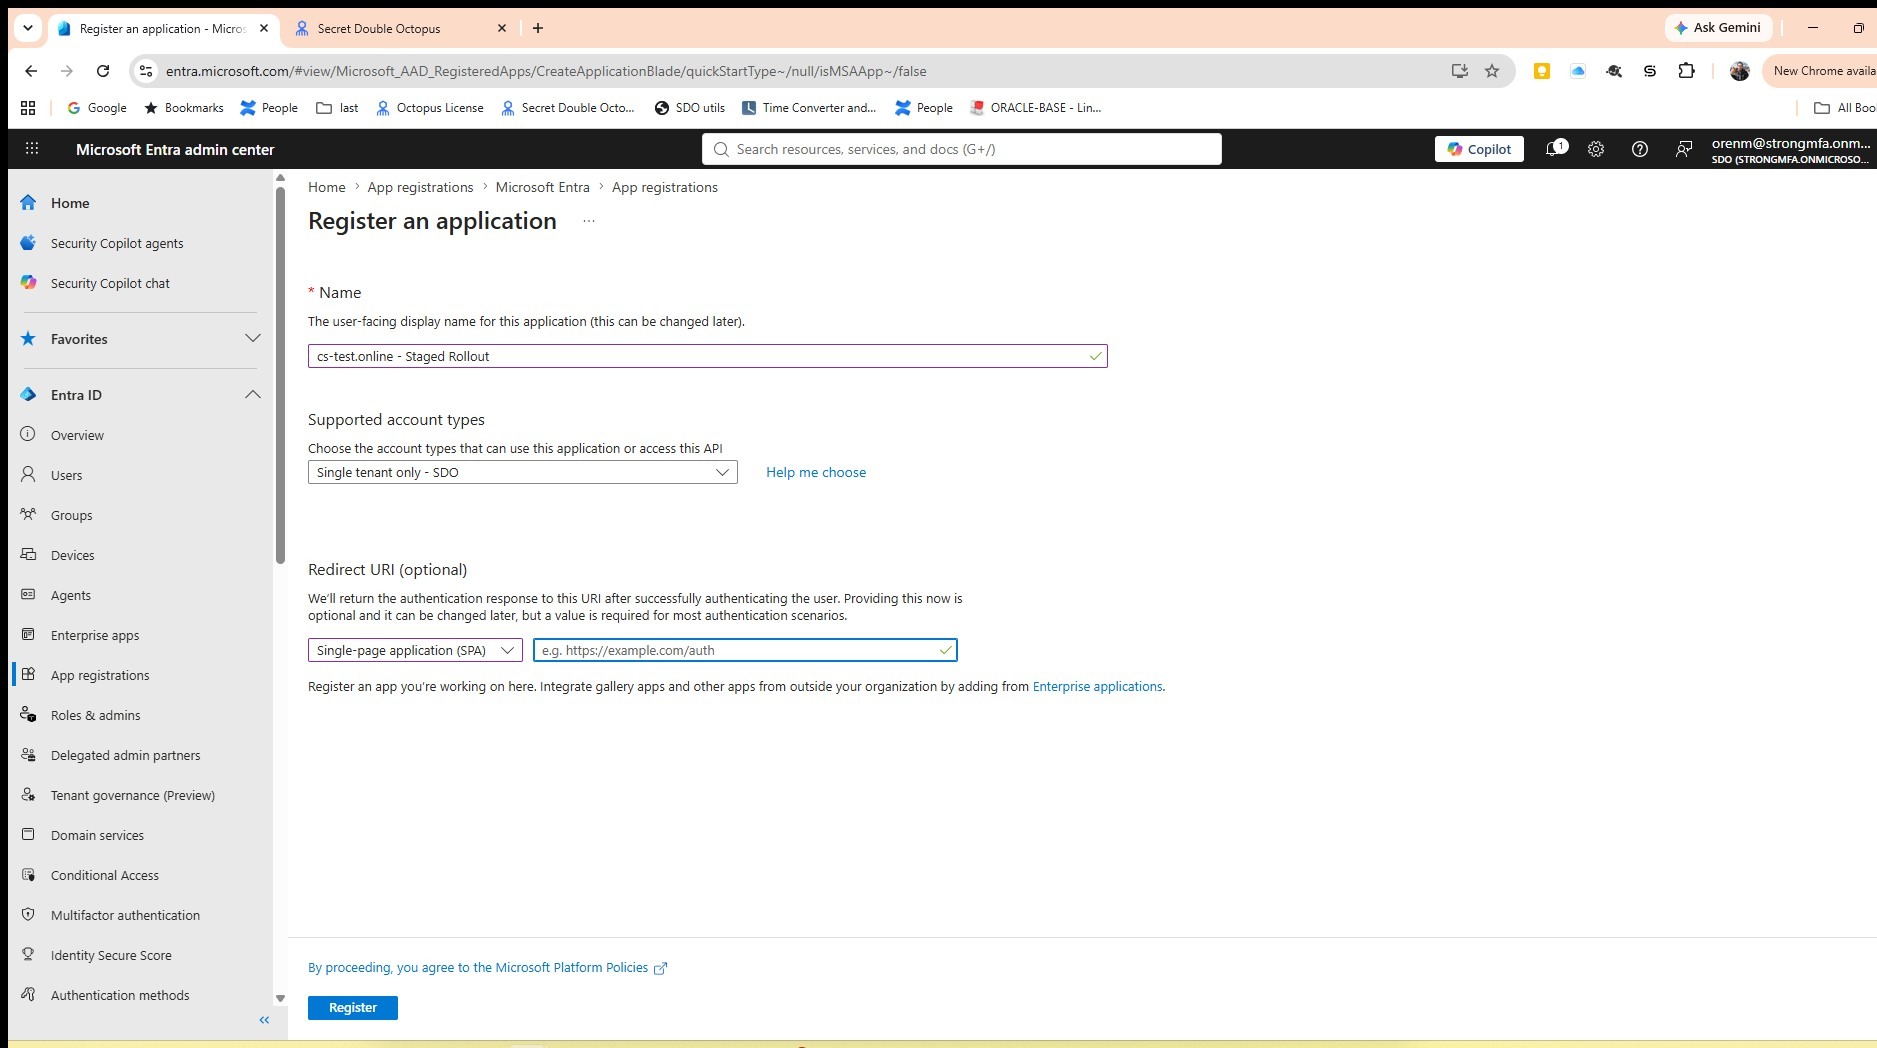
Enter a display name for the application.
4
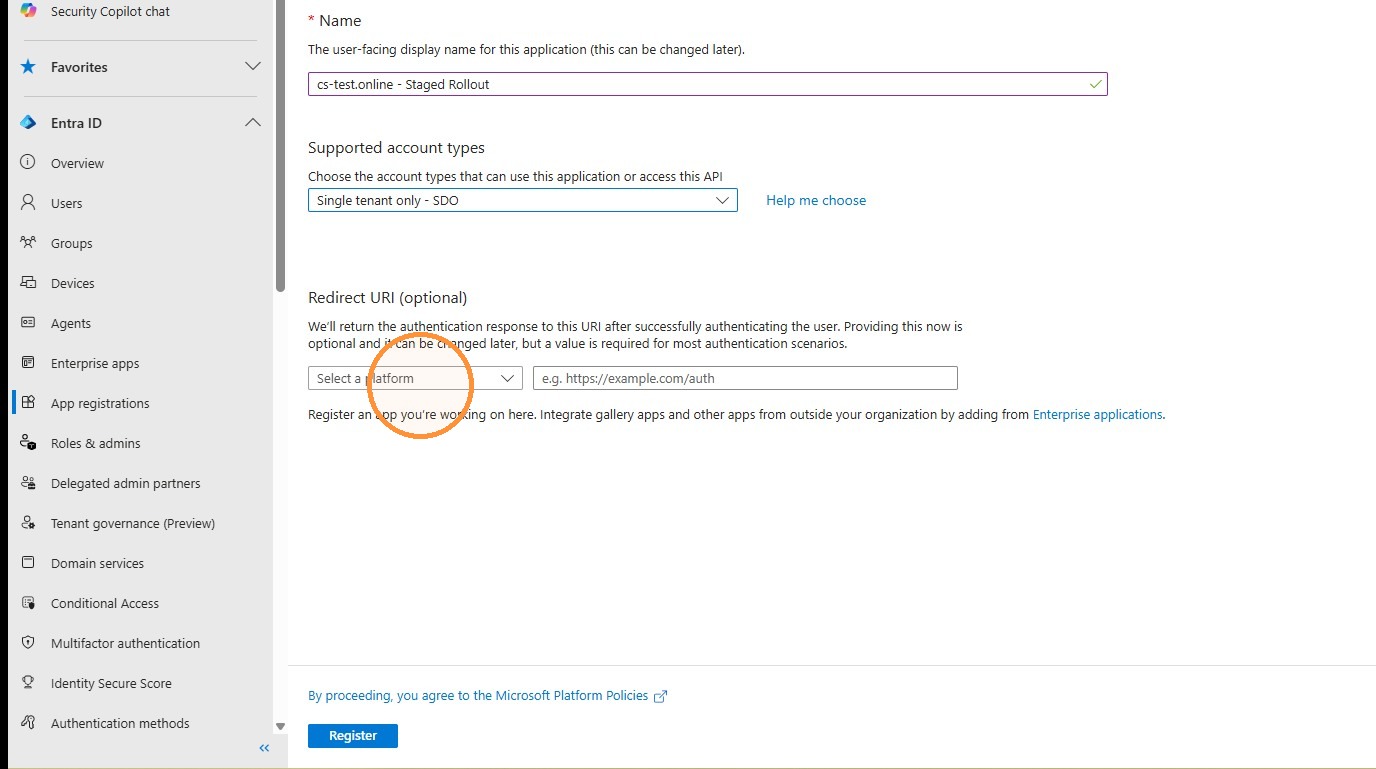
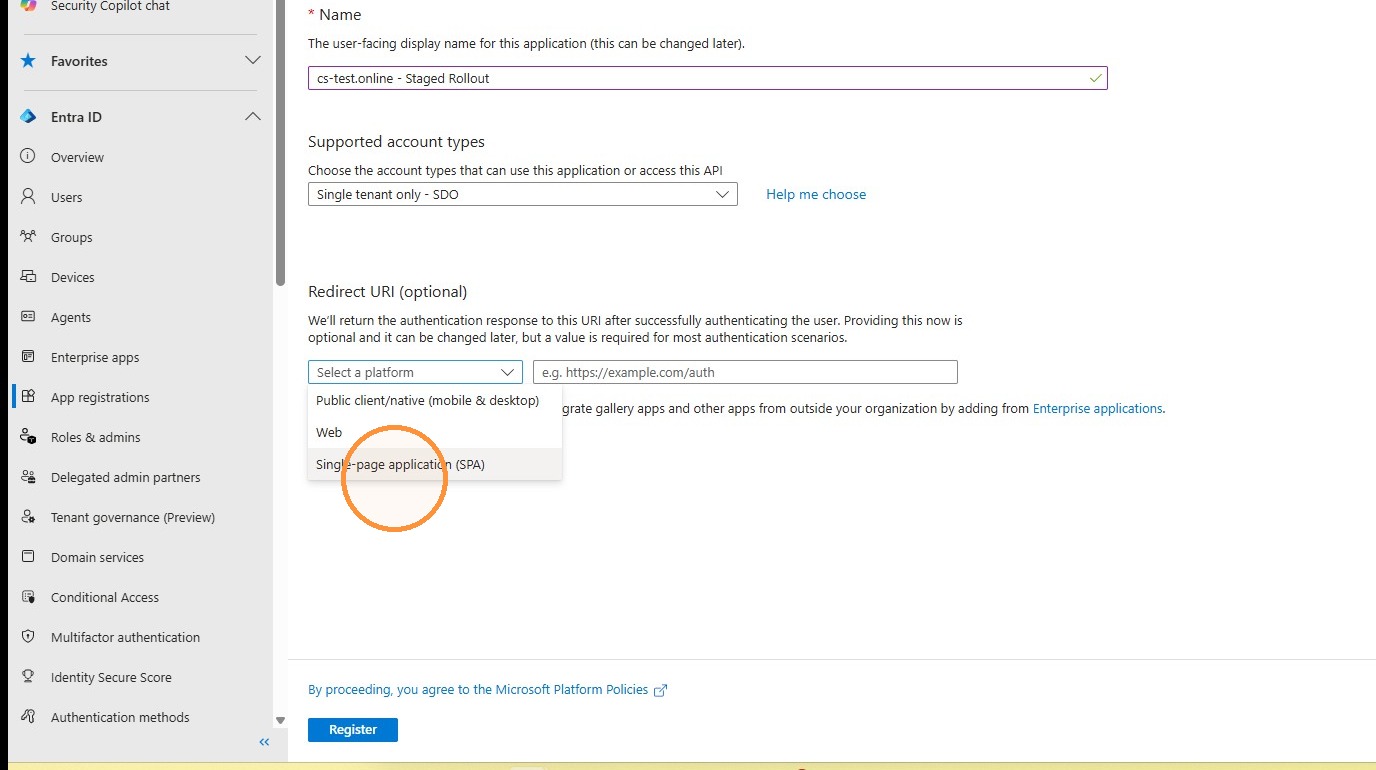
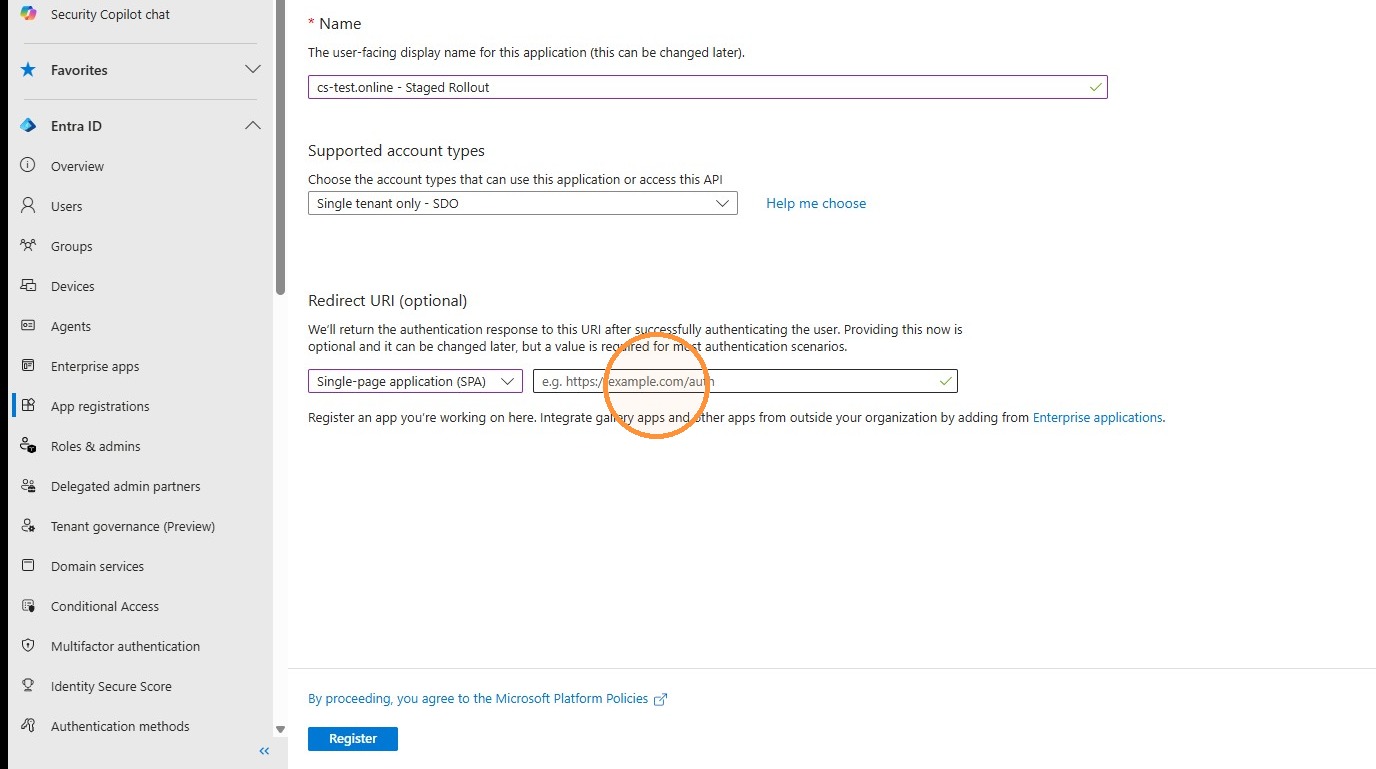
Open the Redirect URI (optional) field.
5
Enter https://login.microsoftonline.com/common/oauth2/logout as the redirect URI, and then click Register.
6
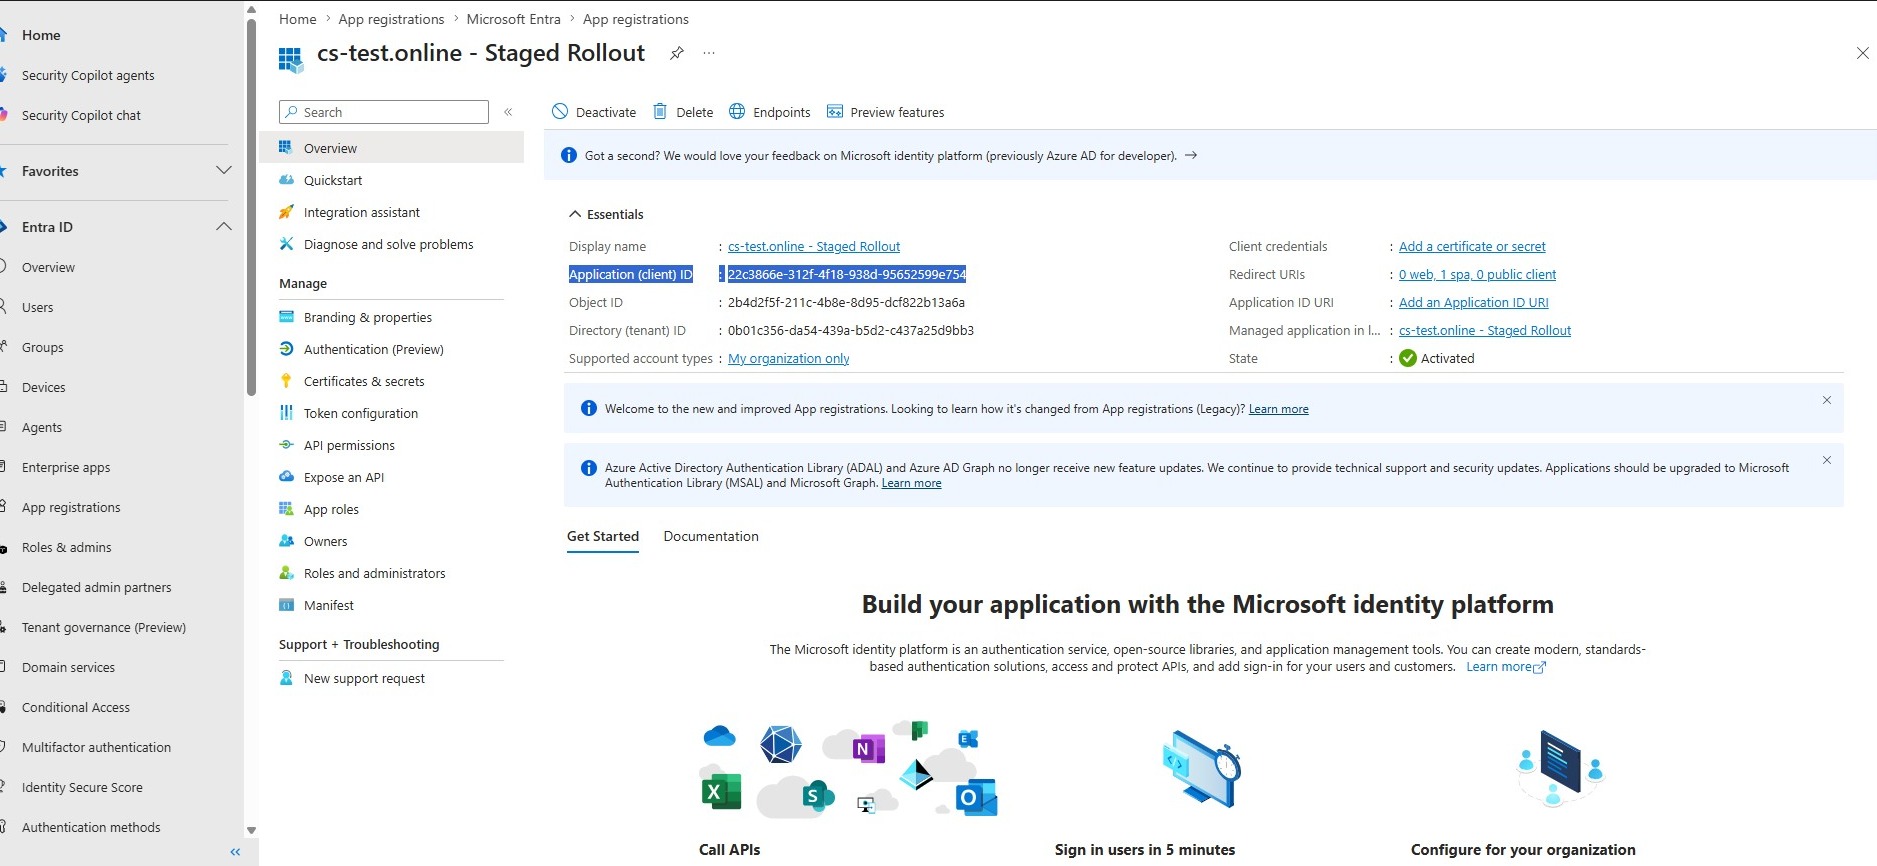
Copy the Application (client) ID for use later in the SDO Management Console.
7
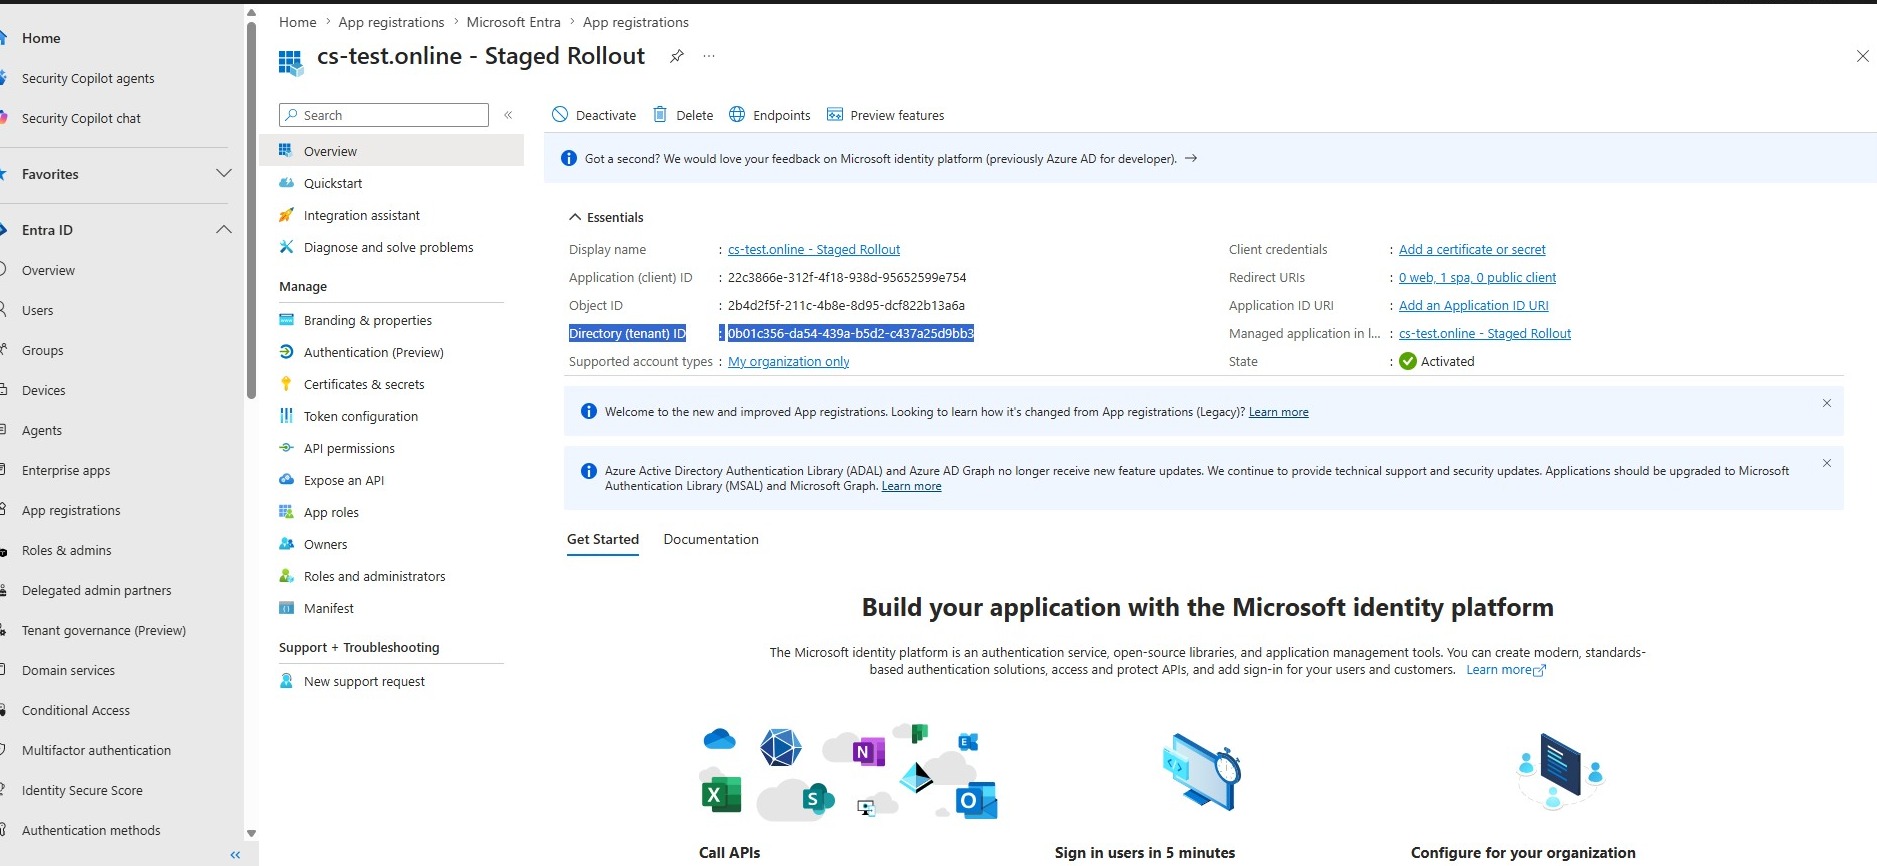
Copy the Directory (tenant) ID for use later in the SDO Management Console.
Section 02
Authentication and Secrets Configuration
8
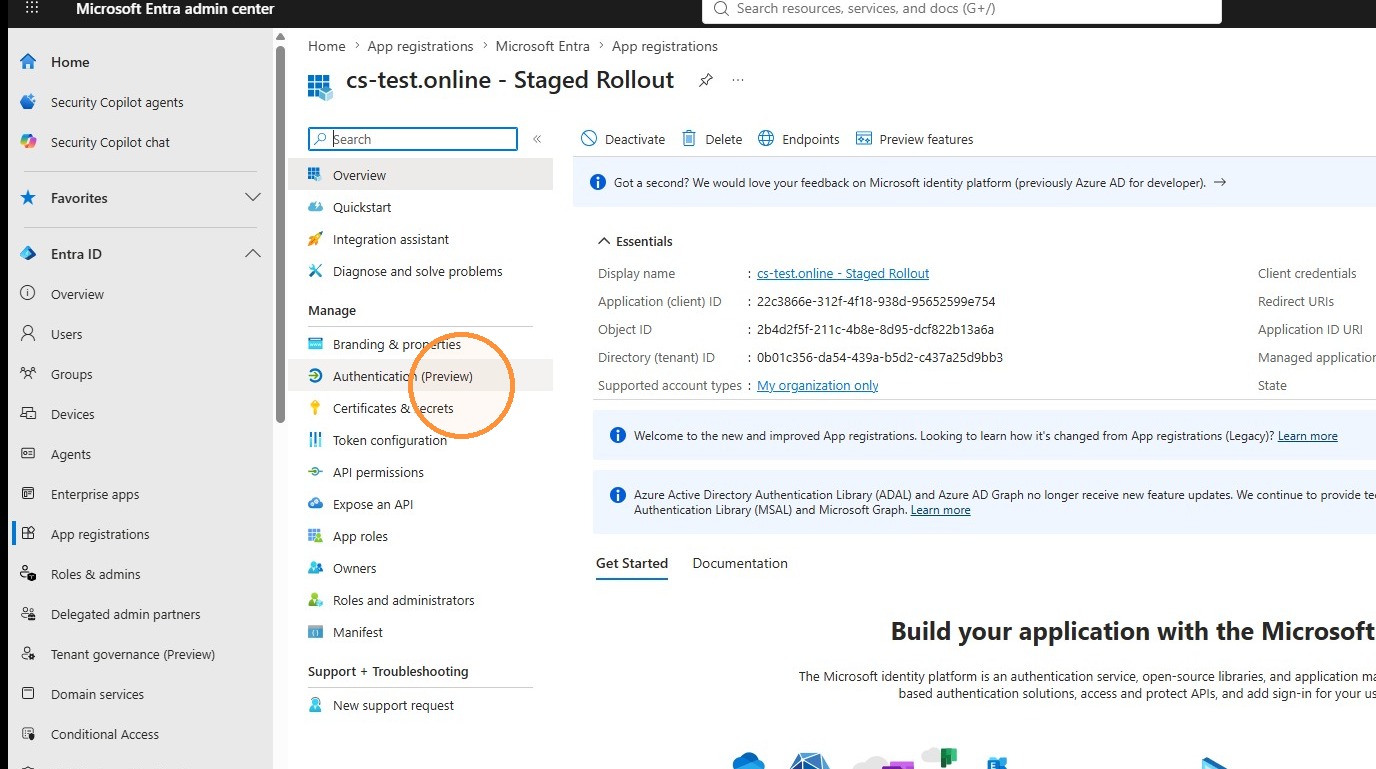
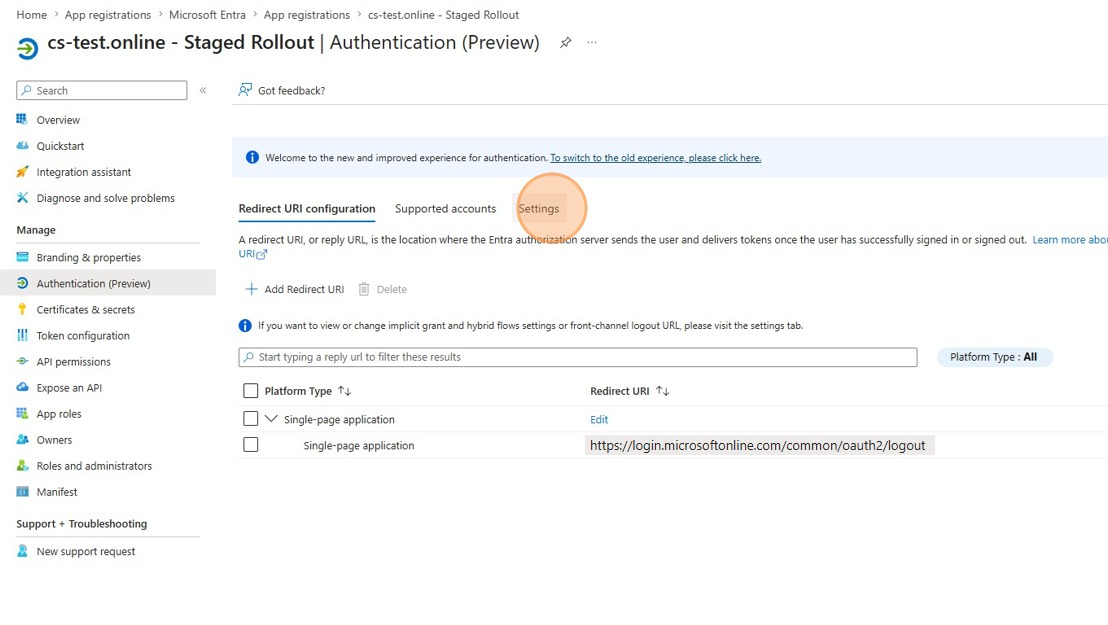
Select Authentication (Preview) from the sidebar.
10
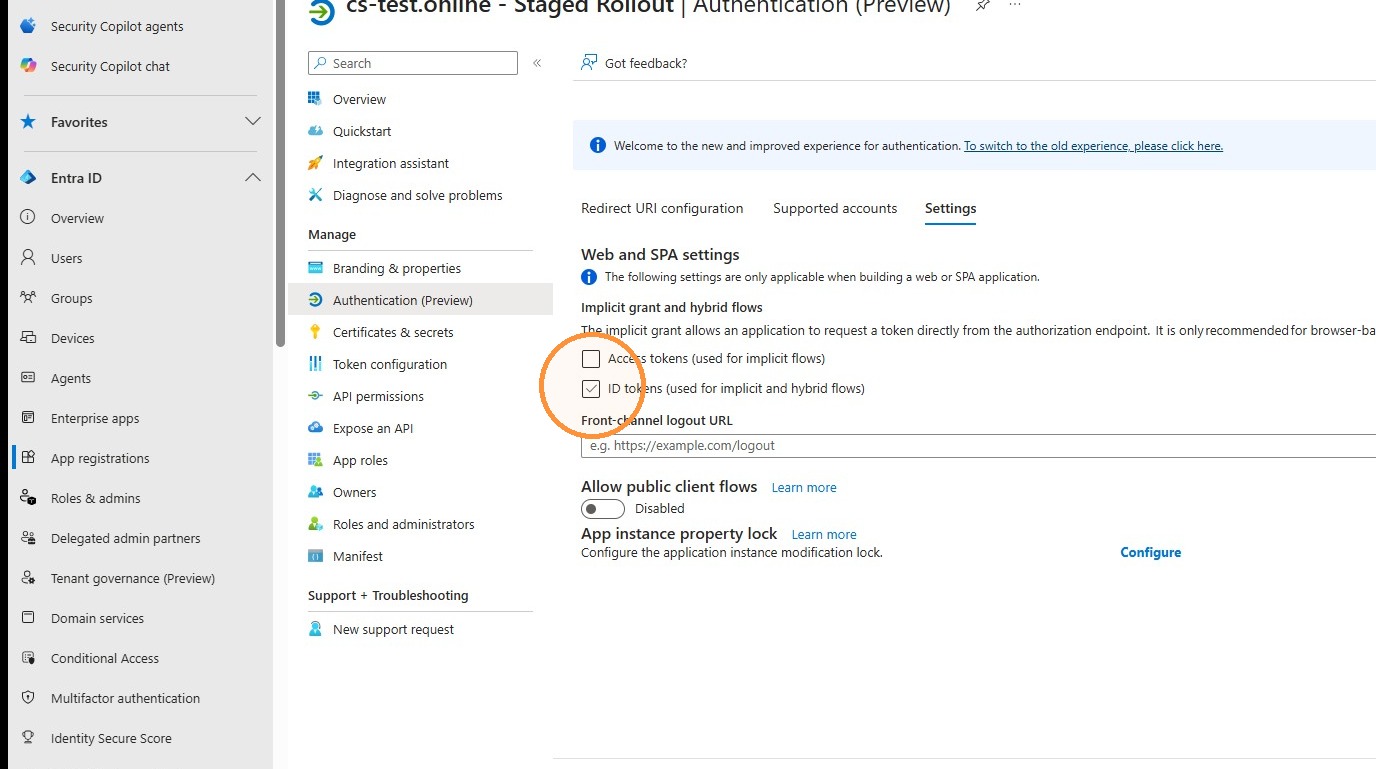
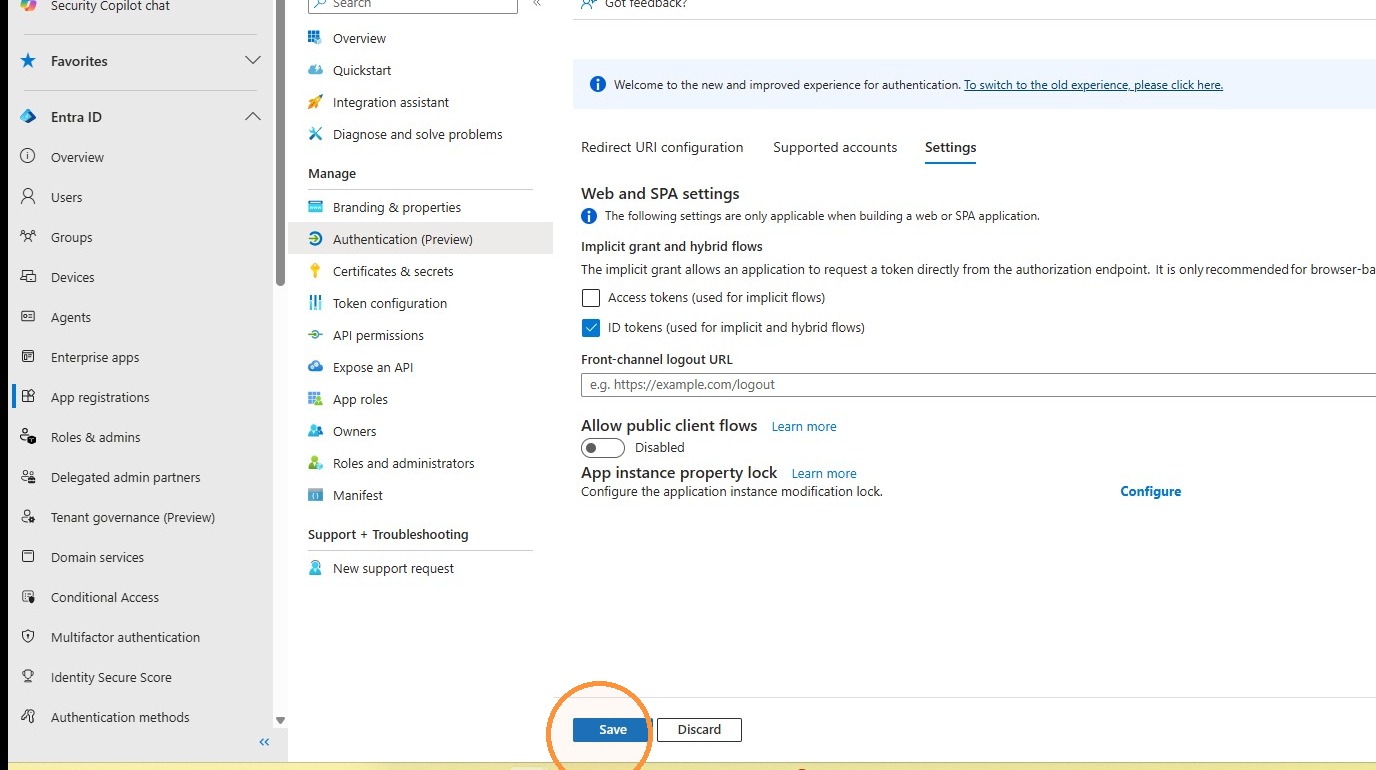
Enable ID tokens (used for implicit and hybrid flows).
12
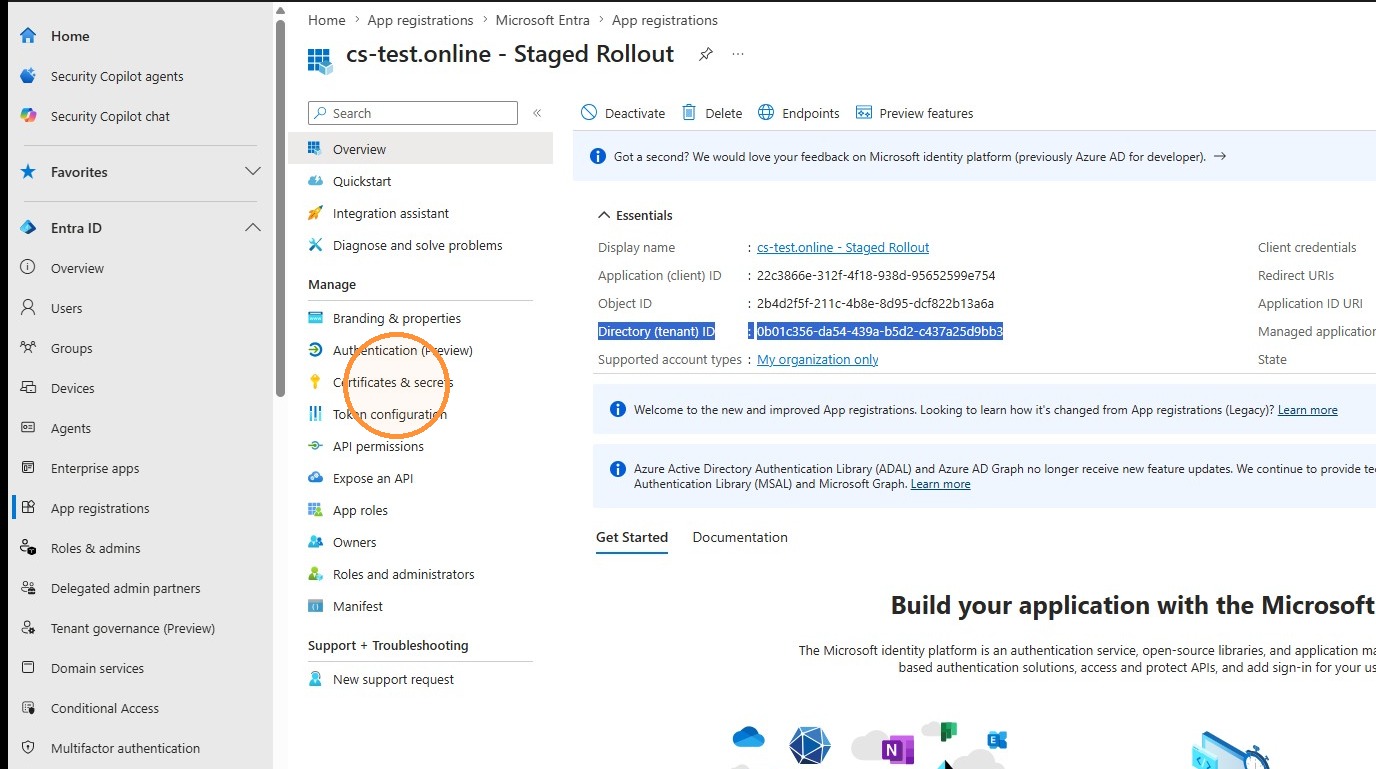
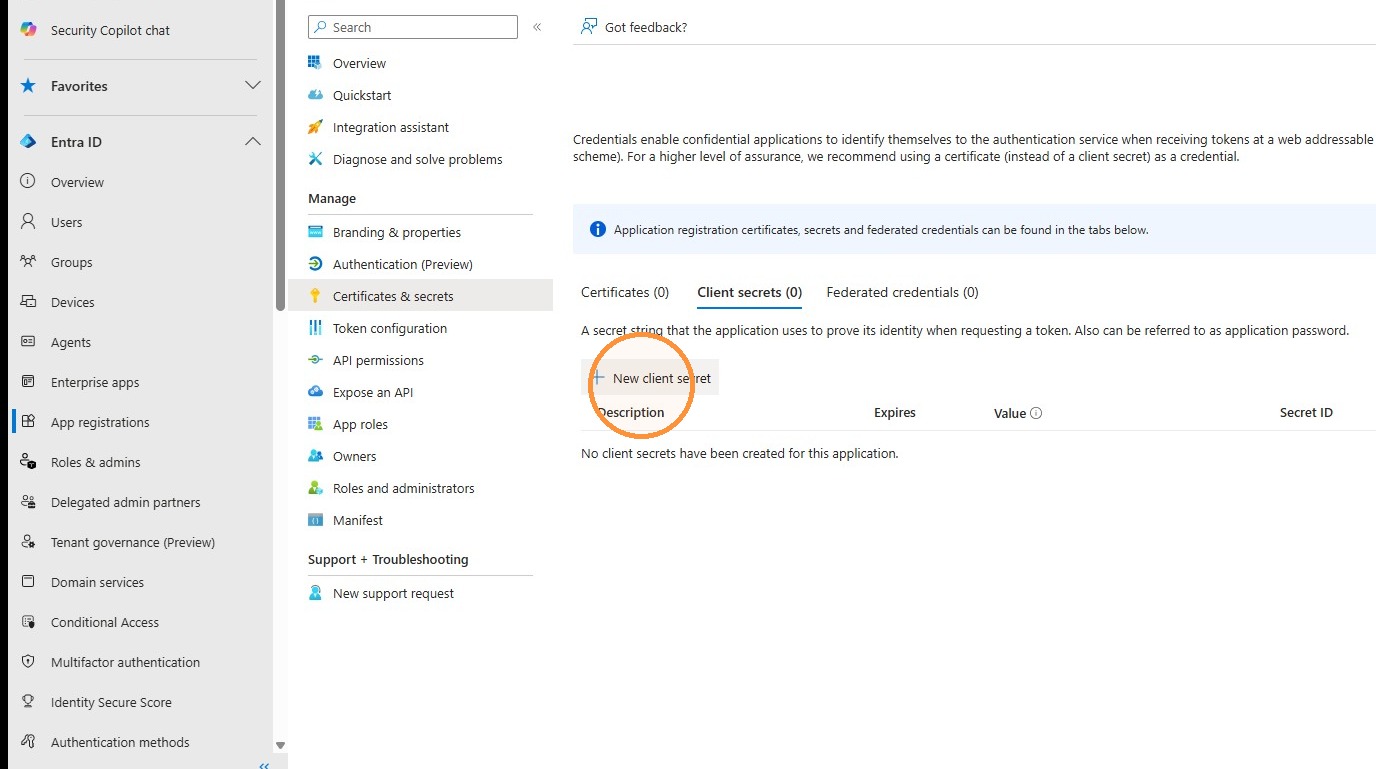
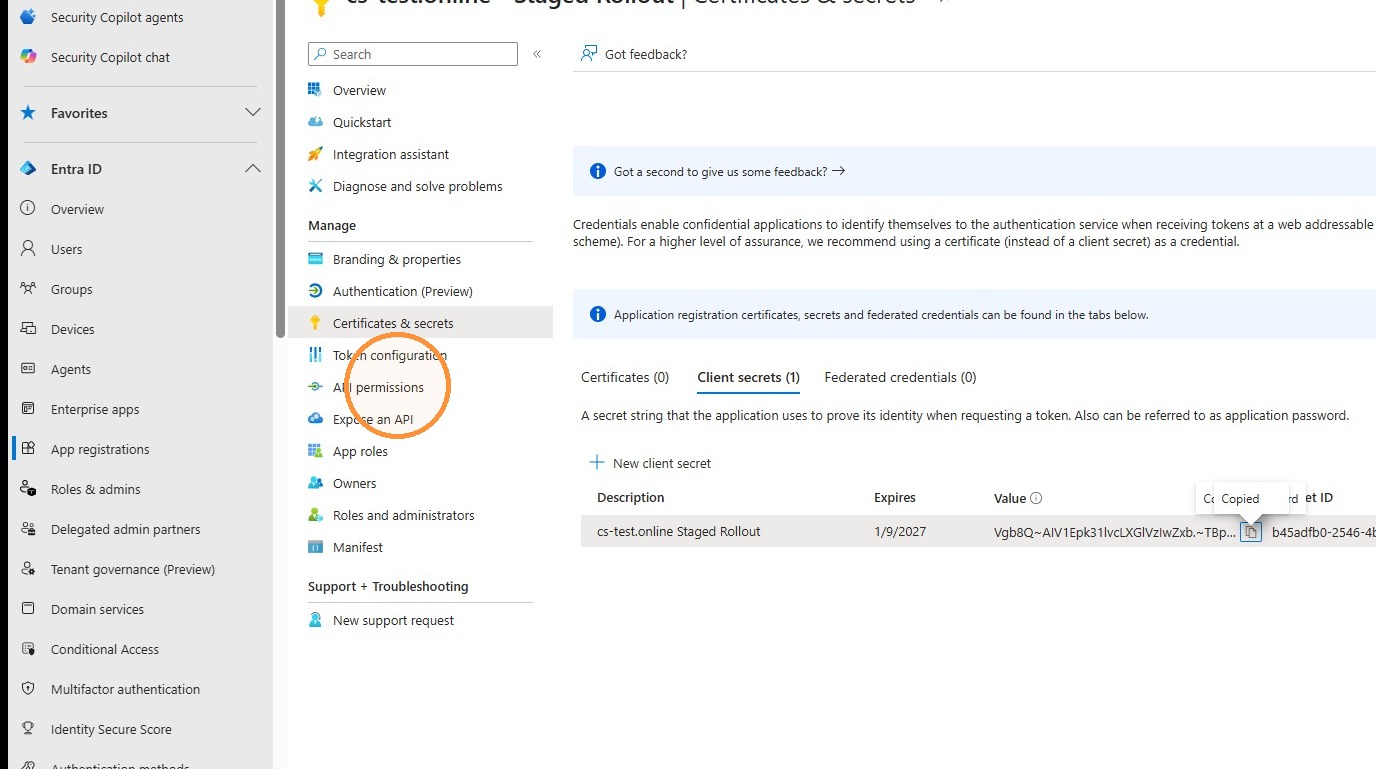
Open Certificates & secrets.
13
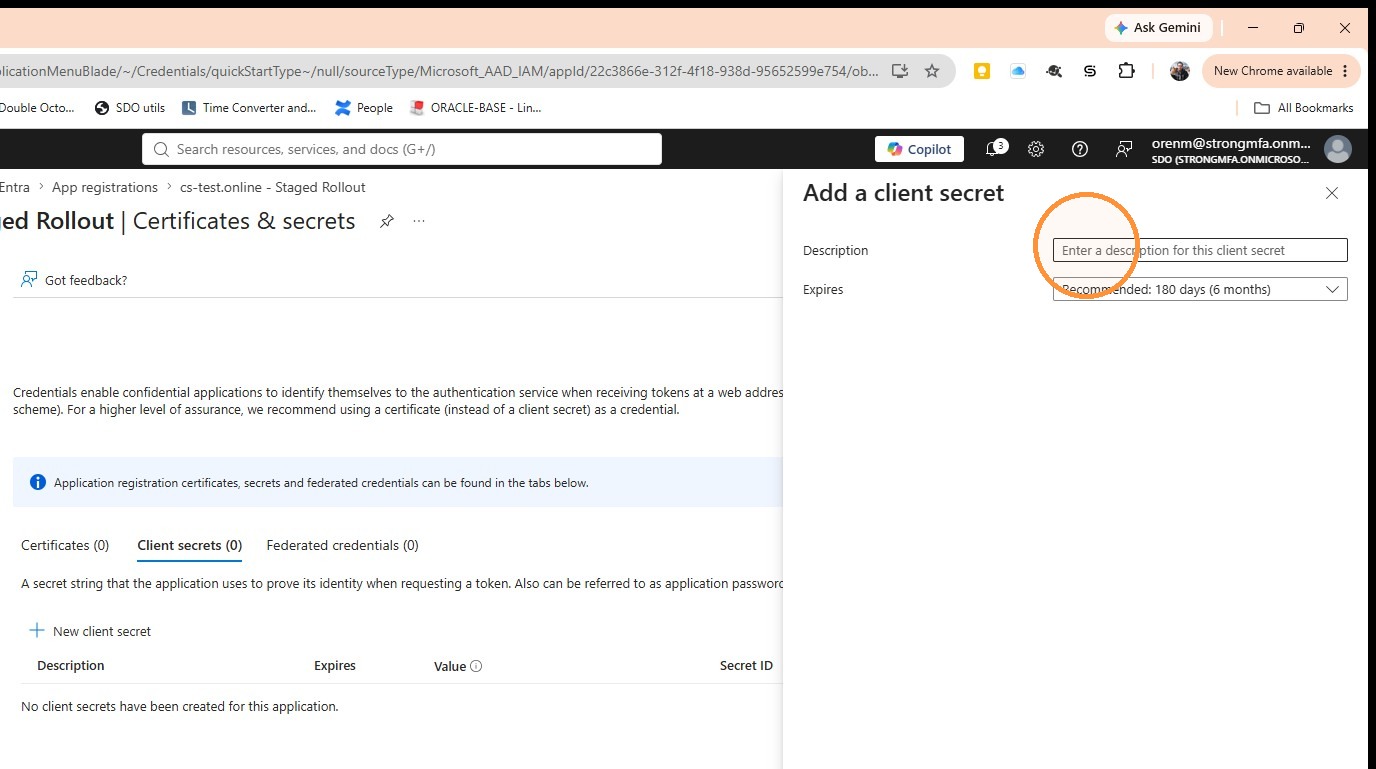
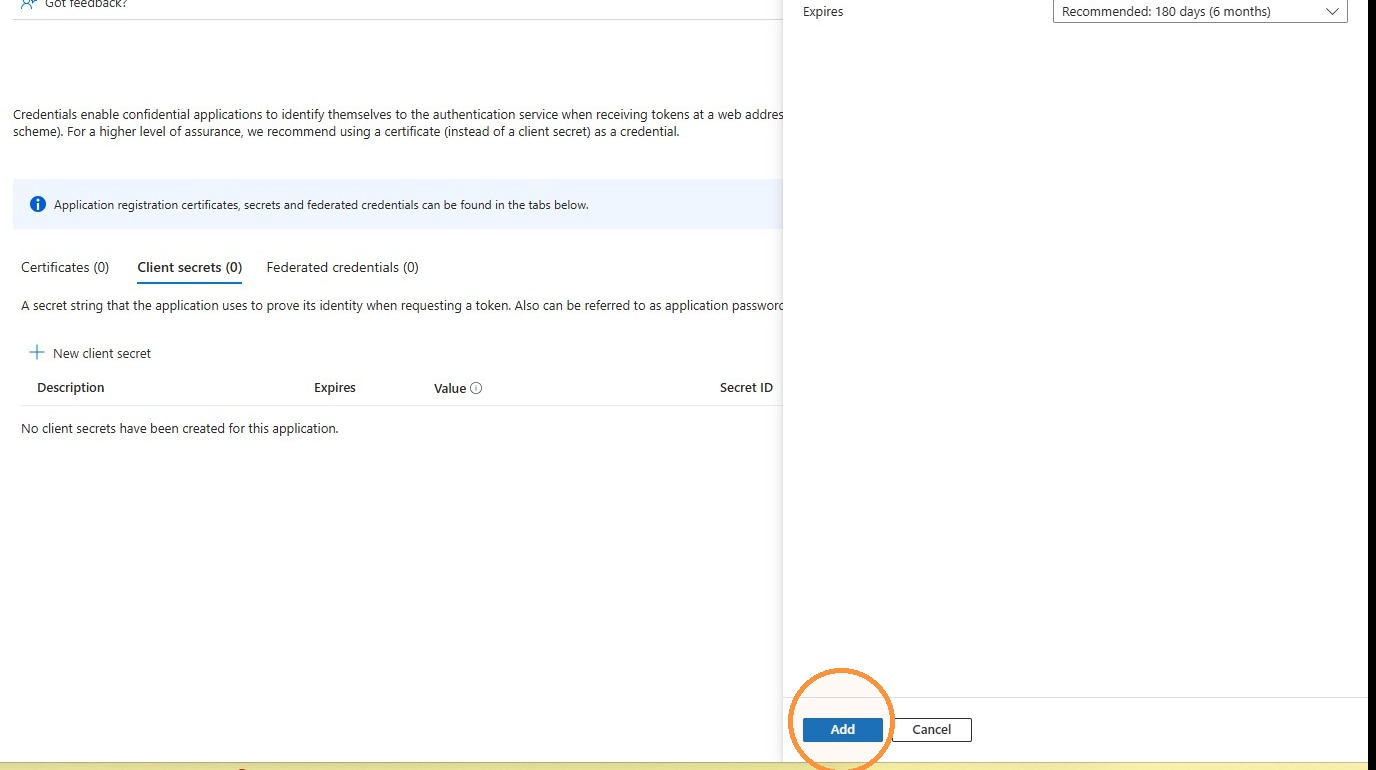
Create a new client secret and enter a descriptive name.
14
Copy the client secret value for use later in the SDO Management Console.
Section 03
API Permissions and Consent
16
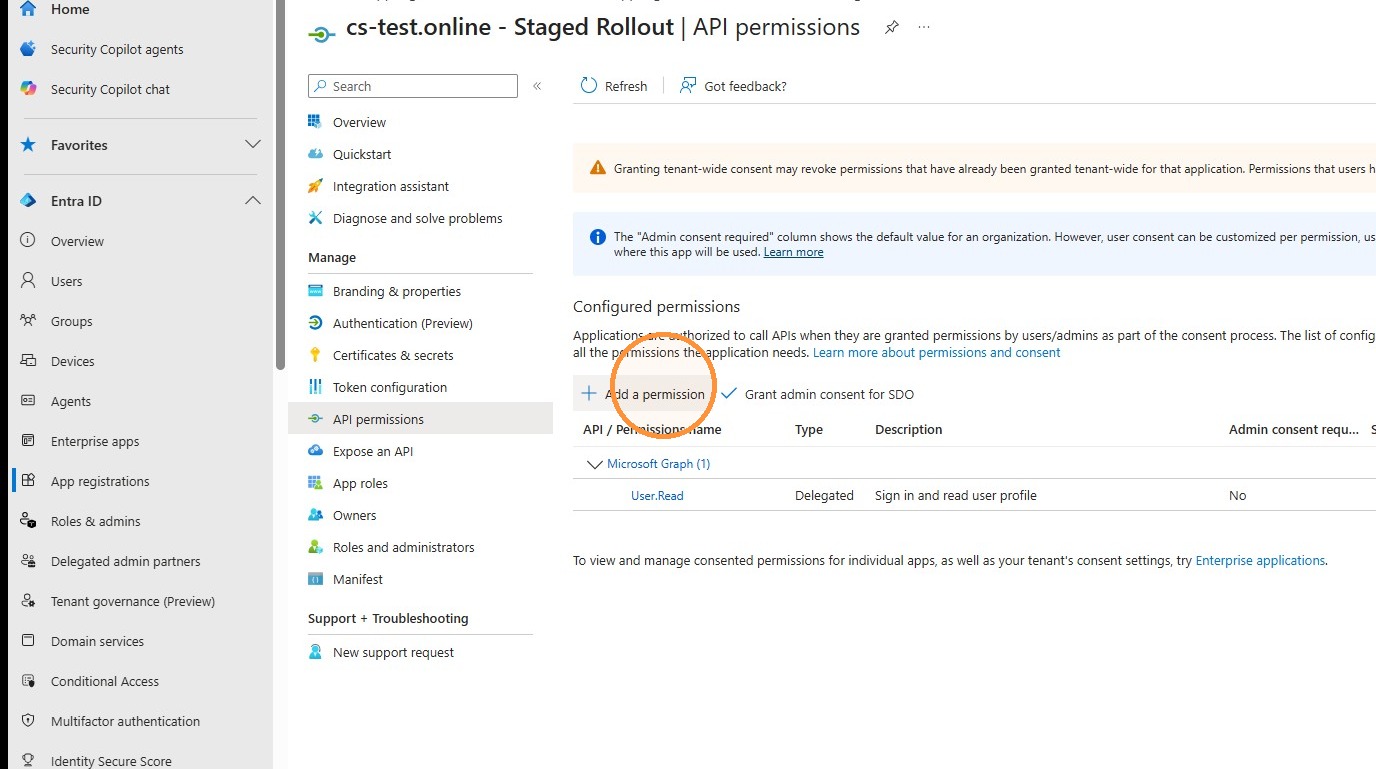
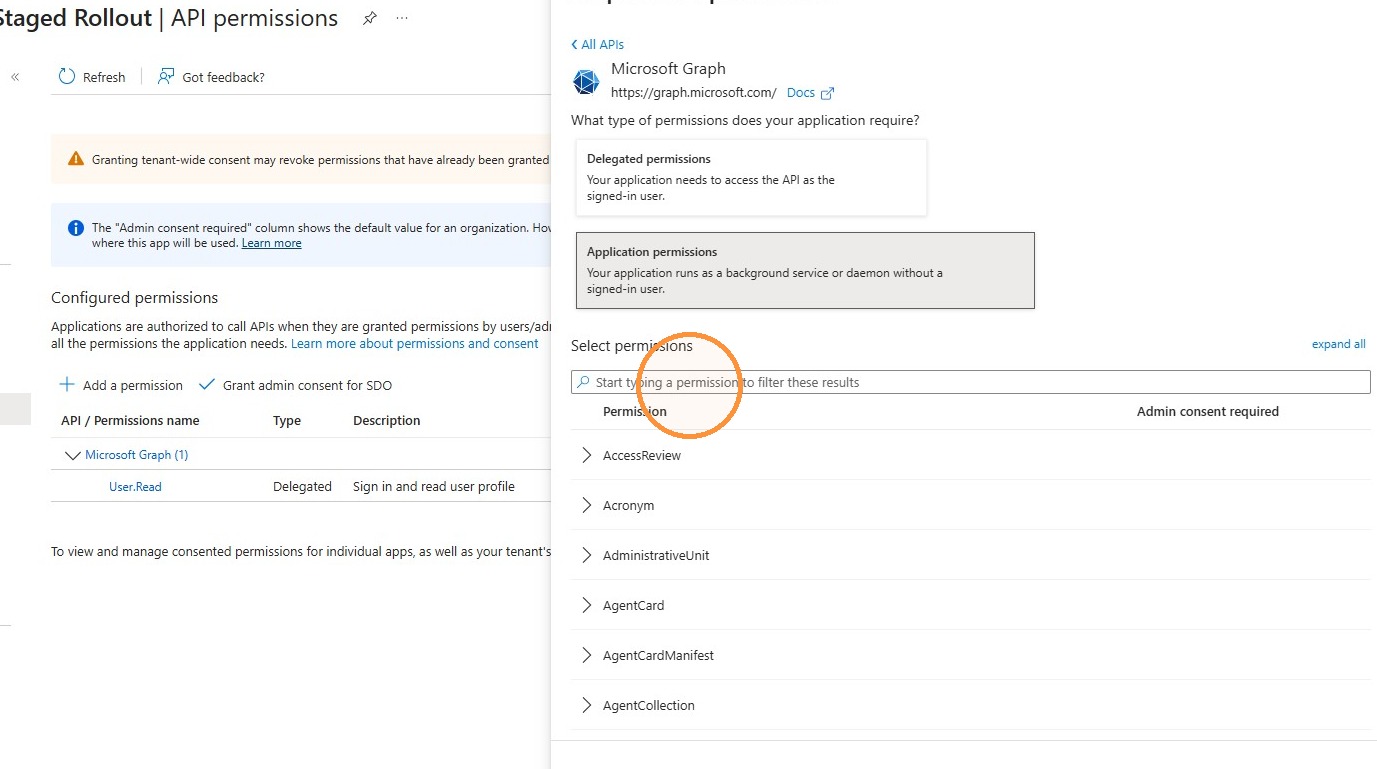
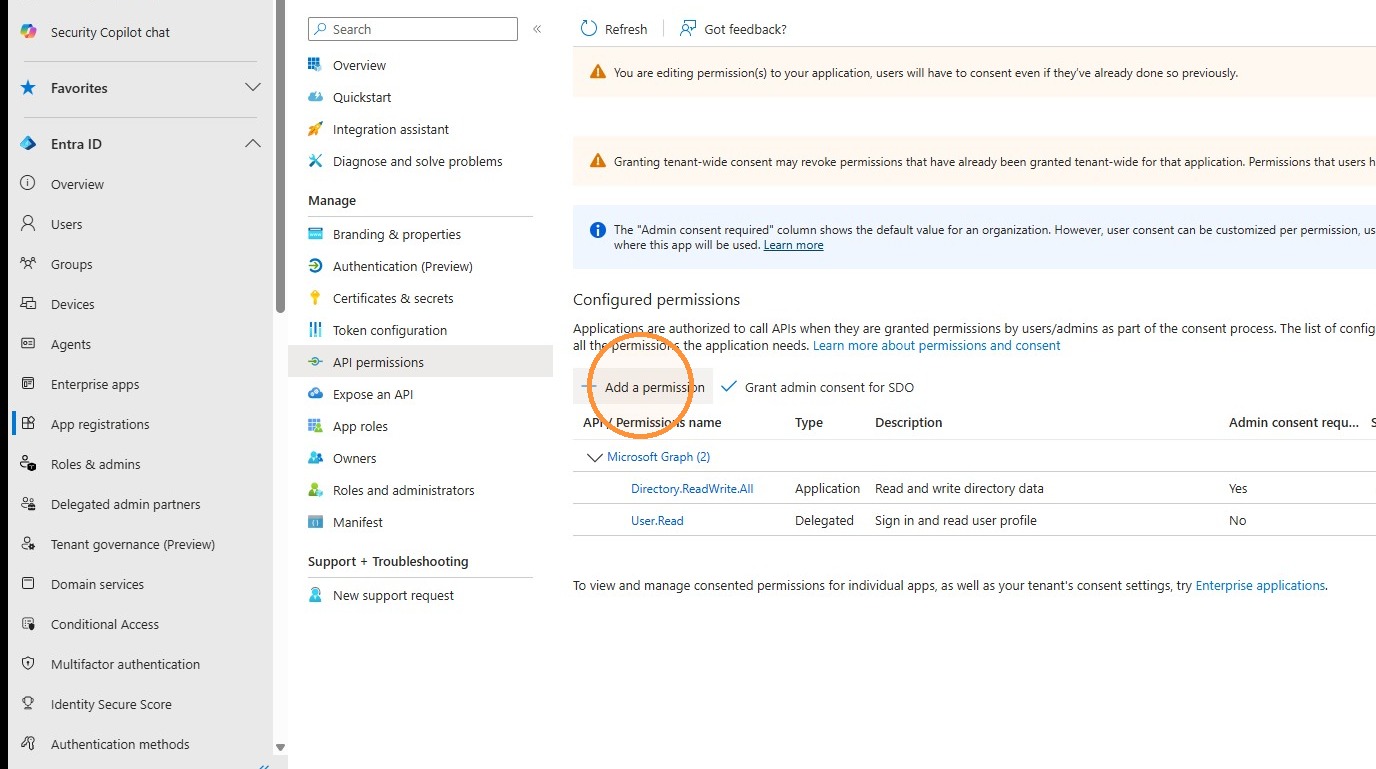
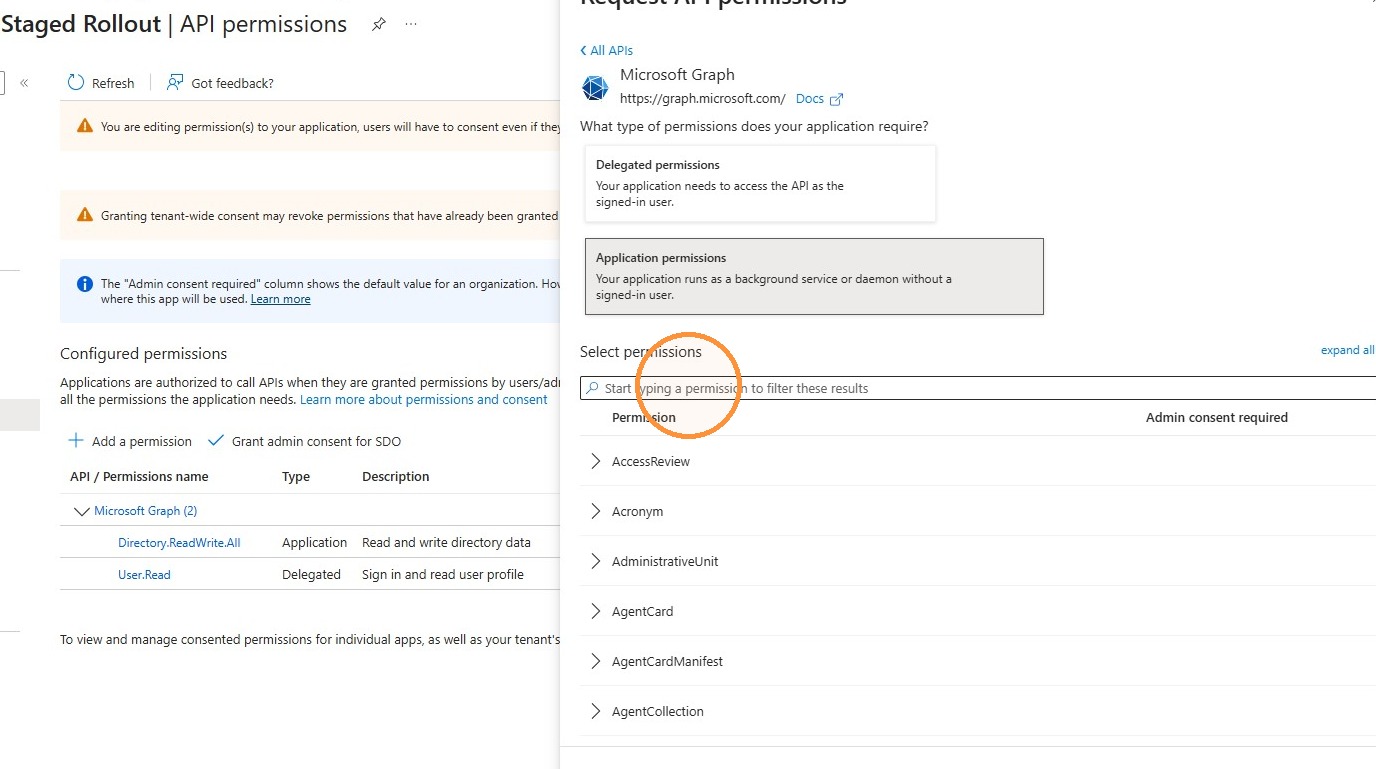
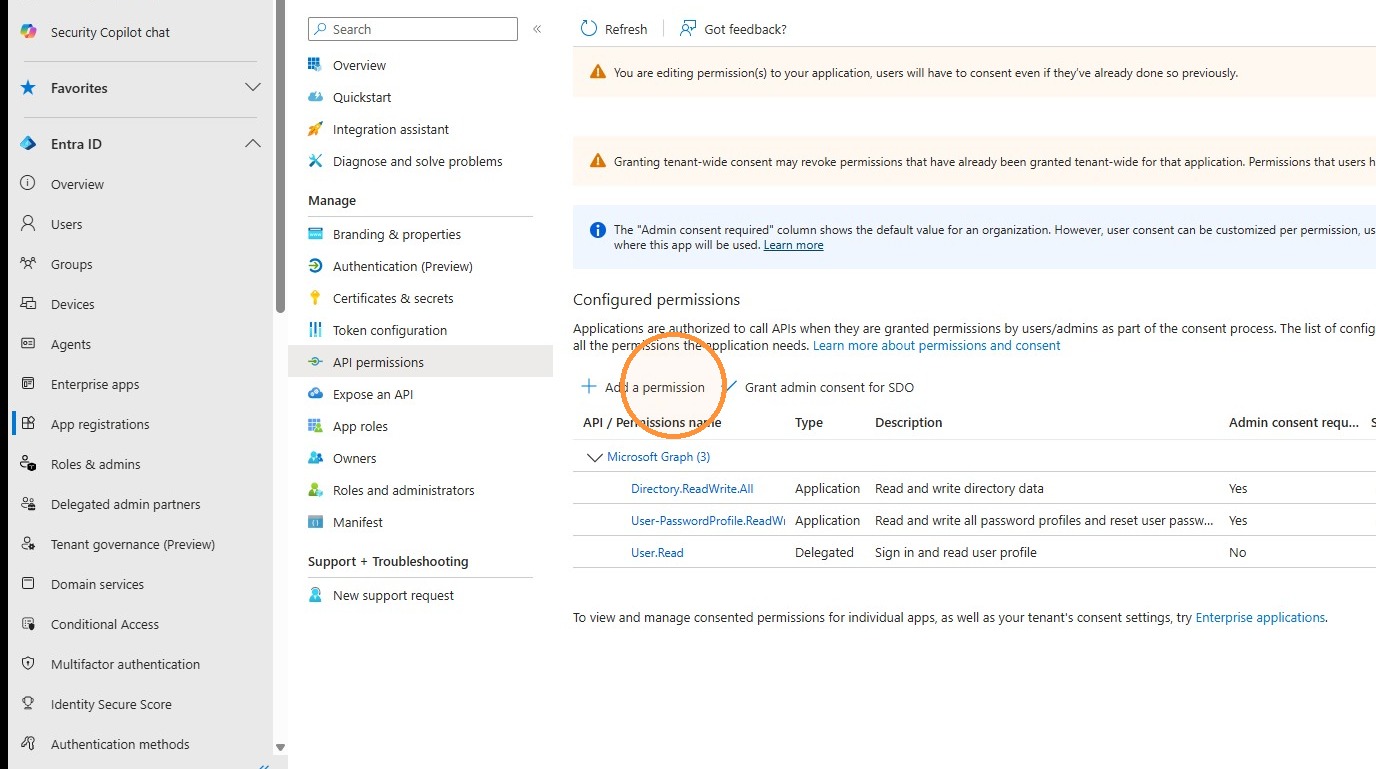
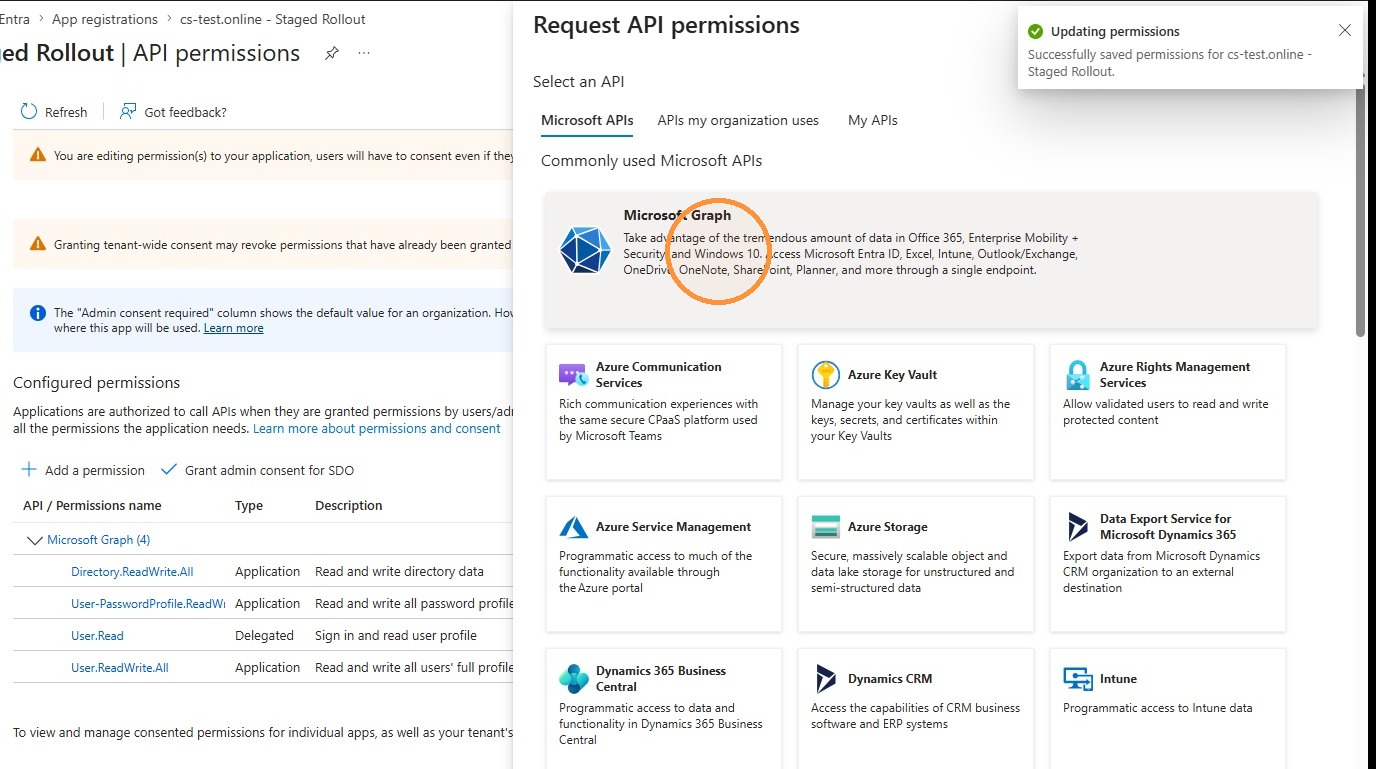
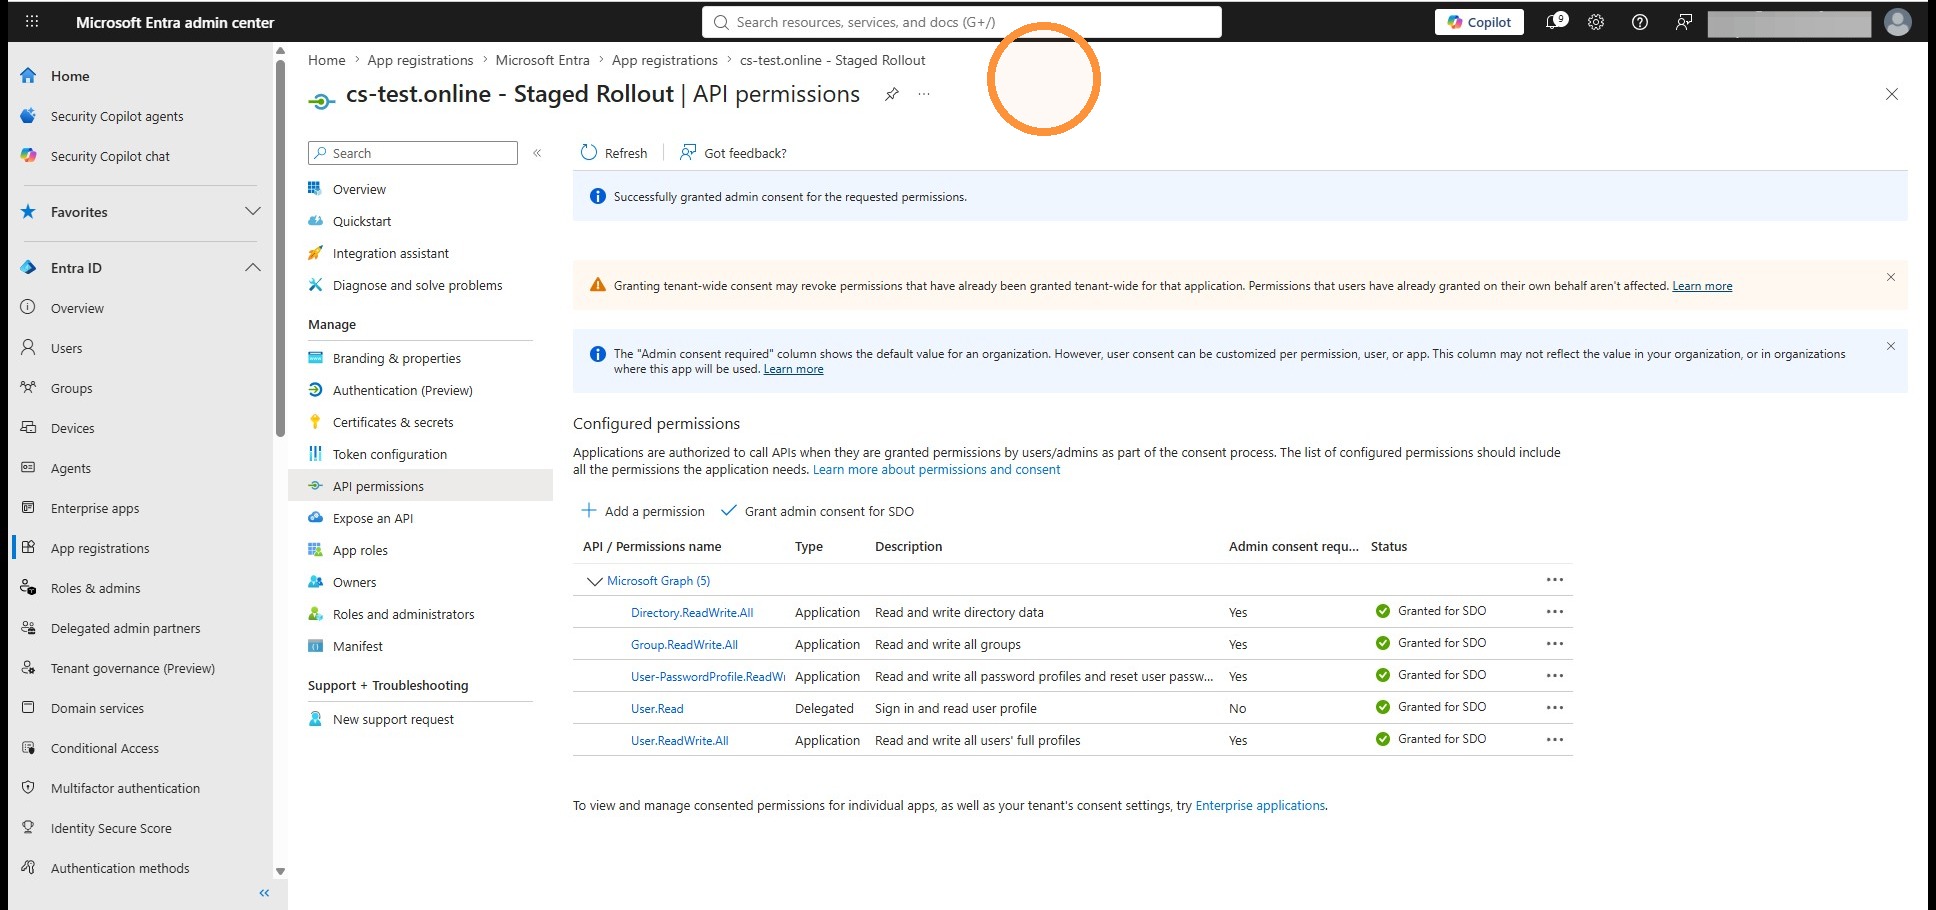
Click Add a permission.
17
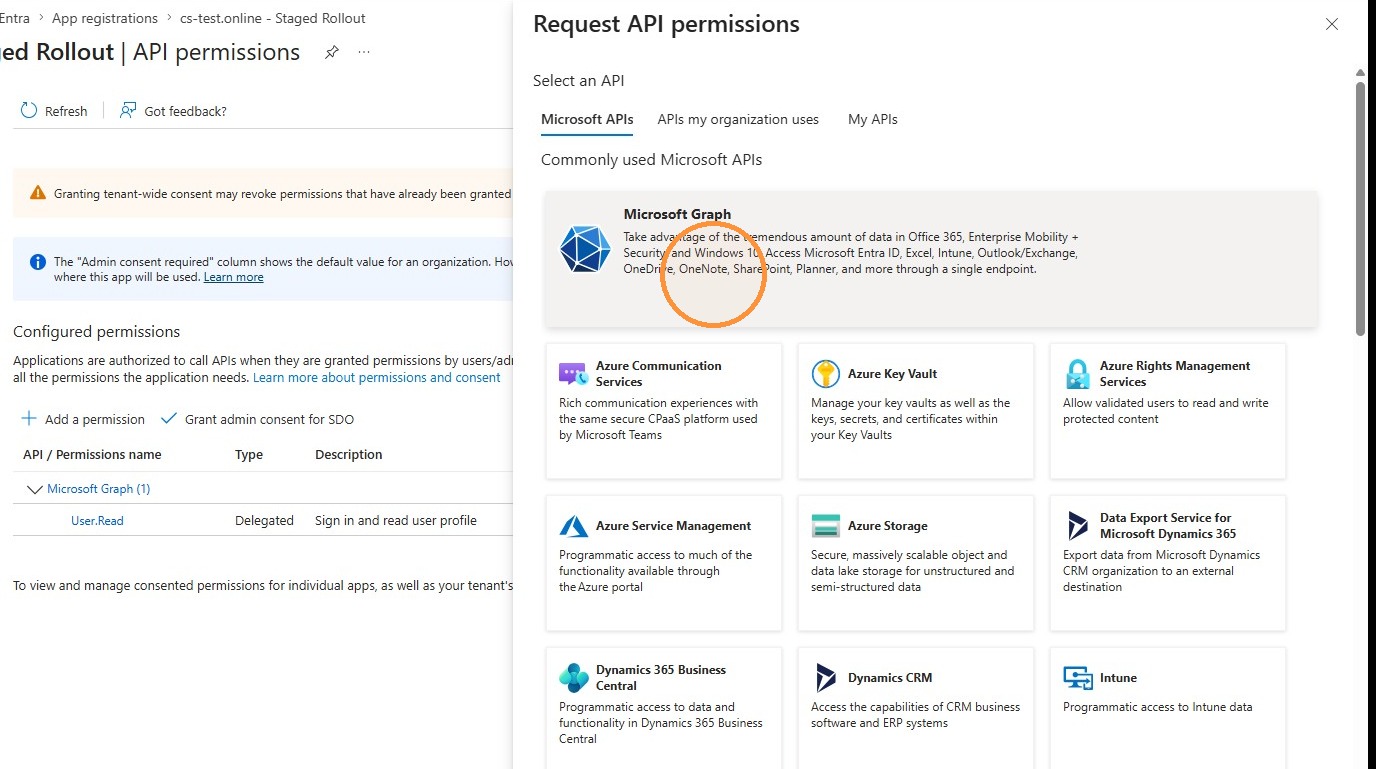
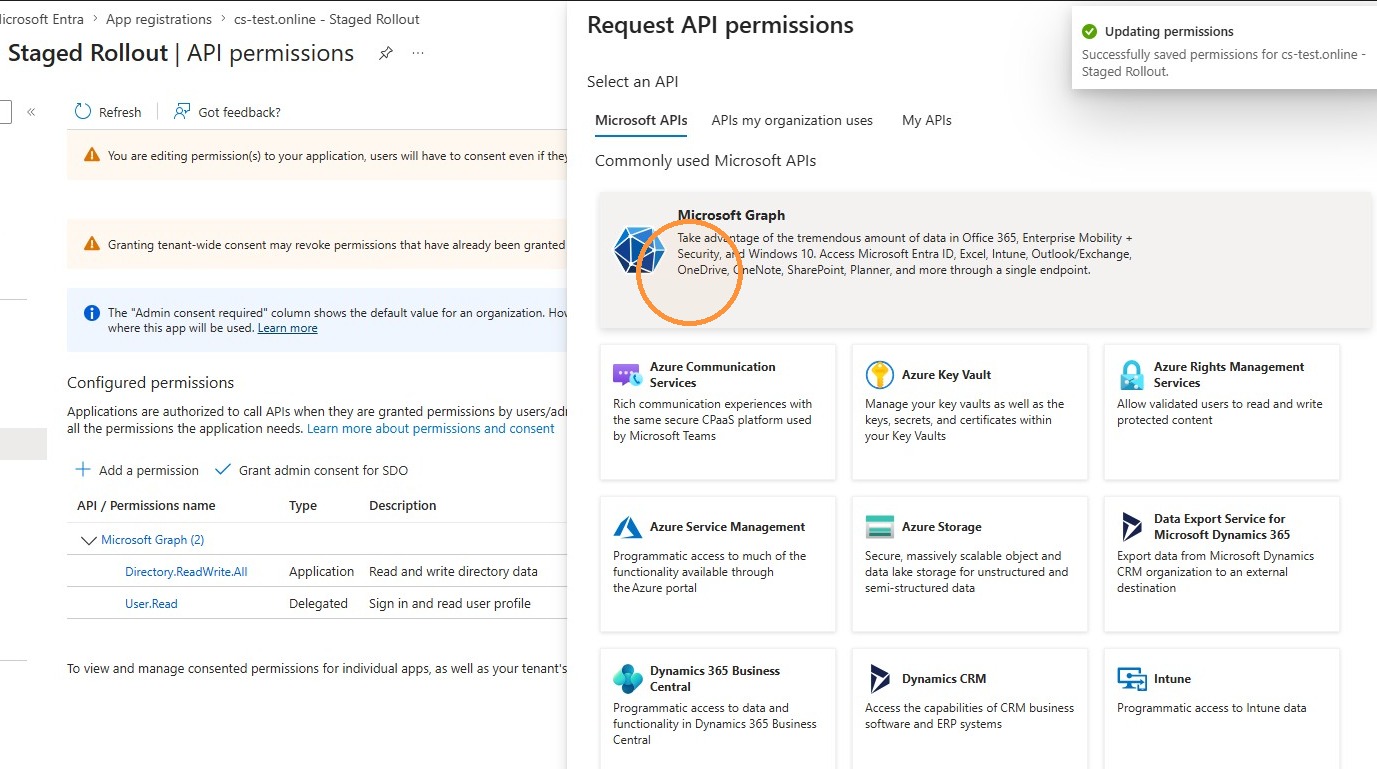
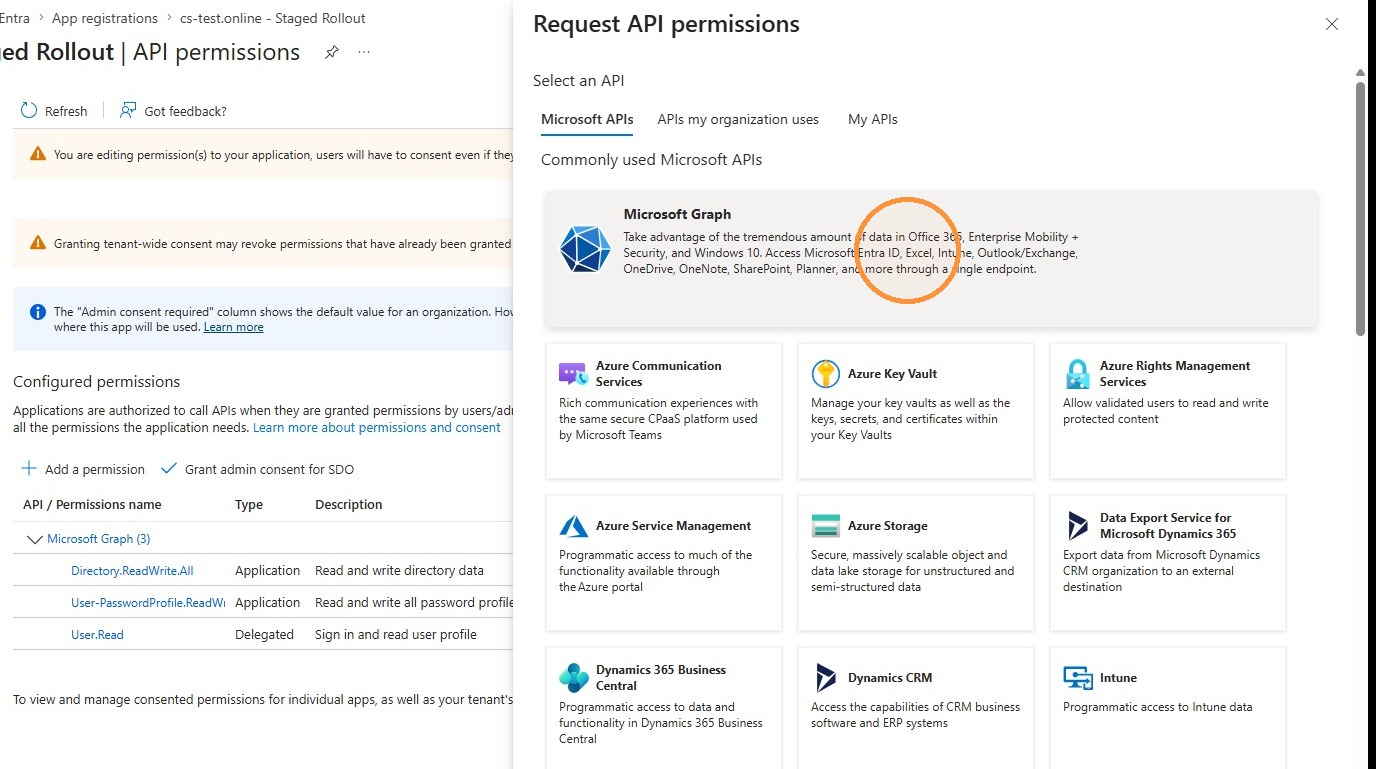
Select Microsoft Graph.
18
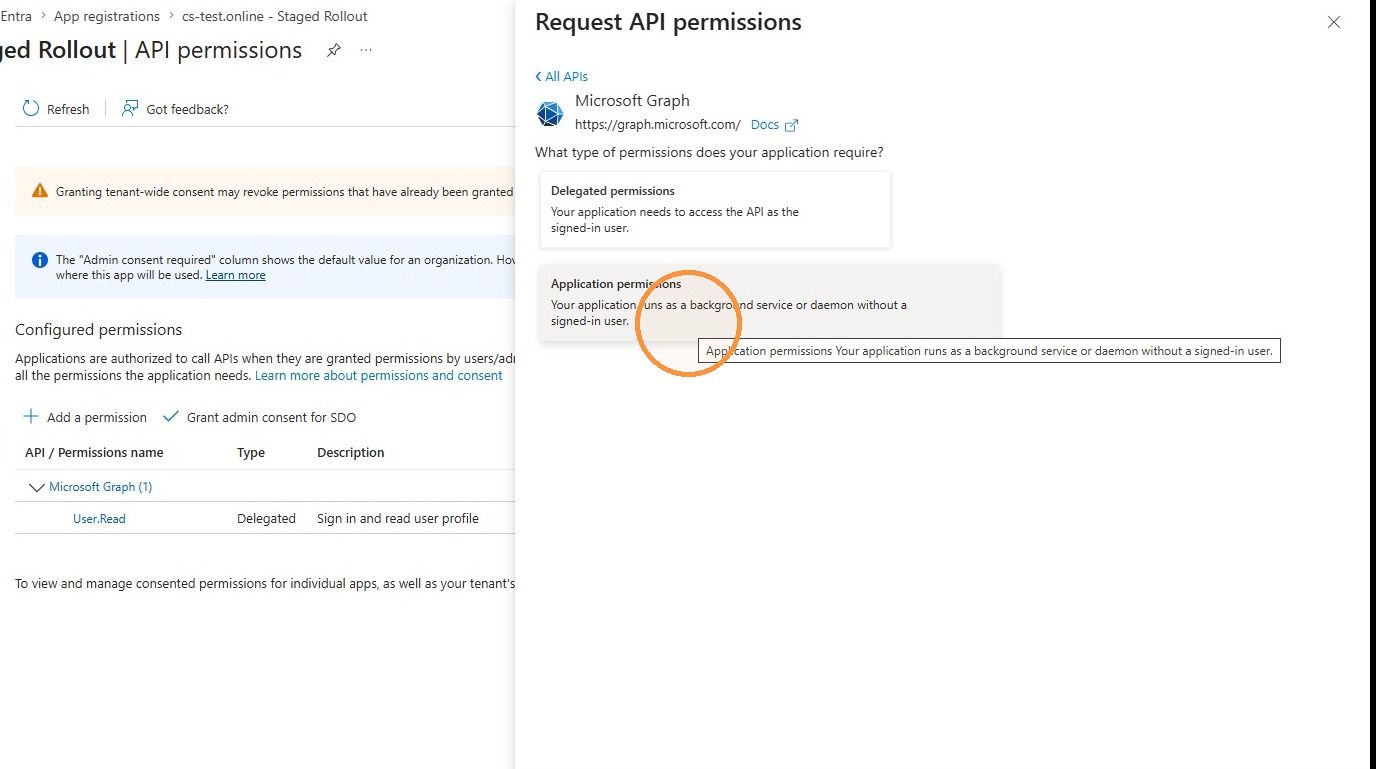
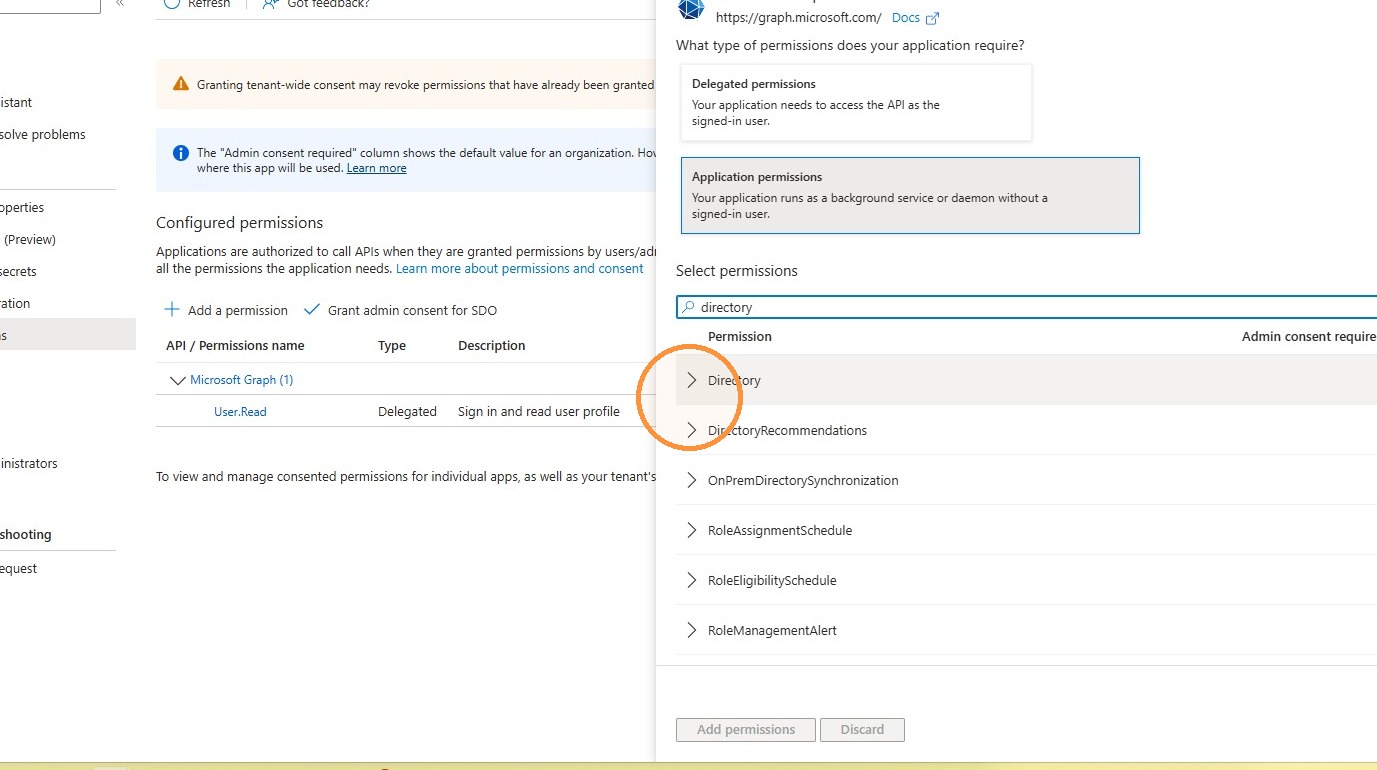
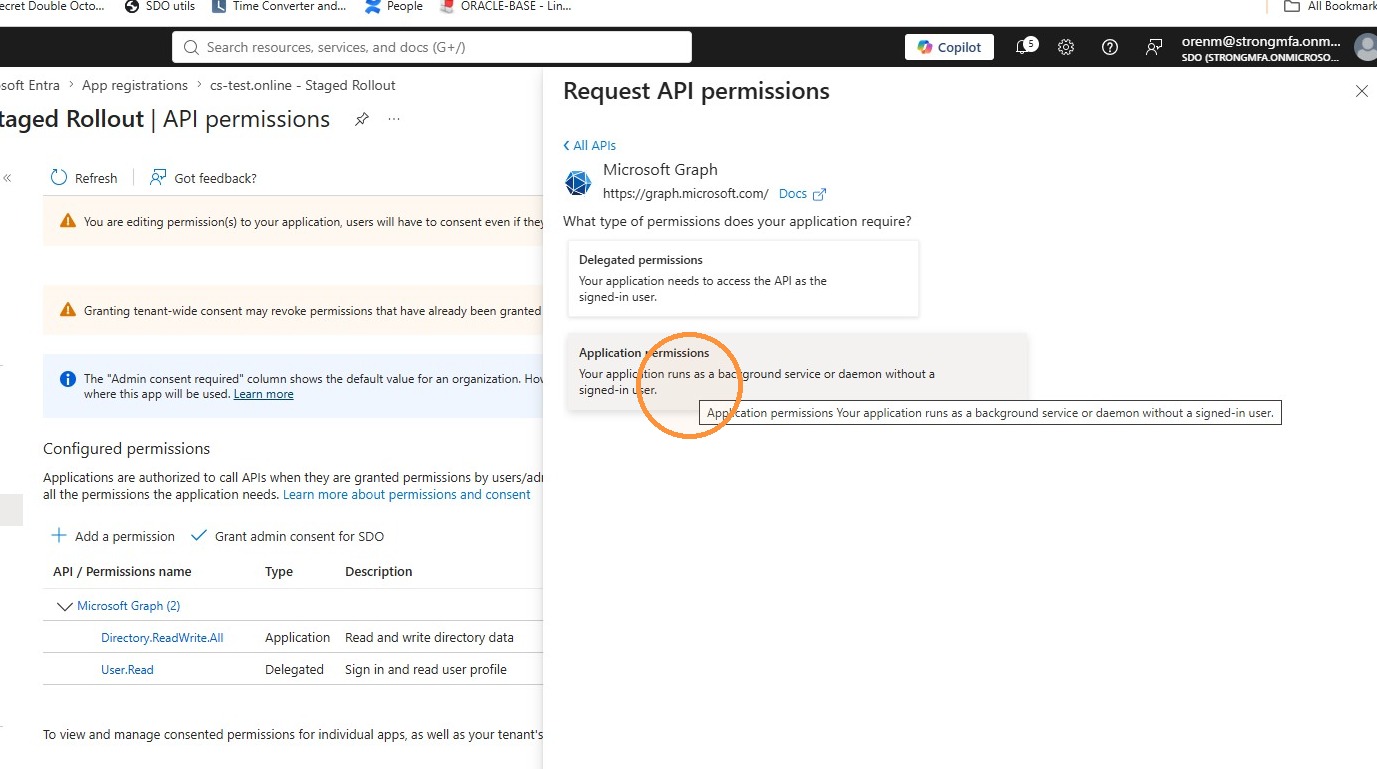
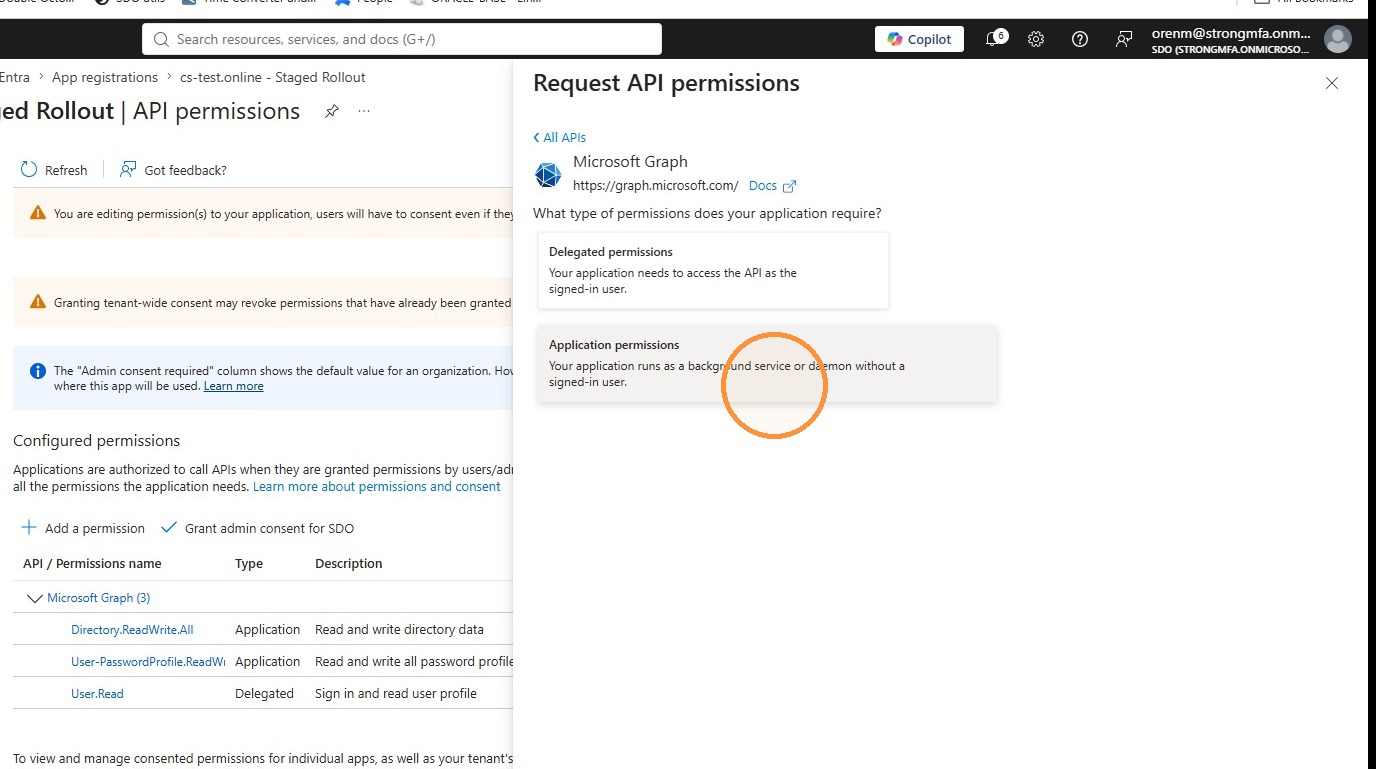
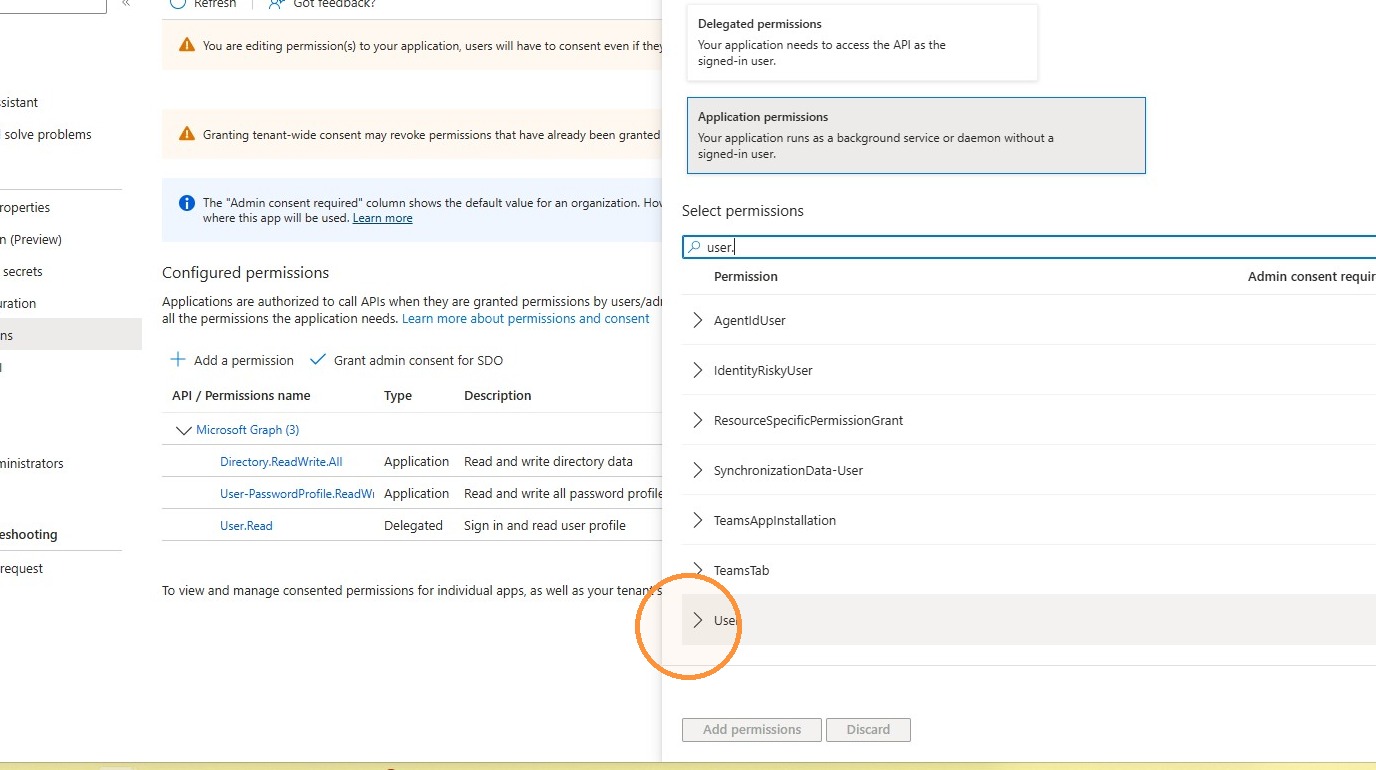
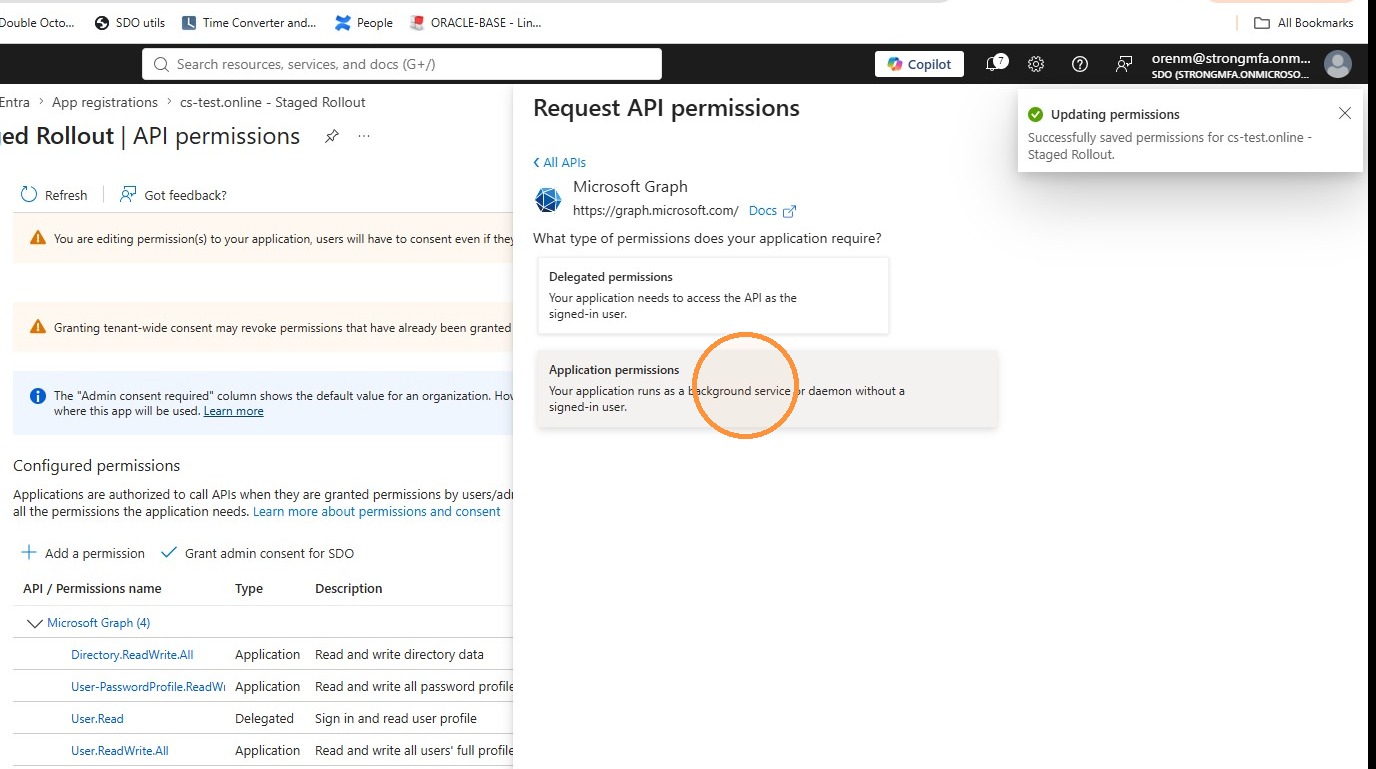
Select Application permissions.
19
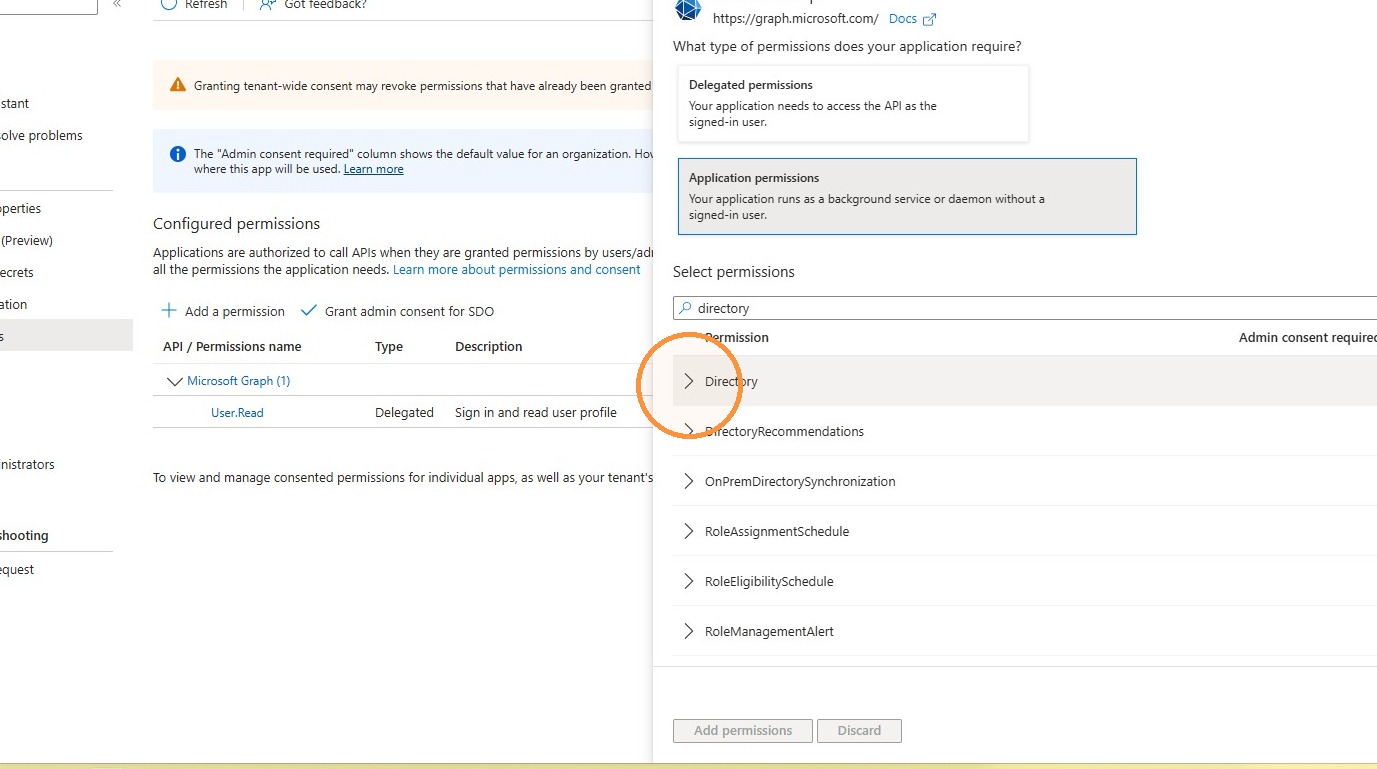
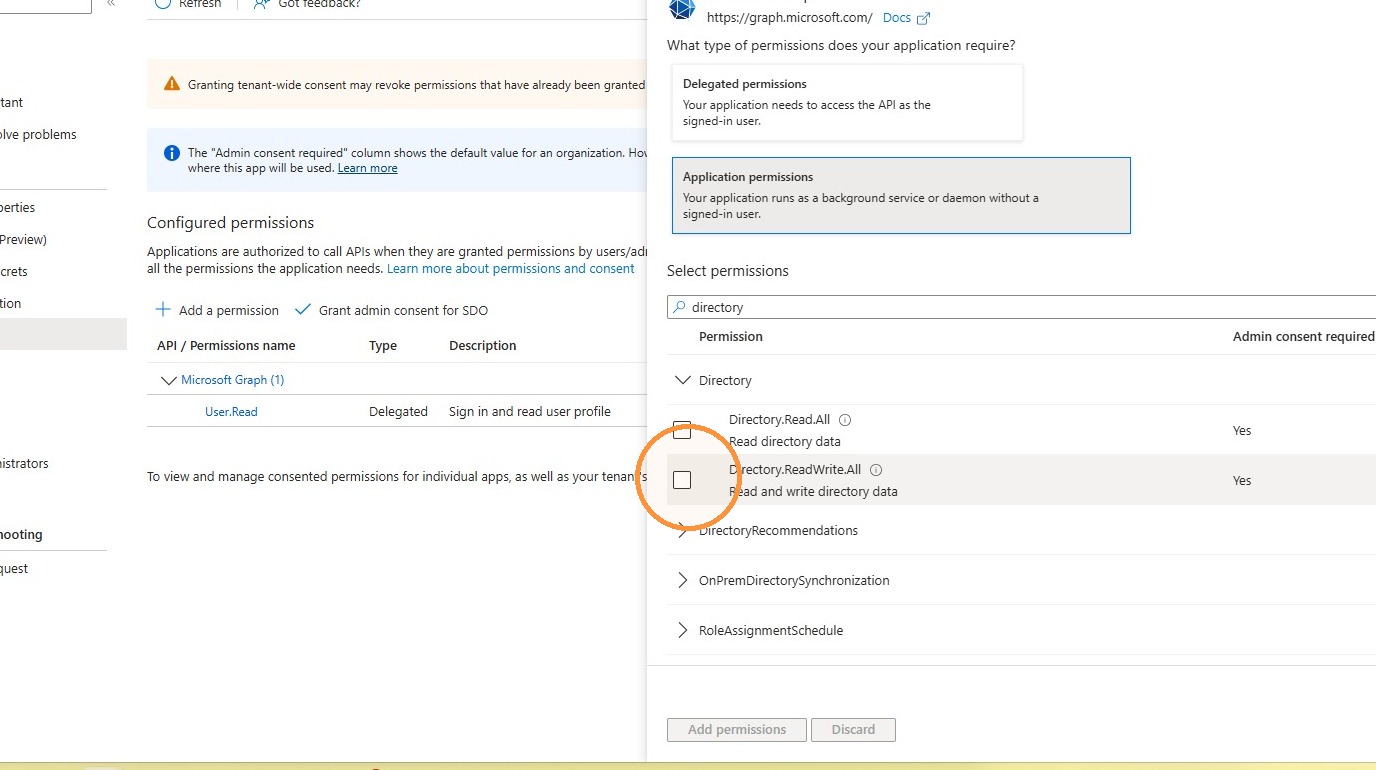
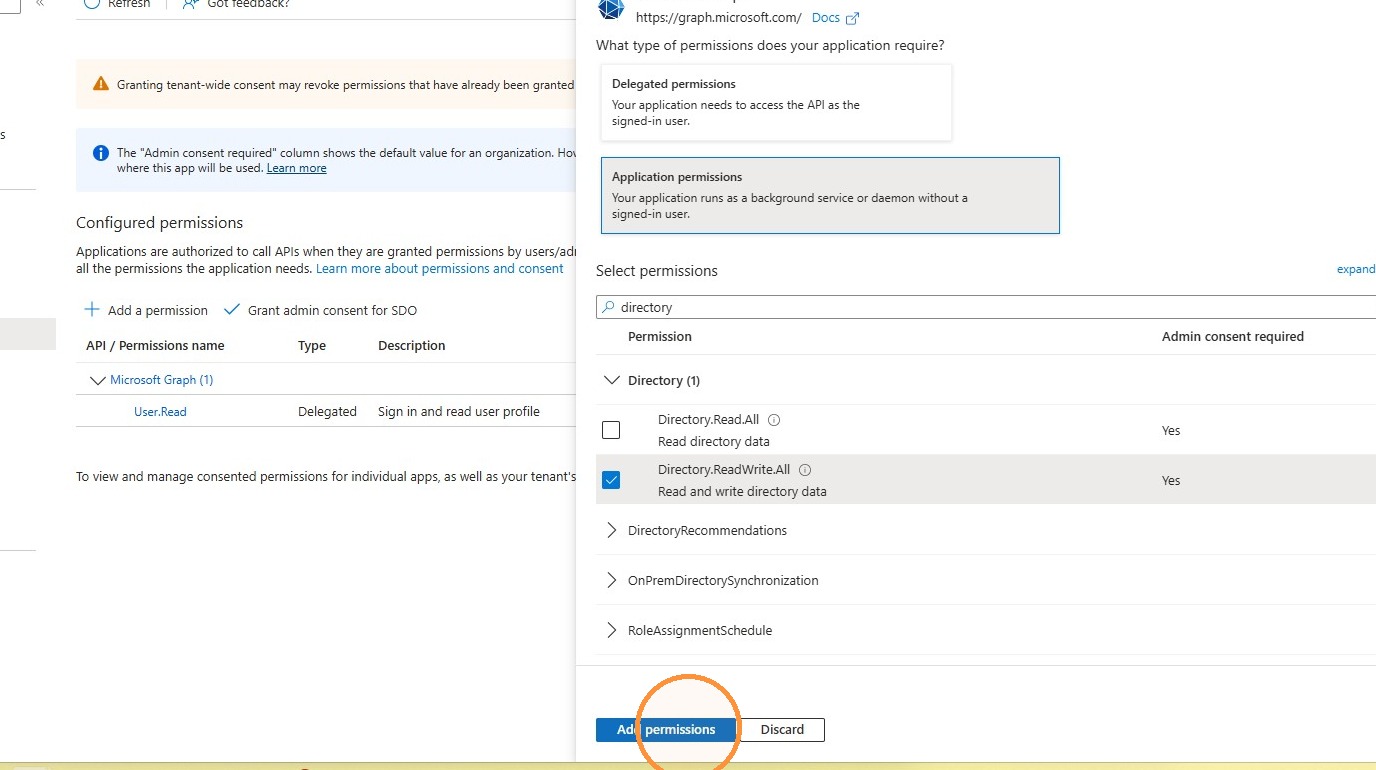
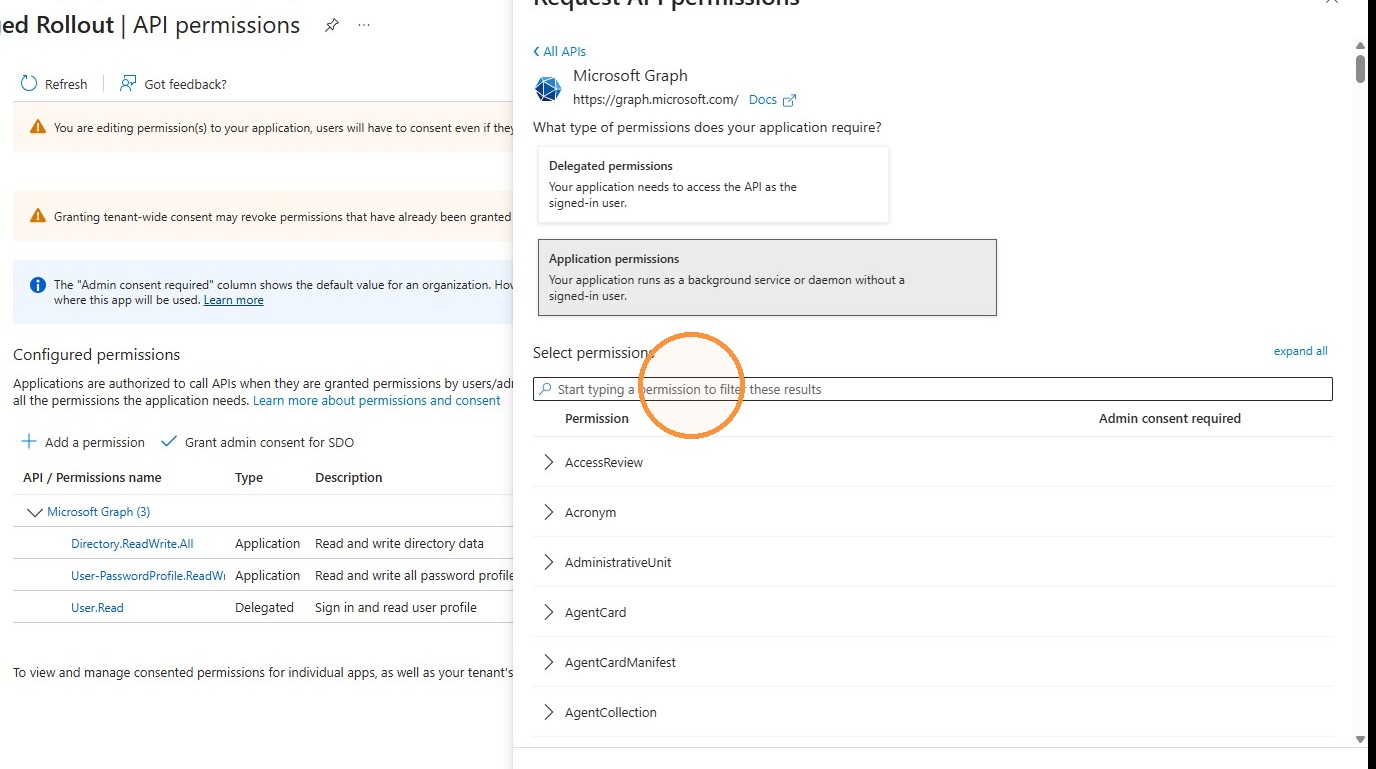
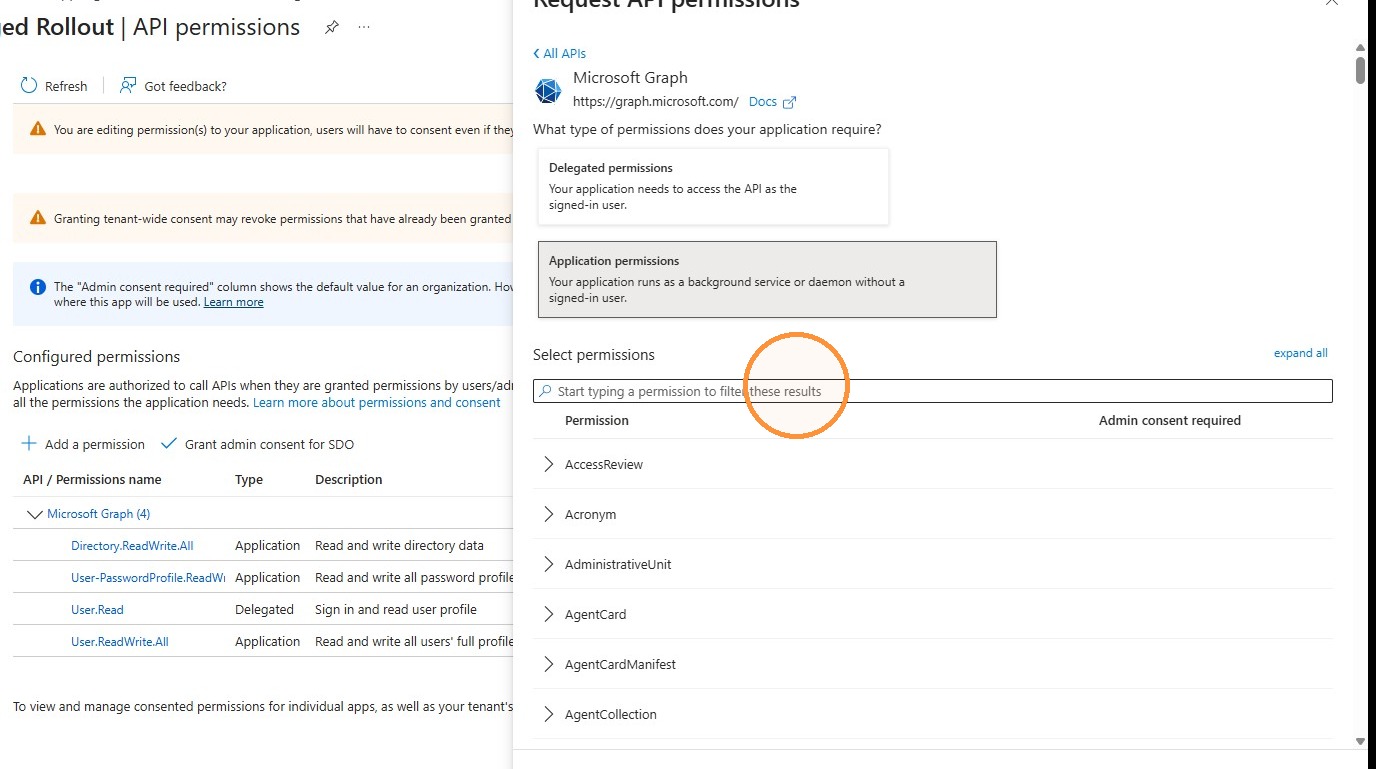
Search for and add the Directory.ReadWrite.All application permission.
20
Click Add a permission.
21
Select Microsoft Graph.
22
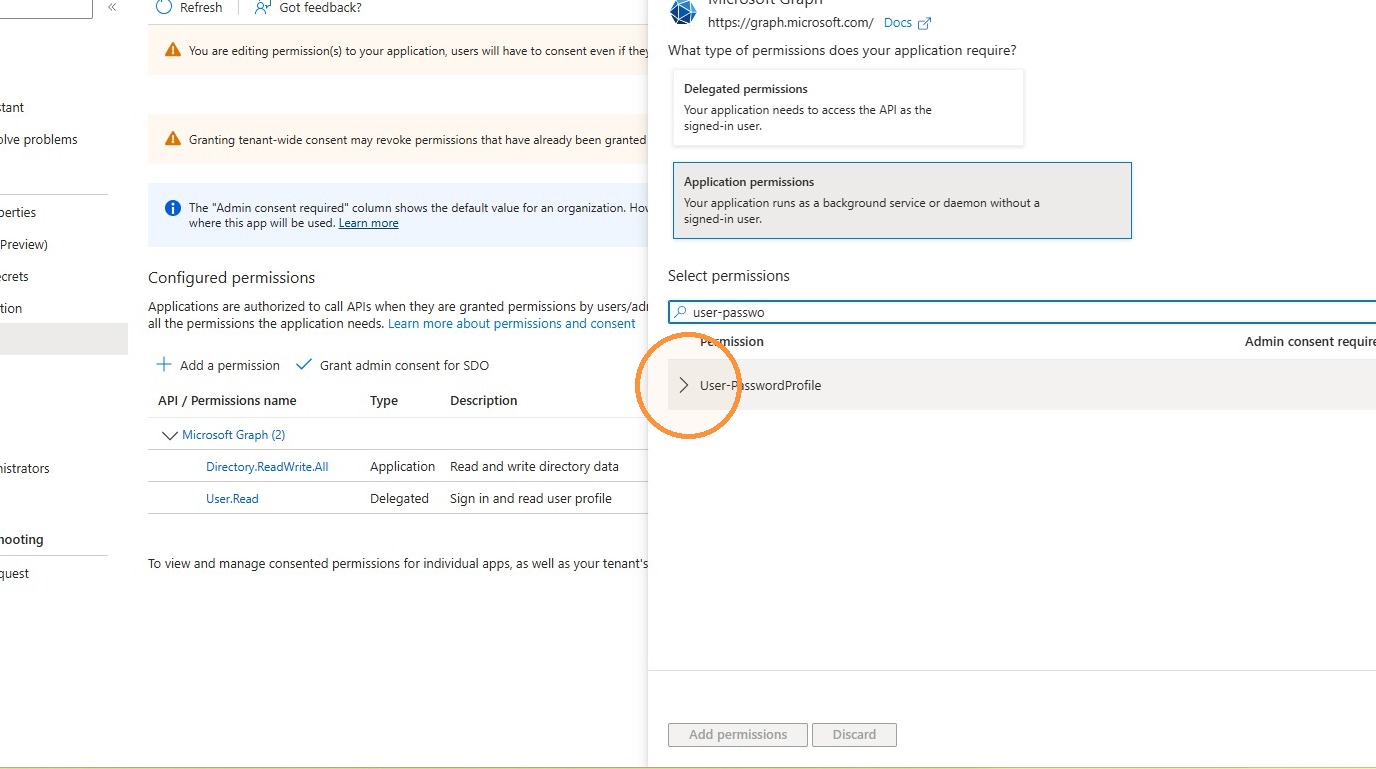
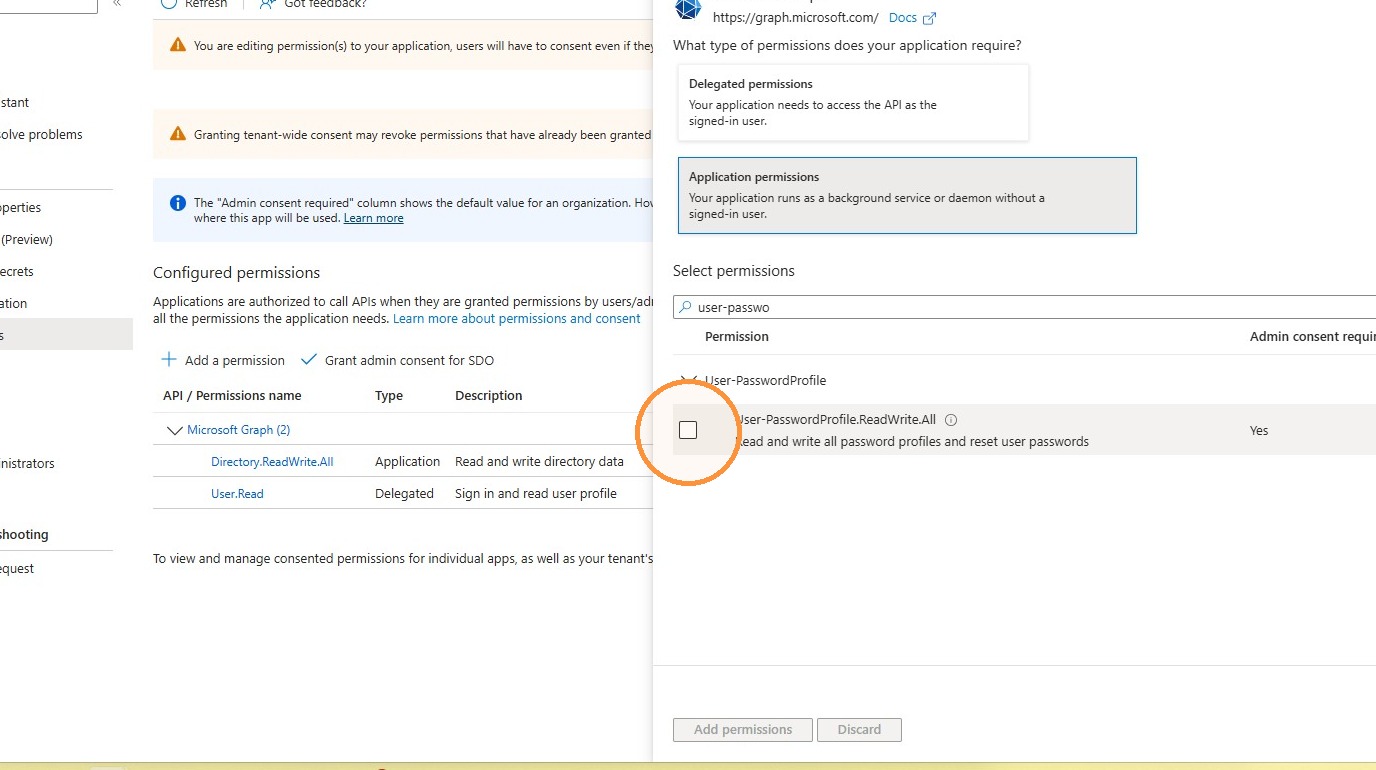
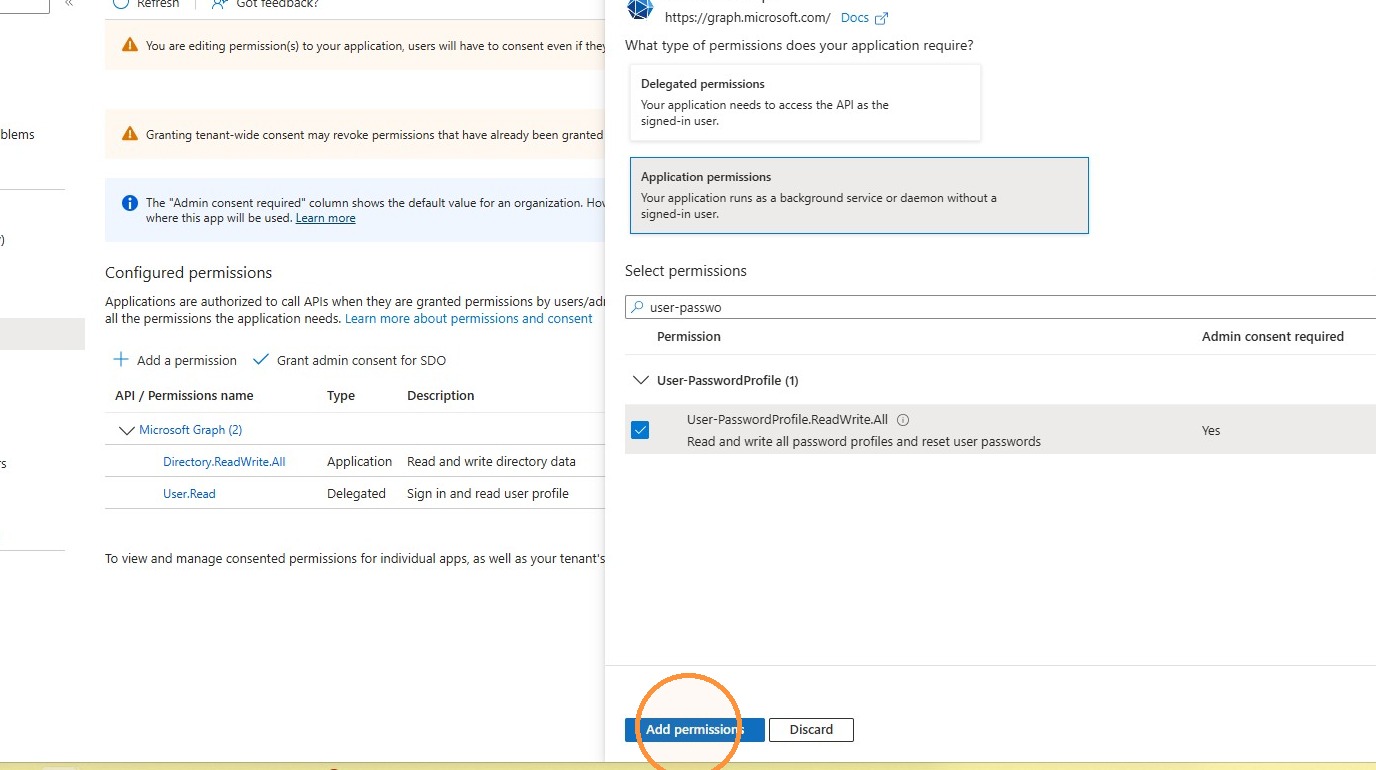
Search for and add the User-PasswordProfile.ReadWrite.All application permission.
23
Click Add a permission.
24
Select Microsoft Graph.
25
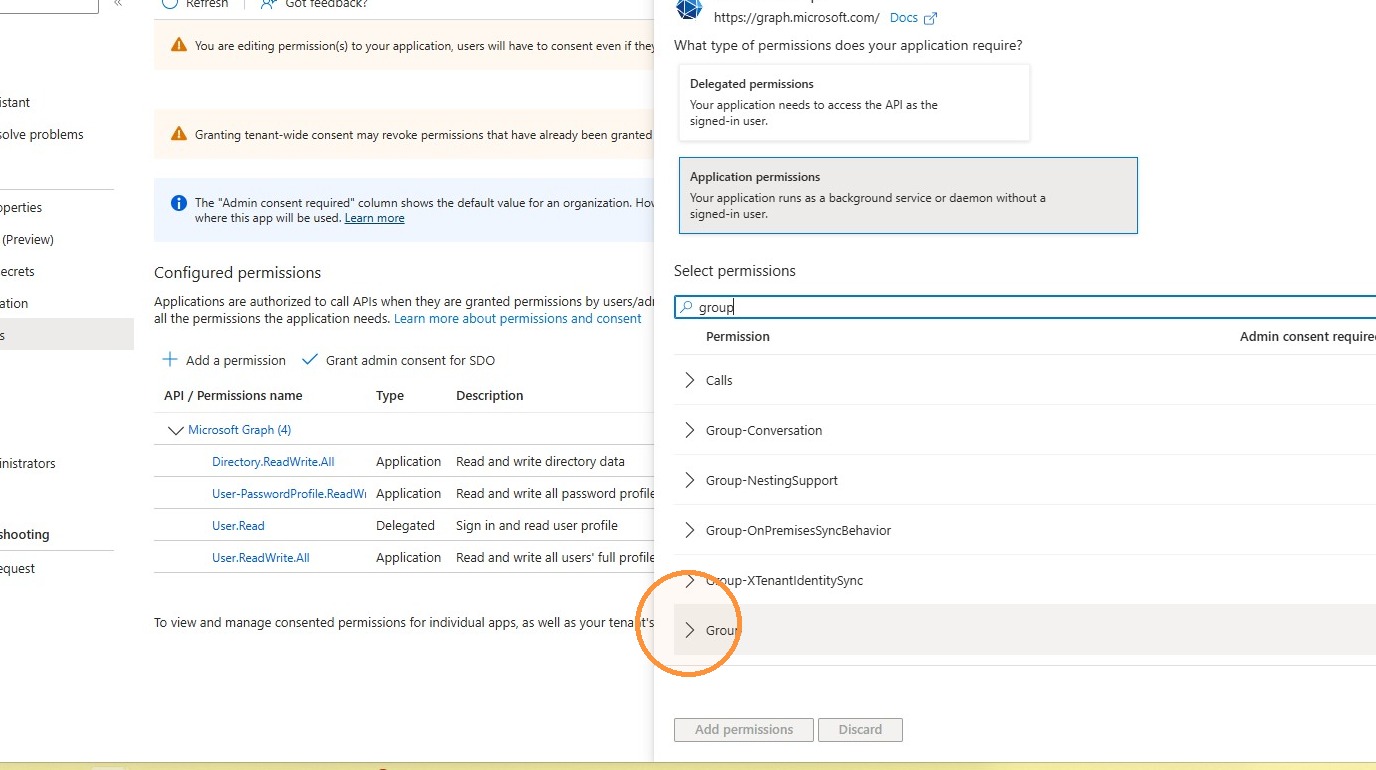
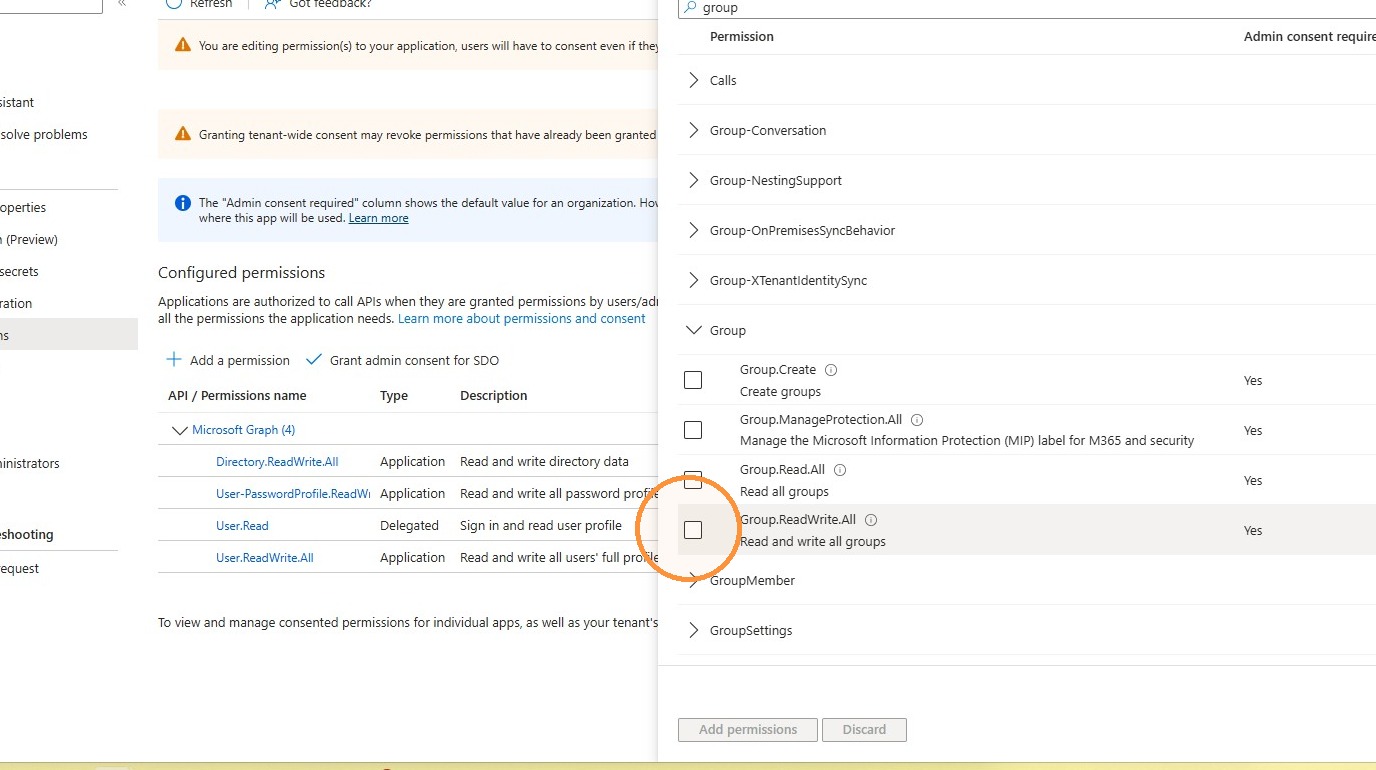
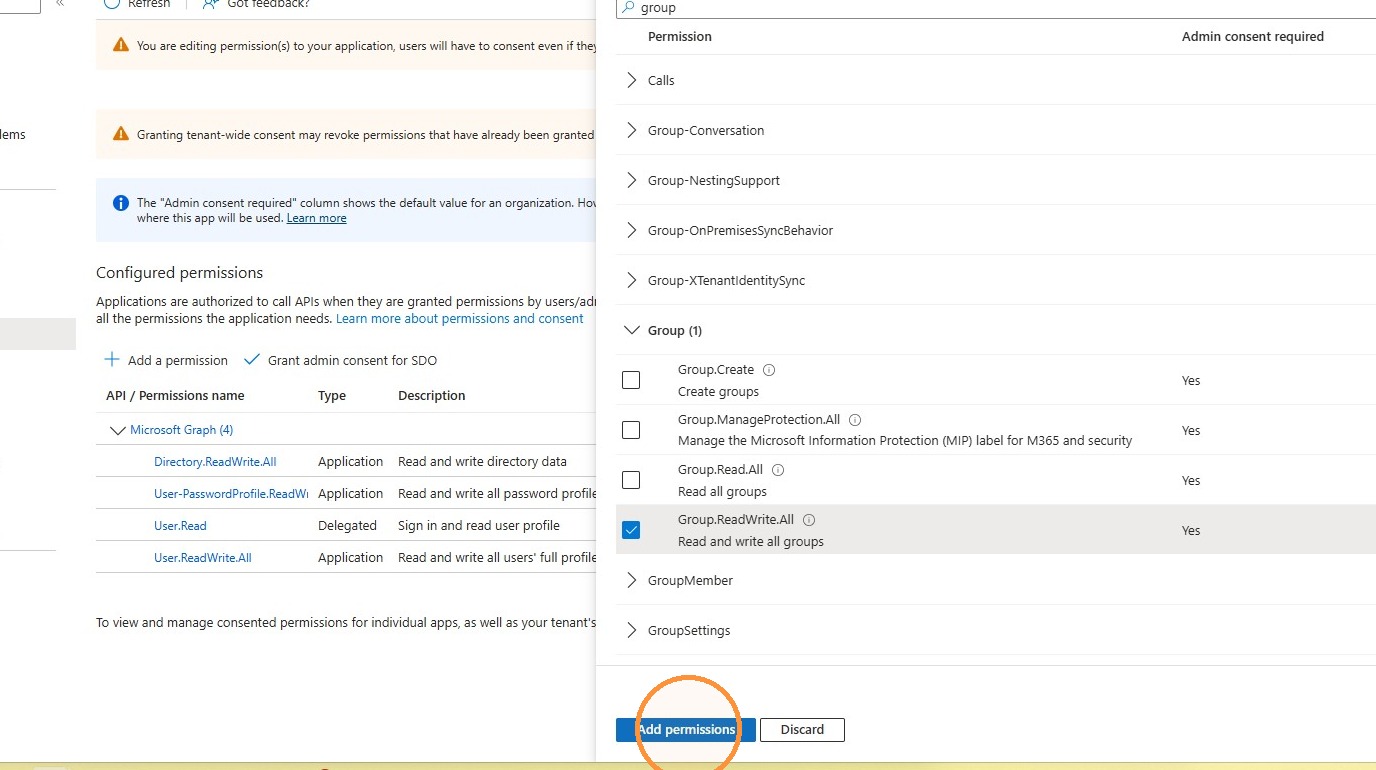
Search for and add the Group.ReadWrite.All application permission.
26
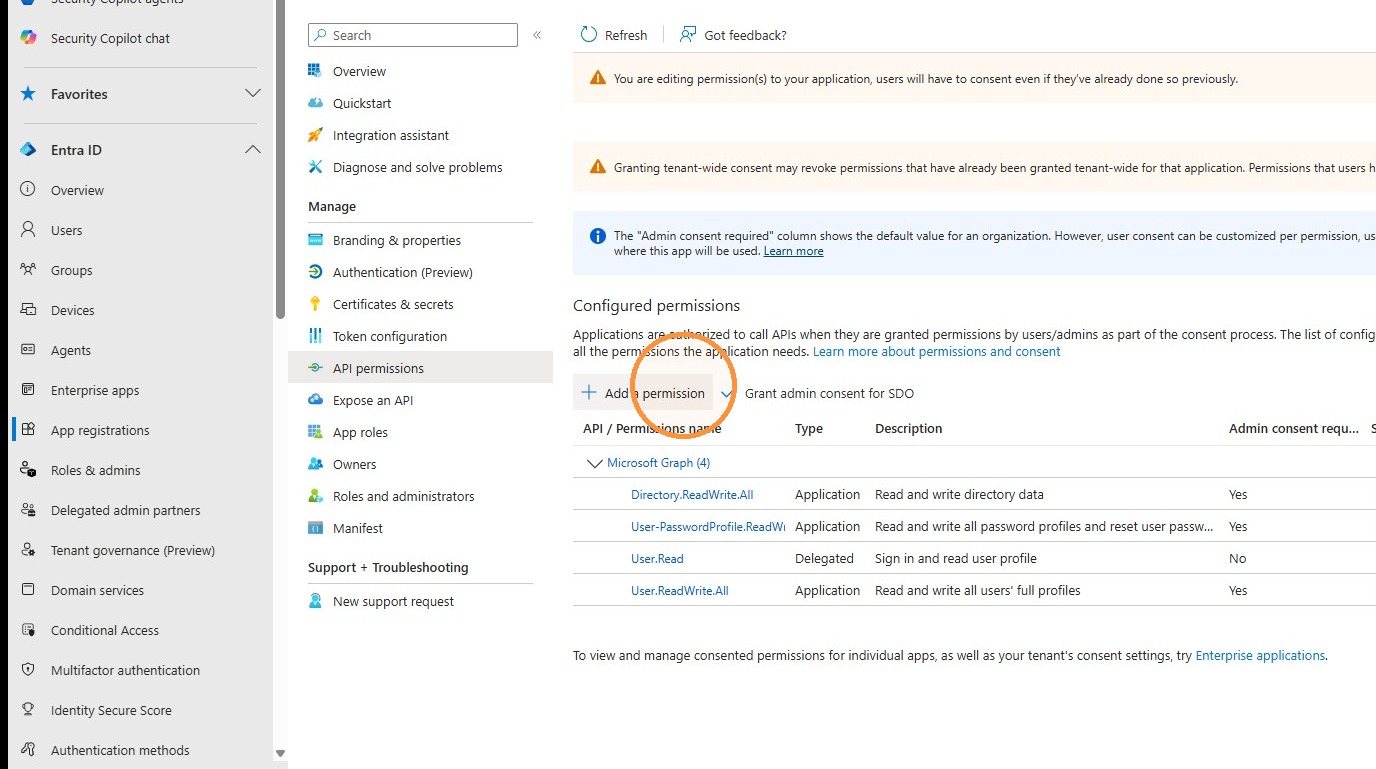
Click Add a permission.
27
Select Microsoft Graph.
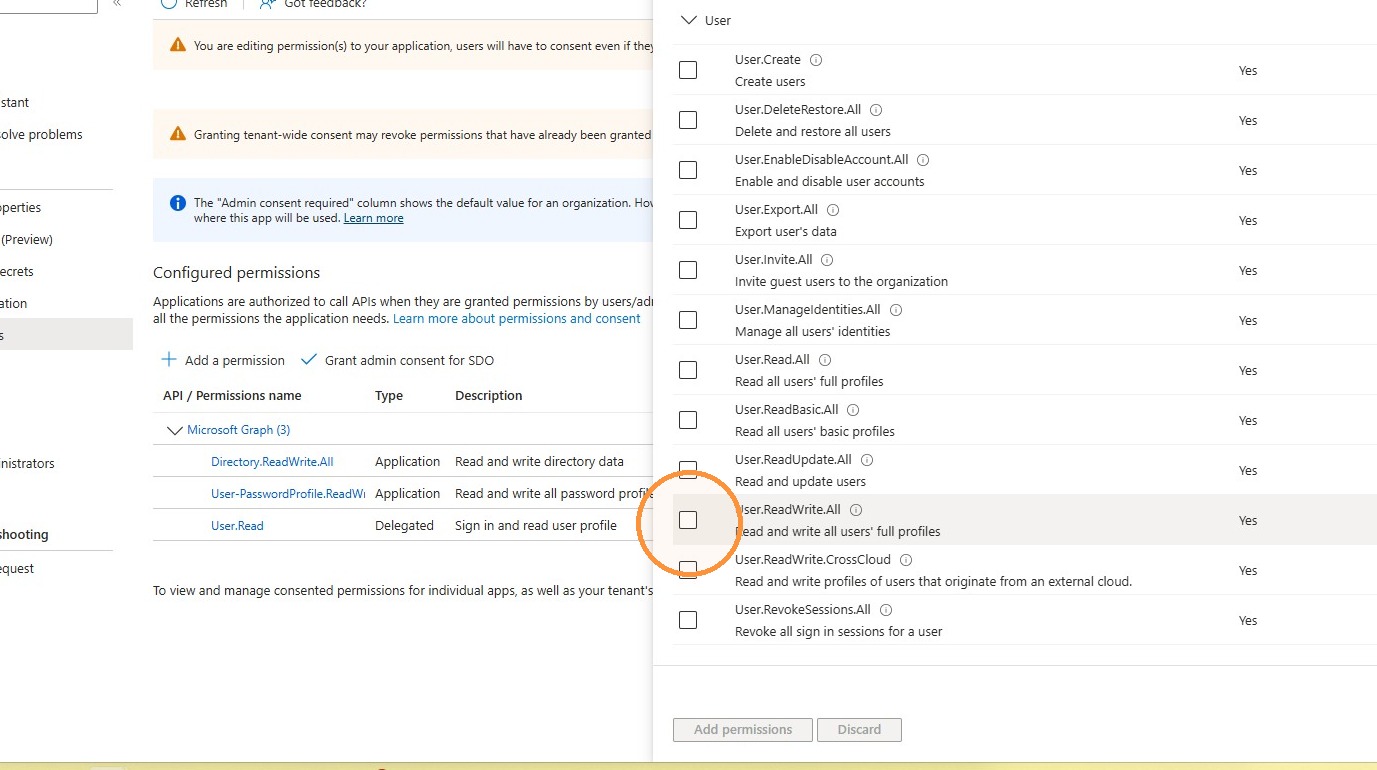
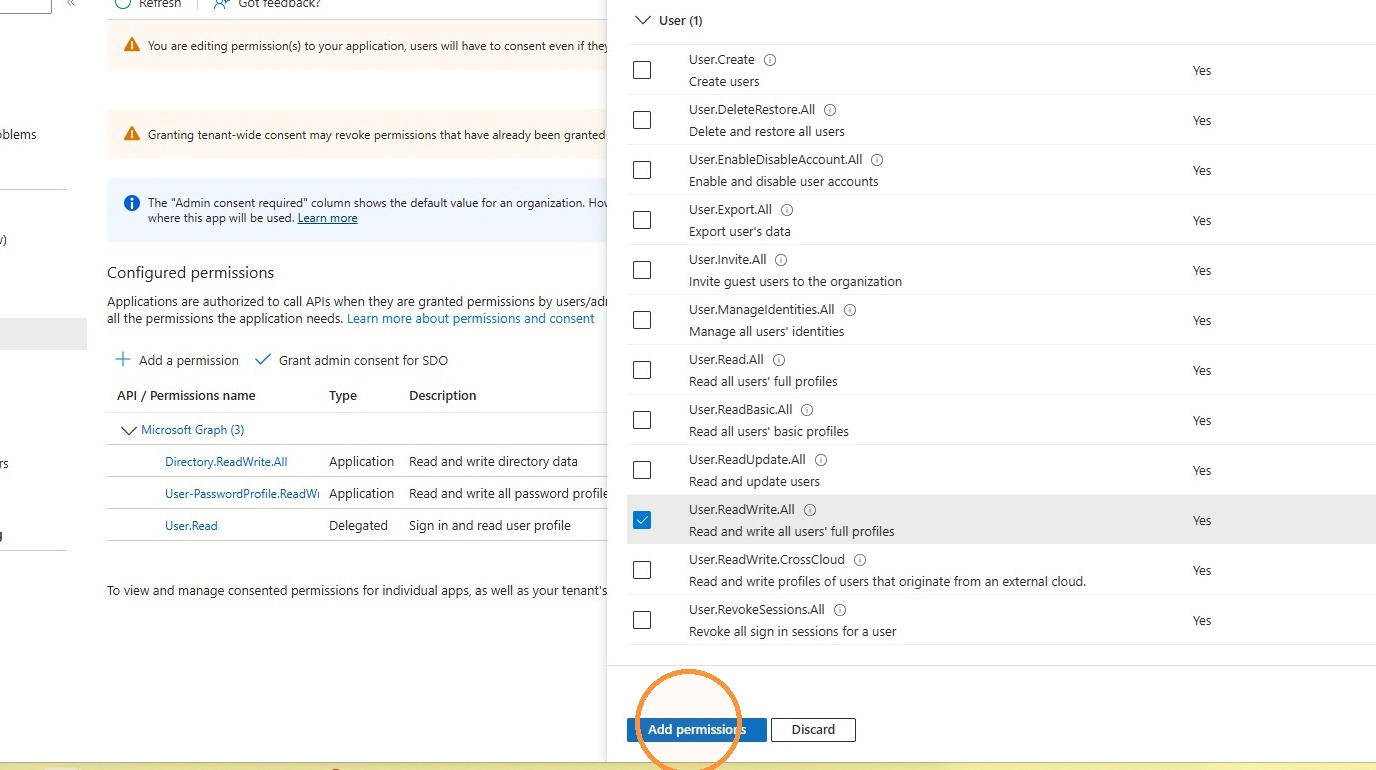
28
Search for and add the User.ReadWrite.All application permission.
29
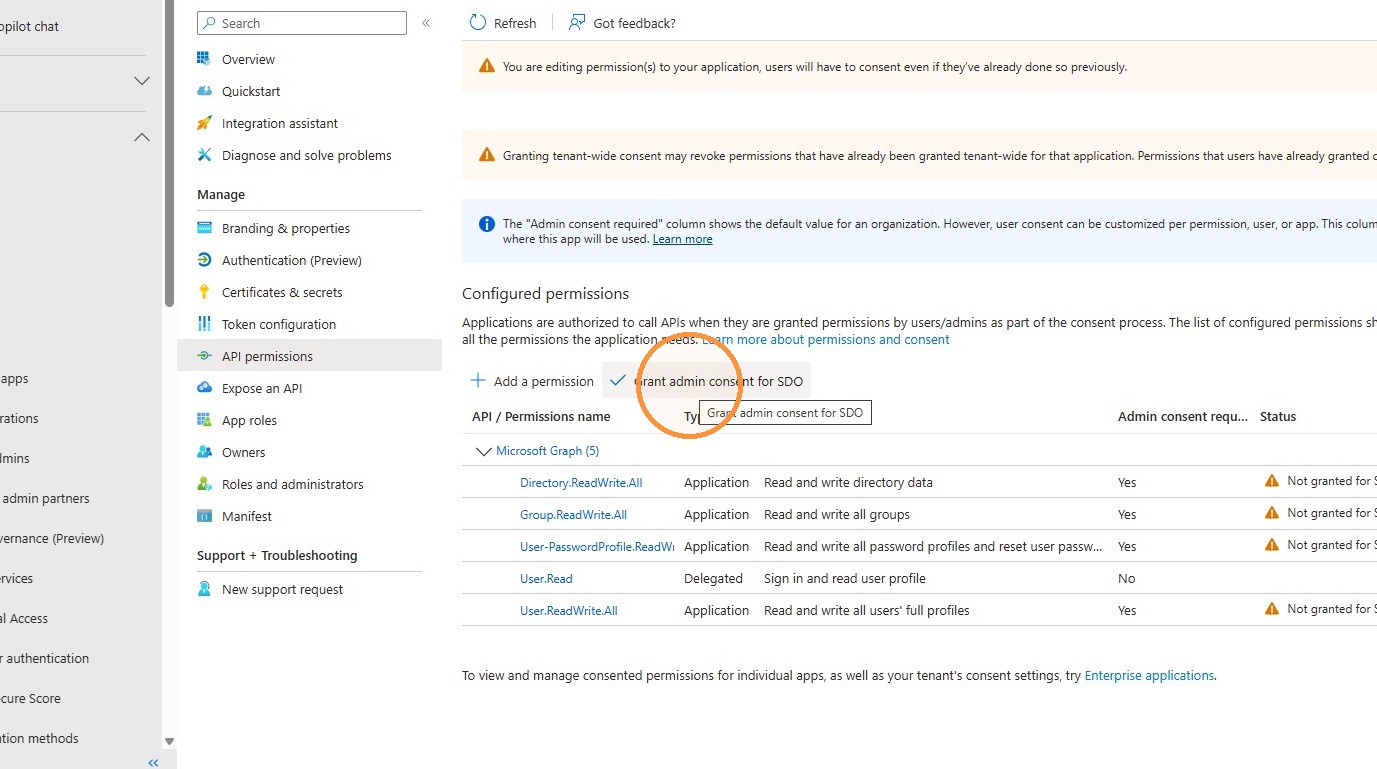
Click Grant admin consent for SDO.
30
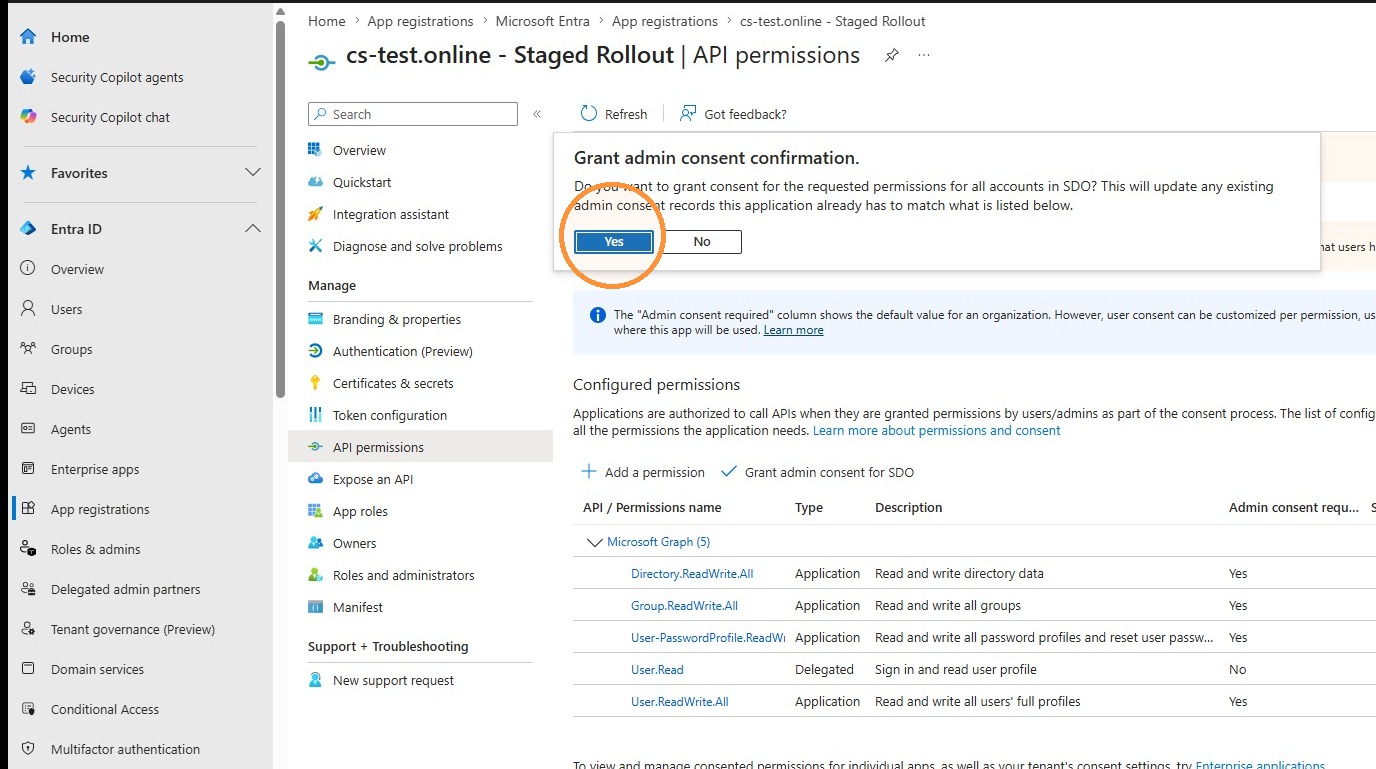
Click Yes to confirm admin consent.
Section 04
Entra Tenant Configuration
31
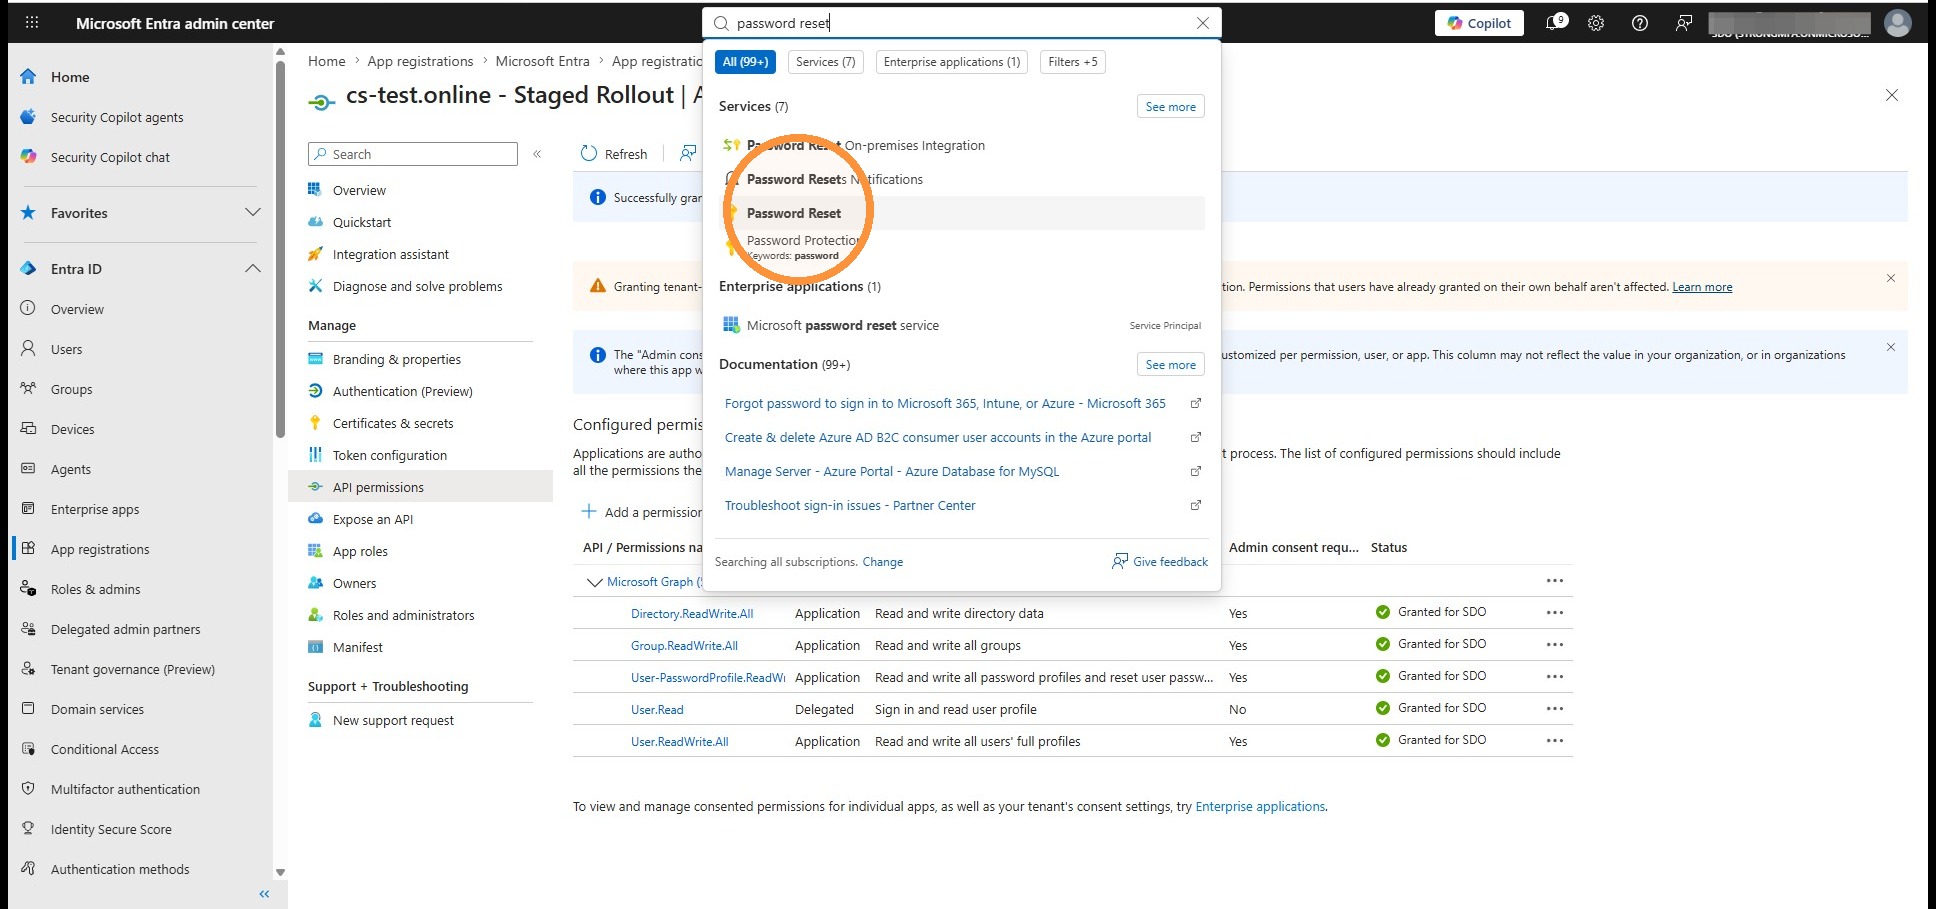
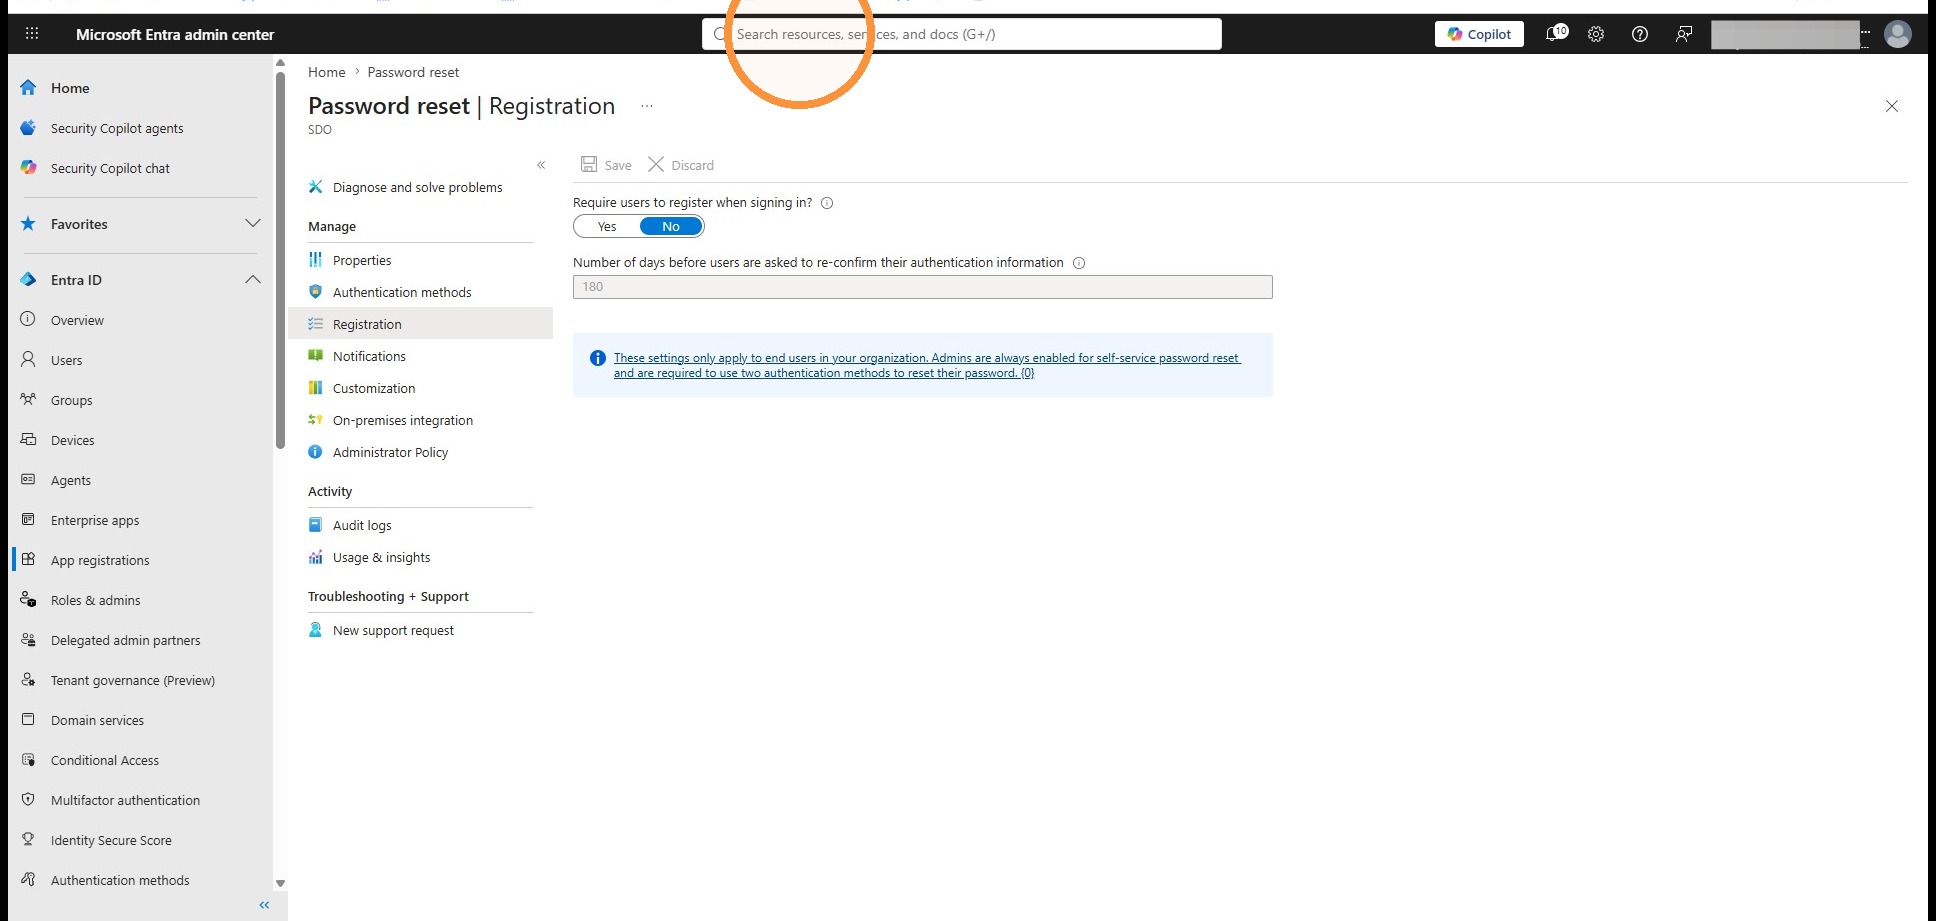
Use the Entra search bar to search for Password Reset.
32
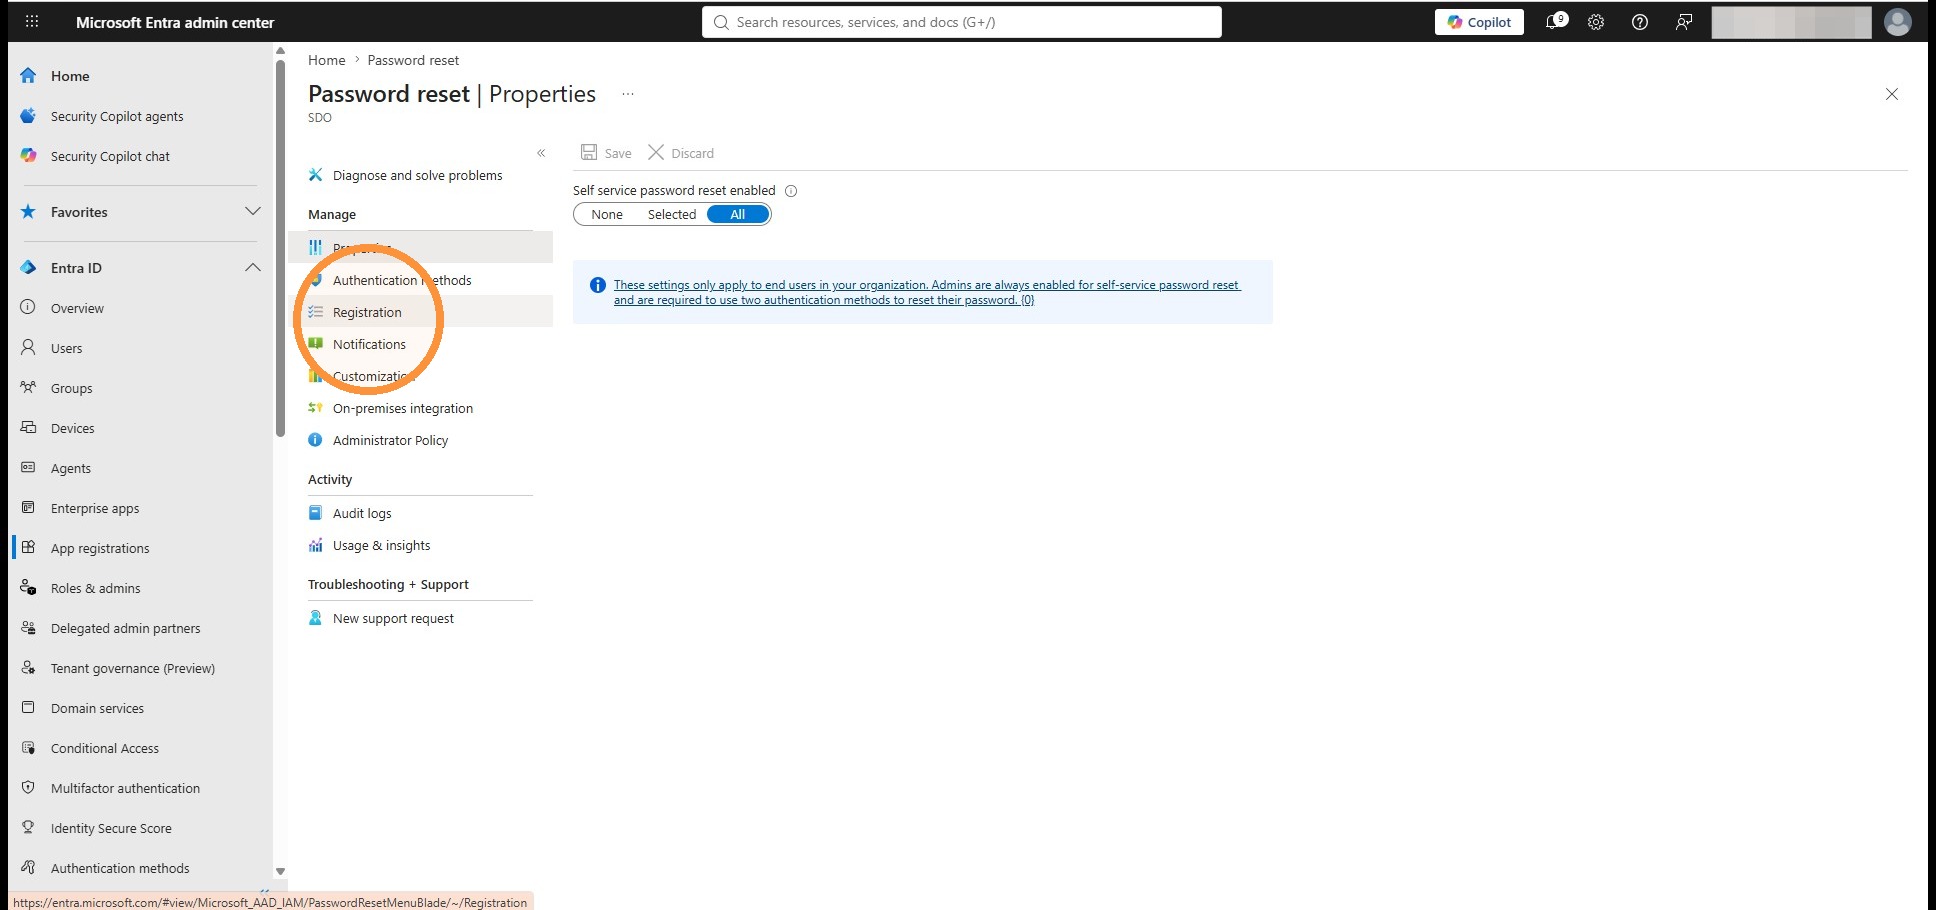
Select Password Reset from the results.
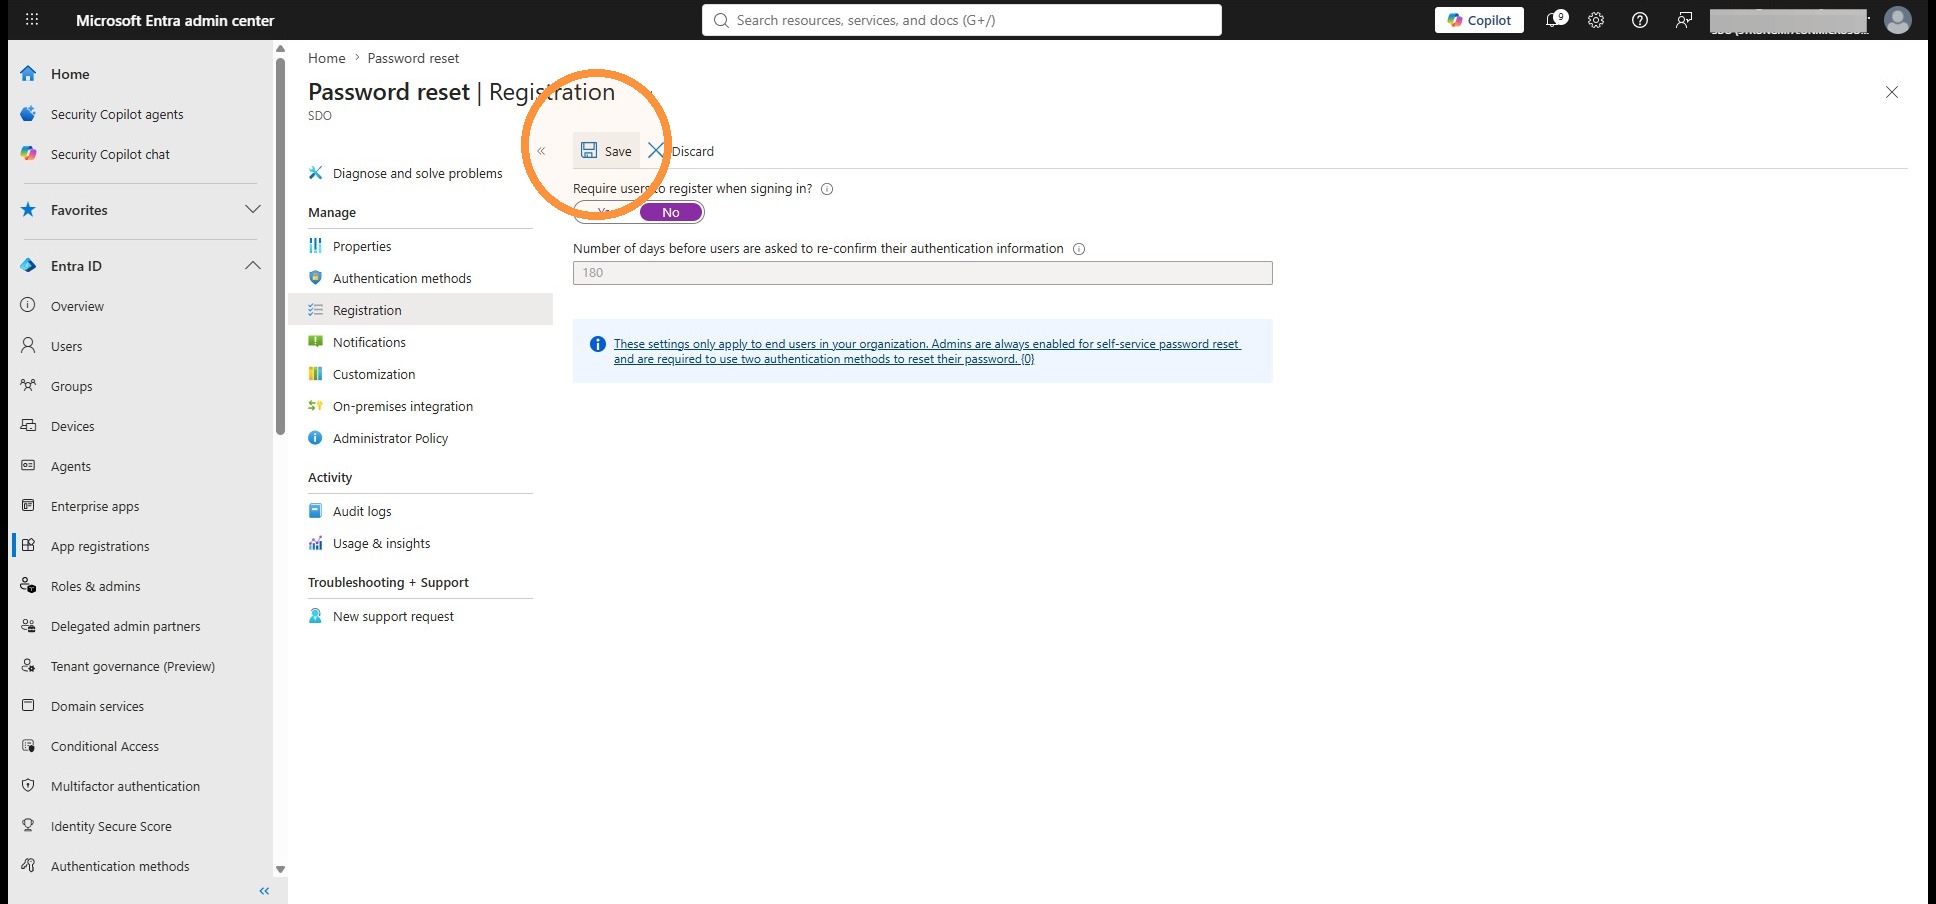
34
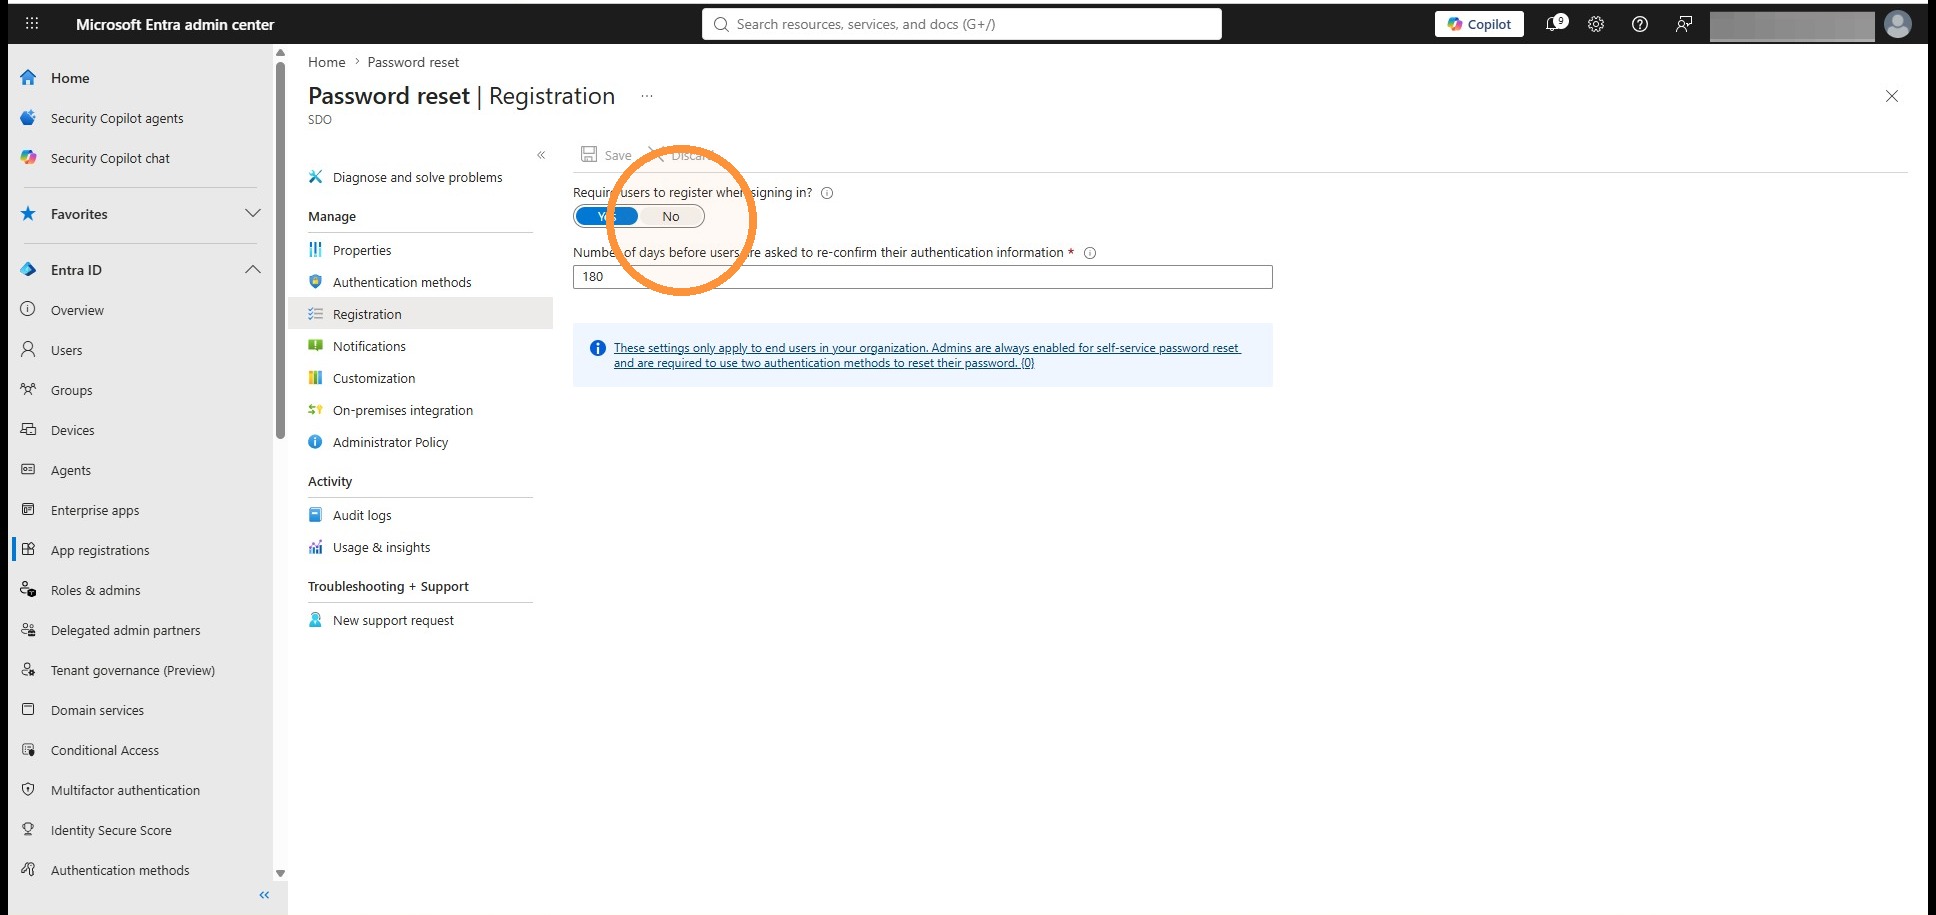
Set the registration option shown to No.
36
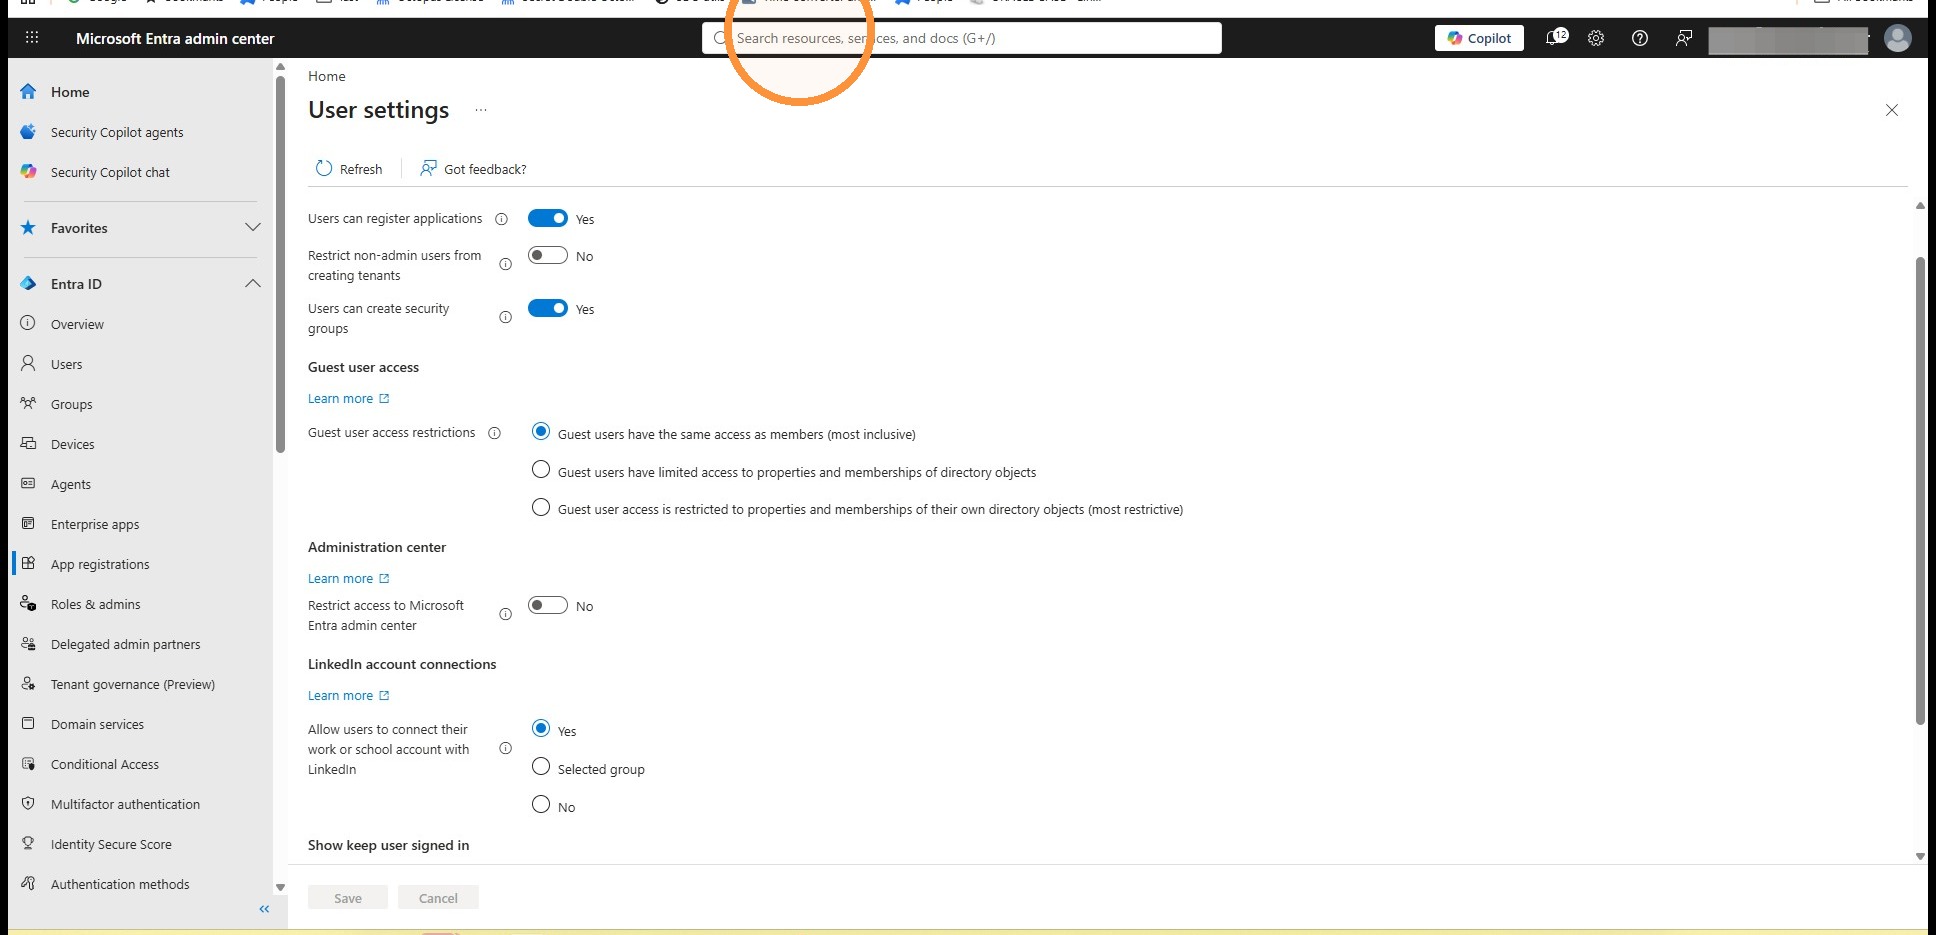
Use the Entra search bar again.
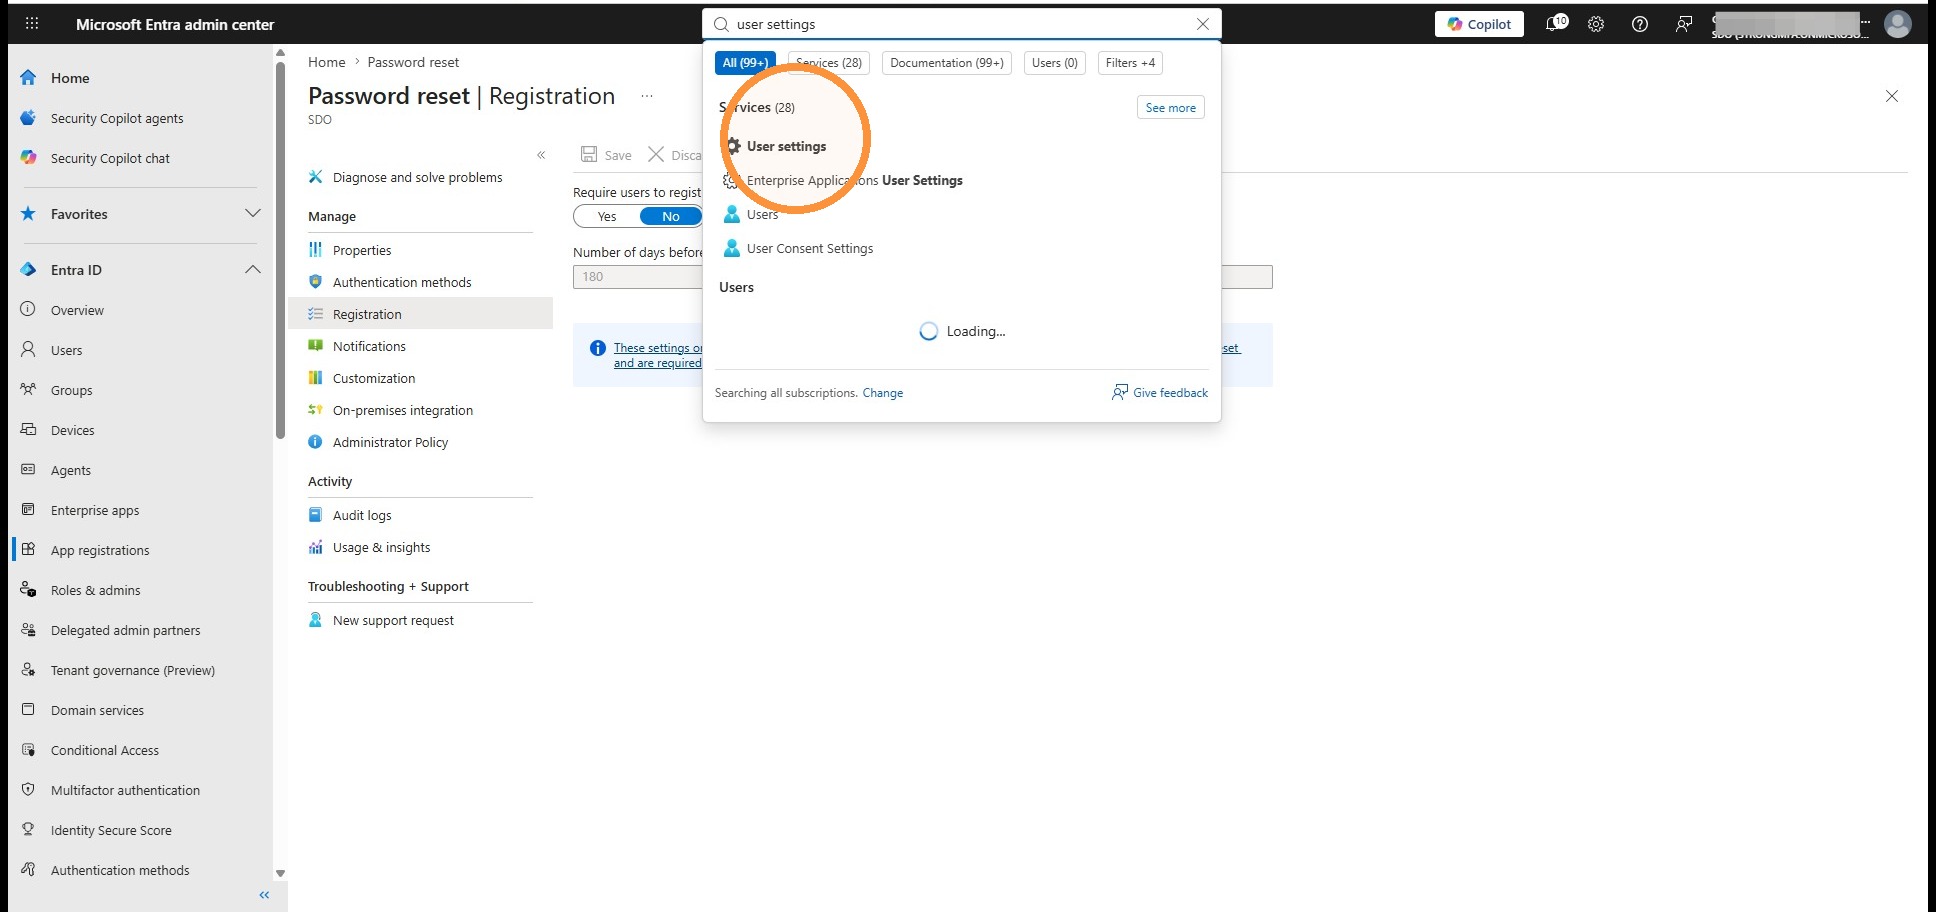
37
Select User settings from the results.
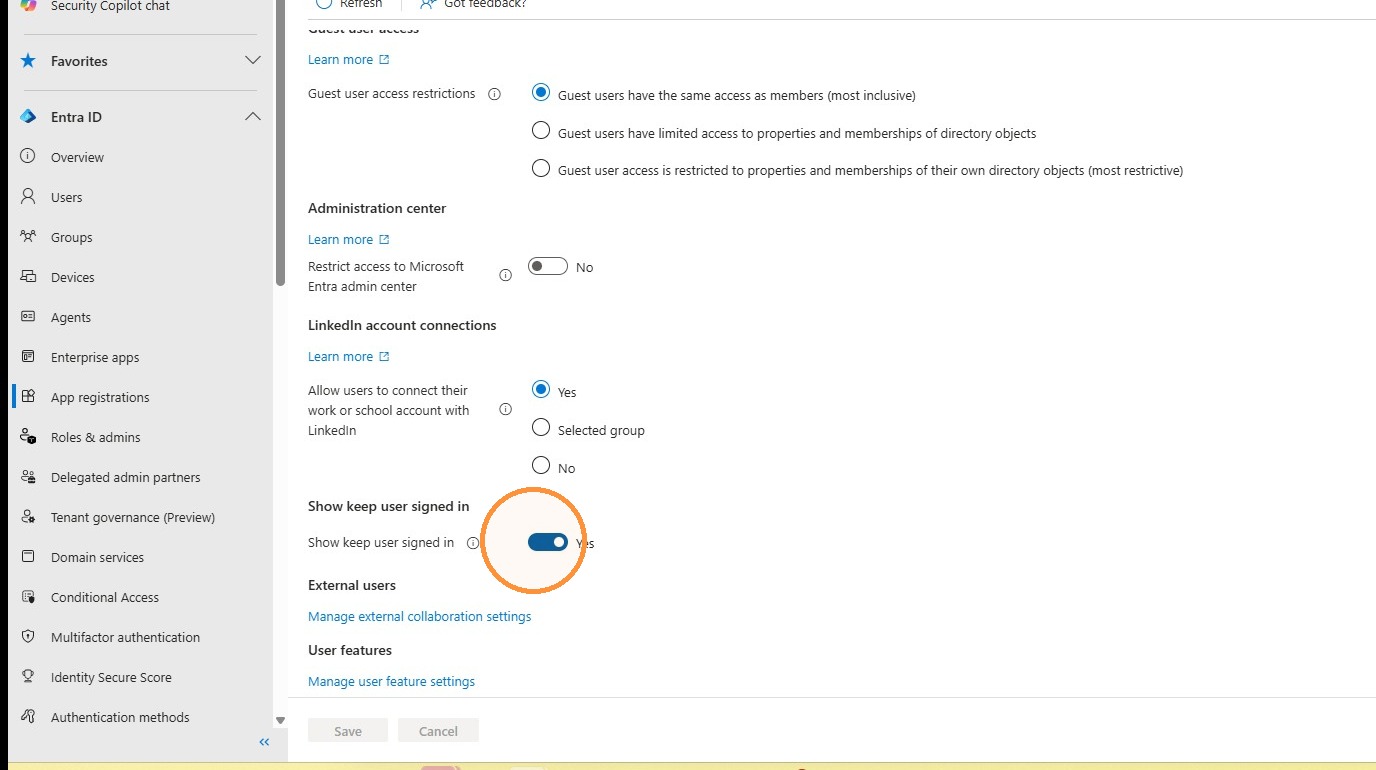
38
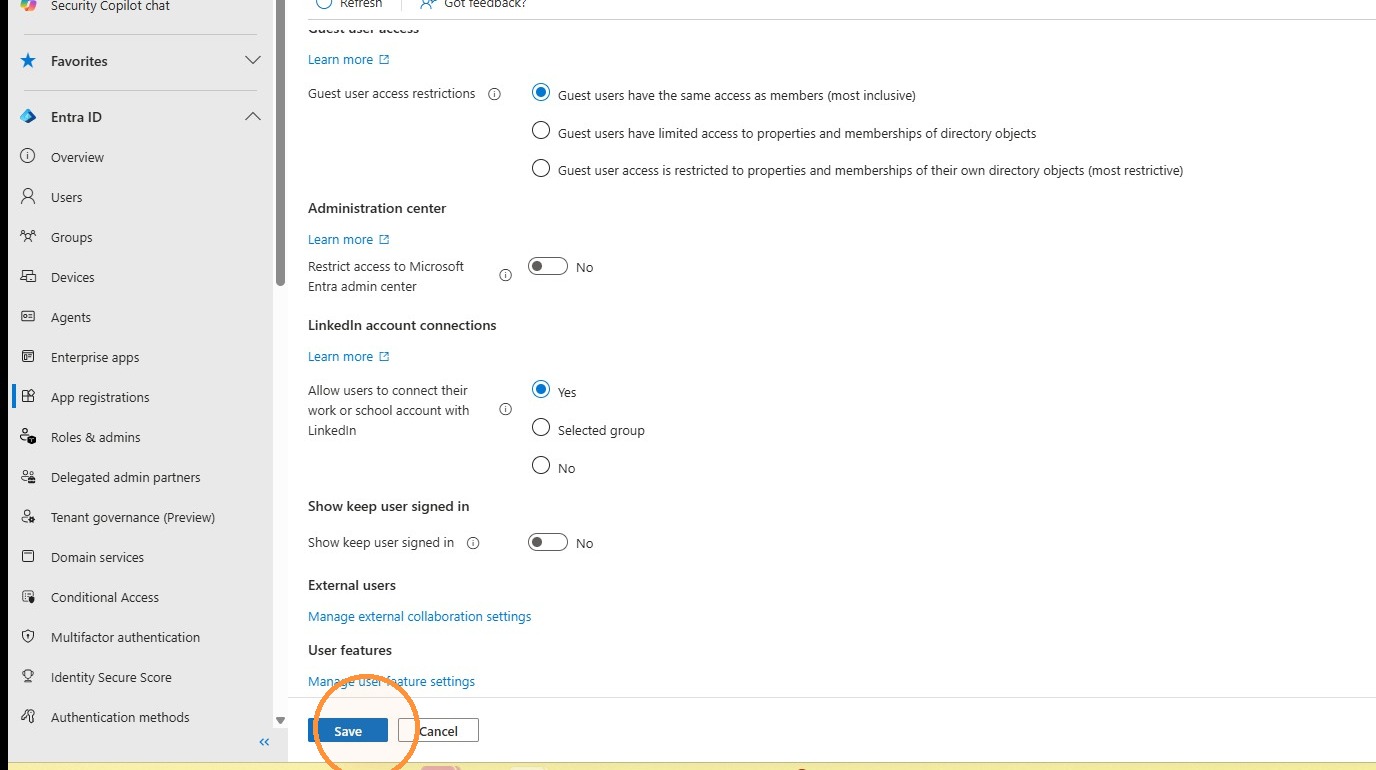
Enable Show keep user signed in.
40
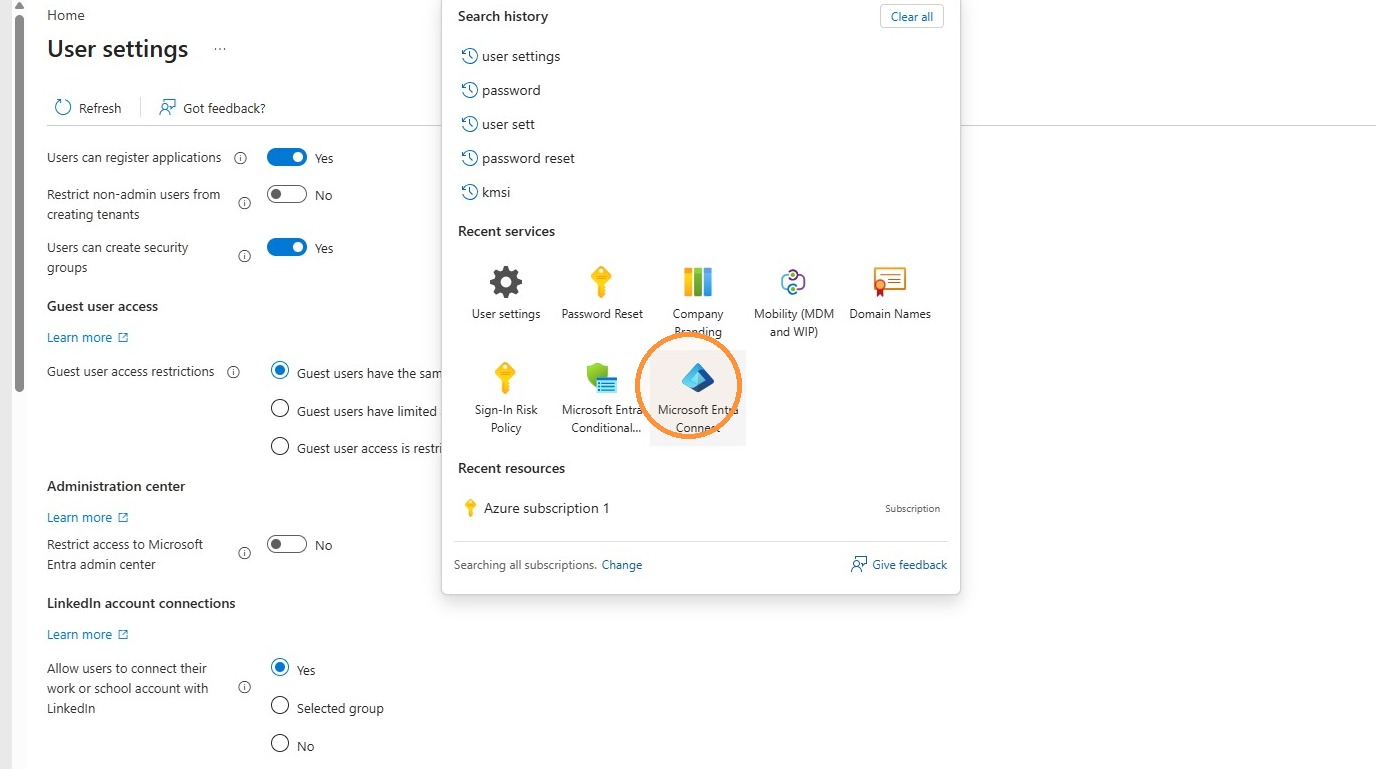
Use the Entra search bar again.
41
Open Microsoft Entra Connect.
42
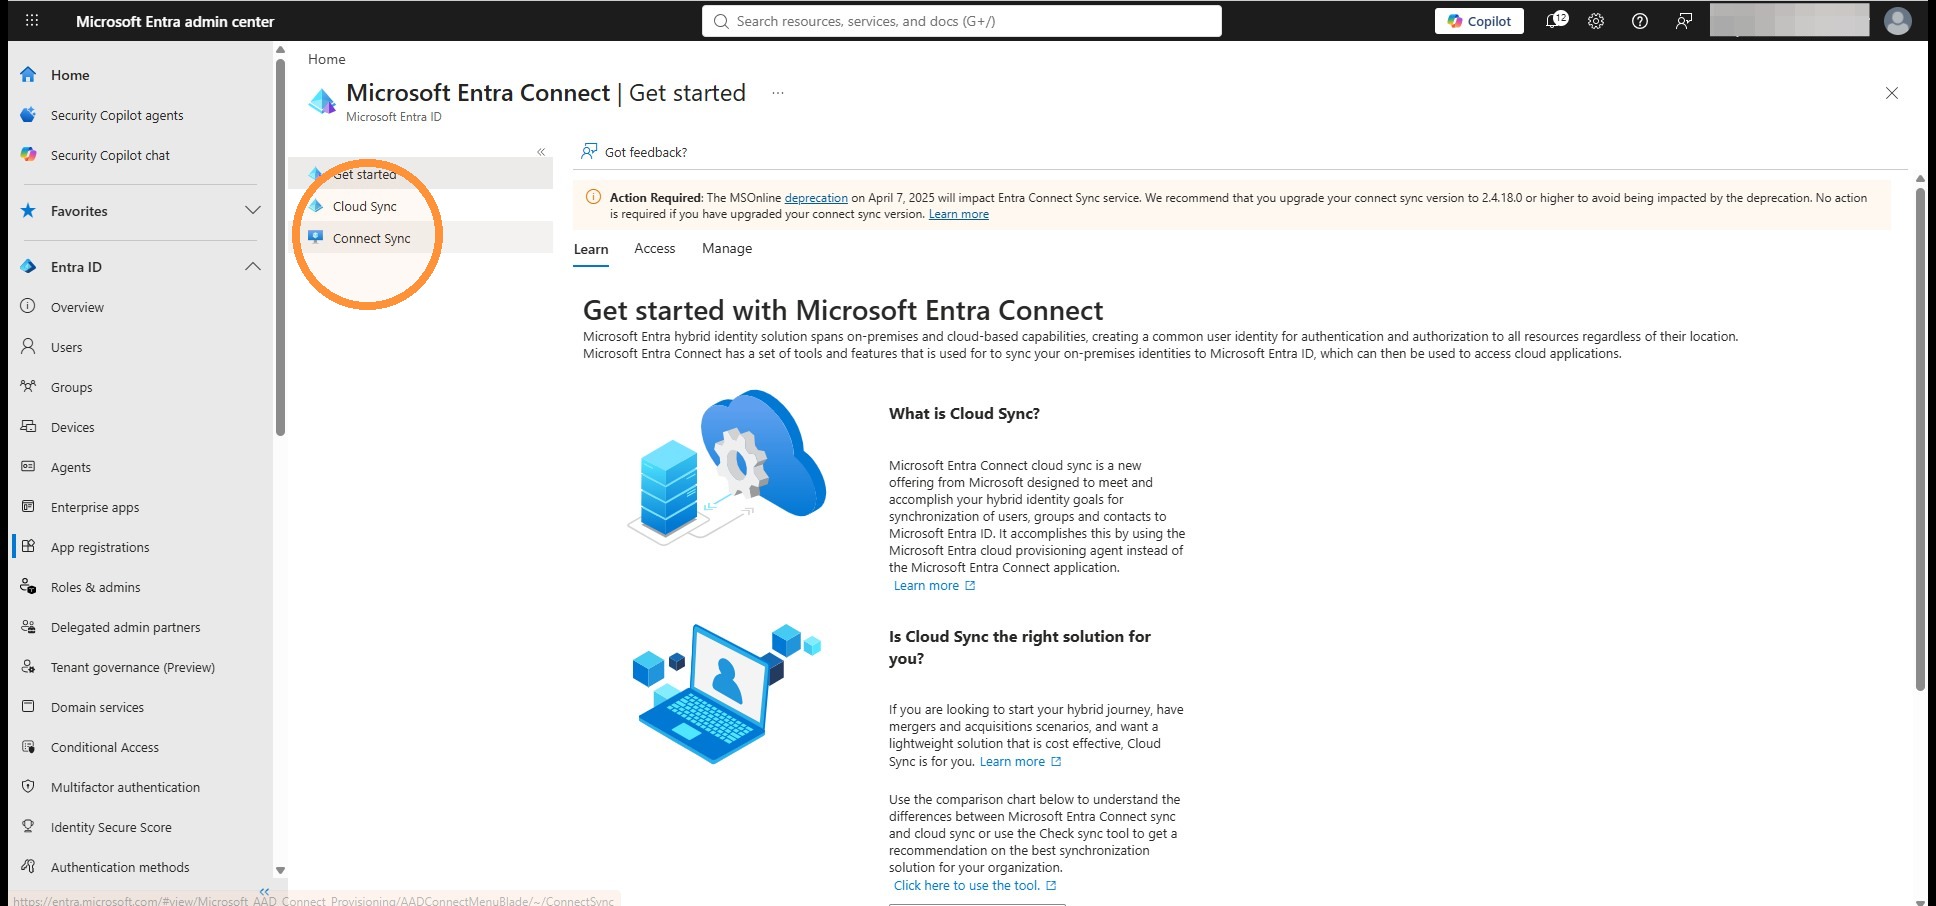
Select Connect Sync from the navigation menu.
43
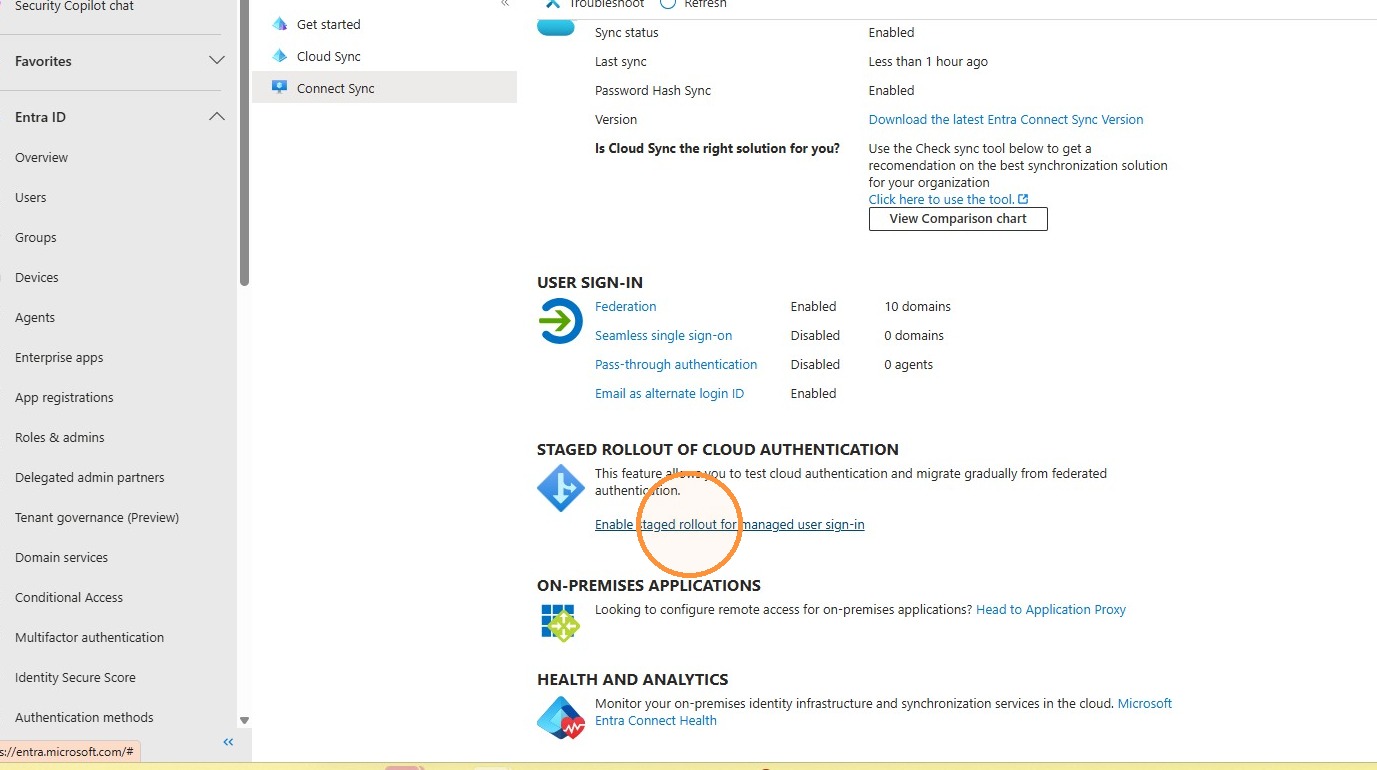
Enable staged rollout for managed user sign-in.
44
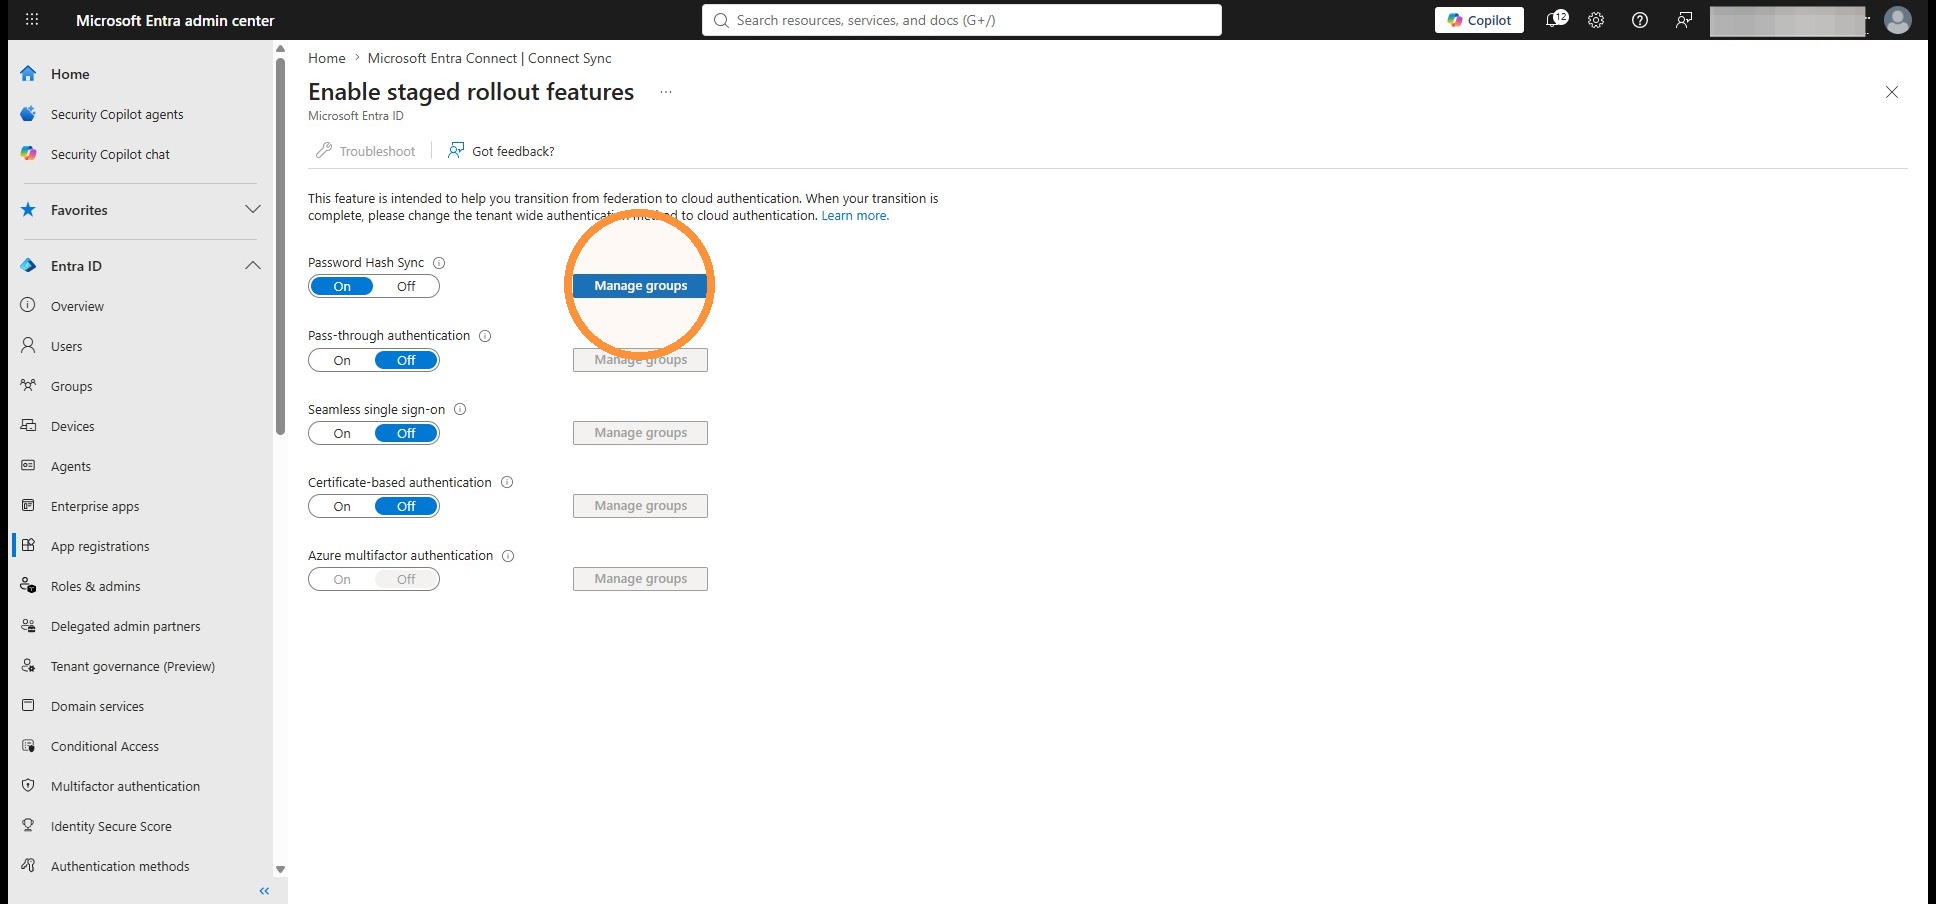
Click Manage groups and verify that the staged rollout group is configured.
Section 05
SDO Directory Integration
45
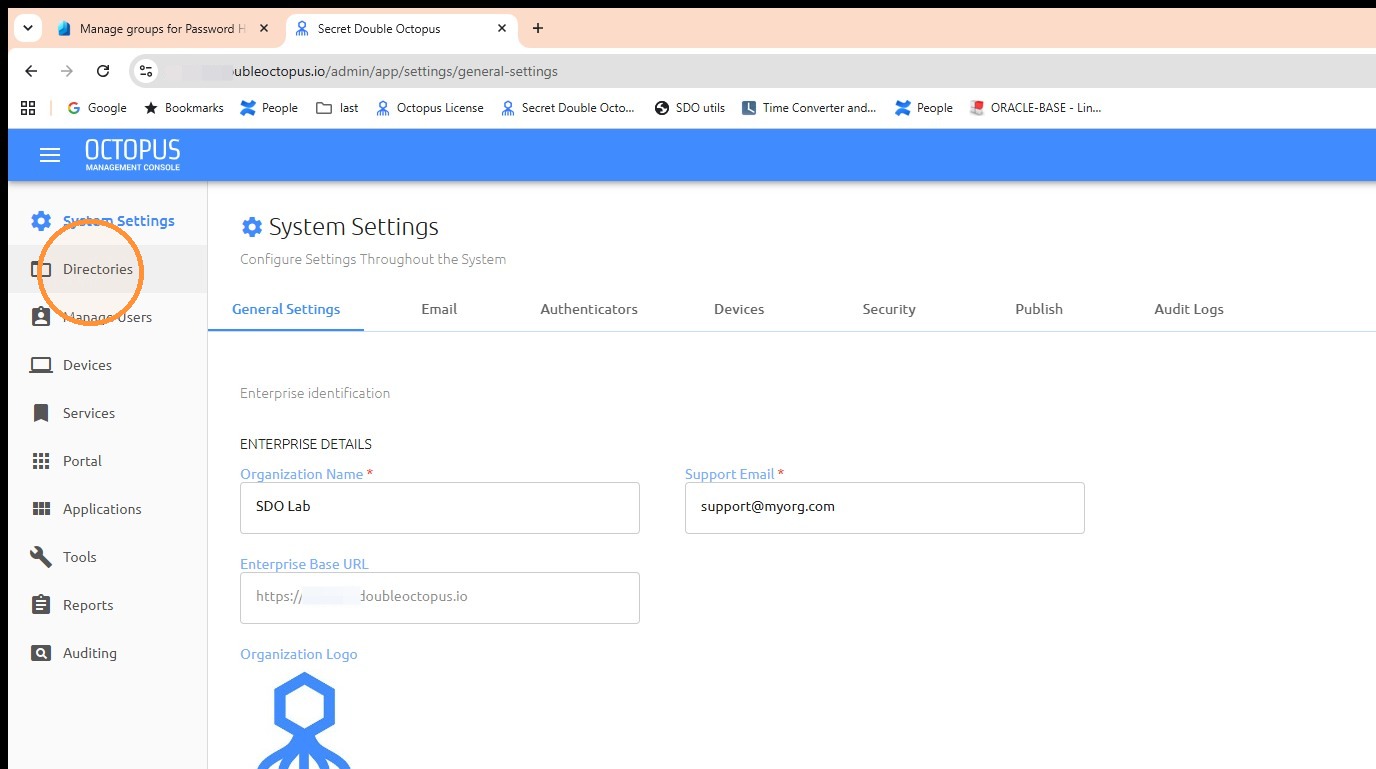
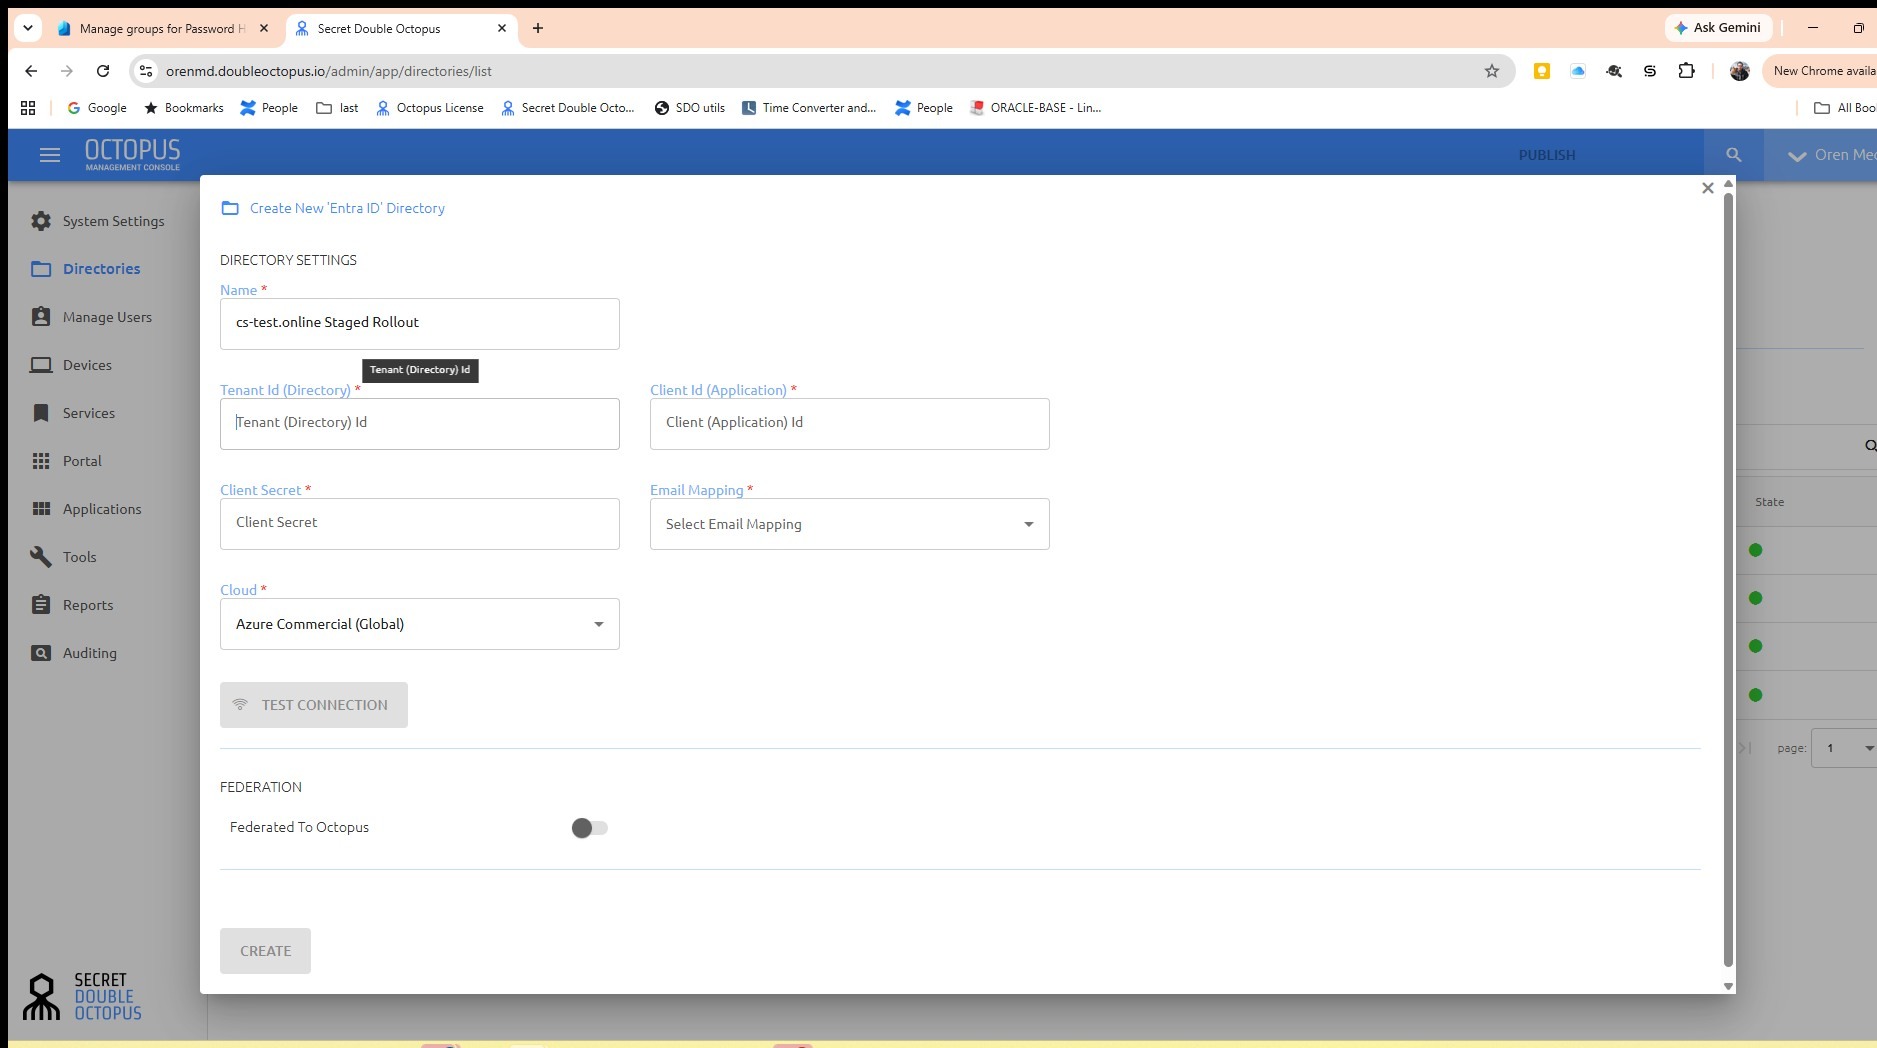
Switch to the Secret Double Octopus Management Console and open Directories.
46
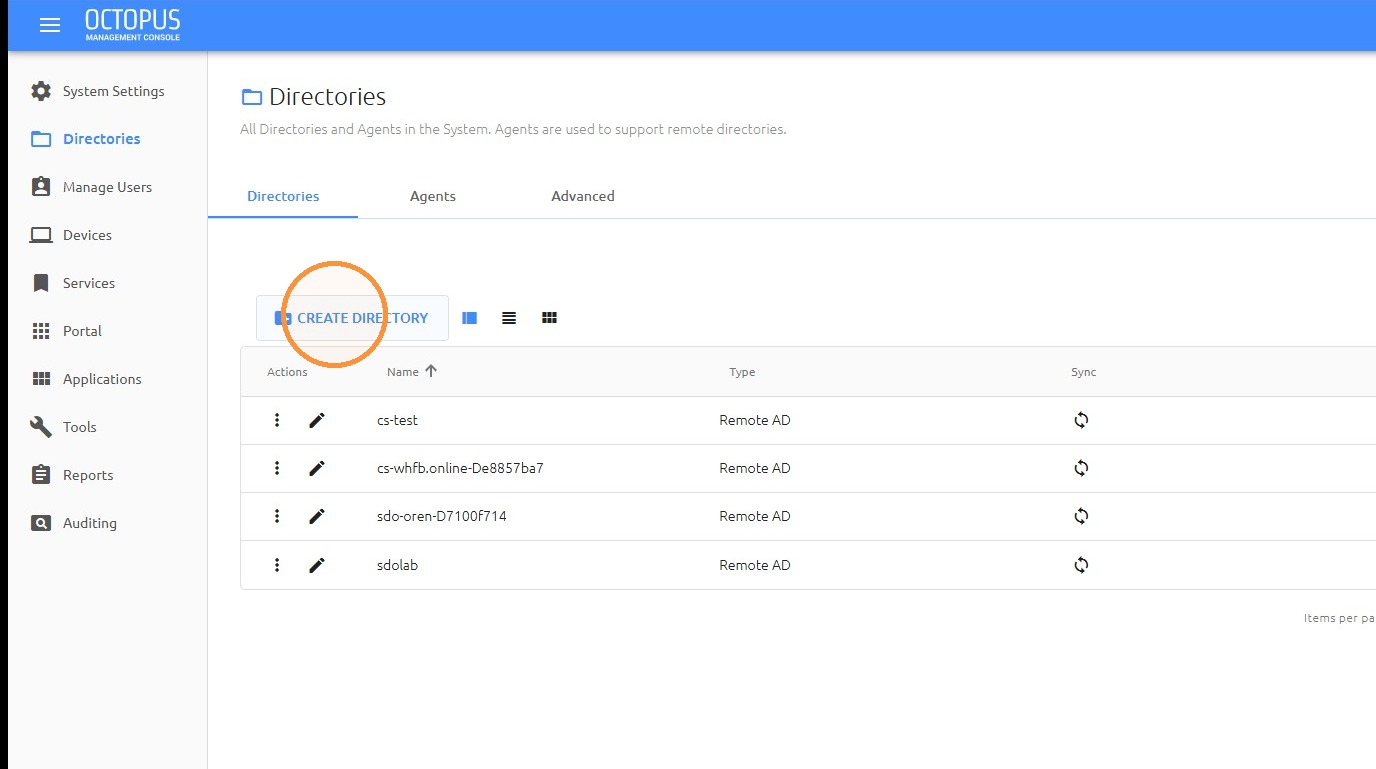
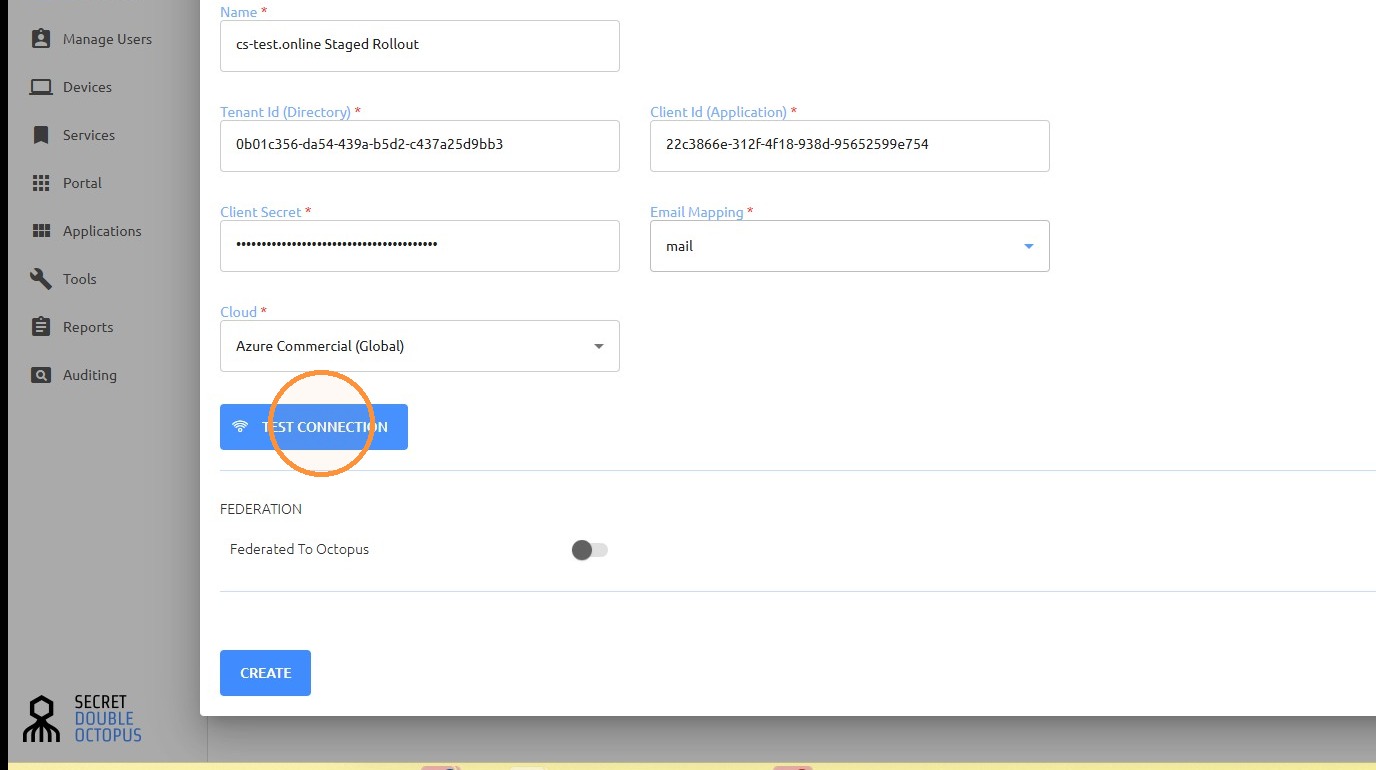
Click Create Directory.
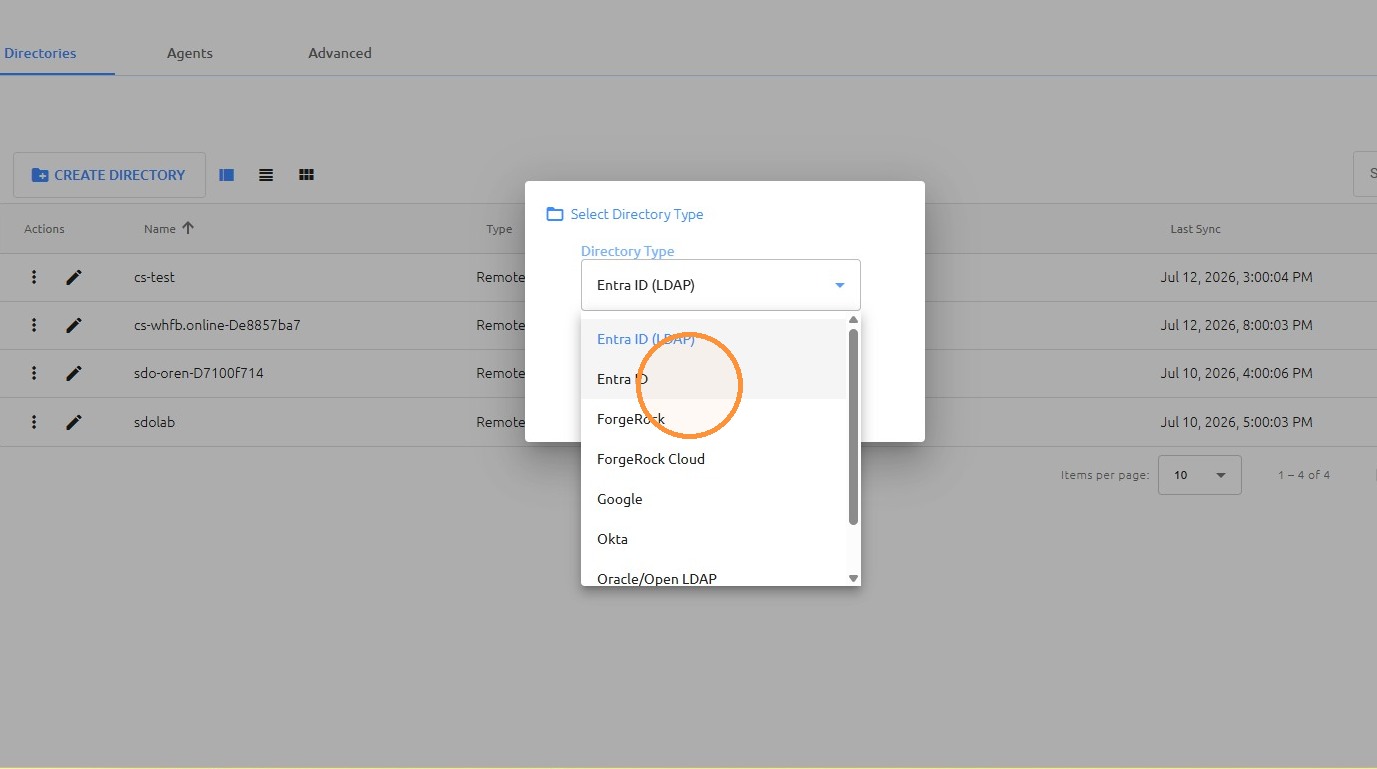
47
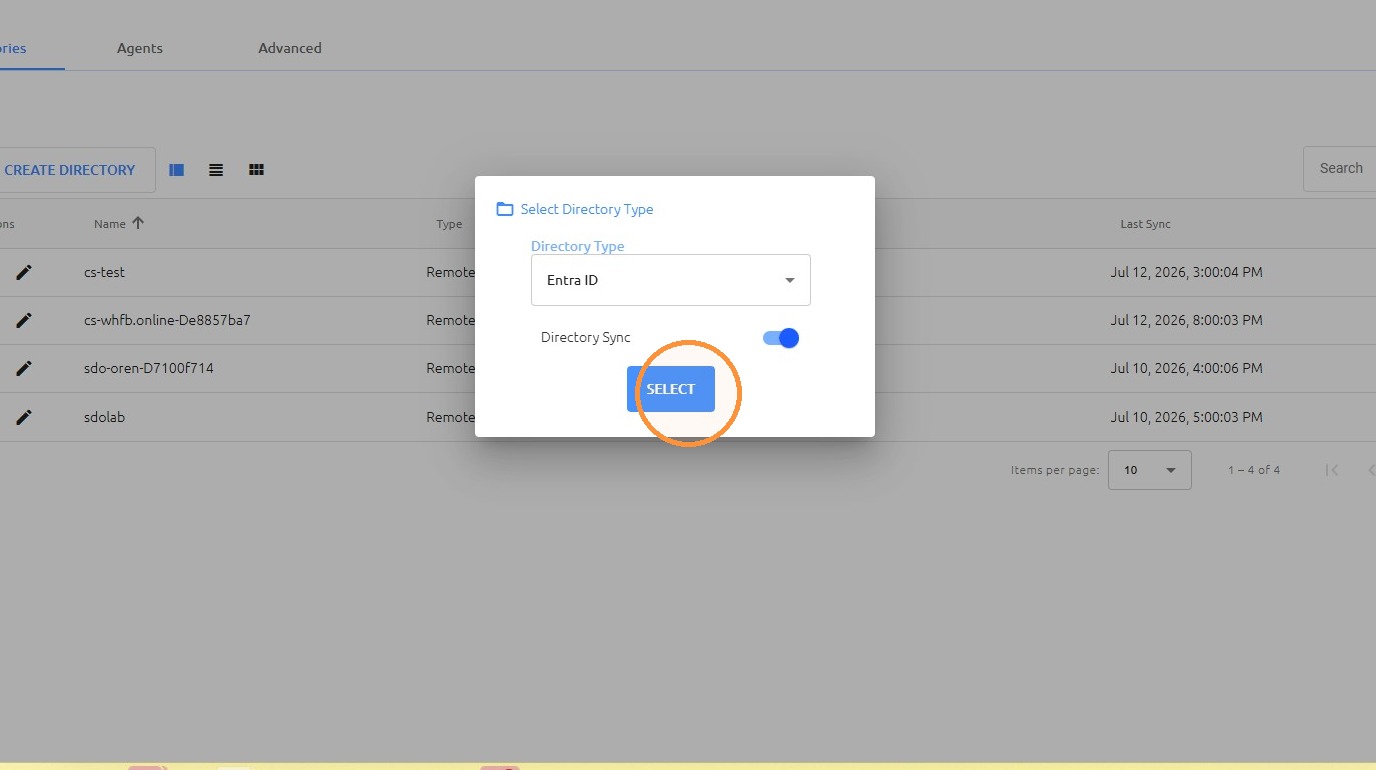
Select Entra ID from the Directory Type menu.
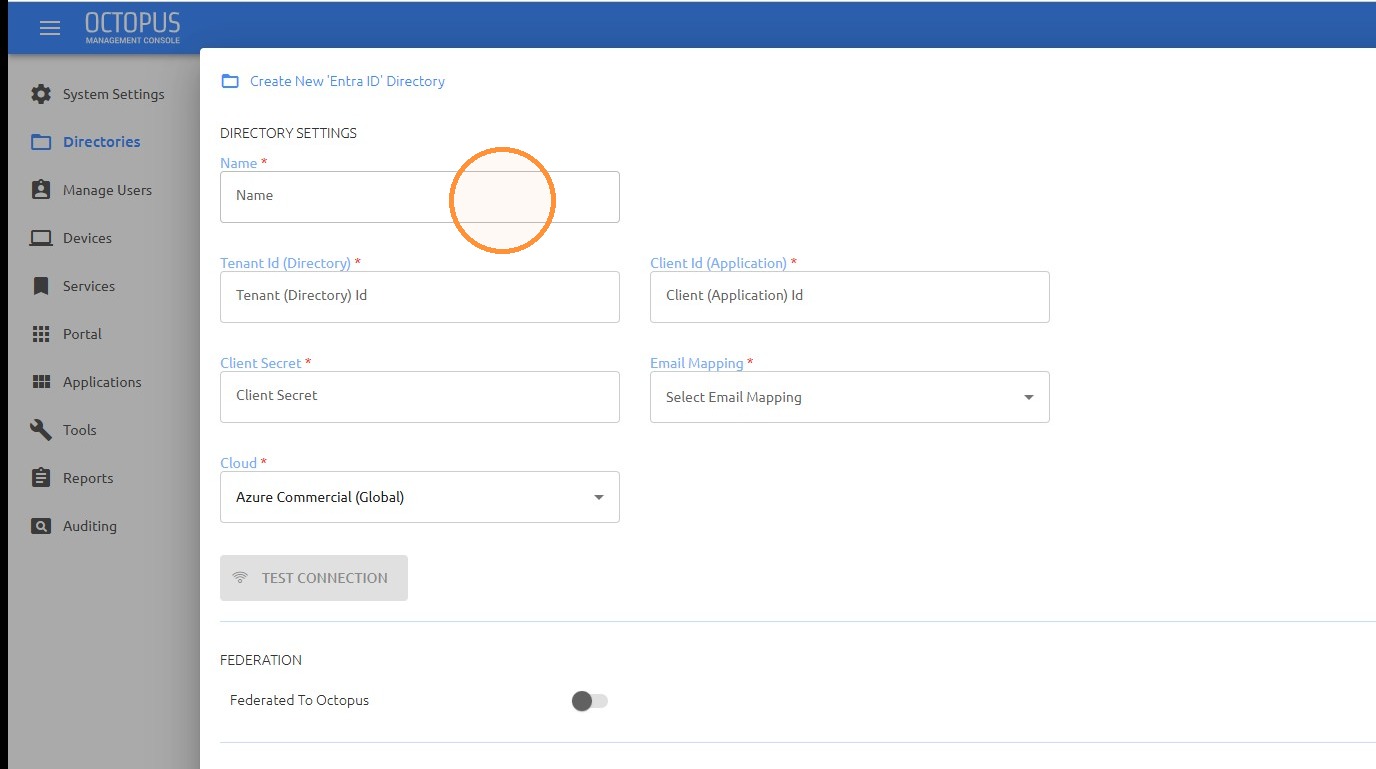
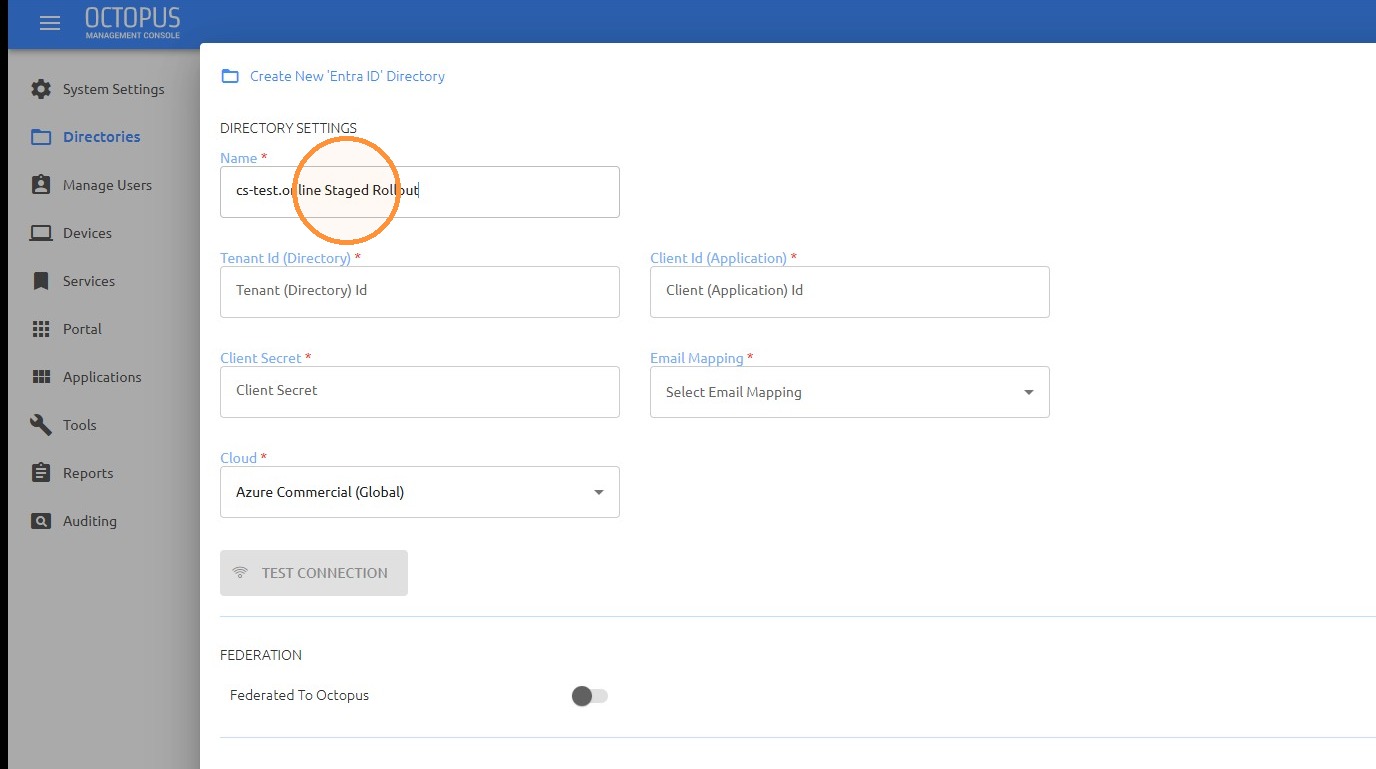
49
Enter a name for the new directory integration.
50
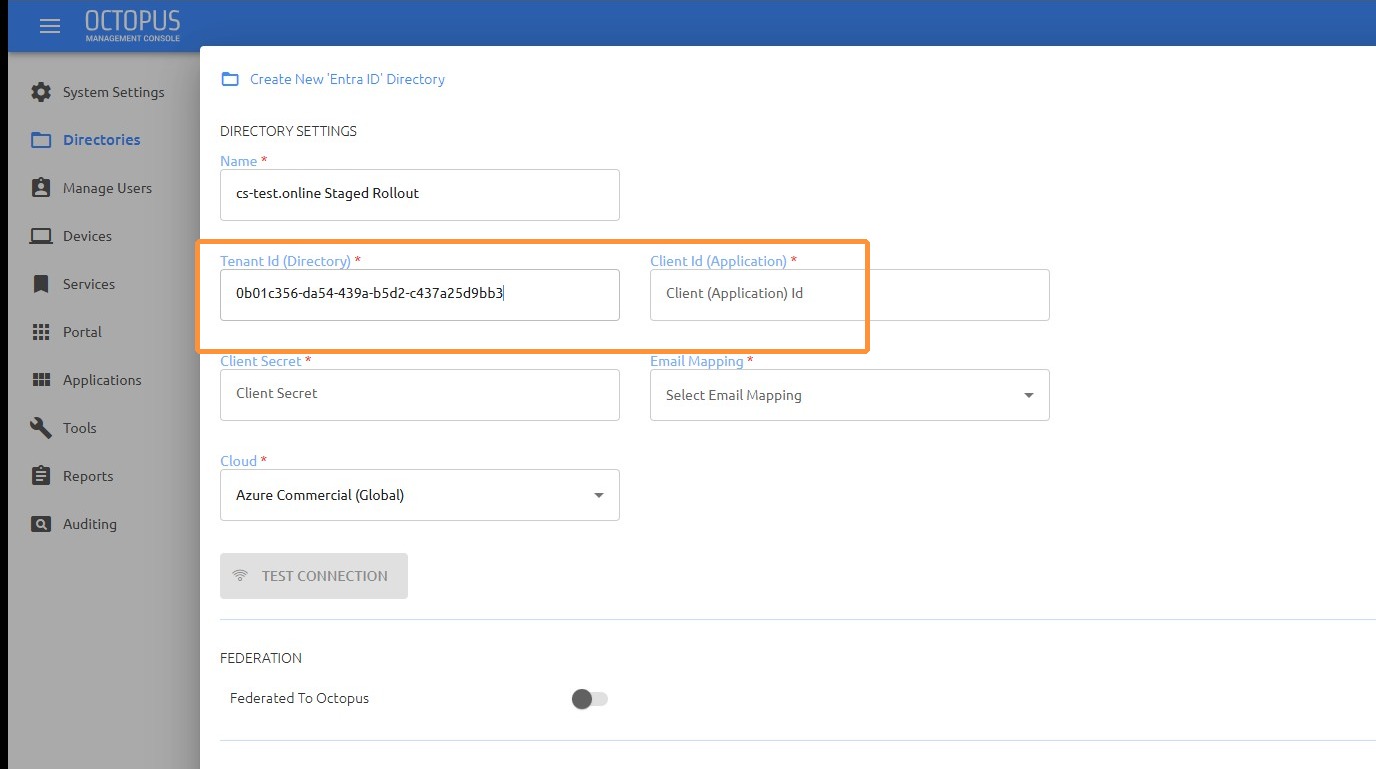
Enter the Tenant ID and Client (Application) ID created in Microsoft Entra ID.
51
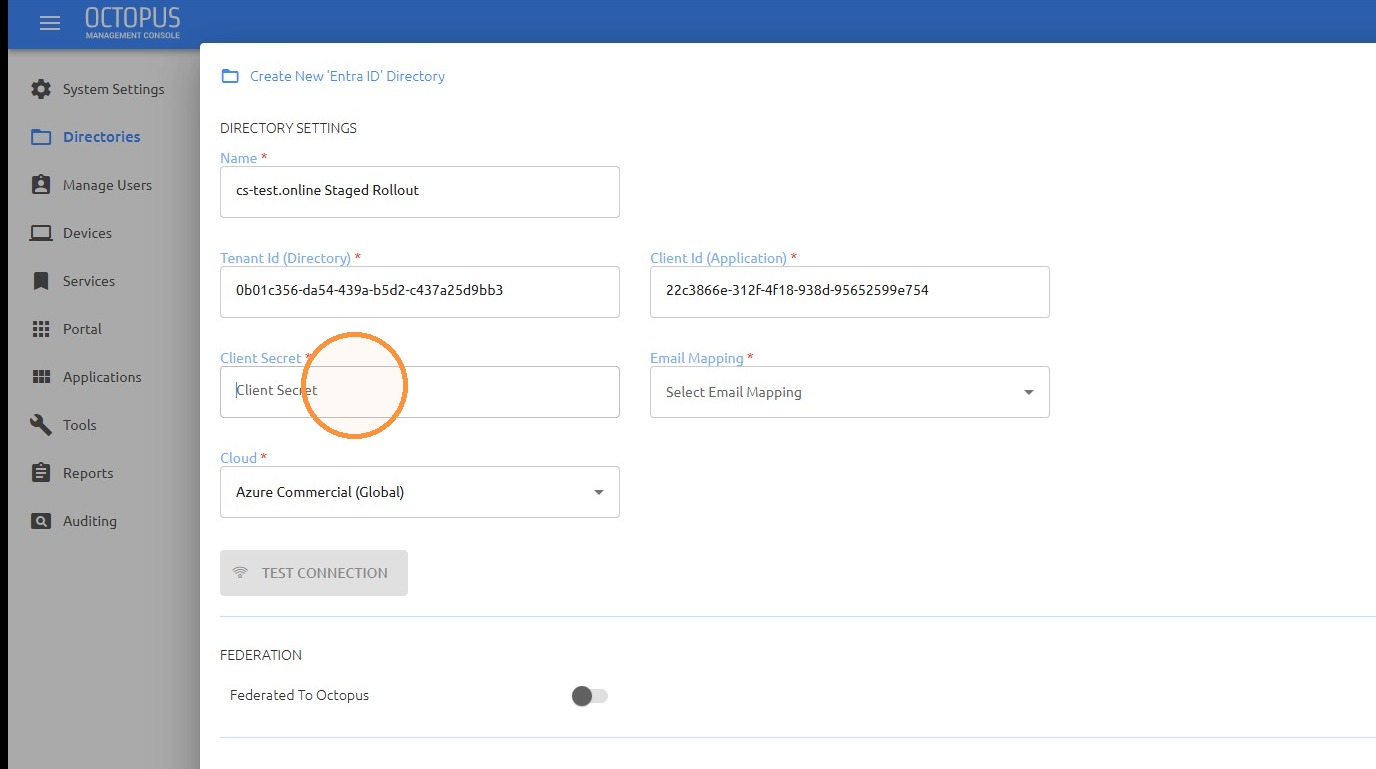
Enter the client secret created in Microsoft Entra ID.
52
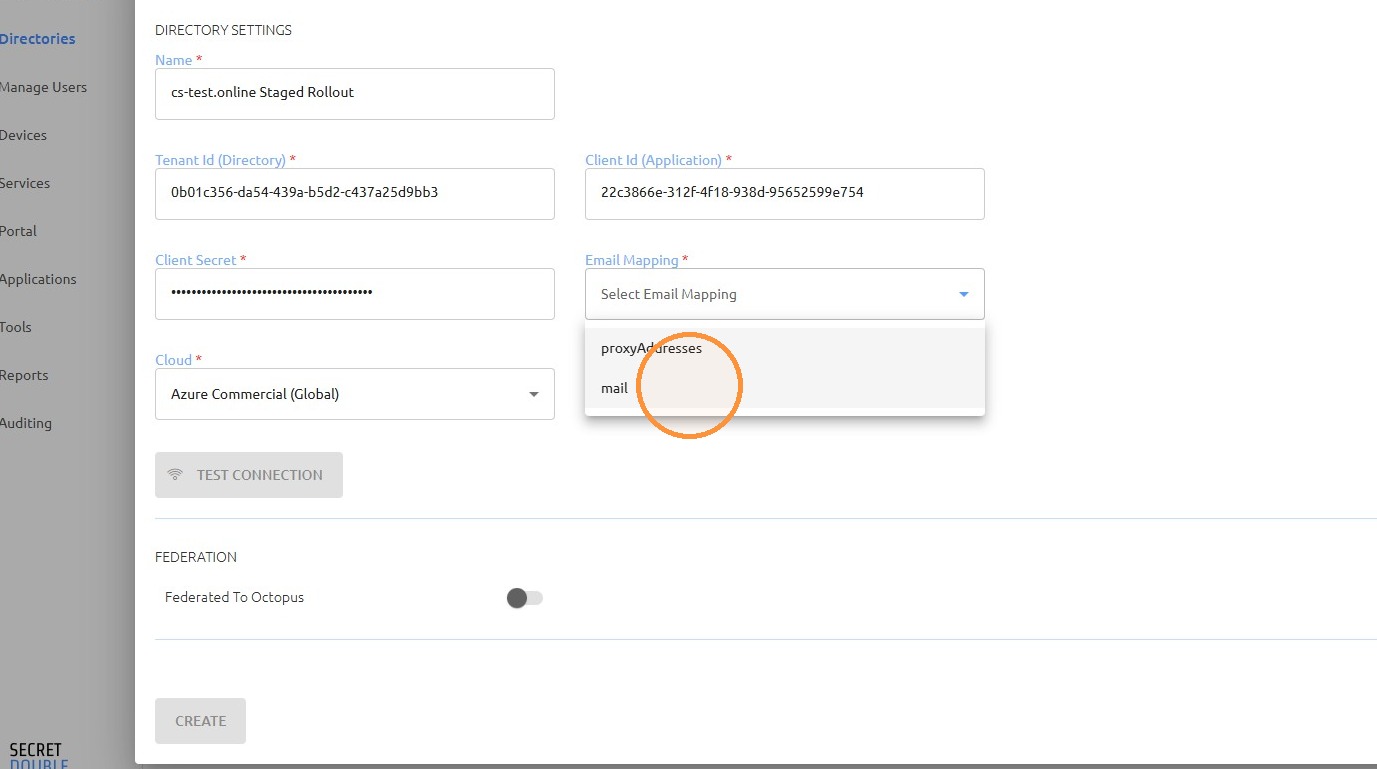
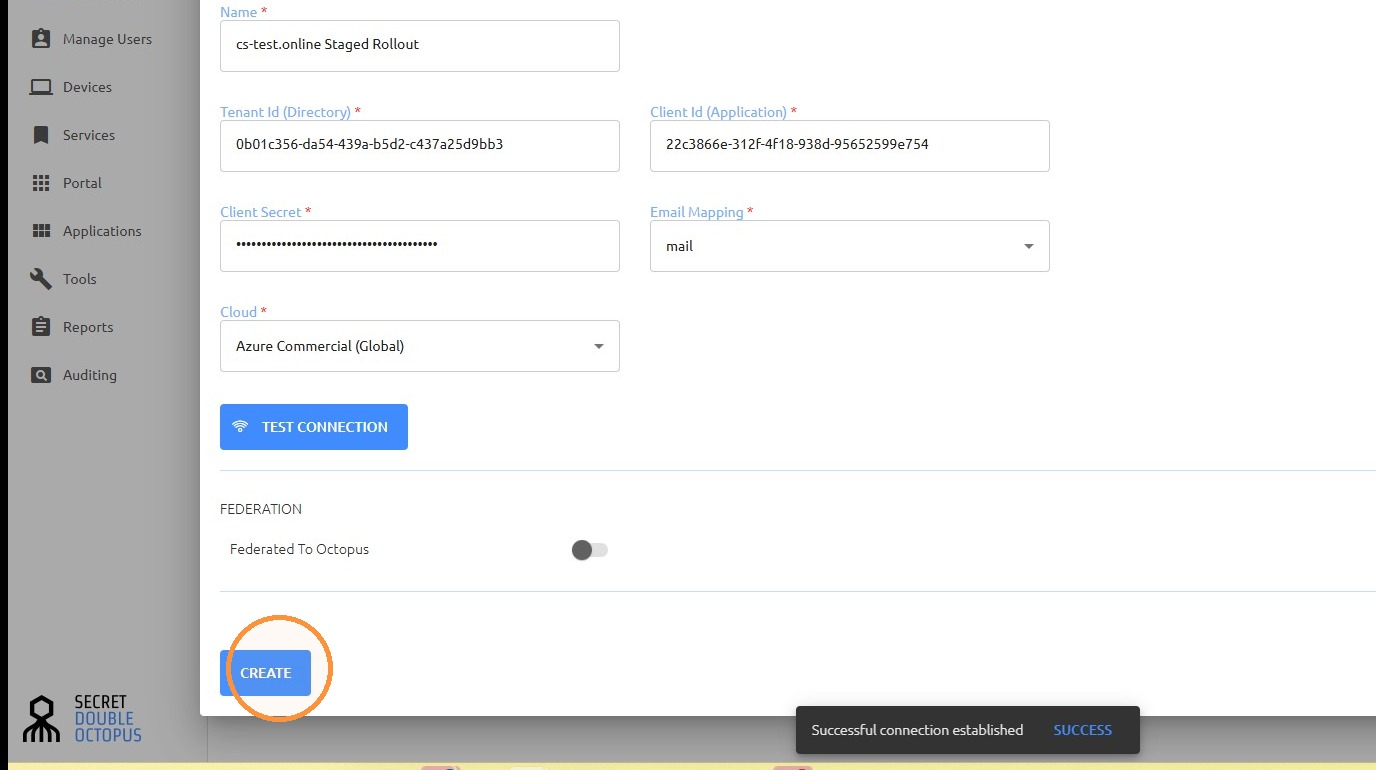
Select mail as the user identifier attribute.
56
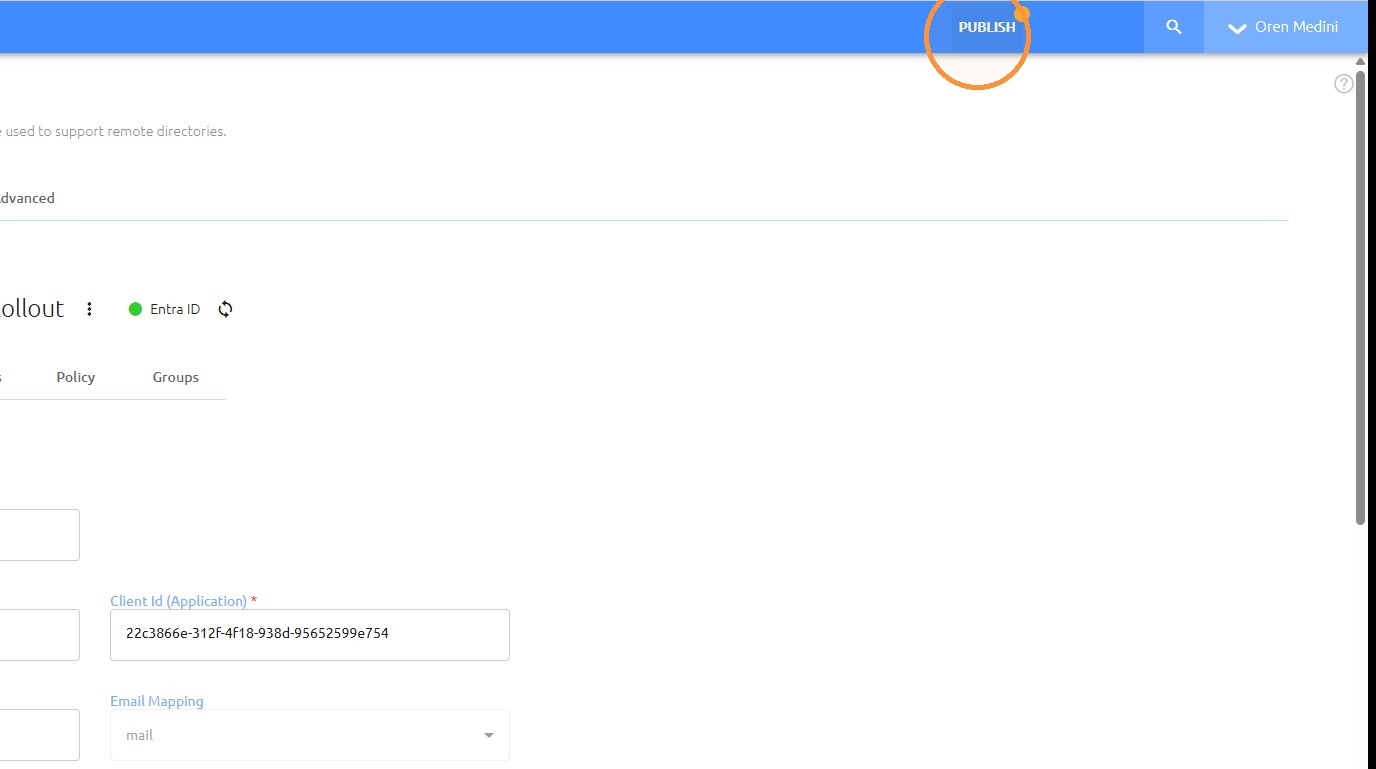
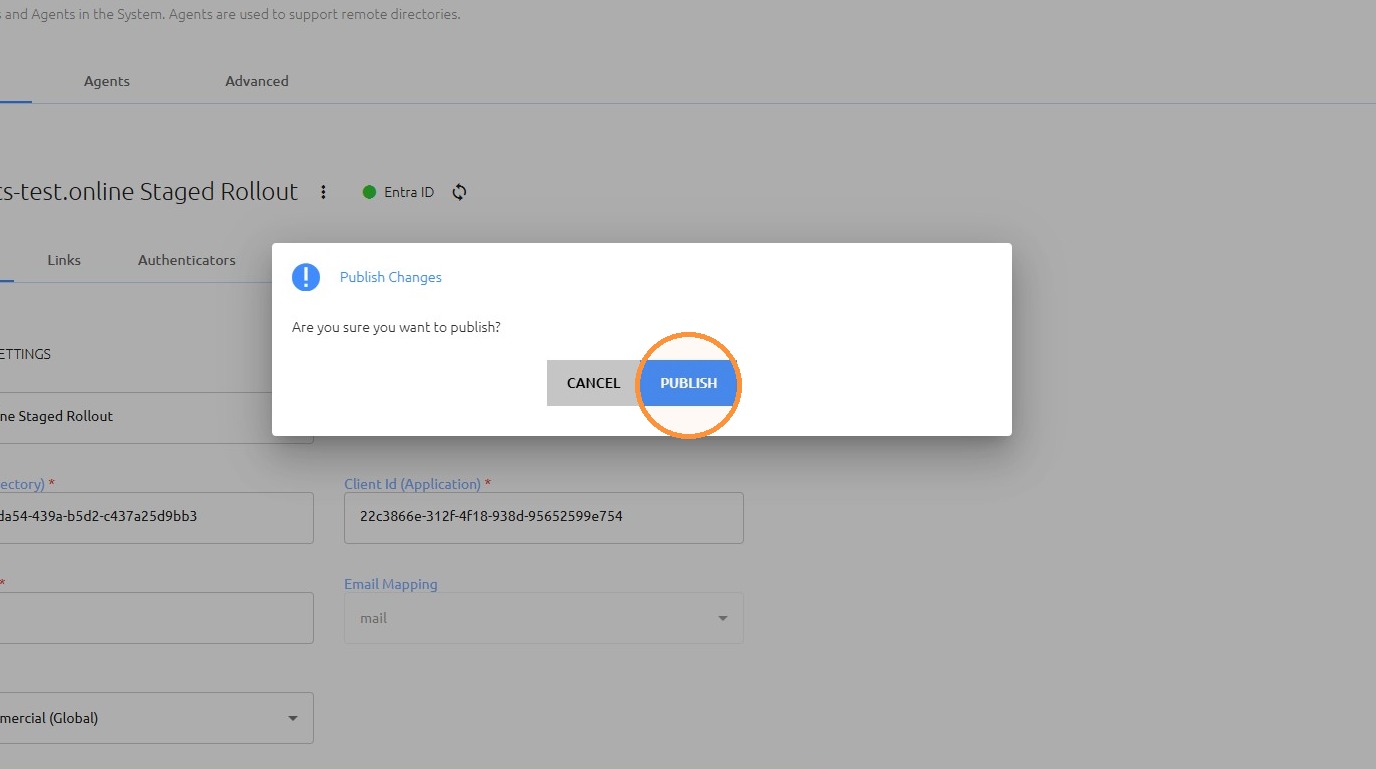
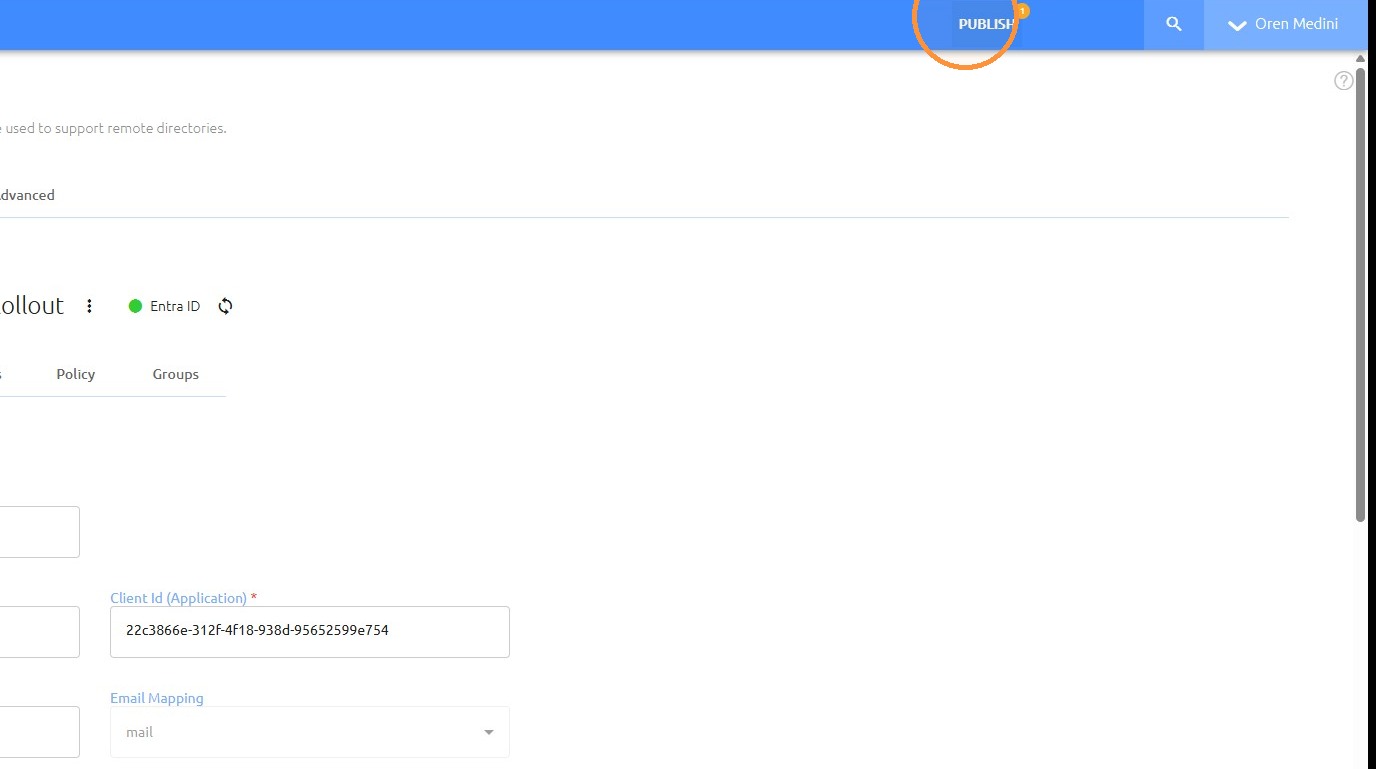
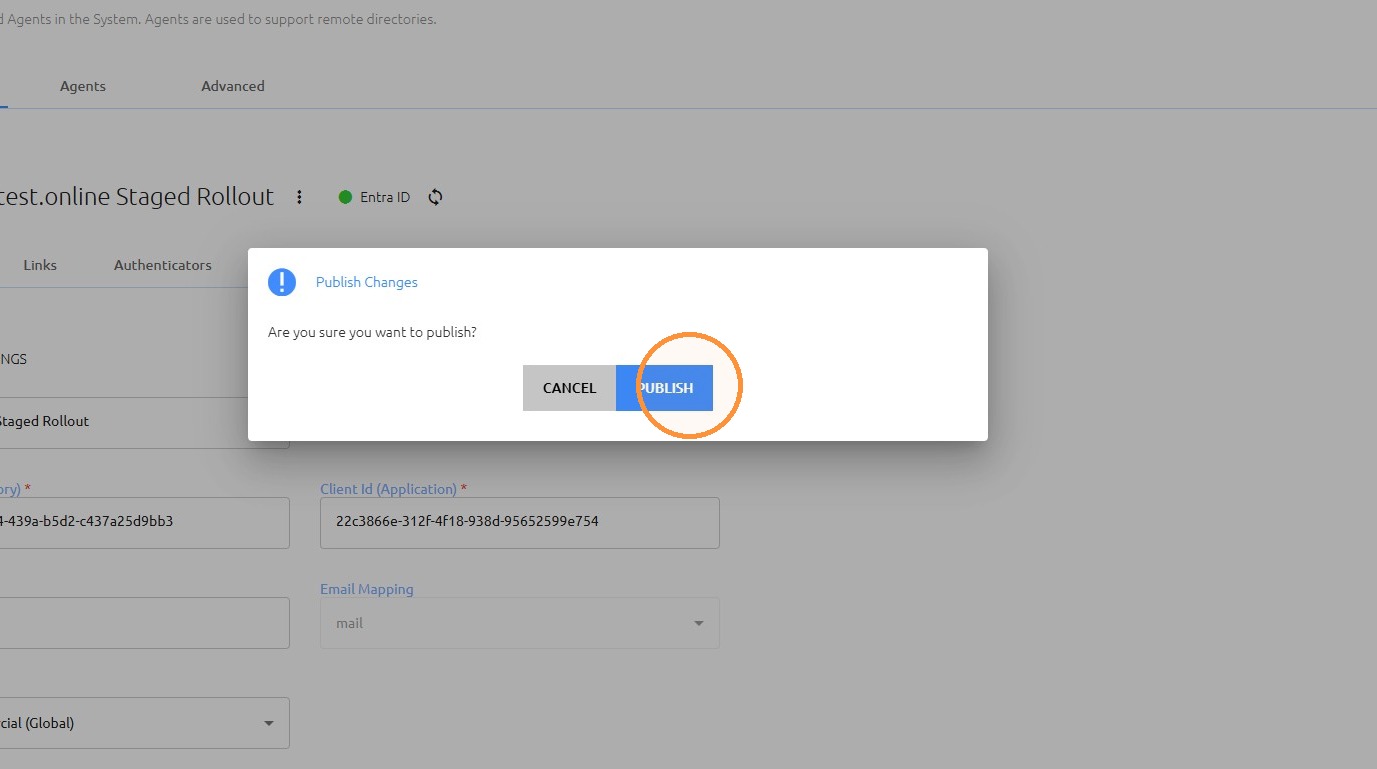
Confirm publishing the new directory.
57
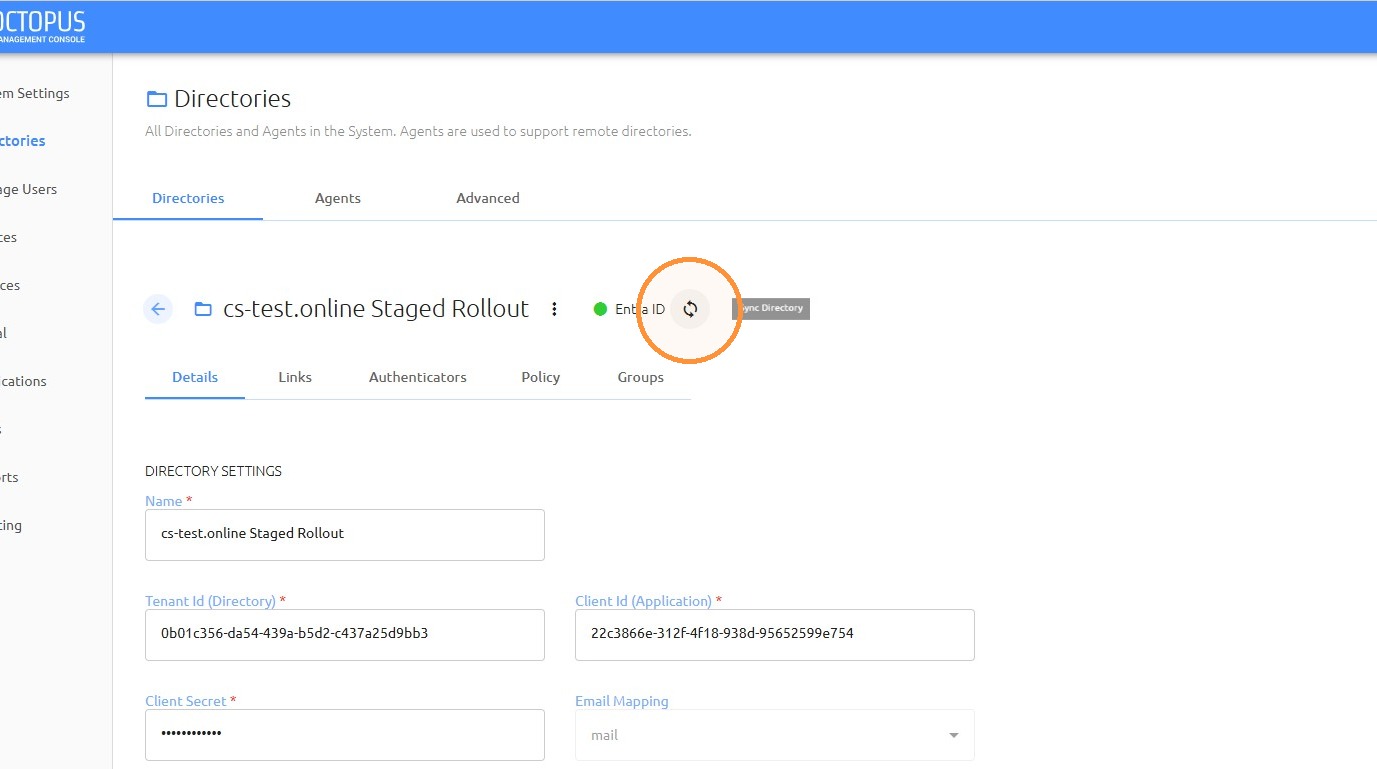
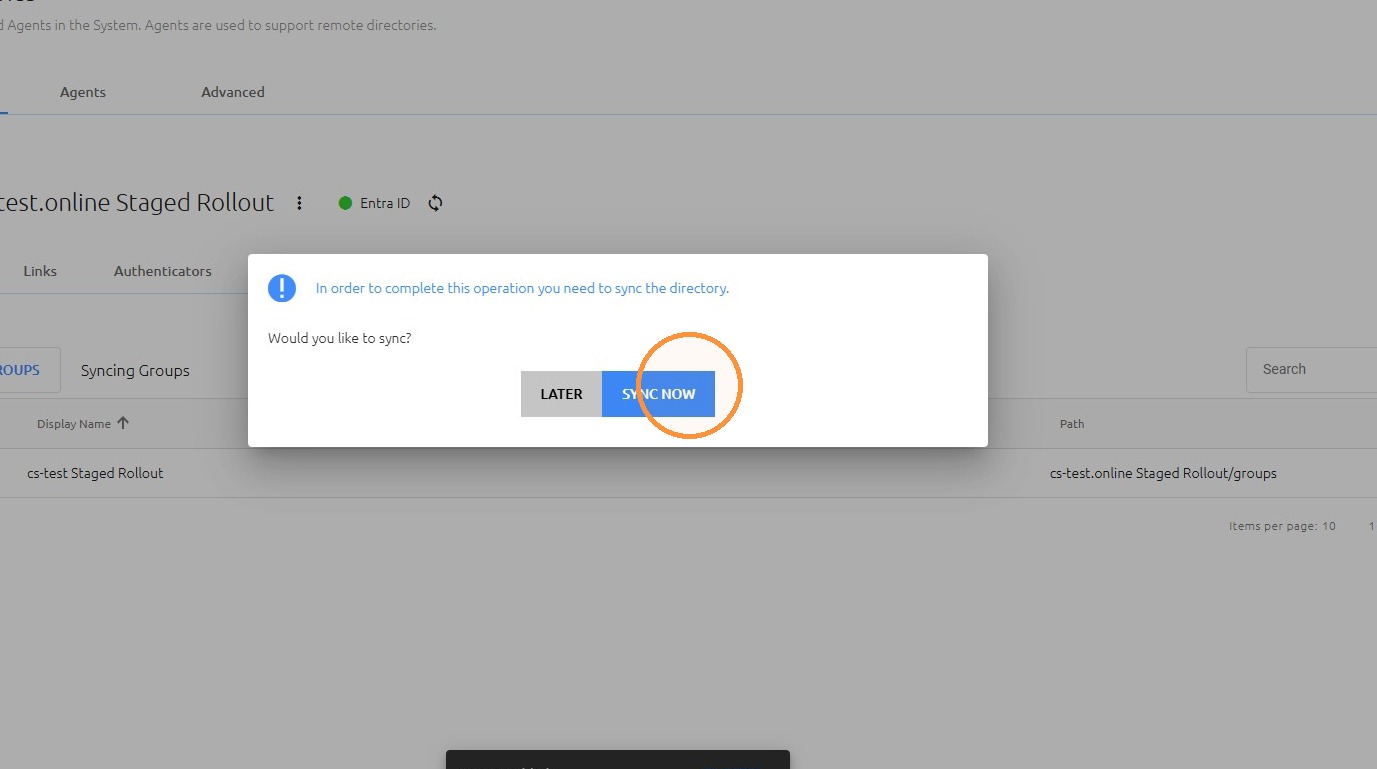
Run directory synchronization.
59
Confirm publishing the synchronization changes.
Section 06
Group Sync and Assignment
62
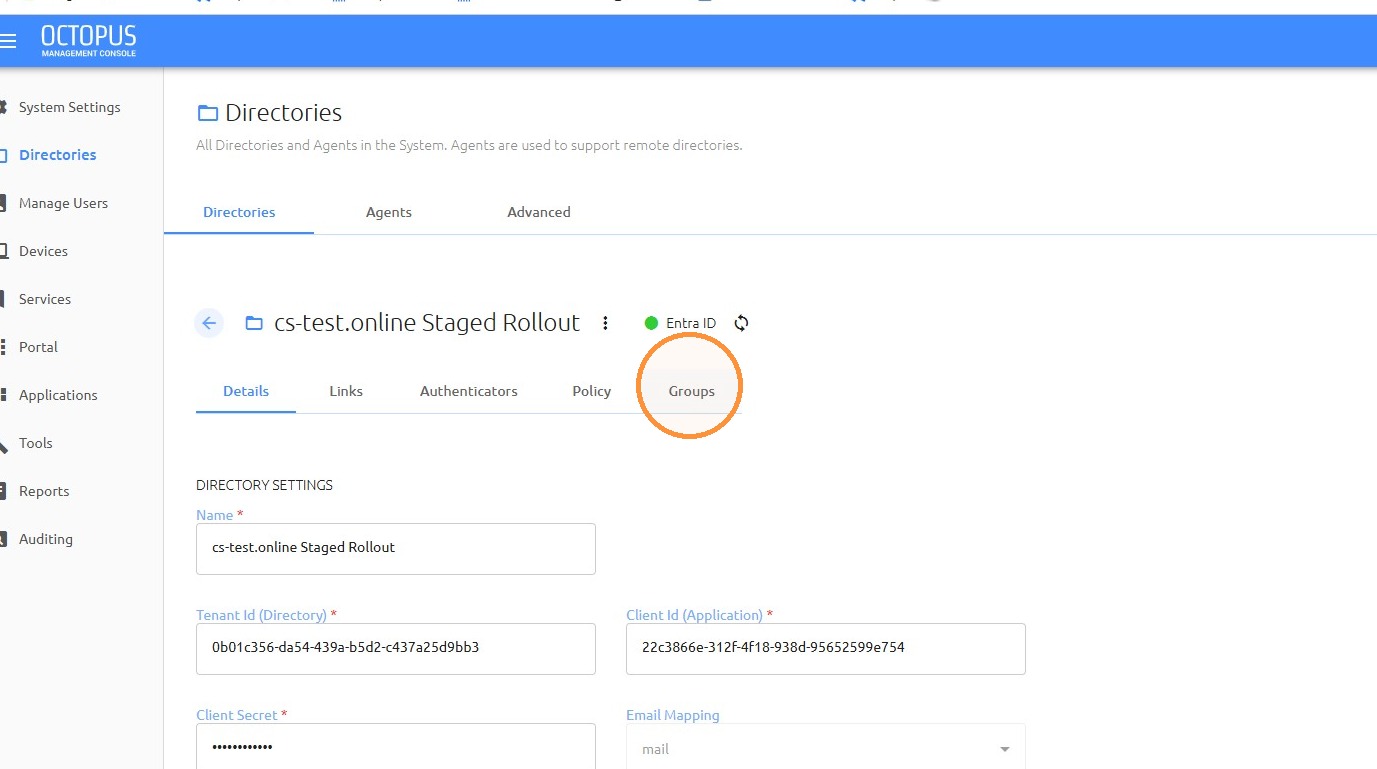
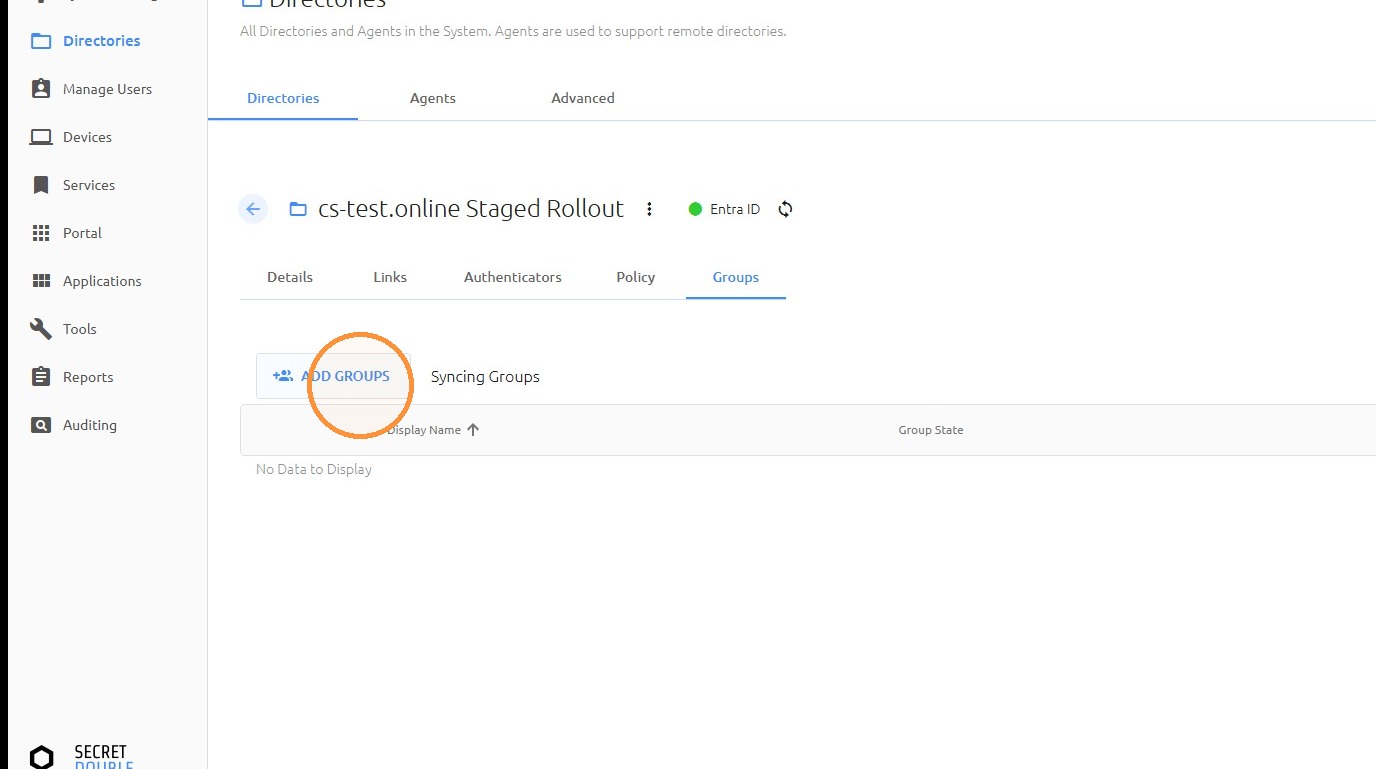
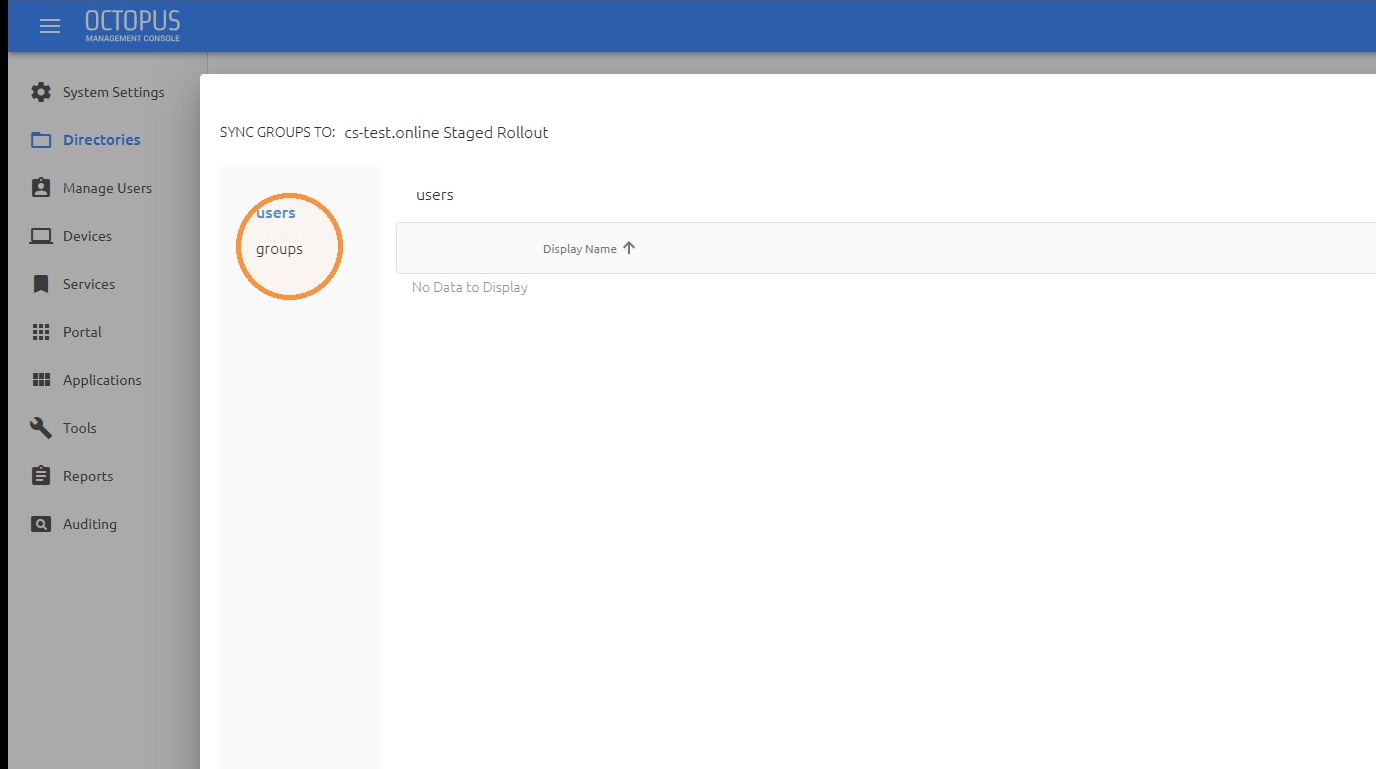
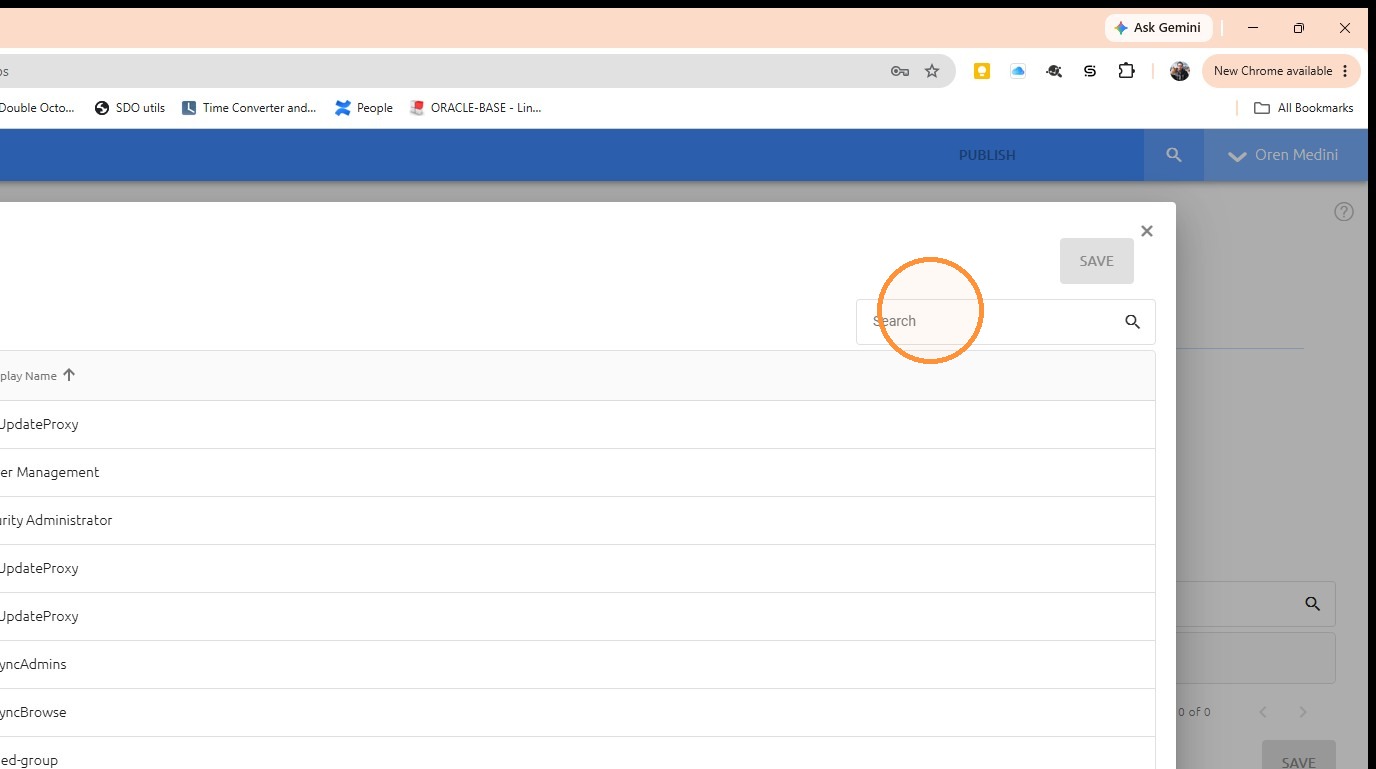
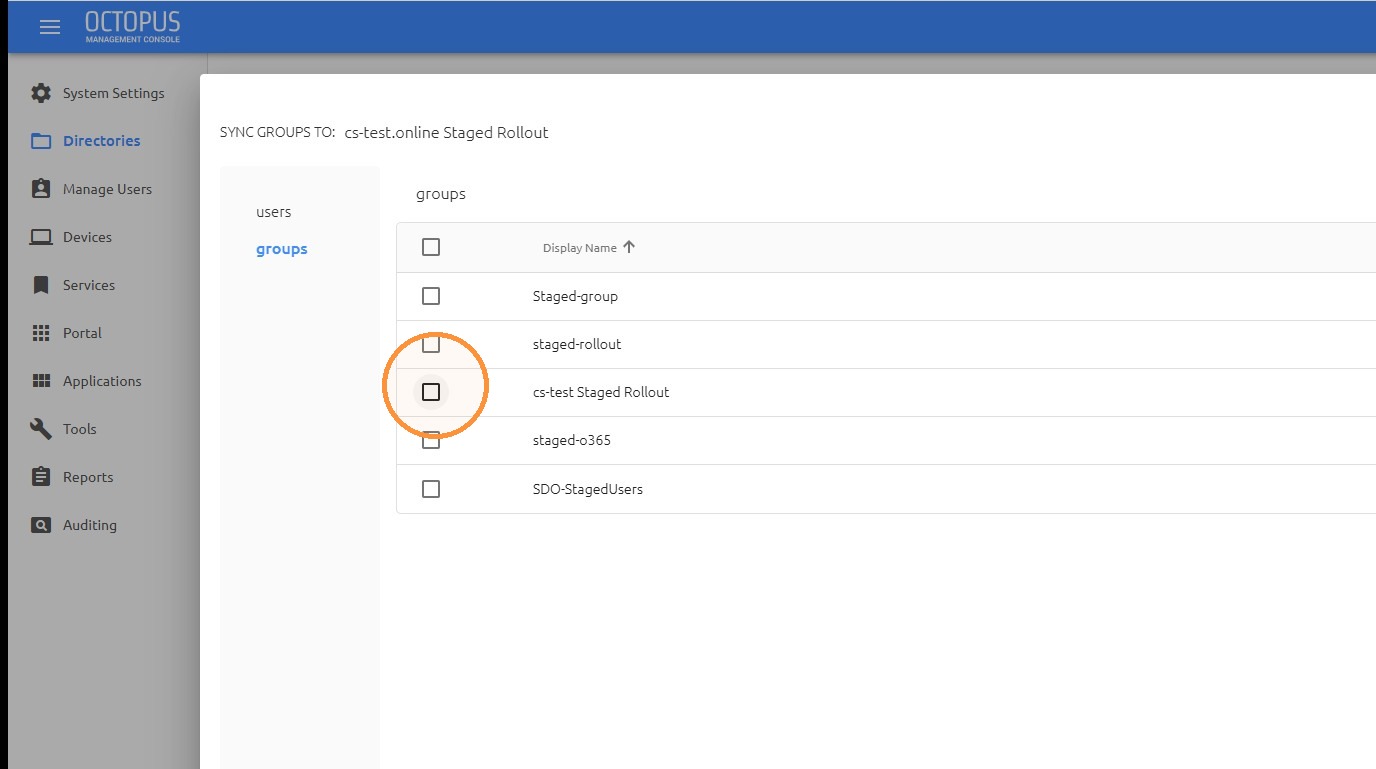
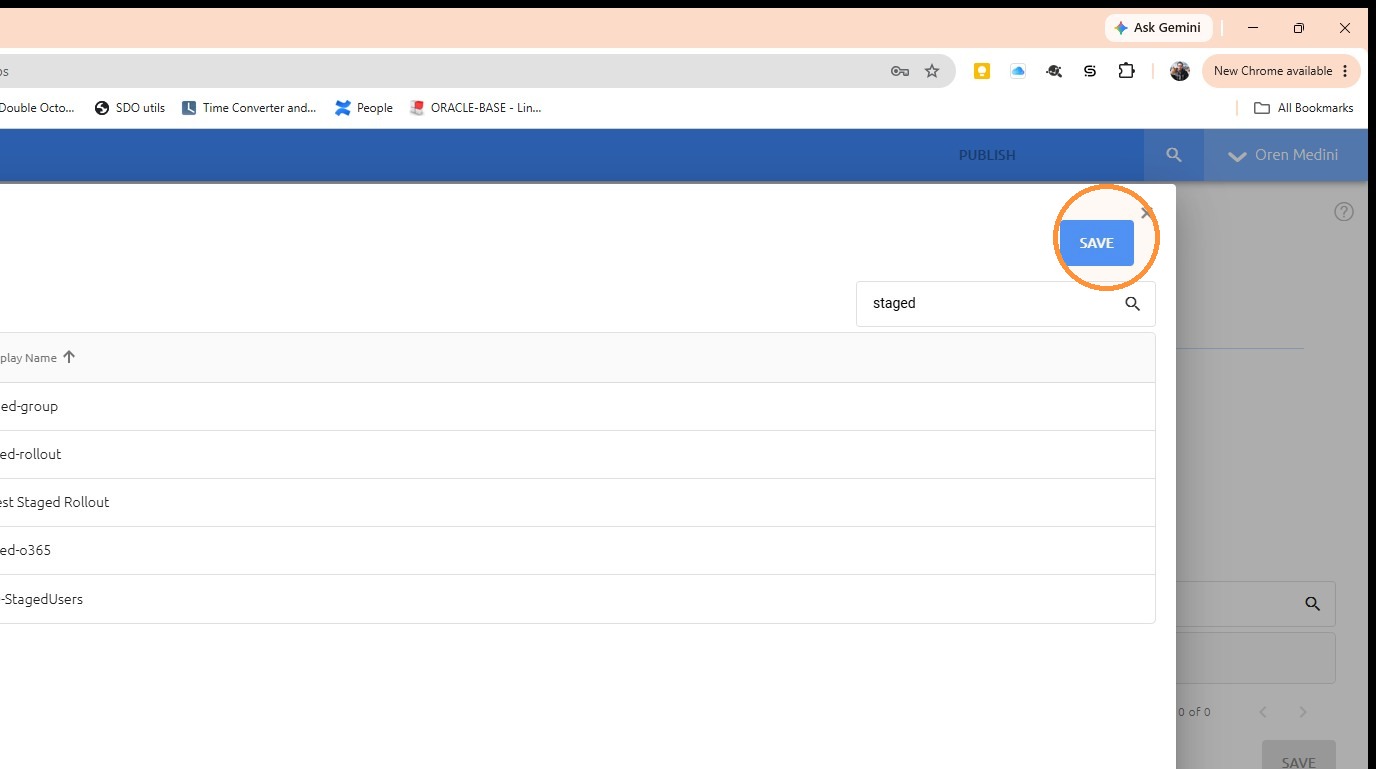
Search for the staged rollout group and add it to the synchronization list.
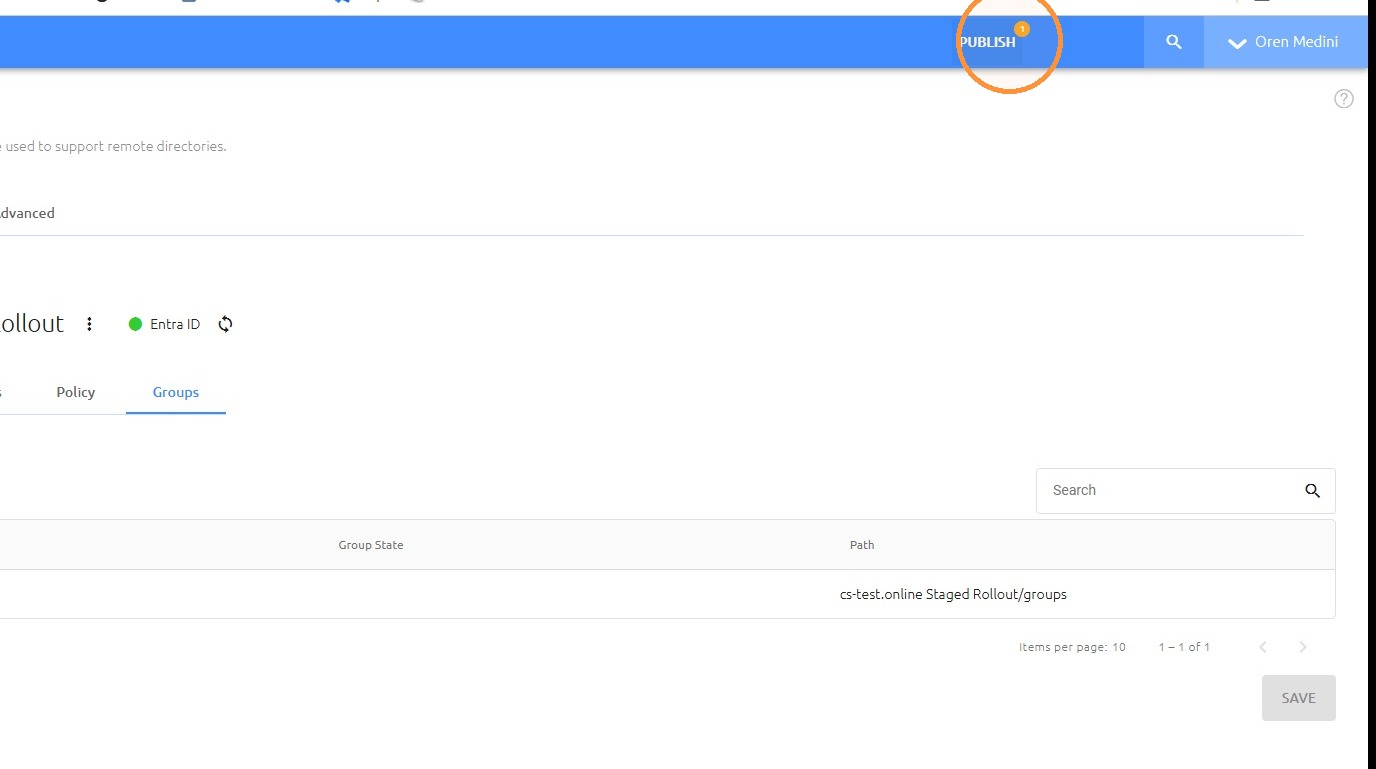
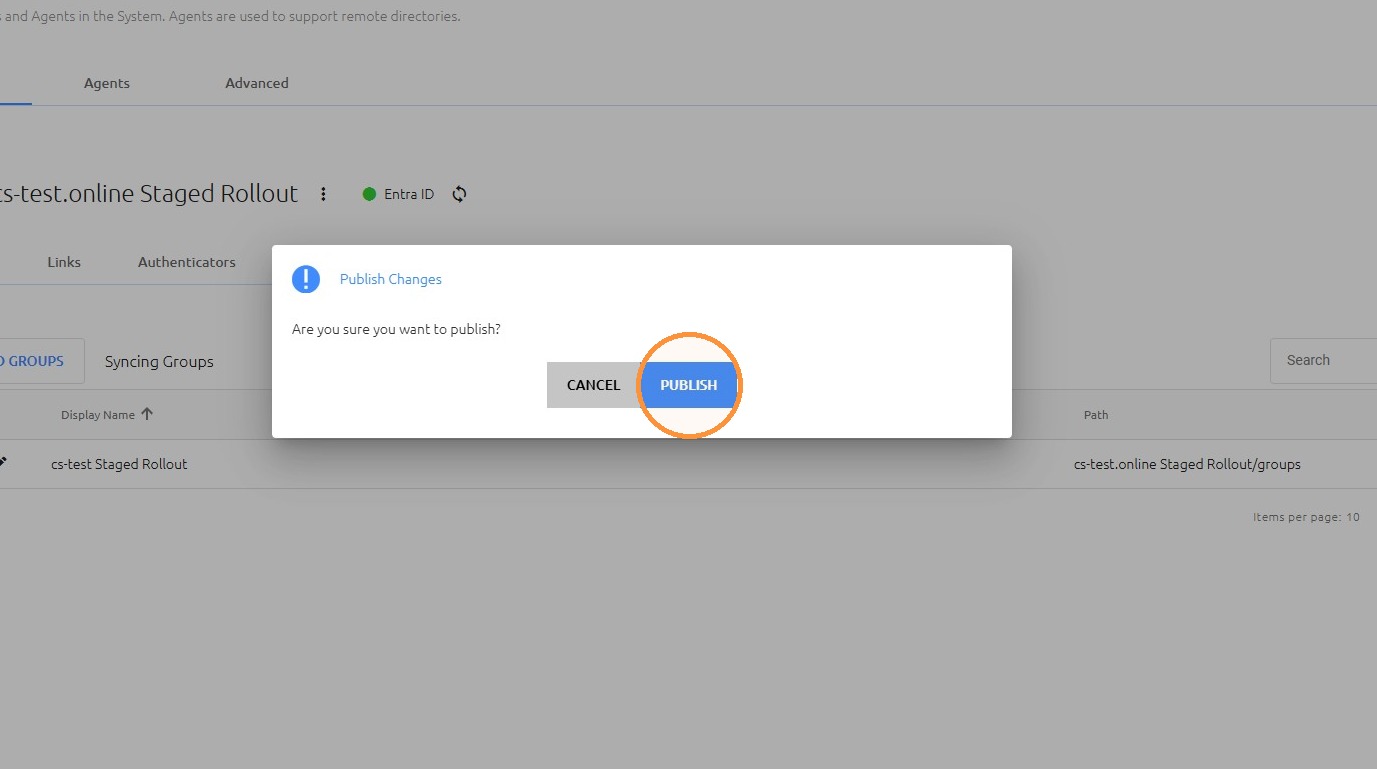
64
Confirm publishing the group changes.
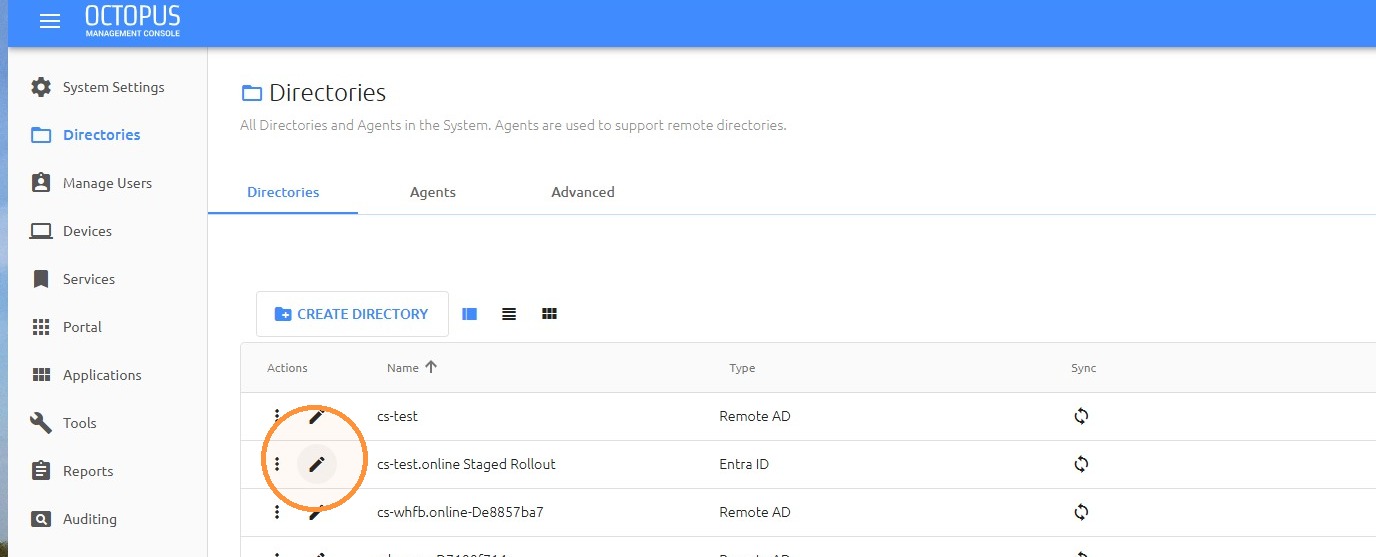
65
Edit the Entra ID directory that you added.
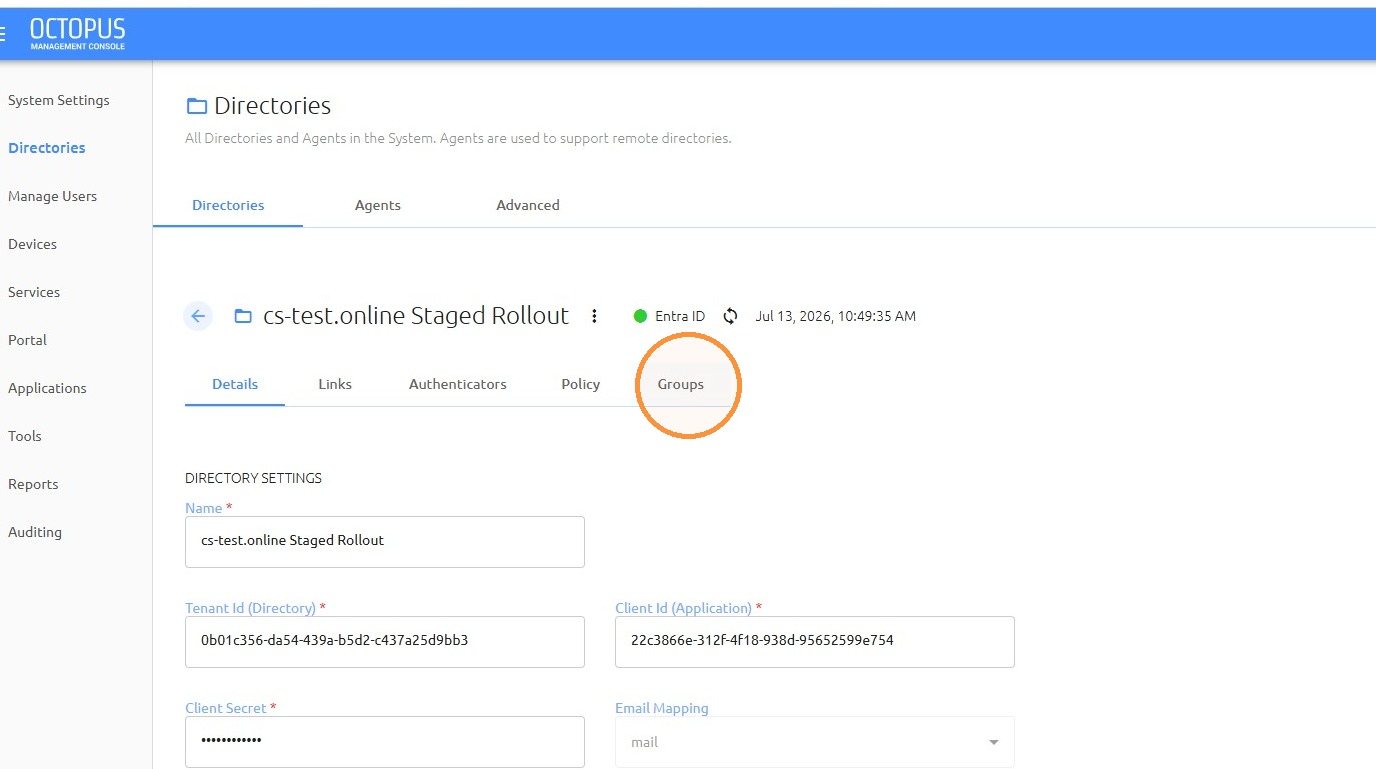
67
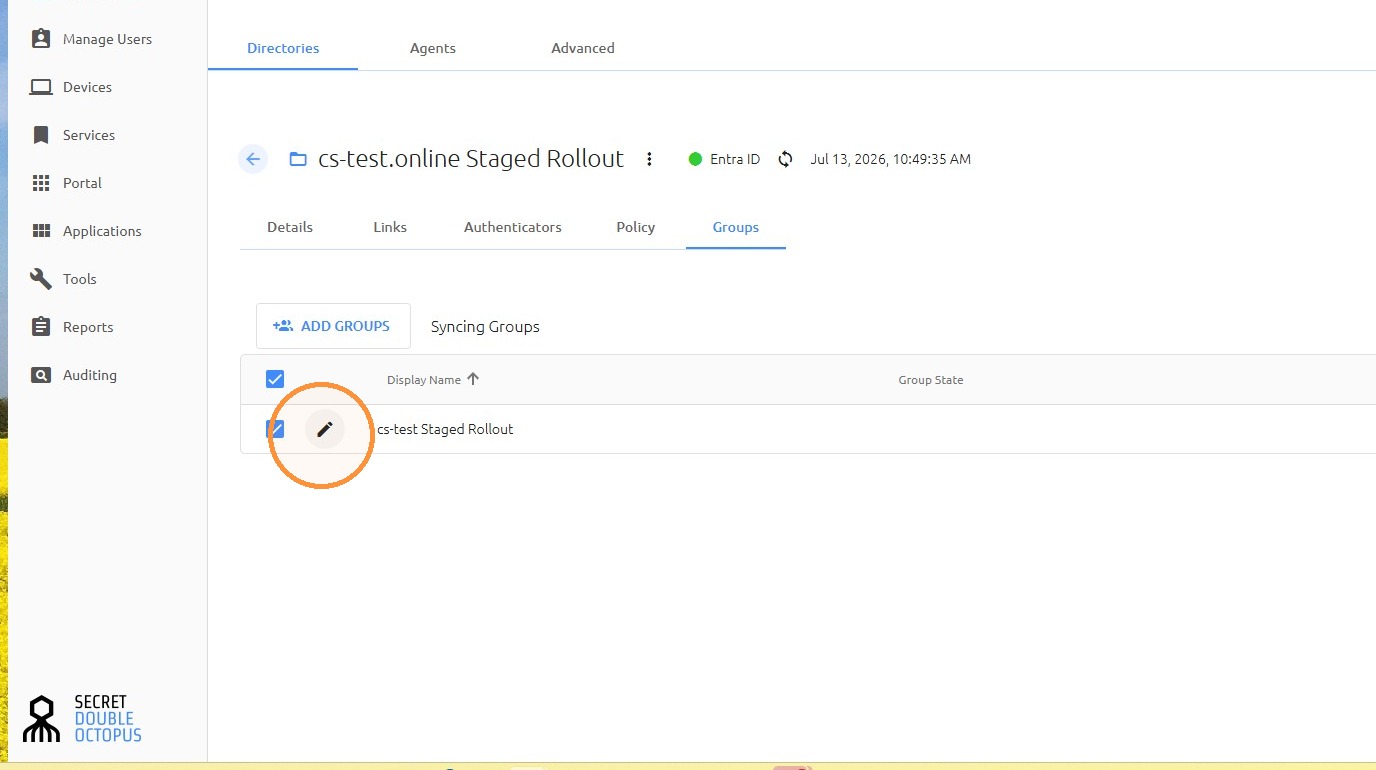
Edit the staged rollout group.
69
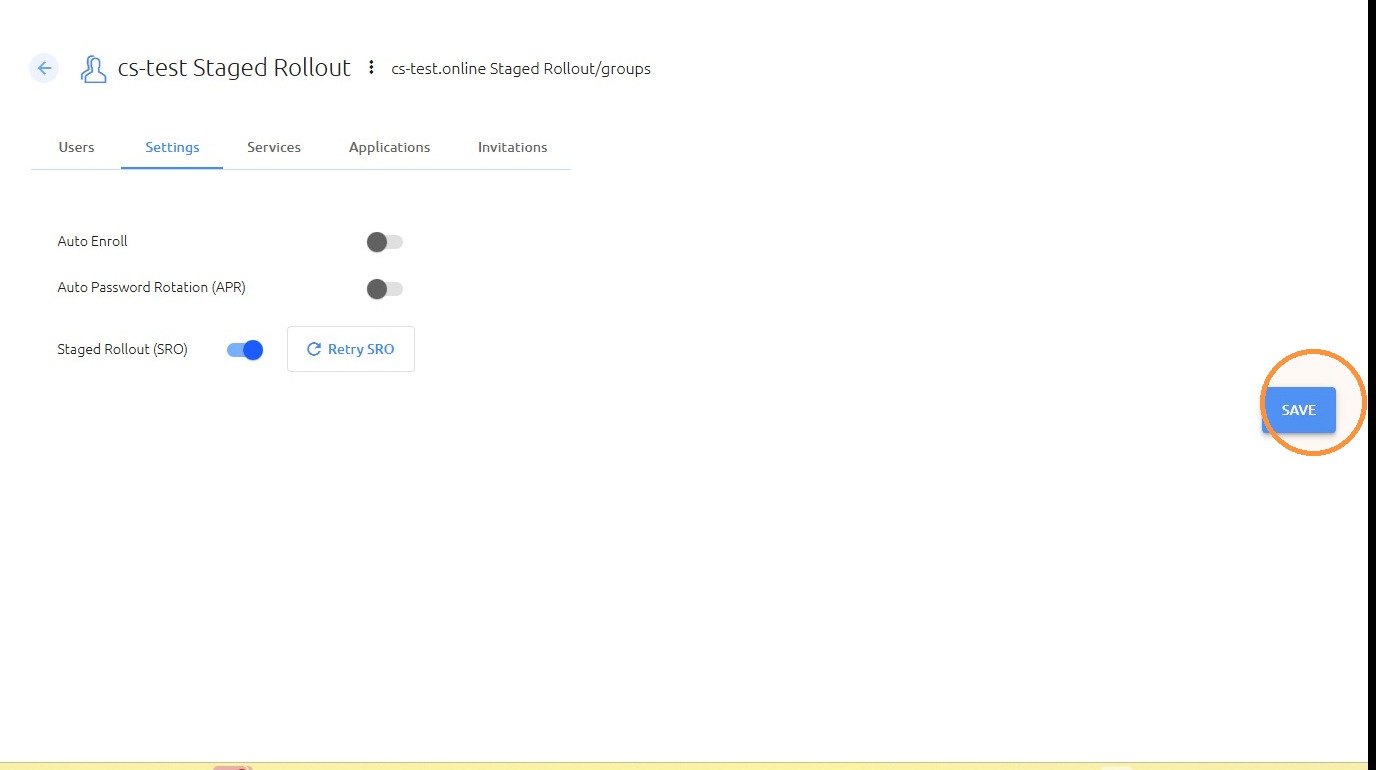
Enable the Staged Rollout (SRO) toggle.
71
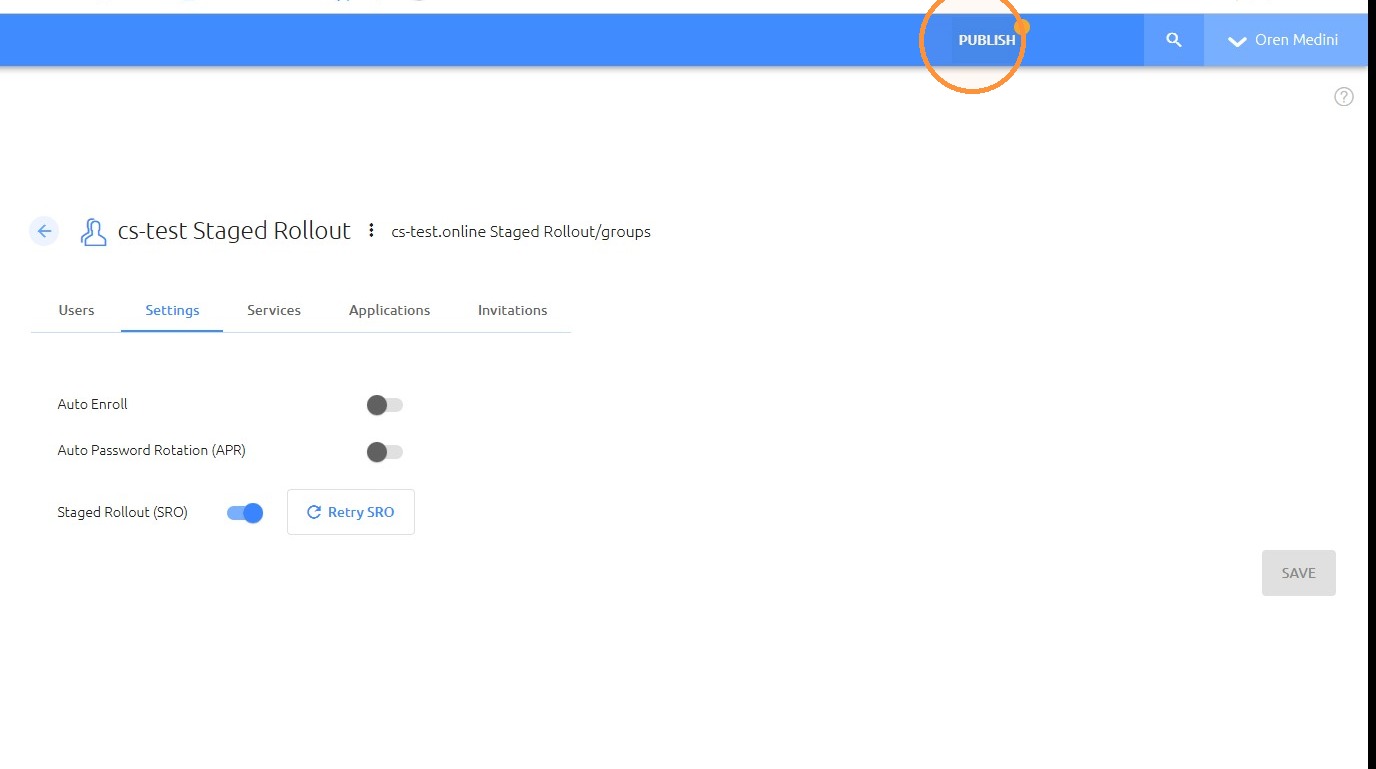
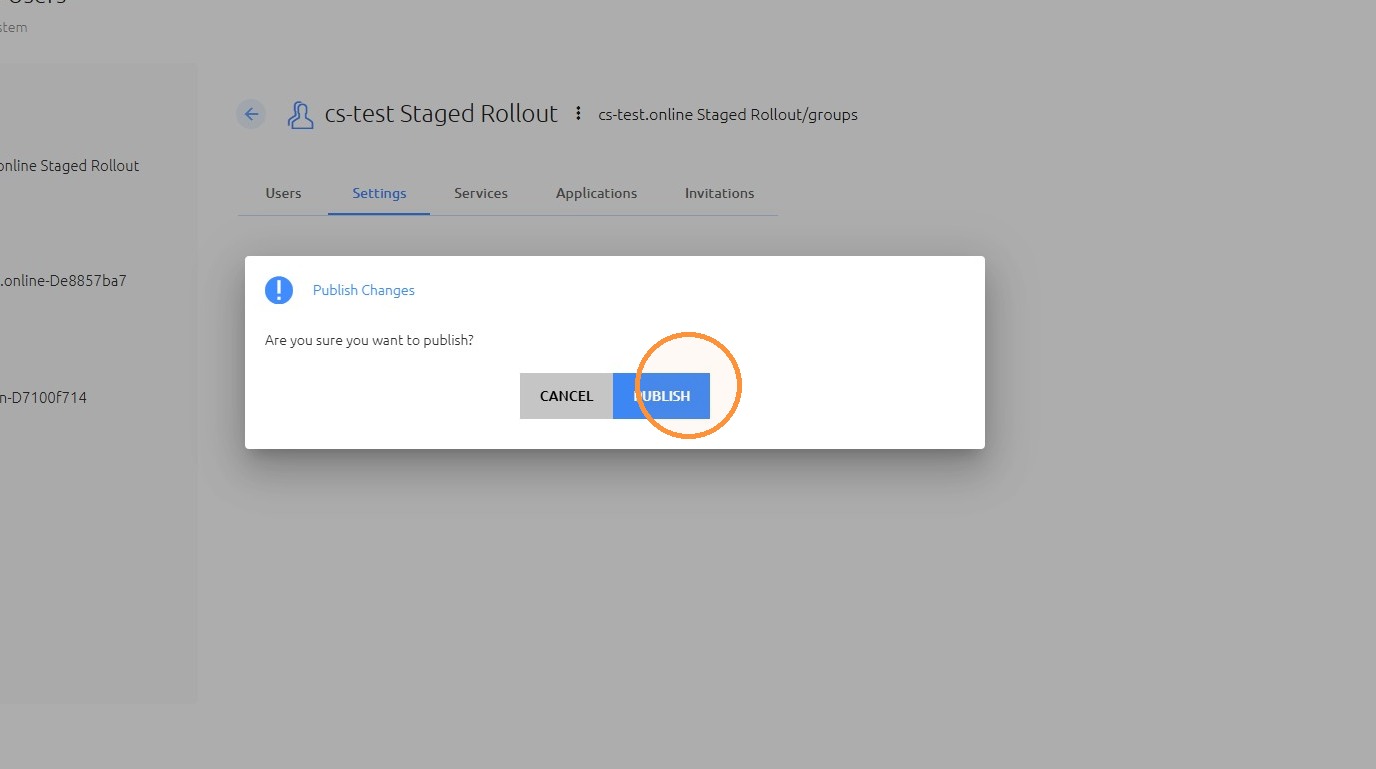
Confirm publishing the staged rollout group settings.
73
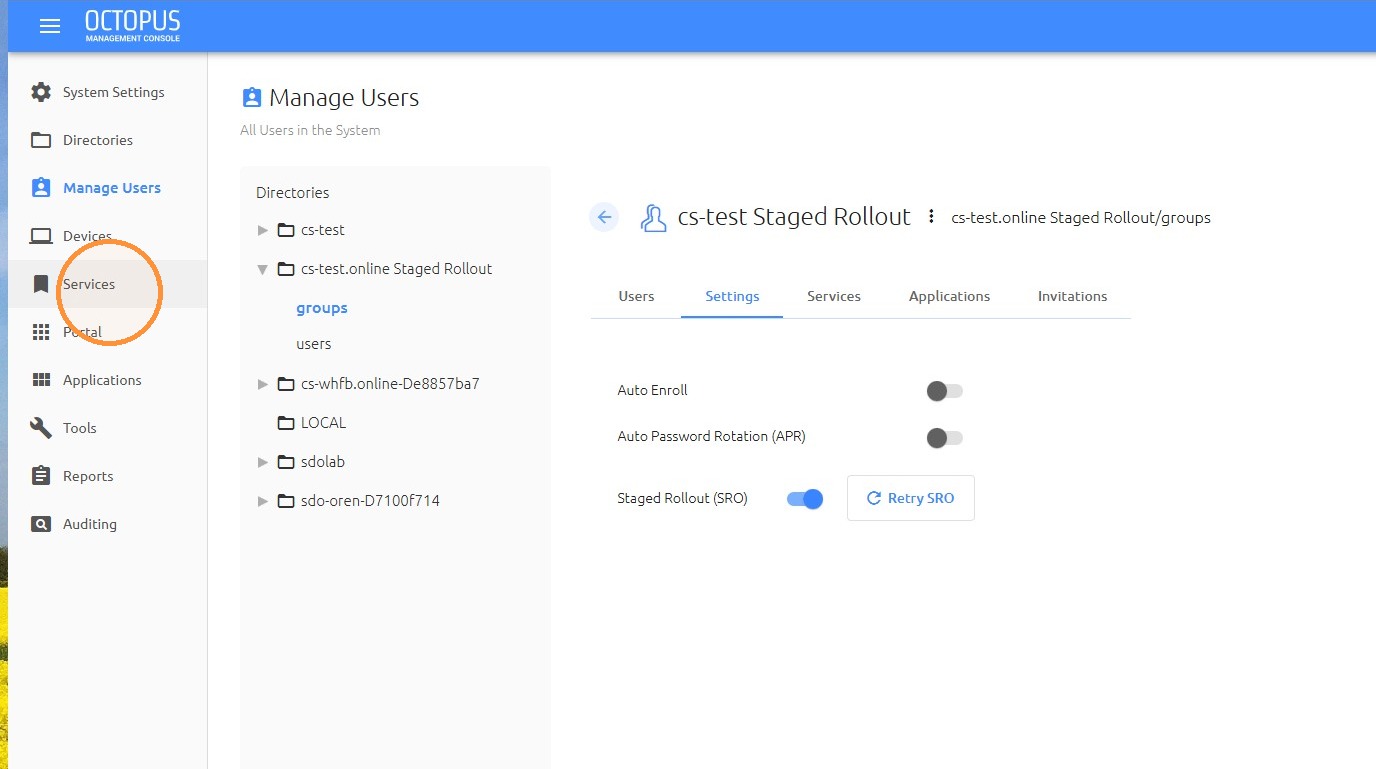
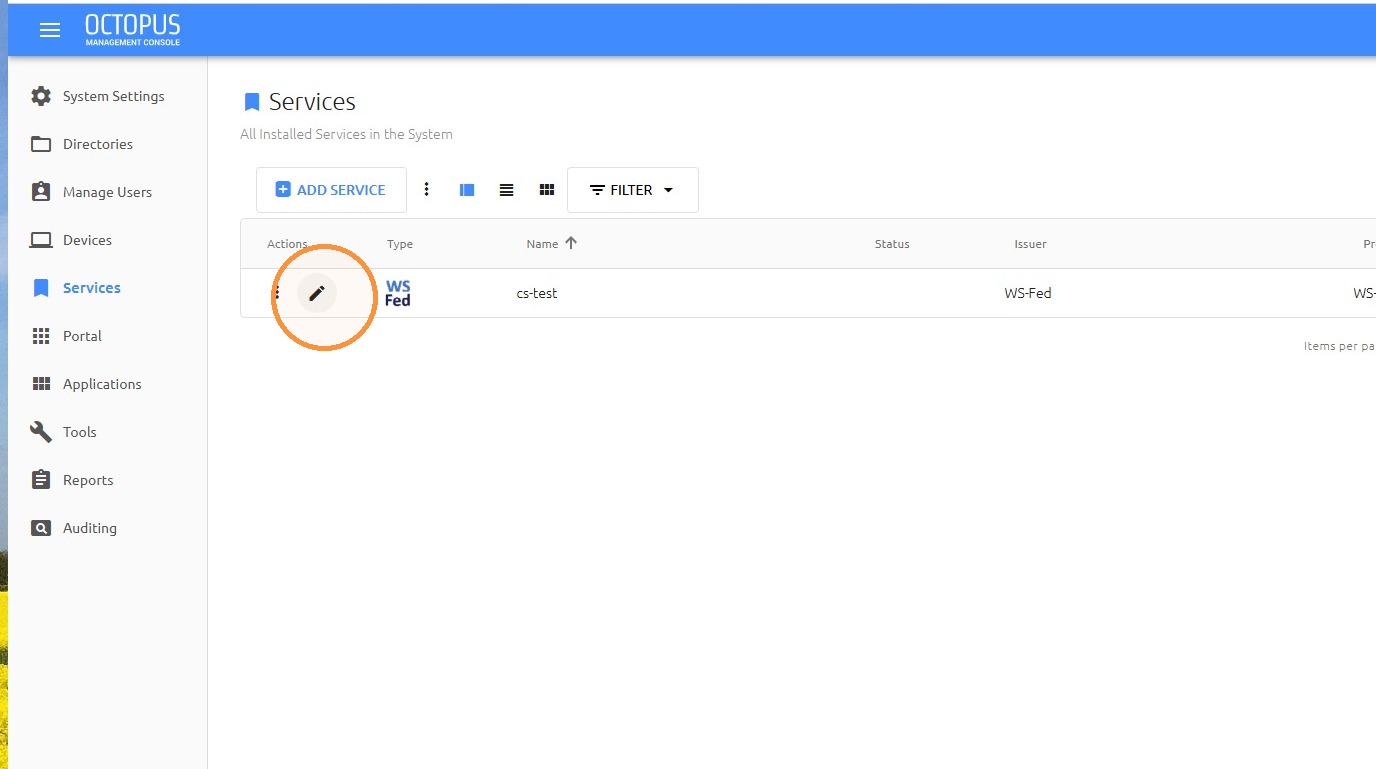
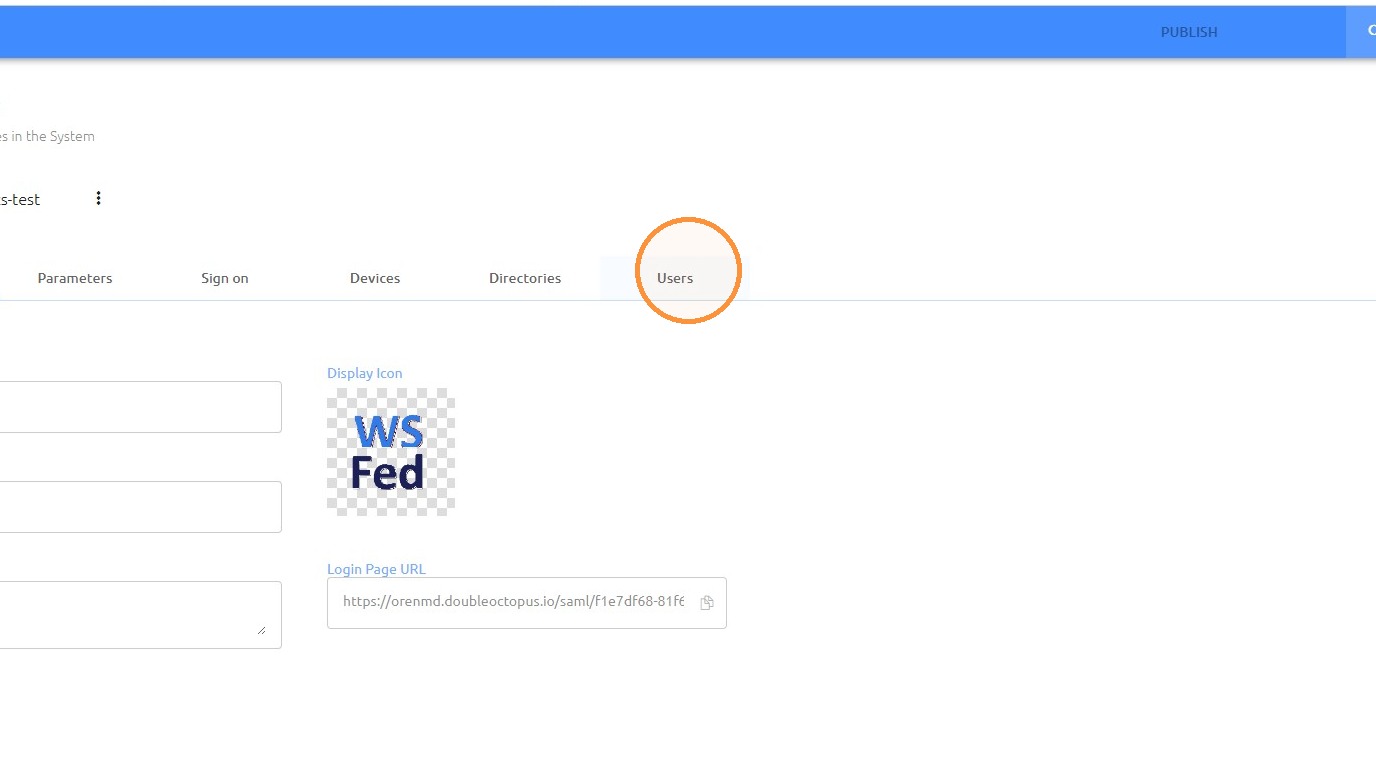
Edit the WS-Federation service.
76
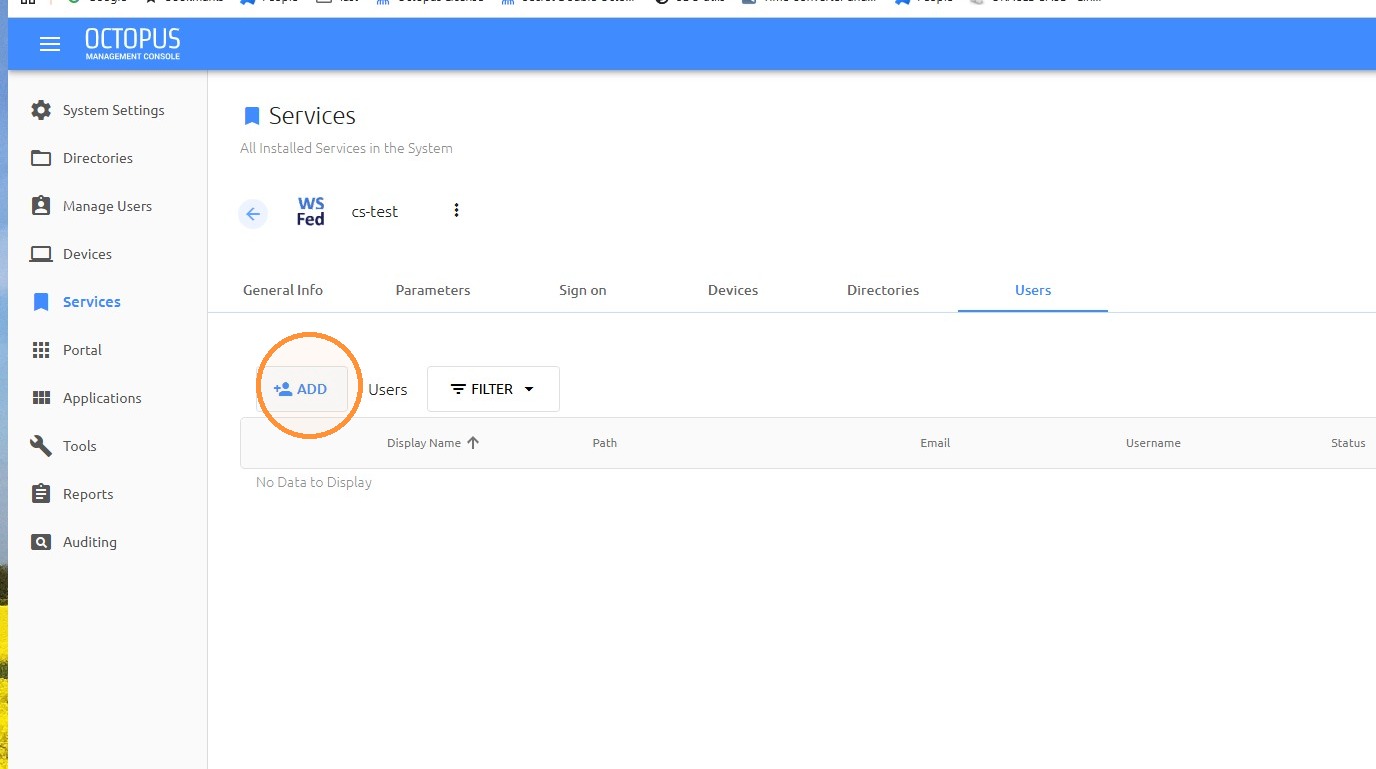
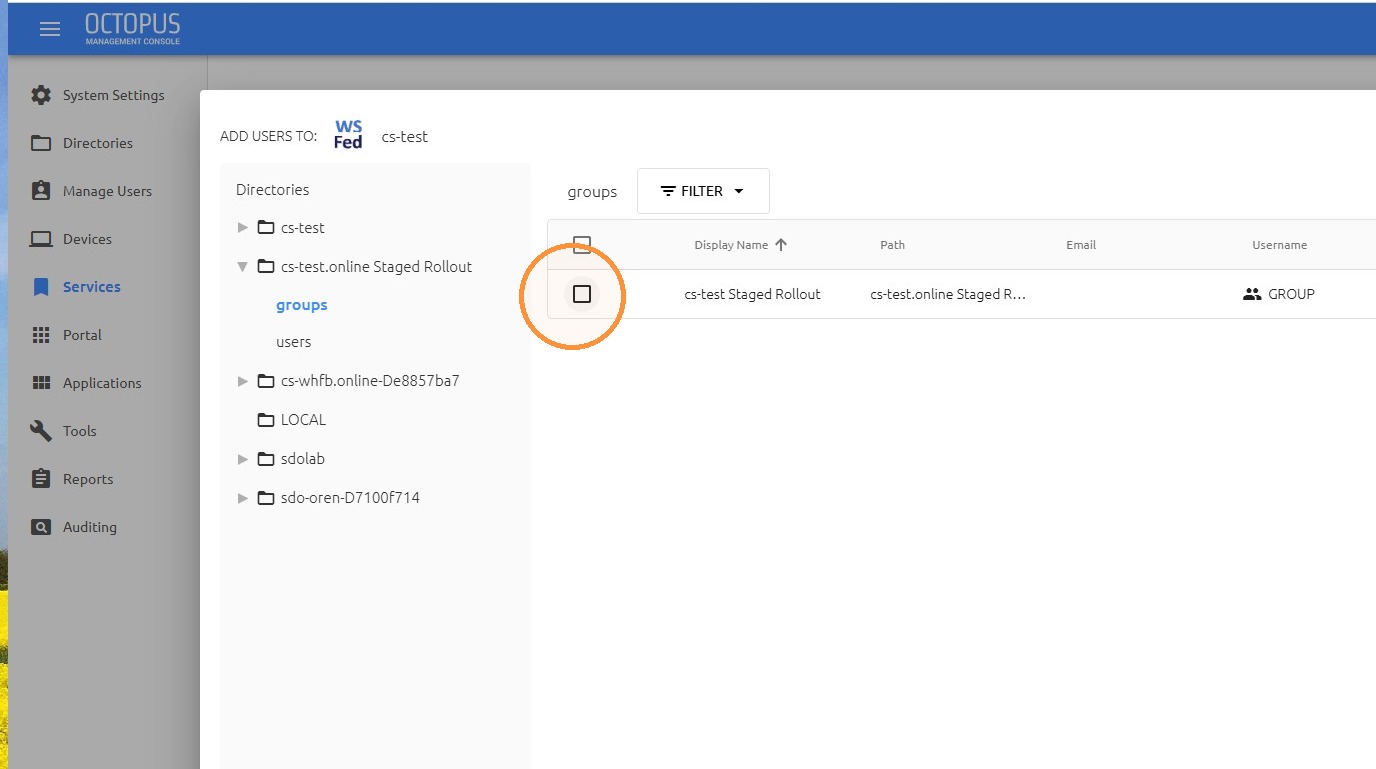
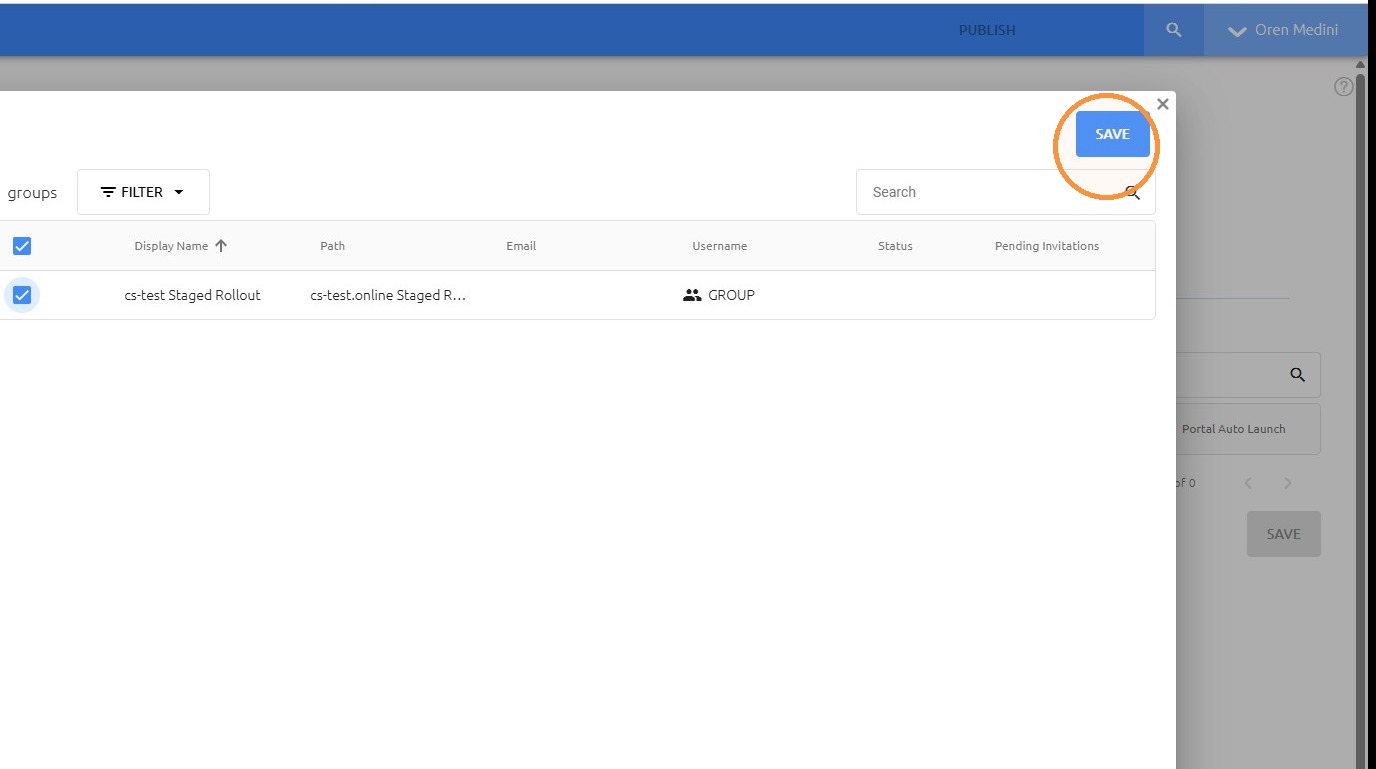
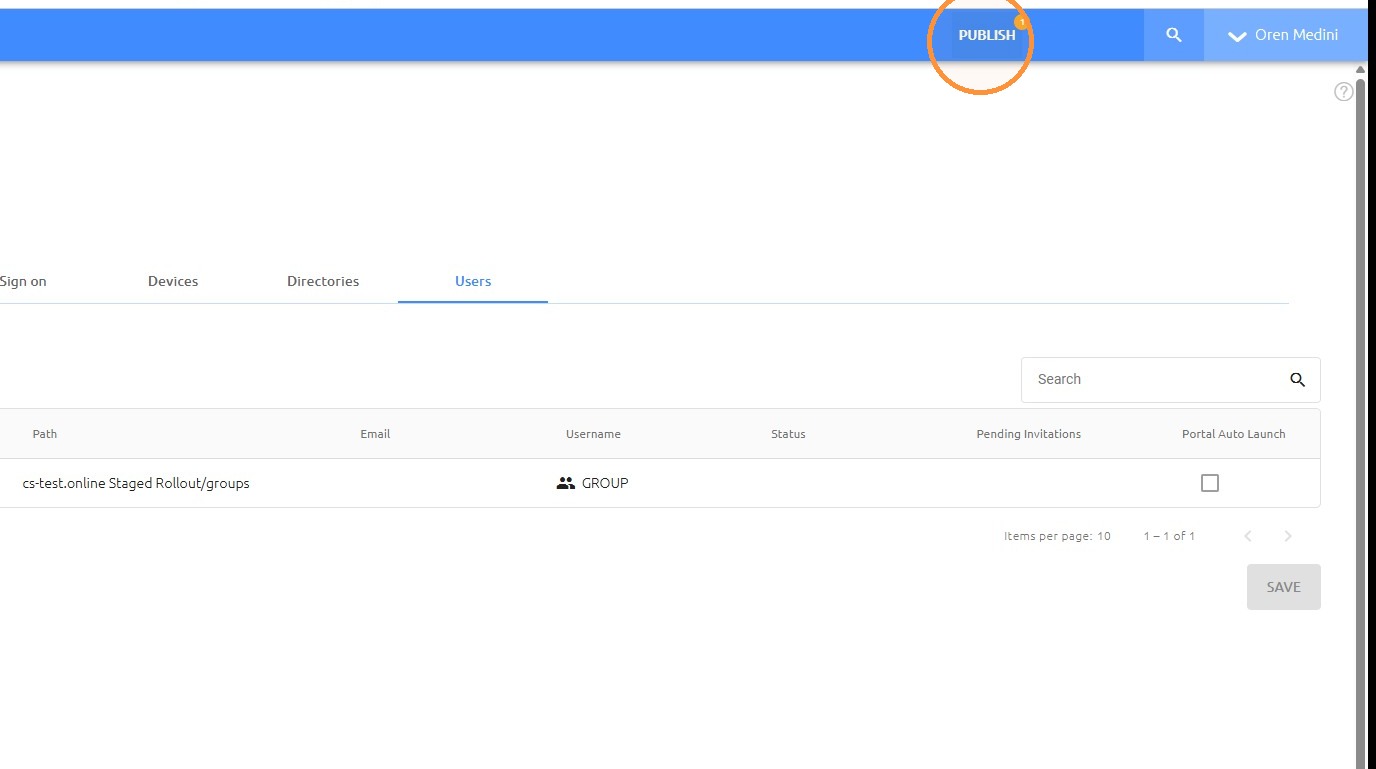
Add the staged rollout group.
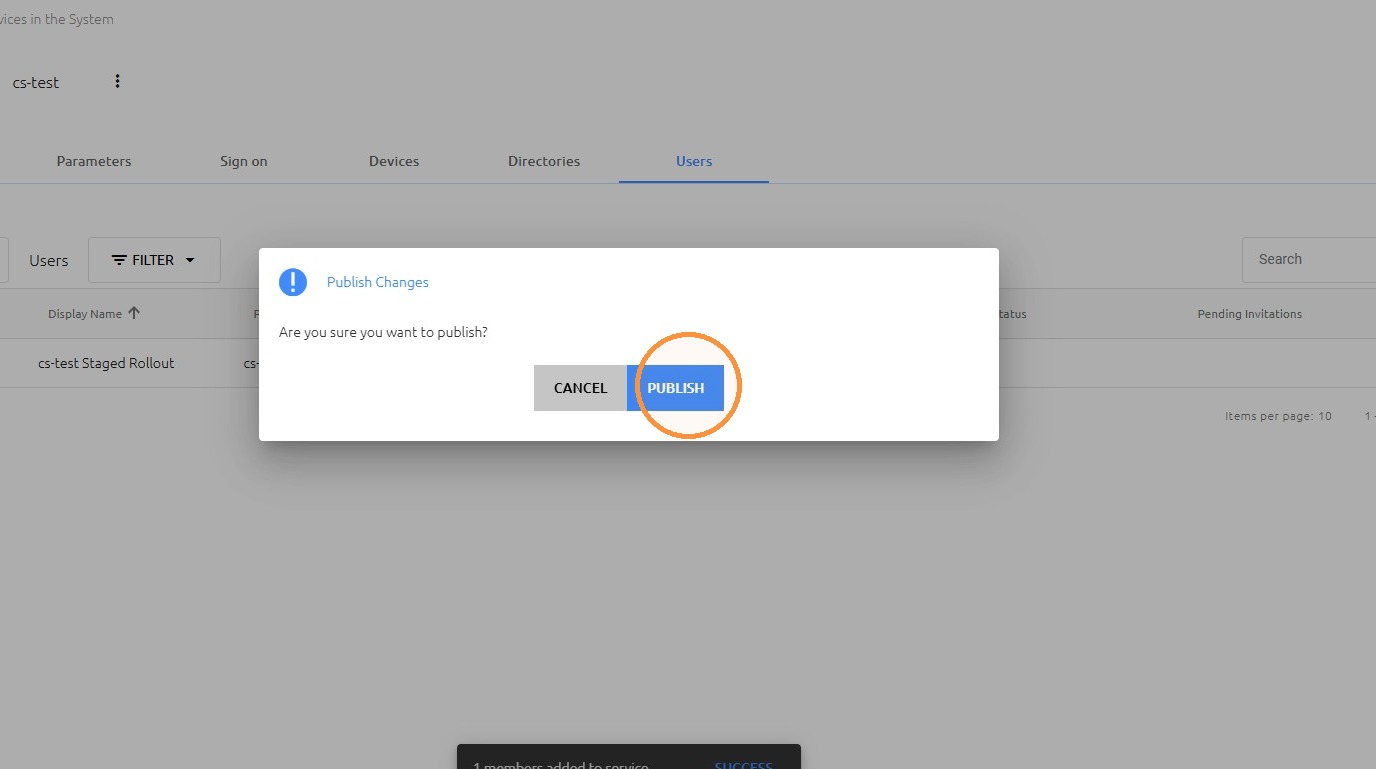
79
Confirm publishing the WS-Federation service changes.
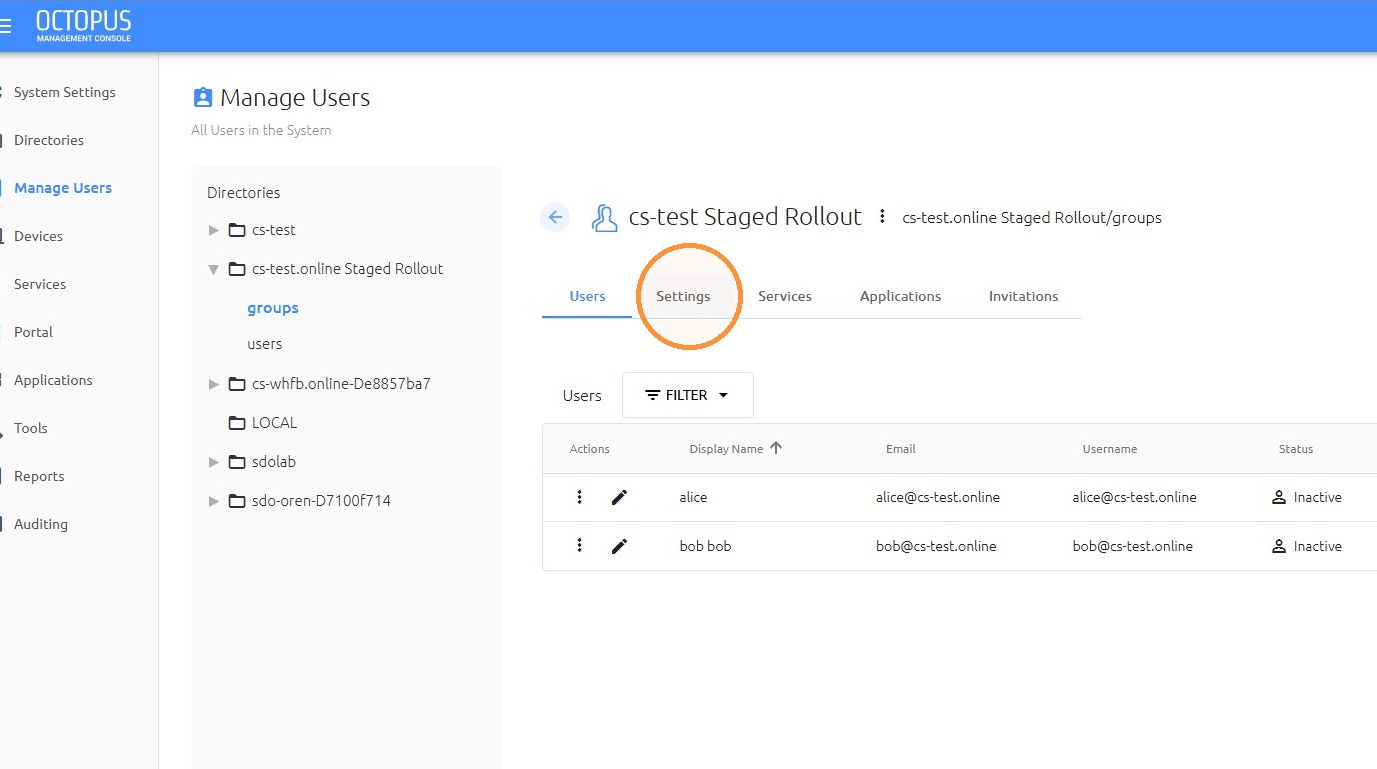
80
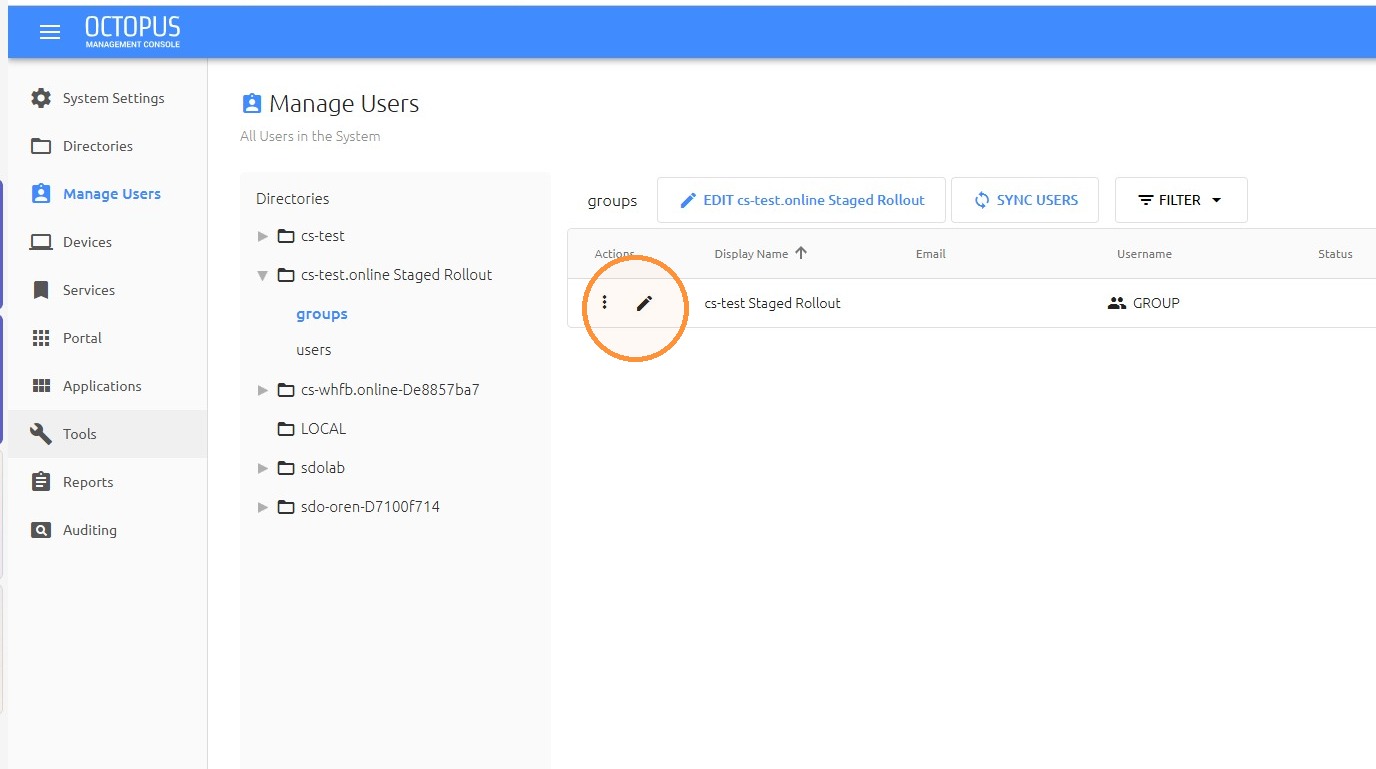
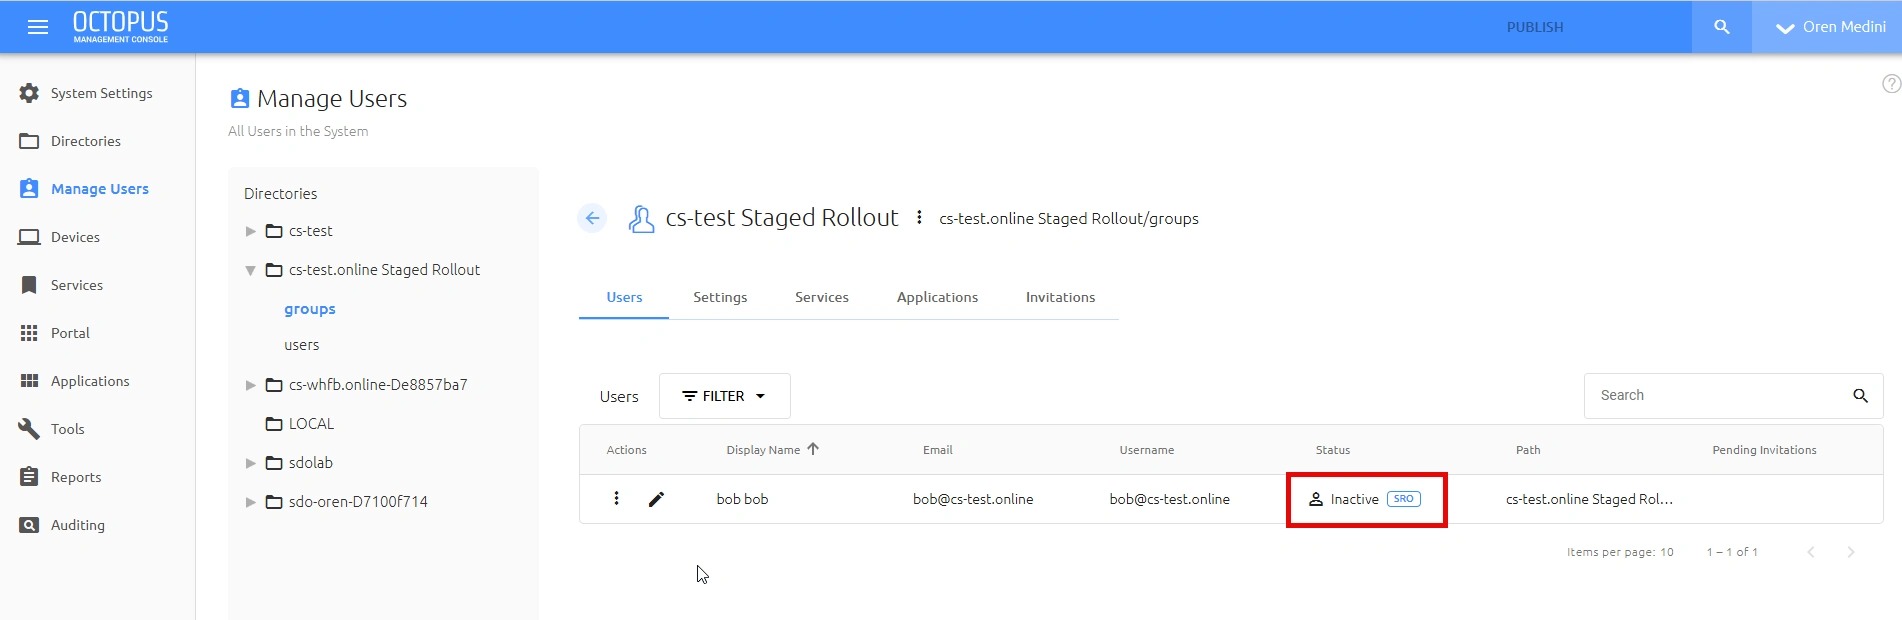
Edit the staged rollout group and validate that the user is in the SRO state.
81
Confirm that the user is displayed with the SRO status.
Staged rollout configuration complete
Confirm that users in the staged rollout group appear with the SRO status and can access the configured WS-Federation service.