This document describes the configurations required for configuring Secret Double Octopus as a service provider in Microsoft Entra ID.
Prerequisites
The integration described in this document is based on the following software versions:
Octopus Authentication Server version 6.7
Entra ID admin center
Integration Workflow
Configuration of the Secret Double Octopus service provider involves the following sequential phases:
Enabling the Portal Service Provider: Activate the Service Provider feature in the Octopus Management Console
Adding the Enterprise Application in Entra ID: Create an application in Entra ID, assign users, and configure single sign on settings
Completing Service Provider Integration: Add the Metadata URL to the Portal Service Provider settings
Follow these steps to activate the Service Provider option in the SDO User Portal:
From the Octopus Management Console, select the Portal menu.
Then, select the Service Provider tab.
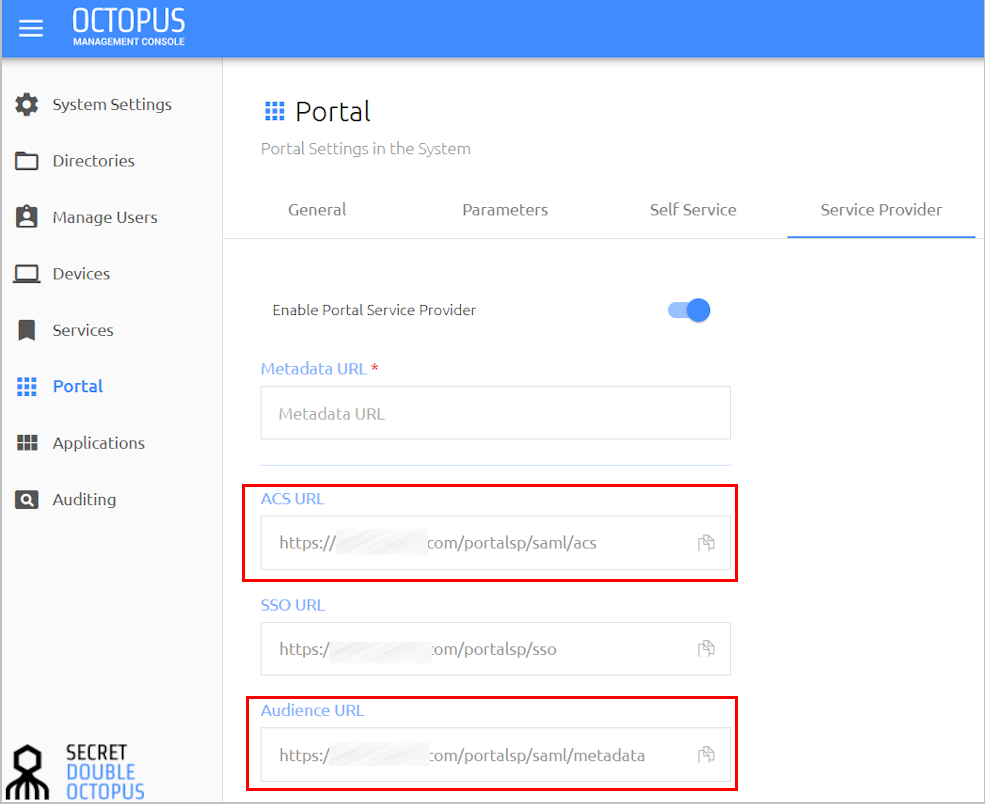
Click the Enable Portal Service Provider toggle button to activate the setting.
Then, at the bottom of the tab, click Save.
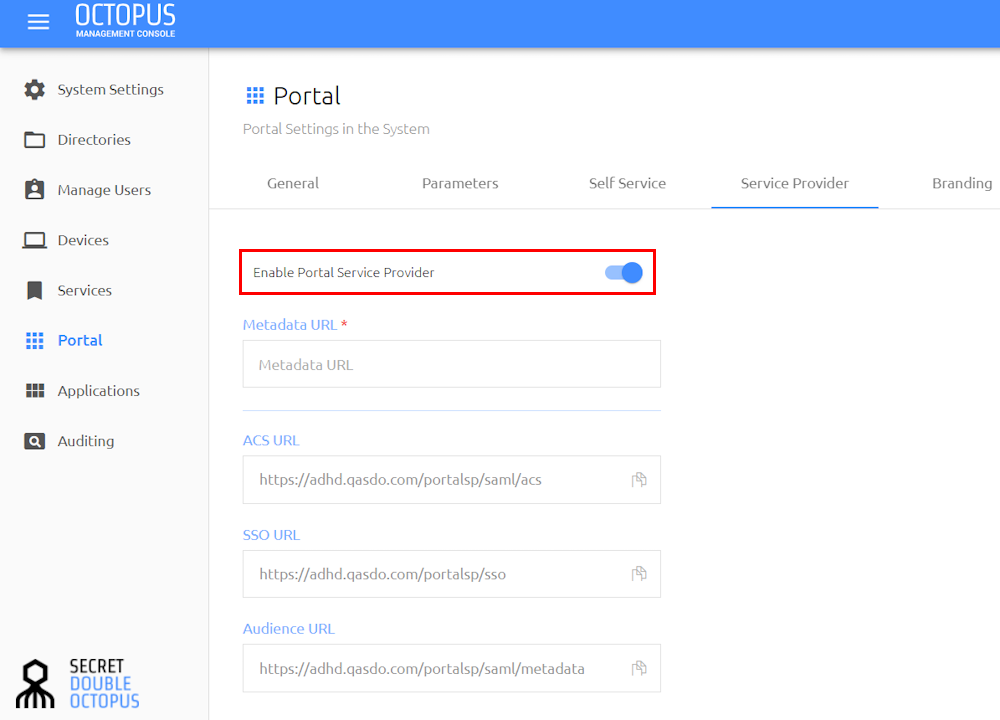
Copy the following settings for later use:
ACS URL
Audience URL
The following sections describe how to create and configure the required Enterprise application in Entra ID:
Follow these steps to add the Enterprise application:
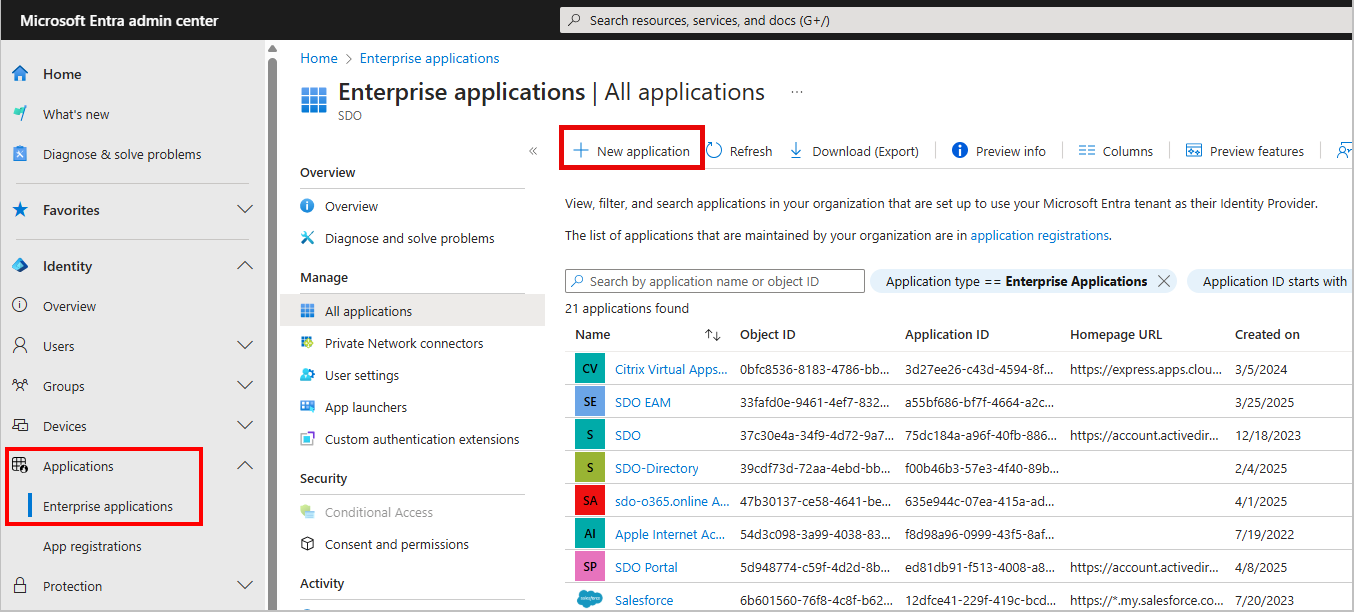
From your Entra ID admin center, navigate to Applications -> Enterprise applications.
Then, at the top of the page that opens, click New application.
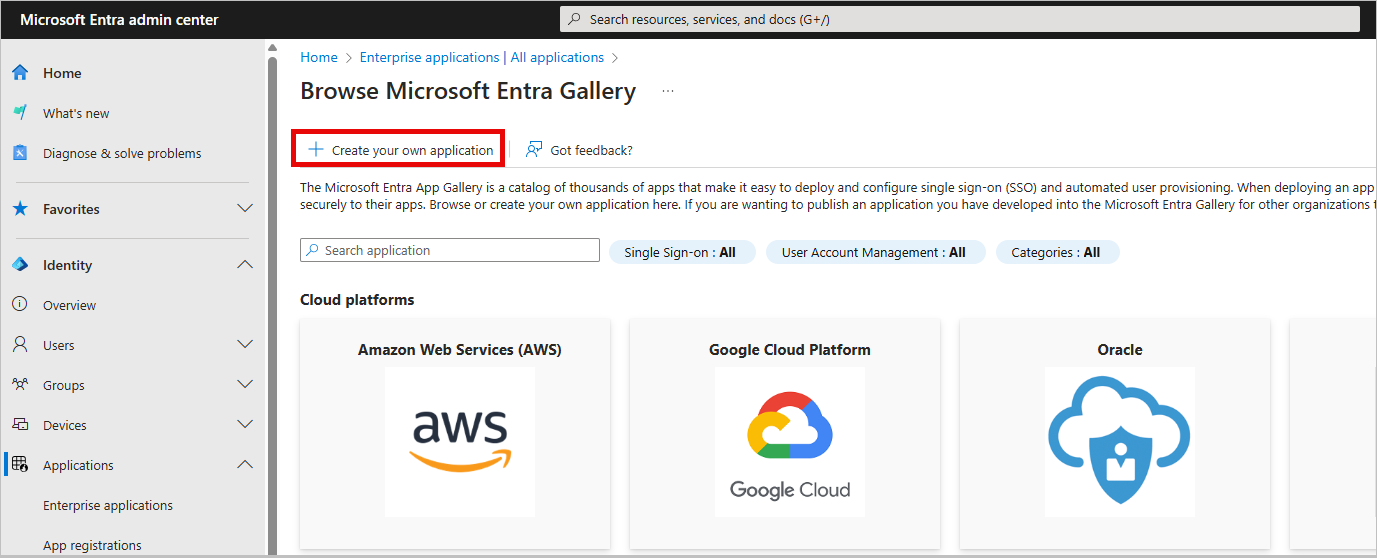
At the top of the page that opens, click Create your own application.
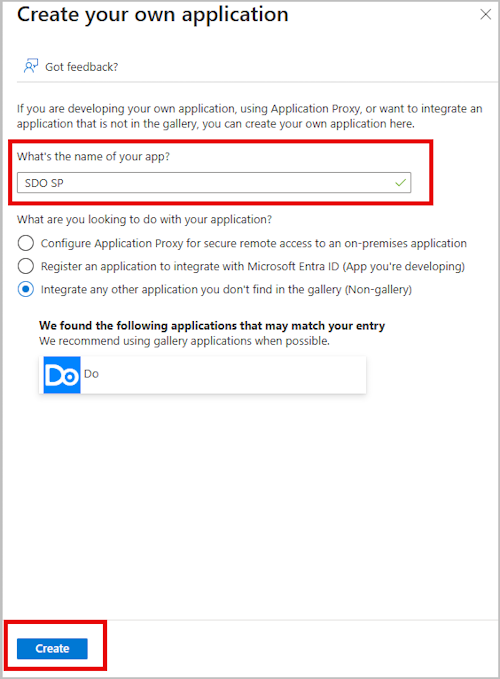
In the pane that opens, enter a name for the app and then click Create. (Do not change any default settings.)
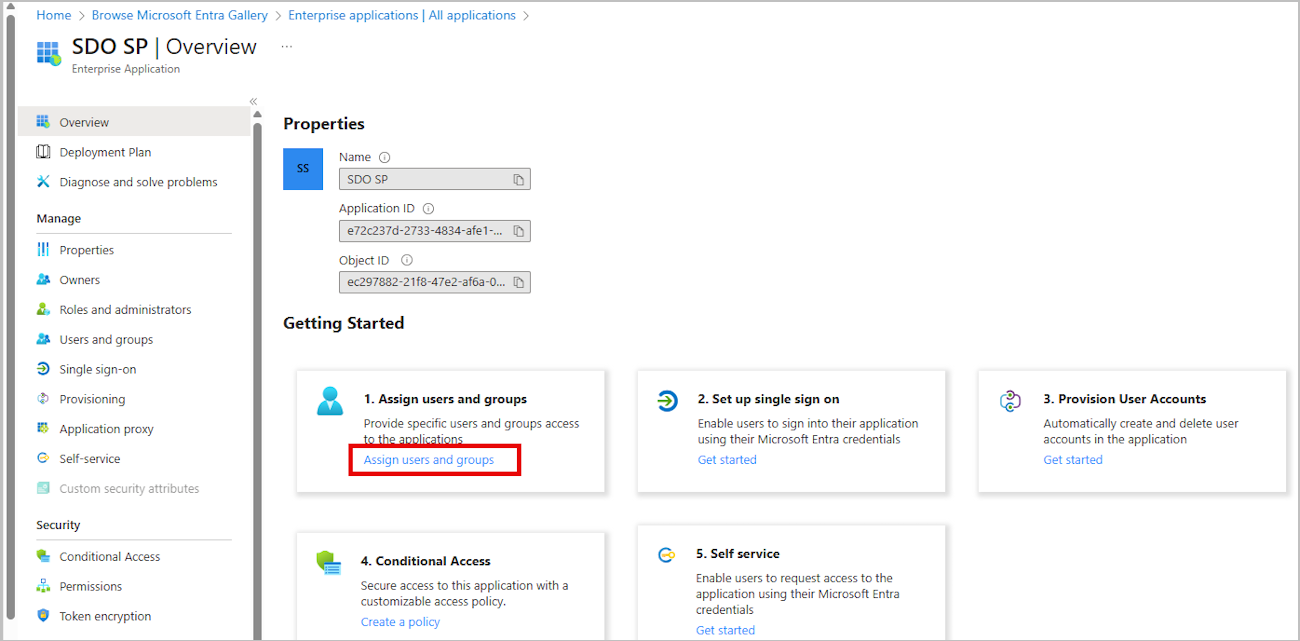
To designate users and groups that will have access to the application, select the application you created and click Assign users and groups.
 |
The procedure below explains how to edit the SAML configuration in your application to set up SSO. Before you begin, make sure that you have access to the following elements that you copied from the Portal menu of the Octopus Management Console (Enabling the Portal Service Provider):
ACS URL
Audience URL
 |
To set up single sign on:
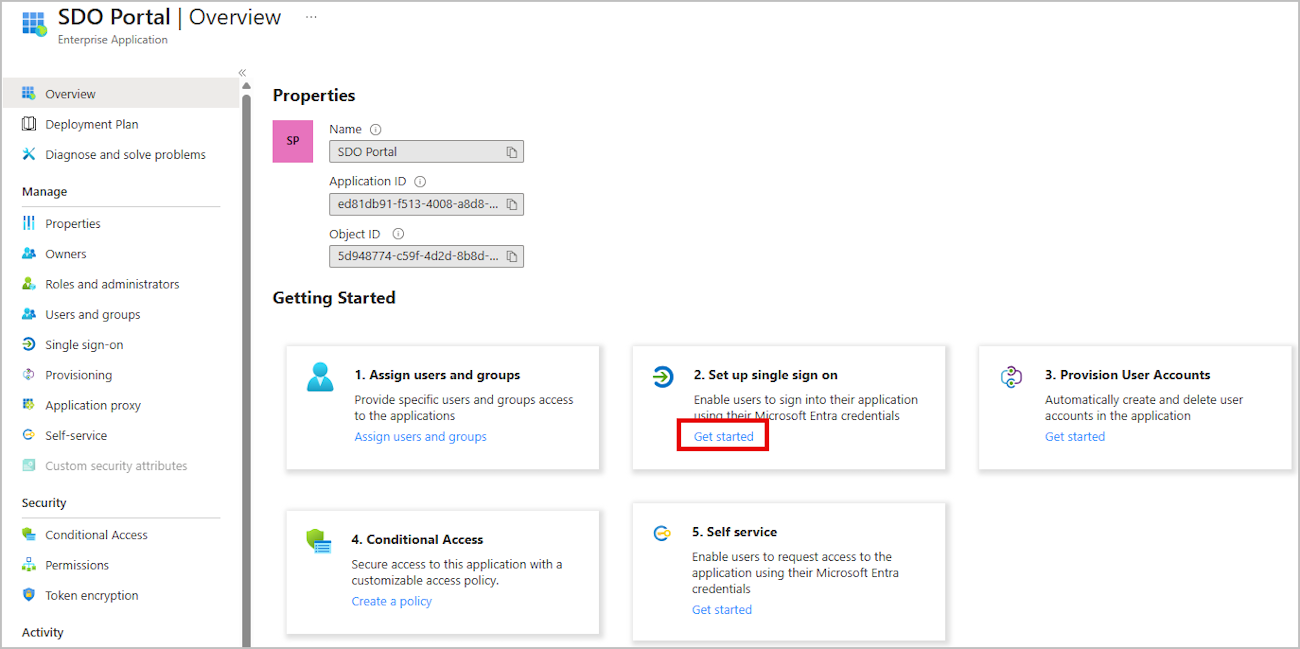
Select the application you created. Under Getting Started > Set up single sign on, click Get started.
In the Basic SAML Configuration frame, click Edit.
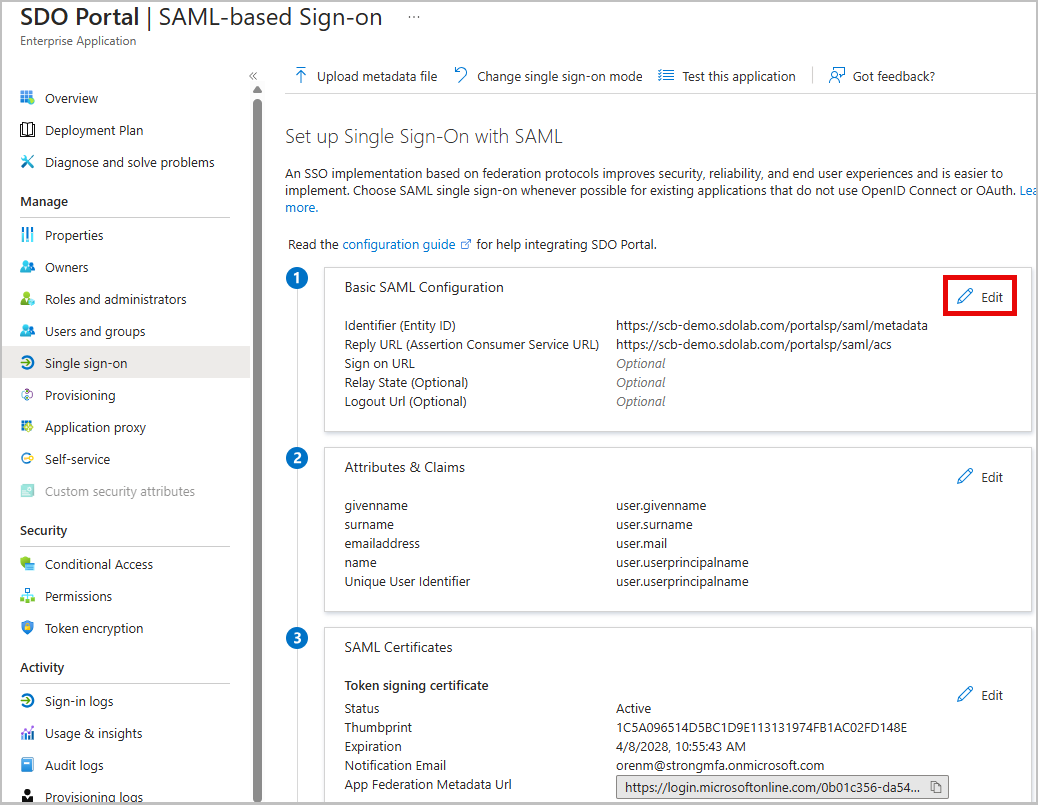
In the pane that opens, configure the following settings:
Identifier: Paste the Audience URL copied from the Octopus Management Console.
Reply URL: Paste the ACS URL copied from the Octopus Management Console.
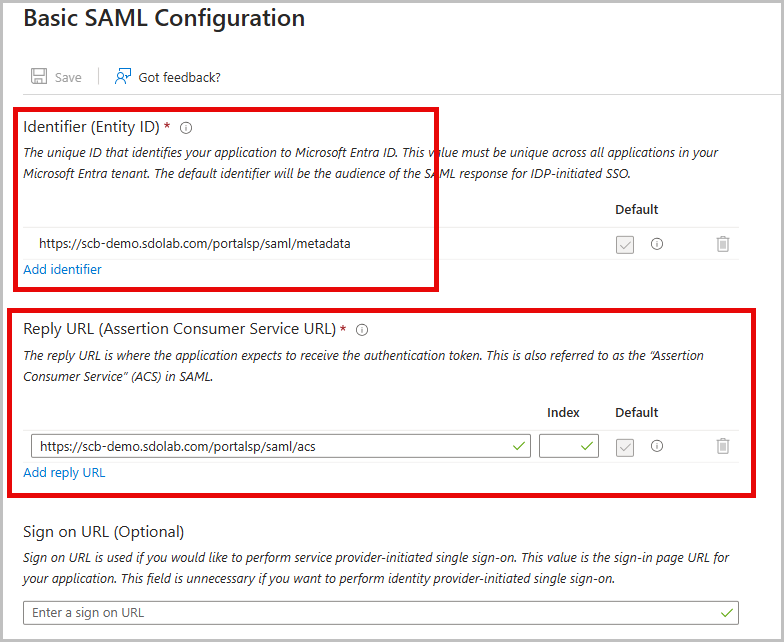
Click Save.
The final phase of the integration involves copying the Metadata URL from the Enterprise Application to the Octopus Management Console.
To complete service provider integration:
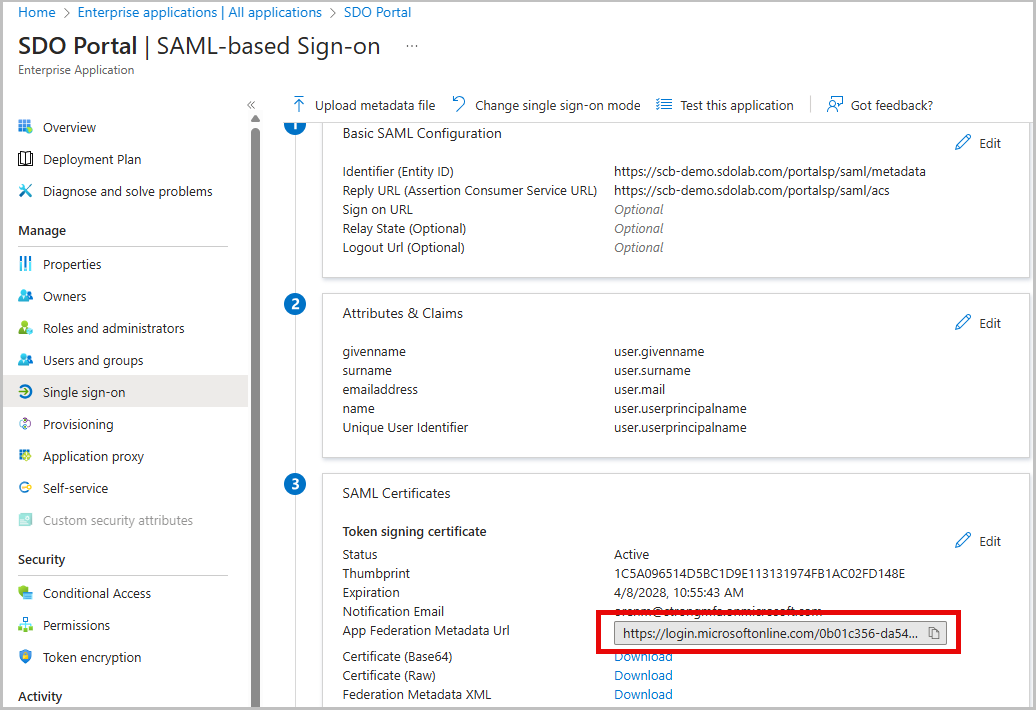
From the SAML-based Sign-on page of your application, copy the App Federation Metadata URL.
From Octopus Management Console, select the Portal menu and open the Service Provider tab.
Paste the App Federation Metadata URL in the Metadata URL field.
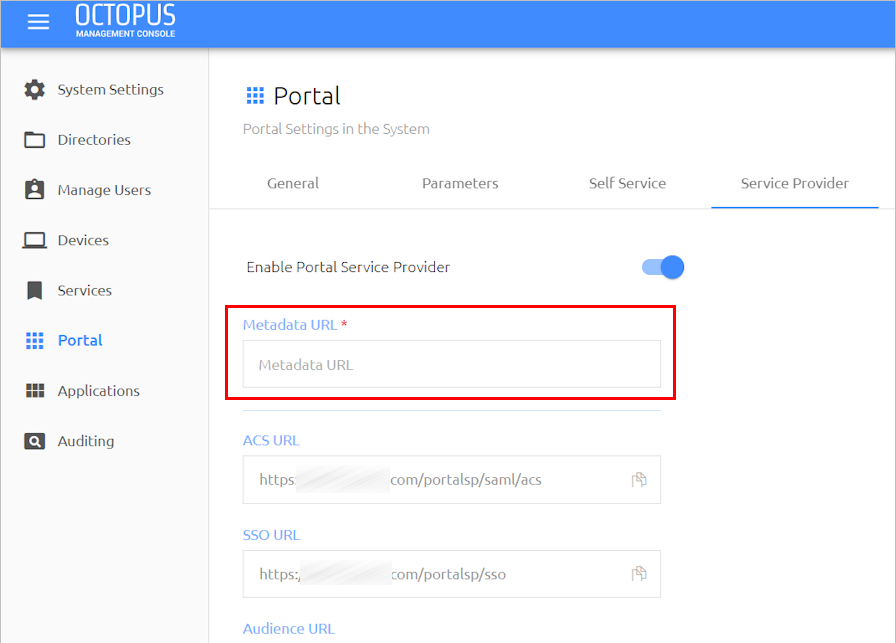
At the bottom of the tab, click Save.
Then, from the toolbar at the top of the page, click PUBLISH and publish your changes.