This document describes the procedures required for configuring the Secret Double Octopus solution as an external authentication method (EAM) for the Microsoft Entra admin center. After successful integration, users will be able to log into the Entra admin center using the Octopus platform for two-factor authentication.
Prerequisites
The integration described in this document requires Octopus Authentication Server version 6.6 (or higher).
Integration Workflow
Configuration of the EAM in Microsoft Entra ID involves the following sequential phases:
Creating the Entra ID EAM Service: Add a dedicated service for Entra ID integration in the Octopus Management Console.
Configuring the Entra ID Environment: Register an app in Entra ID, add the EAM, and assign users and groups.
Running the Solution: Test the integration.
The following procedure explains how to create the required service in the Octopus Management Console. Some of the service settings will be used later in the Entra admin center configuration.
To add and configure the Entra ID EAM service:
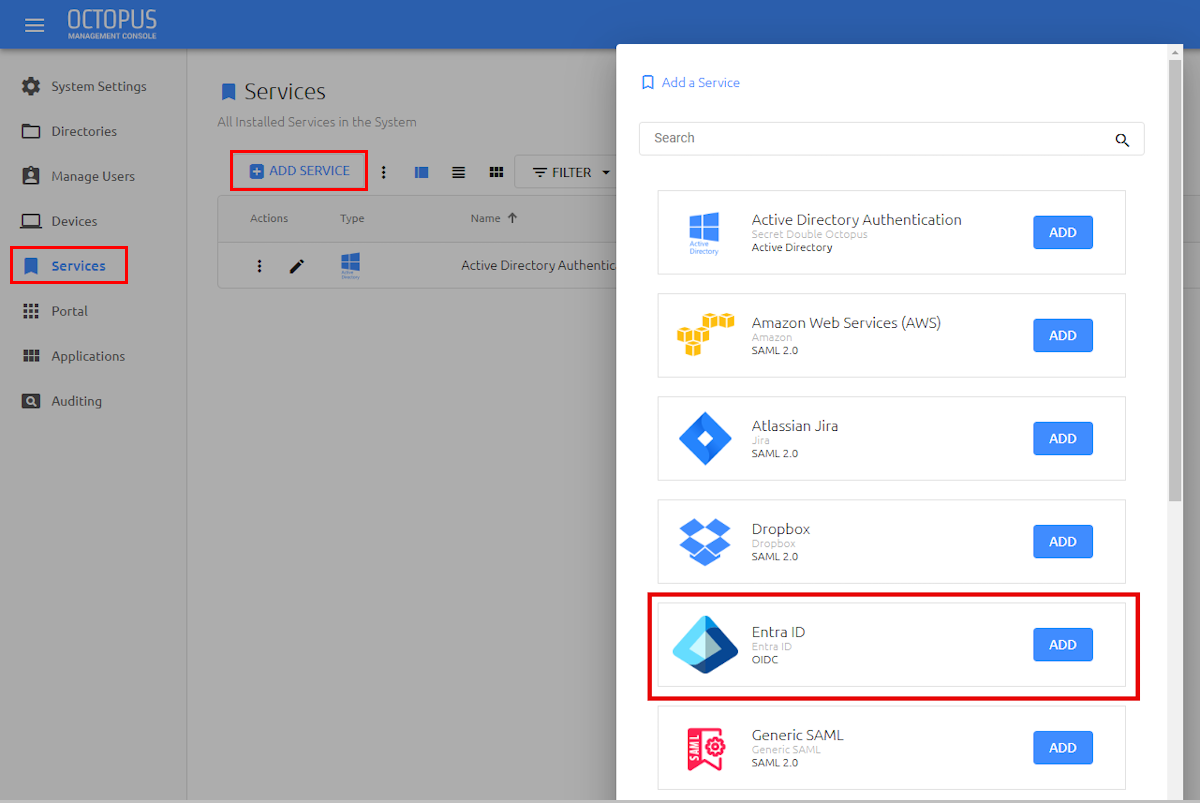
From the Octopus Management Console, select the Services menu and click Add Service. In the Entra ID tile, click Add.
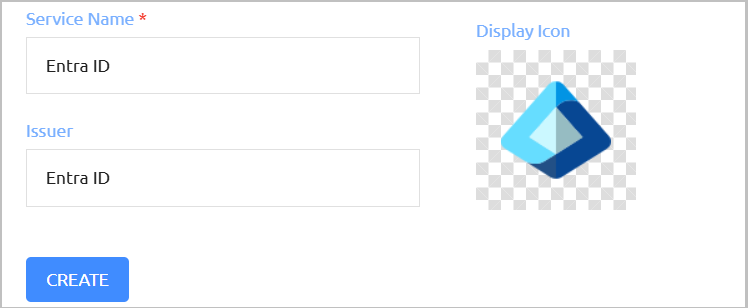
Then, in the dialog that opens, click Create.
Review and configure the following settings in the General Info tab:
Setting
Description
Service Name
Display name to identify the service provider (e.g., Entra ID EAM).
Issuer
Issuer of the service (e.g., Entra ID).
Description
Enter a brief note about the service.
Display icon
This icon will be displayed on the Login page for the service. To change the default icon, click and upload the image of your choice (supported size 128x128 pixels).
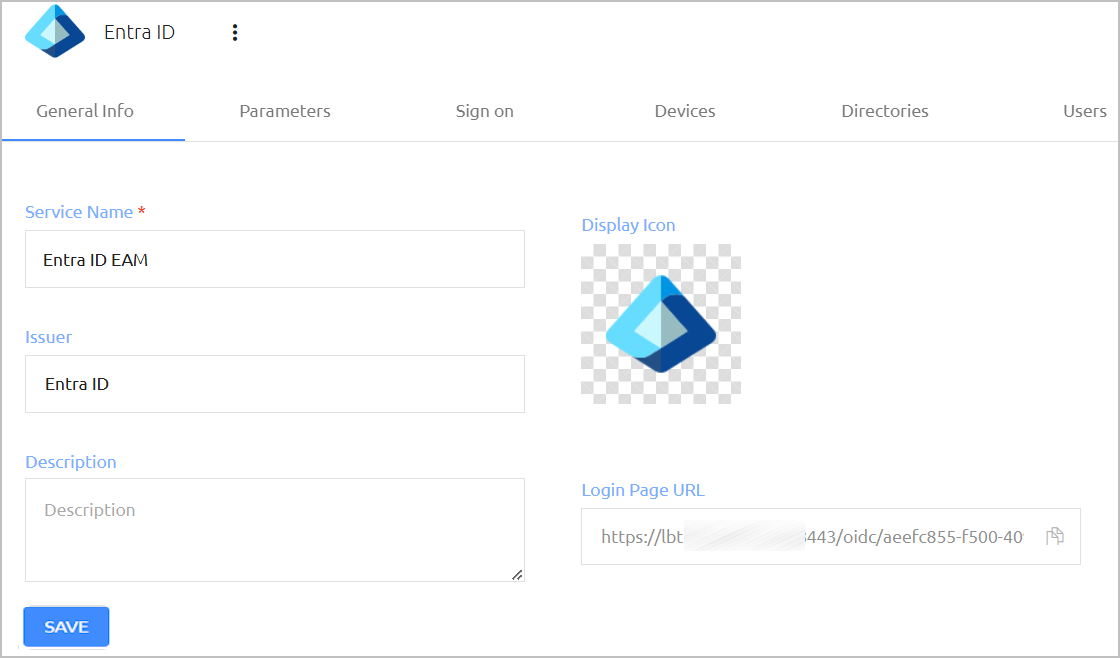
Then, click Save.
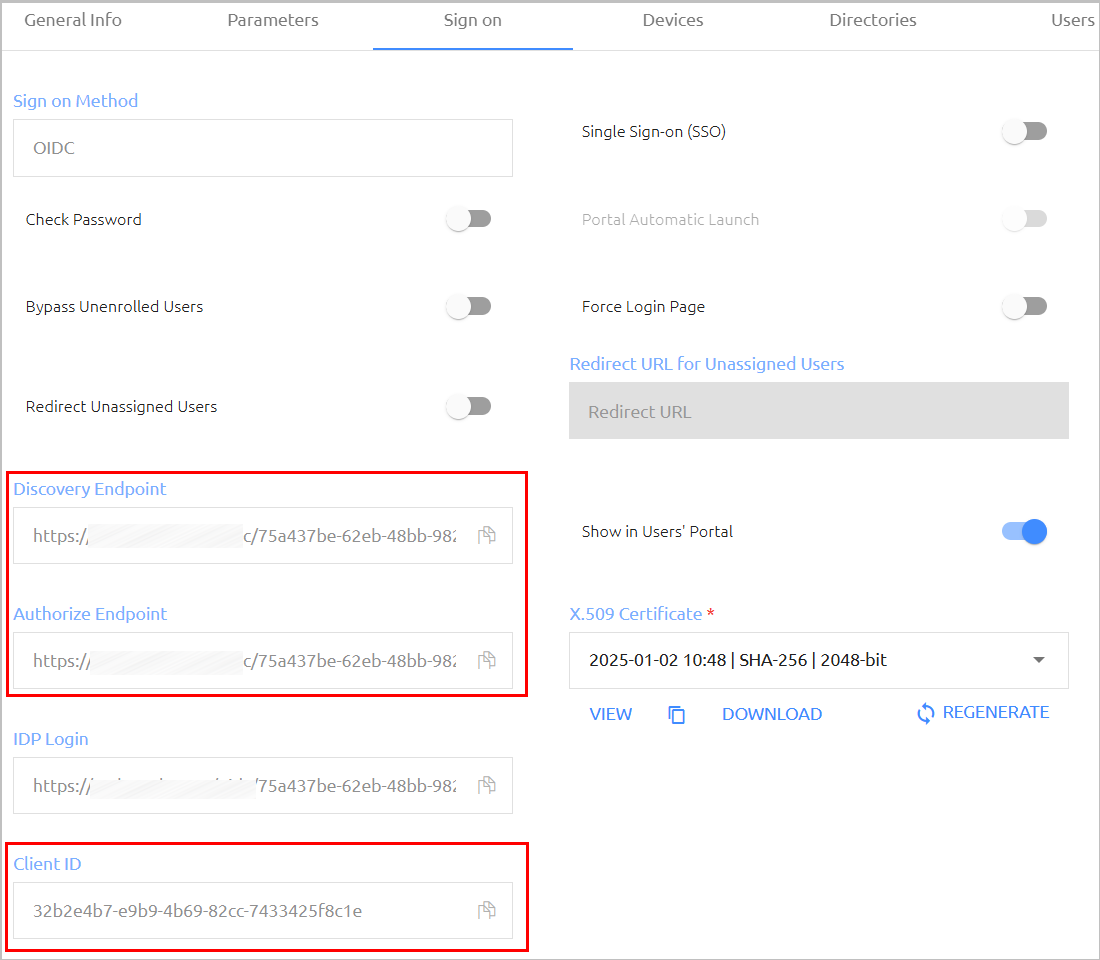
Open the Sign On tab and copy the following settings for later use:
Setting
Description
Discovery Endpoint
A URL pointing to a configuration document containing metadata about the OIDC provider, including URLs for authorization, token supply, user data and more
Authorize Endpoint
A redirect URL allowing Entra ID to authorize use of the external identity provider for authentication
Client ID
A unique identifier for the service called to handle the authentication request
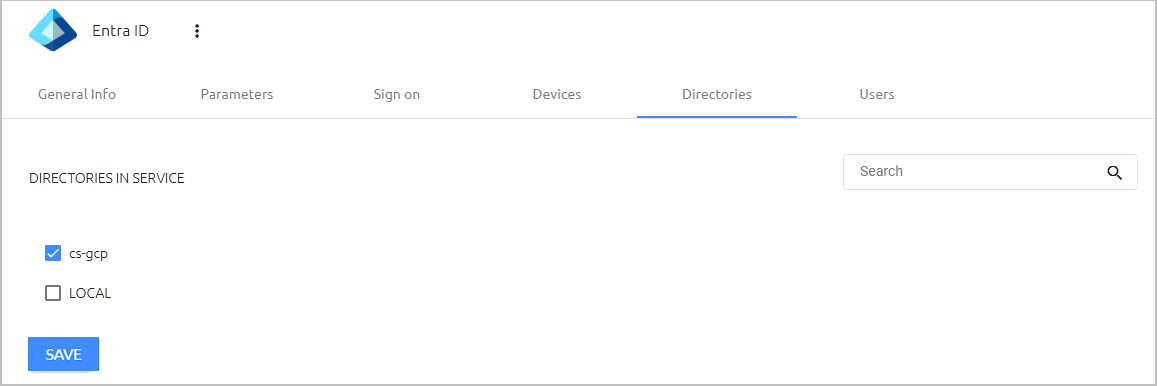
Open the Directories tab and select the checkboxes of the directories you want to integrate with the service. Then, click Save.
Open the Users tab and click Add.

A popup opens, with a list of directories displayed on the left.
Expand the relevant directory and select the checkboxes of the groups and users that you want to add to the service. Then, click Save to close the popup.
The groups and users you selected are listed in the Users tab.
At the bottom of the Users tab, click Save. Then, from the toolbar at the top of the page, click PUBLISH and publish your changes.
The following sections describe how to configure the Microsoft Entra admin center for integration with Secret Double Octopus for passwordless authentication:
Follow the procedure below to add an application registration that enables authentication against Entra ID.
To perform app registration:
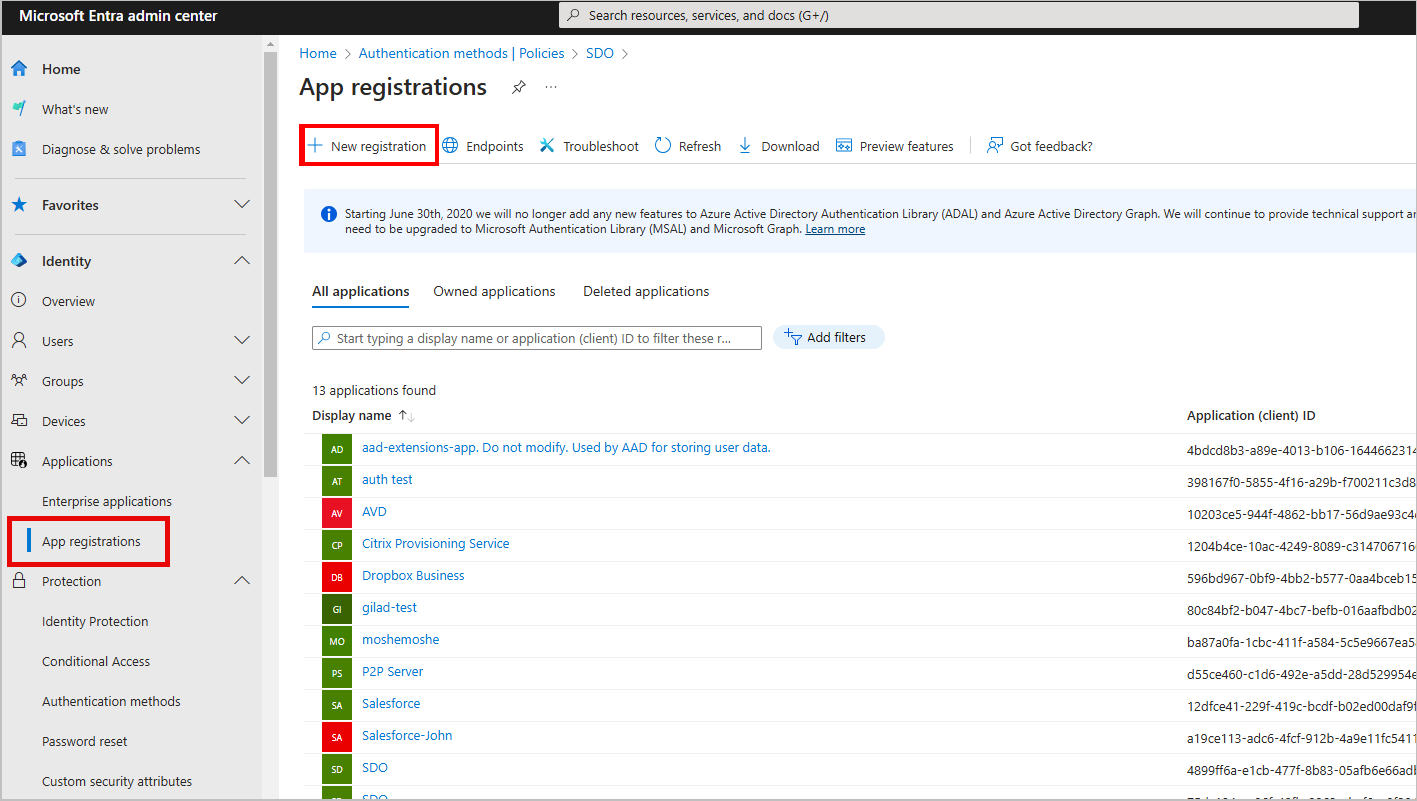
From your Microsoft Entra admin center, navigate to Applications > App Registrations.
Then, at the top of the page that opens, click New registration.
On the page that opens, configure the following settings:
Name: Enter a name for the app, e.g., SDO-MFA.
Redirect URL: Select Web. Then, in the field to the right, paste the Authorize Endpoint URL that you copied from the Entra ID service in the Octopus Management Console.
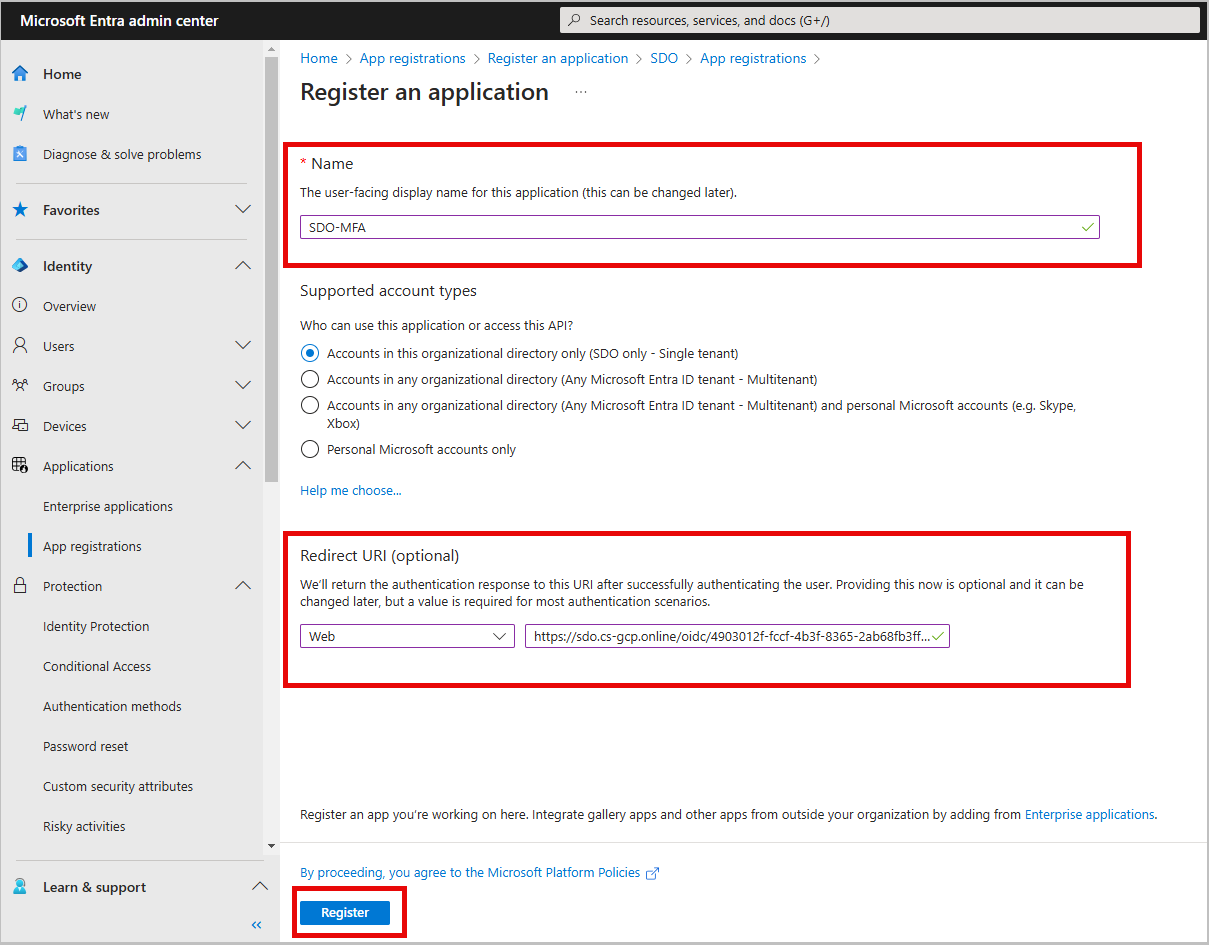
At the bottom of the page, click Register to create the application.
At the top of the application’s Overview page, copy the Application (client) ID for future use. Then, click Token configuration.
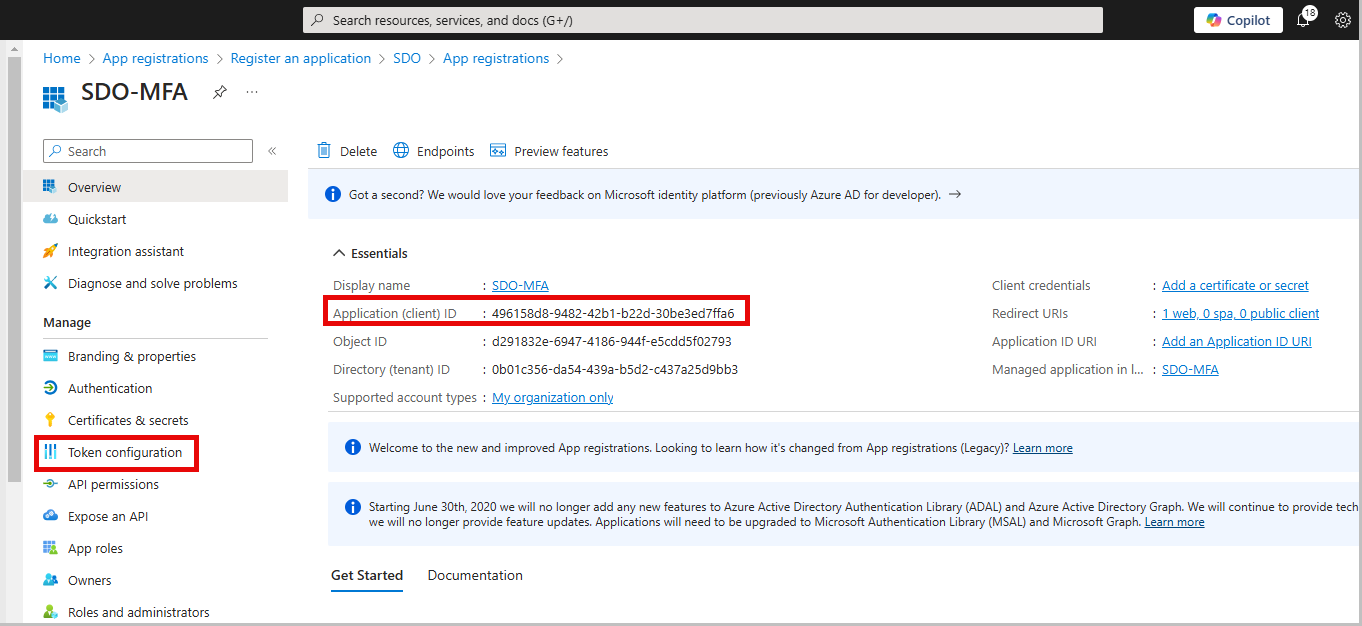
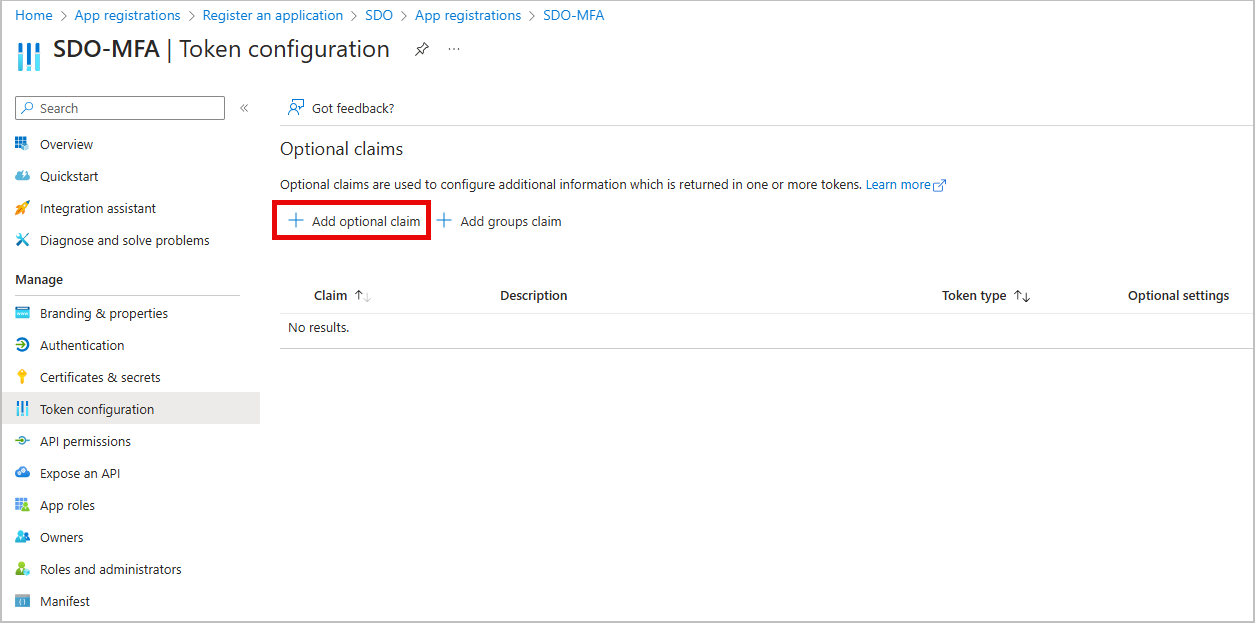
At the top of the Token Configuration page, click Add optional claim.
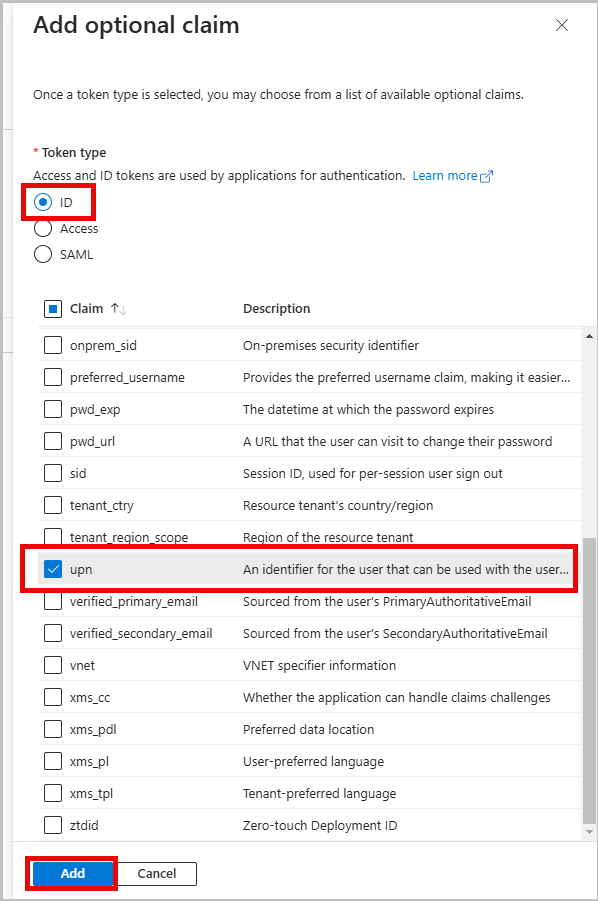
In the pane that opens, select ID as the Token type and upn as the Claim.
Then, click Add.
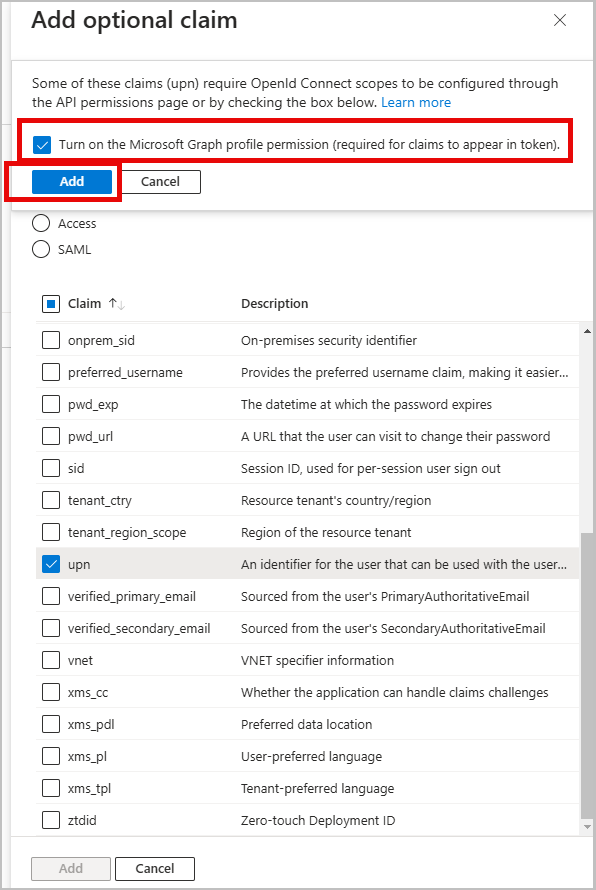
At the top of the window that opens, select the Turn on the Microsoft Graph profile permission checkbox, and click Add.
Follow the steps below to add Secret Double Octopus as an external authentication method in Entra ID. Before you begin, make sure that you have access to the following elements:
The Discovery Endpoint URL from the Entra ID service in the Octopus Management Console
The Client ID from the Entra ID service in the Octopus Management Console
The Application (client) ID from the application you created in the Microsoft Entra admin center
To add the EAM in Entra ID:
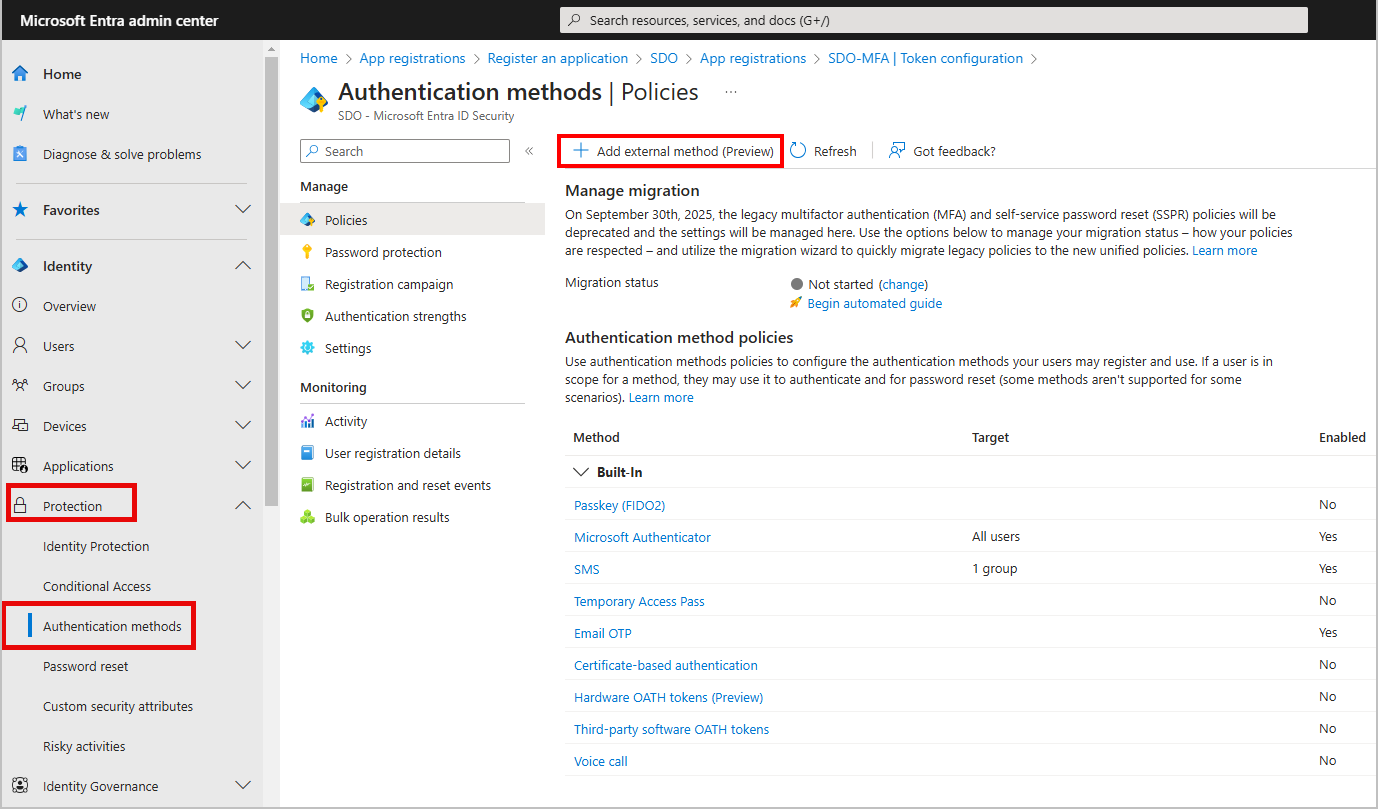
From your Microsoft Entra admin center, navigate to Protection > Authentication methods.
Then, at the top of the page that opens, click Add external method (Preview).
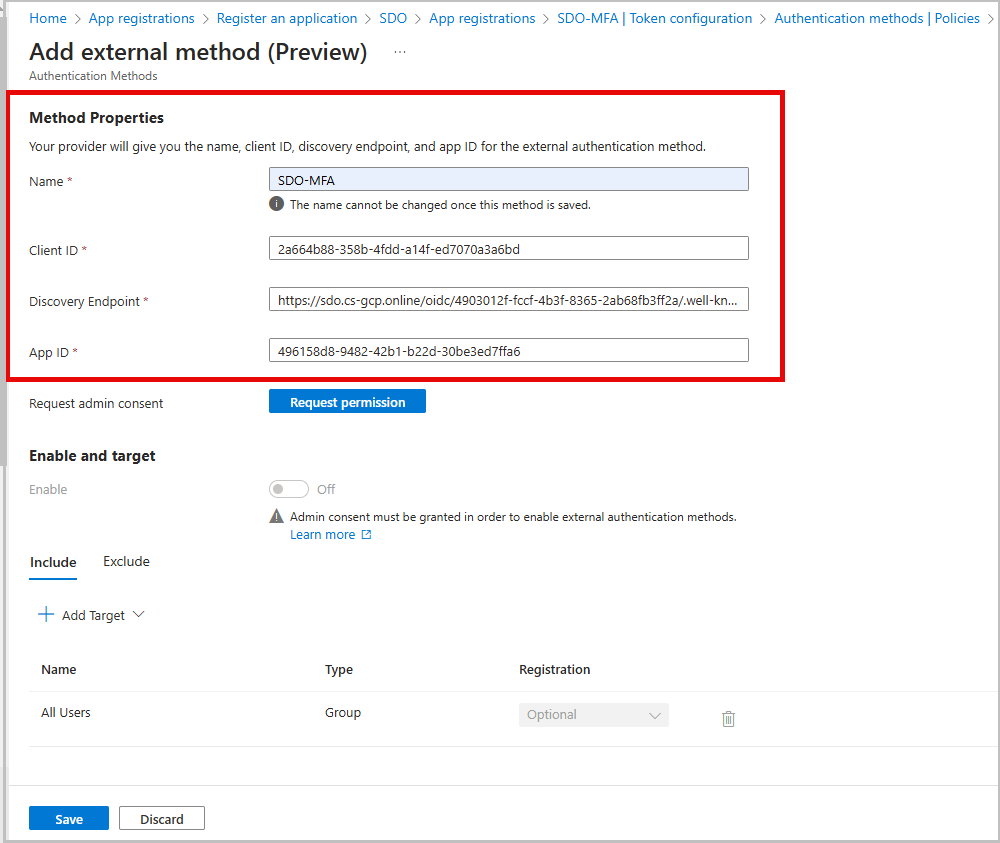
At the top of the window that opens, enter a name for the EAM. Then, configure the following properties:
Client ID: Copy the value from the Entra ID service in the Octopus Management Console.
Discovery Endpoint: Copy the value from the Entra ID service in the Octopus Management Console.
App ID: Copy the Application (client) ID from the application you created in the Microsoft Entra admin center.
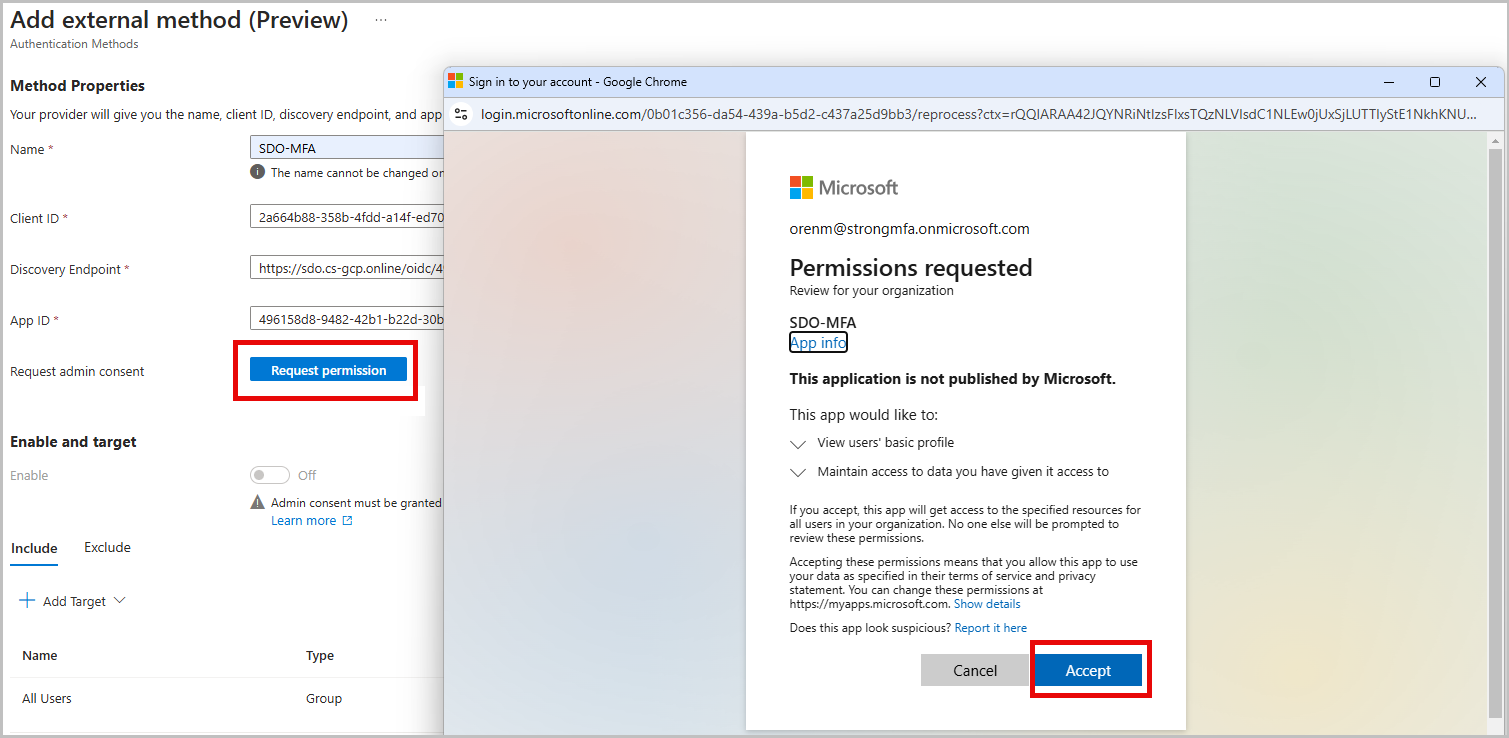
Click Request permission. In the window that opens, approve the request for the external authenticator.
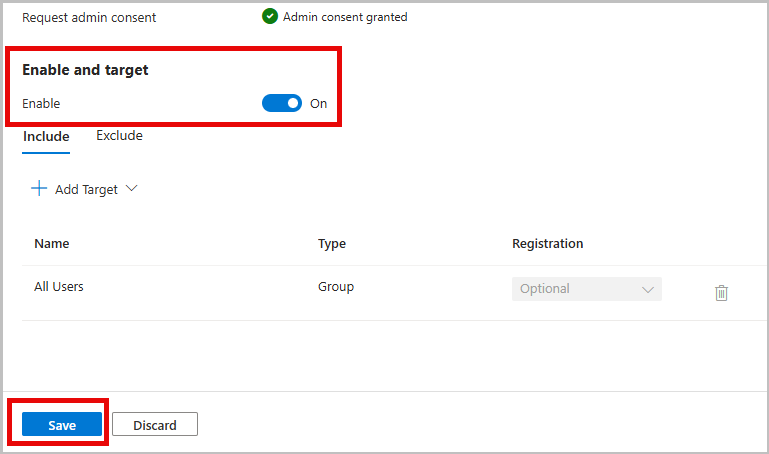
Enable the method, select the target users and click Save.
The following procedure explains how to authorize users and groups to access the external authenticator application you created (Adding and Configuring App Registration).
To assign users and groups:
From your Microsoft Entra admin center, navigate to Applications > Enterprise applications.
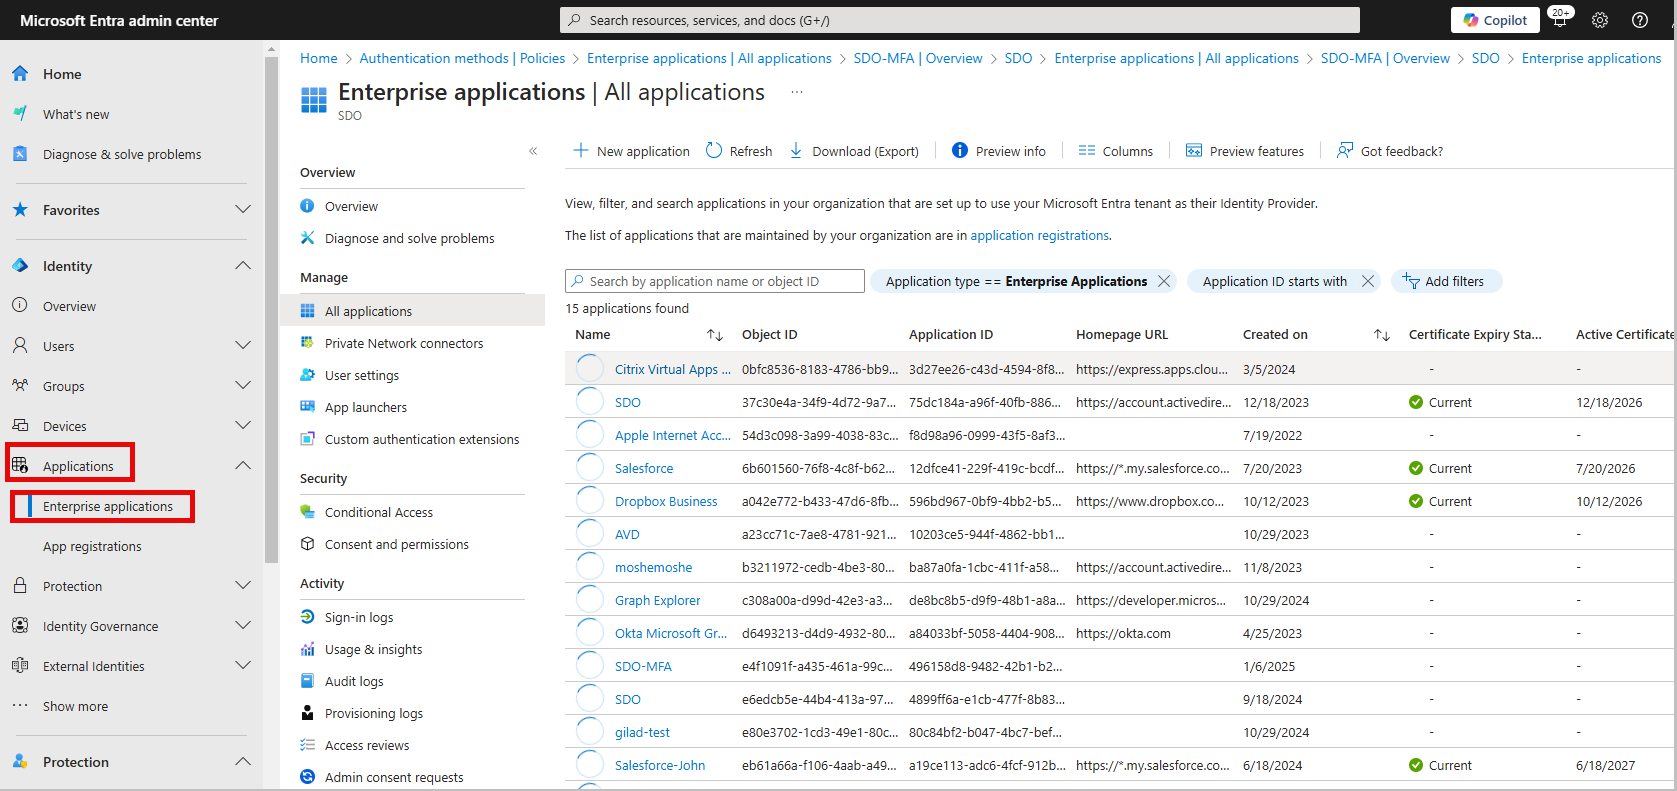
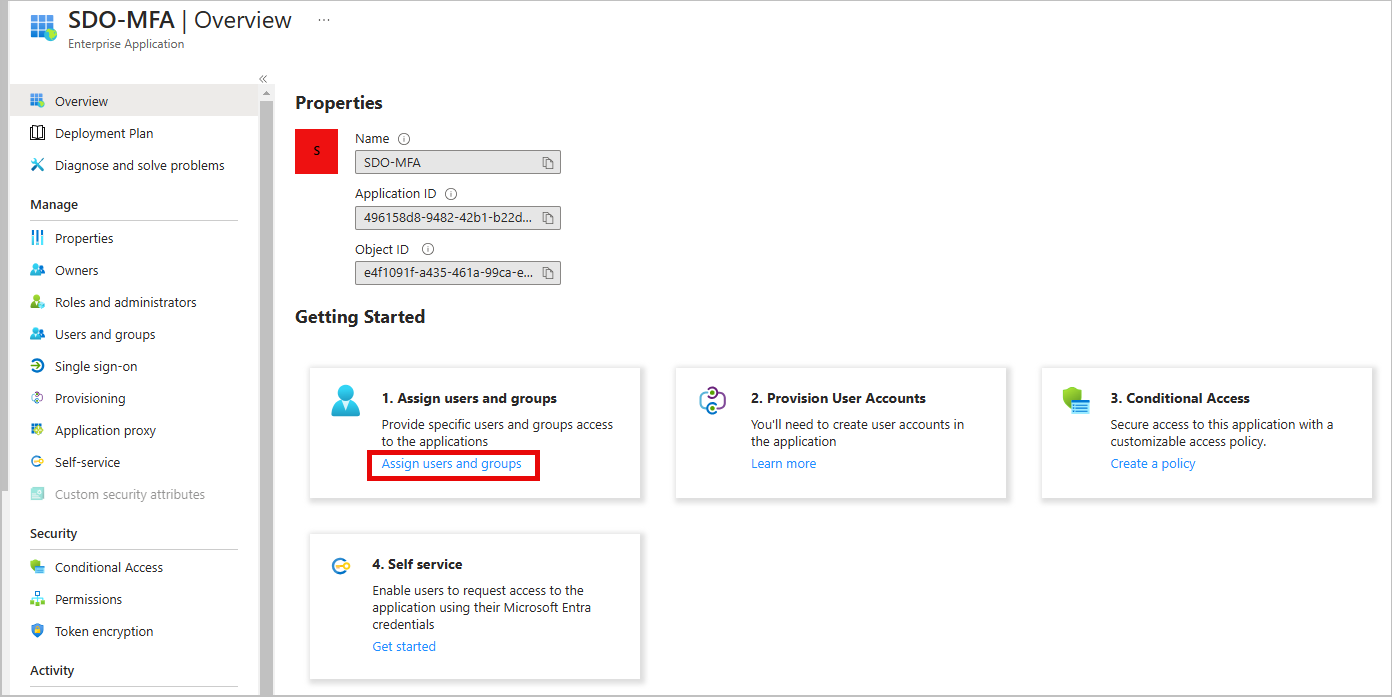
Select the relevant application. On the Overview page, click Assign users and groups.
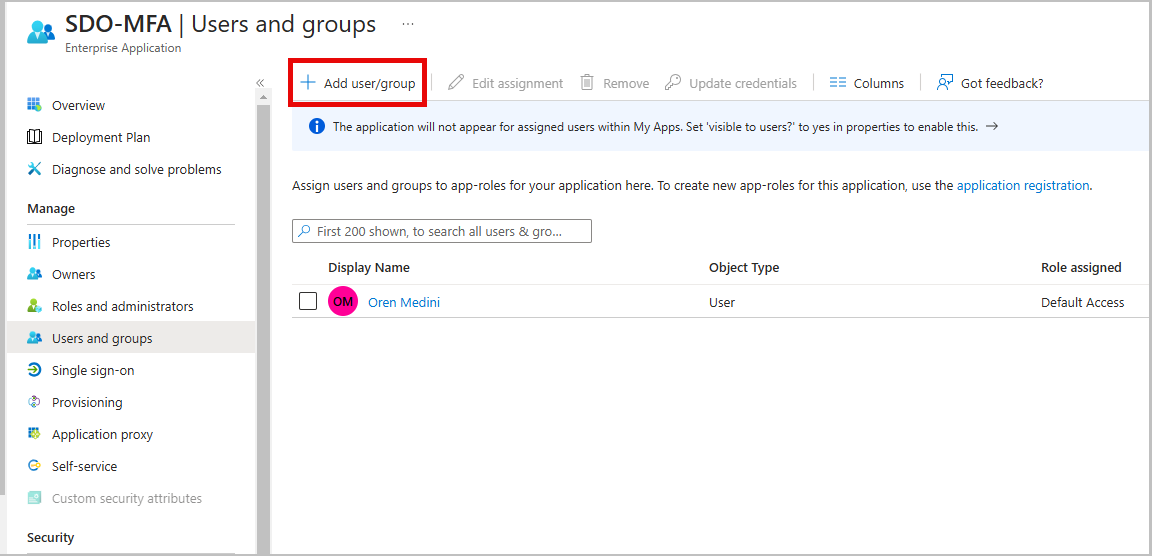
At the top of the page that opens, click Add user/group. Then, add the groups and users that will have permission to use the external authentication app.
Perform the following steps to test the solution:
From your browser, go to the Microsoft Entra admin center.
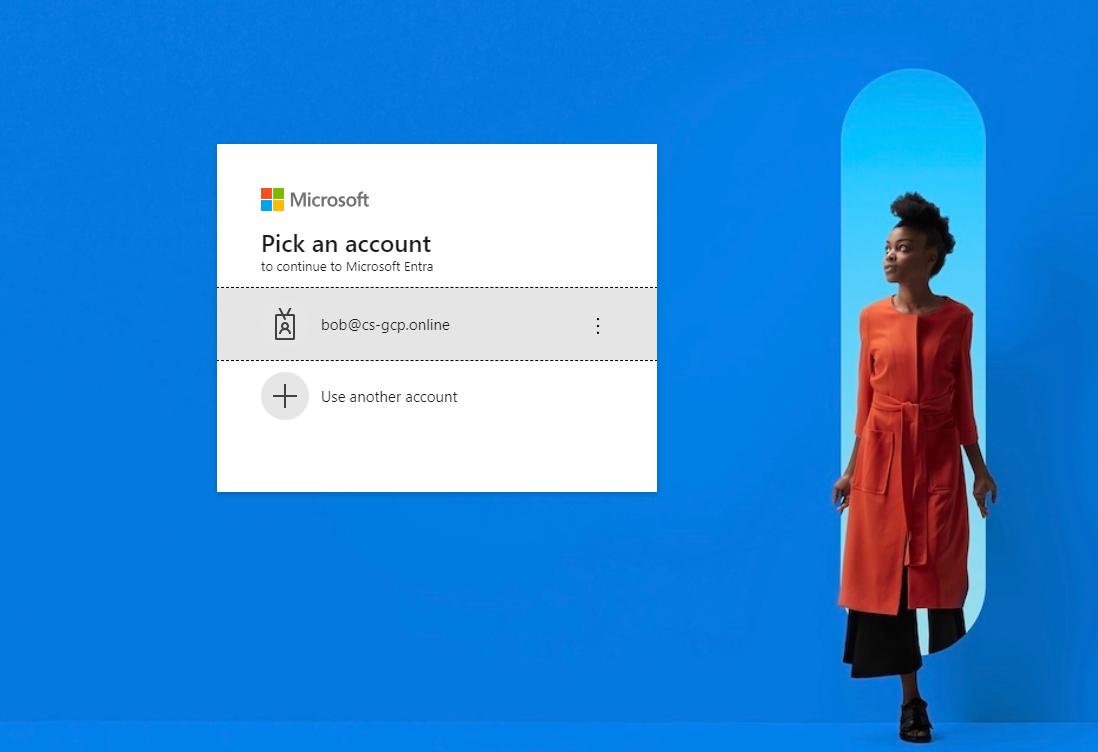
On the Login screen, select or type your account name.
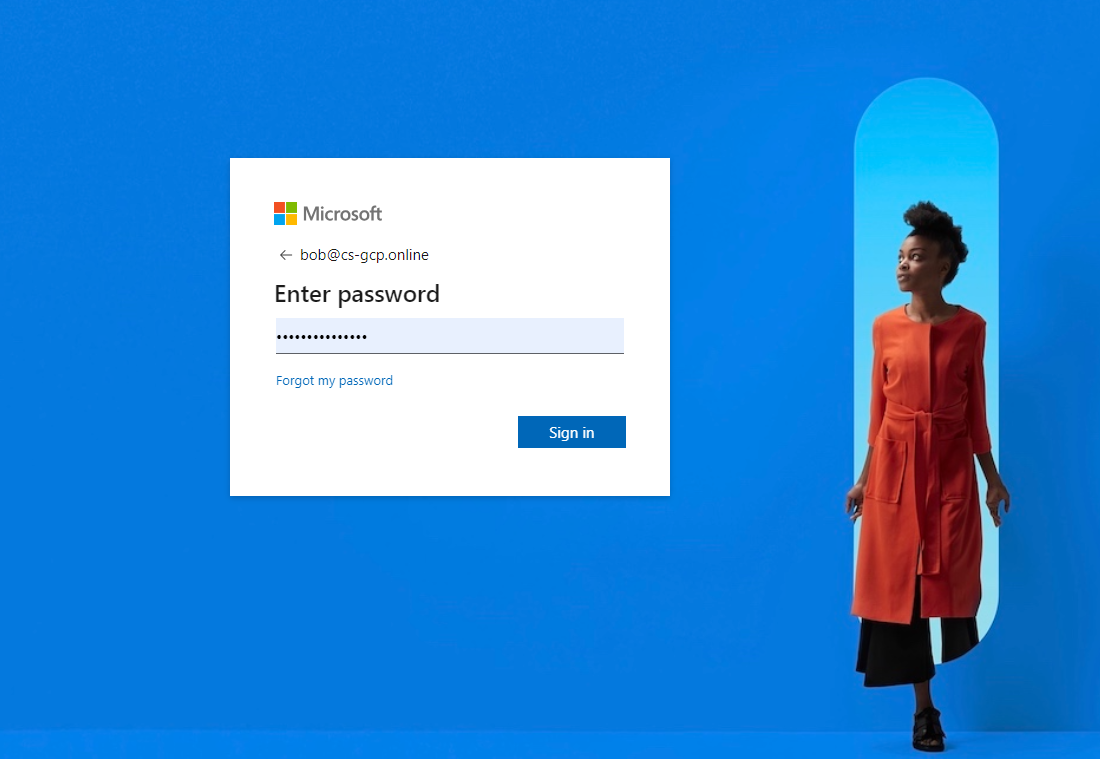
Enter your password and click Sign in.
In the window then opens, SDO as the authenticator.
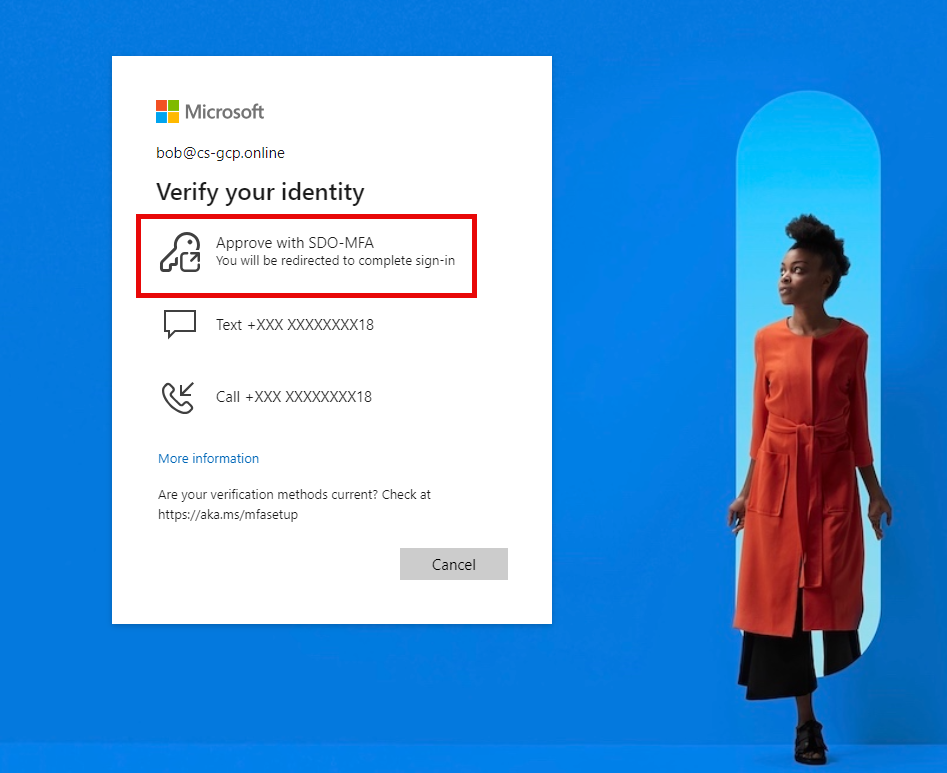
You will be redirected to SDO to authenticate as a second factor.
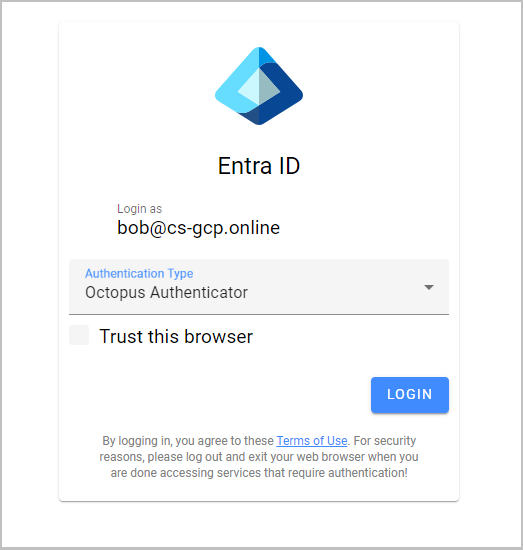
Following successful authentication, you will be logged into the Entra admin center.