SDO Client for Mac - Deploy and Configure
Download SDO Client for Mac Deployment Guide
Download PDF☰ Purpose
This guide provides a high-level overview for deploying and configuring the Secret Double Octopus (SDO) Client for macOS. It outlines the steps for downloading, preparing, configuring, and validating the client for secure password-free authentication across Mac systems.
✎ Who Should Use This Guide
- ► MSP administrators and IT professionals responsible for Mac client deployments
- ► System administrators managing authentication policies on macOS
- ► Support staff assisting with client rollout and validation
⚠ Before You Begin
Before beginning deployment, ensure you have:
- ✓ Administrator access to the SDO tenant Admin Console
- ✓ A Mac system with installation permissions
- ✓ The latest version of the SDO Client for Mac downloaded from the official SDO Support Portal
- ✓ Text editor for XML configuration file editing
☑ Summary of Steps
- 1 Download and Extract - Access the SDO Support Portal, download the latest Mac client package, and extract the files
- 2 Edit Configuration XML - Open the configuration file, retrieve Endpoint URL, Service Keys, and x509 Certificate from the SDO Admin Console, and paste them into the respective fields
- 3 Adjust Settings - Enable sudo integration (set to 'true') and specify the FQDN to enable Kerberos. Remove any unneeded authenticators
- 4 Install the Client - Run the Mac installer, follow the prompts, agree to the license, and allow installation
- 5 Enable Octopus Desktop - Launch the client, select authenticator method, confirm account details, and authenticate with your Mac password
- 6 Test Authentication - Log out and log back in, choose your authenticator, and confirm successful login
- 7 Verify in Admin Console - Check the Audit section to ensure successful authentication records
ℹ Key Notes
Step-by-Step Deployment Guide
This comprehensive guide contains 54 detailed steps organized into the following sections:
- Part 1: Download and Access (Steps 1-14)
- Part 2: Configuration Setup (Steps 15-34)
- Part 3: Installation Process (Steps 35-47)
- Part 4: Testing and Verification (Steps 48-54)
Part 1: Download and Access (Steps 1-14)
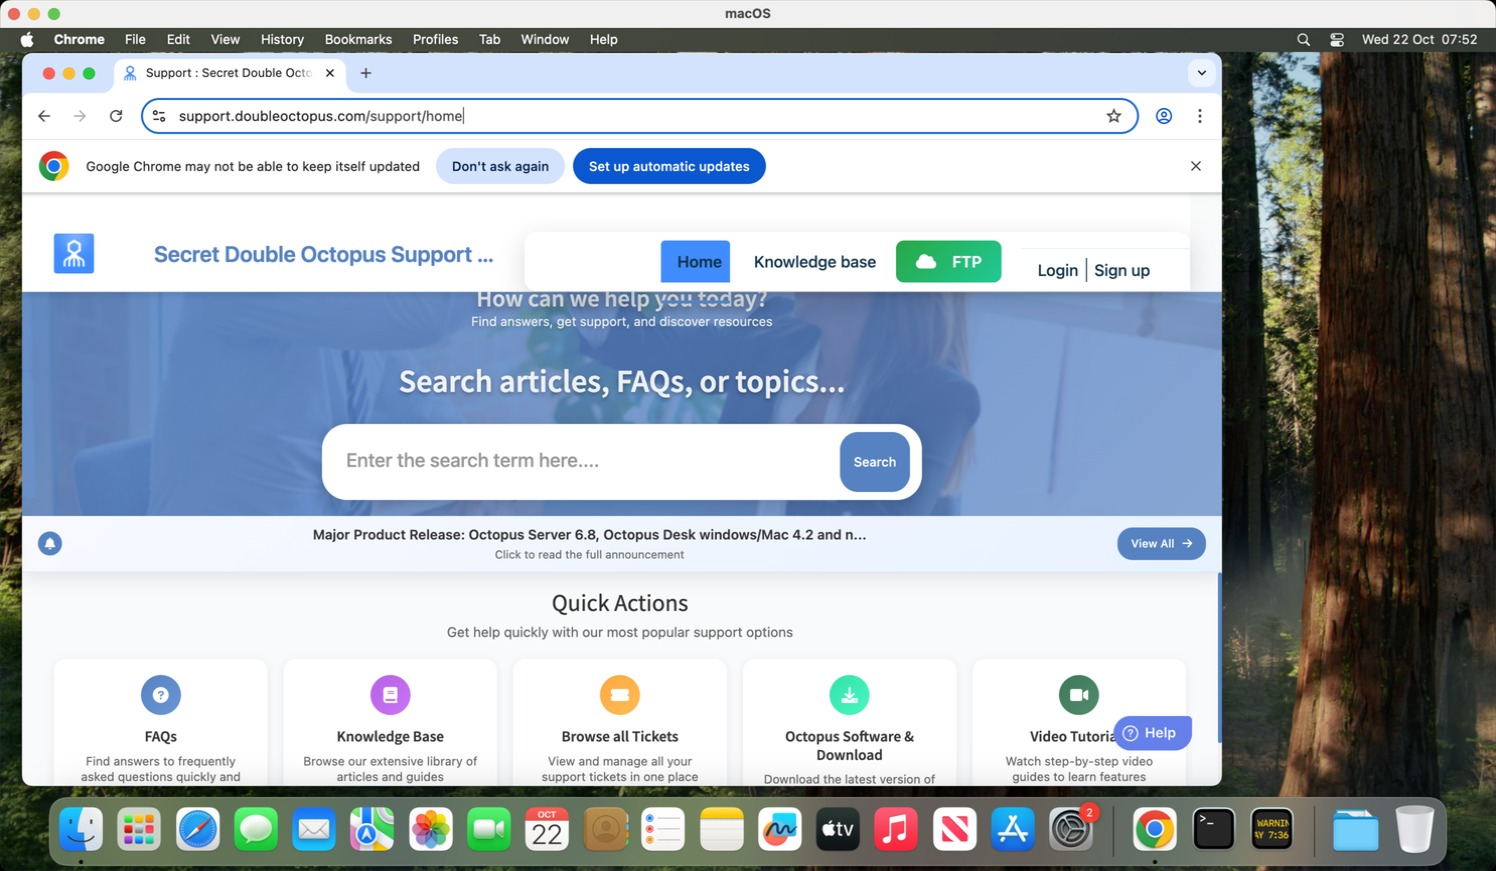
1 Access Support Portal
Open https://support.doubleoctopus.com
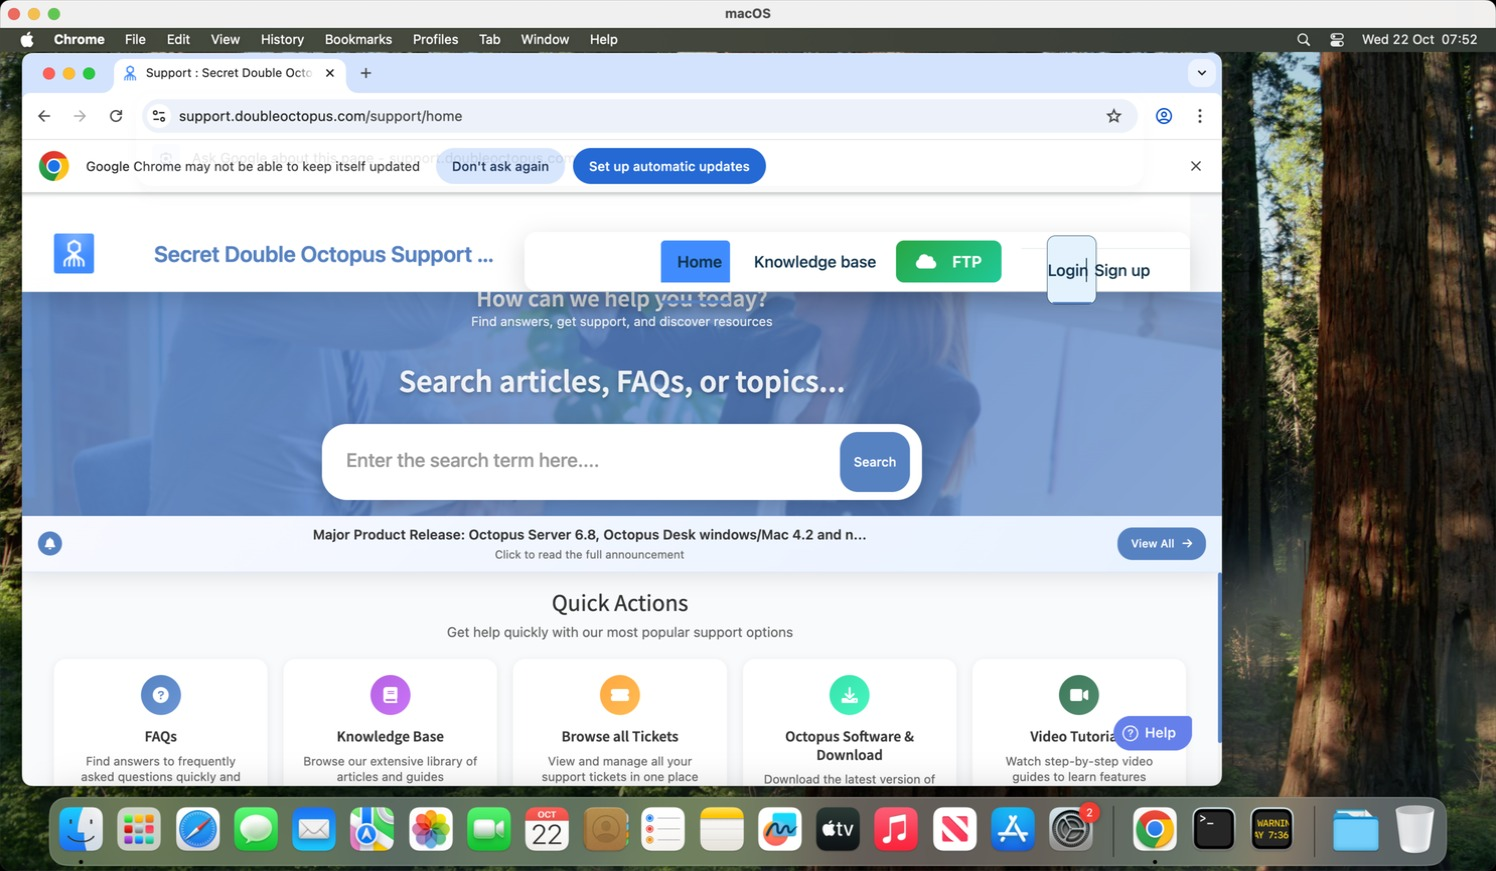
2 Login
Click "Login"
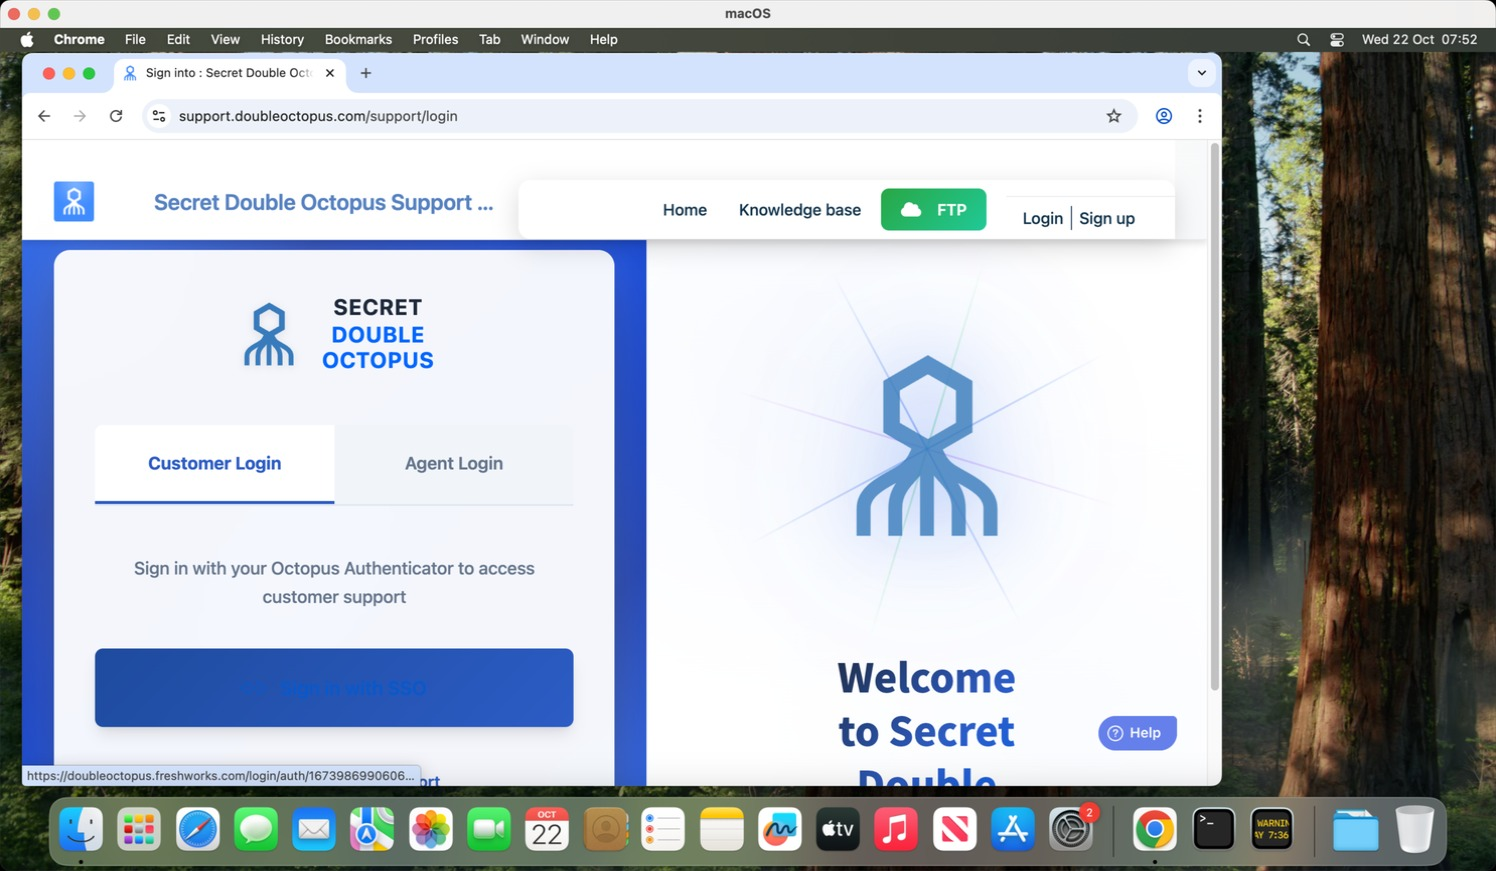
3 Sign in with SSO
Click "Sign in with SSO"
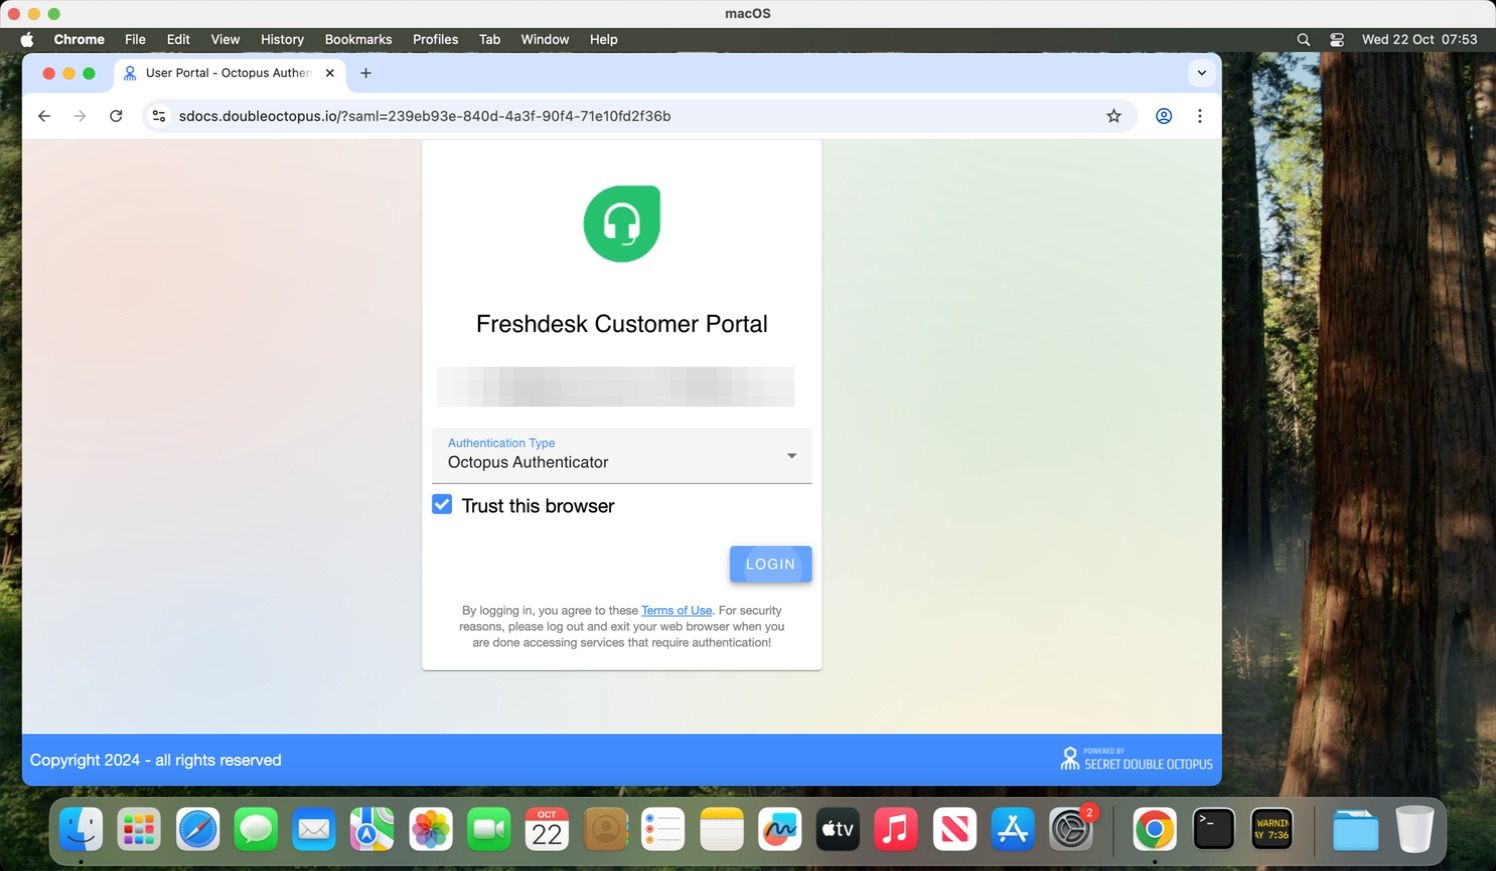
4 Enter Credentials
Enter your email and click "LOGIN"
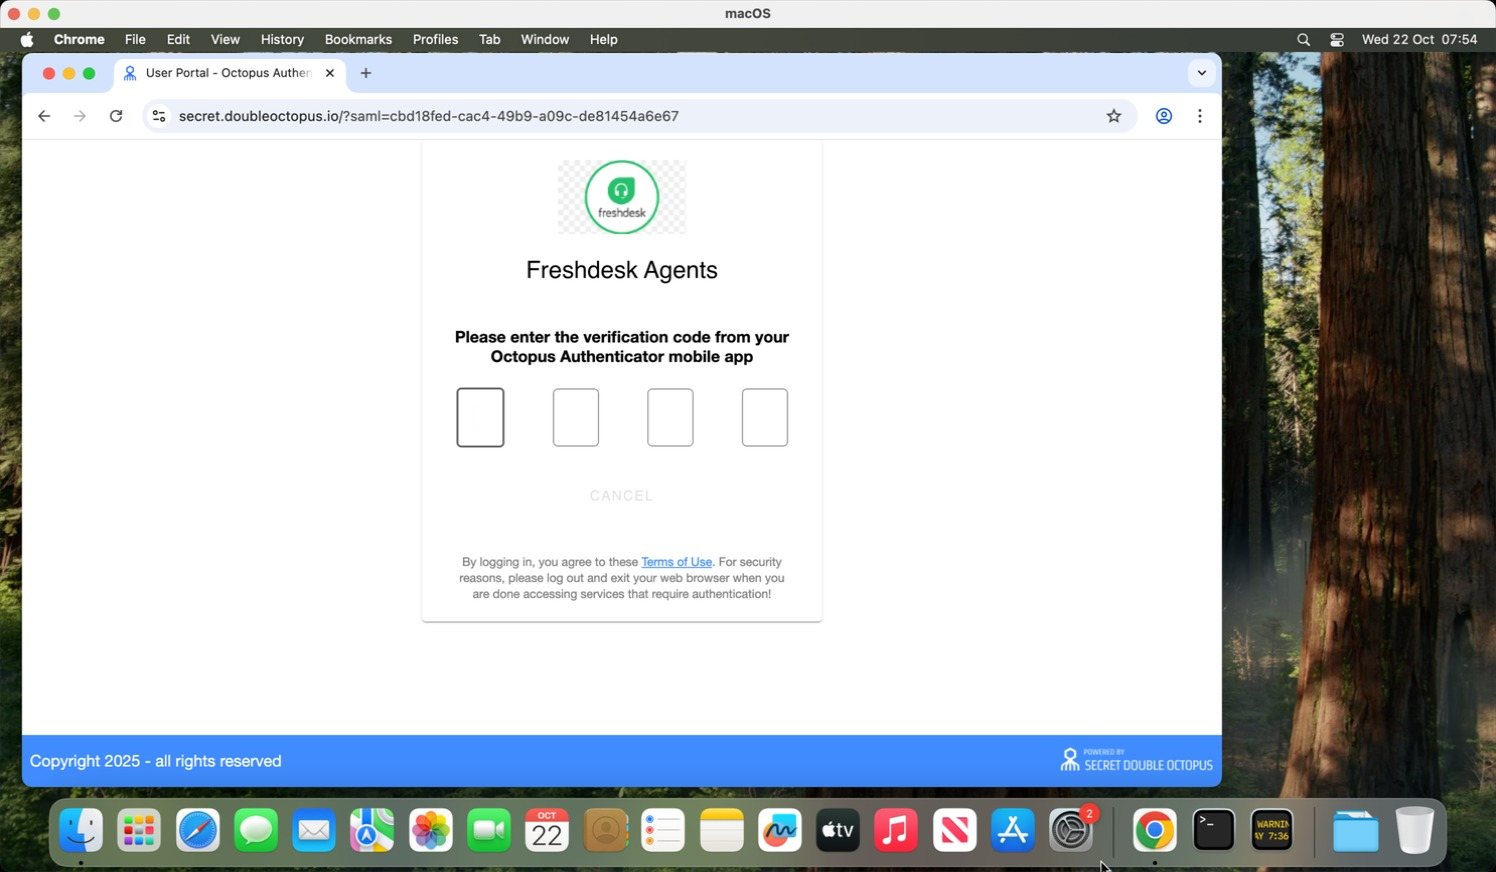
5 Two-Factor Authentication
Enter the 4 digit code if asked (The code is displayed on your mobile app)
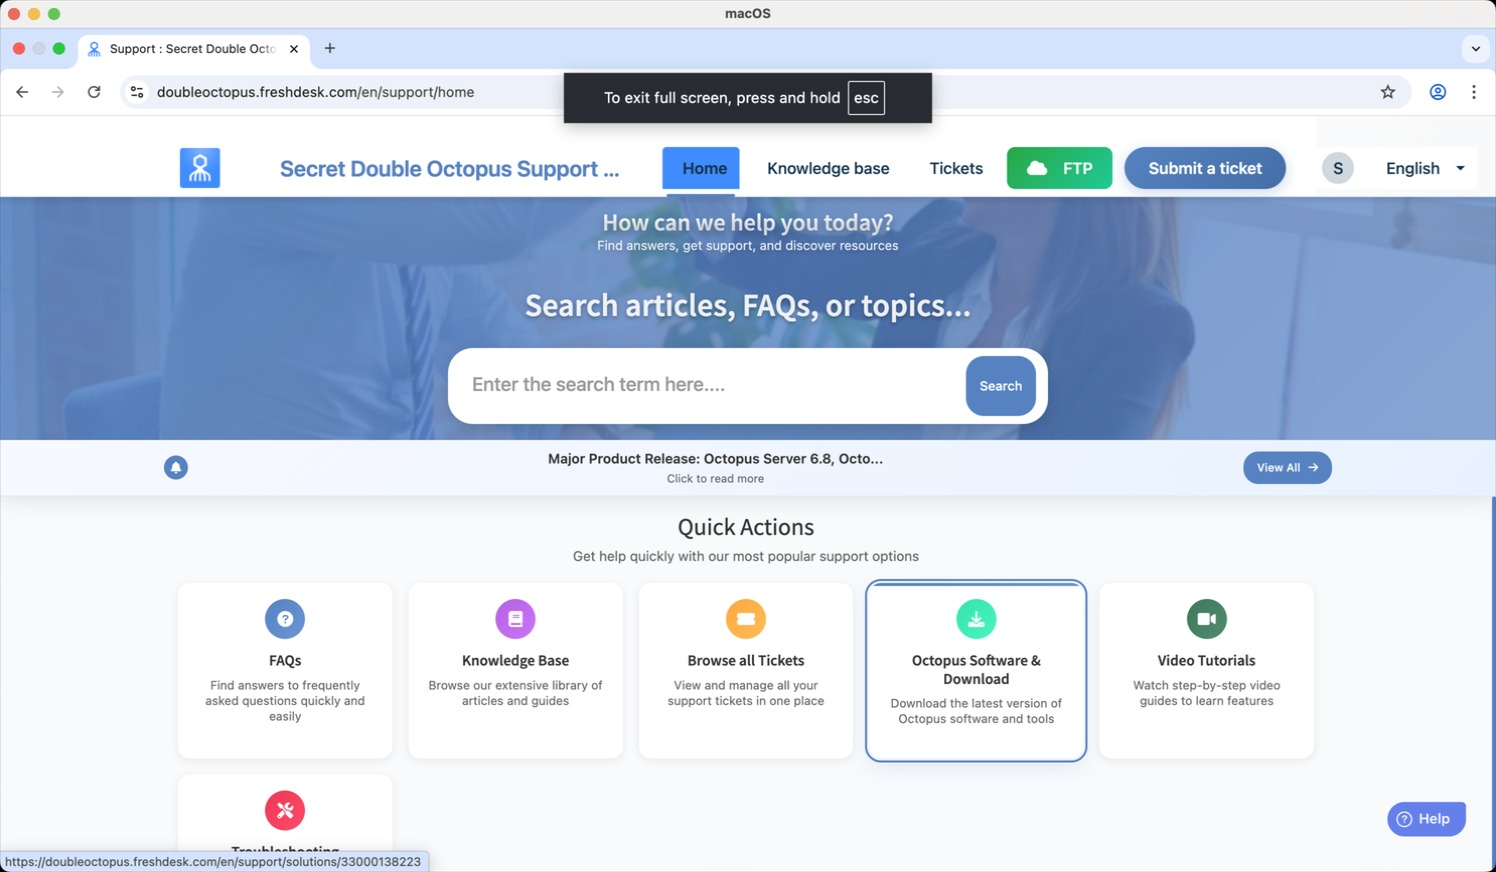
6 Software Downloads
Click "Octopus Software & Download"
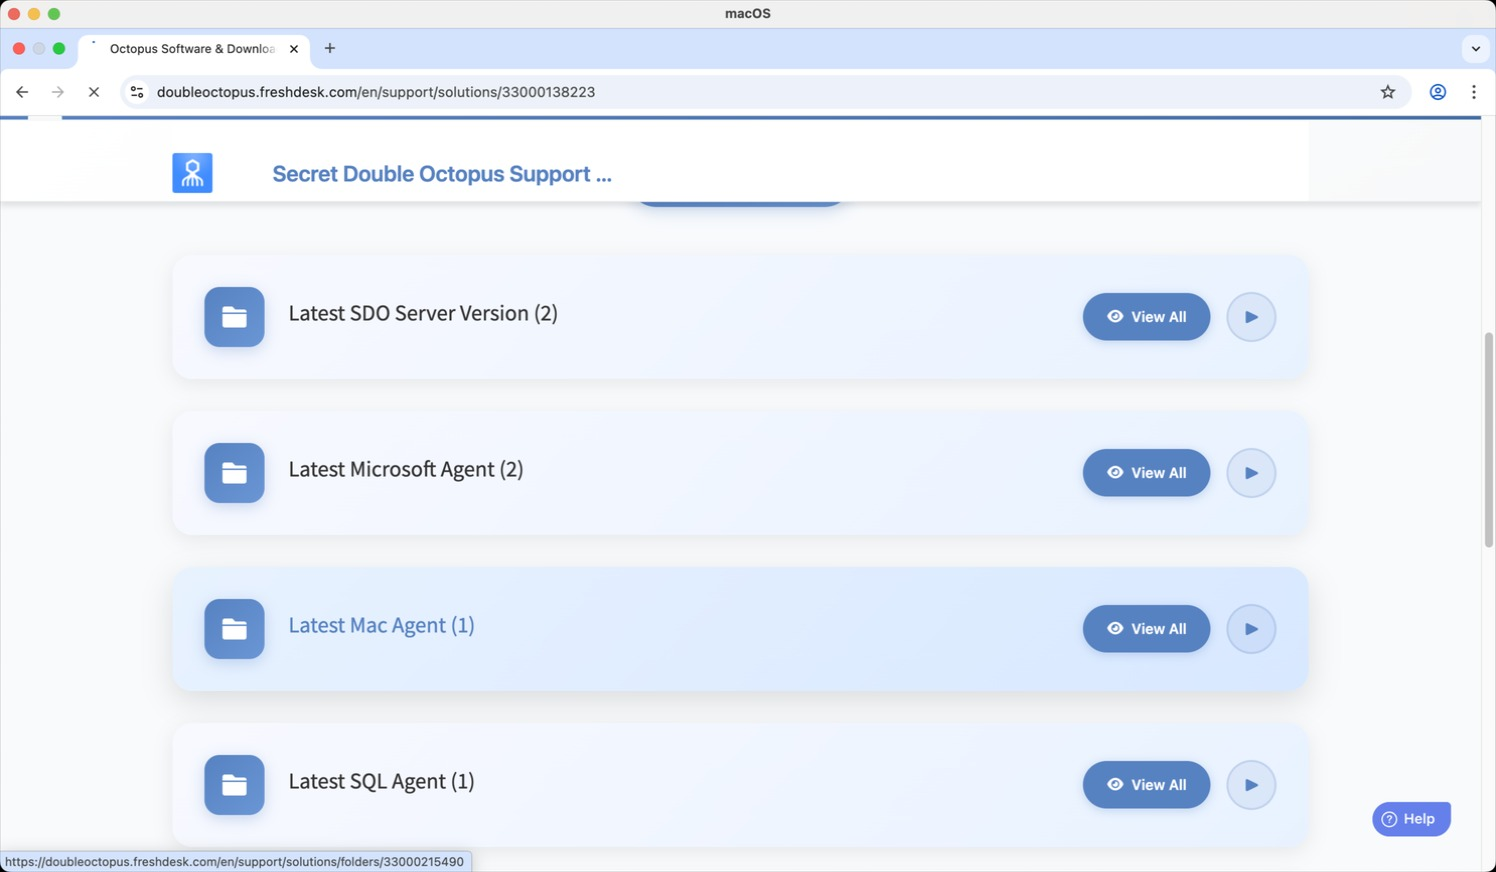
7 Select Mac Agent
Click "Latest Mac Agent"
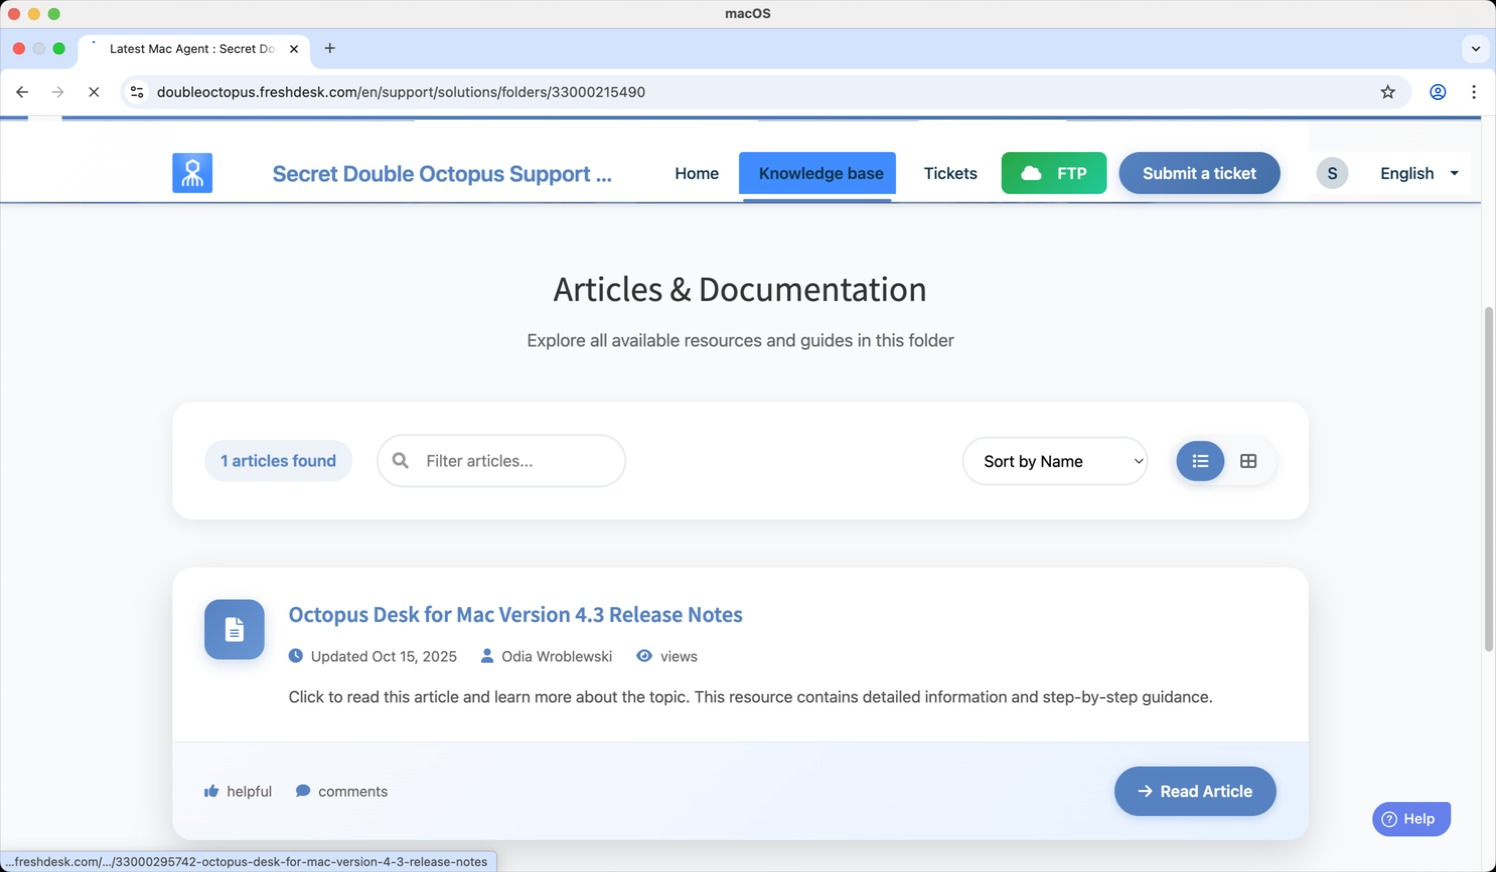
8 Select Latest Version
Click latest "Octopus Desktop for Mac (Latest version)"
9 Access FTP Link
Click the ftp link
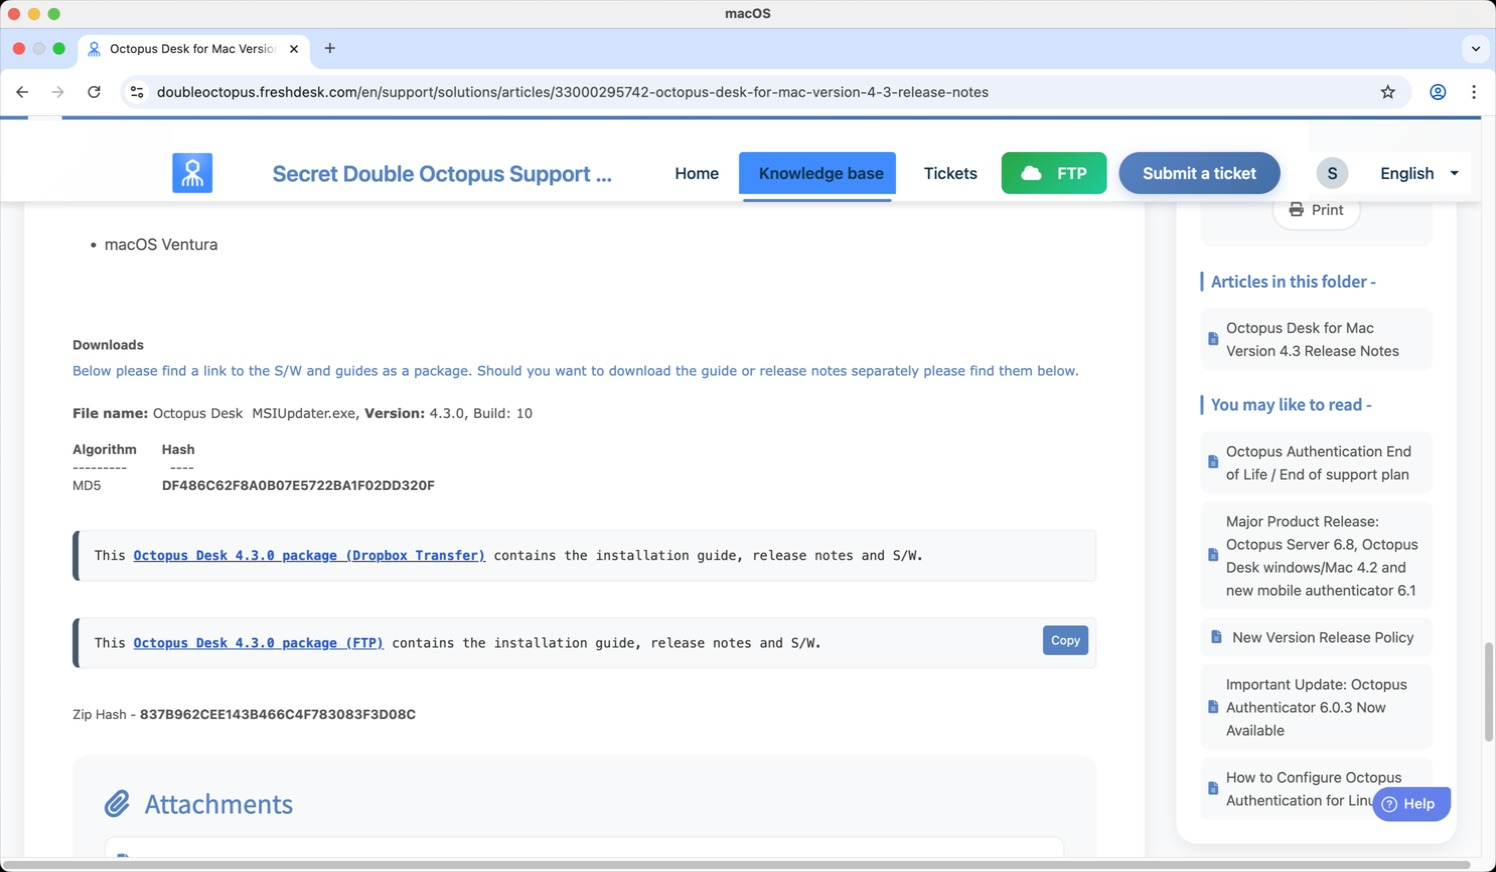
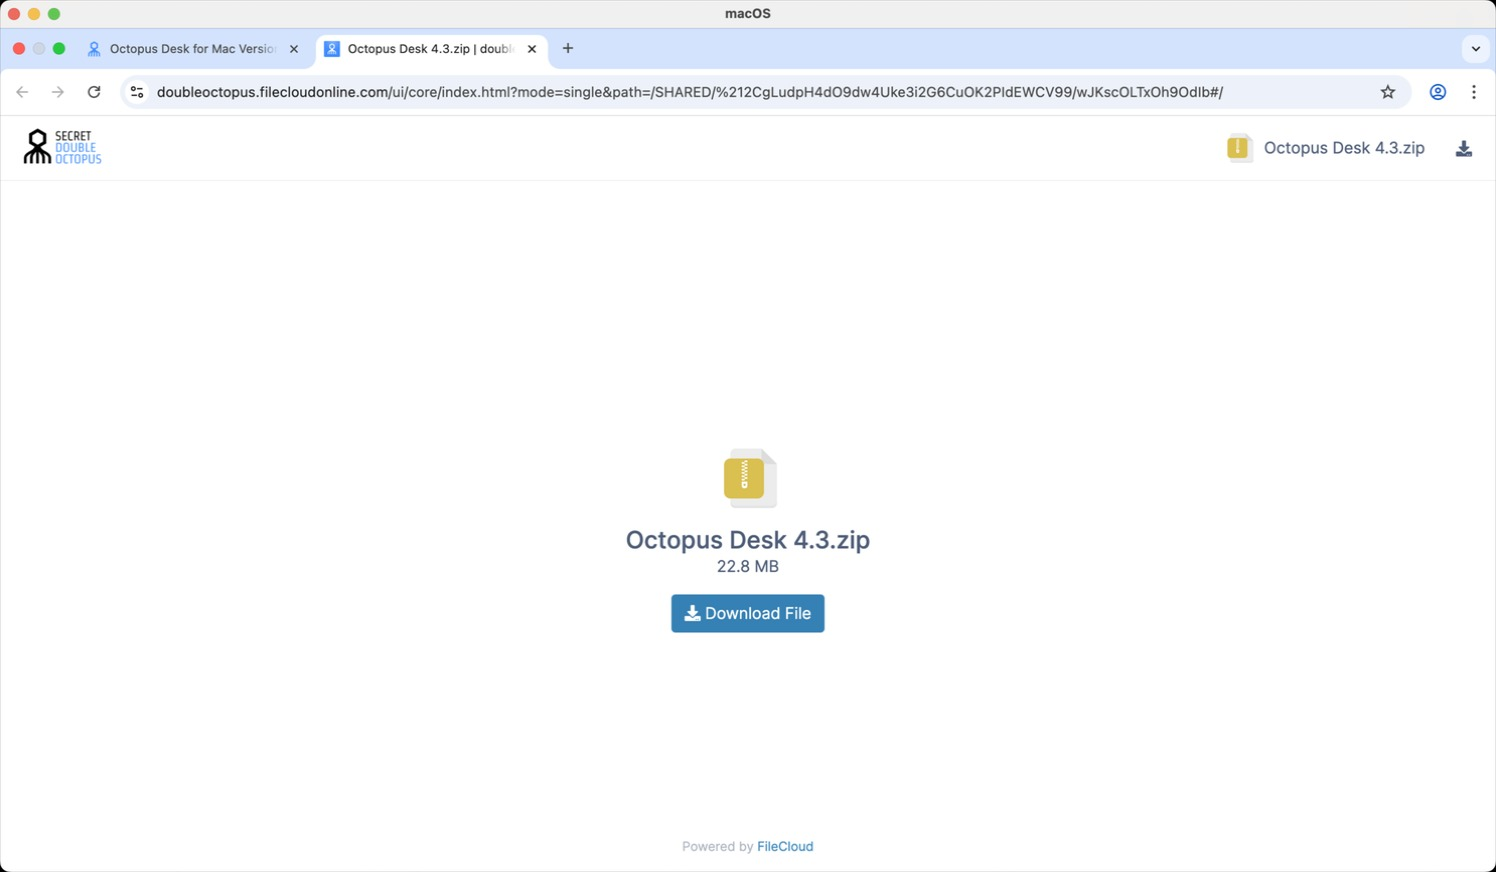
10 Download File
Click "Download file"
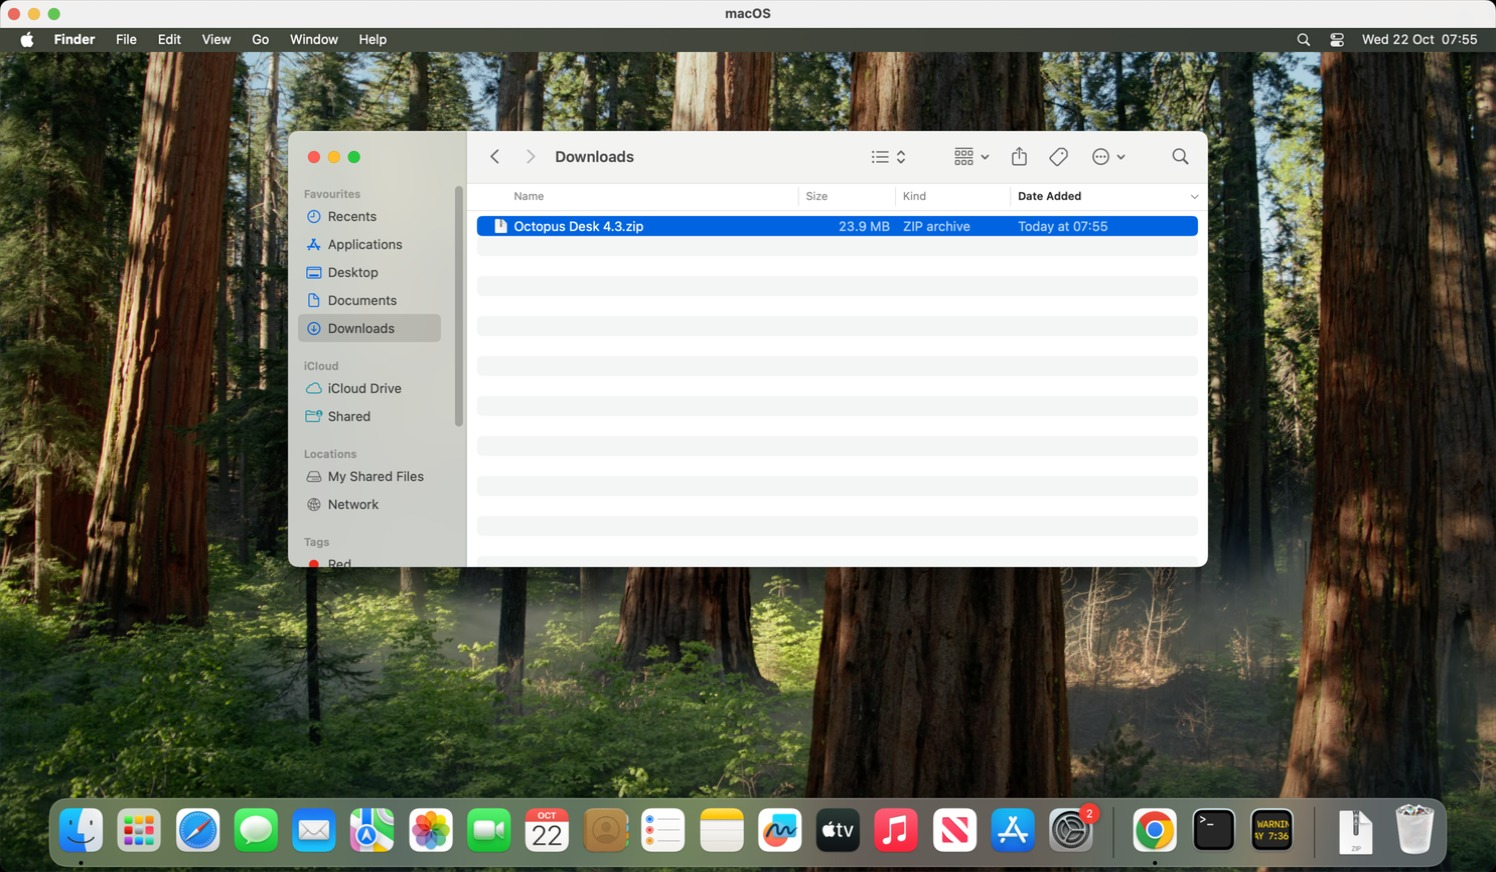
11 Extract Files
Go to the location where you downloaded the file and Double-click "compressed file"
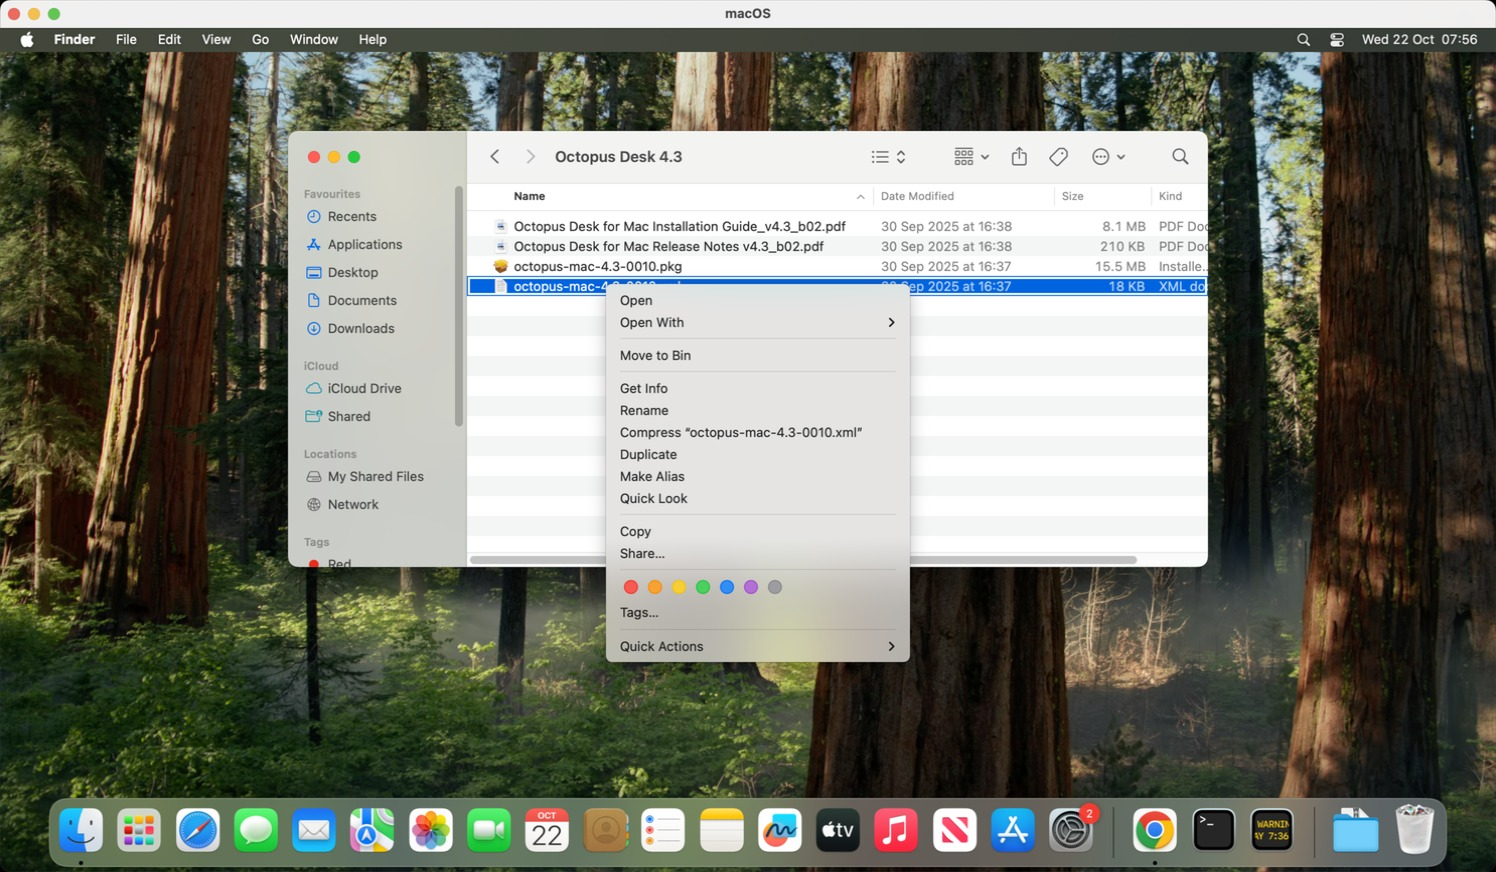
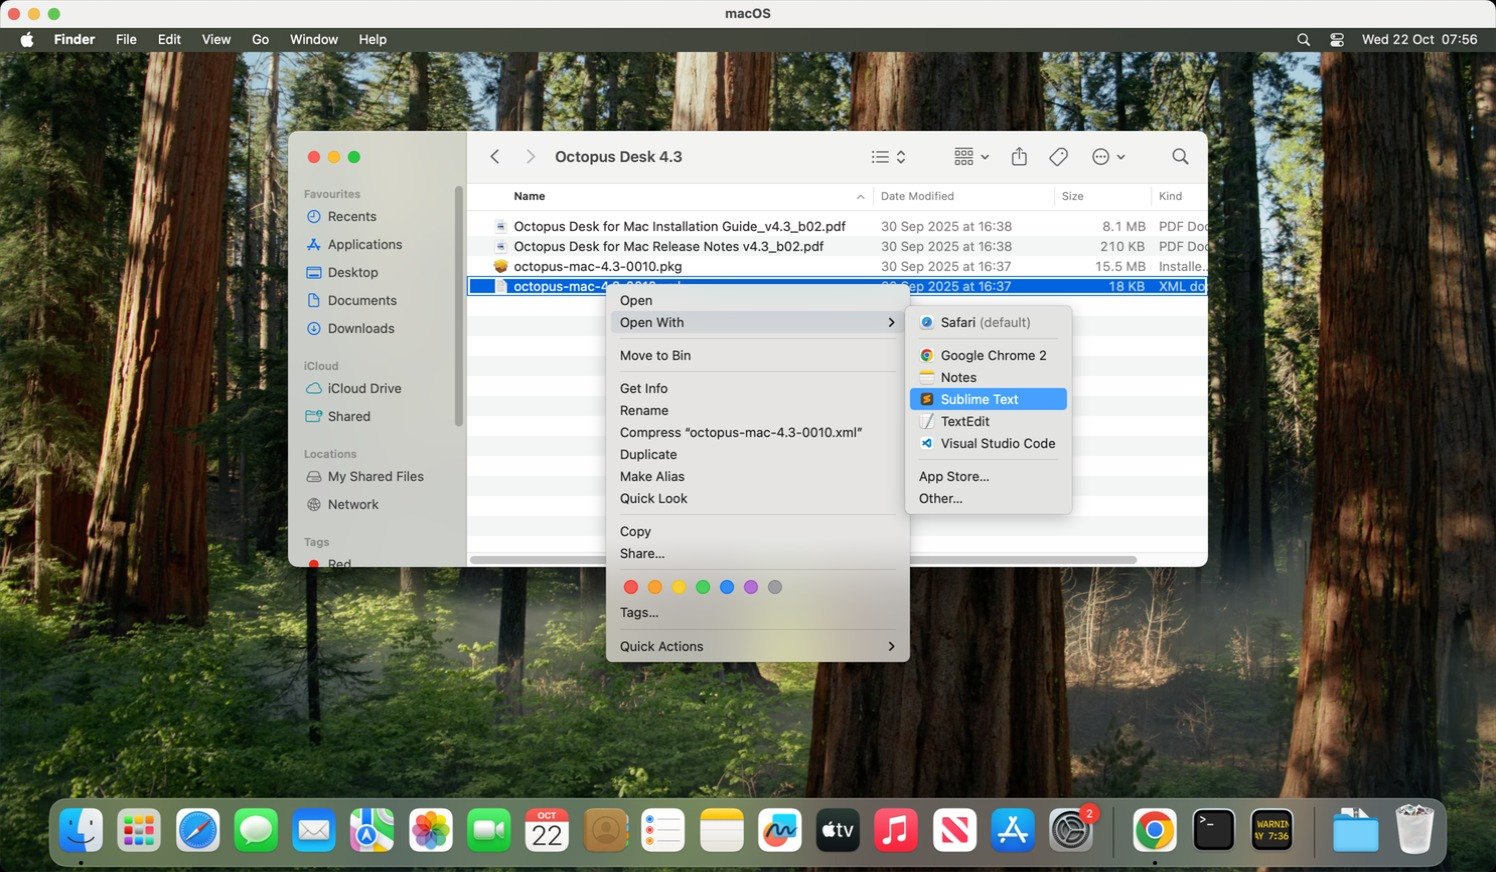
12 Access Configuration File
Go to the folder where the file was extracted and Right click ".xml" file
13 Open XML Editor
Open the ".xml" file with your text editor
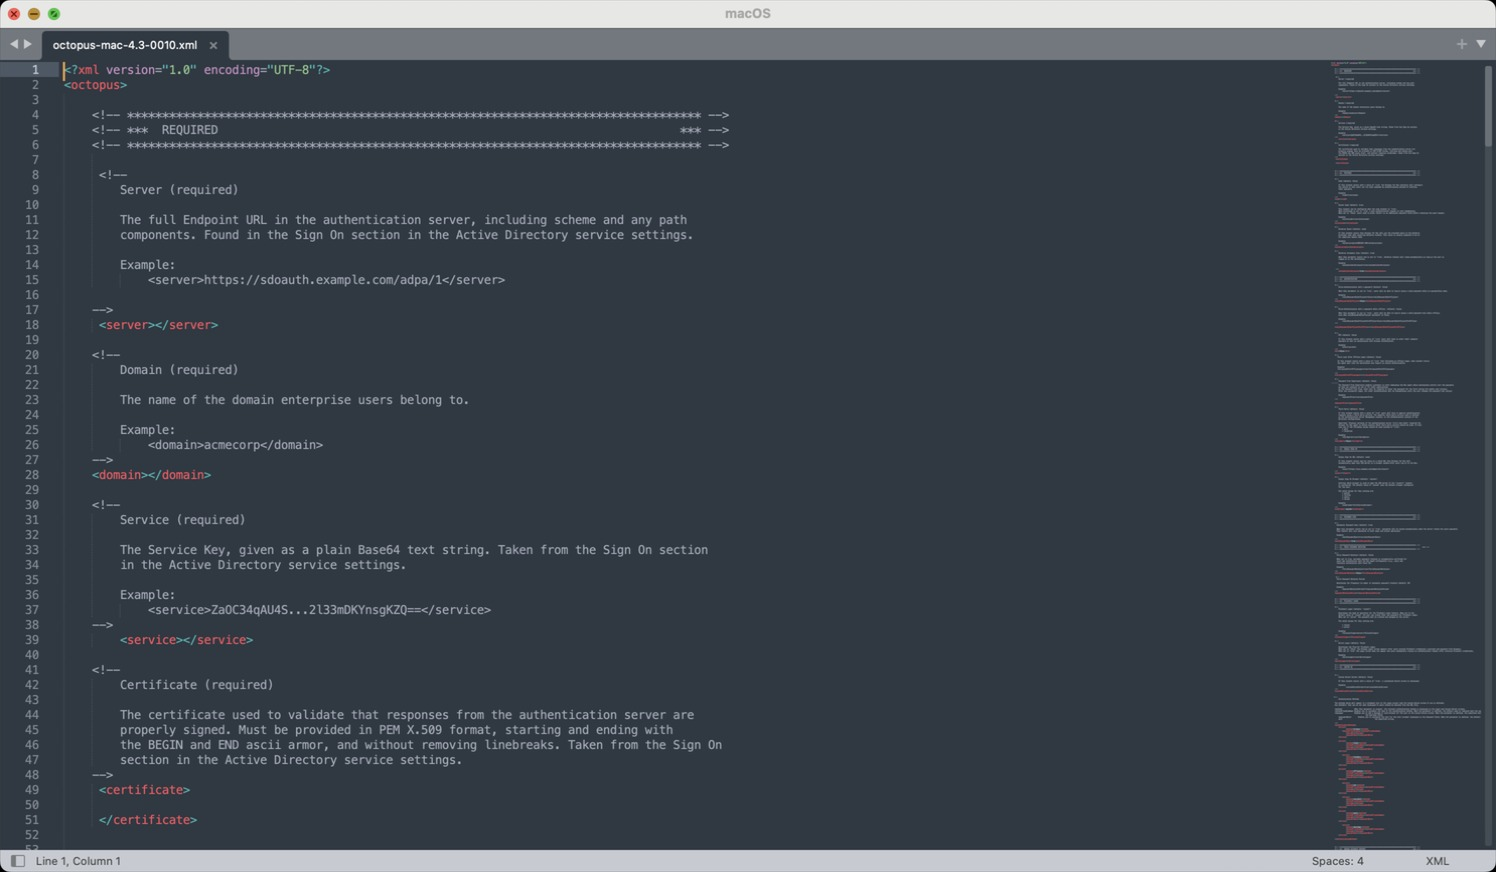
14 View Configuration
Review the XML configuration file structure
Part 2: Configuration Setup (Steps 15-34)
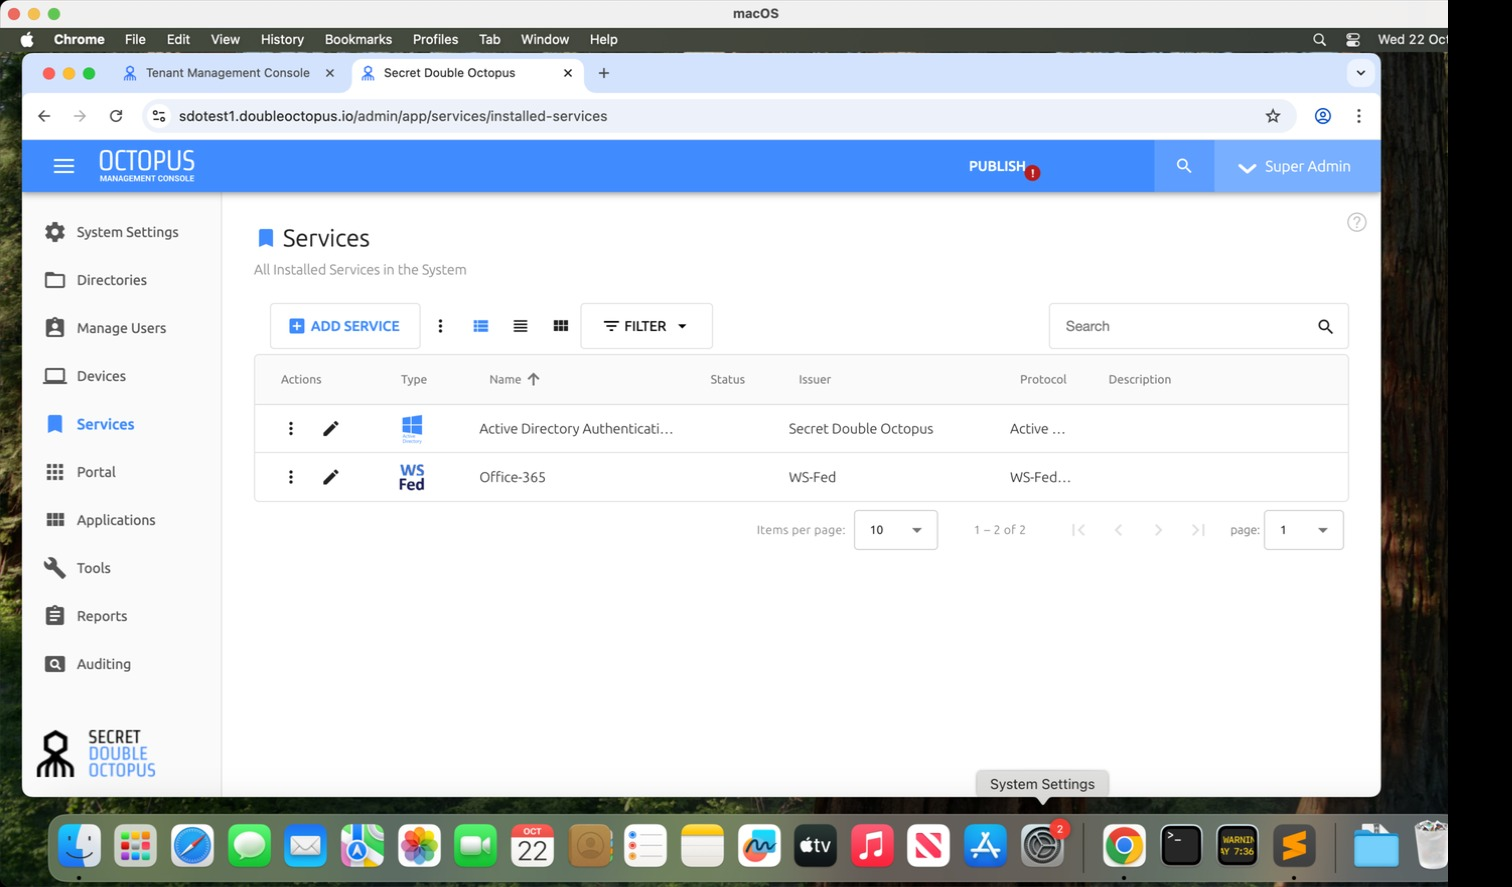
15 Access Admin Console
Open SDO tenant Admin Console and select "Services"
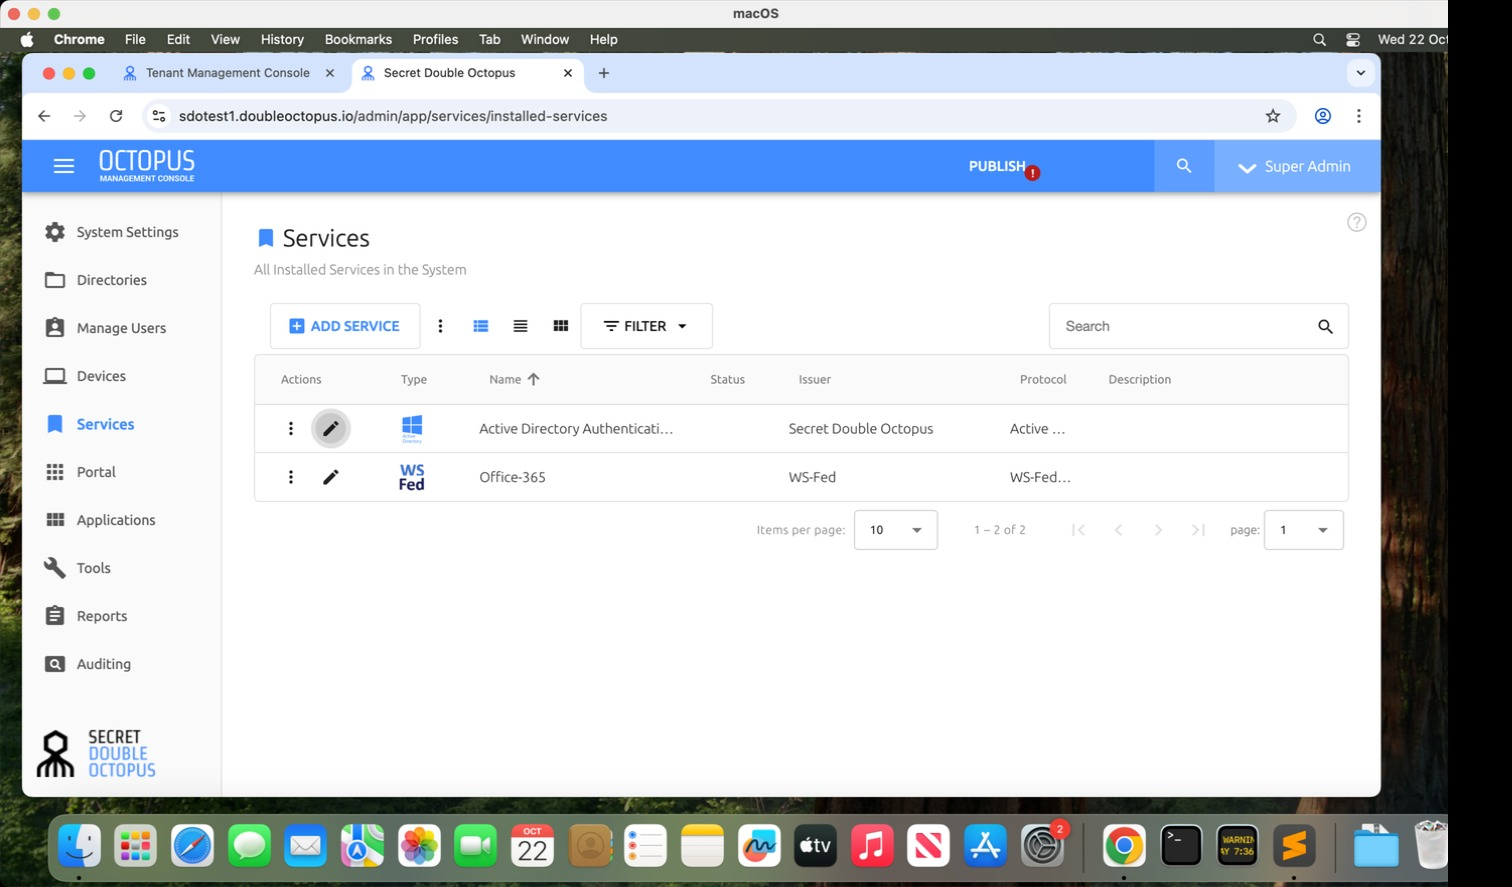
16 Edit Service
Click "edit" on your Active Directory Service
17 Sign On Settings
Click "Sign on"
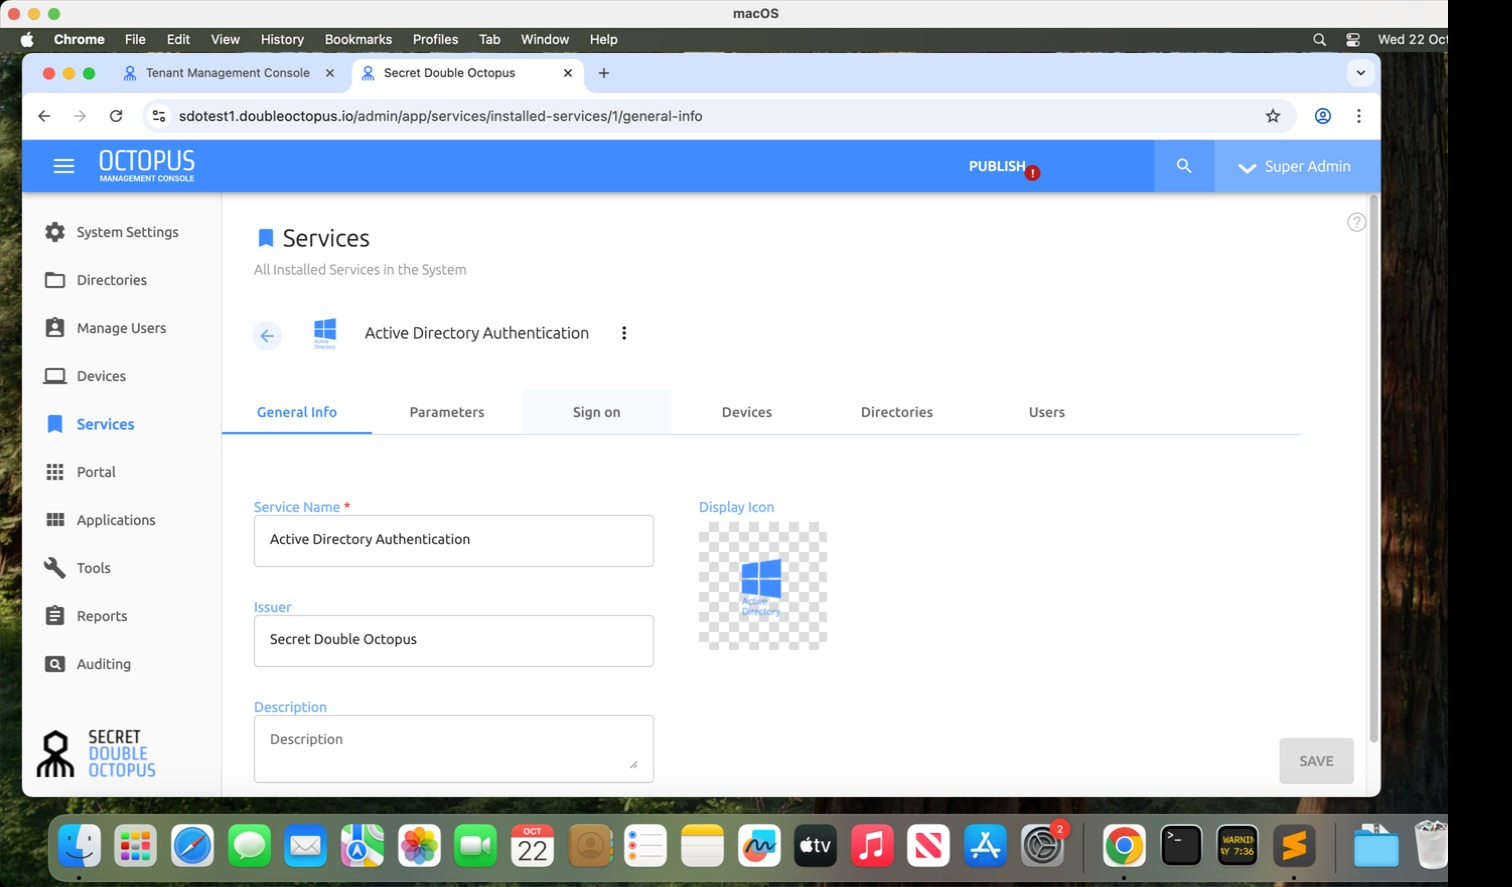
18 Copy Endpoint URL
Copy "Endpoint URL" value
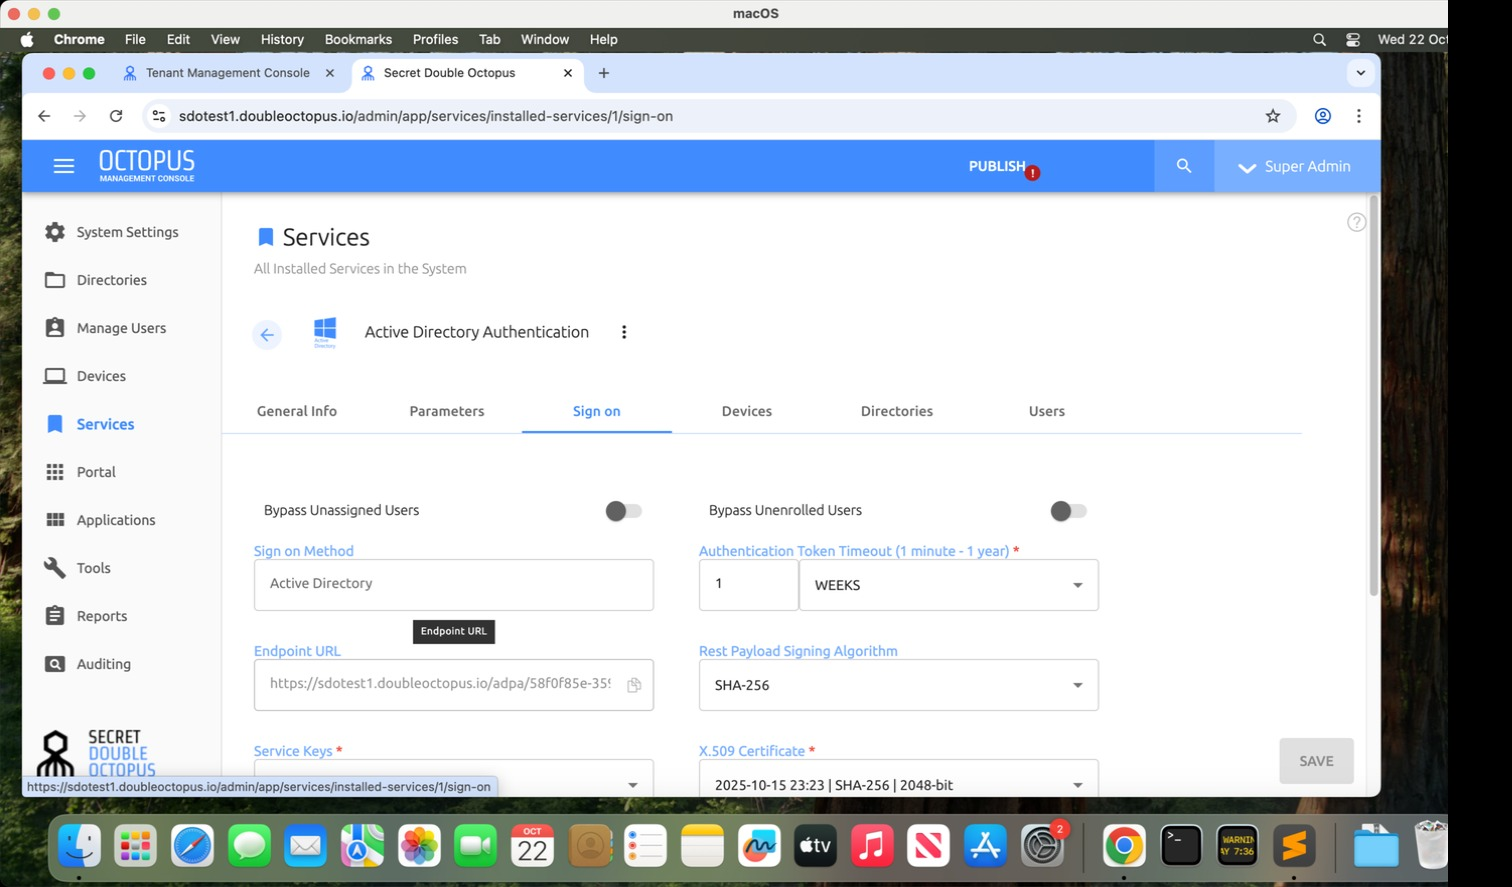
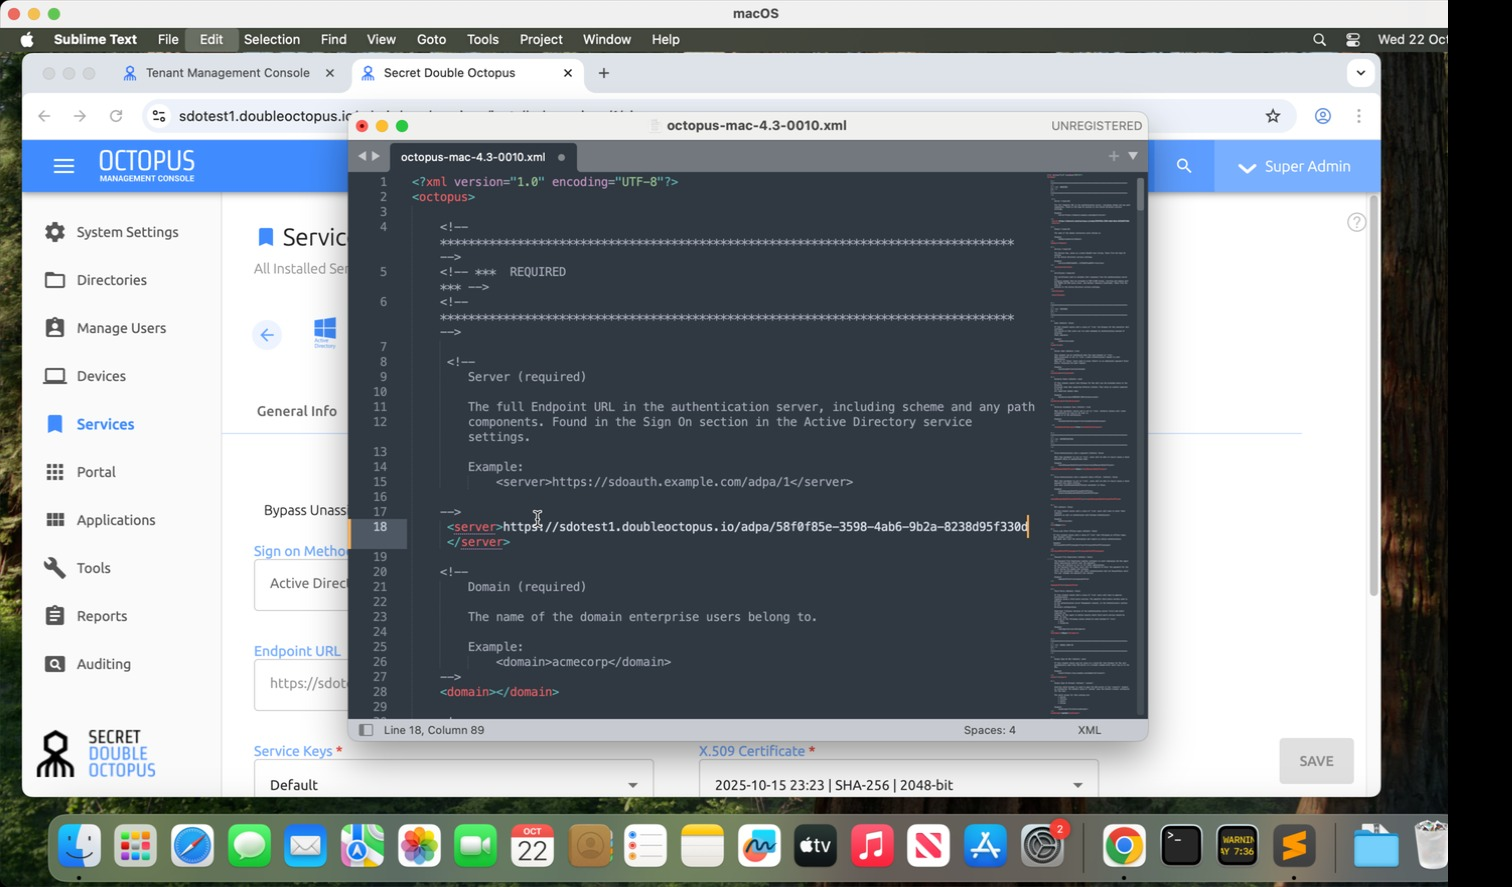
19 Paste Endpoint URL
Paste the copied value in the server section
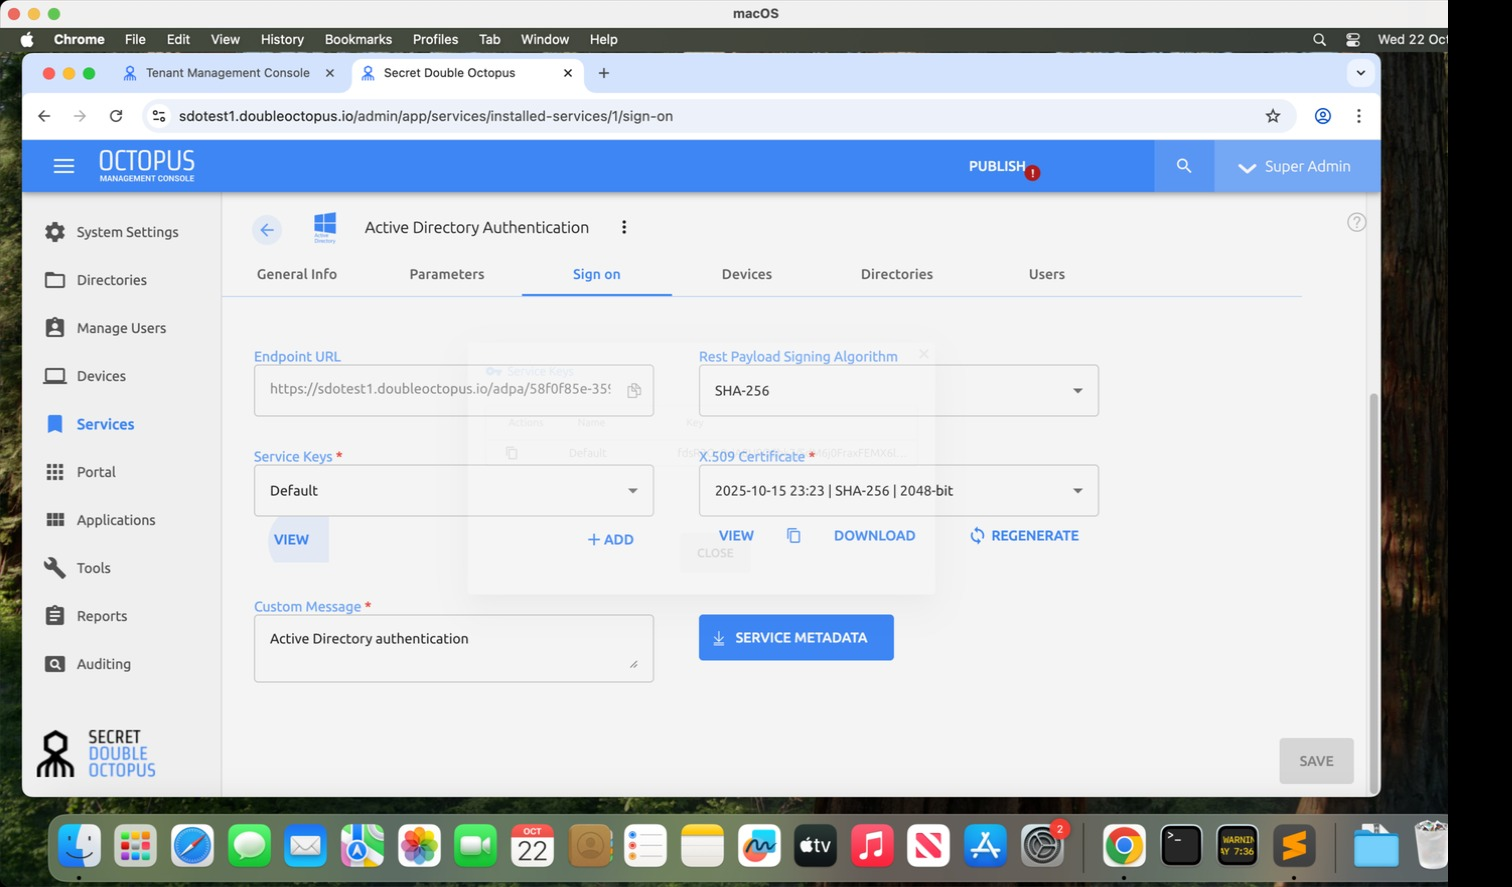
20 Copy Service Keys
Copy "Service Keys"
21 Navigate to Service Section
Navigate to the service configuration section
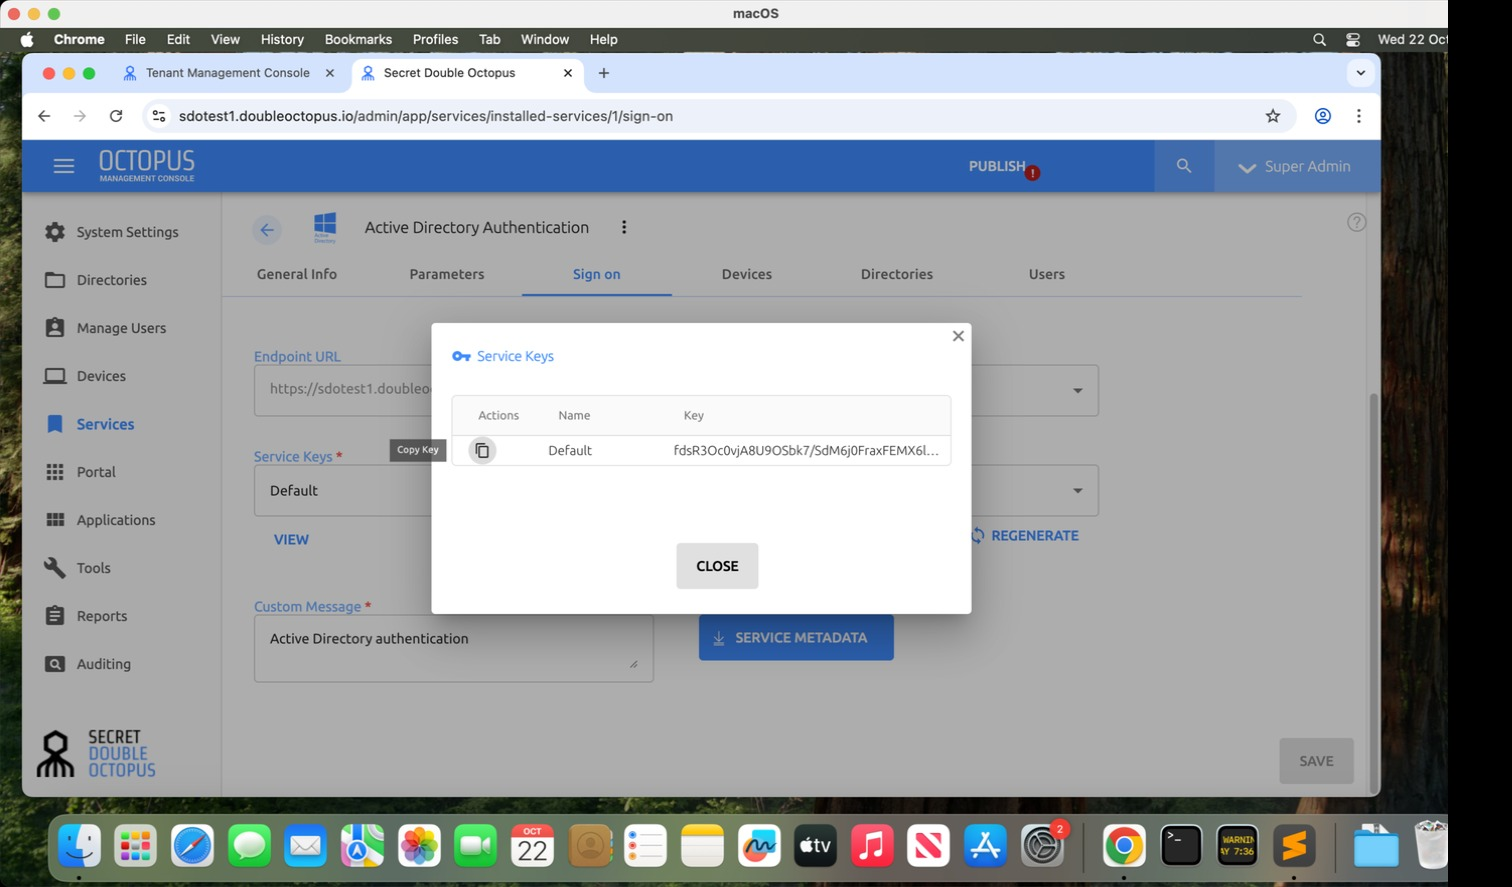
22 Configure Service Settings
Configure the service parameters
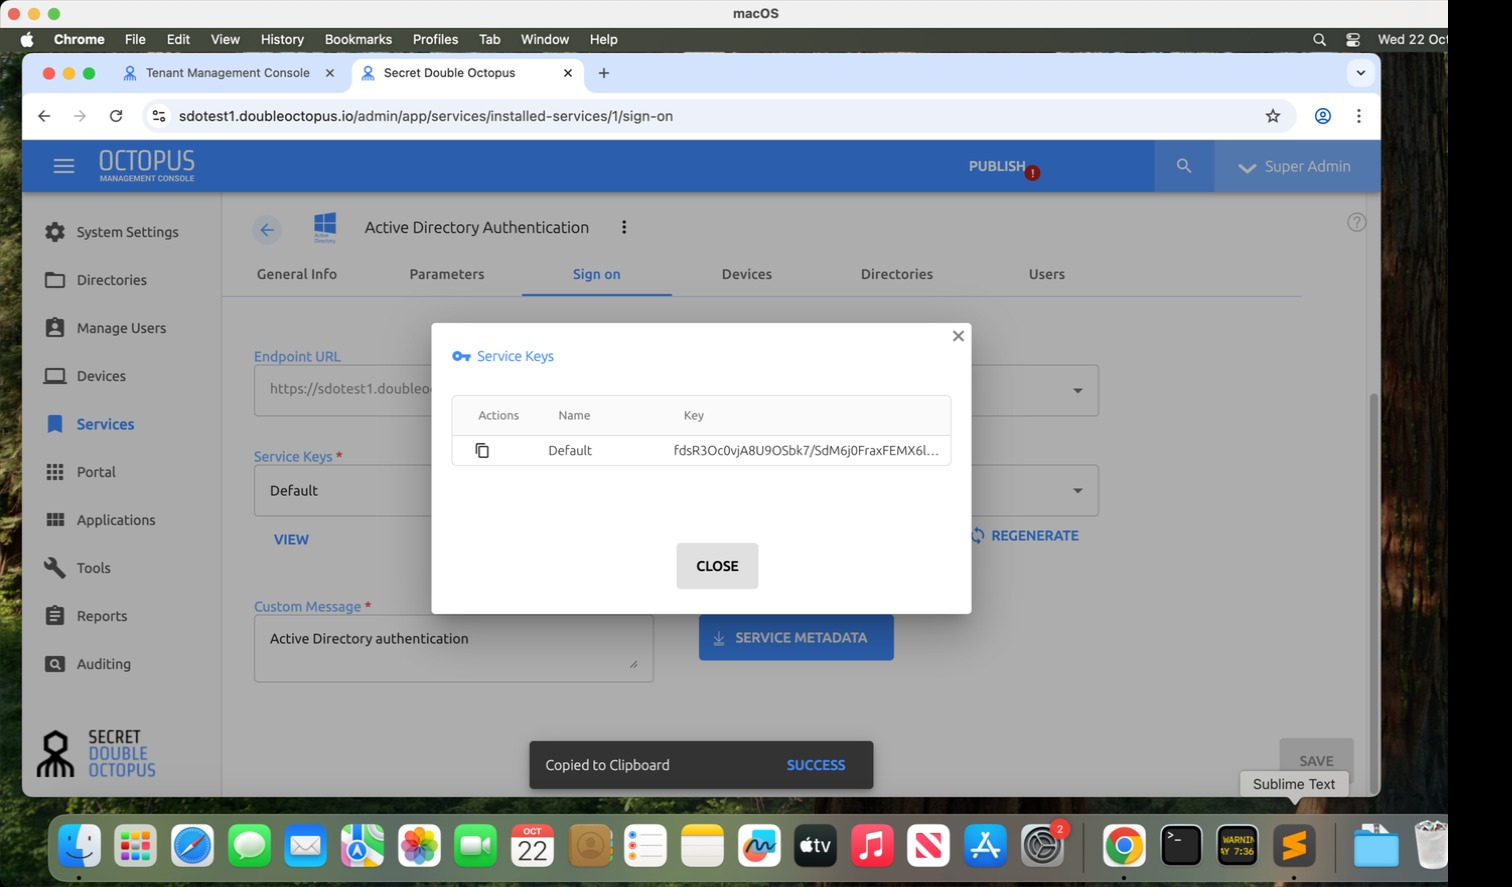
23 Paste Service Keys
Paste the Service Keys in the service value and enter the domain
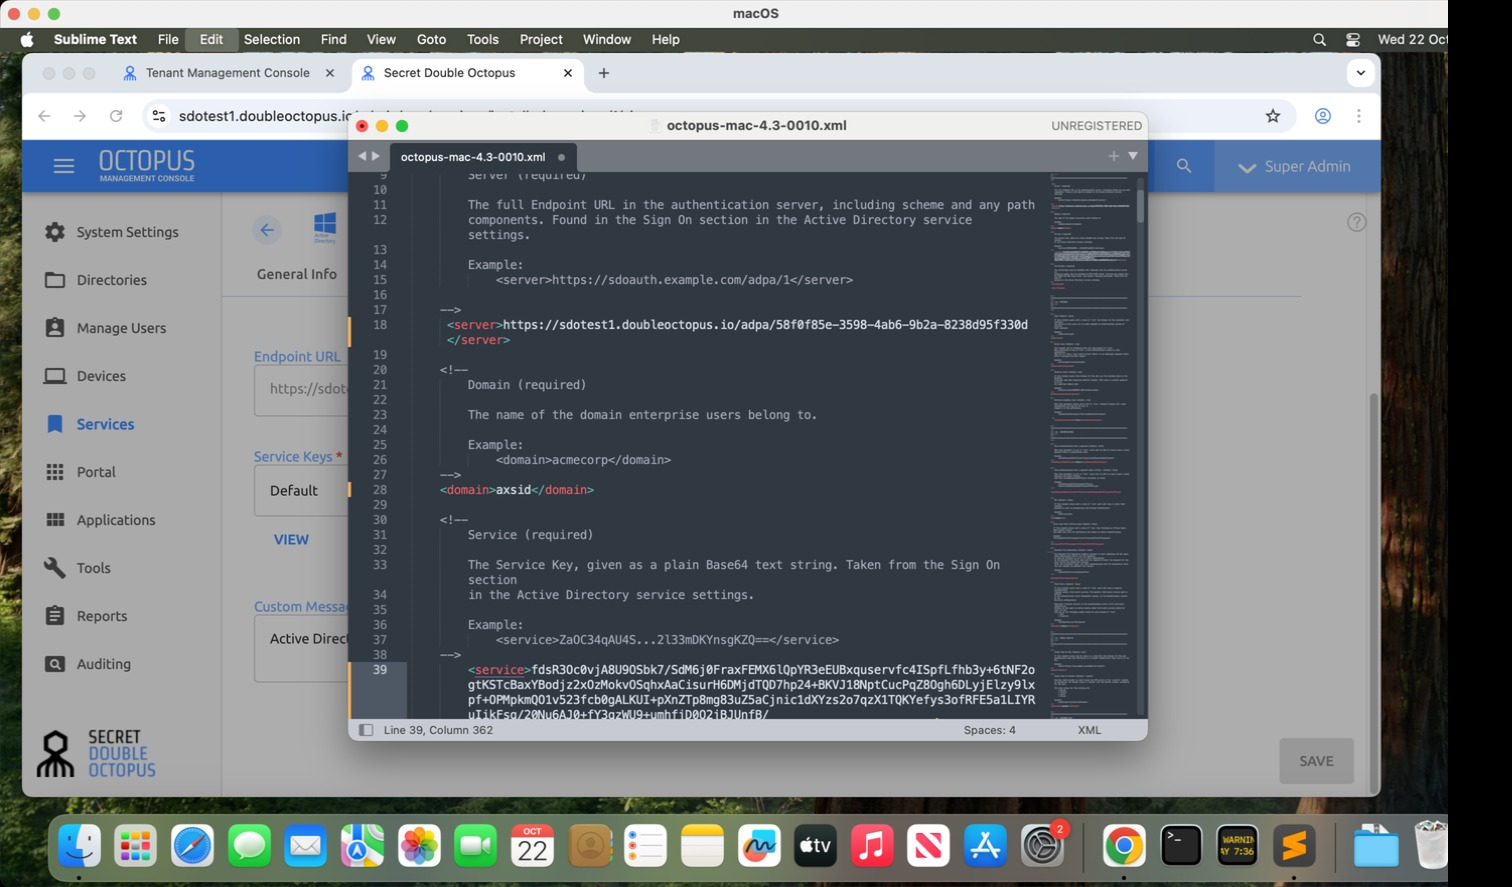
24 Copy x509 Certificate
Copy "x509 certificate"
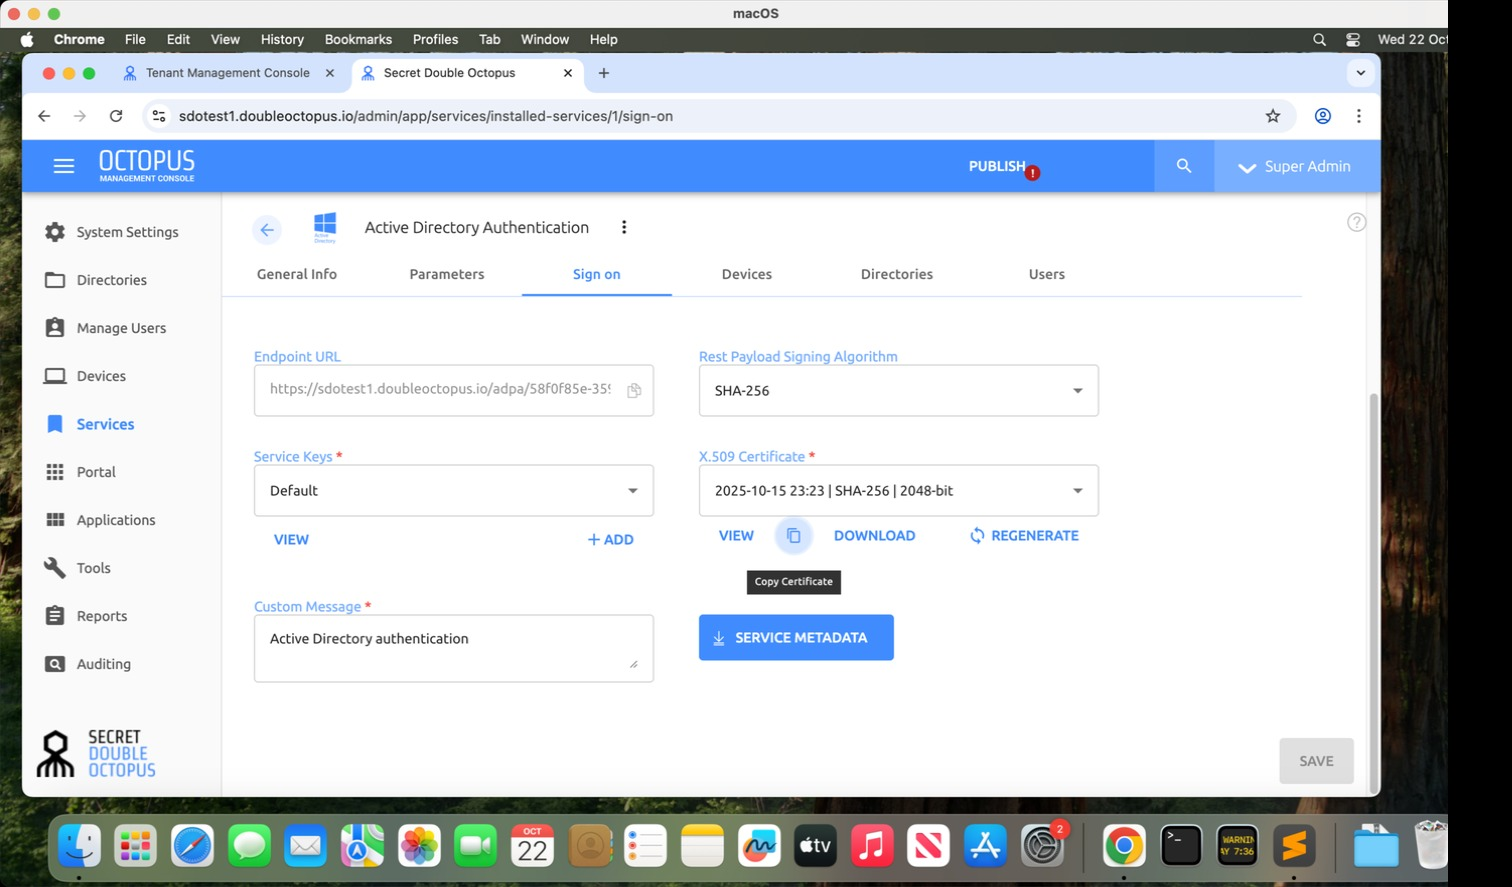
25 Paste Certificate
Paste the copied Certificate to Certificate section
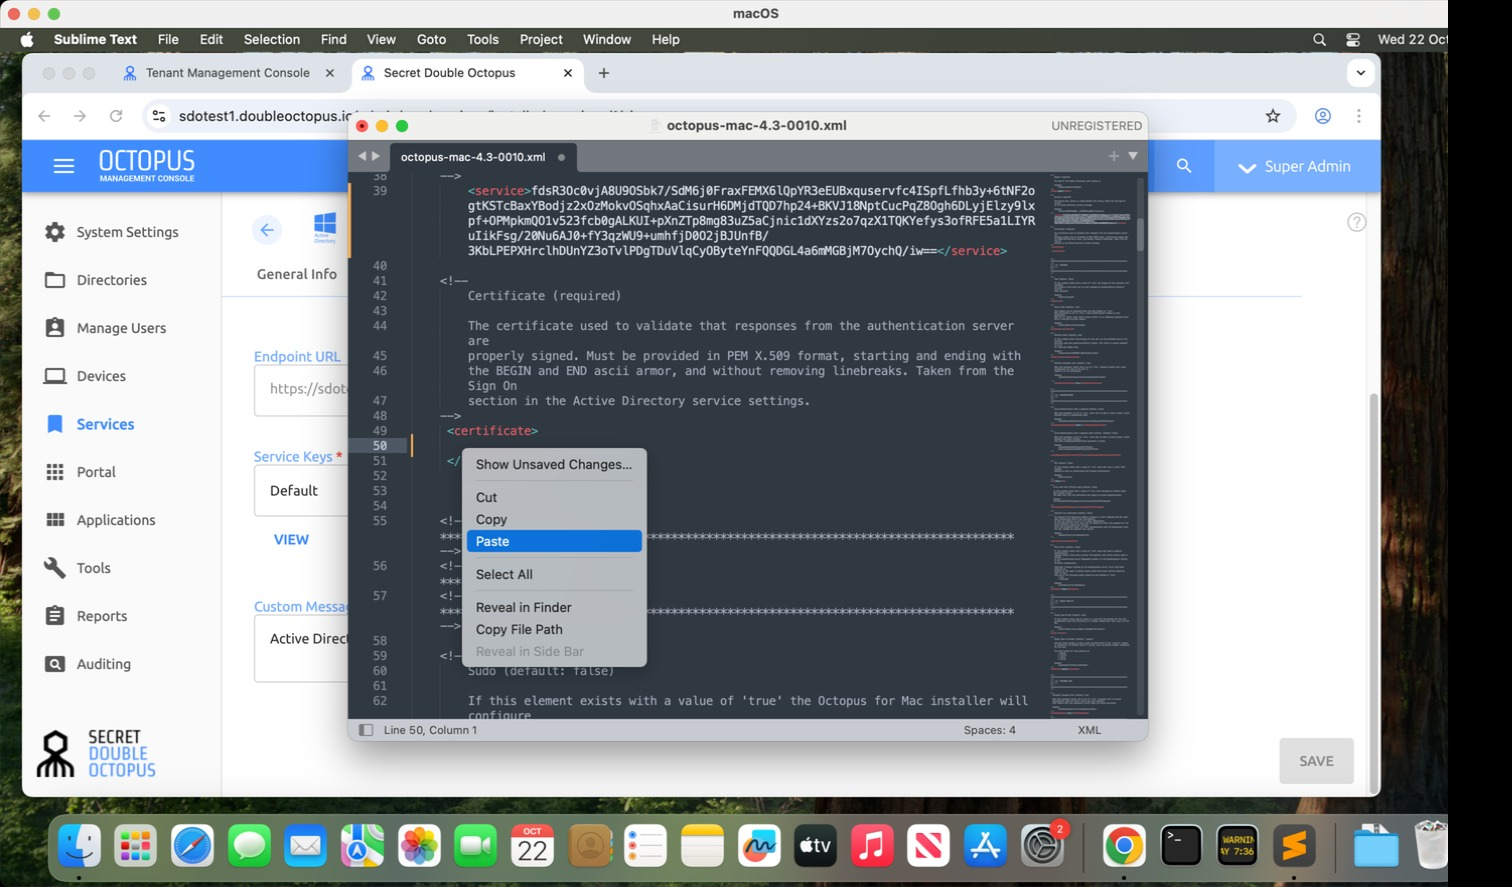
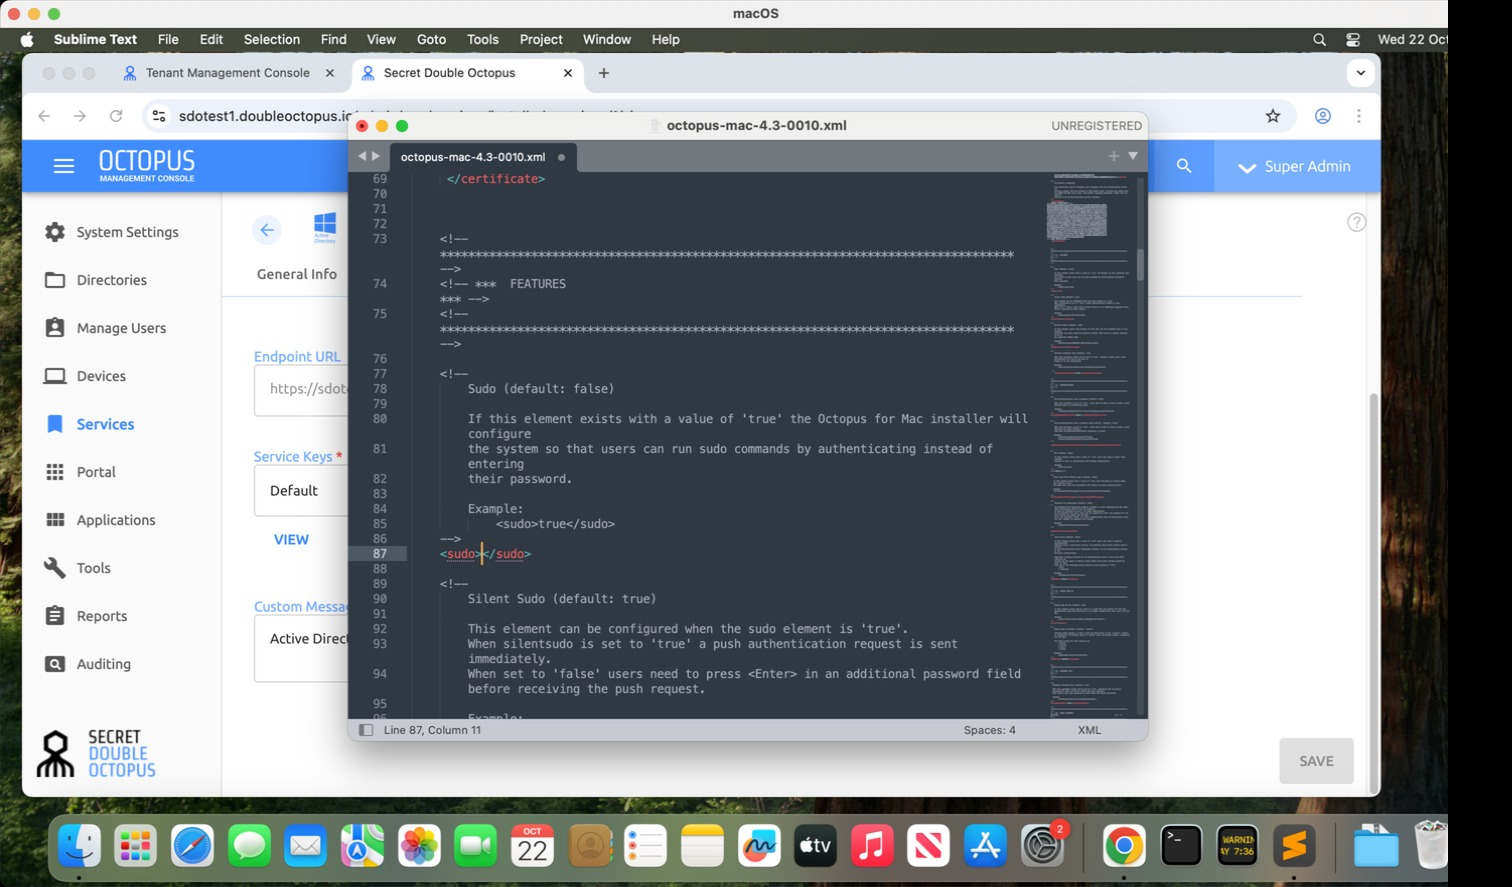
26 Enable Sudo
Enable SDO for sudo by typing true in the sudo section
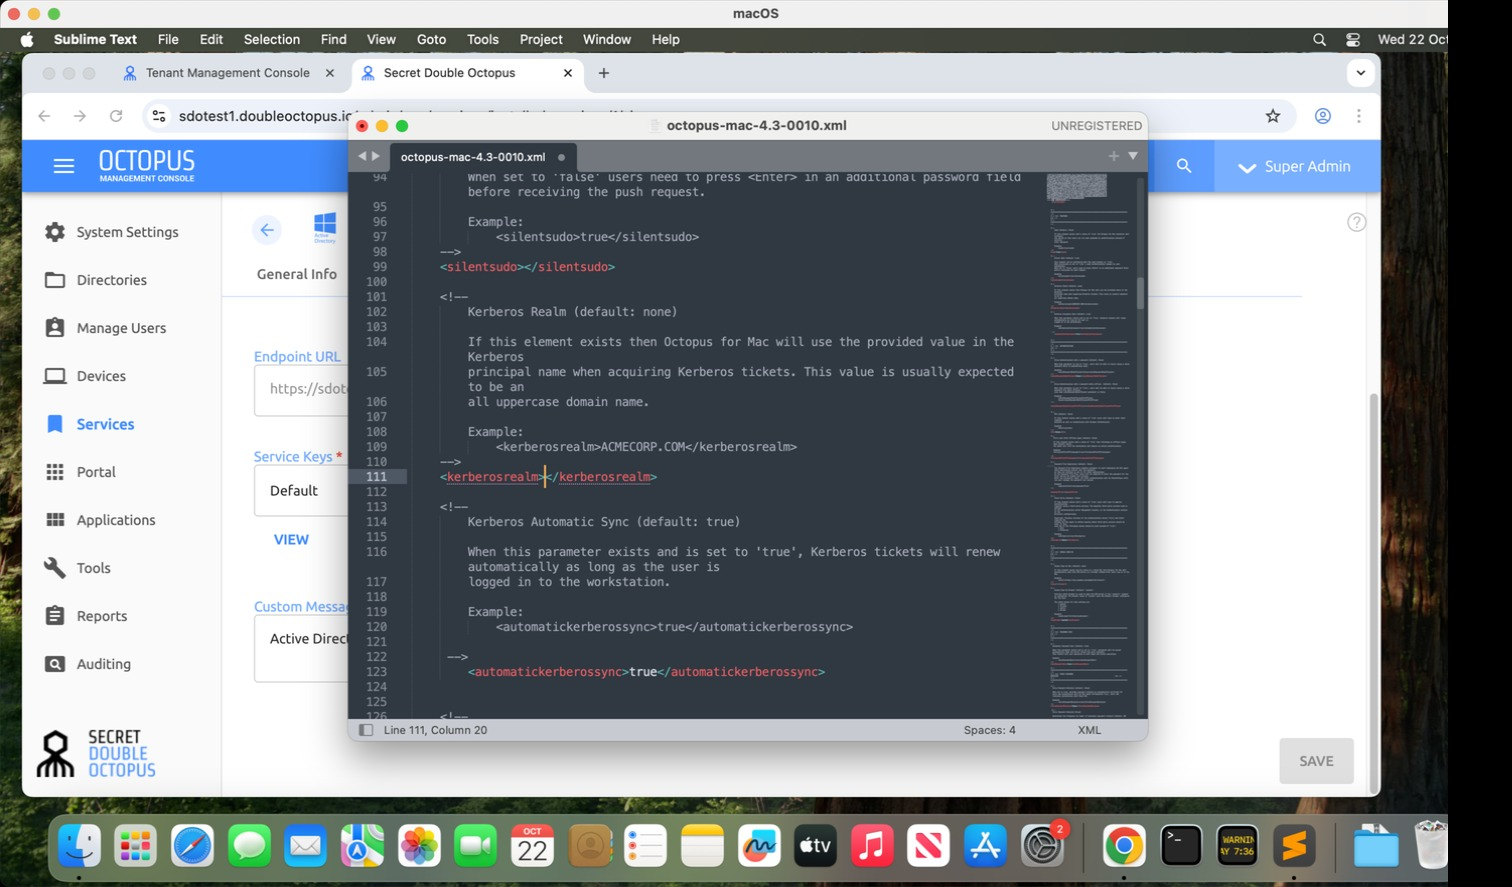
27 Configure Kerberos
Enter the FQDN of the domain to enable Kerberos
28 Adjust Settings 1
Change the settings as needed
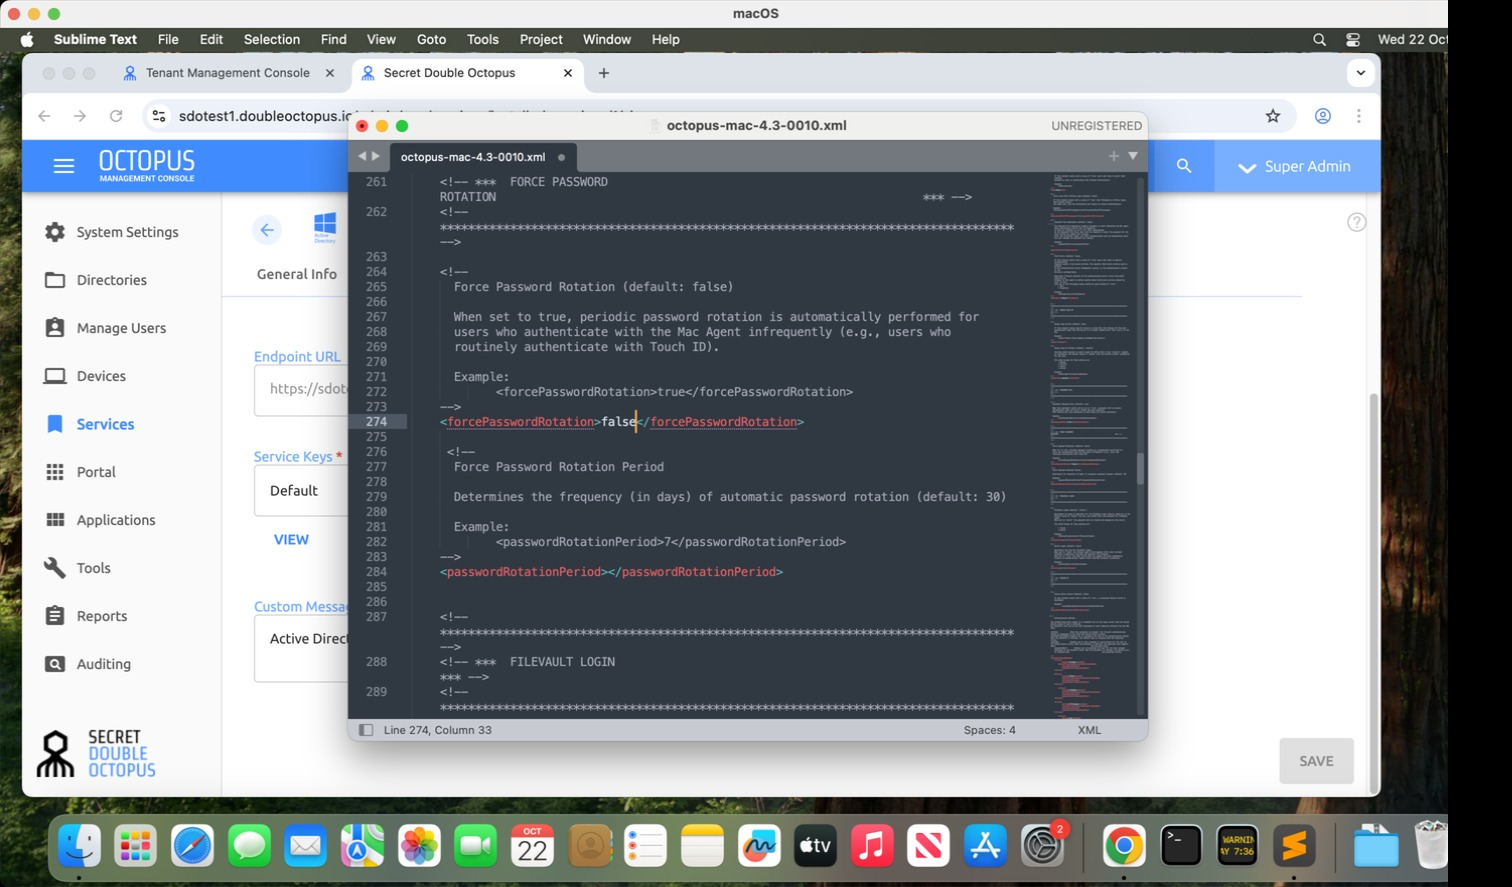
29 Adjust Settings 2
Change the settings as needed
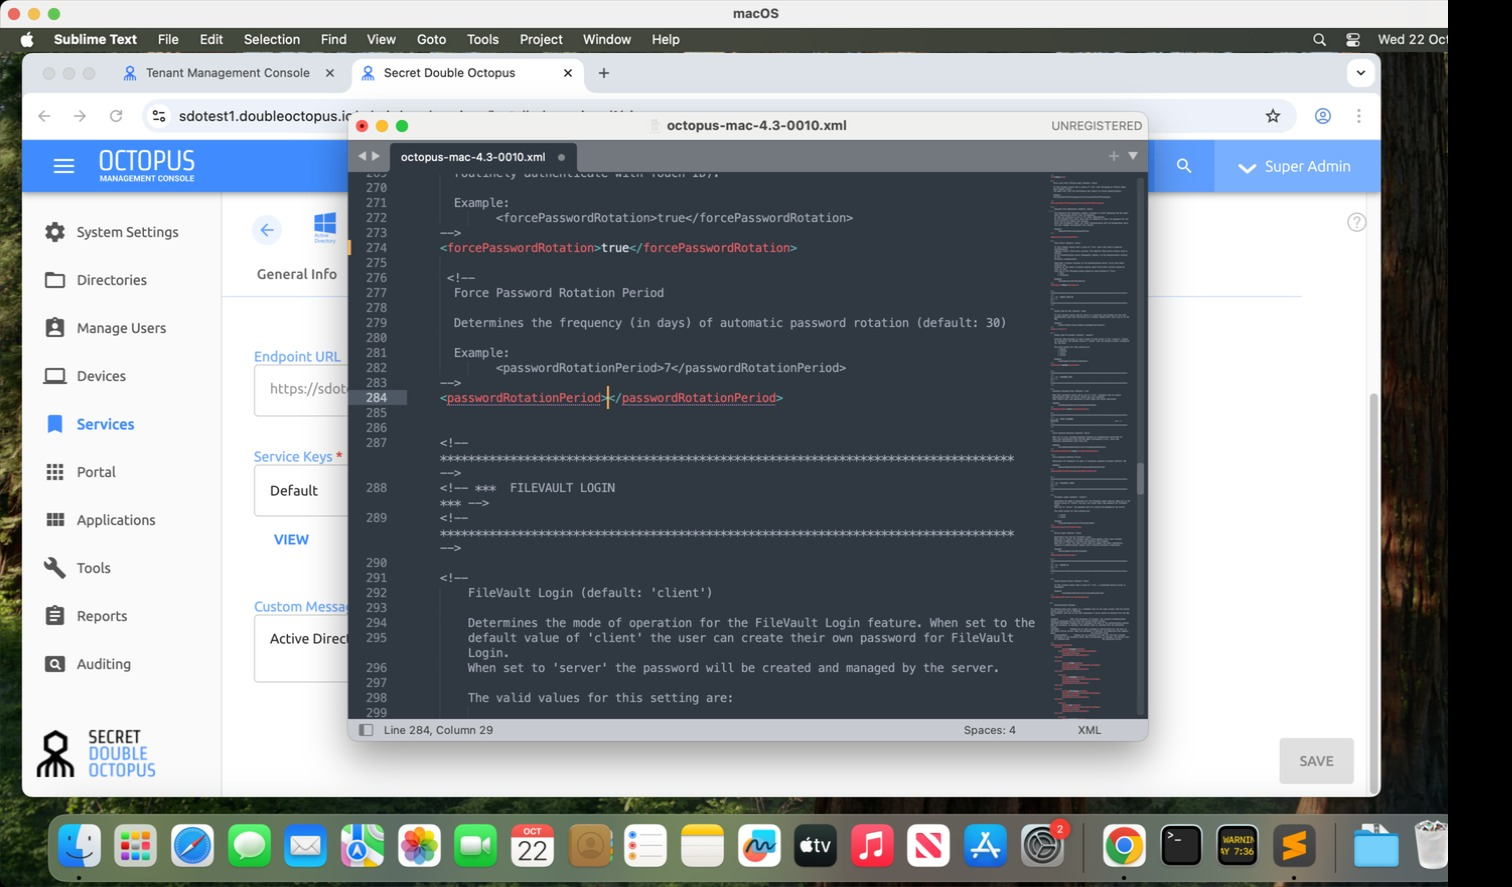
30 Adjust Settings 3
Change the settings as needed
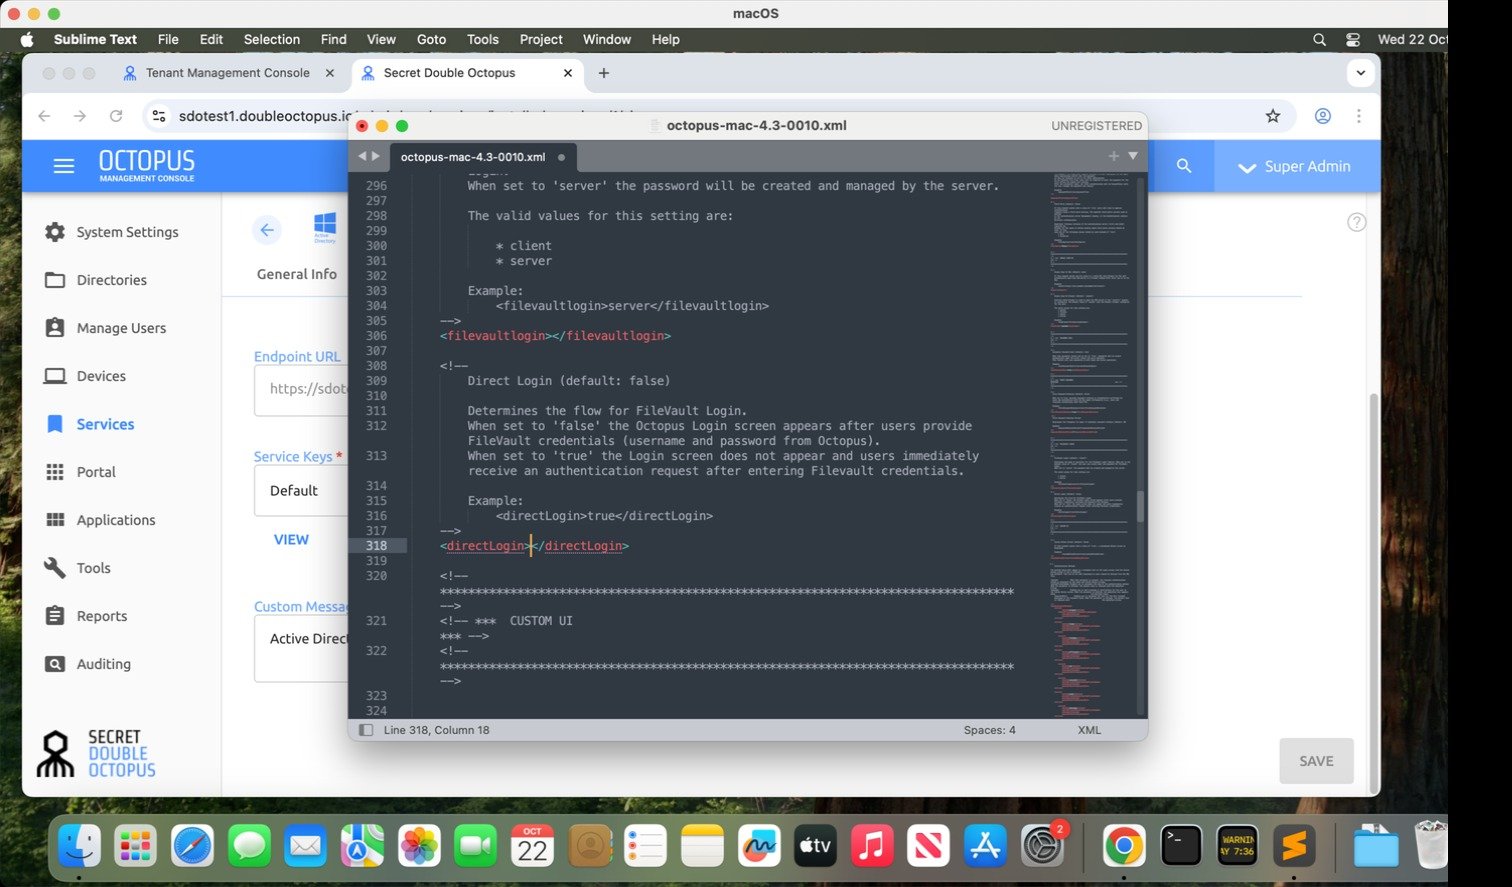
31 Adjust Settings 4
Change the settings as needed
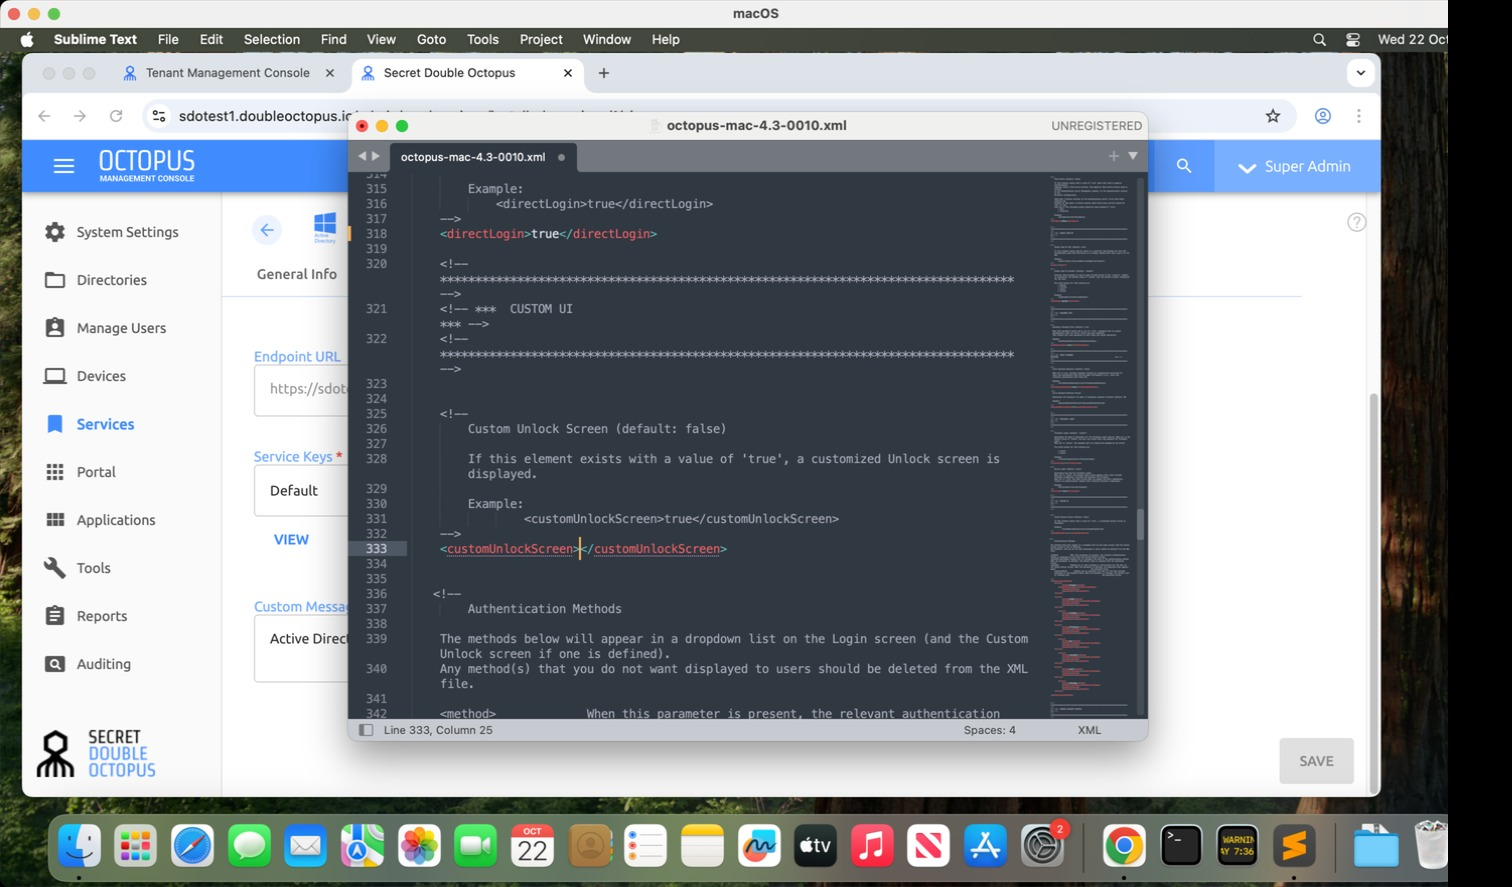
32 Remove Authenticators
Delete any authenticator you don't require
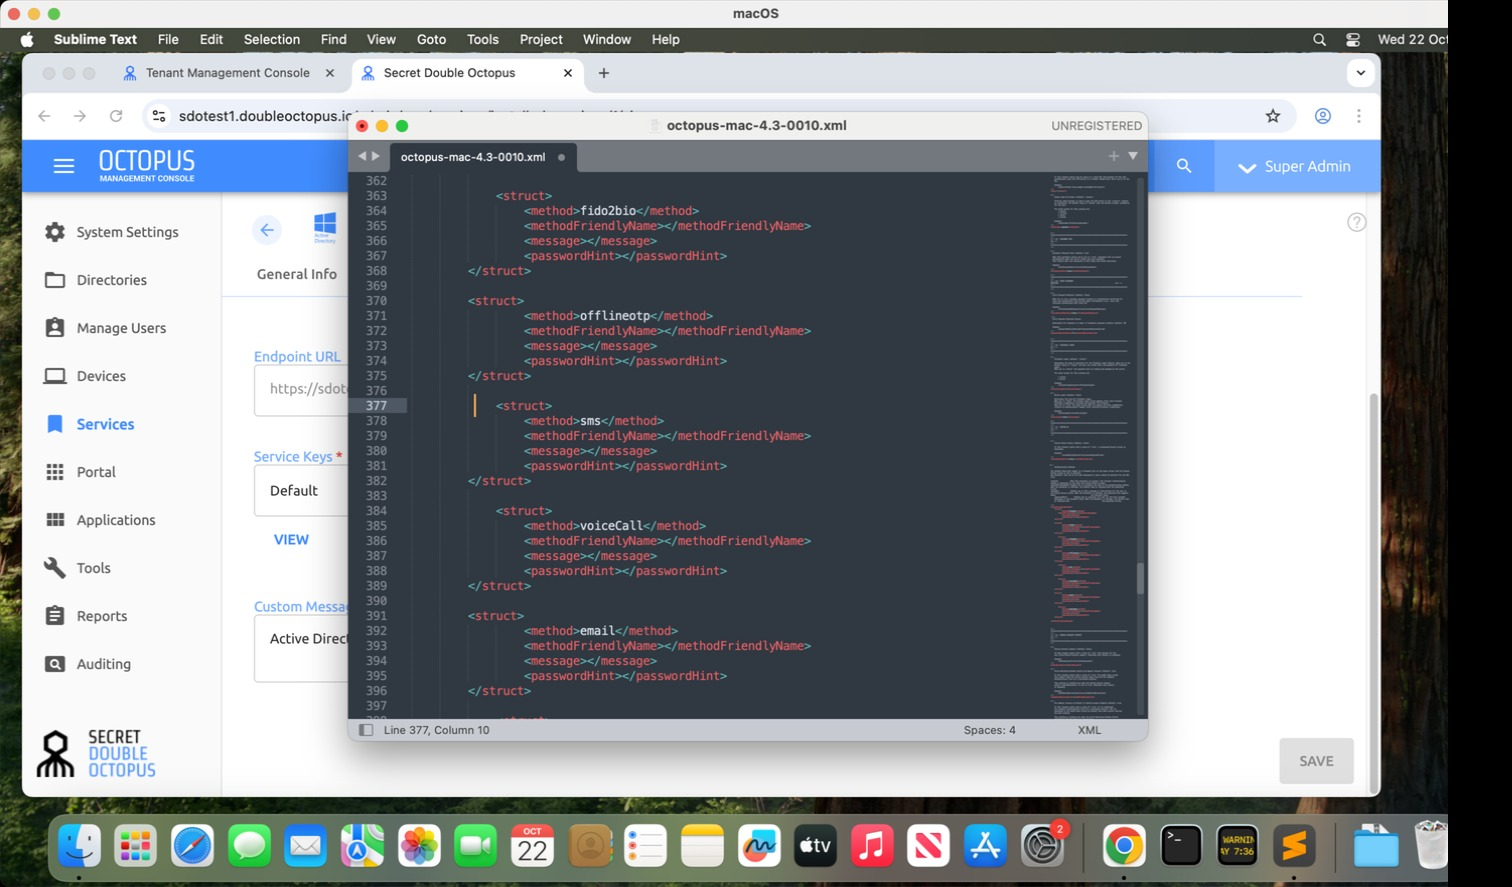
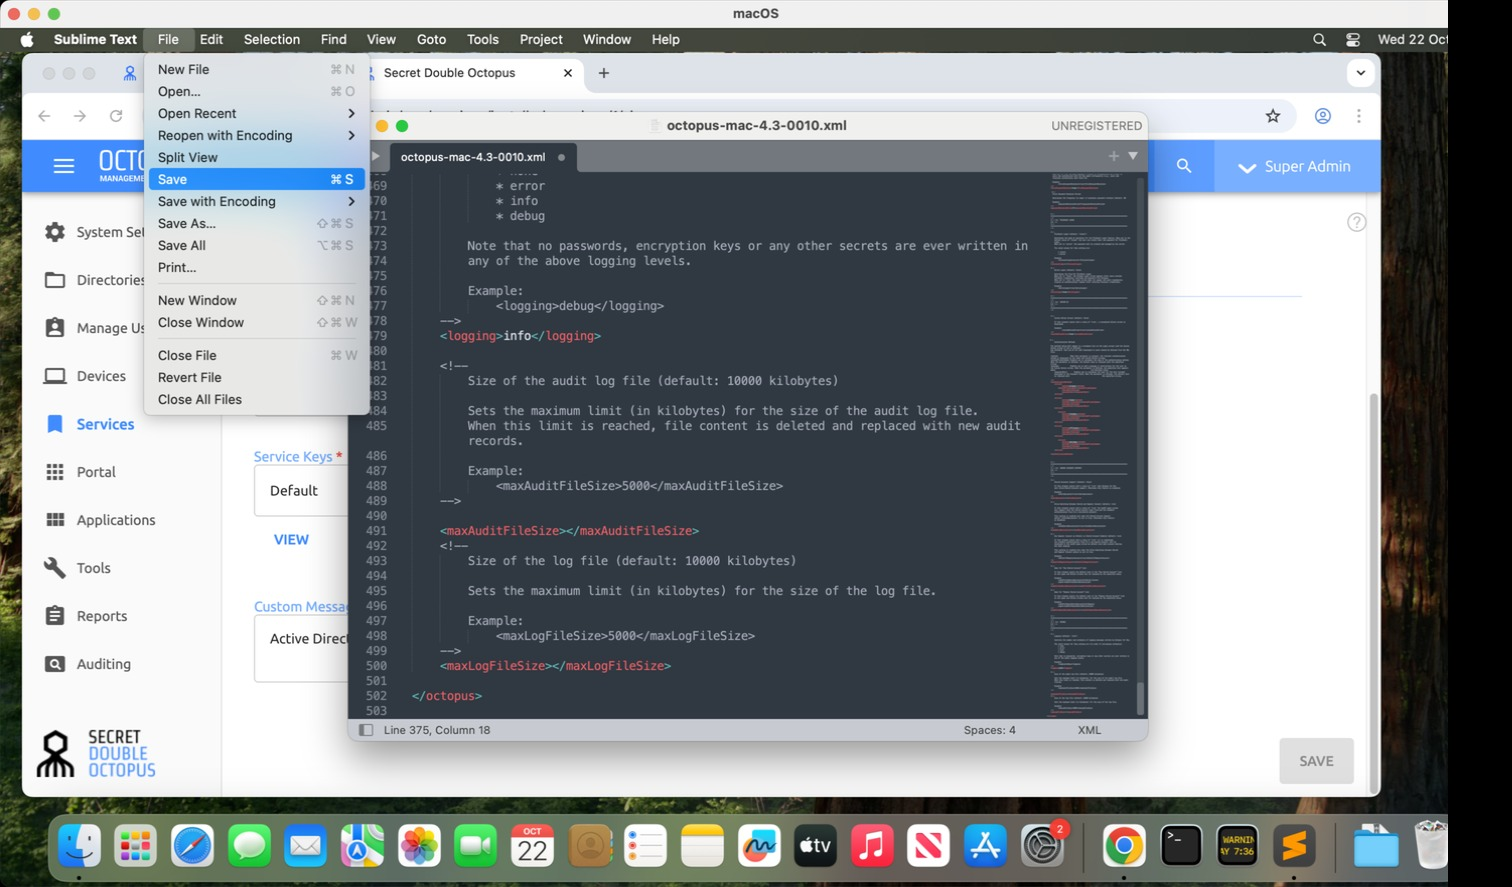
33 Save Configuration
Save the file
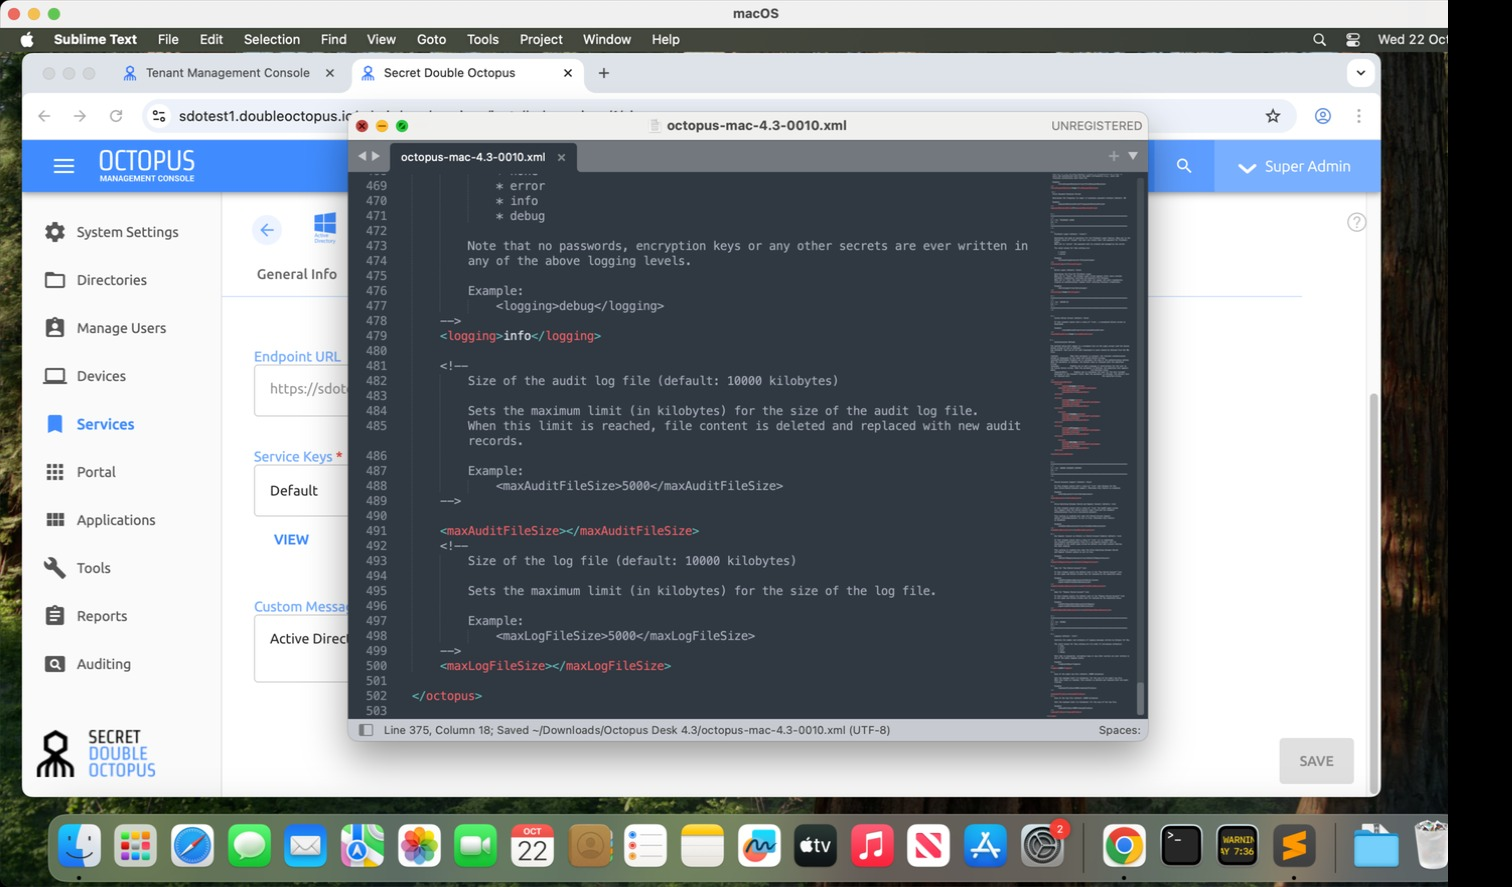
34 Close Editor
Close the file
Part 3: Installation Process (Steps 35-47)
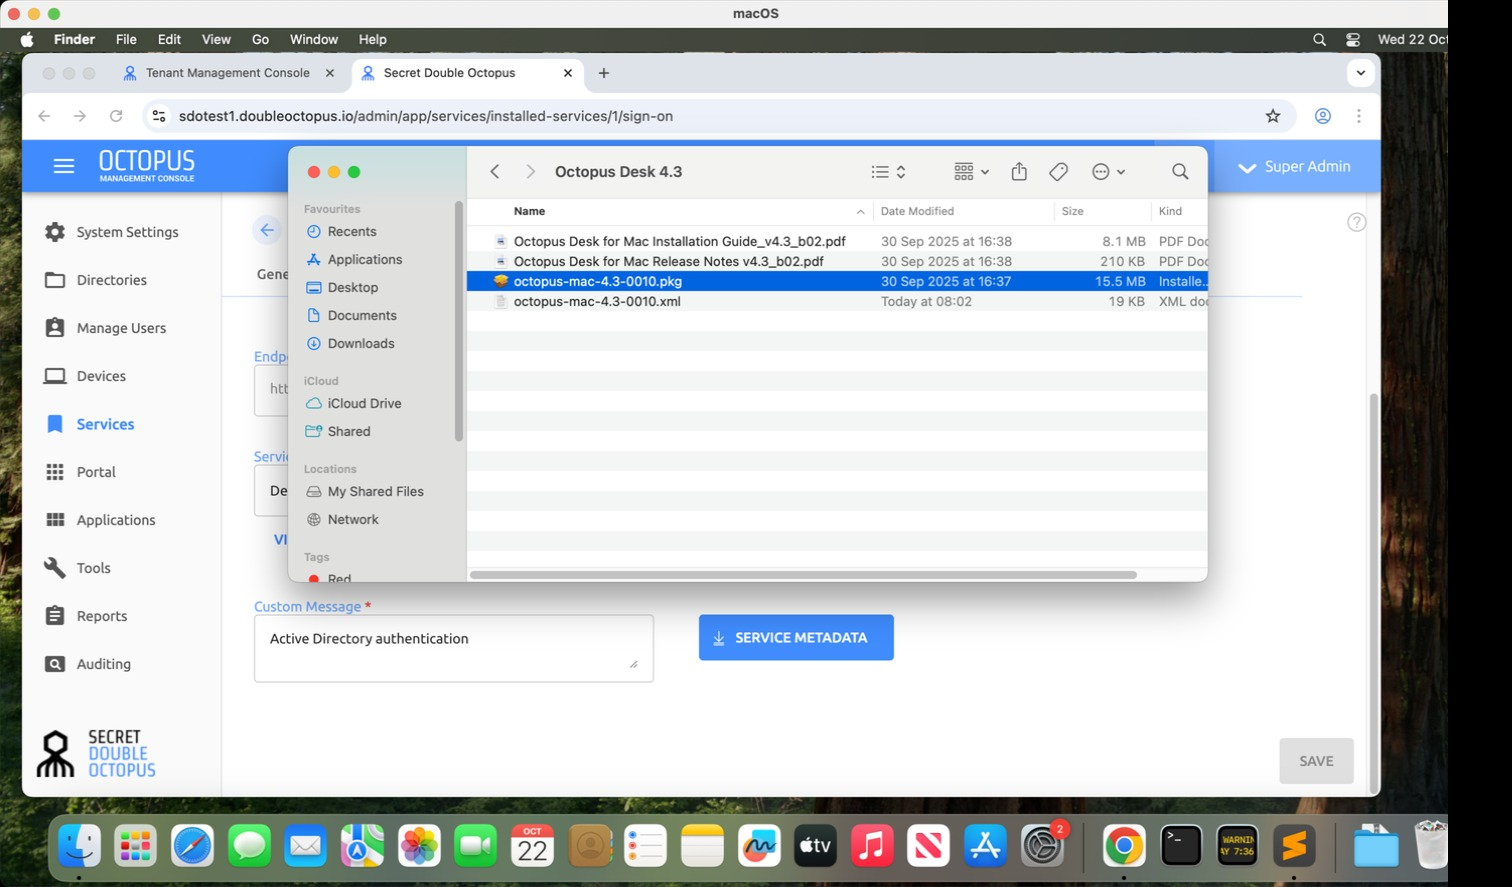
35 Launch Installer
Double-click Mac installer
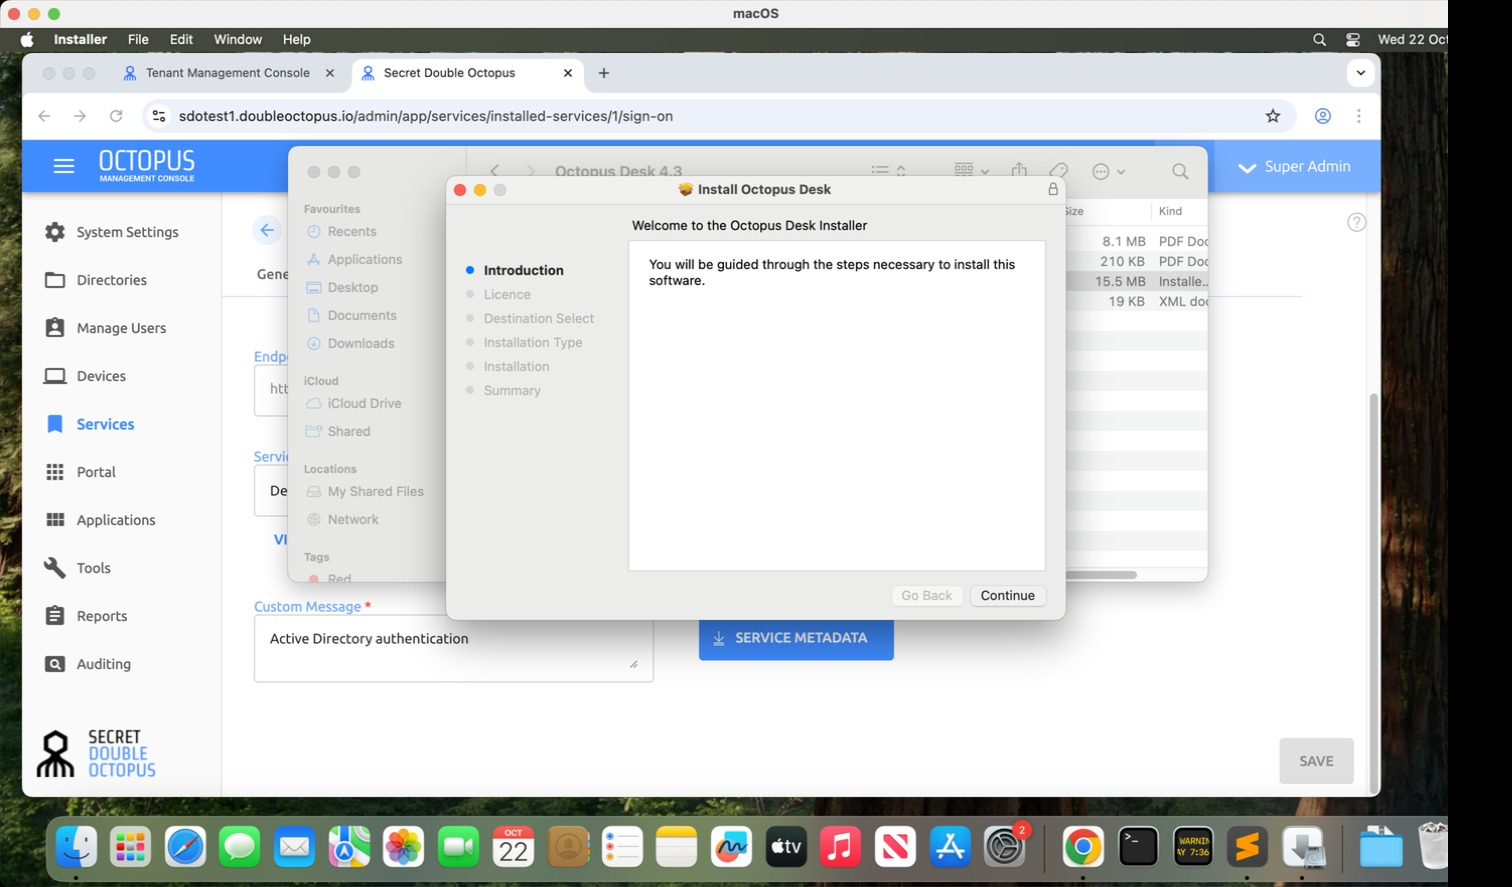
36 Continue Installation
Click "Continue"
37 Proceed with Setup
Click "Continue"
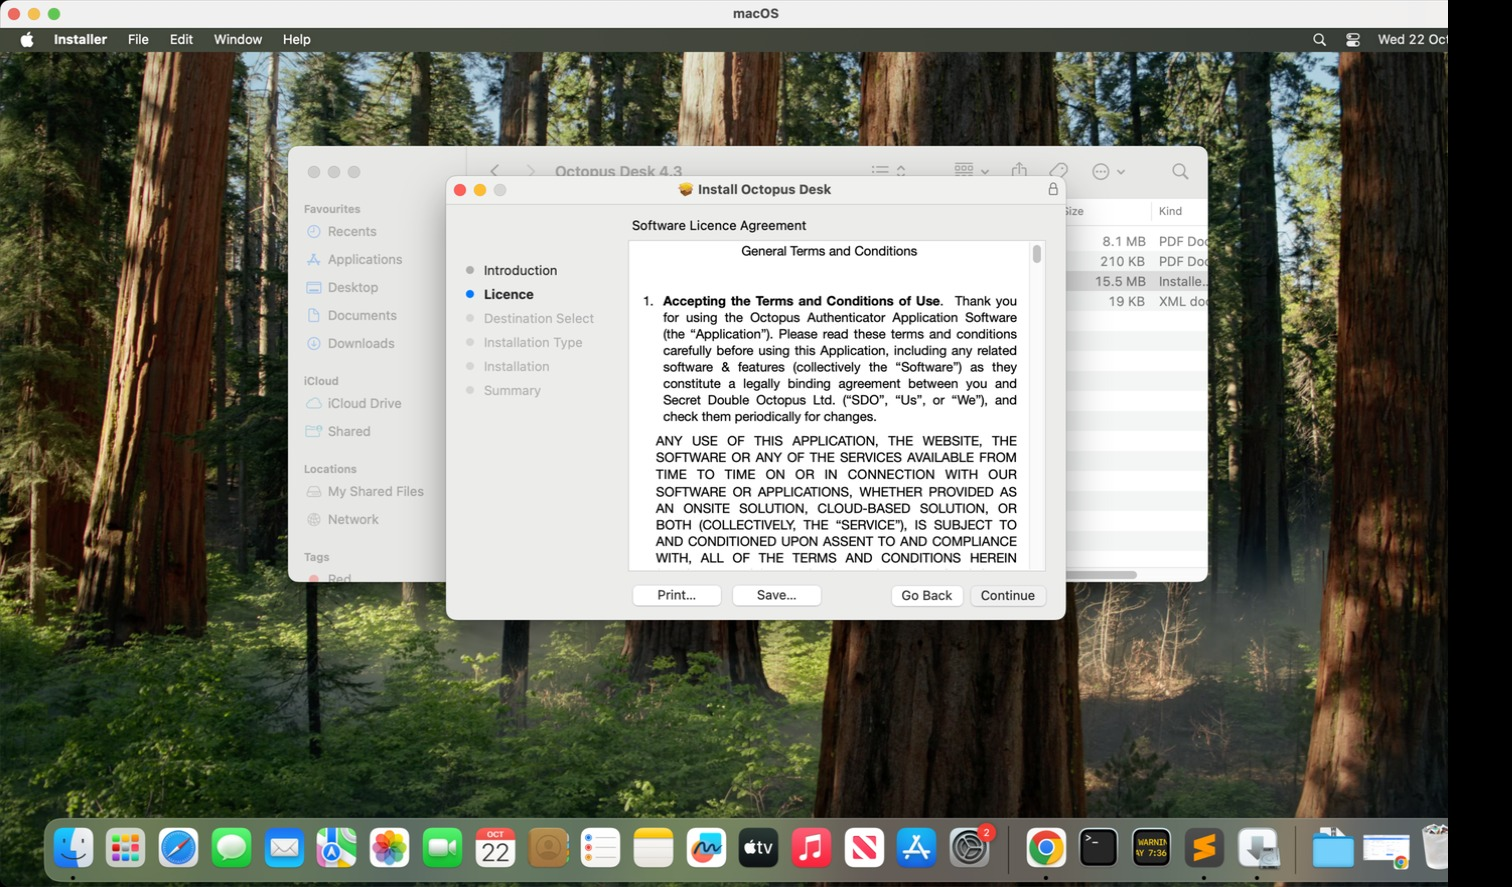
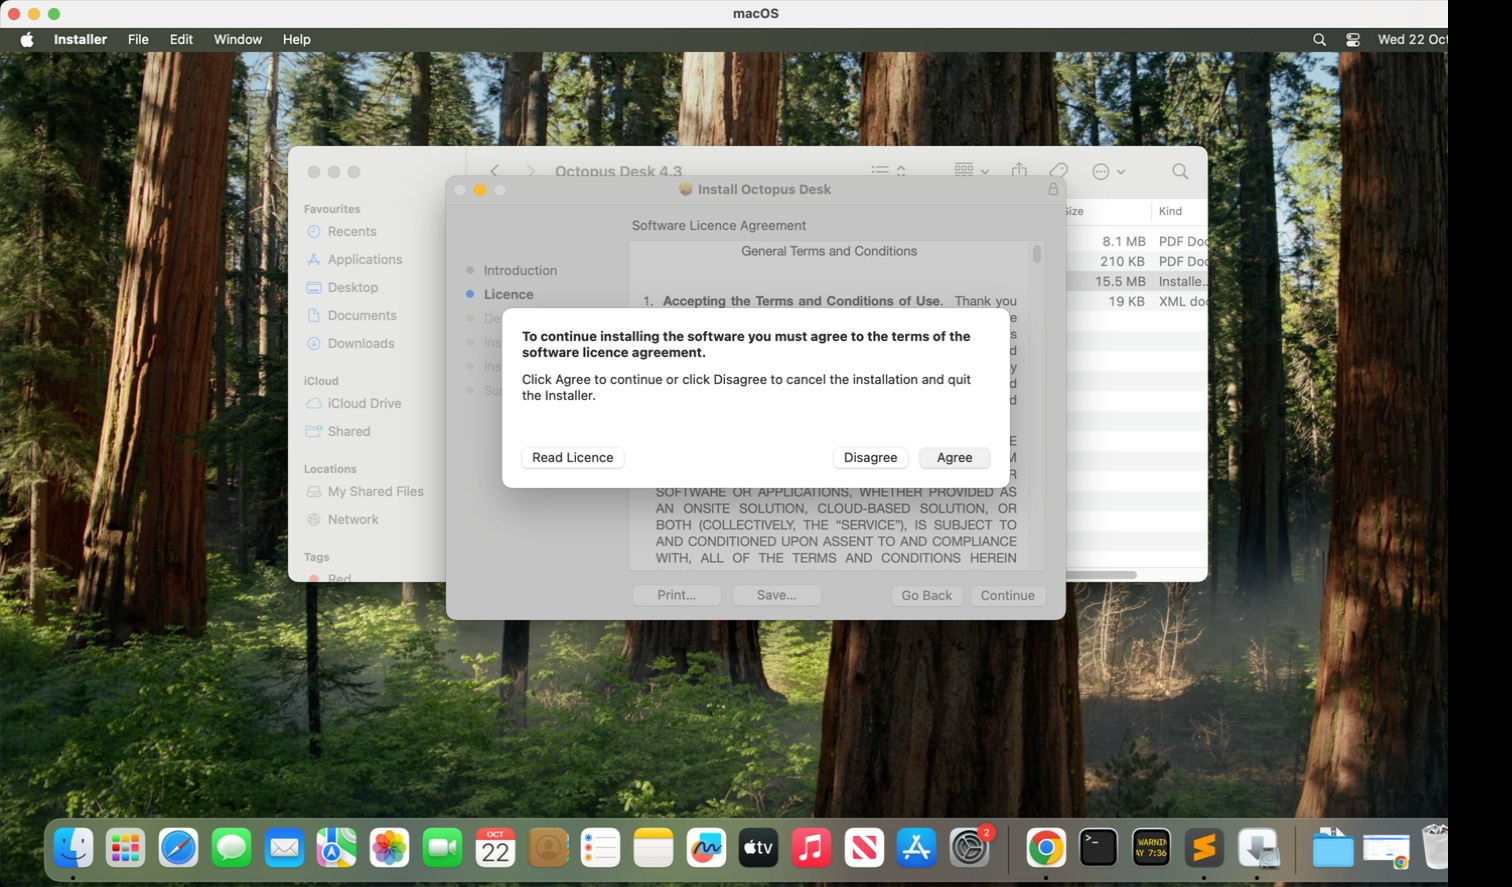
38 Accept License
Click "Agree"
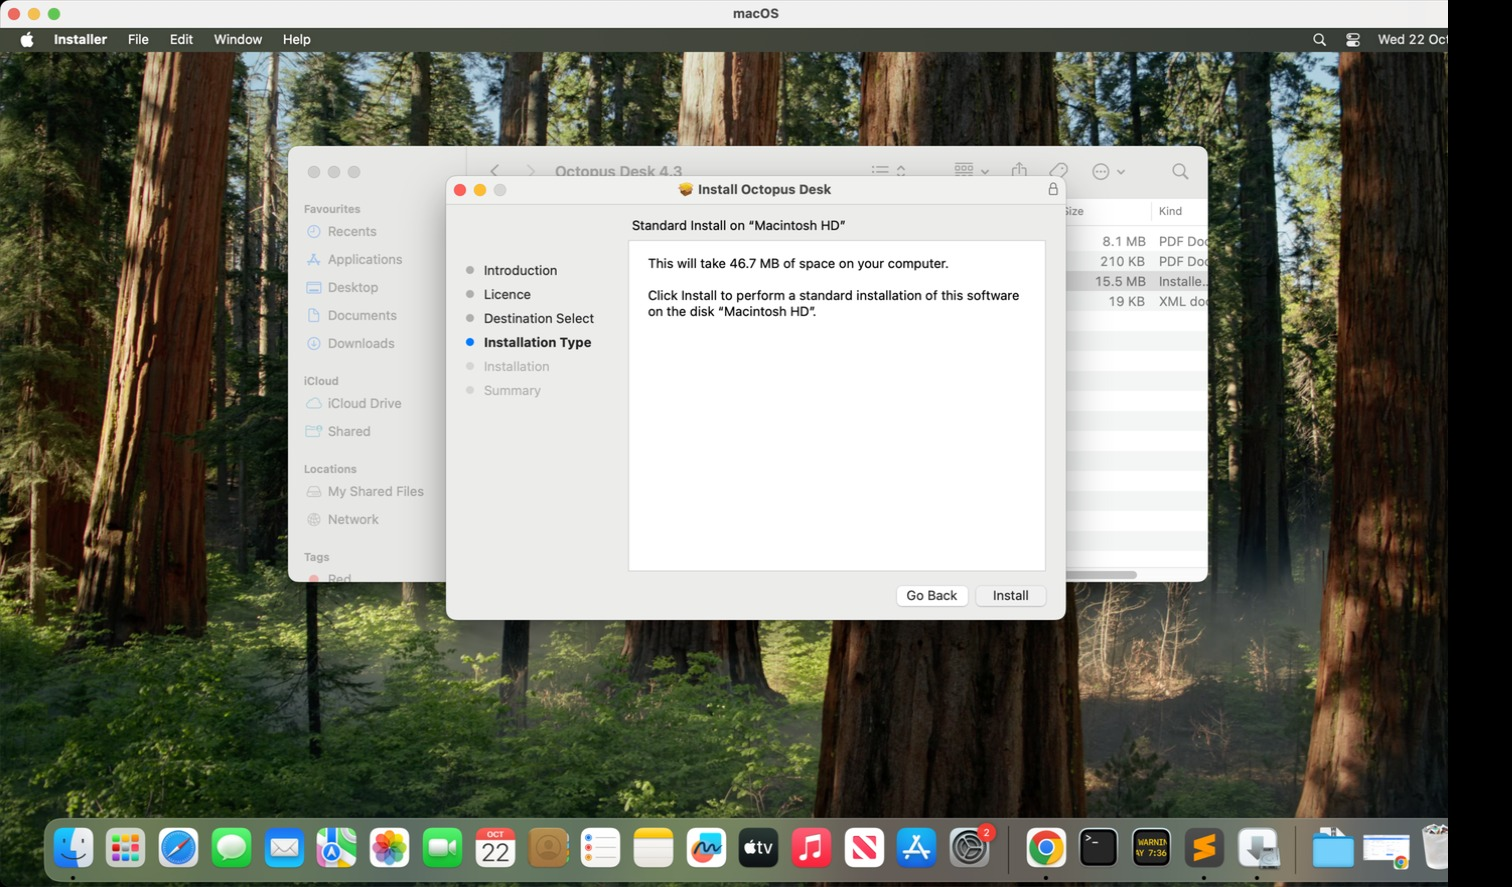
39 Install Software
Click "Install"
40 Allow Installation 1
Click "Allow"
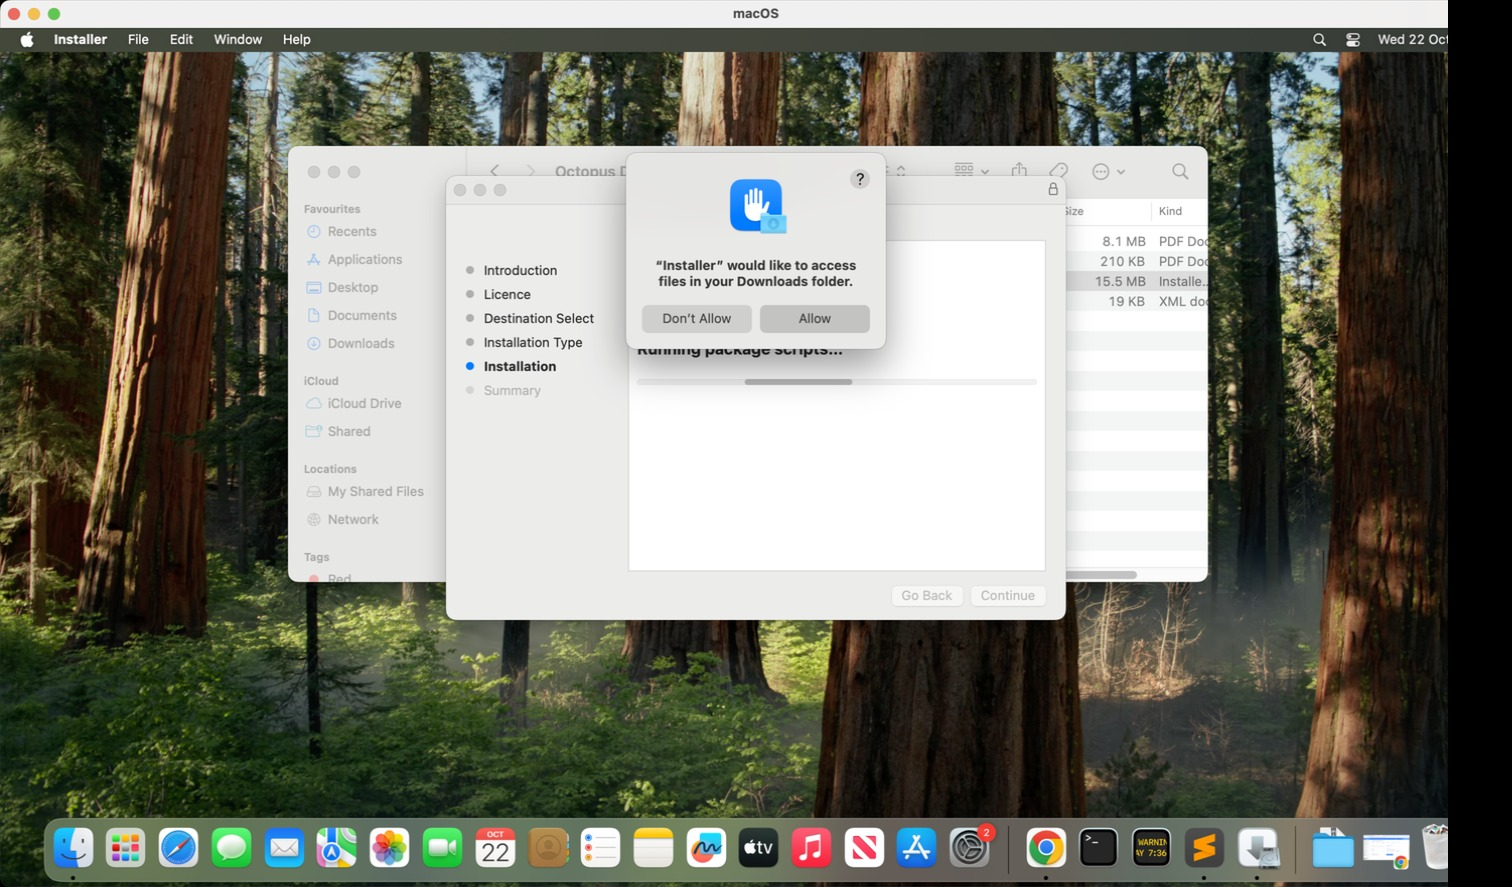
41 Allow Installation 2
Click "Allow"
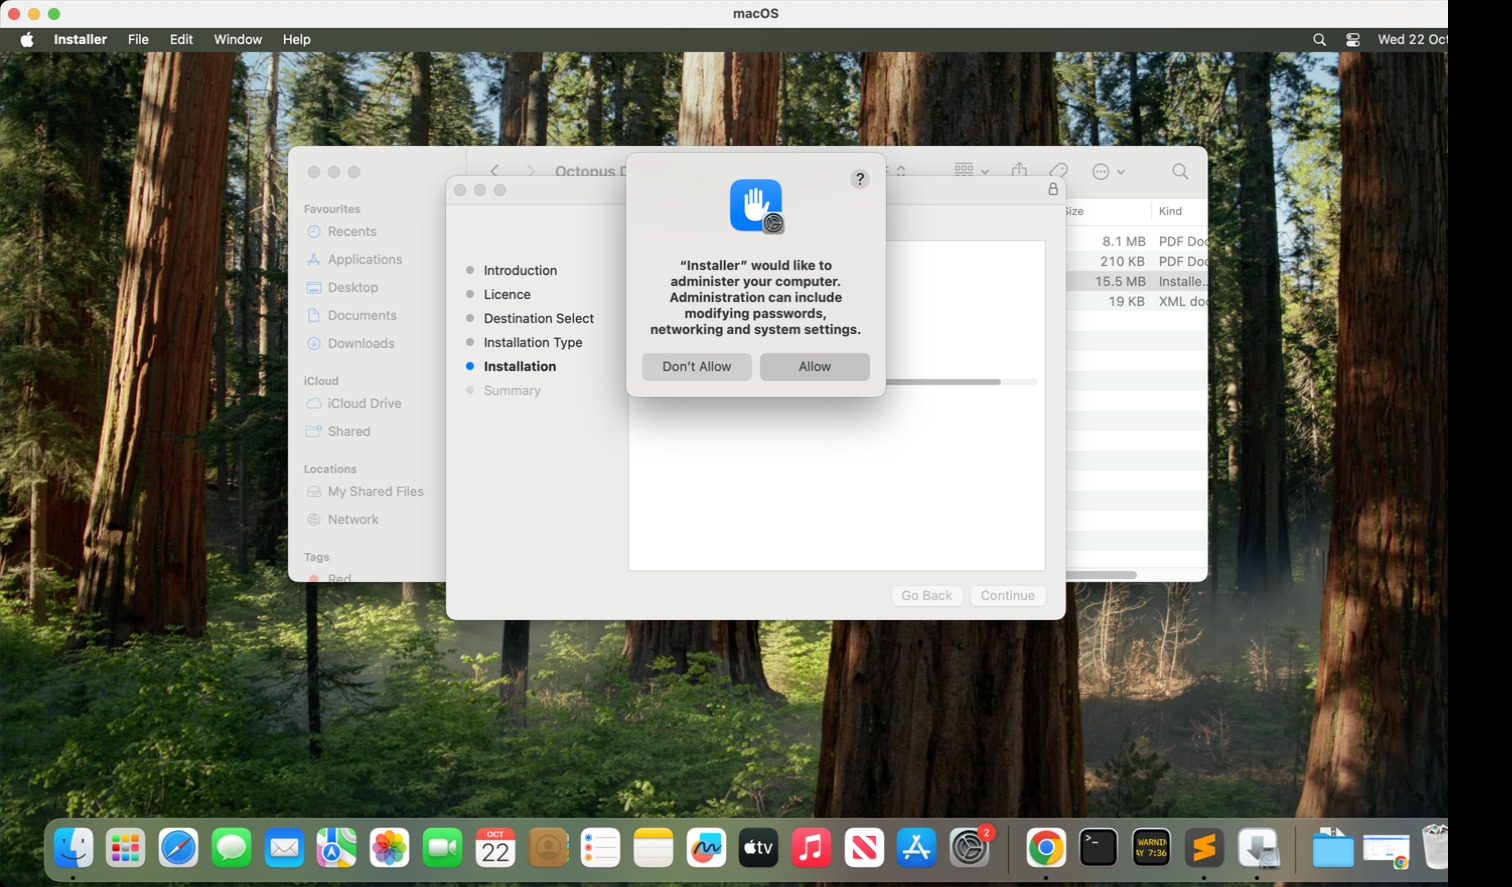
42 Enable Client
Click "Enable Octopus Desktop For Mac"
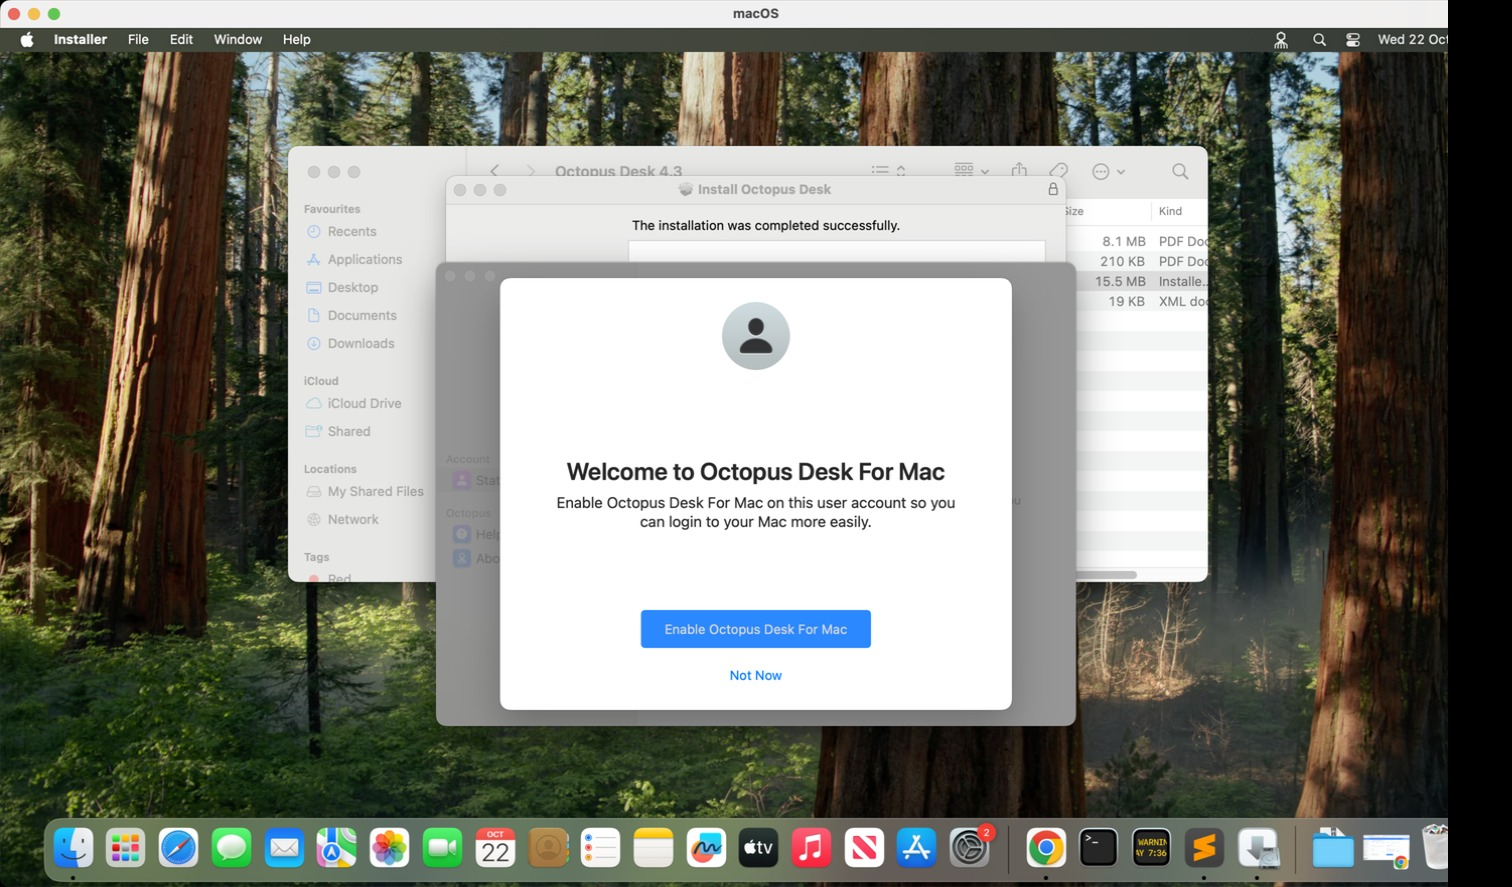
43 Select Authenticator
Select the Authenticator Method
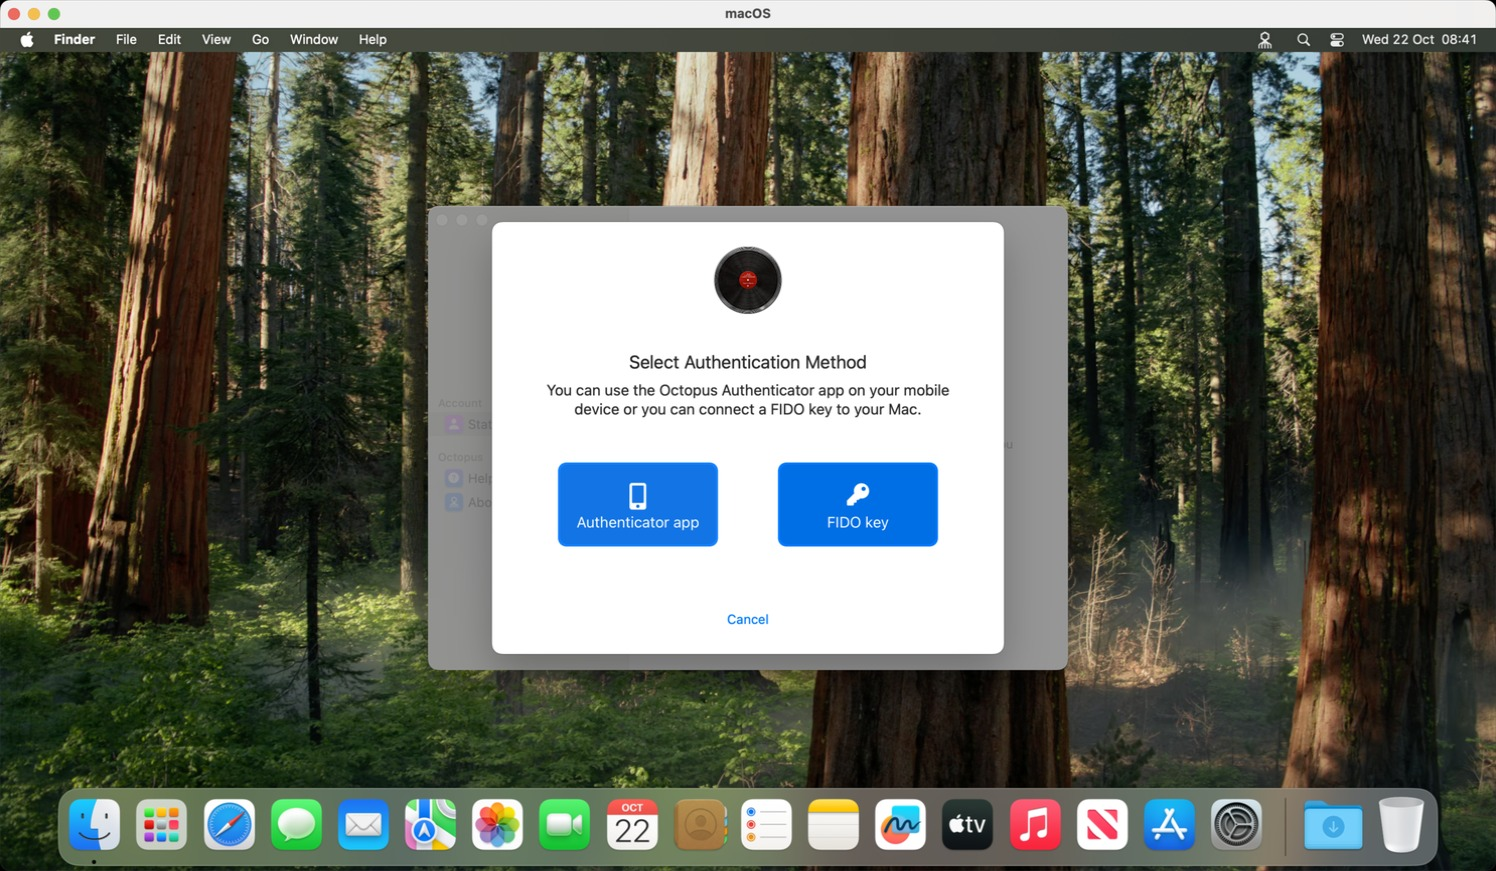
44 Confirm Account
Your Account and Domain should be populated, click "Next"
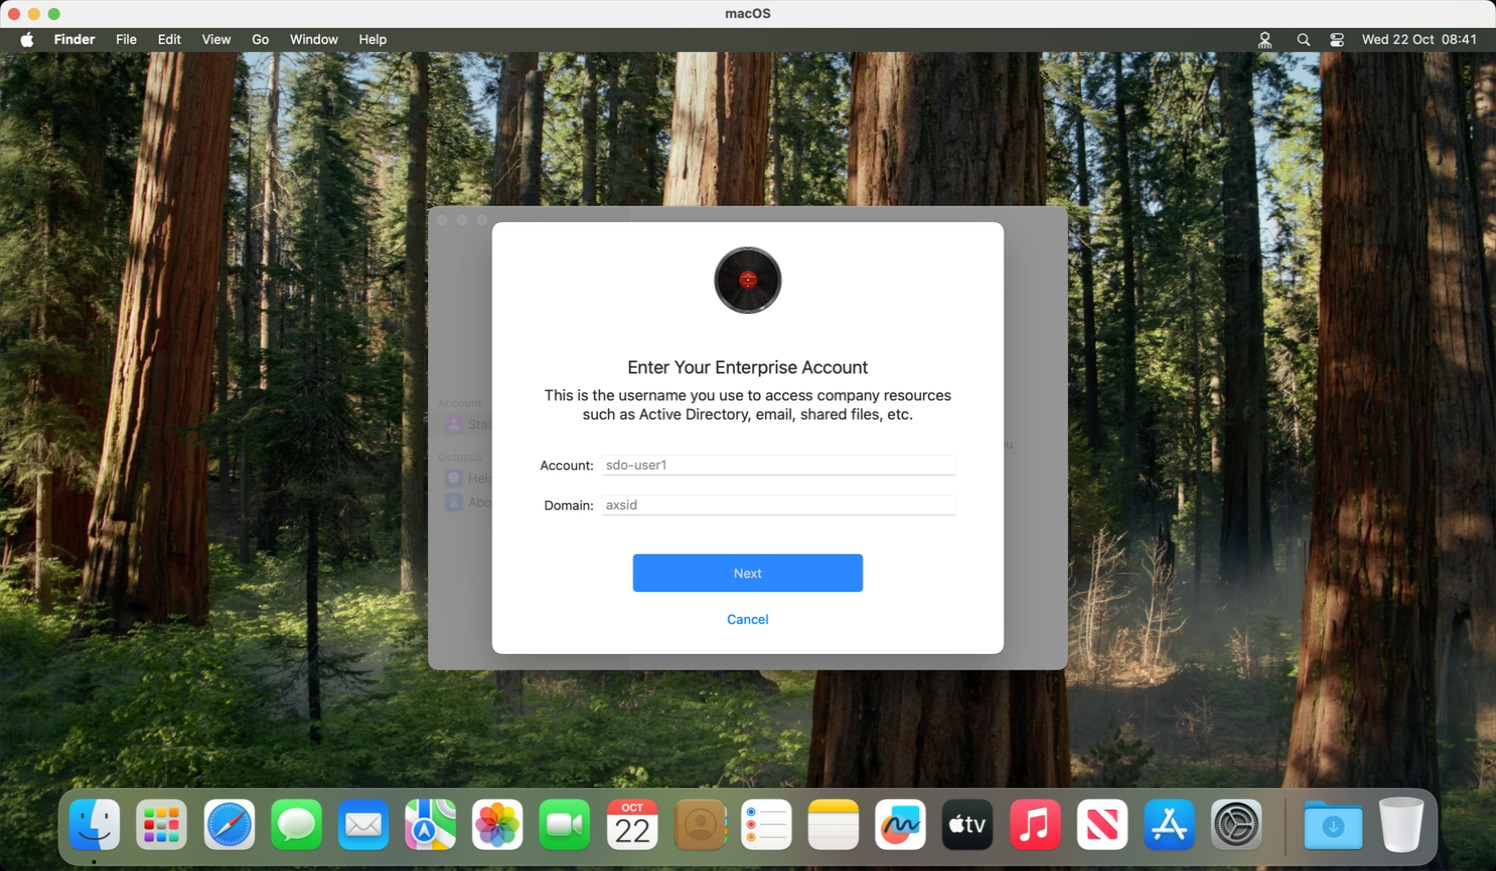
45 Enter Password
Enter your Mac Password
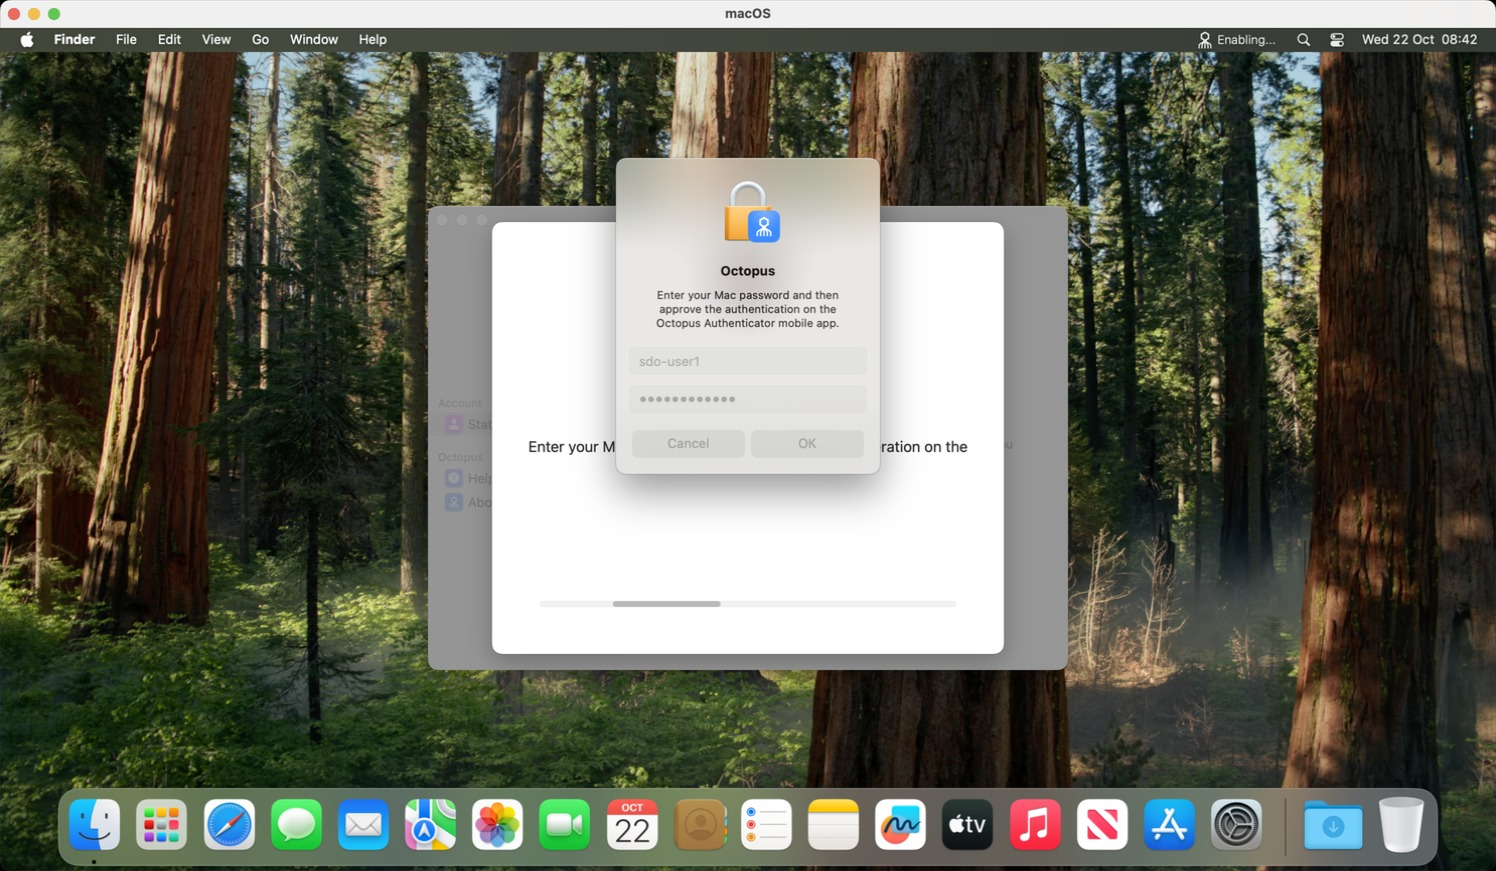
46 Confirm Setup 1
Click "OK"
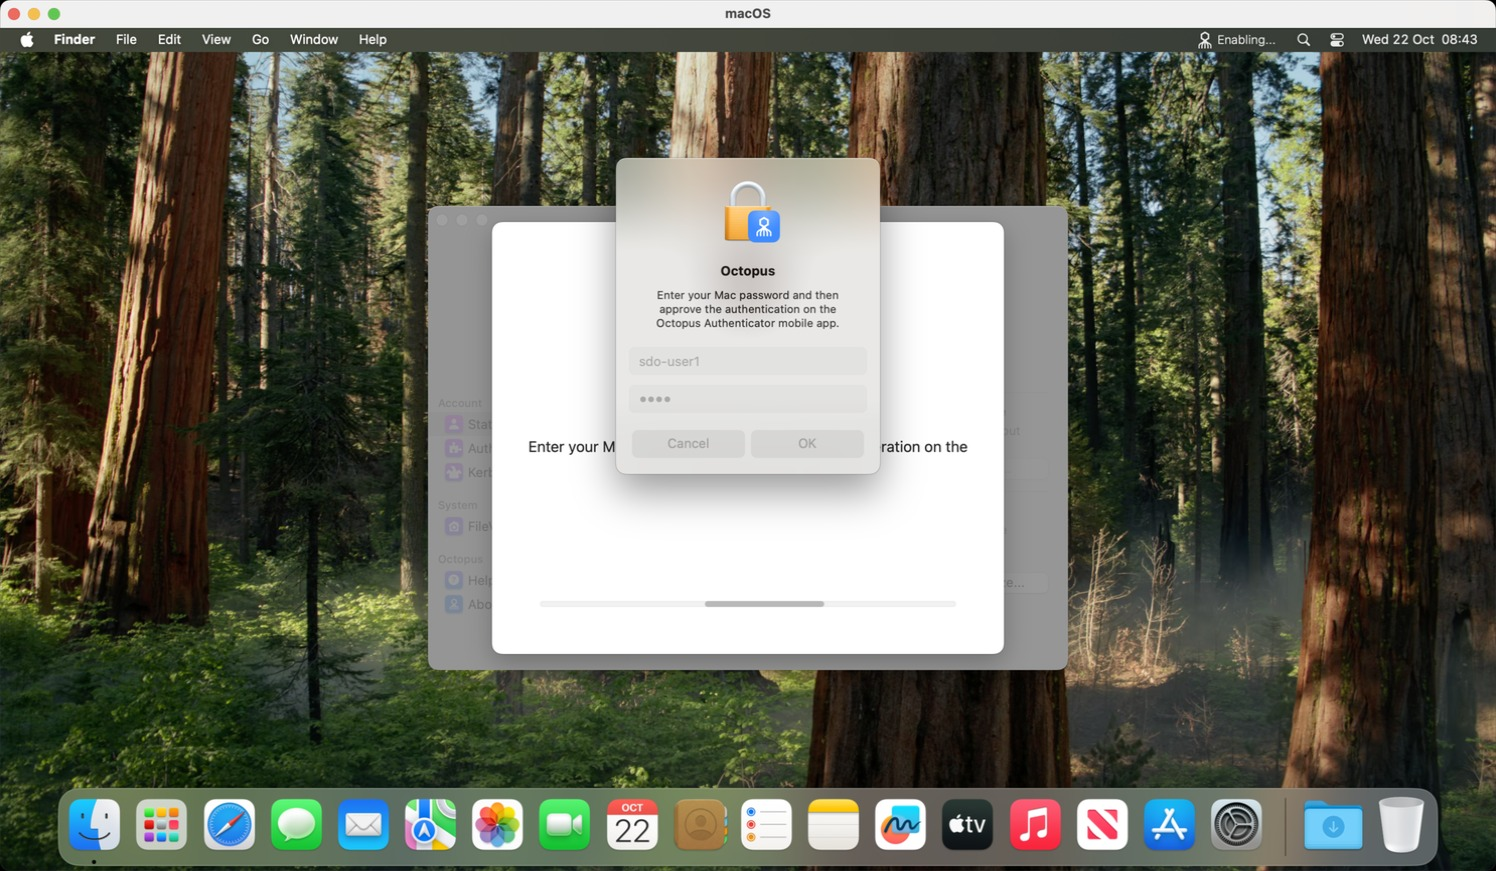
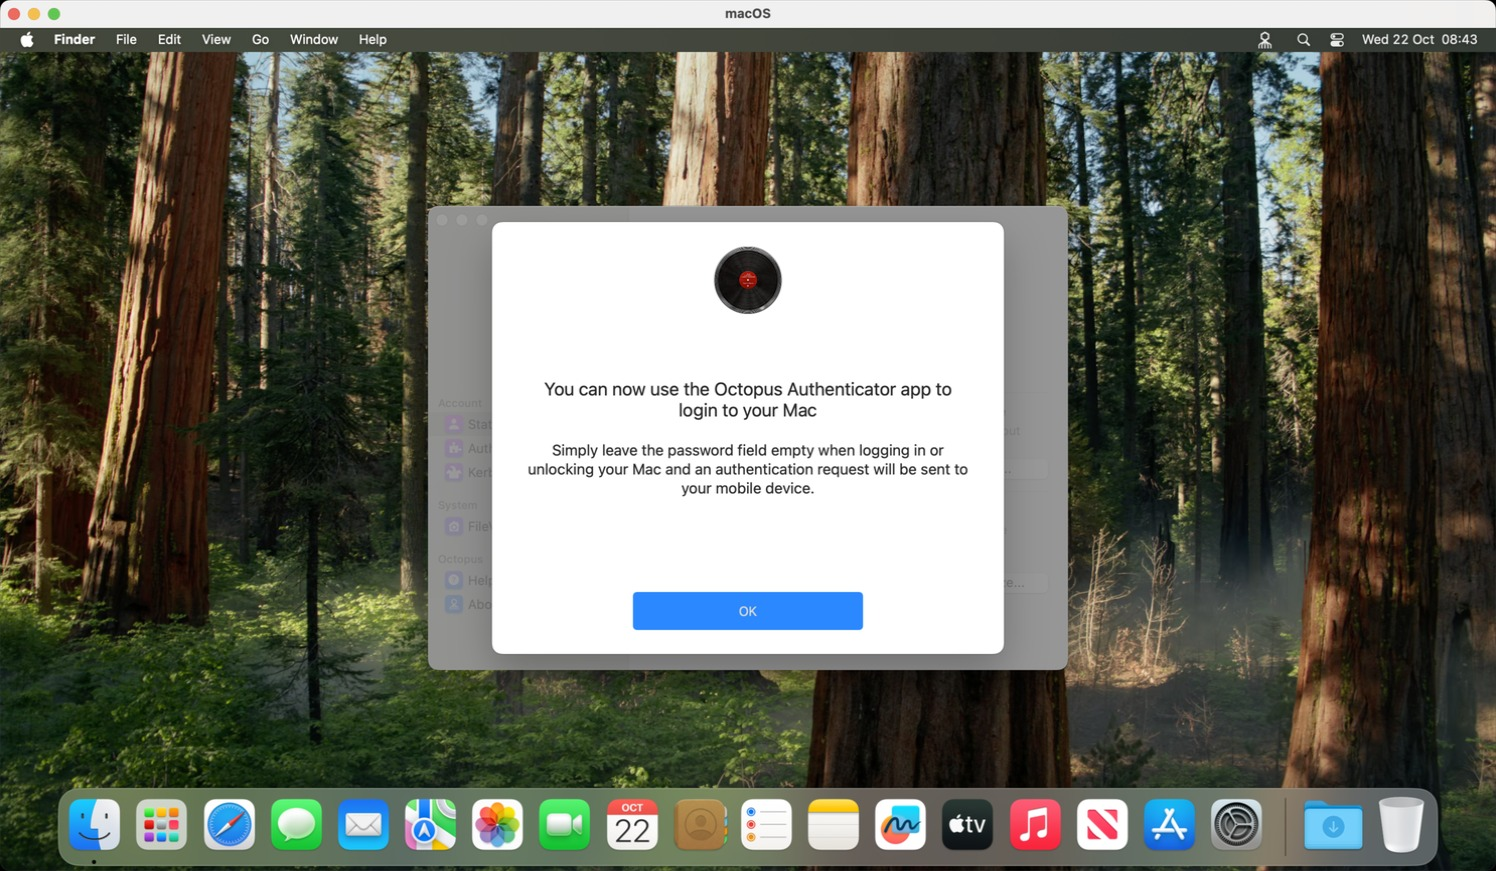
47 Confirm Setup 2
Click "OK"
Part 4: Testing and Verification (Steps 48-54)
48 Test Login
Logout and Login by Entering Username
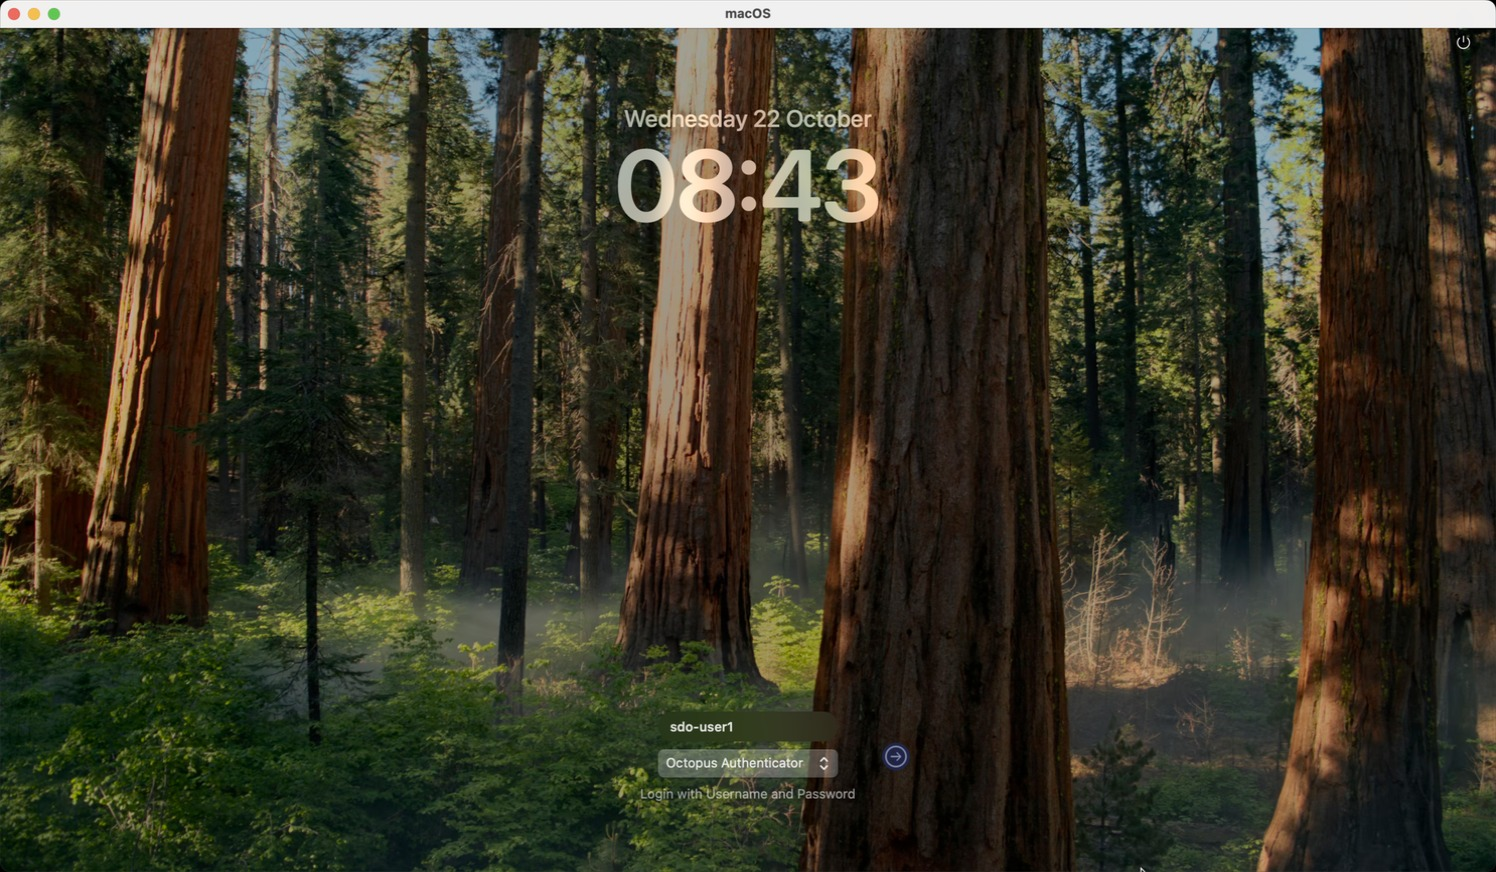
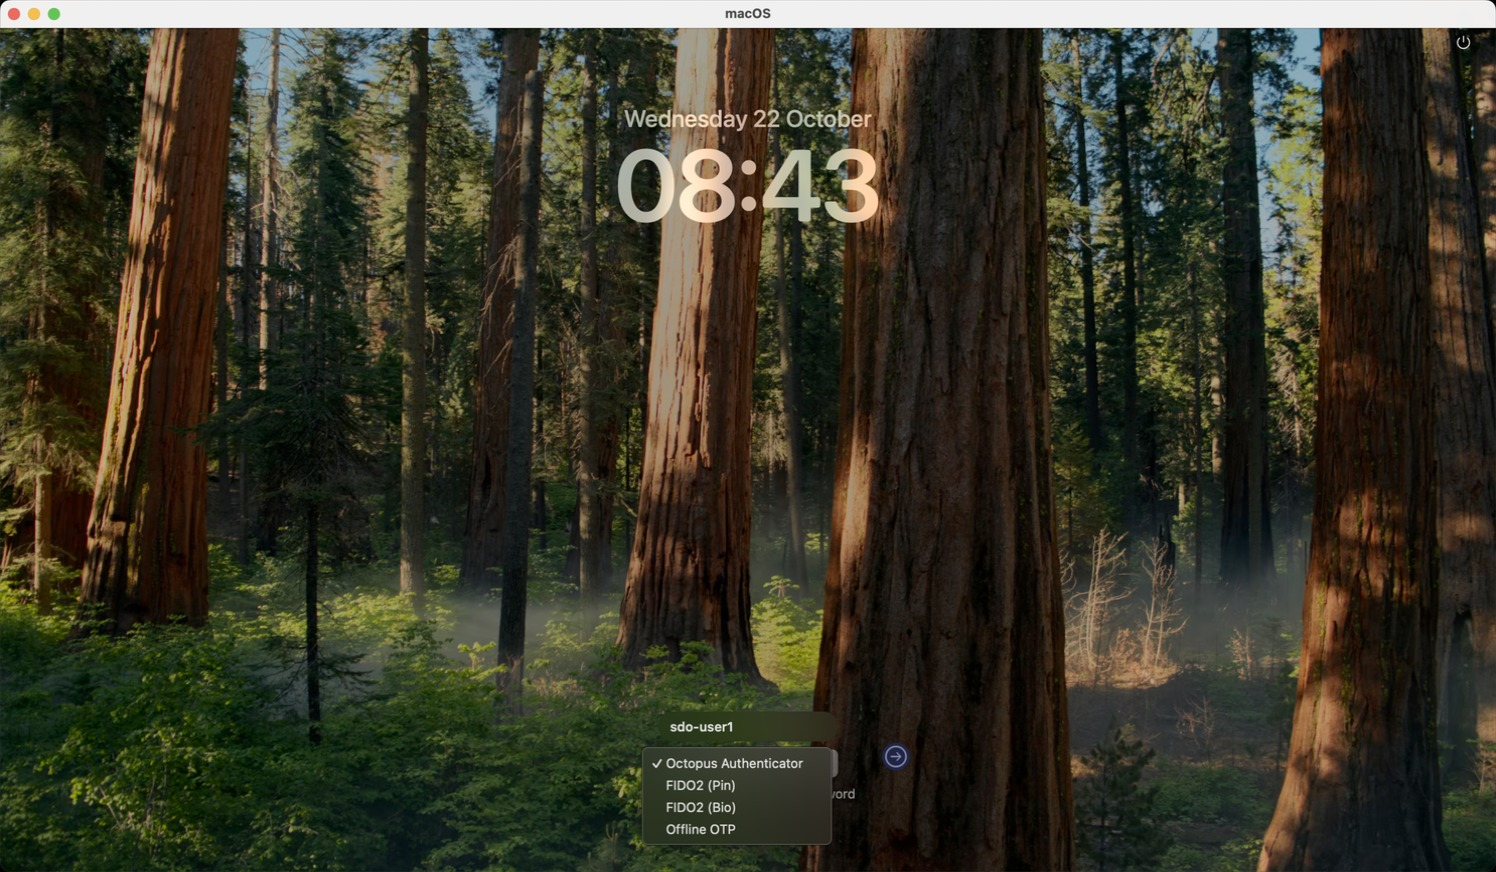
49 Choose Authenticator
Select your Authenticator
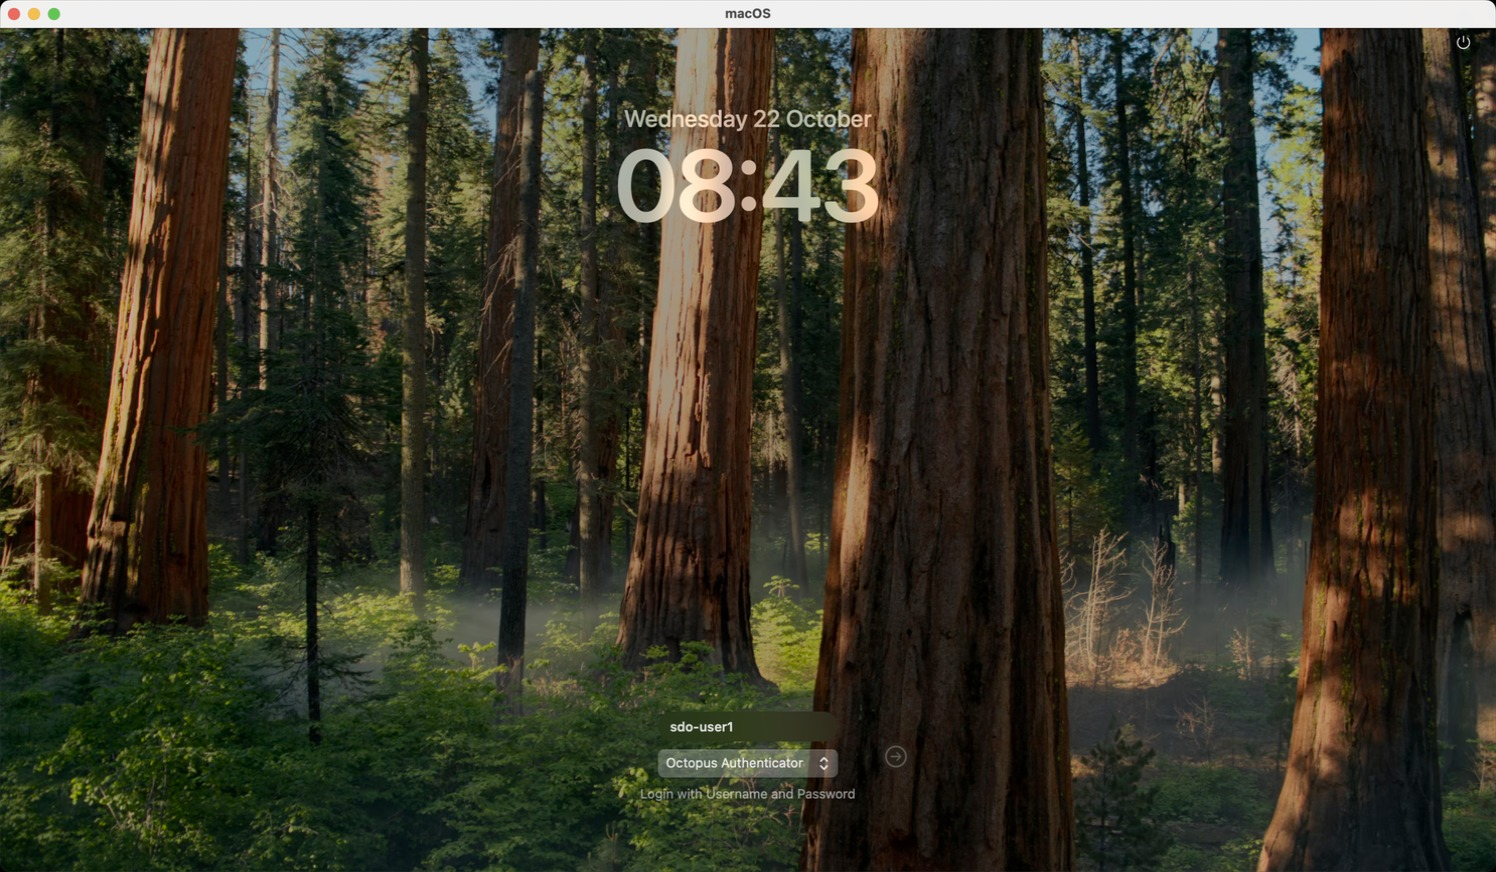
50 Confirm Login
Press "Enter"
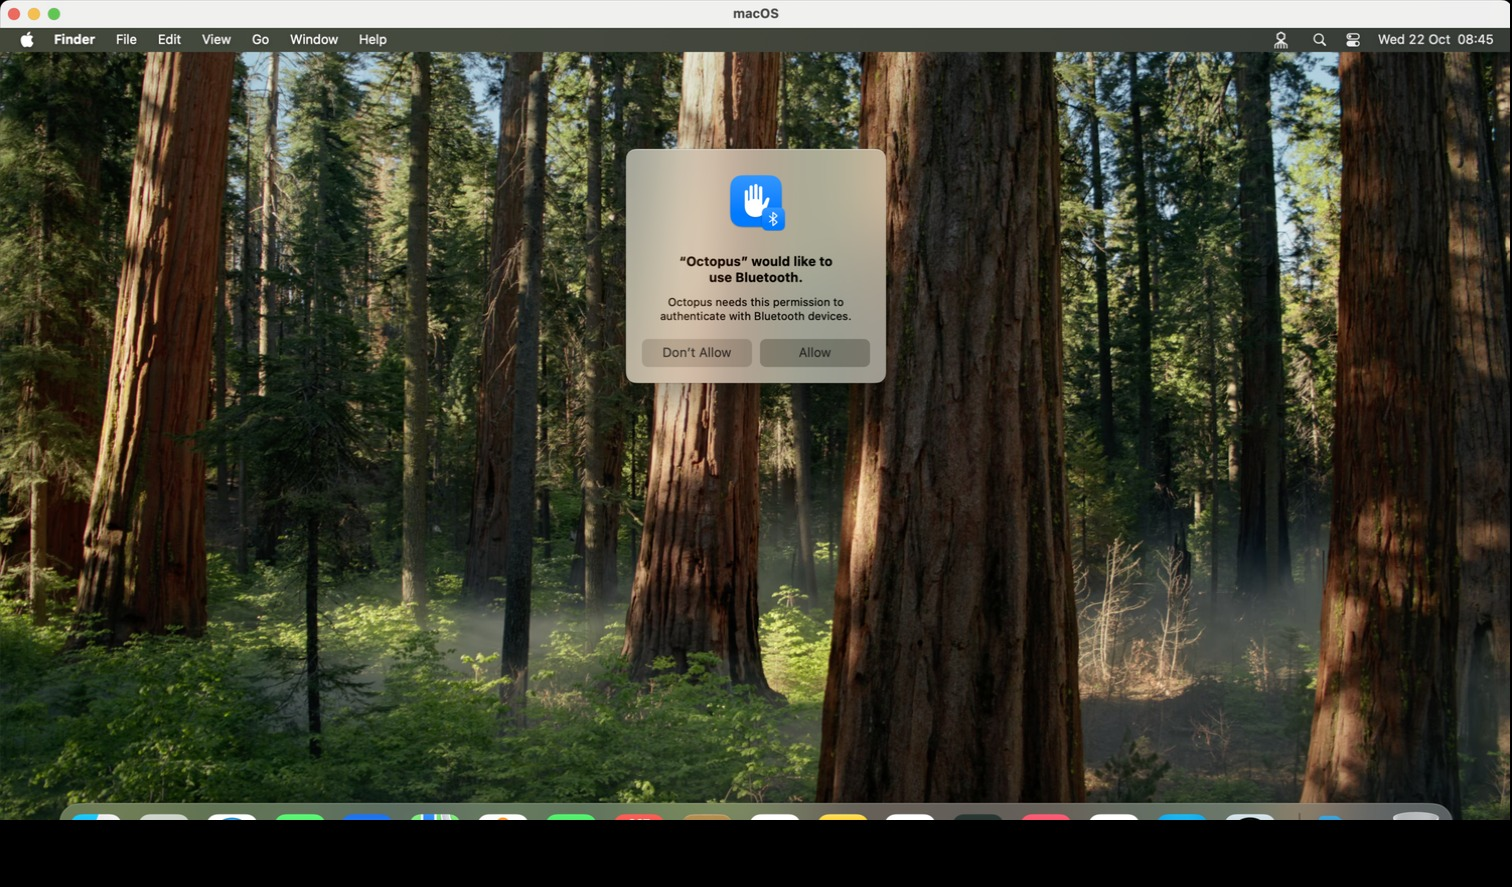
51 Allow Access
Click "Allow"
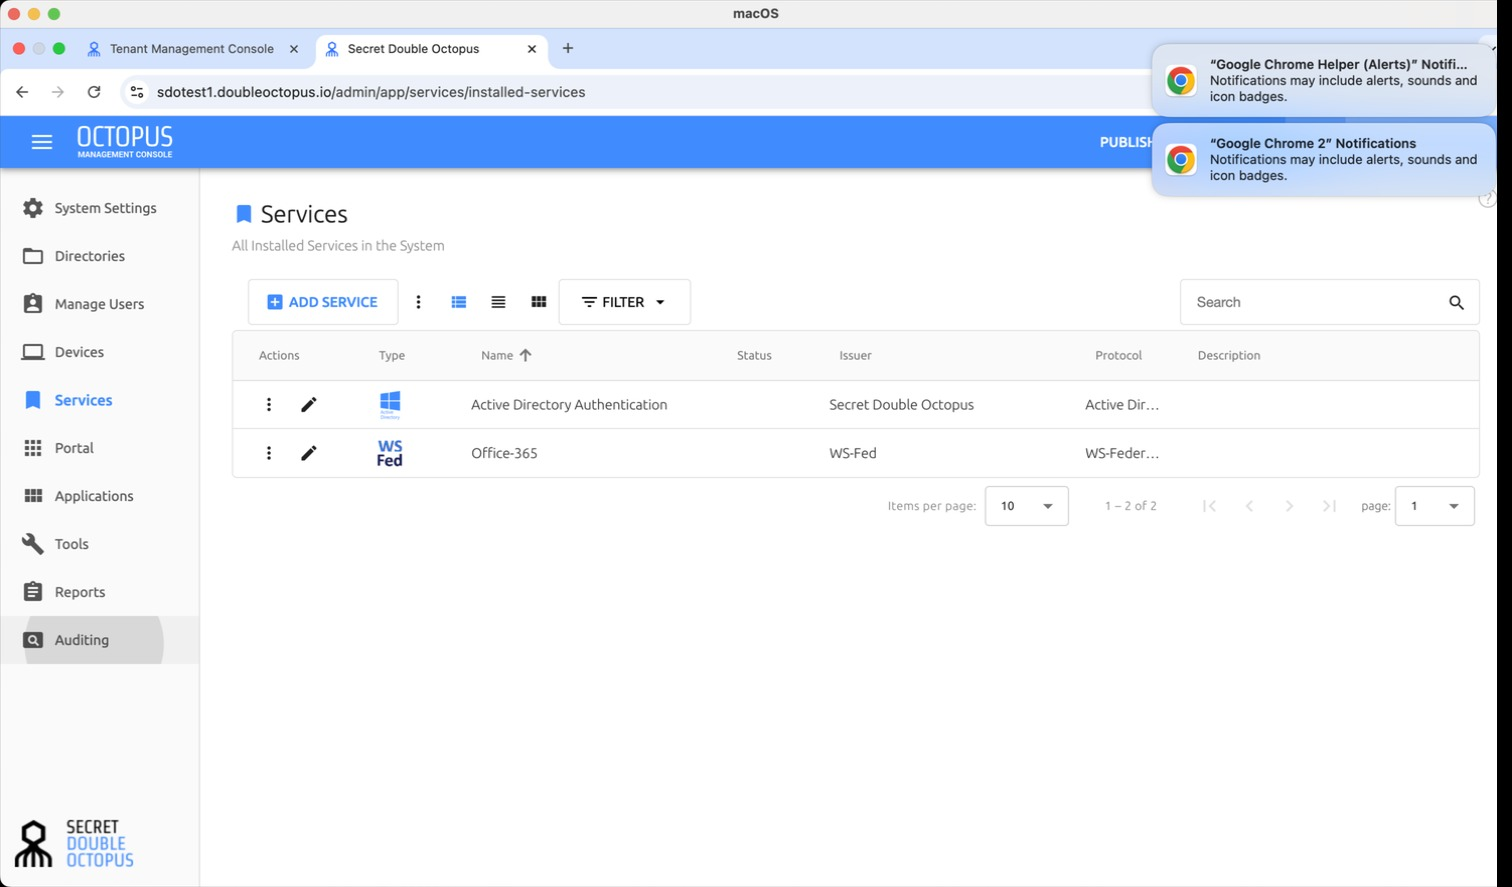
52 Access Audit Console
Open SDO Admin Console and select Audit
53 Verify Login Success 1
Check the Login is successful (Optional)
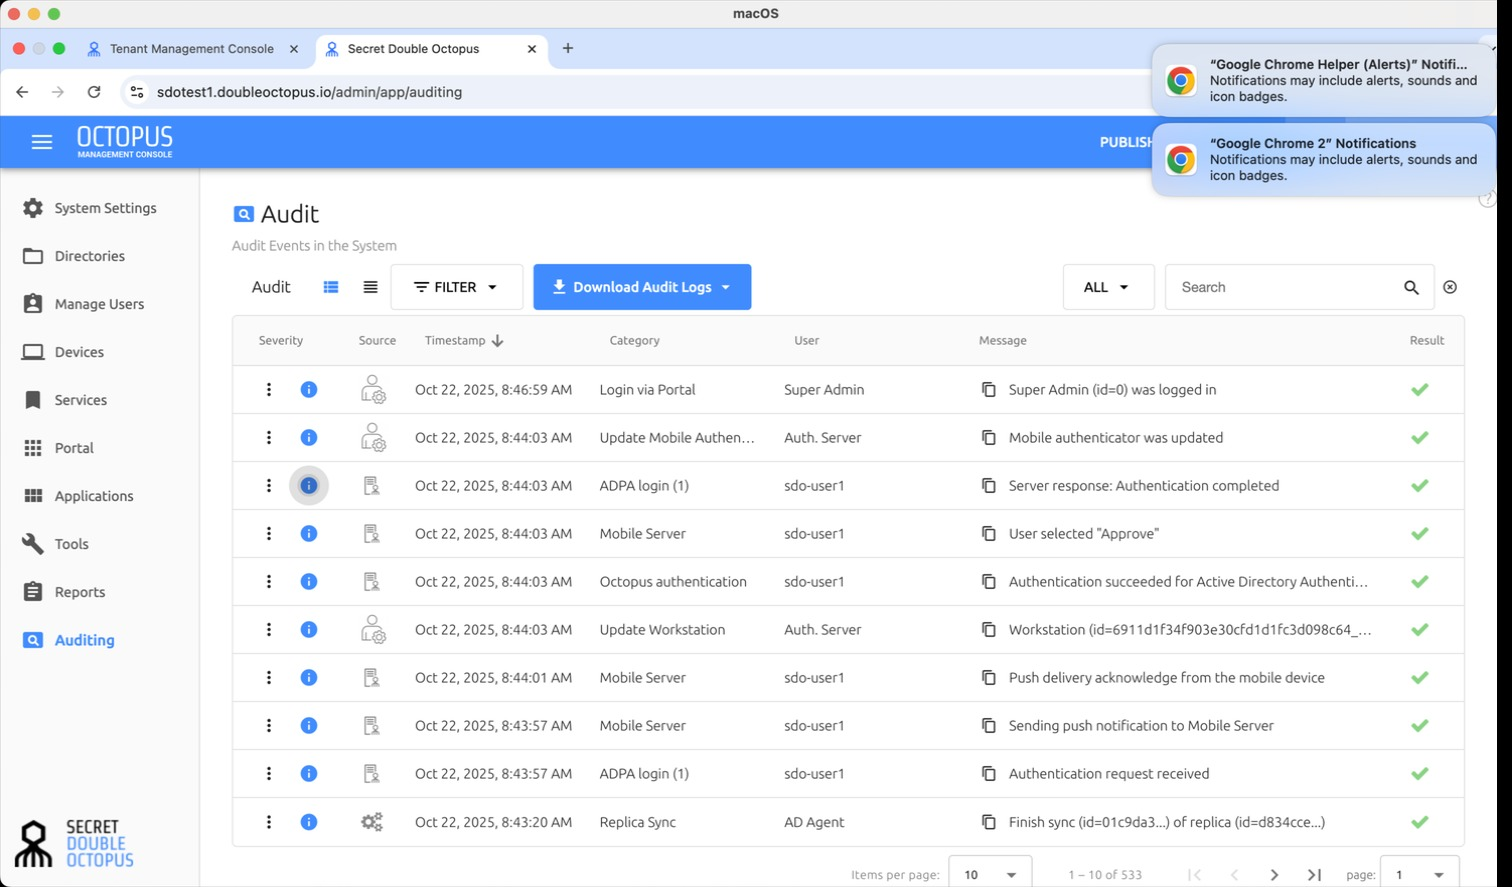
54 Verify Login Success 2
Check the Login is successful (Optional)
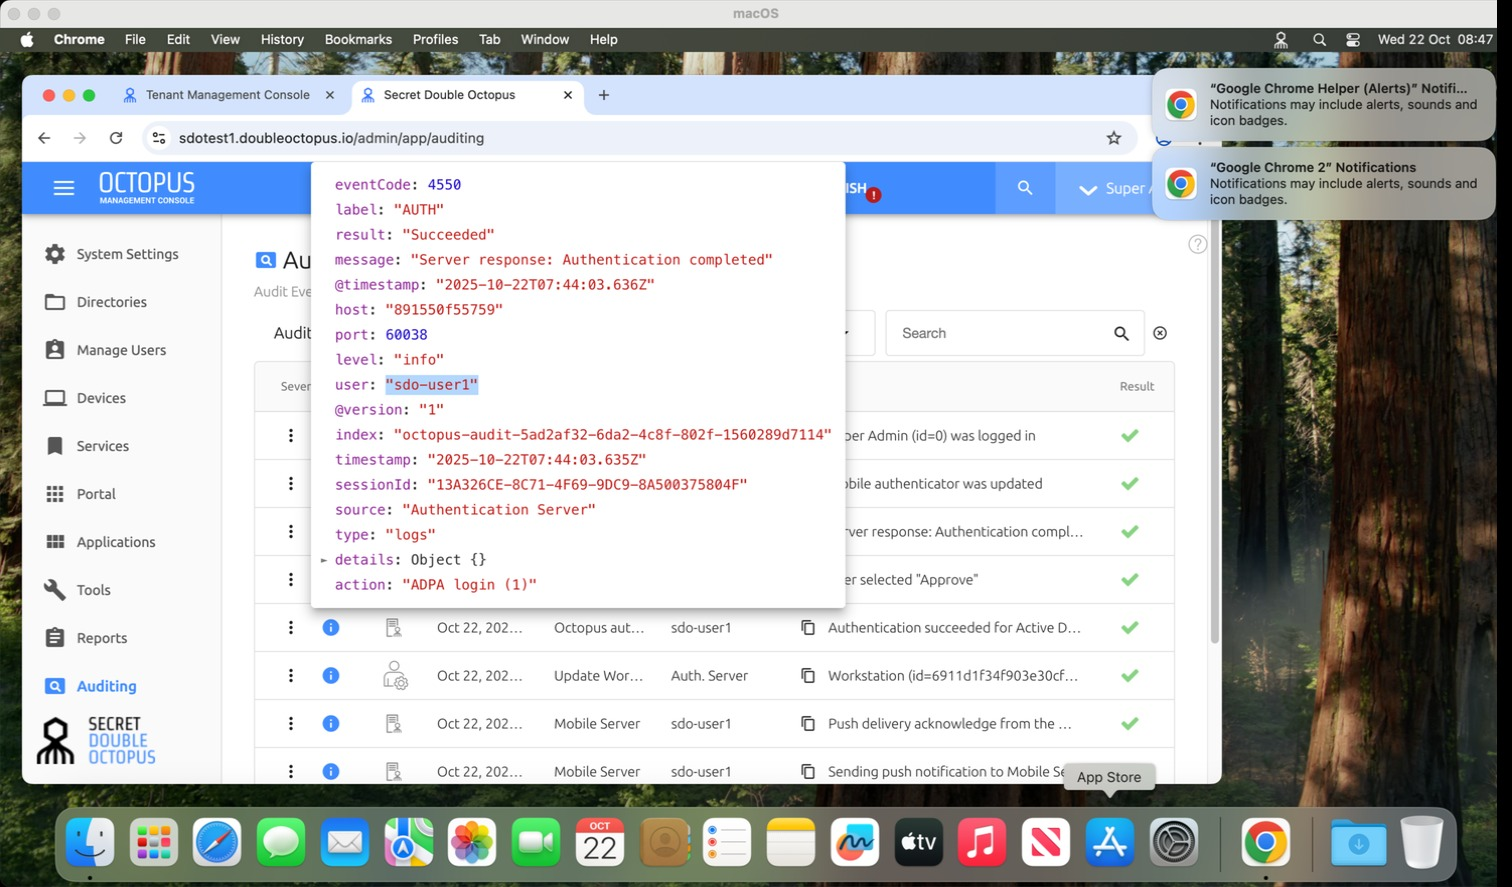
✔ Deployment Complete!
The SDO Client for Mac is now deployed and connected to your tenant. Users can authenticate password-free across macOS, Microsoft 365, VPN, and SAML applications.
- Deploy the client to additional Mac workstations using MDM
- Configure additional authenticator methods as needed
- Set up FileVault integration for disk encryption
- Monitor authentication logs for any issues
- Train users on Touch ID and Apple Watch authentication
⚠ Troubleshooting Tips
- Ensure System Preferences > Security & Privacy allows the SDO extension
- Verify network connectivity to SDO services
- Check Console.app for any installation errors
- Confirm XML configuration has correct values
- Test with a local admin account first
If you encounter any issues during the SDO Client for Mac deployment, please contact Secret Double Octopus support with the following information:
- macOS version and build number
- Installation logs from Console.app
- XML configuration file (with sensitive data redacted)
- Error messages or status codes
- Network configuration details