Octopus Portal Branding Configuration
Step-by-step guide for configuring colors, text, and branding of the Octopus end-user portal.
Estimated Time: 5–10 minutes
Purpose
This guide provides an overview of how to configure the Portal Branding settings inside the Secret Double Octopus (SDO) tenant. It outlines the key steps required to customize the user interface, colors, text, and visuals displayed to end users.
Who Should Use This Guide
- MSP administrators customizing branding for multiple tenants
- System administrators configuring the end-user login experience
- Support teams ensuring consistent organization-wide branding
⚠️ Before You Begin
Ensure the following prerequisites are met before configuring the portal branding:
Configure Portal Branding – Step-by-Step
1 After logging in to the Management Console, click Portal.

Click image to enlarge
2 Click Branding.

Click image to enlarge
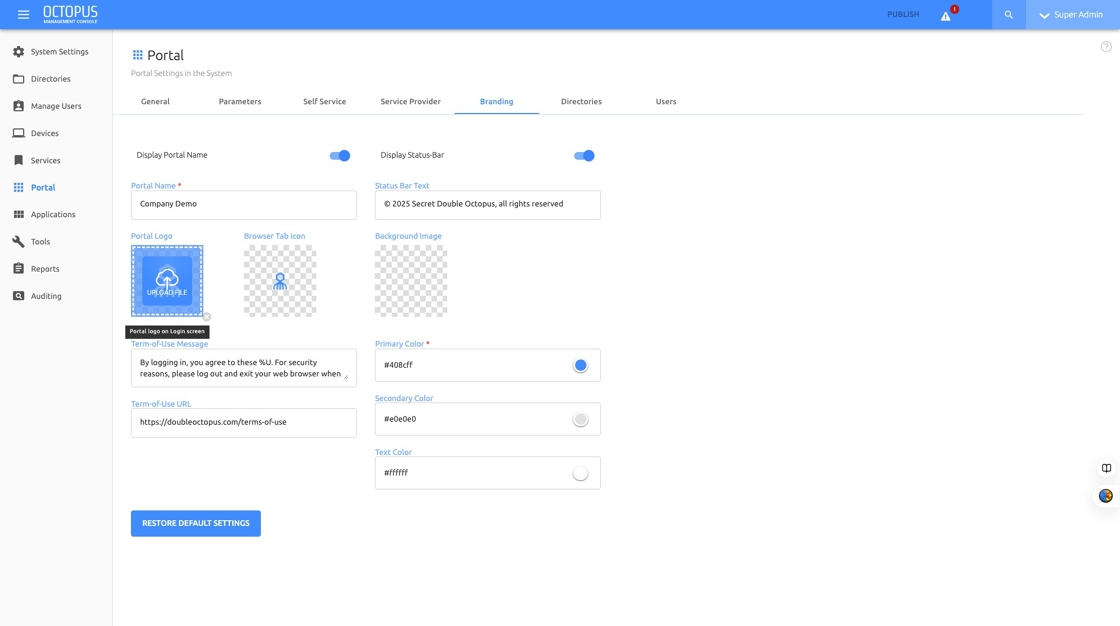
3 Change the text fields, images, and colors as needed, then review the preview.

Click image to enlarge
4 Scroll through the branding page to review all customizable areas.
Click image to enlarge
5 Review the title, description, and portal preview area.

Click image to enlarge
6 Review logo, main text, and action button appearance in the portal preview.

Click image to enlarge
7 To change the Primary Color of the portal, click the primary color selector.

Click image to enlarge
8 Use the color picker to choose the desired primary color.

Click image to enlarge
9 To change the Secondary Color, click the secondary color selector.

Click image to enlarge
10 Choose the desired secondary color using the color picker.

Click image to enlarge
11 Adjust the strength / intensity of the selected color using the slider.

Click image to enlarge
12 Click the Status Bar Text field.

Click image to enlarge
13 Use the dropdown or text options in the Status Bar Text field to choose the content.

Click image to enlarge
14 Choose what should be presented on the status bar of the page (e.g., tenant name, text, or custom message).

Click image to enlarge
15 Click SAVE to store your branding changes.

Click image to enlarge
16 Click PUBLISH to apply the new branding settings.

Click image to enlarge
17 Confirm the Publish action if prompted.

Click image to enlarge
18 Open the user menu in the top-right corner of the console.

Click image to enlarge
19 Click Logout.

Click image to enlarge
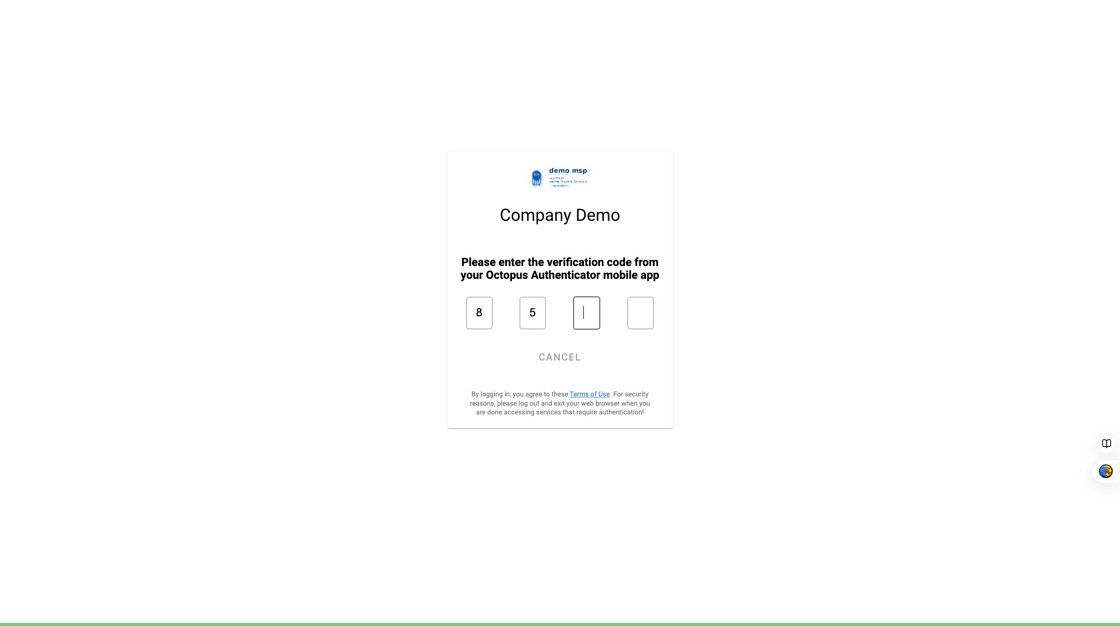
20 Login to the end-user portal and verify the new branding is applied.

Click image to enlarge
21 When needed, configure Adaptive Authentication to match the branding and security requirements.
Click image to enlarge
22 Confirm that the updated colors, text, and branding are displayed correctly in the portal.

Click image to enlarge