Occasionally it is necessary to move your Secret Double Octopus Microsoft SQL database to a new host. This document provides step-by-step instructions for moving the database from one host to another and configuring the Secret Double Octopus platform to use the new database host and location. It also details the guidelines for testing your new environment.
The environment used for the procedures described in this document is based on the following software versions:
Octopus Authentication Server version 5.8.2 or above
Microsoft SQL Server 20xx
Before you begin, make sure you have the following access permissions:
Root level access to the Secret Double Octopus Management Console Linux server
Administrative privileges to the source and target Microsoft SQL servers
Super User account credentials to the Secret Double Octopus Management Console interface
Moving your database to a new host involves the following sequential phases:
Shutting Down Secret Double Octopus MC Services: Shut down Management Console services to ensure that no data is written to the current database.
Backing Up the Source Database: Create a backup of the database using backup software.
Restoring Your Database to the Target Host: Restore the database to the new host server.
Reconfiguring the Secret Double Octopus MC: Update database settings in the Management Console.
Testing System Functionality: Perform various tests to confirm that all systems are operational.
Depending on your infrastructure setup and the circumstances surrounding your need to move the database, some of these steps may not be relevant for you.
Before performing any operations on your database, it is critical that you shut down the Management Console services of the Secret Double Octopus platform. This ensures that no data is written to the current database during the procedure and prevents data inconsistencies.
To shut down Management Console services:
Establish an SSH connection to your Management Console Linux host.
To stop the Management Console services, run the following command:
systemctl stop sdomcbe

* in case you have a secondary Managment console, please stop sdomcbe srvice there too.
To confirm that the services have stopped, run the following command:
systemctl status sdomcbe

The procedure detailed in this section is relevant for a planned move of the database when no replication to the target server is available. If you are restoring a database from a previous backup for disaster recovery purposes, or you are using a replicated database copy, the backup process described here is not required.
Please note that the instructions in the procedure below use the native SQL backup capabilities. You may use your own backup software if desired.
To back up the source database:
Open Microsoft SQL Server Management Studio and connect to the existing source SQL server.
Browse to the database that needs to be moved. (In the example below, the database is named SDO.)
Right-click on the database and select Tasks > Back Up.
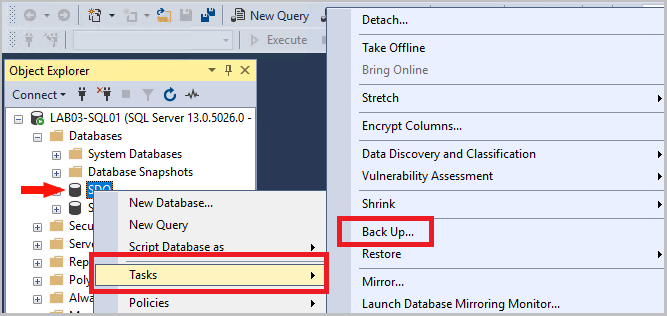
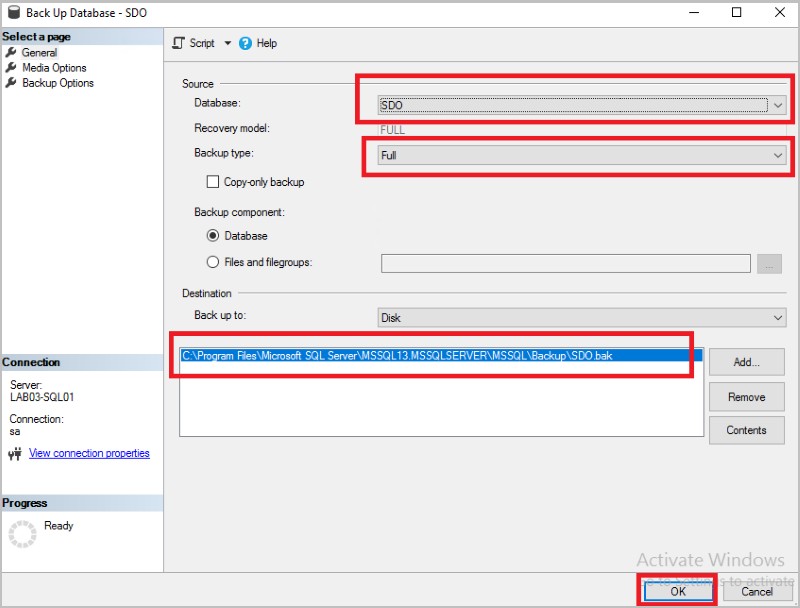
On the page that opens, complete the following steps:
Under Source, verify that the correct Database is selected.
From the Backup type dropdown list, select Full.
Under Destination, review the backup location and change it if necessary. Make a note of the location.
To start the backup process, click OK.
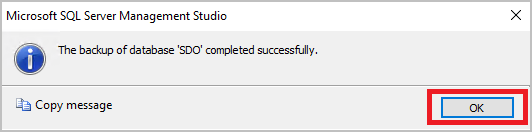
Verify that the backup completes successfully. In the confirmation popup, click OK.
Move or copy the backup file to the target server. (You will restore the database in the next phase- Restoring Your Database to the Target Host.)
To ensure that changes cannot be made to the original source database as you proceed, take it offline:
Right-click on the source database and select Tasks > Take Offline.
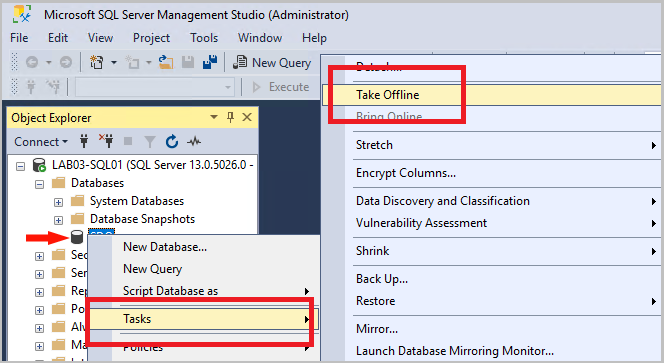
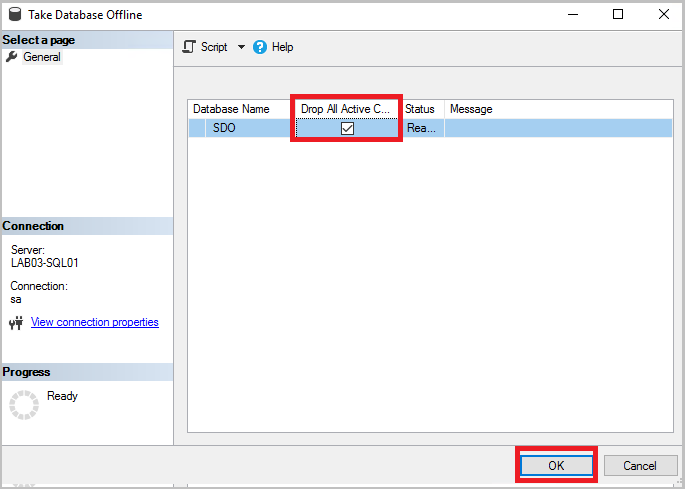
On the page that opens, select the Drop All Active Connections checkbox. Then, click OK.
Follow the steps below to restore the database to the target server.
Note: The instructions in the procedure use the native backup and restore features for Microsoft SQL Server. If you are using your own backup platform, follow that platform’s process for restoring your database to the new server.
To restore the database to the target server:
From the Microsoft SQL Server Management Studio, connect to the target database server.
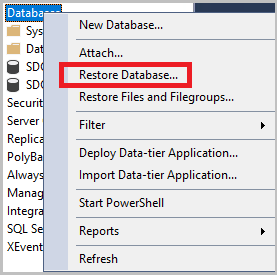
Right-click on Databases and select Restore Database.
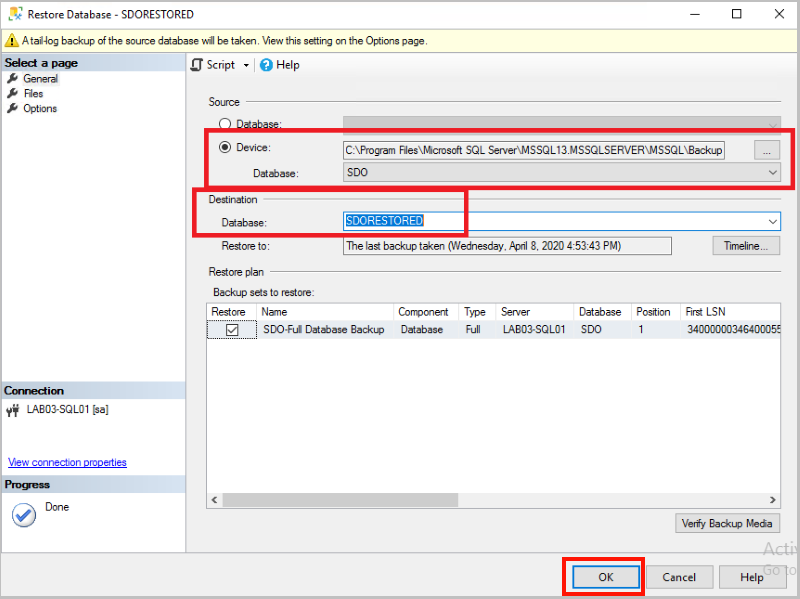
On the page that opens, complete the following steps:
Under Source, select the Device radio button and then browse to your backup file.
Under Destination, from the Database dropdown list, select the name of the database to which the data will be restored (SDORESTORED in the example below).
To start the restore process, click OK.
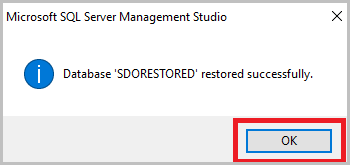
Verify that the restore operation completes successfully. In the confirmation popup, click OK.
Follow these steps to reconfigure database settings in the Octopus Management Console.
This solution is applicable only for Octopus Authentication Server versions 5.x and above:
SSH into the the MC server:
Backup the configuration file:
cd /opt/sdo/mcbackendsql/config/envs/
sudo cp production.json production_org_backup.json
vi production.json
add one character next to highlighted database, i.e. "database_old_1":
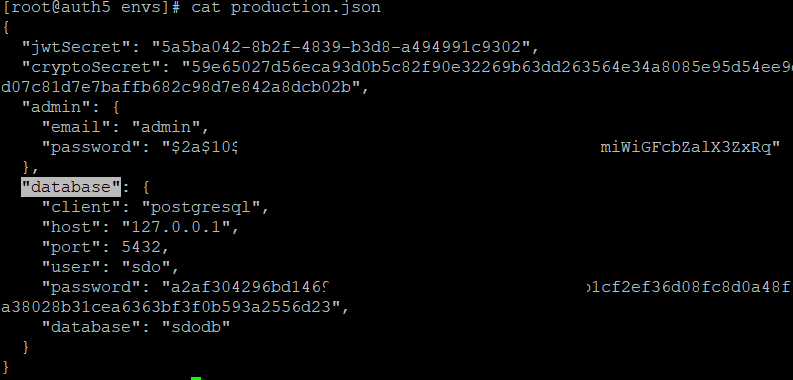
Save & exit.
Restart the service:
sudo systemctl restart sdomcbe
Refresh the browser, it will revert back out to the login screen
This solution is applicable only for Octopus Authentication Server versions lower than 5.x
Scenario:
The Management Console (MC) Admin's credentials are stored in the SQL DB. It can be the internal (PostgressSQL) or the external database (PostgressSQL, MSSQL or Oracle).
Should the DB became corrupted, has been deleted, server expirienced a failure or its host name/IP was changed, the admin might not be able to login to the MC.
The steps below will allow to reconnect and rebuild the system without the need to re-install the MC Server.
Explanation:
Whenever the sdomcbe service starts it looks for the DB configuration file. If the configuration file is empty or missing it will get into the “NoDB mode”.
Similarly to what happens when you fresh install AOI or MC machine.
The only way to recover from a dead DB is to remove the DB configuration file and restart the sdomcbe.
Instructions
SSH into the the MC server:
Delete the configuration file:
sudo rm /opt/sdo/mcbackendsql/config/db/production.json
Restart the service:
sudo systemctl restart sdomcbe
Refresh the browser, it will revert back out to the login screen
Login as the super-user
Add the data base. You might need to reconfigure the new DB
In case the Auth servers needs to be reconnected
>sudo /opt/sdo/scripts/update_remote.sh AUTH
- Log into the web management GUI of the Management Console server as admin super-user. You will immediately be taken to the Database tab to configure database settings.
Complete the database connection settings for the new database server. Then, click Test Connection to perform a validation check.
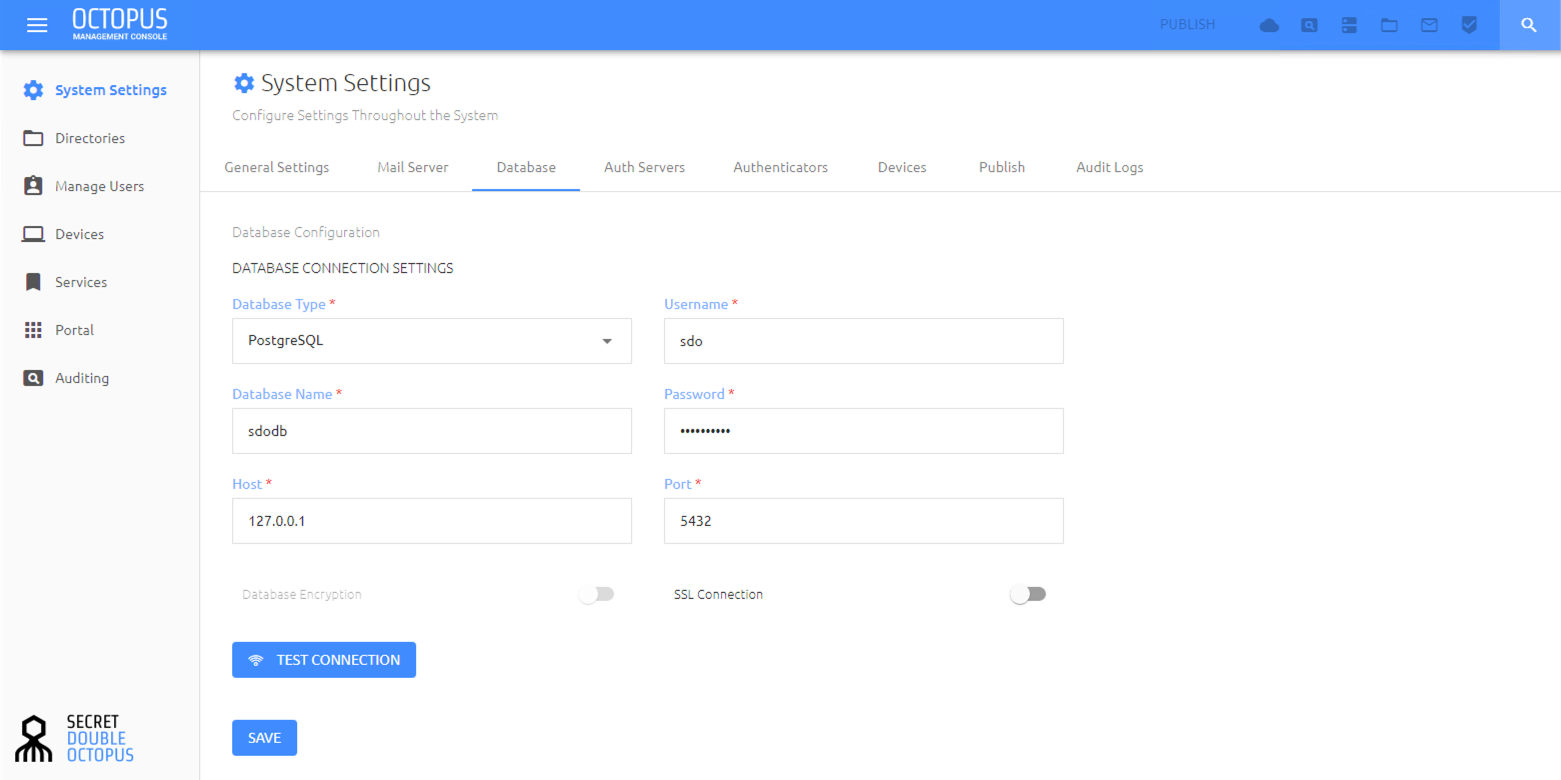
If your settings are valid, a Success message is displayed.

At the bottom of the Database tab, click Save. Then, in the confirmation popup, click Save.
You will be logged out of the Management Console automatically.
Continue by testing the new configuration, as described below.
After moving your database, we recommend performing the following system checks and tests to confirm that the database is operating correctly:
Check the following System Settings and verify that they are accurate:
Organization Name
Enterprise Base URL
SMTP server and email settings
Check Authentication Server settings, and verify that all Authentication Servers are online and connected.
Add a test user to an integrated directory and synchronize the directory. Then add the test user to a service and authenticate to that service as the test user.