This installation option is intended to install only the Octopus Management Console and database (if needed). Following installation, there is a stand-alone Management Console, without an Authentication Server.
For the system to work properly, you will need to install an Authentication Server installed on a separate server. The Authentication Server can be installed only after the Management Console installation is completed.
IMPORTANT: Before beginning the installation process, review the list of prerequisites.
Follow the procedure below to install the Octopus Management Console Server.
To perform Management Console Server installation:
Run the Octopus Authentication Server installation package:
sudo ./octopus-####.run
To choose the Management Console installation option, enter 1.
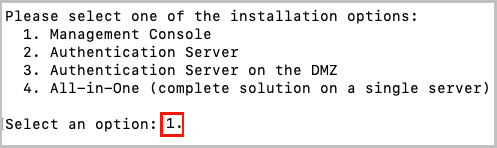
Specify the setting for installing as a secondary Management Console (default = no).

If you are installing a secondary Management Console, type y and follow the procedure for Secondary Server Installation.
When prompted, enter the port number to be used for the SSH connection between the Management Console and the Authentication Server.

Specify the setting for firewall creation (default = yes).

To skip firewall creation, type n. It will then be necessary to ensure that the Linux firewall is configured correctly, according to the chosen configuration:With SSL: Ports 443 and 8443 are enabled
Without SSL: Ports 80, 8008 and 8009 are enabled accordingly
Select a database configuration setting (default = yes).

If you don't want to use a local PostgreSQL database, type n. Manual configuration of a database will then be your first step when you log into the Management Console for the first time.
IMPORTANT: If you choose to use a local (internal) PostgreSQL database, keep in mind that you will NOT be able to migrate it to an external database later on.Enter Administrator login details for the Management Console.

Delete the default email setting and enter the correct email address. Then enter and retype the password.
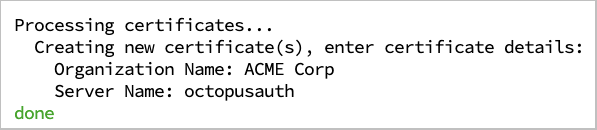
Enter details for the self-signed certificate:
Organization name: Delete My Org and enter the correct name.
Server name: Enter the server name for the certificate. (The name will appear as known on the Linux server. Change it if necessary.)
Verify that the installation completed successfully.
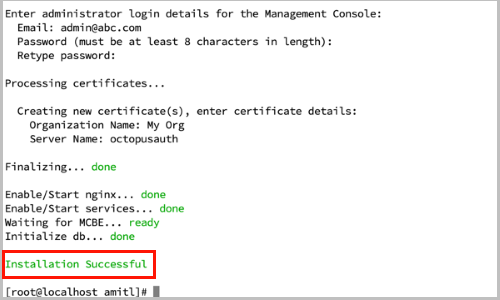
To enable the new GUI to be uploaded, perform a hard refresh to the browser, or clear the browser cache.
To complete setup of the Octopus Management Console, log into the Management Console, activate Octopus Authentication and configure the SMTP communication of the system. For details, refer to Management Console: Basic Configuration.
IMPORTANT: If you did not use a local PostgreSQL database, manual configuration of a database needs to be your first step after logging into the Management Console. For details, refer to Appendix C: Database Configuration.