Table of Contents
Introduction
This document describes the configurations required for SAML 2.0 integration between the Octopus Authenticator and the VMware UAG.
Integration Environment
The environment used for the integration described in this document is based on the following software versions:
- Octopus Authentication Server version 5.0.4
- VMware Unified Access Gateway Appliance v3.8
- VMware Horizon 8.1
Integration Workflow
The integration process involves the following sequential phases:
- Creating the VMware UAG SAML Service: Add and configure the required SAML service in the Octopus Management Console
- Configuring UAG Integration: Add the identity provider and configure SAML authentication in your UAG environment
For an overview of the authentication process in runtime, refer to Running the Solution.
Creating the VMware UAG SAML Service
The following procedure explains how to create the required SAML service in the Octopus Management Console. The service settings will be used later in the UAG configuration.
To add and configure the VMware UAG SAML service:
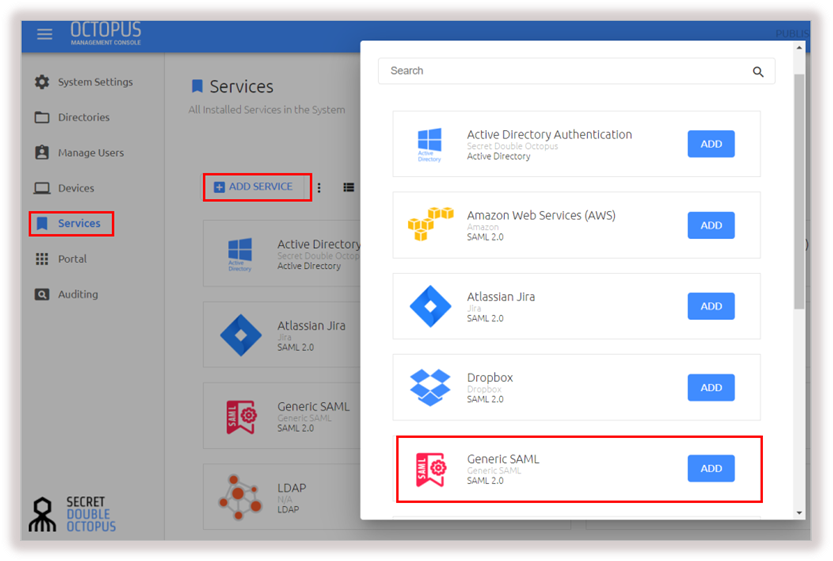
1. From the Octopus Management Console, open the Services menu. At the upper left corner of the page, click Add Service.
2. In the Generic SAML tile, click Add.
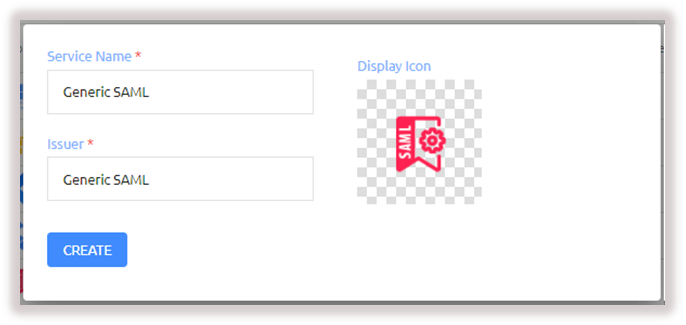
Then, in the dialog that opens, click Create.
3. Configure the following settings in the General Info tab:
Setting | Description | |
Service Name | Enter a display name to identify the Service Provider (e.g.,UAG). |
|
Issuer | Enter the issuer of the service (e.g., UAG). |
|
Description | Enter a brief note about the service. |
|
Display icon | This icon will be displayed on the Login page for the service. To change the default icon, click and upload the image of your choice. (Supported image size is 488x488 pixels.) |
|
Login Page URL | <https://<Enterprise Base URL>/saml/<random UUID>/login> |
|
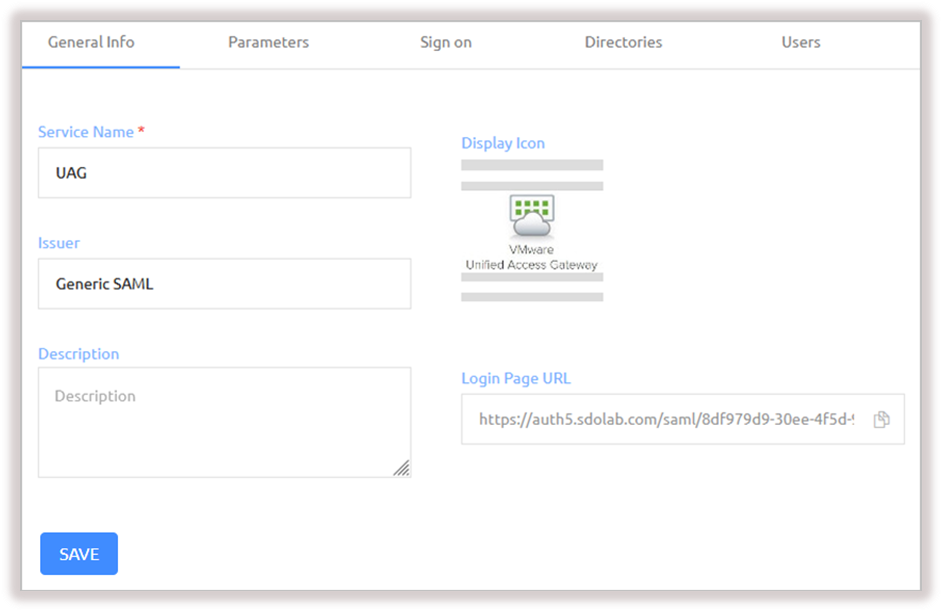
Then, click Save.
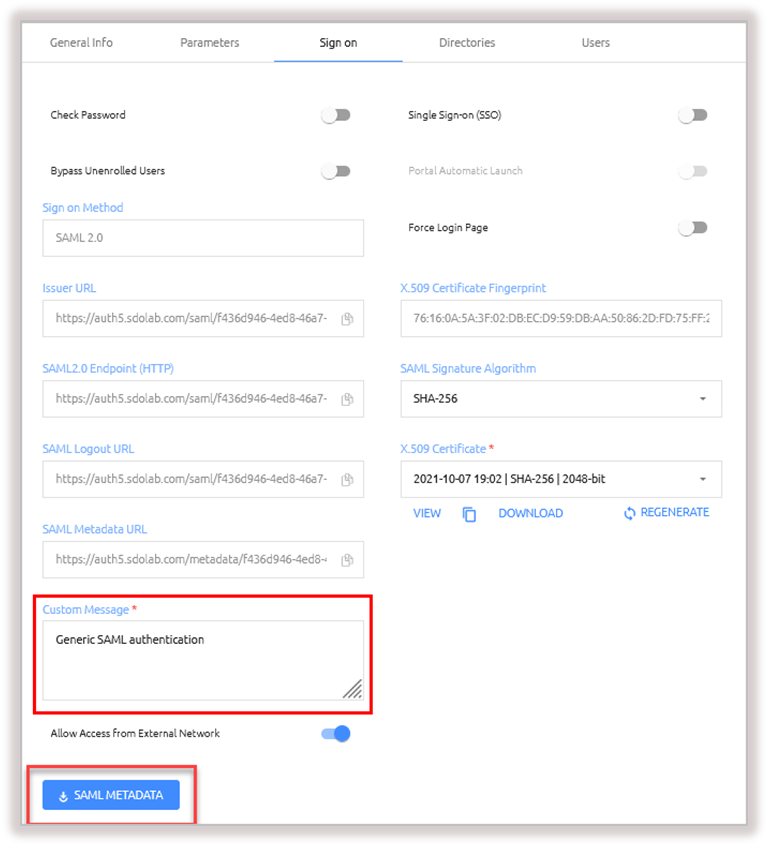
4. Open the Sign on tab, and update the default message in the Custom Message field. (This is the message displayed to the user upon successful login.)
Then click SAML METADATA to download the metadata.xml file. Save the file for later use.
5. At the bottom of the Sign on tab, click Save.
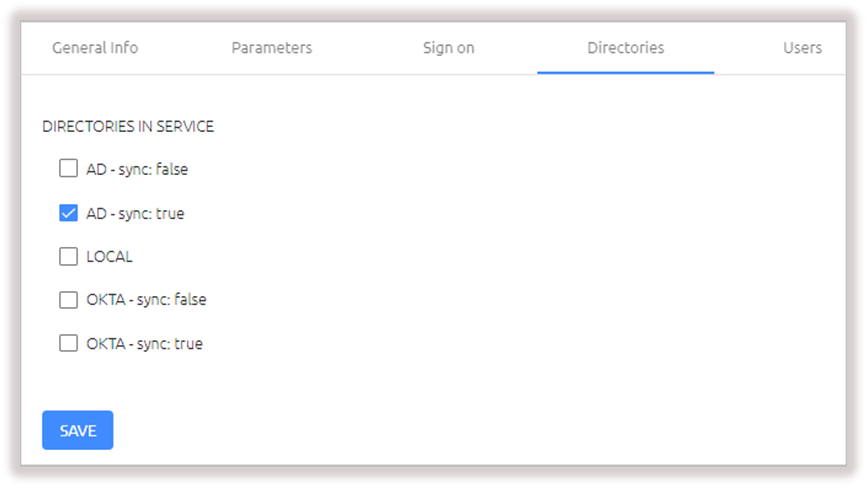
6. Open the Directories tab and select the checkboxes of the directories you want to integrate with the service. Then, click Save.
6. Open the Users tab and click Add.
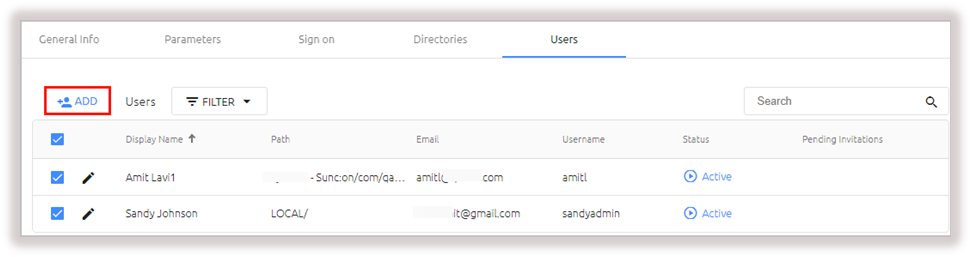
A popup opens, with a list of directories displayed on the left.
8. Expand the directories list and select the checkboxes of the groups and users that you want to add to the service. Then, click Save to close the popup.
The groups and users you selected are listed in the Users tab.
9. At the bottom of the Users tab, click Save.
10. Open the Parameters tab and override the default Name ID field (sent to the service to identify the user) with User Principal Name:
a. At the top of the tab, open the Parameters list and select the relevant directory.
For example:
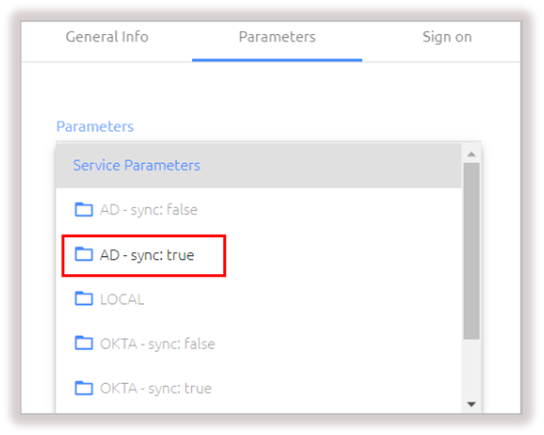
b. Select the Name ID checkbox. Then, from the dropdown list, select UserPrincipalName.
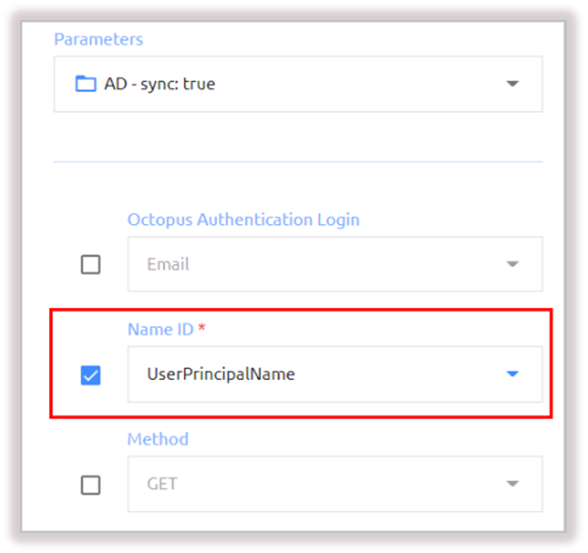
c. At the bottom of the Parameters tab, click Save.
11. In the ACS URL field, enter the return address to the service in the following format:
https://<UAG>/portal/samlsso
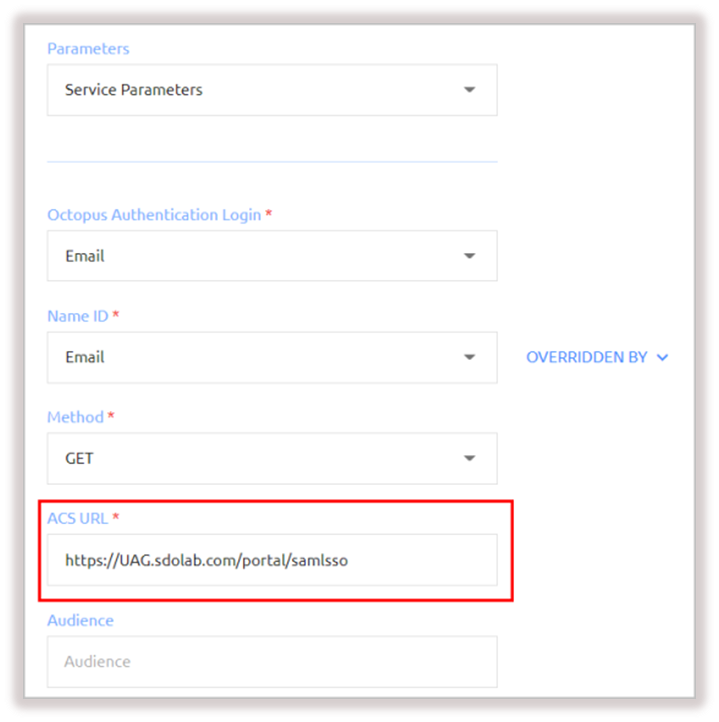
12. Click Save. Then, from the toolbar at the top of the page, click PUBLISH and publish your changes.
Configuring UAG Integration
Follow the steps below to add the Octopus SAML service as an identity provider and configure SAML authentication in the UAG admin console.
Before you begin, verify that you have the metadata.xml file downloaded from the Sign on tab of the service you created in the Octopus Management Console.
To configure UAG integration with the Octopus SAML service:
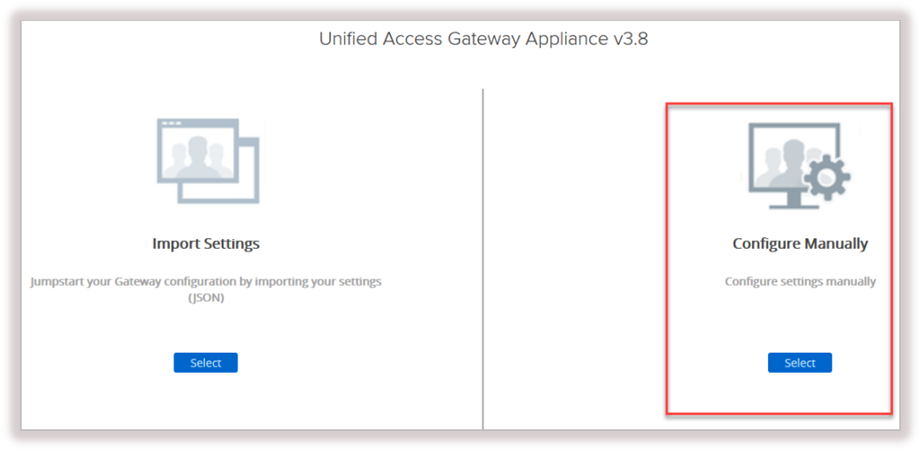
1. From the UAG admin console, select Configure Manually.
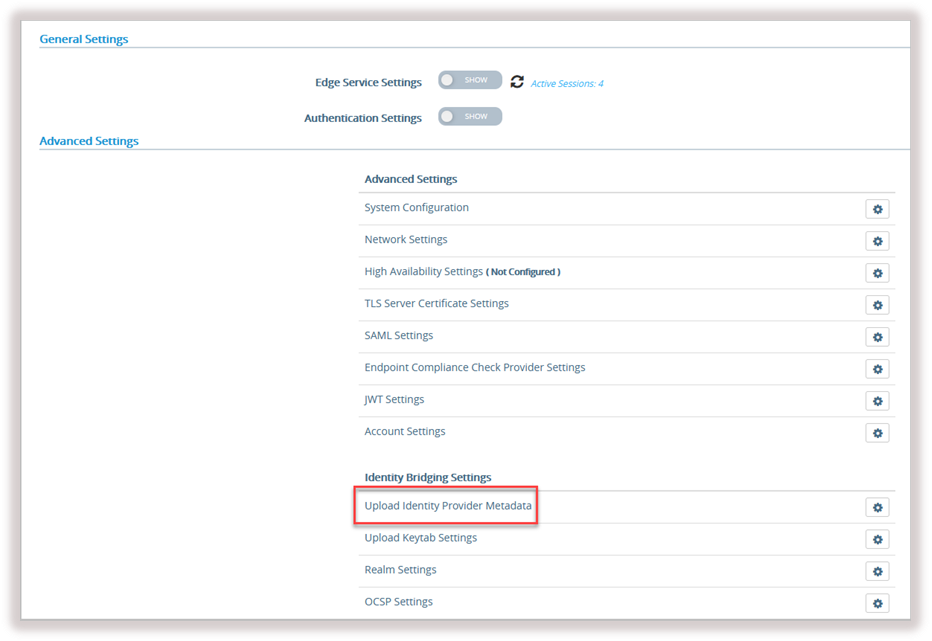
2. Under Identity Bridging Settings, select Upload Identity Provider Metadata.
3. In the window that opens, click Select and upload the metadata.xml file from the Octopus SAML service.
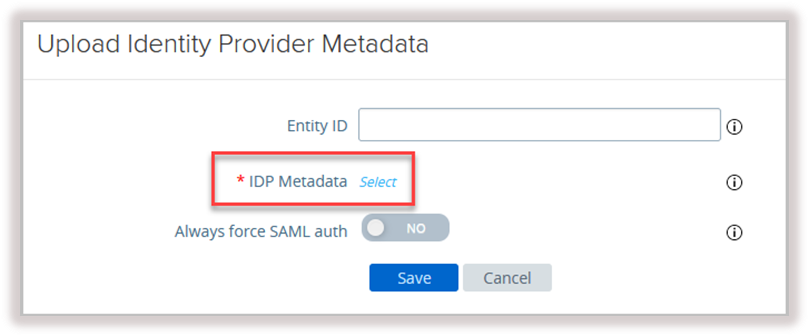
Then, click Save.
4. To configure SAML authentication, open the Edge Service Settings and select Horizon Settings.
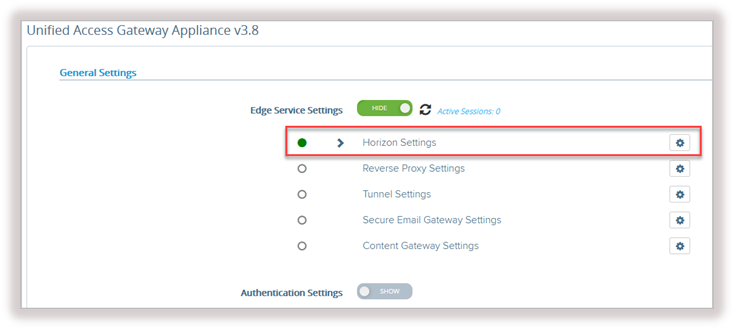
5. Configure the following settings on the Horizon Settings page:
- Auth Methods: Select SAML.
- Identity Provider: Select the IDP you uploaded in Step 3.
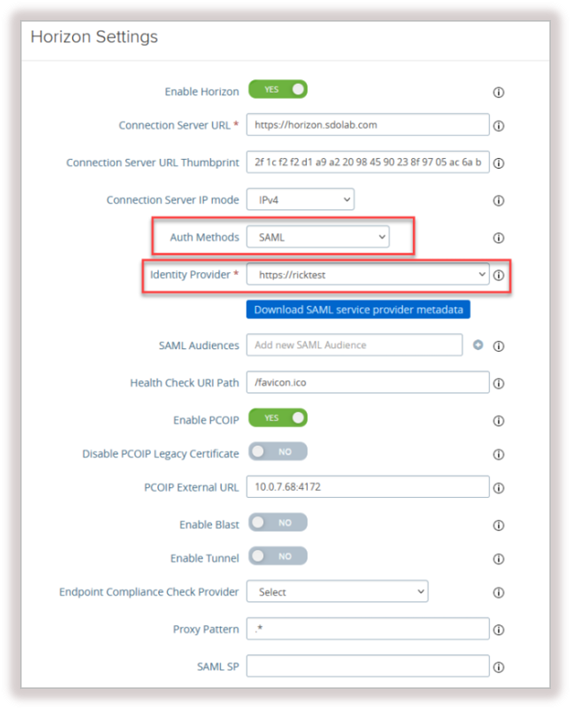
6. Click Save.
Running the Solution
This section describes the user experience of logging into the VMware UAG via the Octopus Authenticator. The authentication process is as follows:
1. From a browser, the user opens the VMware Horizon client and selects the server.
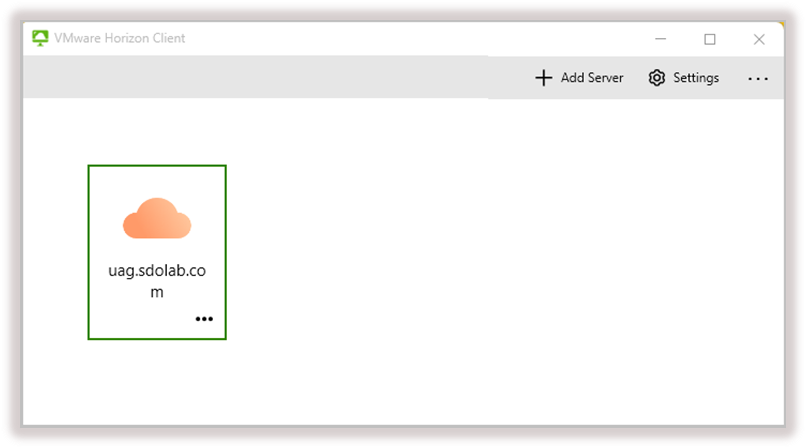
The user is then redirected to the Secret Double Octopus login page.
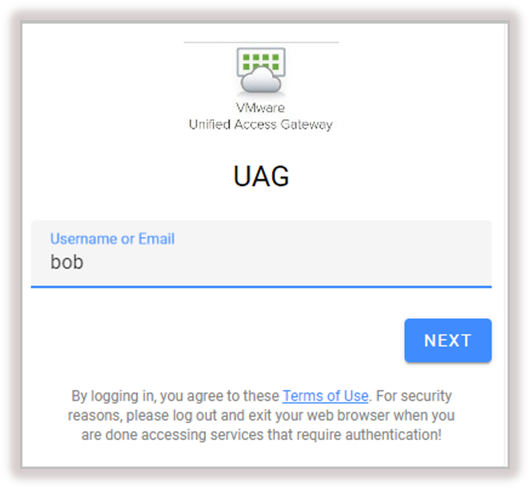
2. The user enters a username or email and clicks Next.
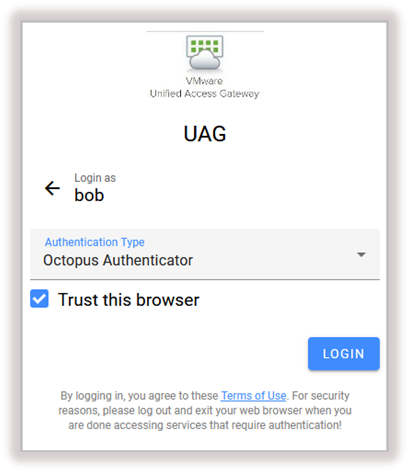
3. The user then selects the authentication method (if relevant), and clicks Login.
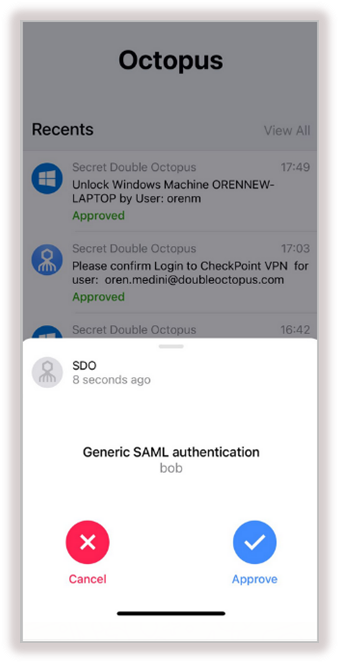
A push notification appears on the user's authentication app, requesting authentication approval.
4. The user taps Approve.
After successful authentication, the user is logged into the VMware UAG.