This document describes the configurations required for SAML 2.0 integration between the Octopus Authenticator and VMware Workspace ONE UEM (previously AirWatch).
Integration Environment
The environment used for the integration described in this document is based on the following software versions:
Octopus Authentication Server version 5.4
Workspace ONE UEM version 22.12.0.7 (2212) (cloud)
Integration Workflow
The integration process involves the following sequential phases:
Creating the VMware UEM SAML Service: Add and configure the required SAML service in the Octopus Management Console
Configuring the VMware UEM Environment: Add the identity provider and configure SAML authentication in your UEM console
Prerequisites
Communication between the 3rd party Identity Provider and the Service Provider in the SAML protocol is signed with a certificate. Since the certificate should be unique to the organization, it needs to be downloaded from a service that you will create in the Octopus Management Console.
Before starting Octopus integration, please verify that your VMware UEM is configured with an SSL certificate.
The following procedure explains how to create the required SAML service in the Octopus Management Console. This adds VMware UEM as a Service Provider in the Octopus Authentication Server.
The settings of this service will be used later during the UEM configuration.
To add and configure the UEM SAML service:
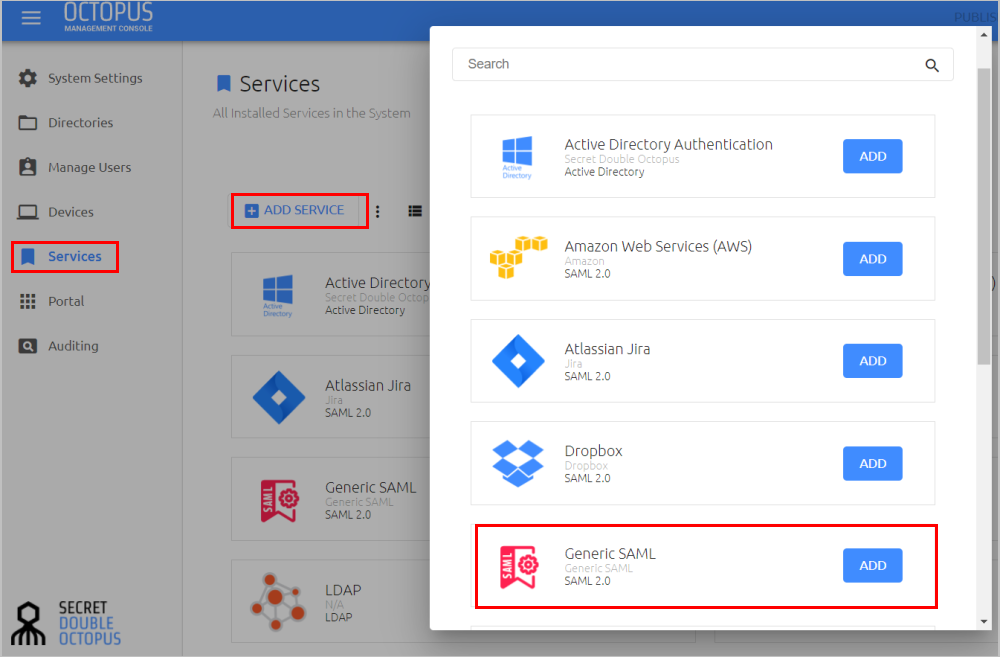
From the Octopus Management Console, open the Services menu. At the upper left corner of the page, click Add Service.
In the Generic SAML tile, click Add.
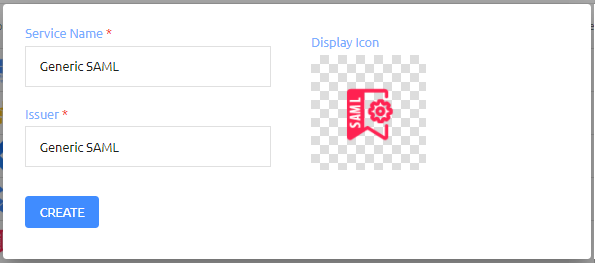
Then, in the dialog that opens, click Create.
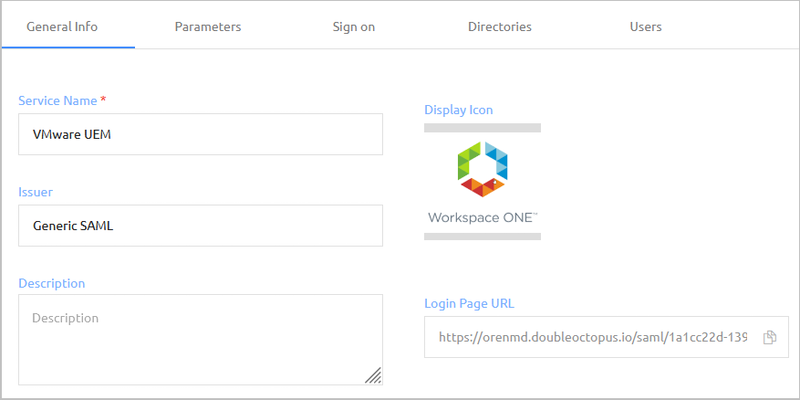
Configure the following settings in the General Info tab:
Setting
Description
Service Name
Enter a display name to identify the Service Provider (e.g.,AirWatch).
Issuer
Enter the issuer of the service (e.g., VMware UEM).
Description
Enter a brief note about the service.
Display icon
This icon will be displayed on the Login page for the service. To change the default icon, click and upload the image of your choice. (Supported image size is 488x488 pixels.)
Login Page URL
<https://<Enterprise Base URL>/saml/<random UUID>/login> The Enterprise Base URL can be modified in System Settings > General Settings.
At the bottom of the tab, click Save.
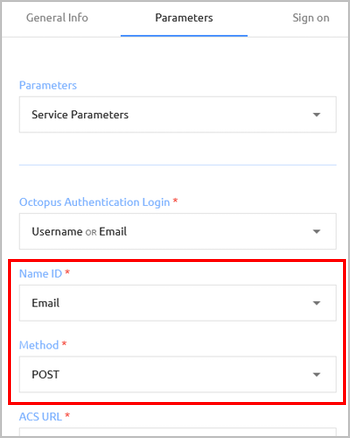
Open the Parameters tab and configure the following settings:
Parameter
Value / Description
Name ID
Select Email
Method
Select POST
At the bottom of the Parameters tab, click Add Parameter.
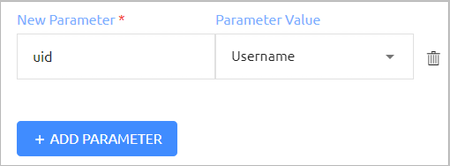
In the New Parameter field, enter uid. Then, from the Parameter Value dropdown list, select Username.
Click Save.
Note: The ACS URL and Audience parameters will be added at a later stage of the integration.
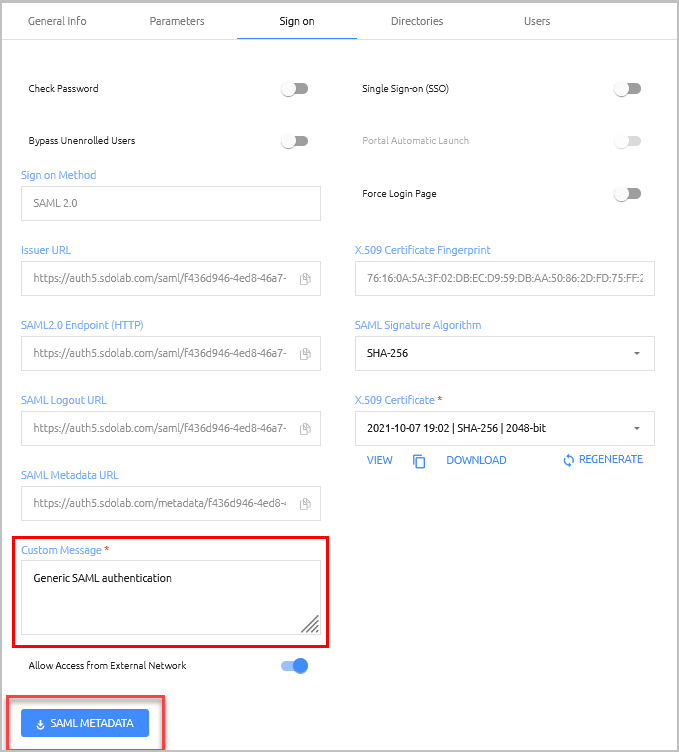
Open the Sign on tab, and update the default message in the Custom Message field. (This is the message displayed to the user upon successful login.)
Then click SAML METADATA to download the metadata.xml file. Save the file for later use.
At the bottom of the Sign on tab, click Save.
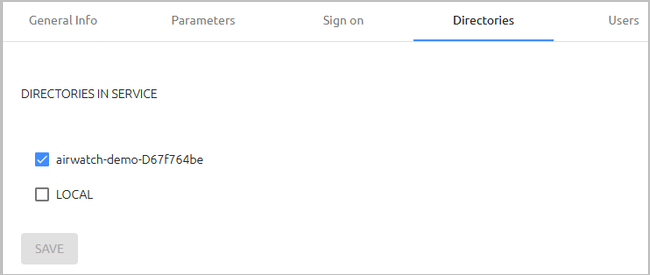
Open the Directories tab and select the checkboxes of the directories you want to integrate with the service. Then, click Save.
Open the Users tab and click Add.
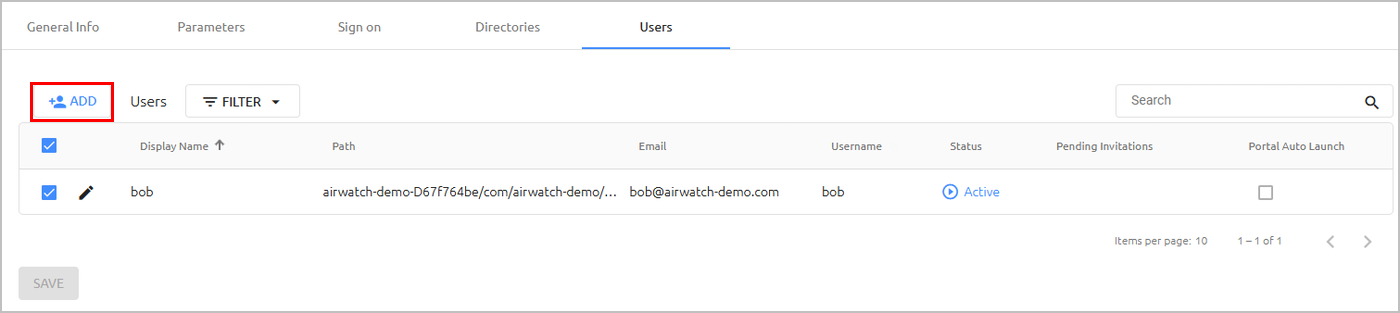
A popup opens, with a list of directories displayed on the left.
Expand the directories list and select the checkboxes of the groups and users that you want to add to the service. Then, click Save to close the popup.
The groups and users you selected are listed in the Users tab.
At the bottom of the Users tab, click Save.
Click Save. Then, from the toolbar at the top of the page, click PUBLISH and publish your changes.
The following sections describe how to add the Octopus SAML service as an Identity Provider and configure SAML authentication in the UEM Console:
The Cloud Agent needs to be installed to sync users from the local environment to the VMware UEM. The Agent can be installed on any domain-joined server.
To install the cloud connector:
From the VMware UEM Console, navigate to System > Enterprise Integration > Cloud Connector.
Then, click Download AirWatch Cloud Connector Installer.
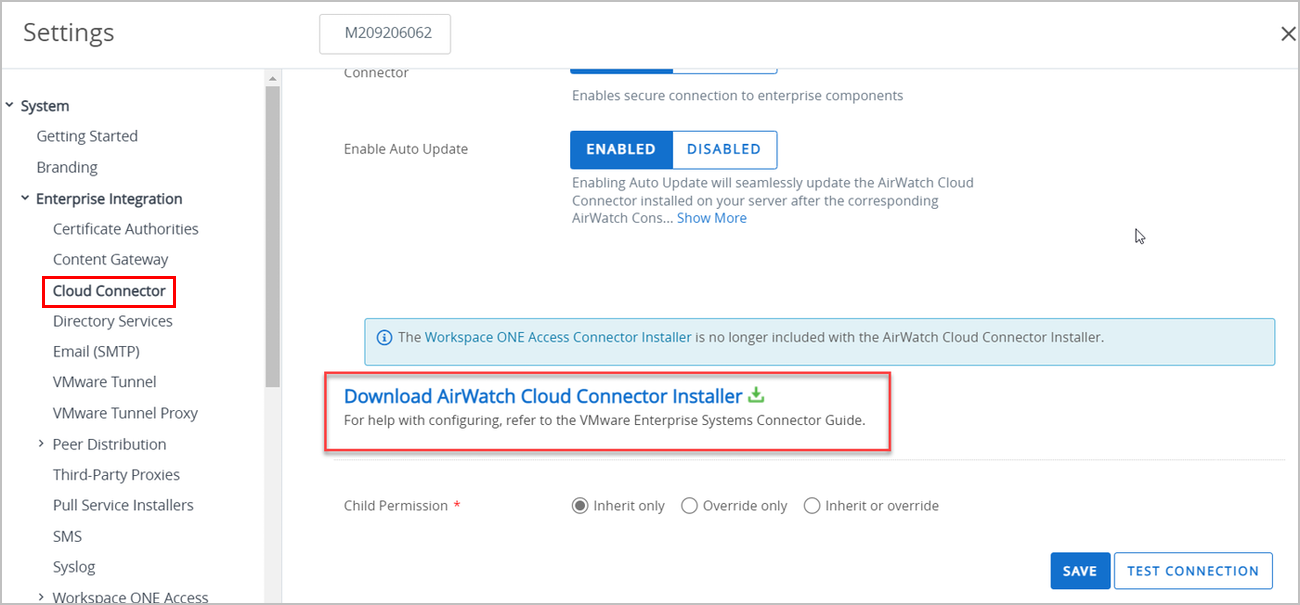
Install the cloud connector on a domain-joined server.
When installation is completed, click TEST CONNECTION to validate communication between the AD and the VMware UEM tenant.
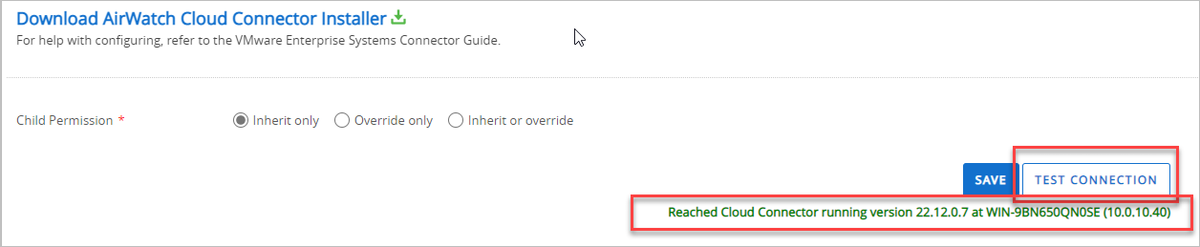
After installing the Connection Agent, you need to configure the user repository (directory) so its users will be enrolled in AirWatch.
To configure directory services:
From the VMware UEM Console, navigate to System > Enterprise Integration > Directory Services and select the Server tab.
Configure the following settings:
Setting
Value / Description
Directory Type
Select the directory type to integrate
Server
Enter your server IP
Port
Enter the port to communicate with your user repository
Bind Username
Enter the user that will bind to the service
Bind Password
Enter the password for the binding user
Domain
Enter your domain name
Server
Enter the server IP
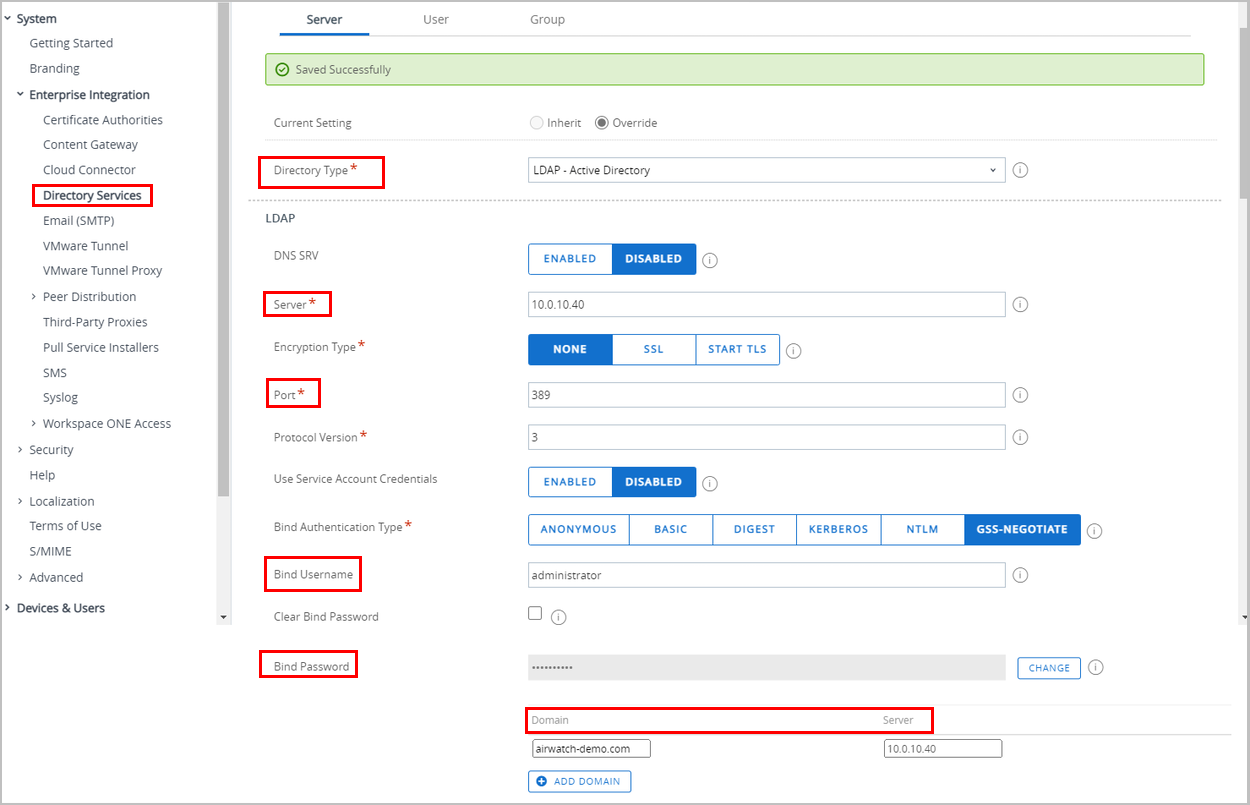
Click Save.
Open the User tab. Update the Base DN and then click Save.
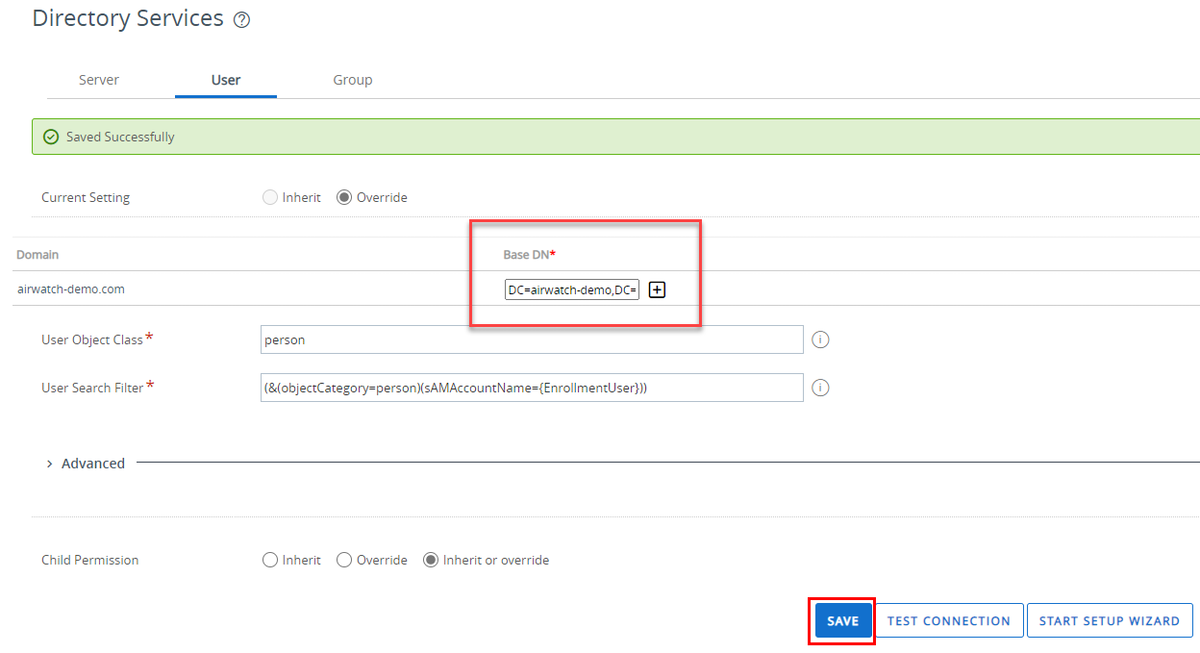
From the lower right corner of the tab, click TEST CONNECTION.
On the Test Connection window, check your server connectivity and the user retrieval from your user repository.
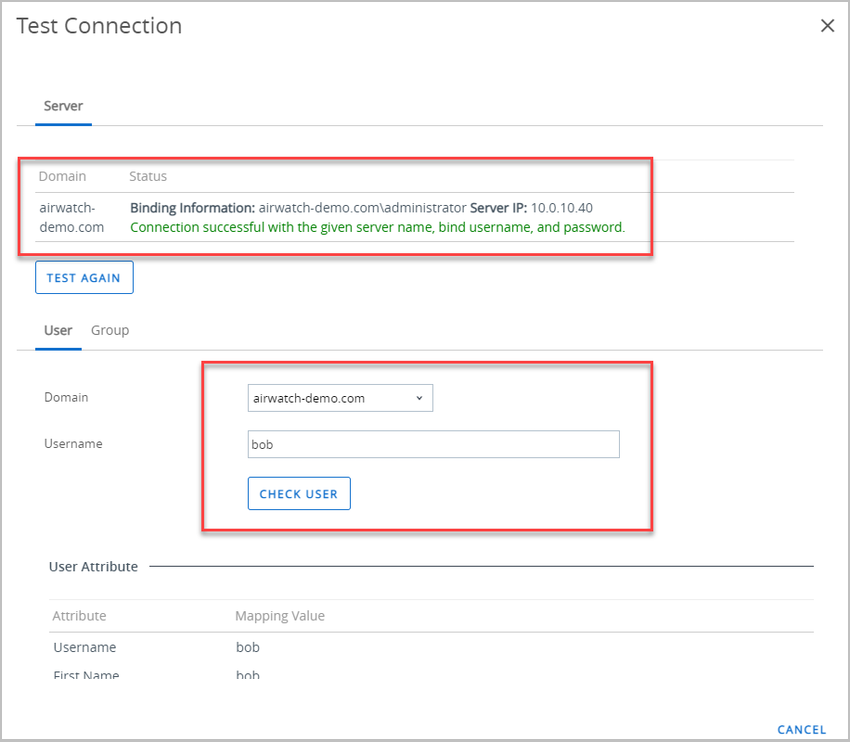
Follow the steps below to configure SAML authentication in the VMware UEM console. During the procedure, you will also need access to the Octopus Management Console in order to add parameters to the settings of the SAML service you created.
Before you begin the procedure, verify that you have downloaded the metadata.xml file from the Sign on tab of the Octopus SAML service.
To configure SAML authentication:
From the VMware UEM Console, navigate to System > Enterprise Integration > Directory Services.
Toward the bottom of the page, click Export Service Provider Service.
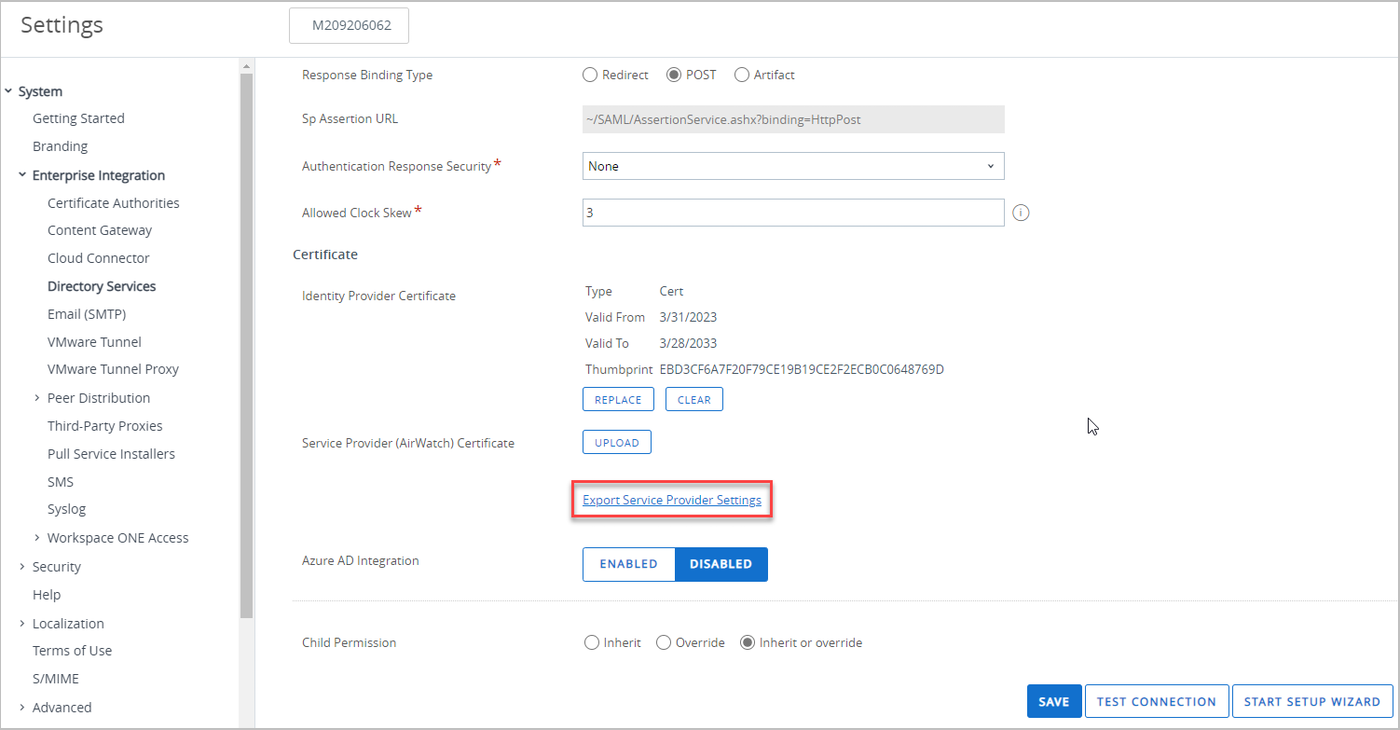
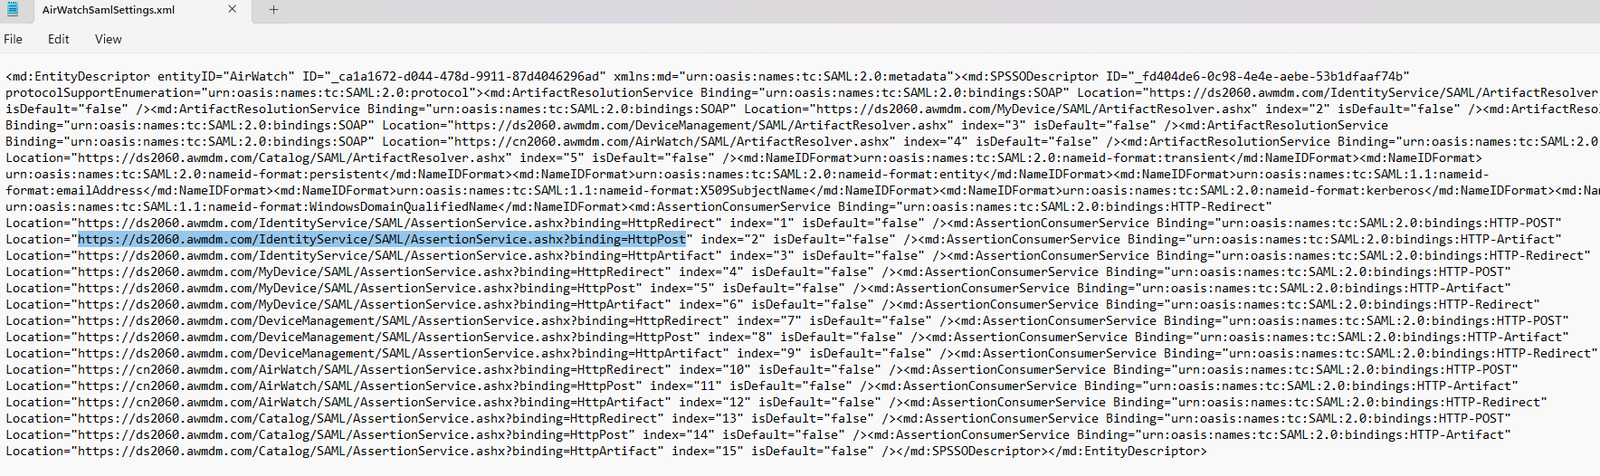
Open the downloaded file (AirWatchSAMLSettings.xml), and copy the IdentityService HTTP-POST ACS URL.
From the Octopus Management Console, select the Services menu. In the row or card of the SAML service you created, click the Edit icon to open the service settings.
Open the Parameters tab and configure the following settings:
Parameter
Value / Description
ACS URL
Enter the ACS URL you copied from the AirWatchSAMLSettings.xml file
Audience
Enter AirWatch
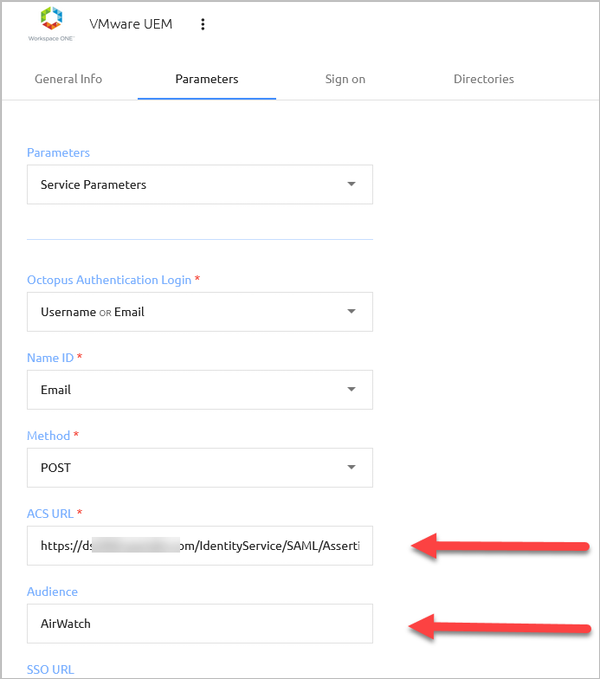
At the bottom of the Parameters tab, click Save. Then, from the toolbar at the top of the page, click PUBLISH and publish your changes.
If you have not yet downloaded the service metadata, open the Sign on tab and click SAML METADATA (at the bottom of the tab).
Return to the UEM Console (System > Enterprise Integration > Directory Services). Under SAML 2.0, click Upload and select the metadata.xml file you previously downloaded.
After uploading the file, data from the Octopus SAML service will be populated.
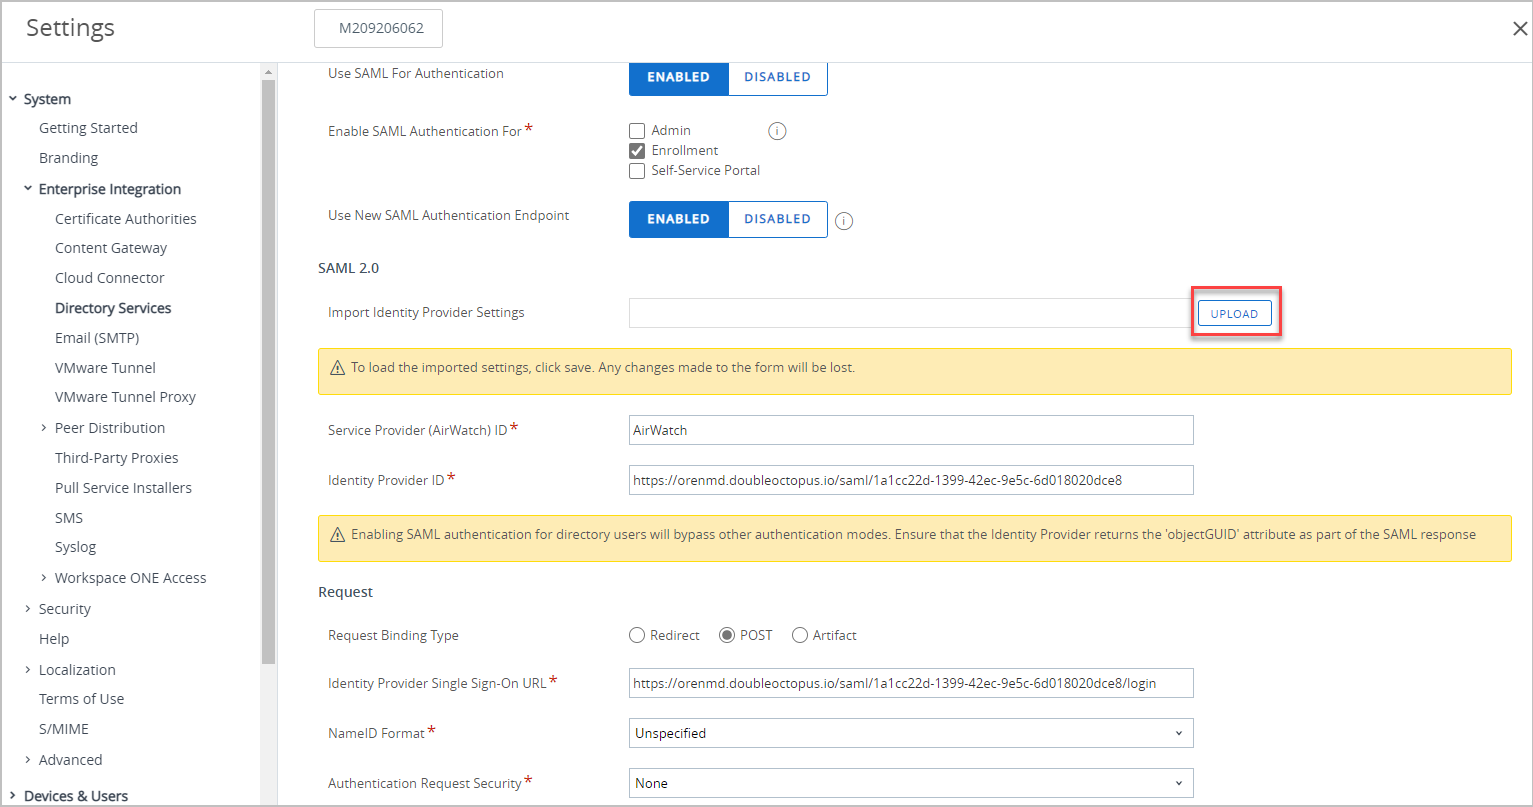
Scroll down to the bottom of the page and click Save.