Introduction
This document describes the configurations required for SAML 2.0 integration between the Octopus Authenticator and CyberArk Password Vault servers. This integration enables passwordless login to PVWA using SAML authentication.
The integration process involves the following sequential phases:
- Creating the CyberArk SAML Service: Adding a dedicated service for CyberArk integration in the Octopus Management Console (MC)
- Configuring the CyberArk Password Vault 3rd Party IdP Setup: Configuring Password Vault settings to support integration with the Octopus Authenticator
- Completing Service Integration: Setting additional required parameters in the CyberArk service in the Octopus MC
Integration Environment
The environment used for the integration described in this document is based on the following software versions:
- Octopus Authentication Server: Version 4.6.4 and higher[YD1]
- CyberArk Password Vault: Version 11.3 and higher
Creating the CyberArk SAML Service
The following procedure explains how to create the required SAML service in the Octopus Management Console. The service settings will be used later in the Password Vault Identity Provider setup.
To add and configure the CyberArk SAML service:
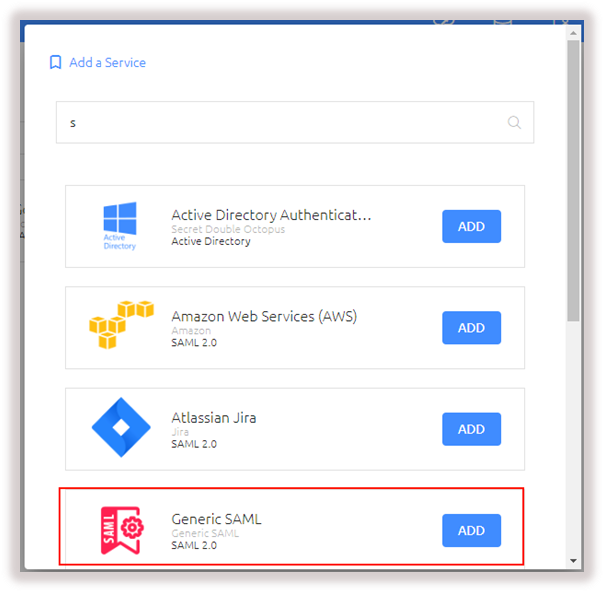
1. From the Octopus Management Console, open the Services menu and click Add Service. In the Generic SAML tile, click Add.
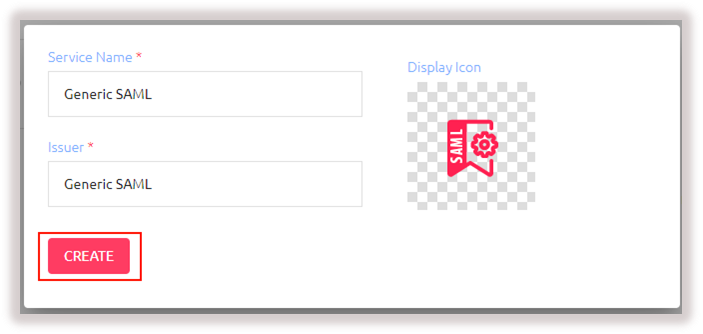
Then, in the dialog that opens, click Create.
2. Review and configure the following settings in the General Info tab.
Setting | Description | |
Service Name | CyberArk Password Vault |
|
Issuer | CyberArk |
|
Description | Enter a brief note about the service |
|
Display icon | This icon will be displayed on the Login page for the service. To change the default icon, click and upload the image of your choice. |
|
Login Page URL | <https://<Enterprise Base URL>/generic-saml/<No.>/login>[YD1] |
|
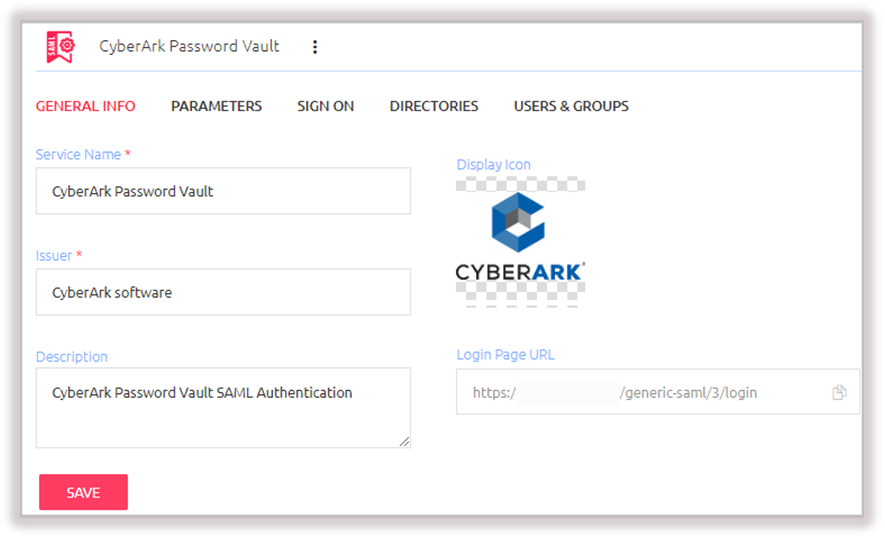
Then, click Save.
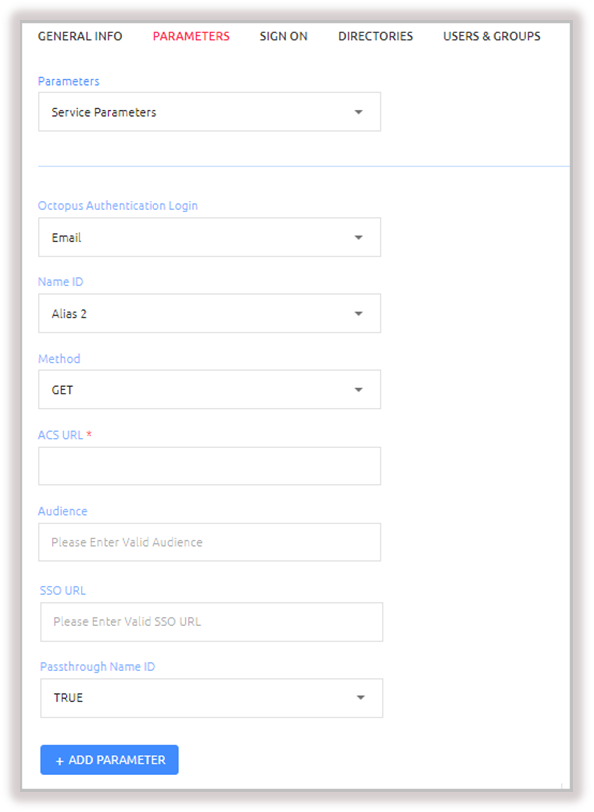
3. Open the Parameters tab and configure the following settings:
Setting | Value / Notes | |
Octopus Authentication Login | Select the login method for the Octopus Authenticator Server, e.g., Email. |
|
Name ID | Select the CyberArk login username, e.g., Alias 2.[YD1] |
|
Method | SSO binding method: Select GET. |
|
ACS URL | CyberArk PasswordVault Access Restriction BaseURL: https://components.cyberark.local/PasswordVault/api/auth/saml/logon |
|
Audience | Password Vault |
|
Passthrough Name ID | Select TRUE. |
|
4. Create a new parameter named samlIssuer:
- At the bottom of the Parameters tab, click Add Parameter.
- In the Parameter Key field, enter samlIssuer.
- From the Parameter Value dropdown list, select Free Text. Then, in the field to the right, enter Octopus Authenticator.
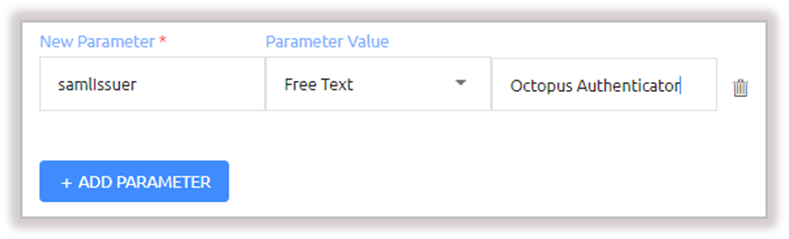
d. At the bottom of the Parameters tab, click Save.
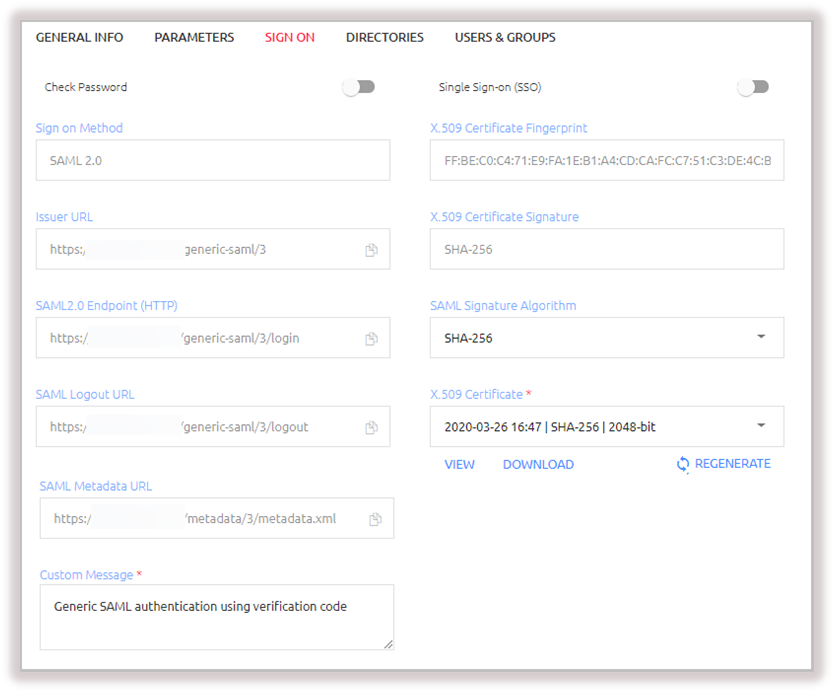
5. Open the Sign On tab and configure the following settings. We recommend not to change default values.
Setting | Value | |
Check Password | Disabled (default setting) |
|
Single Sign-on (SSO) | Disabled (default setting) |
|
Sign on Method | SAML 2.0 |
|
Issuer URL | https://<Enterprise base URL>/ generic-saml/<No> |
|
SAML 2.0 Endpoint (HTTP) | https://<Enterprise base URL>/generic-saml/login |
|
SAML Signature Algorithm | SHA-256 (default) |
|
X.509 Certificate | X.509 certificate for the Octopus Authenticator CyberArk service |
|
Custom Message | The message displayed to the user upon successful login |
|
6. If you made changes to the settings, click Save.
7. Open the Directories tab. Then, select the checkbox of the directory to be integrated with the service.
8. Open the Users & Groups tab and click Add.
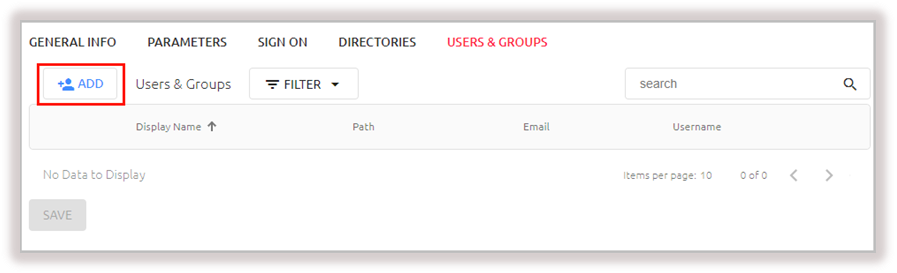
A popup opens, with a list of directories displayed on the left.
9. Expand the relevant directory and select the checkboxes of the groups and users that you want to add to the service. Then, click Save to close the popup.
The groups and users you selected are listed in the Users & Groups tab.
10. Click Save and then publish your changes.
Configuring the CyberArk Password Vault 3rd Party IdP Setup
The sections below explain how to configure Password Vault settings to support integration with the Octopus Authenticator.
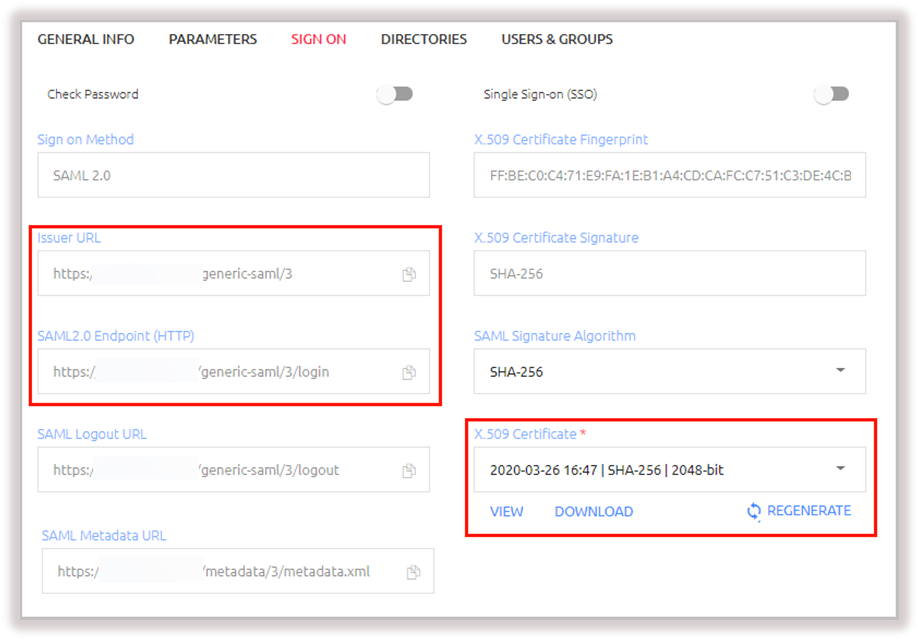
Before you begin, make sure that you have access to the following elements from the Sign On tab of the CyberArk SAML service that you created in the Octopus Management Console:
- Issuer URL: Click the Copy icon to copy the URL.
- SAML2.0 Endpoint (HTTP): Click the Copy icon to copy the URL.
- X.509 Certificate: Click View. Then, in the popup that opens, click Copy to copy the string.
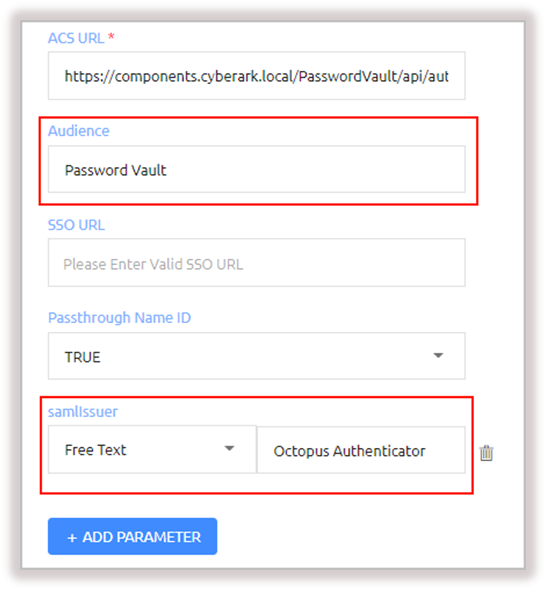
You will also need the following elements from the Parameters tab of the service:
- Audience
- samlIssuer value
Password Vault Web Configuration File Modification
The following procedure describes how to make the required edits in Password Vault’s saml.config file.
To modify the saml.config file:
1. Navigate to C:\inetpub\wwwroot\PasswordVault\ and open the saml.config file for editing.
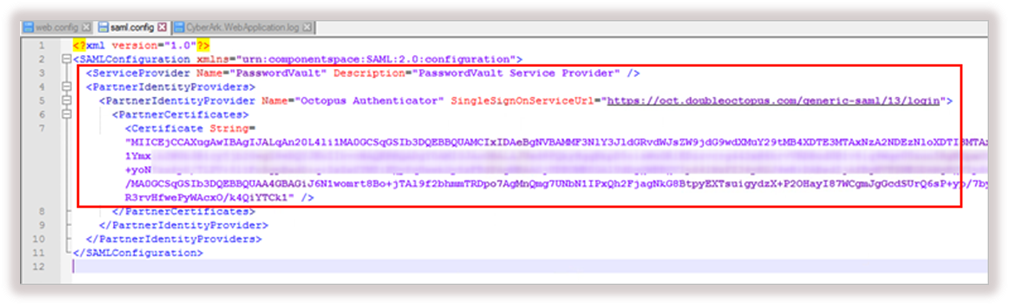
2. Edit the following key-value pairs below the SAMLConfiguration line:
a. ServiceProvider: Change the Name to that of the Audience for the CyberArk SAML service.

b. PartnerIdentityProvider: Change the Name to that of the value of the samlIssuer parameter.

c. SingleSignOnServiceUrl: Change the value to the SAML2.0 Endpoint (HTTP) URL.

d. Certificate: After String=, paste the content of the X.509 Certificate.
3. Save your changes.
Password Vault SAML Configuration
Follow the steps below to configure the required setup in your CyberArk Password Vault Administrator account.
To configure the Password Vault setup:
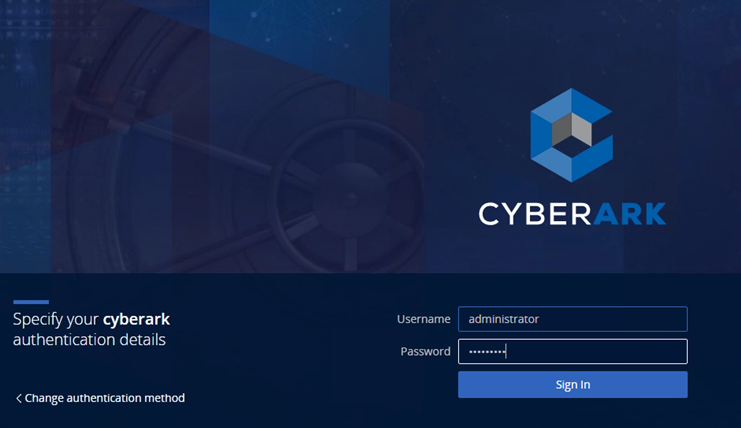
1. From your browser, log into your CyberArk Password Vault Admin account.
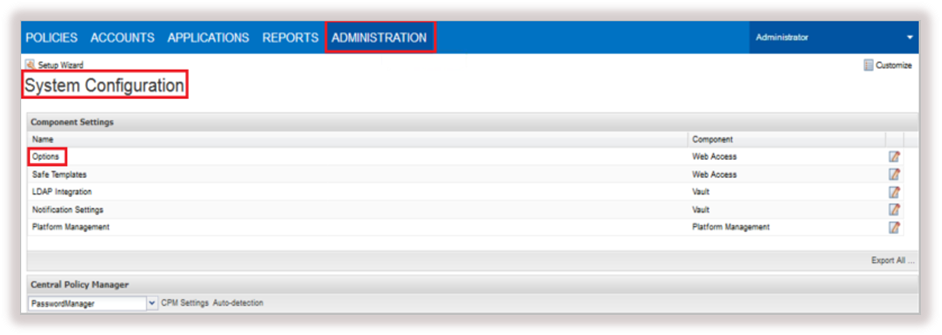
2. From the Administration tab, under System Configuration, select Options.
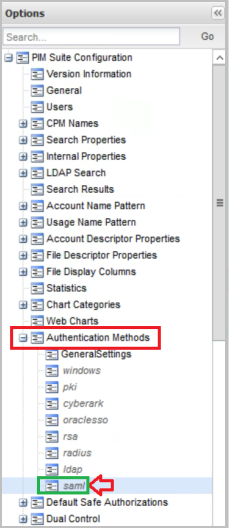
3. Under PIM Suite Configuration, expand the Authentication Methods category and select saml.
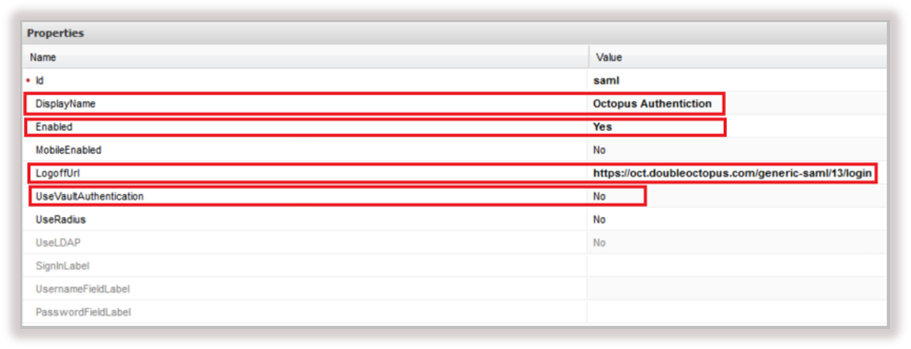
4. Configure the following properties:
Name | Value | |
id | saml |
|
Display Name | Octopus Authentication |
|
Enabled | Yes |
|
MobileEnabled | No |
|
LogoffUrl | SAML2.0 Endpoint URL (from the Sign On tab of the SAML service in the Octopus MC) |
|
UseVaultAuthentication | No |
|
5. In the upper left corner of the page, click Apply.
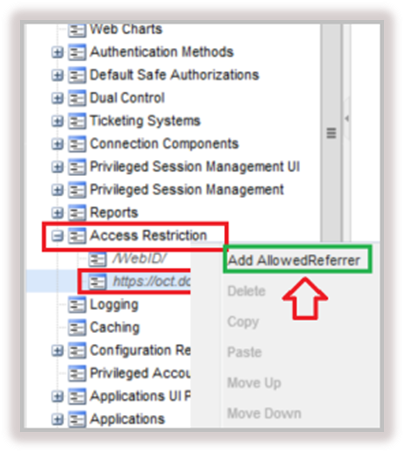
6. Under PIM Suite Configuration, expand the Access Restriction category. Right-click and select Add AllowedReferrer.
7. Configure the following properties:
Name | Value |
|
BaseUrl | SAML2.0 Endpoint URL (from the Sign On tab of the SAML service in the Octopus MC) | |
RegularExpression | No | |
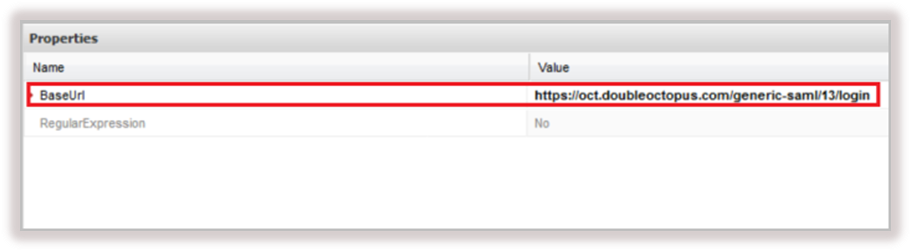
8. In the upper left corner of the page, click Apply.
Completing Service Integration
To complete the integration process, you need to add required service parameters to the Octopus Authenticator CyberArk service.
To complete service integration:
- Log into the Octopus Management Console and open the Services menu.
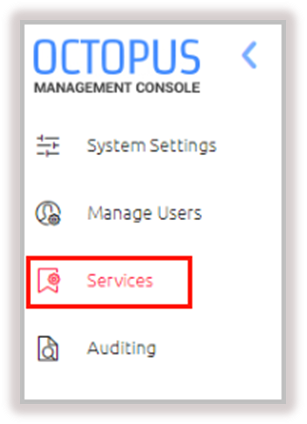
2. In the tile of the CyberArk SAML service, click  to display the service settings.
3. Open the Parameters tab and set the following parameters:
Setting | Value |
|
ACS URL | Password Vault SAML authentication URL (e.g., https://<your Cyberark FQDN>/PasswordVault/api/auth/saml/logon)[SS1] | |
Audience | Password Vault value | |
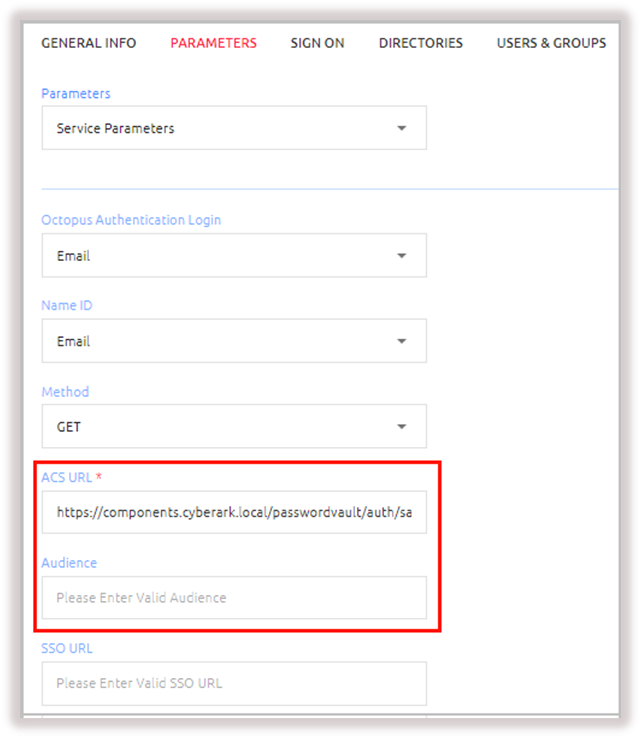
4. At the bottom of the Parameters tab, click Save.
5. Verify the directories and users assigned to the service, and then publish your changes.
Password Vault Login with Octopus Authenticator
This section describes the user experience of logging into CyberArk via the Octopus Authenticator. The authentication process is as follows:
1. From a browser, the user opens the CyberArk login page and selects the Octopus Authenticator method.
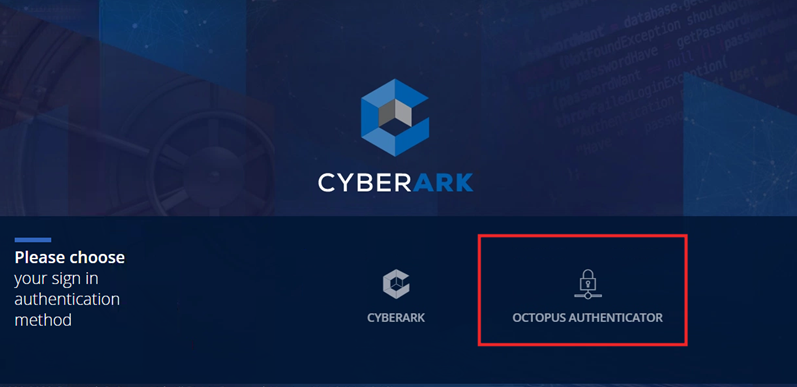
The user is then redirected to CyberArk’s Octopus Authentication login page.
2. The user enters a username and clicks Login.
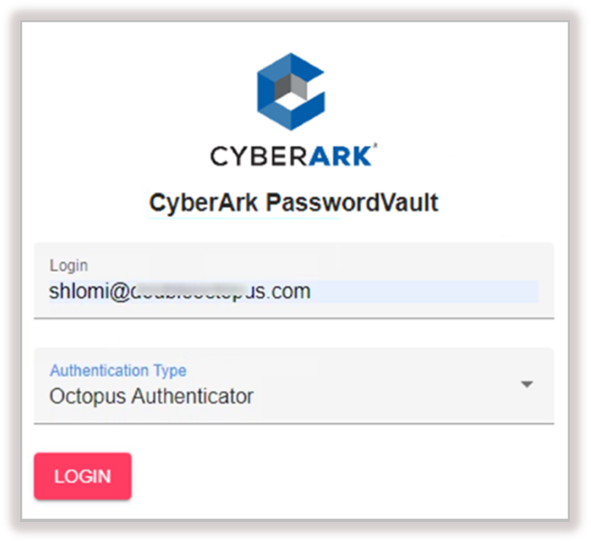
A challenge number is generated and displayed on the webpage.
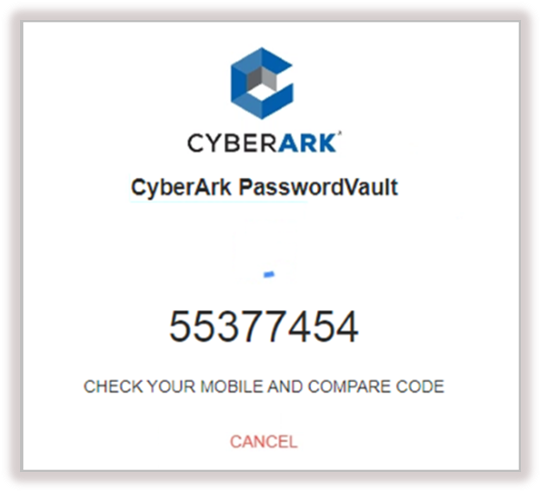
A notification with this number appears on the user's Octopus Mobile App, asking for authentication approval.
3. The user taps Approve.
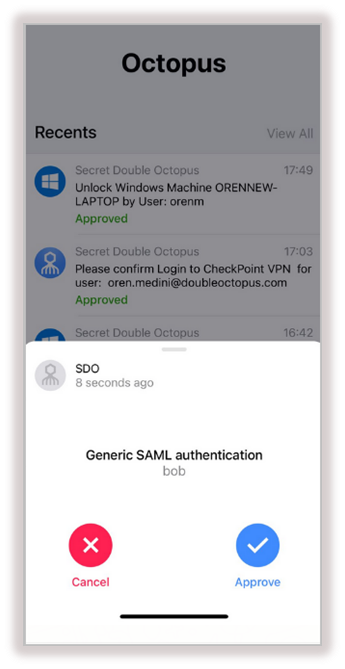
After successful authentication, the user is logged into CyberArk.