This document describes the configurations required for RADIUS integration between the Octopus Authenticator and VMware Horizon.
Integration Environment
The environment used for the integration described in this document is based on the following software versions:
VMware Horizon 8.1
Octopus Authentication Server version 5.8.2
Note: The procedures detailed in this document are relevant to all versions of the Octopus Authentication Server.
Integration Workflow
VMware Horizon integration involves the following sequential phases:
Creating the VMware Horizon RADIUS Service: Add a dedicated service for VMware Horizon integration in the Octopus Management Console.
Configuring VMware Horizon Integration: Configure RADIUS authentication on the Connection server.
Running the Solution: Test the integration.
The following procedure explains how to create the required RADIUS service in the Octopus Management Console. The service settings will be used later in the Horizon Connection server configuration.
To add and configure the RADIUS service:
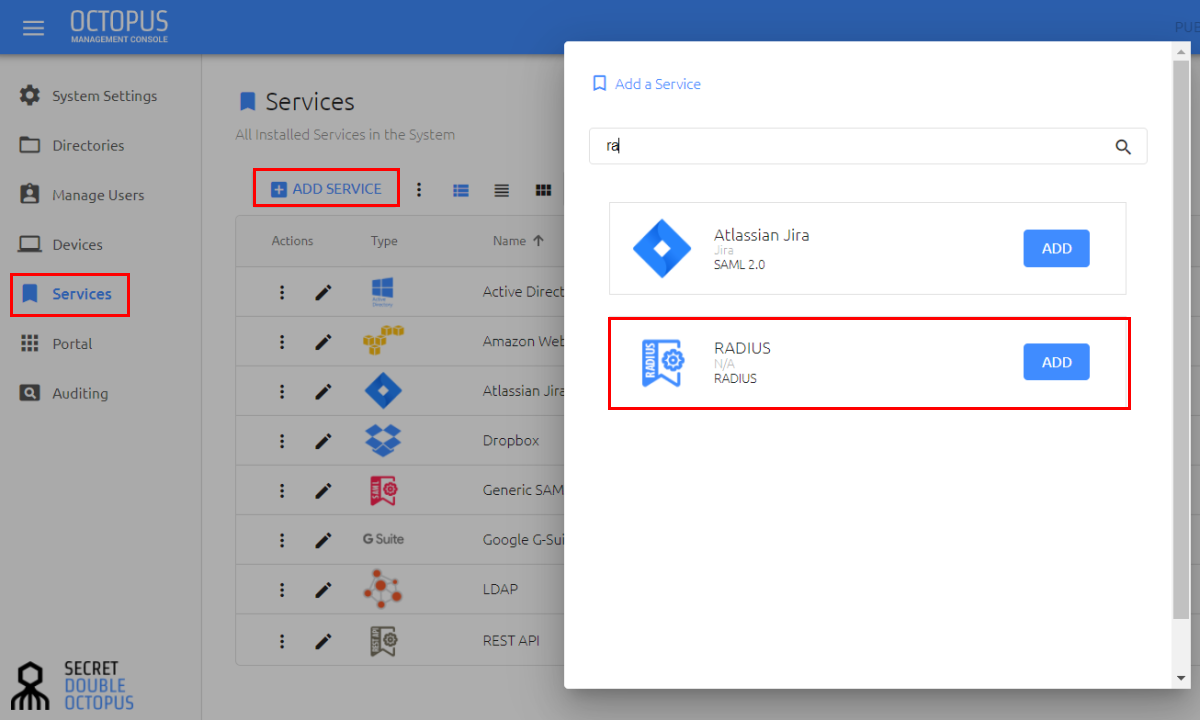
From the Octopus Management Console, select the Services menu and click Add Service. In the RADIUS tile, click Add.
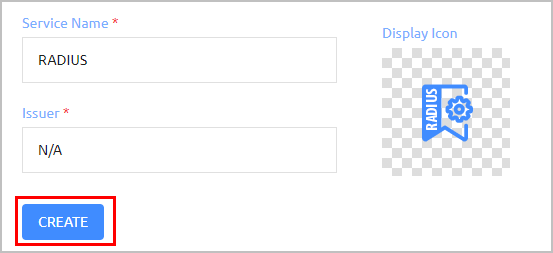
Then, in the dialog that opens, click Create.
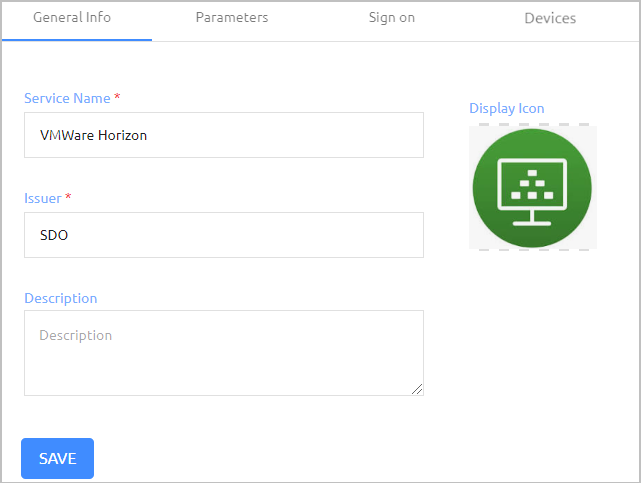
Review and configure the following settings in the General Info tab:
Setting
Description
Service Name
Display name to identify the service provider (e.g., VMware Horizon).
Issuer
Issuer of the service (e.g., SDO).
Description
Enter a brief note about the service.
Display icon
This icon will be displayed on the Login page for the service. To change the default icon, click and upload the image of your choice (supported size 488x488 pixels).
Then, click Save.
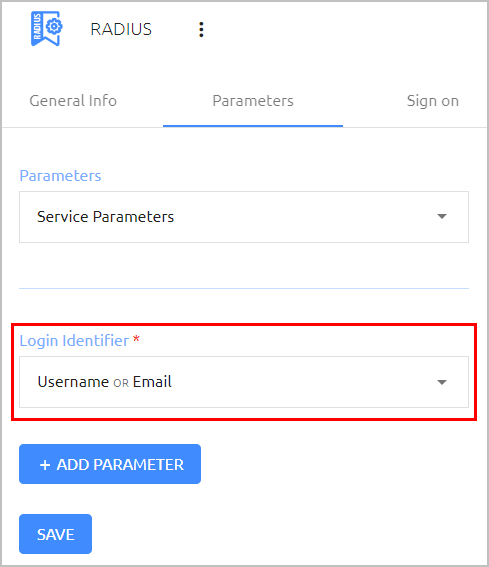
Select the Parameters tab. Open the Login Identifier list and select the identifier(s) required to log into the RADIUS service. (You can select multiple identifiers to support various platforms.)
At the bottom of the Parameters tab, click Save.
Open the Sign On tab and configure the following settings:
Setting
Value / Notes
Check Password
Verify that the setting is enabled. (When enabled, users are required to enter a password for MFA authentication.)
Two-step Authentication
Verify that the setting is enabled. When enabled, users enter initial credentials (e.g., username and password) first, and then supply an additional identifier (e.g., OTP) in a separate step.
Secret
The RADIUS secret key required for communication between the RADIUS service and Octopus Authenticator.
Port
The port used for communication with the RADIUS server.
Custom Message
The message displayed to users upon successful authentication.
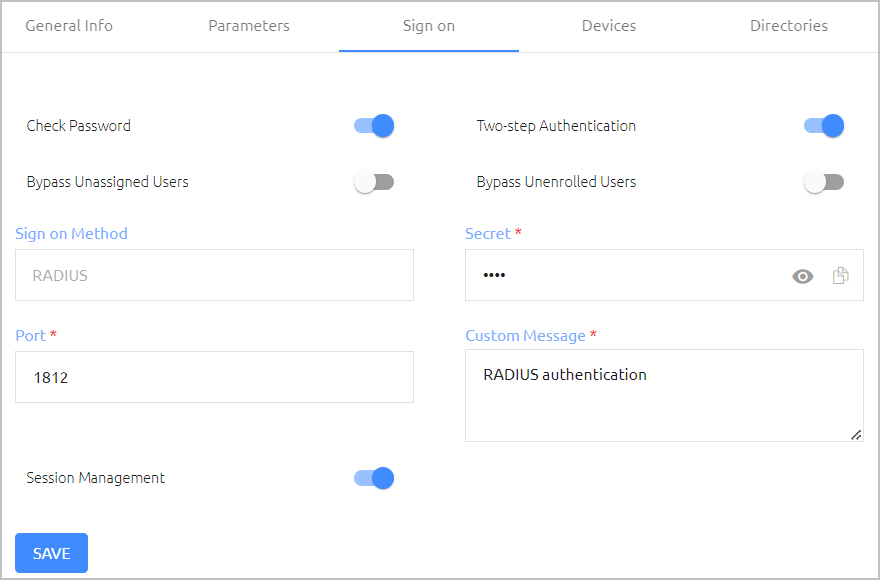
At the bottom of the Sign On tab, click Save.
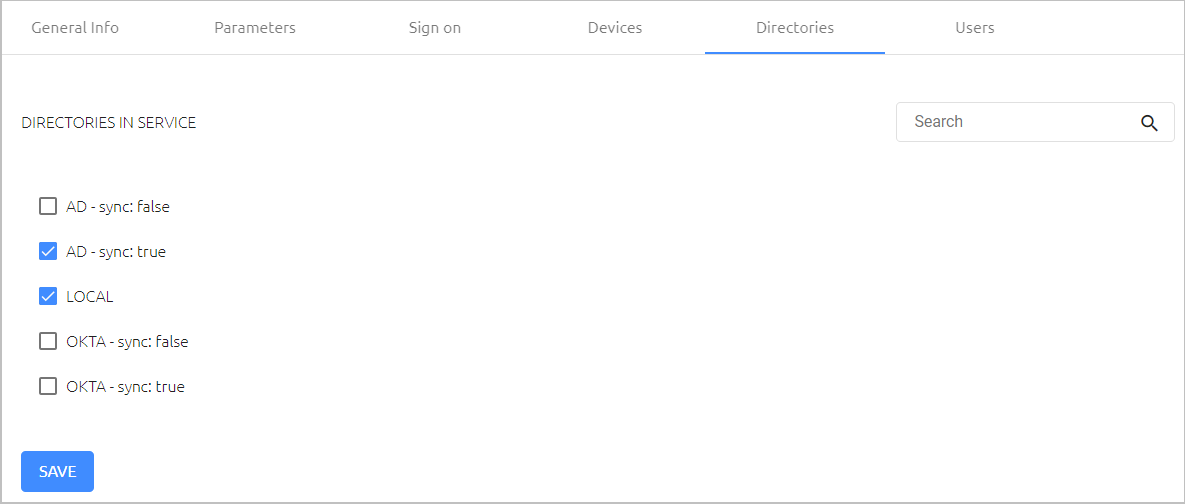
Open the Directories tab and select the checkboxes of the directories you want to integrate with the service. Then, click Save.
Open the Users tab and click Add.

A popup opens, with a list of directories displayed on the left.
Expand the relevant directory and select the checkboxes of the groups and users that you want to add to the service. Then, click Save to close the popup.
The groups and users you selected are listed in the Users tab.
At the bottom of the Users tab, click Save. Then, from the toolbar at the top of the page, click PUBLISH and publish your changes.
The procedure below explains how to configure VMware Horizon for integration with Secret Double Octopus.
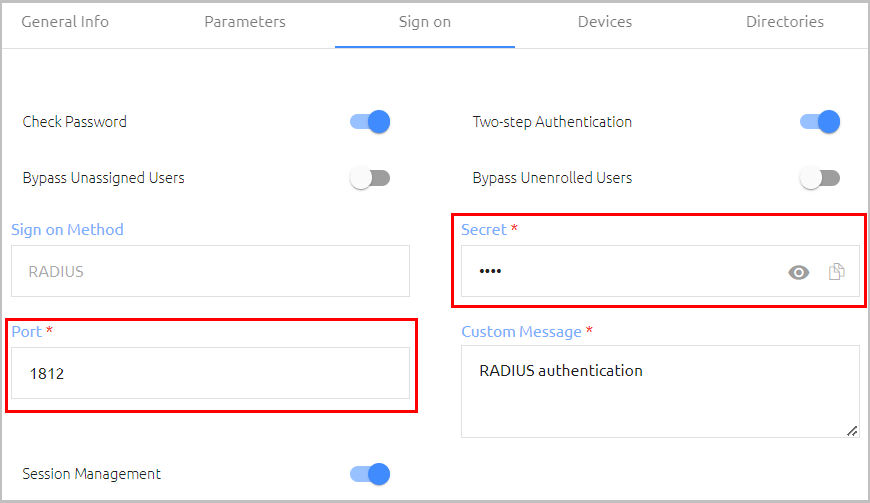
Before you begin, make sure that you have access to the following settings from the Sign on tab of the RADIUS service that you created in the Octopus Management Console:
Secret
Port
 |
To configure VMware Horizon integration settings:
From the VMware Horizon console, navigate to Settings > Servers. Then, at the top of the Servers page, select the Connection Servers tab.
Select the relevant server and click Edit.
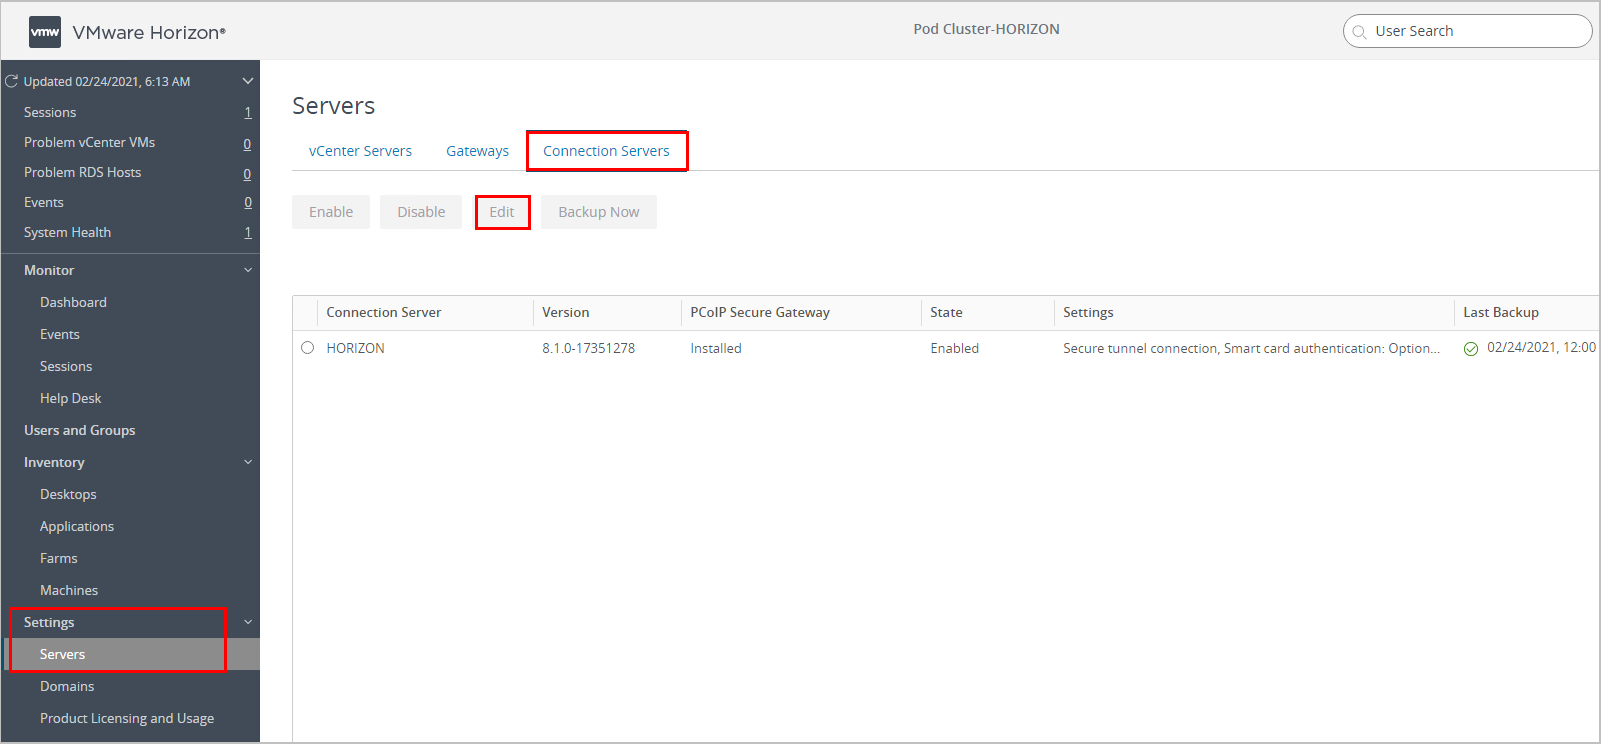
The Edit Connection Server Settings page opens.
Select the Authentication tab.
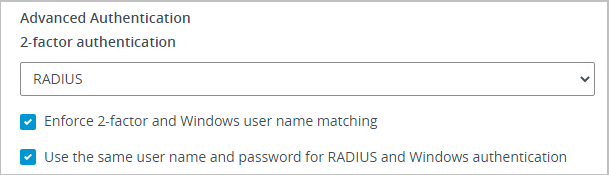
Scroll to the bottom of the tab. Under 2-factor authentication, select RADIUS from the list. Then, select both of the following checkboxes:
Enforce -factor and Windows user name matching
Use the same user name and password for RADIUS and Windows authentication
In the Authenticator section (under the checkboxes), click Manage Authenticators.
From the Manage Authenticators dialog, click Add.
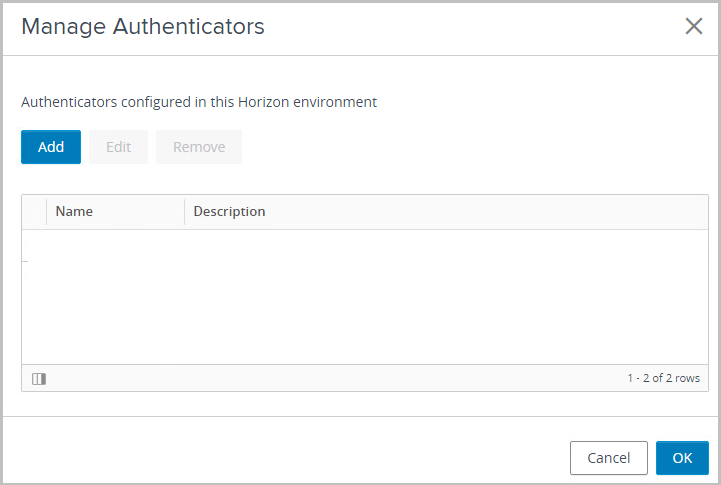
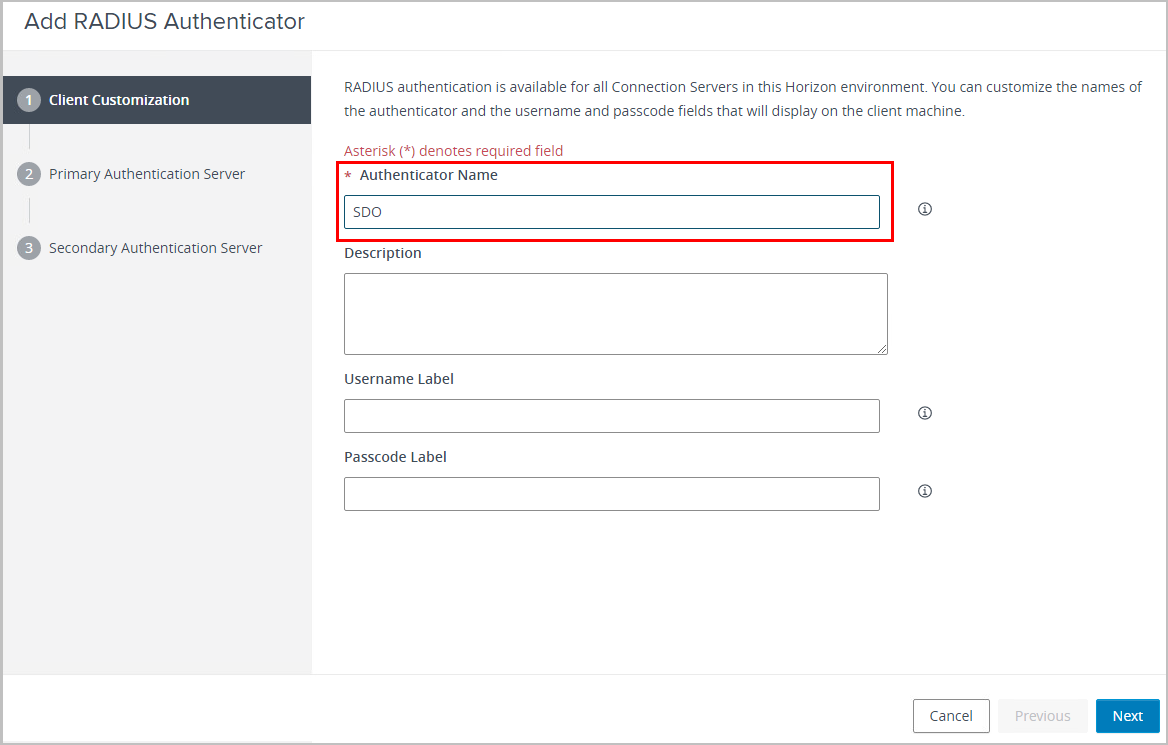
The Add RADIUS Authenticator window opens.
In the Authenticator Name field, enter a name for the service. Then, click Next.
On the page that opens, configure the following settings:
Setting
Value / Notes
Hostname/Address
Hostname/address of the RADIUS server
Authentication Port
The port number configured in the Octopus RADIUS service
Authentication Type
Select PAP
Shared Secret
The secret configured in the Octopus RADIUS service
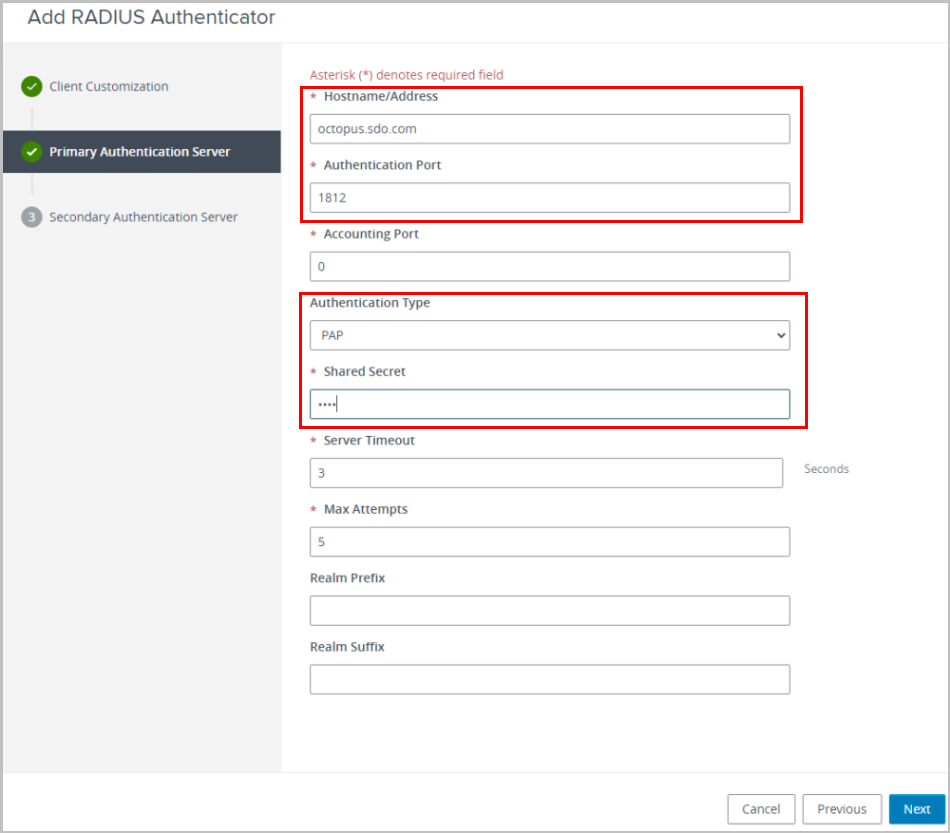
Click Next, and then click Finish.
This section describes the user experience of logging into VMware Horizon via the Octopus Authenticator. The authentication process is as follows:
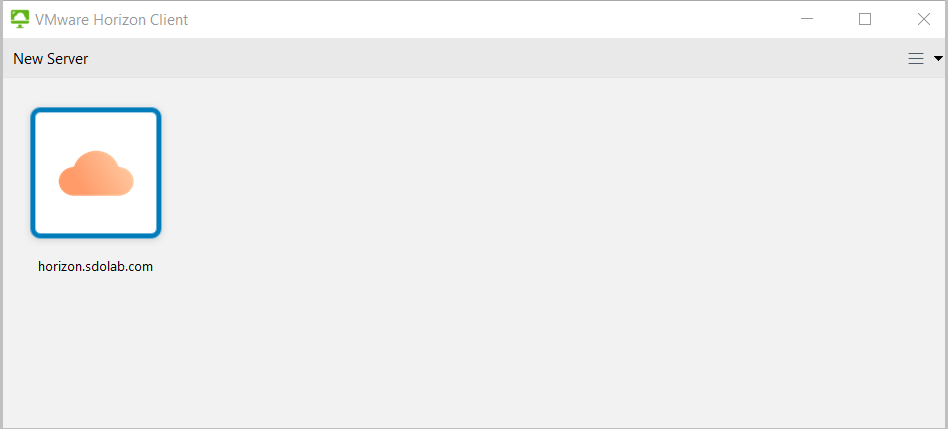
The user opens the Horizon Client and selects the server.
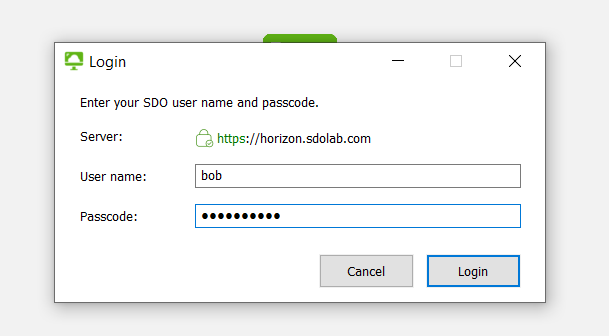
The user enters a username and AD password, and then clicks Login.
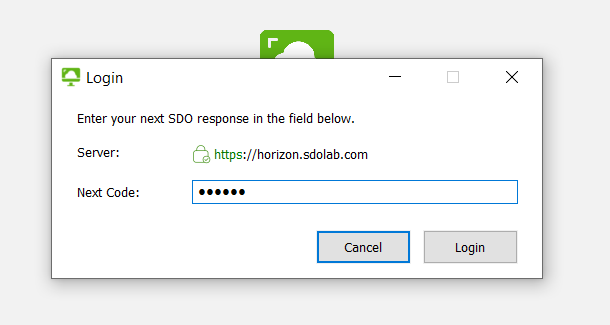
Another window then opens, in which the user is prompted to enter a code.
The user enters the OTP displayed in the authentication app and clicks Login.
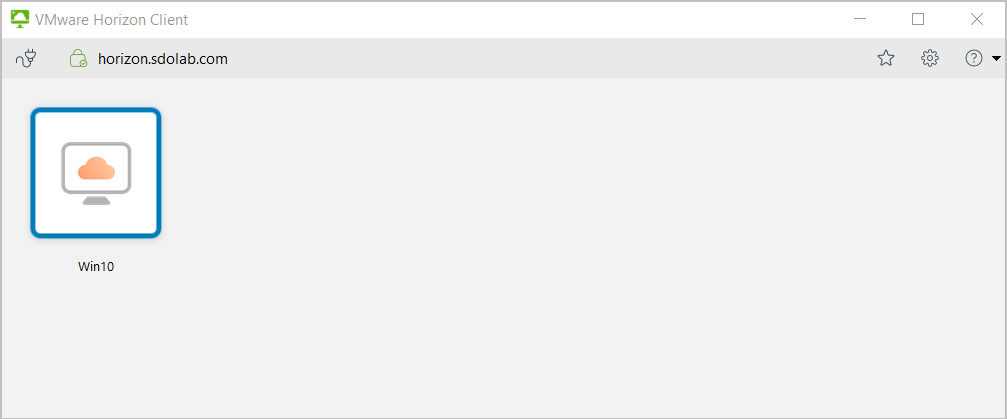
Following successful authentication, the user is logged into VMware Horizon.
This appendix describes how to redirect a FIDO key to the VDI for VDI FIDO authentication using Secret Double Octopus. The process involves three steps, as explained in the sections below.
Step 1: Configure the VDA Agent to Support USB Redirection
To support USB Redirection, make sure you install the USB Redirection feature when installing or modifying the Agent.
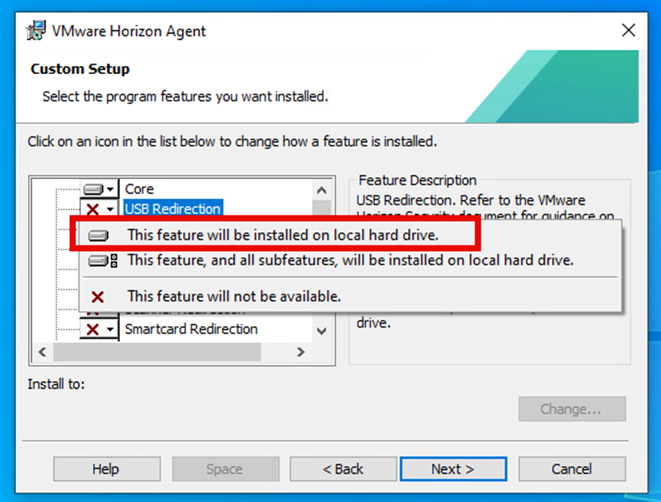 |
Step 2: Enable FIDO2 USB Redirection in your Group Policy
This step is generally optional. If your environment requires this redirection, refer to the documentation on Configuring FIDO2 Redirection.
Step 3: Install the SDO Agent on your VDA Machine
To support FIDO2 authentication to the VDI, install the Octopus agent as a credential provider on the VDA machine. For details, please refer to the Octopus Desk for Windows Installation Guide.