Installation of the Octopus RADIUS Agent provides support for authentication using the RADIUS protocol. The RADIUS Agent changes the local RADIUS call to a secured REST API call, allowing local RADIUS clients to connect to the Octopus Authentication Server.
The Octopus RADIUS Agent can be configured to work with either the Octopus Authenticator, the ForgeRock Authenticator or Okta Verify (through SDO 3rd party authenticator). The ForgeRock integration supports the push notification, OTP or simple (username / password) methods of authentication. The Okta Verify integration supports push notification.
This document describes how to install the Octopus RADIUS Agent on a Windows machine.
The Octopus RADIUS Agent can be installed on the following operating systems:
Windows 10
Windows 11
Windows Server 2016
Windows Server 2019
Windows Server 2022
Important: Windows 8.1 and Windows Server 2012 are not supported.
Before beginning the installation, verify that you have Admin privileges on the target Windows machine. In addition, make sure that you have:
obtained the installation file (OctopusRadiusAgent.exe) from Secret Double Octopus
created the ADPA service in the Octopus Management Console (Creating the Active Directory Authentication Service)
If you plan to use the ForgeRock Authenticator or Okta Verify, make sure that you have properly set up the relevant third-party authenticator in the Octopus Management Console (Configuring Third-party Authenticators).
The following sections describe how to set up the Management Console to support use of the Octopus RADIUS Agent:
The following procedure explains how to create an ADPA service in the Octopus Management Console. Some of the service settings will be required later, during installation of the Octopus RADIUS Agent.
To add and configure the ADPA service:
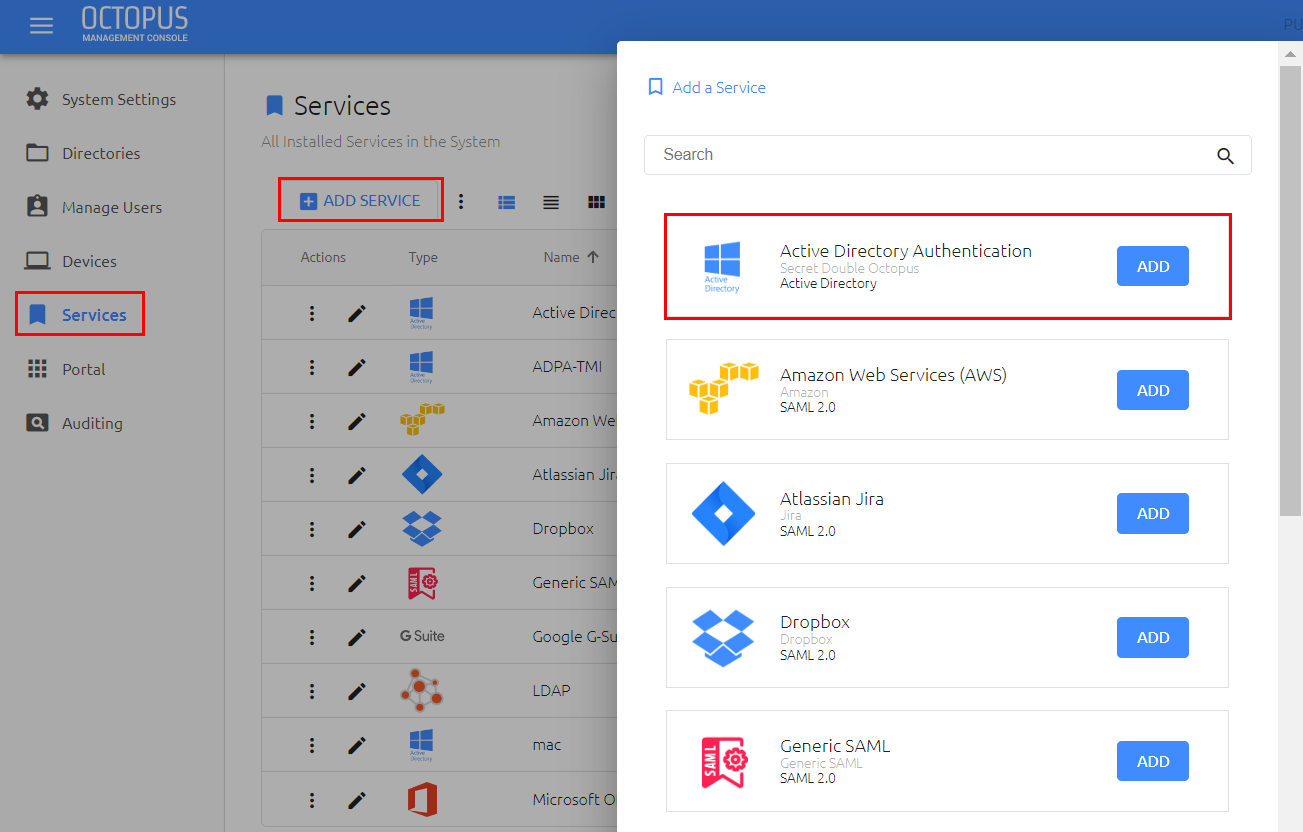
From the Octopus Management Console, open the Services menu and click Add Service. In the ADPA tile, click Add.
Then, in the dialog that opens, click Create.
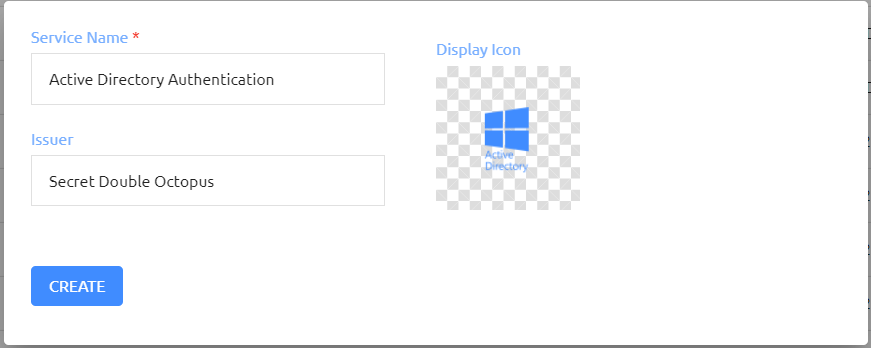
Review and configure the following settings in the General Info tab:
Setting
Value / Notes
Service Name
ADPA
Issuer
Secret Double Octopus
Description
Notes about the service
Display icon
The icon that appears on the Login page for the service. To change the default icon, click and upload the image of your choice (supported size 128x128 pixels).
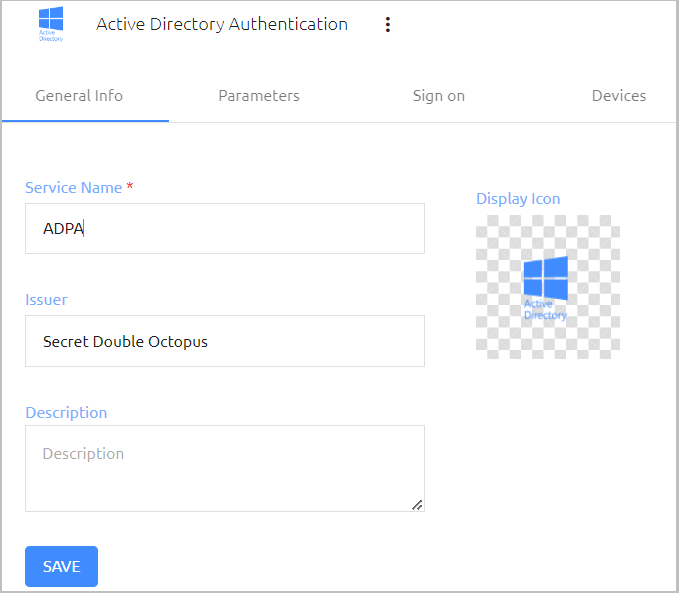
Then, click Save.
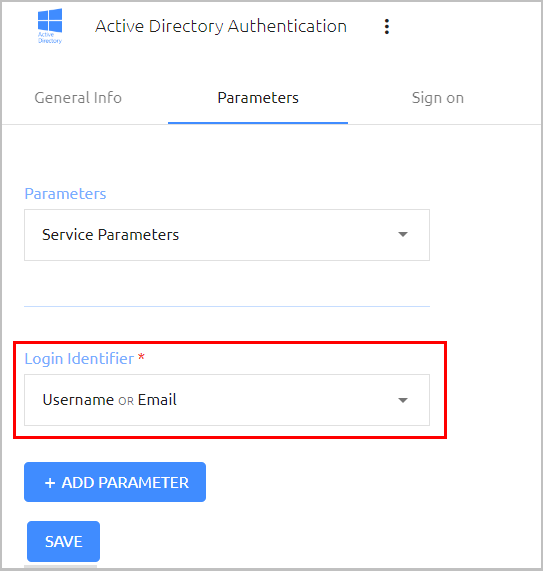
Open the Parameters tab. Under Login Identifier, select the identifier(s) required to log into the service. (It is recommended to select Email and Username.) Then, click Save.
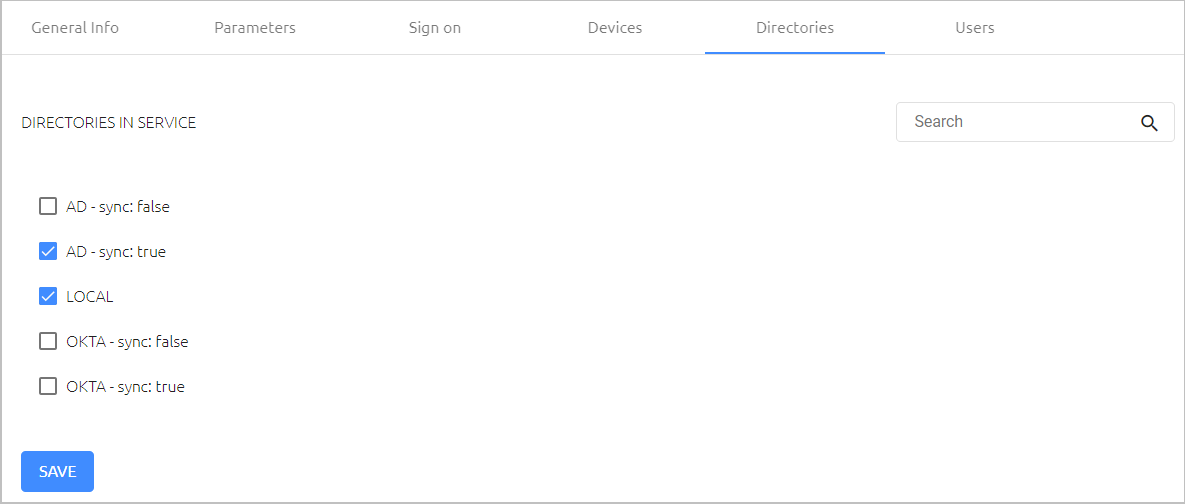
Open the Directories tab and select the checkbox(es) of the directory / directories to be integrated with the service. Then, click Save.
Open the Users tab. In the upper left corner of the tab, click Add.
A popup opens, with a list of directories displayed on the left.
Expand the directories list and select the checkboxes of the groups and users that you want to add to the service. Then, click Save to close the popup.
The groups and users you selected are listed in the Users tab.
At the bottom of the Users tab, click Save. Then, from the toolbar at the top of the page, click PUBLISH and publish your changes.
If you use Okta Verify or ForgeRock Authenticator, a third-party authenticator needs to be added to the Management Console and selected as an additional authenticator in the settings of the integrated directory. For complete details about adding third-party authenticators, please refer to the Octopus Management Console Admin Guide.
To configure a third-party authenticator:
From the System Settings menu of the Management Console, select the Authenticators tab. Verify that the relevant third-party authenticator has been added, and that it is enabled and connected.
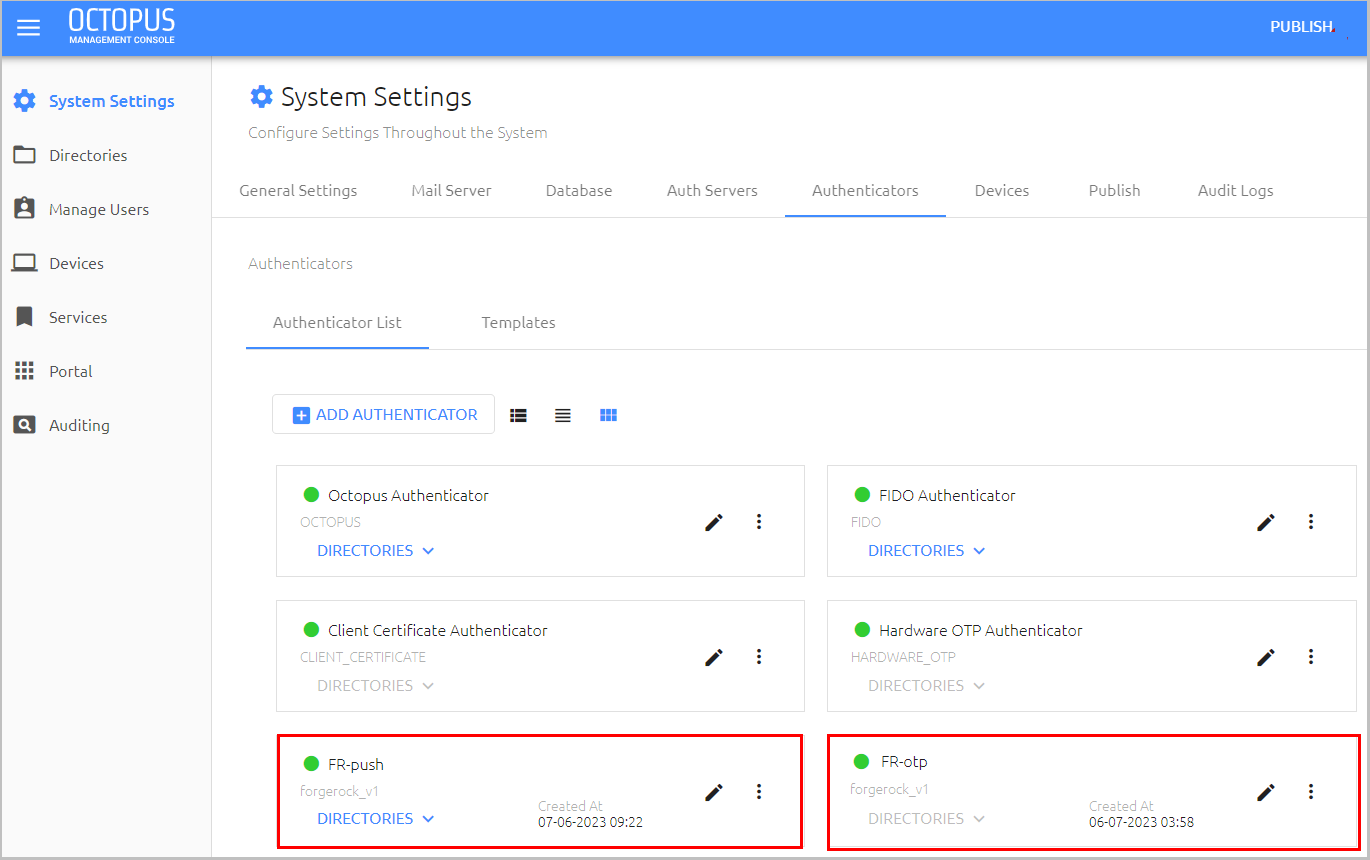
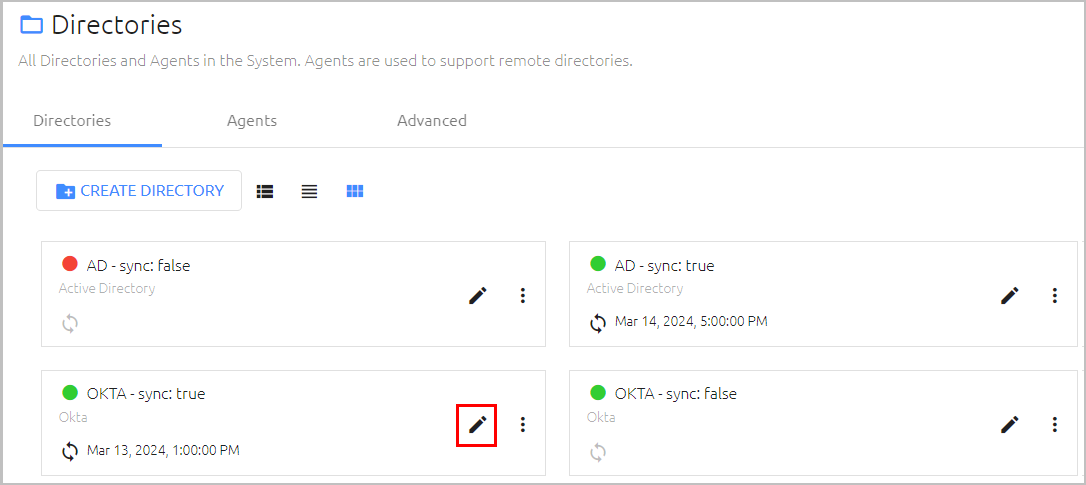
From the Directories menu, in the row or card of the relevant directory, click the Edit icon to open the directory settings.
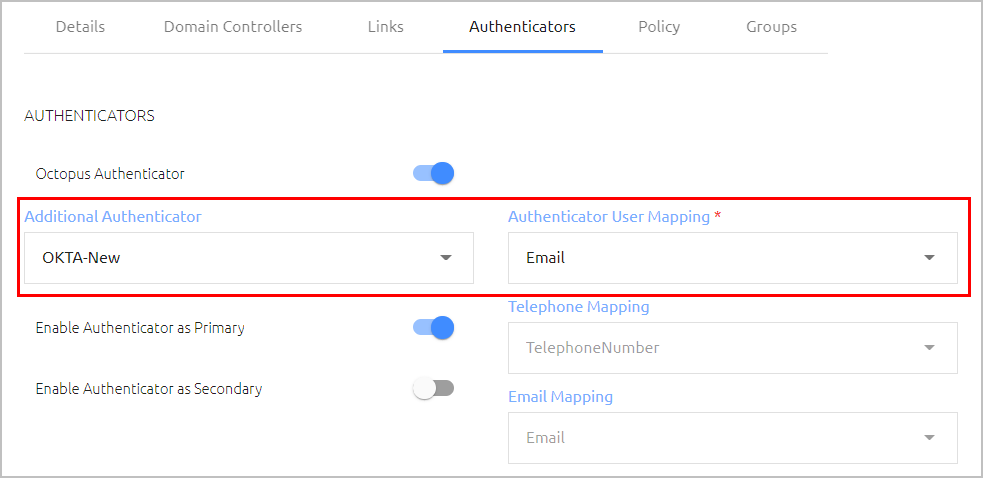
Select the Authenticators tab. From the Additional Authenticator list, select the relevant authenticator. Then, select the appropriate Authenticator User Mapping (usually Email).
At the bottom of the Authenticators tab, click Save. Then, from the toolbar at the top of the page, click PUBLISH and publish your changes.
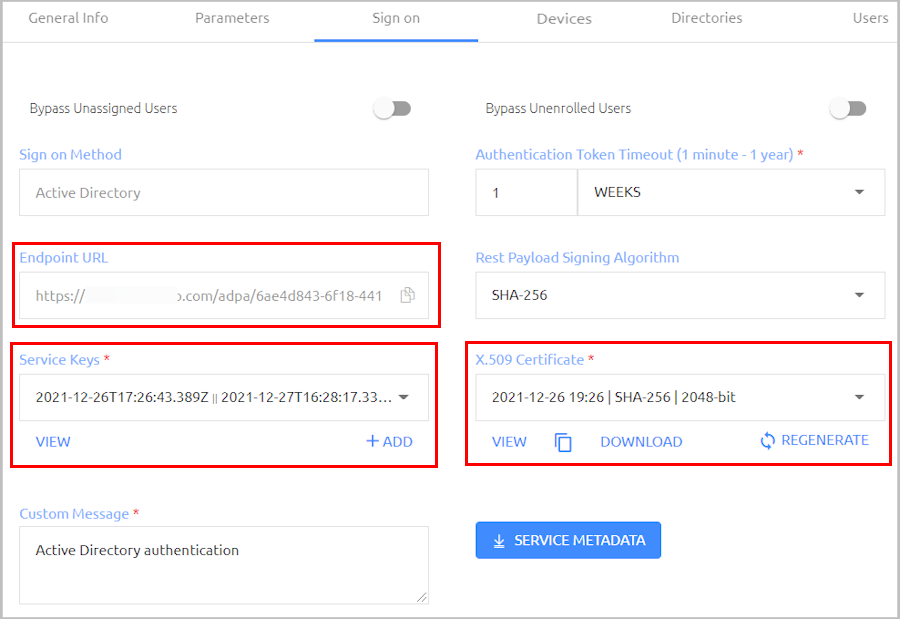
Follow the steps below to install the RADIUS Agent. Before you begin, make sure you have access to the following components from the Sign on tab of the ADPA service that you created in the Octopus Management Console:
Endpoint URL: Click the Copy icon to copy the URL.
Service Key: Click View. Then, from the popup that opens, click the Copy icon to copy the key.
X.509 Certificate: Click the Copy icon to copy certificate contents.
To install the Octopus RADIUS Agent:
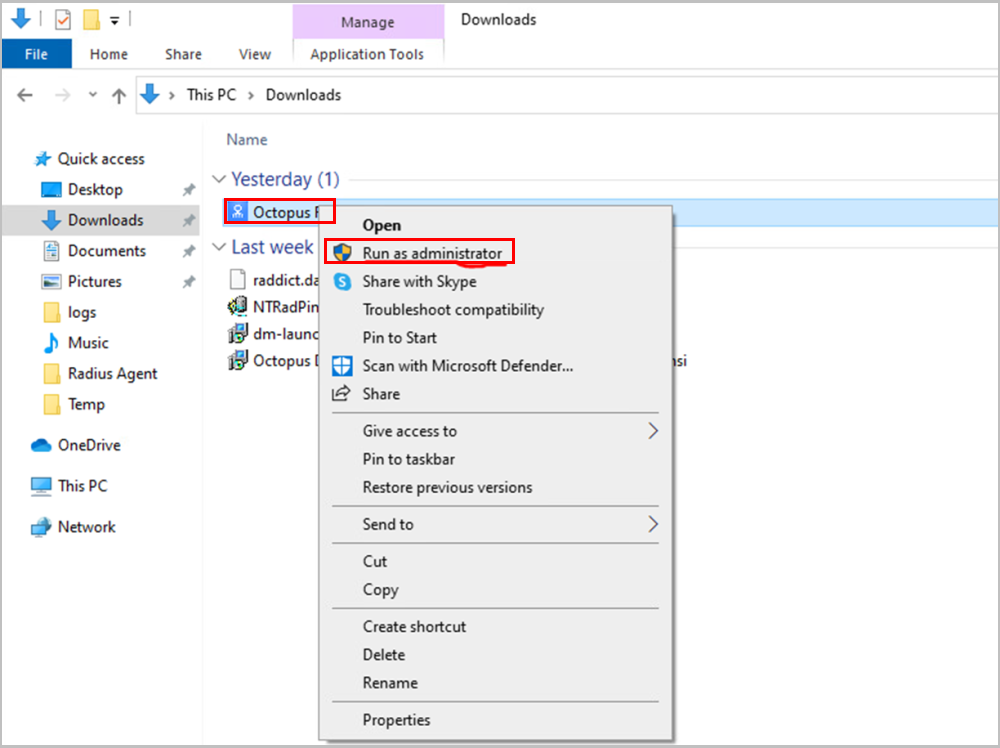
Right-click on the OctopusRadiusAgent.exe file and select Run as administrator.
The installation wizard opens.
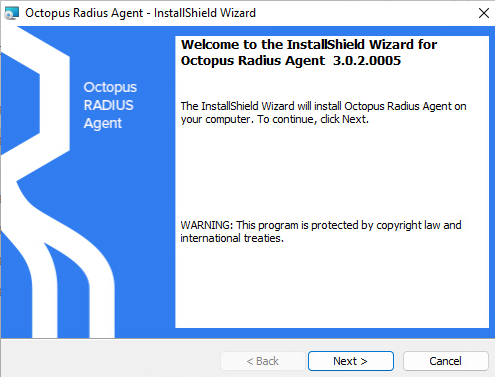
On the Welcome screen, click Next.
On the License Agreement screen, accept the terms and then click Next.
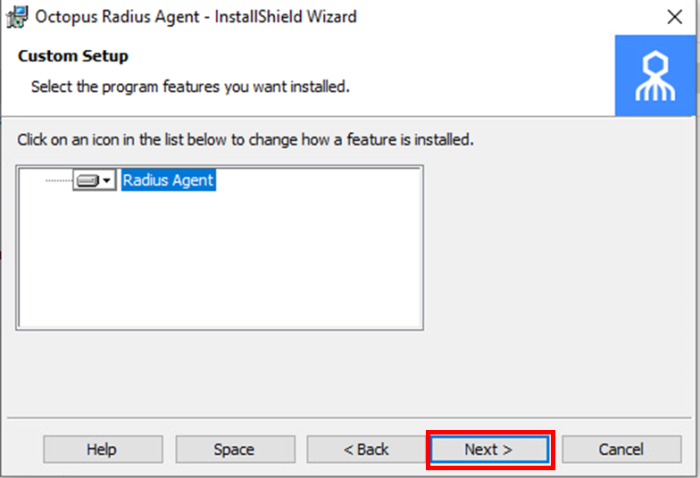
On the Custom Setup screen, click Next.
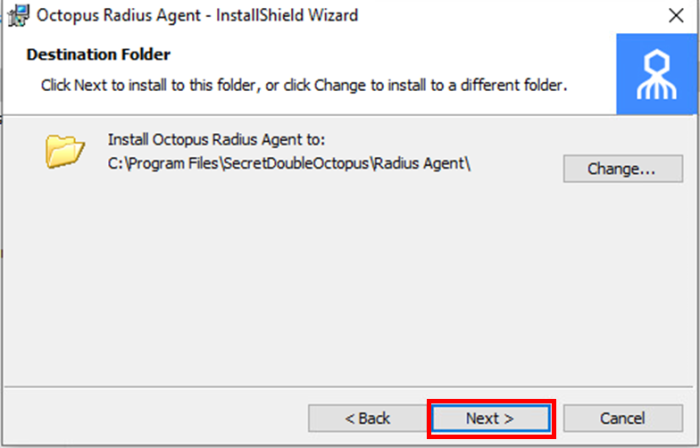
On the Destination Folder screen, click Next.
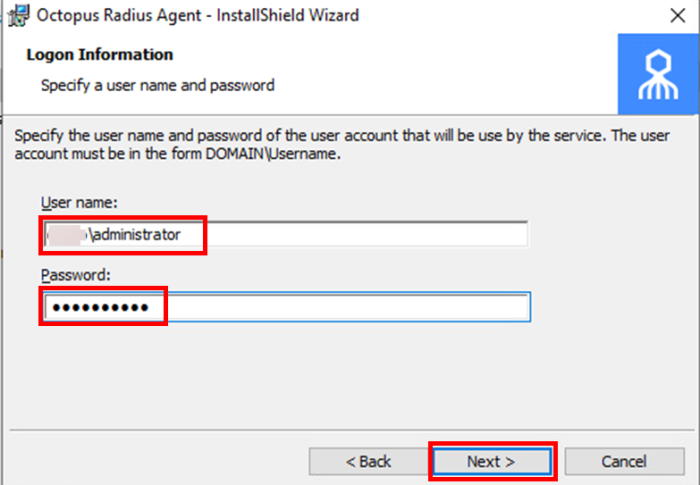
On the Logon Information screen, enter the user credentials for the account using the SDO RADIUS service. Make sure the syntax for the username is Domain\Username.
On the Agent Parameters page, select either the SDO checkbox OR the ForgeRock checkbox, according to the authenticator that you want to configure. (Only ONE of these checkboxes can be selected.) For Okta integration, select SDO.
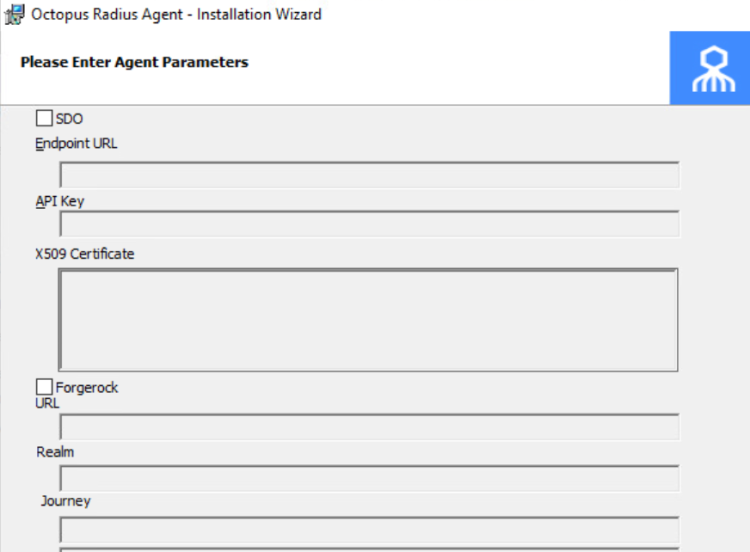
After making your selection, continue as follows:
If you selected SDO, continue with Step 8.
If you selected ForgeRock, go to Step 9.
For Octopus Authenticator / Okta Verify: Configure the required settings by copying them from the Sign on tab of the Octopus ADPA service settings.
Setting
Setting in Sign on Tab
Endpoint URL
Endpoint URL
API Key
Service Key
X.509 Certificate
X.509 Certificate
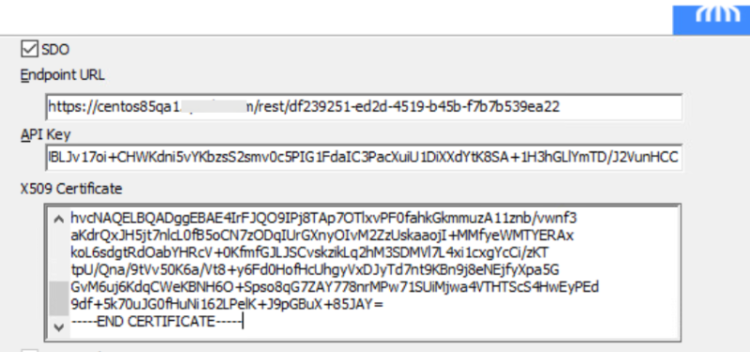
After copying these settings, go to Step 10.
For ForgeRock: Configure the required settings by entering the relevant URL and Realm for your ForgeRock environment. In the Journey field, enter the journey / tree value for ONE of the following authentication methods:
Push (e.g., pushpass)
OTP (e.g., otppass)
Simple (e.g., simple)
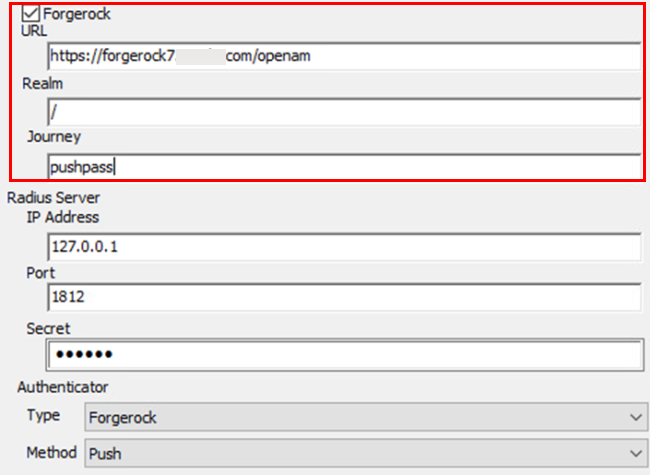
Review the default values in the Radius Server section and if necessary, change them to match the configuration for your RADIUS server.
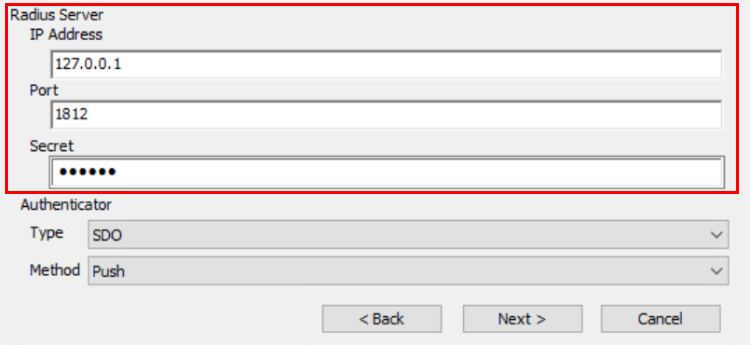
Review the settings in the Authenticator section and verify that they match the authenticator type and method that you configured. If necessary, you can correct the Authenticator configuration by selecting the correct settings from the dropdown lists.
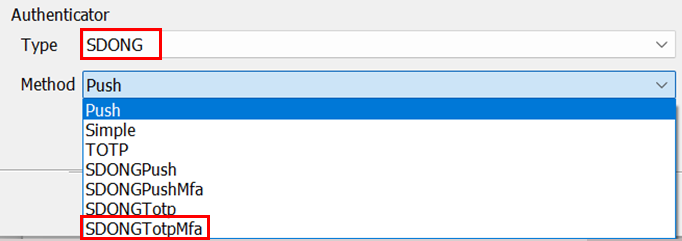
For OTP authentication, select SDONG for the Type and SDONGTotpMfa for the Method.
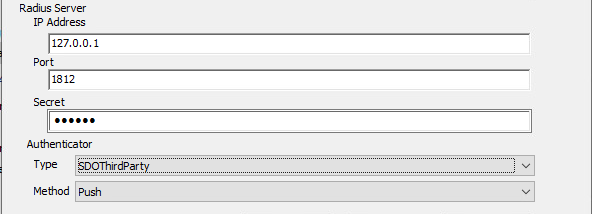
For Okta Verify, select SDOThirdParty for the Type and Push for the Method.
Click Next.
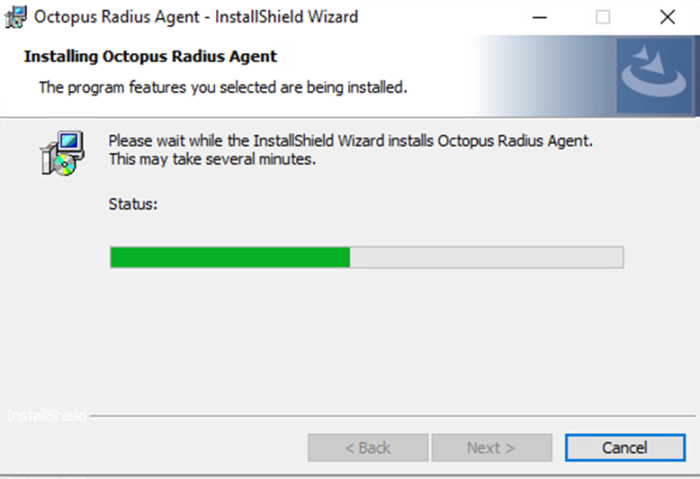
To begin the installation, click Install.
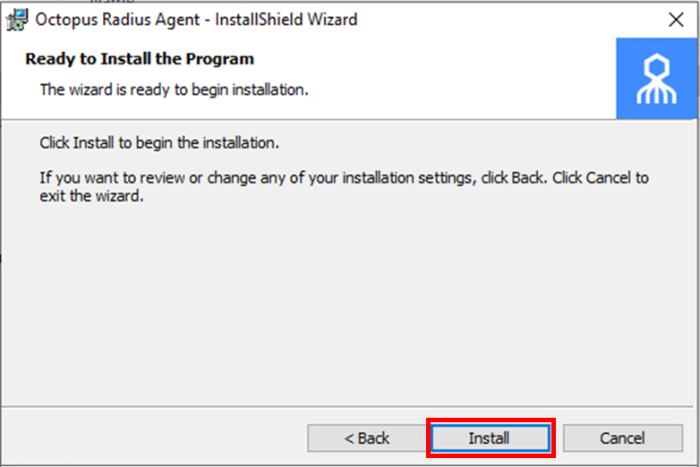
A status bar is displayed during the installation process.
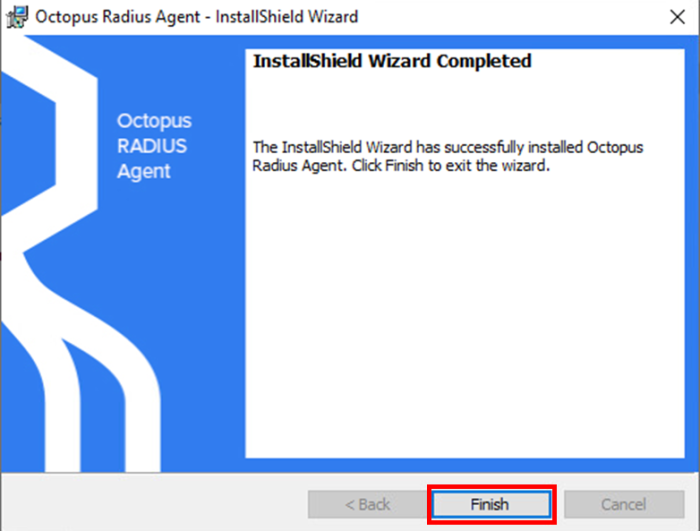
To exit the installation wizard, click Finish.
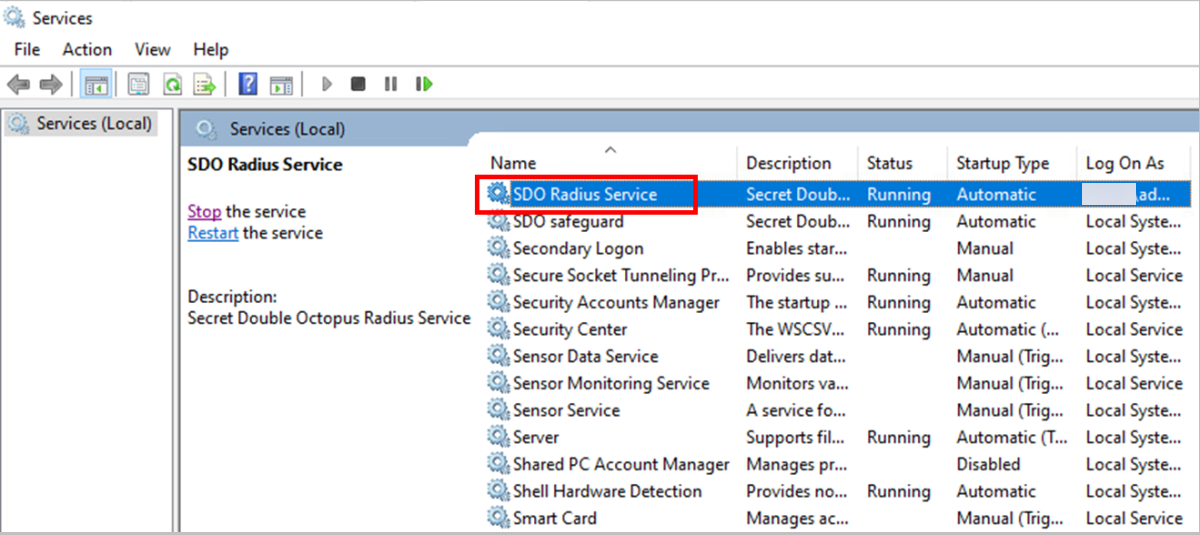
Following installation, it is recommended to carry out the following checks to verify that your environment has been set up as expected:
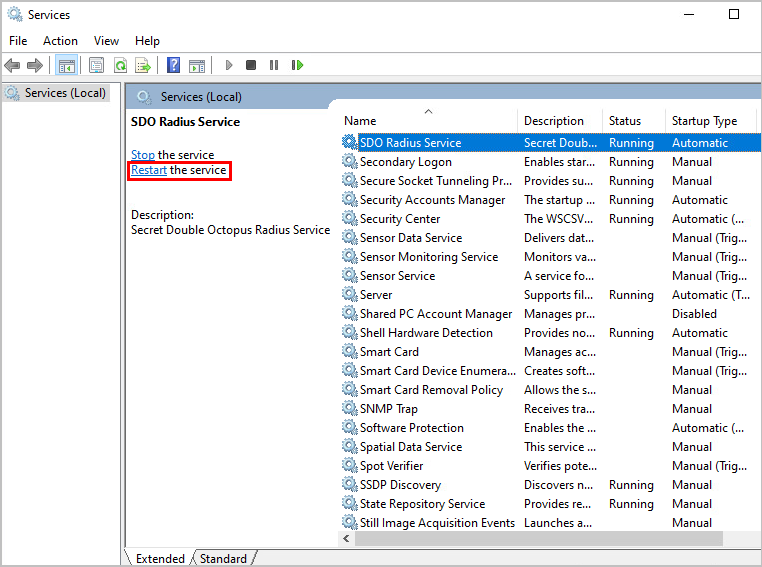
Make sure that the SDO Radius Service is installed and running.
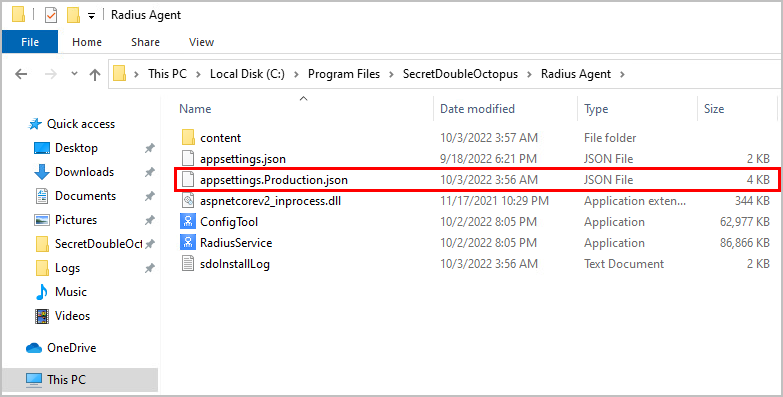
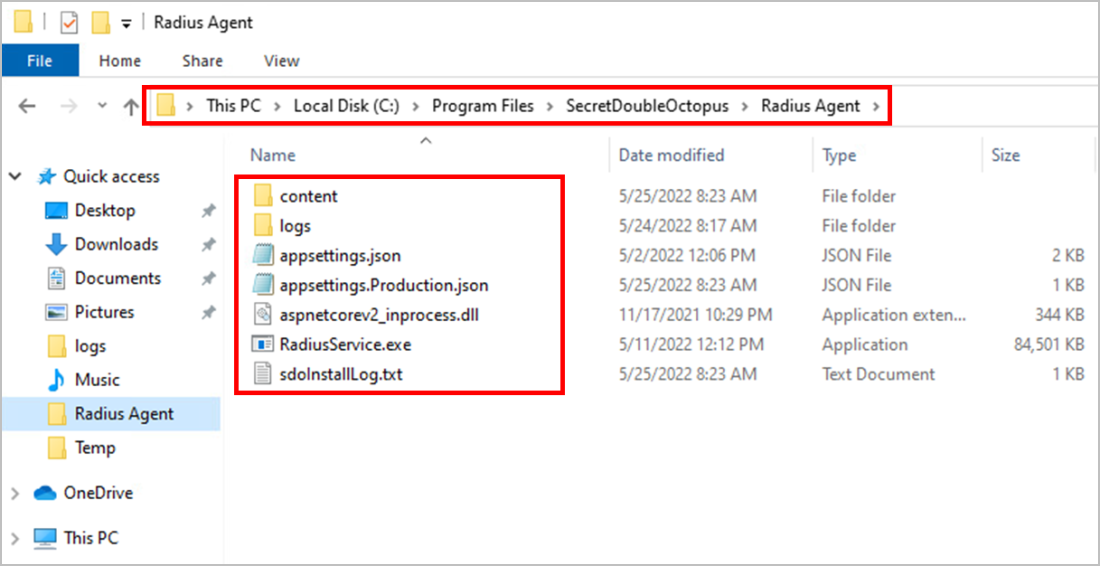
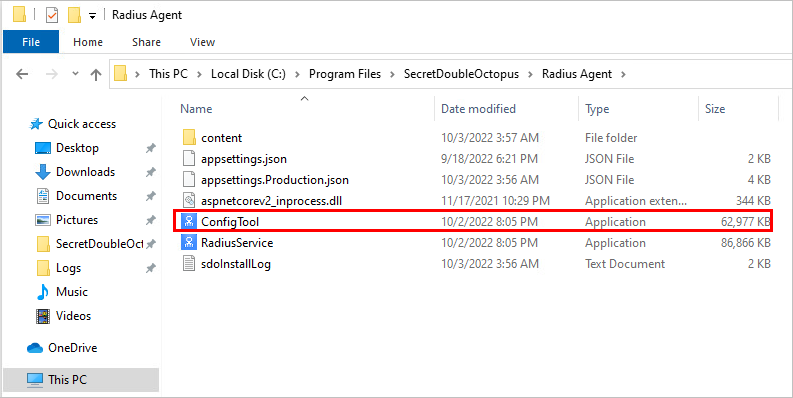
Verify that all the folders and files shown in the figure below are installed under C > Program Files > SecretDoubleOctopus > Radius Agent
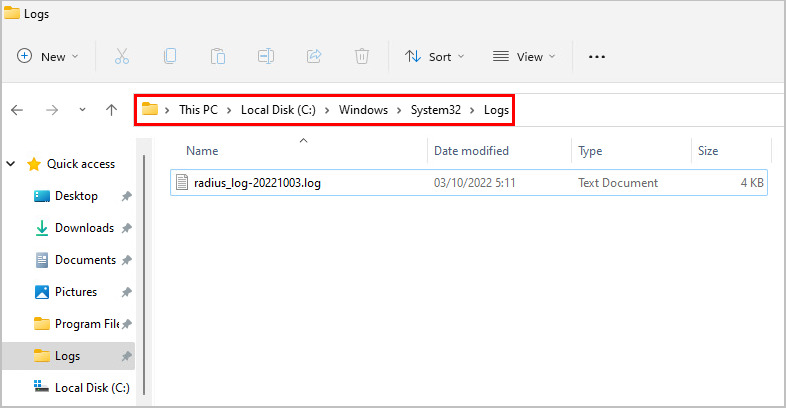
Verify that the log files have been installed in the following location:
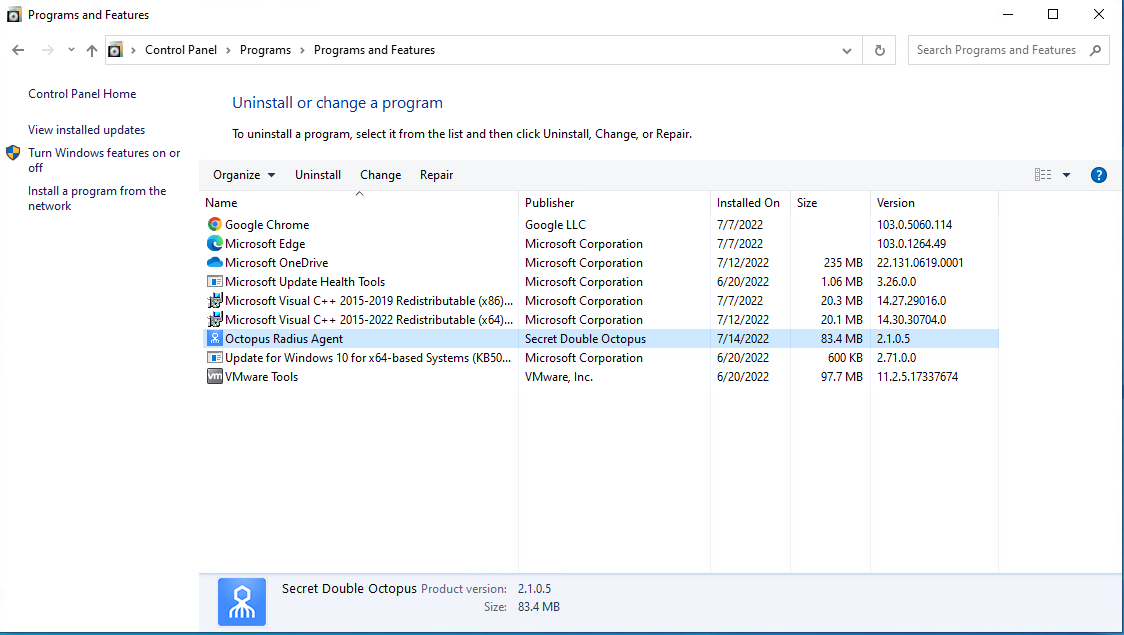
The RADIUS Agent may be uninstalled at any time via the Control Panel of your Windows machine.
From the Control Panel, navigate to Programs > Programs and Features. Then, select Octopus Radius Agent and click Uninstall.
 |
The following sections present optional post-installation procedures.
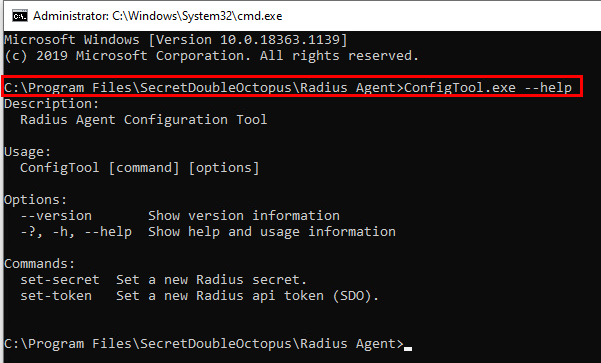
After installing the RADIUS Proxy, it is recommended to change the secret used during the installation process. You can change the secret using the ConfigTool that is provided as part of the installation files and folders.

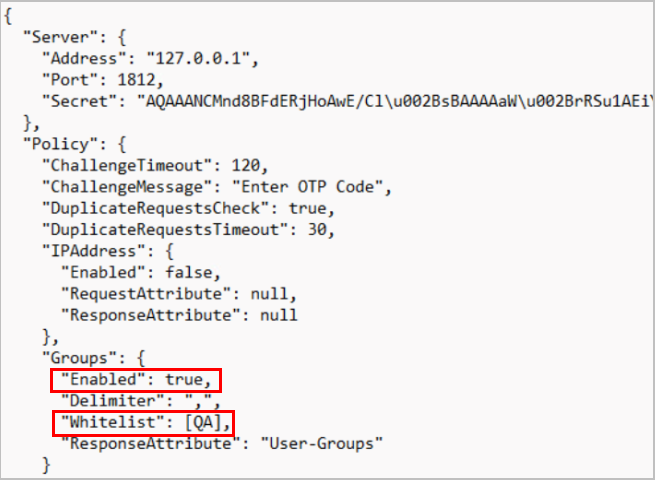
You can configure group memberships to be included in the RADIUS response by updating settings in the appsettings.Production JSON file.