Installing and Configuring the SDO RADIUS Proxy
Complete end-to-end guide for downloading, installing, configuring, and testing the Octopus RADIUS Agent.
Last Updated: November 2025 | Estimated Time: 30–45 minutes
⚠ Prerequisites
Before starting, ensure you have:
- ✓ Access to the Secret Double Octopus Management Console
- ✓ Admin permissions to manage services and agents
- ✓ A Windows server or workstation to host the RADIUS Agent
- ✓ Network connectivity between the RADIUS Agent, SDO cloud, and your RADIUS clients (VPN, Wi-Fi, etc.)
- ✓ A test user enrolled with Octopus Authenticator
Tip: In production, consider deploying at least two RADIUS Proxies for high availability and load distribution.
Section 1: Downloading the RADIUS Agent
In this section you will sign in to the SDO support portal and download the latest Octopus RADIUS Agent package.
1 Login to https://support.doubleoctopus.com/support/home

Click image to view full size
2 Click "Sign in with SSO"

Click image to view full size
3 Enter your Email and Click "LOGIN" with Octopus Authenticator"

Click image to view full size
4 Click "Octopus Software & Download"

Click image to view full size
5 Click "Radius Agent (1)"

Click image to view full size
6 Click "Octopus RADIUS Agent Version 3.0.2 Release Notes"

Click image to view full size
7 Click "Download Octopus RADIUS Agent "

Click image to view full size
8 Click download file

Click image to view full size
Section 2: Collecting Configuration from the SDO Tenant
Here you will collect the Endpoint URL, certificate, and service key from your SDO tenant. These values are required later when configuring the agent.
9 Select "Services" in the SDO tenant

Click image to view full size
10 Click "edit" under the Active Directory Service

Click image to view full size
11 Click "Sign on"

Click image to view full size
12 Open a Notepad

Click image to view full size
13 Copy the "Endpoint URL", "Service Keys", and the "x509 Certificate"

Click image to view full size
14

Click image to view full size
15 Click "VIEW"

Click image to view full size
16 Copy the Service Keys content
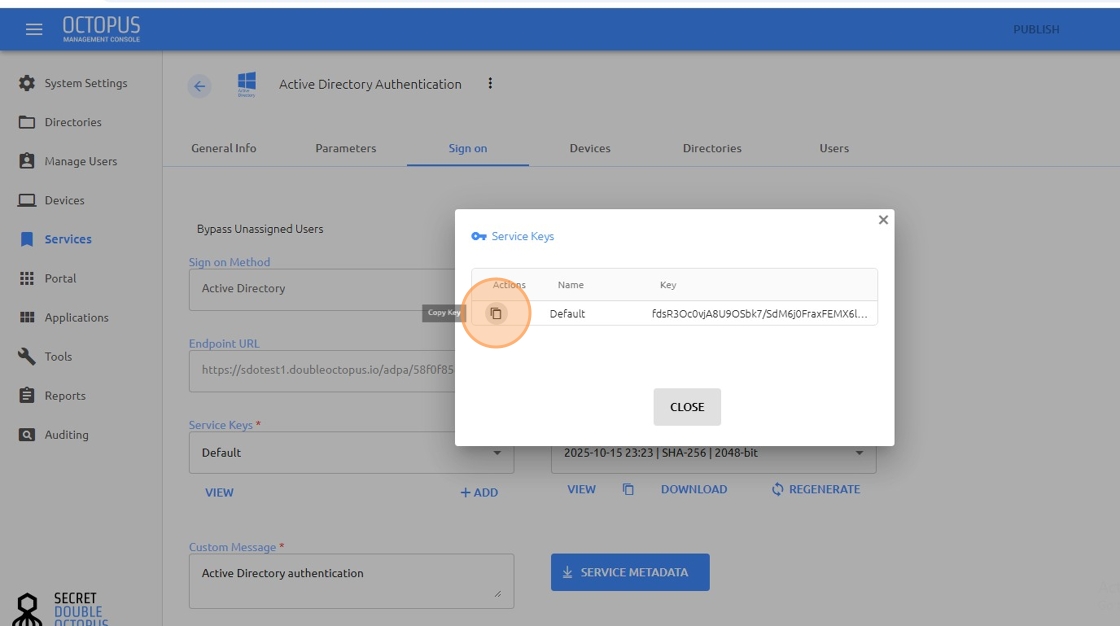
Click image to view full size
17 Paste the content to your Notepad

Click image to view full size
18 Click "VIEW" under "x509 Certificate"

Click image to view full size
19 Click "COPY"

Click image to view full size
20 Paste the content to your Notepad

Click image to view full size
Section 3: Installing the RADIUS Agent
Next, you will extract the downloaded package and run the installer on the Windows host that will run the RADIUS Proxy.
21 Right click the Radius agent you downloaded earlier

Click image to view full size
22 Click "Extract All..."

Click image to view full size
23 Click "Extract"

Click image to view full size
24 Double-click extracted file

Click image to view full size
25 Click "Next >"

Click image to view full size
26 Click "I accept the terms in the license agreement"

Click image to view full size
27 Click "Next "

Click image to view full size
28 Click "Next >"

Click image to view full size
29 Click "Next"

Click image to view full size
30 Enter the service account Username and Password

Click image to view full size
31 Click "Next"

Click image to view full size
Section 4: Configuring the RADIUS Agent
In this section you will open the RADIUS Agent configuration tool and paste in the values collected from the SDO tenant.
32 Click "SDO" and paste the "Endpoint URL", "Service Key" and "Certificate" from your Notepad

Click image to view full size
33 Select "SDONG" under "TYPE"

Click image to view full size
34 Select "SDONGPush" under "Method"

Click image to view full size
35 Enter your Radius server IP under "IP Address"

Click image to view full size
36 Enter your Radius port.

Click image to view full size
37 Enter a radius secret under "Secret"

Click image to view full size
38 Click "Next"

Click image to view full size
39 Click "Install"

Click image to view full size
Section 5: Testing and Verifying RADIUS
Finally, you will run a test RADIUS authentication and verify that requests are flowing correctly through the SDO RADIUS Proxy.
40 Download and run NTRadPing (Radius testing tool)
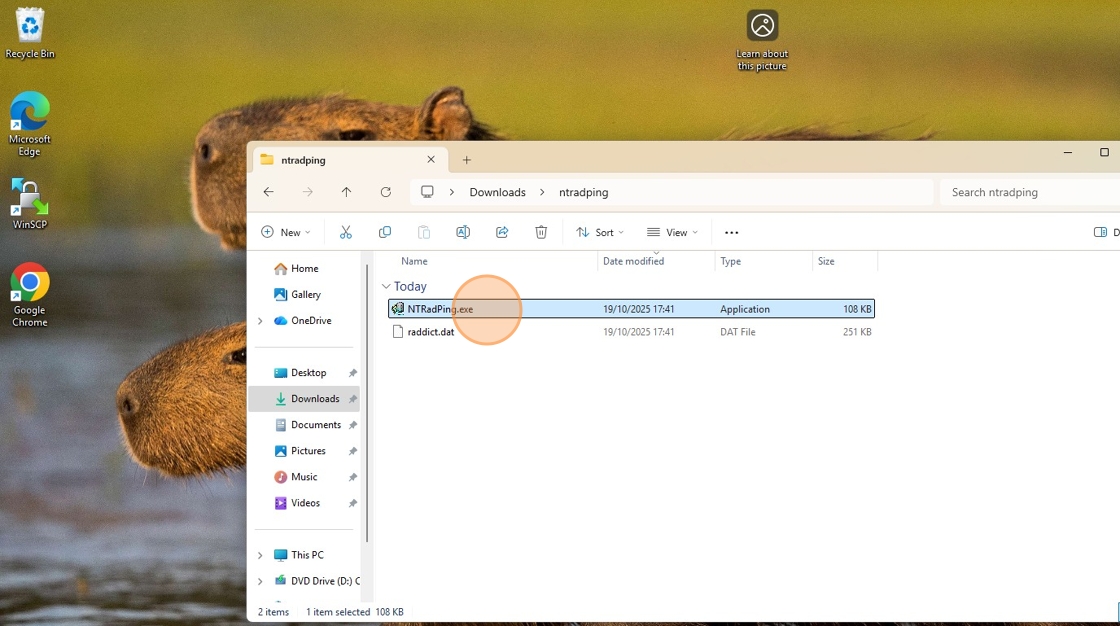
Click image to view full size
41 Enter the Radius server, port, RADIUS Secret key (created during the Radius agent install) and username. Click "Send"
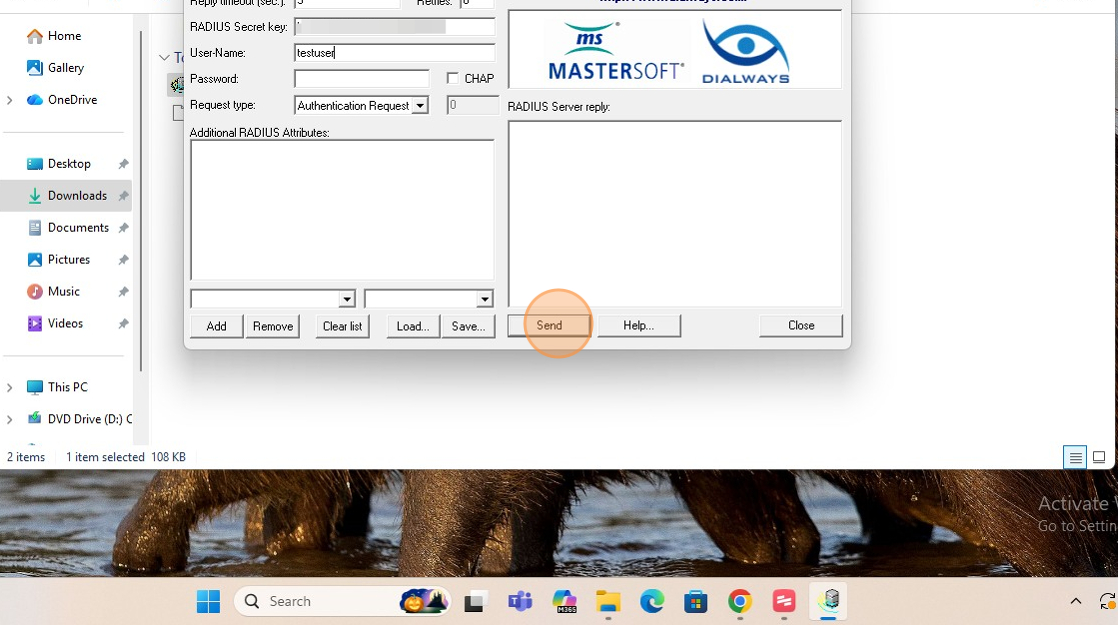
Click image to view full size
42 A message "response: Access-Accept" will be shown if the configurations were correct.

Click image to view full size
43 Open the SDO tenant and select "Auditing"

Click image to view full size
44 Verify that the Authentication was successful

Click image to view full size
45 Click on the exclamation mark next next to the successful login to see more details.

Click image to view full size
✓ RADIUS Proxy Configuration Complete!
Your RADIUS infrastructure is now integrated with Secret Double Octopus.
RADIUS authentications are now protected and centrally controlled by your SDO policies.
⚙ Troubleshooting Tips
- No response from RADIUS Proxy: Verify the RADIUS Agent service is running and that UDP ports 1812/1813 are open between client and proxy.
- Authentication fails immediately: Check that the shared secret matches on the RADIUS client and in the SDO configuration.
- Requests not visible in SDO logs: Confirm the agent is registered correctly and can reach SDO cloud endpoints.
- Policy-related denials: Review RADIUS policies in SDO and confirm that the user, group, and client are in scope.
☎ Need Help?
If you encounter any issues during the RADIUS Proxy deployment:
- Contact Secret Double Octopus Support via the support portal
- Attach relevant RADIUS logs, timestamps, and client IP information
- Include screenshots of the SDO RADIUS configuration and client settings
This guide describes the complete flow for configuring the Secret Double Octopus RADIUS Proxy.
© 2025 - RADIUS Proxy Configuration Guide | Secret Double Octopus