Create a New Client Tenant
Tenant Manager - Create New Tenant
Complete guide for creating and managing new tenants in the Tenant Manager system
Download PDF☰ Purpose
This guide provides a comprehensive overview of how to create and configure a new client tenant using the Secret Double Octopus (SDO) Tenant Manager. It outlines the essential steps required to establish a tenant, configure Single Sign-On (SSO), and verify successful access to the new environment.
✎ Who Should Use This Guide
- ► MSP administrators responsible for onboarding new clients
- ► IT professionals configuring and managing tenant environments
- ► Support personnel provisioning customer accounts
⚠ Before You Begin
Ensure you have the following prerequisites before creating a tenant:
- ✓ Administrative access to the Tenant Manager platform
- ✓ Permission to create new tenants
- ✓ Client organization details (name and preferred subdomain)
- ✓ Administrator contact information for the new tenant
☑ Summary of Steps
- 1 Log in to the Tenant Manager and click Create Tenant
- 2 Enter the client's organization name and assign a unique subdomain
- 3 Add the primary administrator by providing their name and email address
- 4 Open the new tenant's configuration panel and enter Edit mode
- 5 Enable SSO Login and click Save to apply configuration changes
- 6 Use MC SSO Sign In to verify that the tenant is accessible and properly configured
ℹ Key Notes
Document Overview
This guide will walk you through the complete process of creating a new tenant in the Secret Double Octopus platform:
- Creating a new tenant with unique organizational identifiers
- Setting up the initial administrator account
- Configuring SSO login capabilities
- Accessing the newly created tenant environment
⚠ Important Notes
- Each subdomain must be unique across the entire platform
- Administrator email addresses should be valid and monitored
- SSO enablement is recommended for enhanced security
1 Initiate Tenant Creation
Click the "CREATE TENANT" button to begin the tenant creation process.
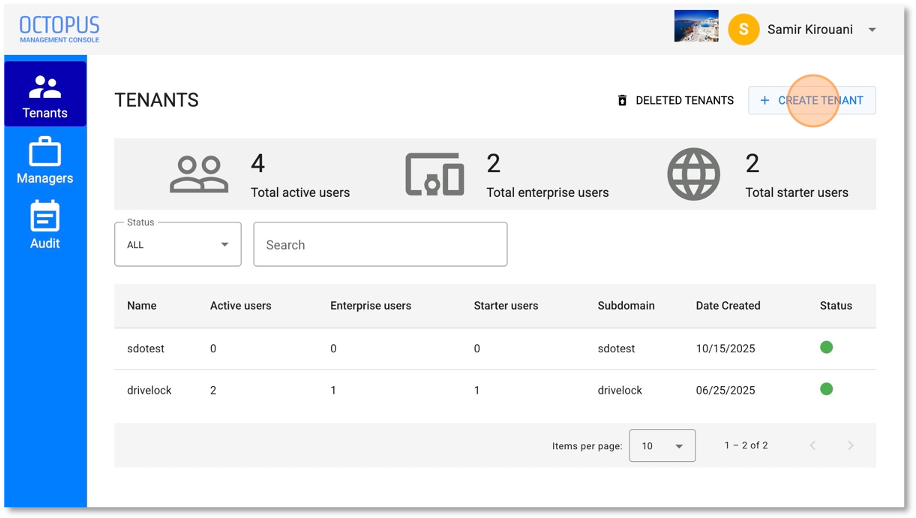
2 Access Organization Settings
Navigate to the organization settings within the tenant creation interface.
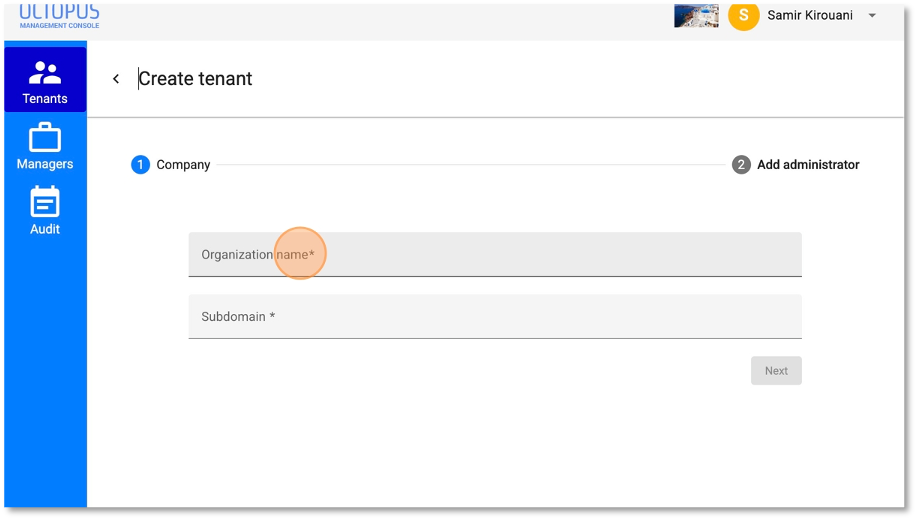
3 Configure Organization Details
Enter the required organizational information including subdomain and organization name.
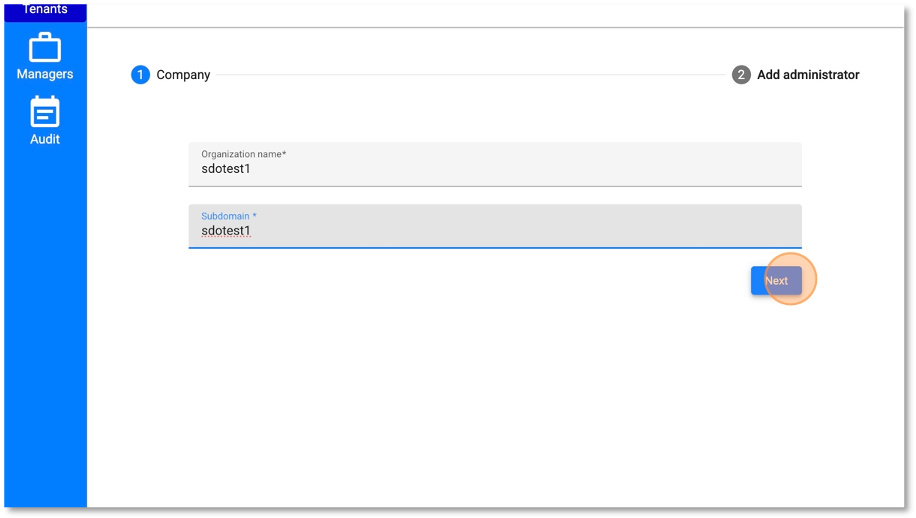
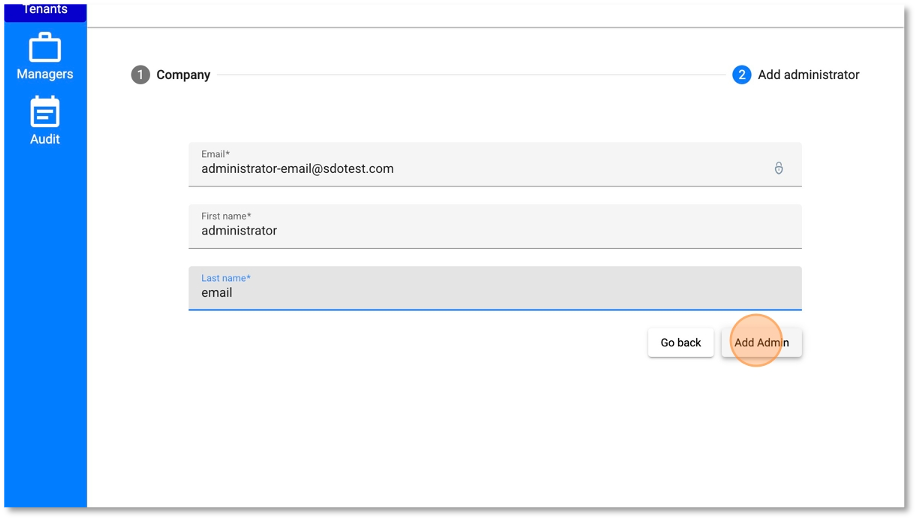
4 Set Up Administrator Account
Configure the initial administrator account for the new tenant.
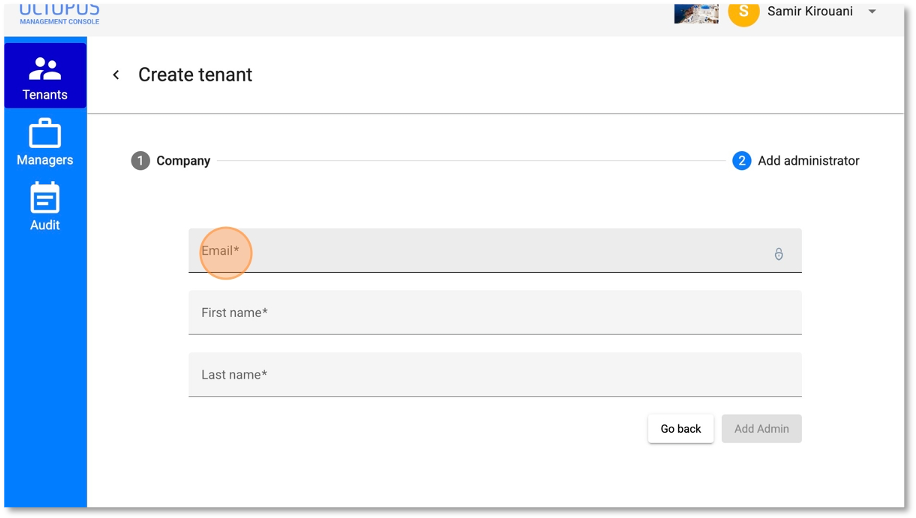
5 Add Administrator
Add administrator details and configure authentication settings.
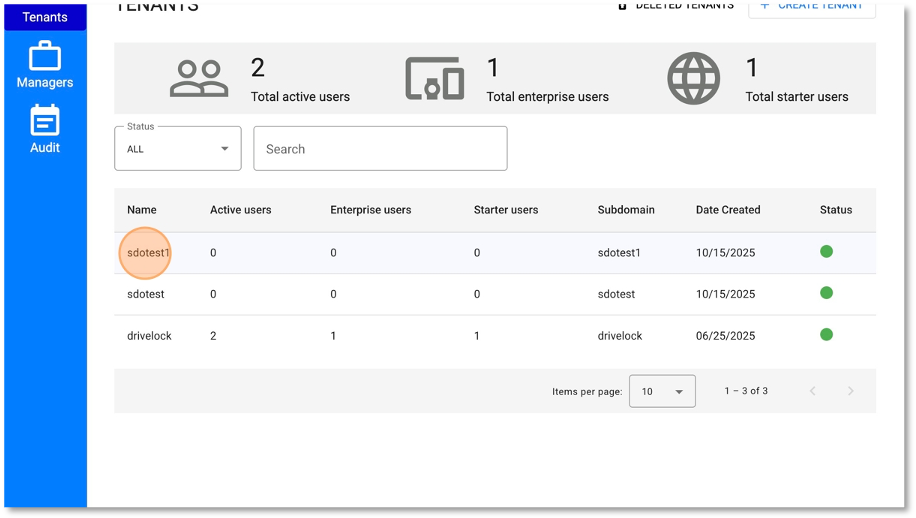
6 Access Tenant Configuration
Access the newly created tenant configuration page to make additional settings.
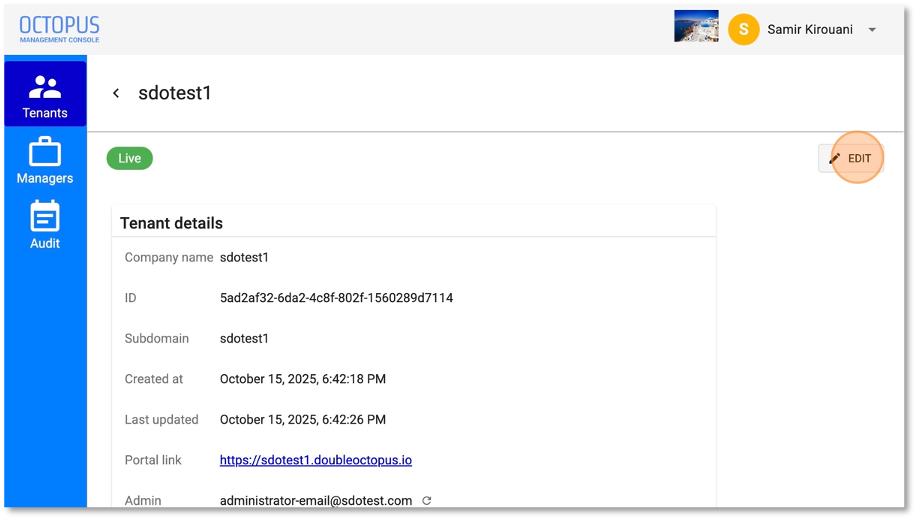
7 Enter Edit Mode
Click the "EDIT" button to modify tenant settings and configure additional options.
8 Enable SSO Login
Enable SSO Login by clicking on the "SSO Login enabled" checkbox or toggle.
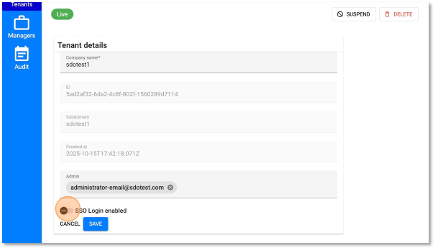
9 Save Configuration
Click on "SAVE" to apply all configuration changes.
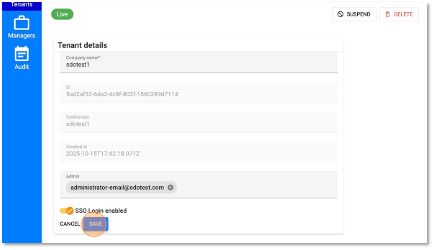
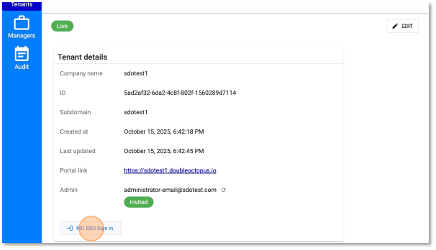
10 Access the New Tenant
Click on "MC SSO Sign in" to access and verify the newly created tenant environment.
✔ Tenant Creation Complete!
Your new tenant has been successfully created and configured. The administrator will receive an email with login instructions.
- Check the administrator's email for activation instructions
- Complete SSO configuration if enabled
- Add additional users to the tenant
- Configure security policies and access controls
- Set up integration with existing systems
If you encounter any issues during the tenant creation process, please contact Secret Double Octopus support with the following information:
- Tenant subdomain
- Organization name
- Administrator email address
- Error messages (if any)