Configuring Shared Accounts in Secret Double Octopus
Step-by-Step Guide for Secure Shared Account Access with SDO
Last Updated: November 2024 | Estimated Time: 20–30 minutes
Download Options:
⚠ Prerequisites
Before starting, ensure you have:
- ✓ Access to the Secret Double Octopus Management Console
- ✓ SDO tenant admin or delegated administrator permissions
- ✓ A shared account in your directory (for example,
Shared-Account) - ✓ At least one user who should be allowed to use the shared account
- ✓ Endpoint(s) with the SDO agent installed for testing
Tip: Use a clear naming convention for shared accounts (for example: APPNAME-ENV-SHARED) so users can easily identify them.
Section 1: Verify Directory & Shared Account in SDO
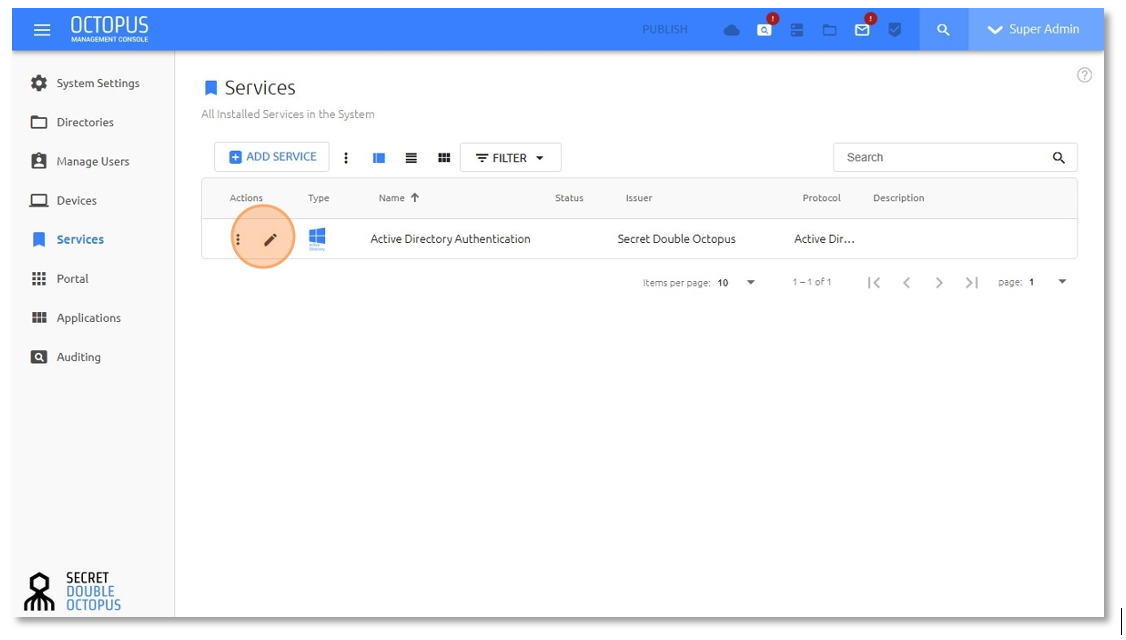
1 Open the SDO Admin Portal and edit your directory service
In your browser, open the SDO Admin Portal and navigate to Services → Installed Services. Locate your Active Directory (or other directory) service and click Edit.
2 Verify the correct directory and users are synced
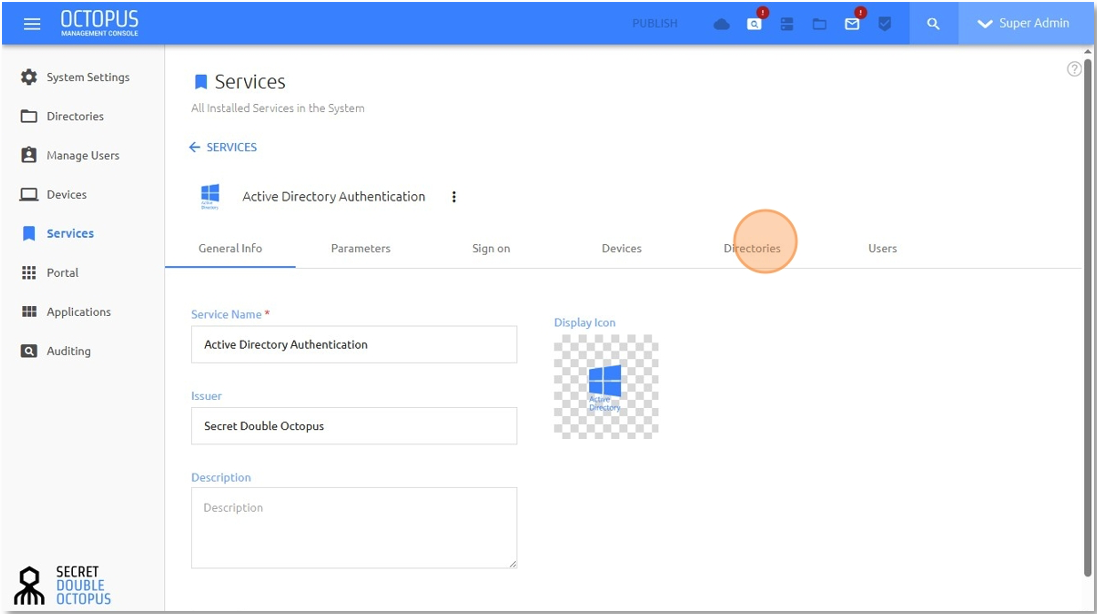
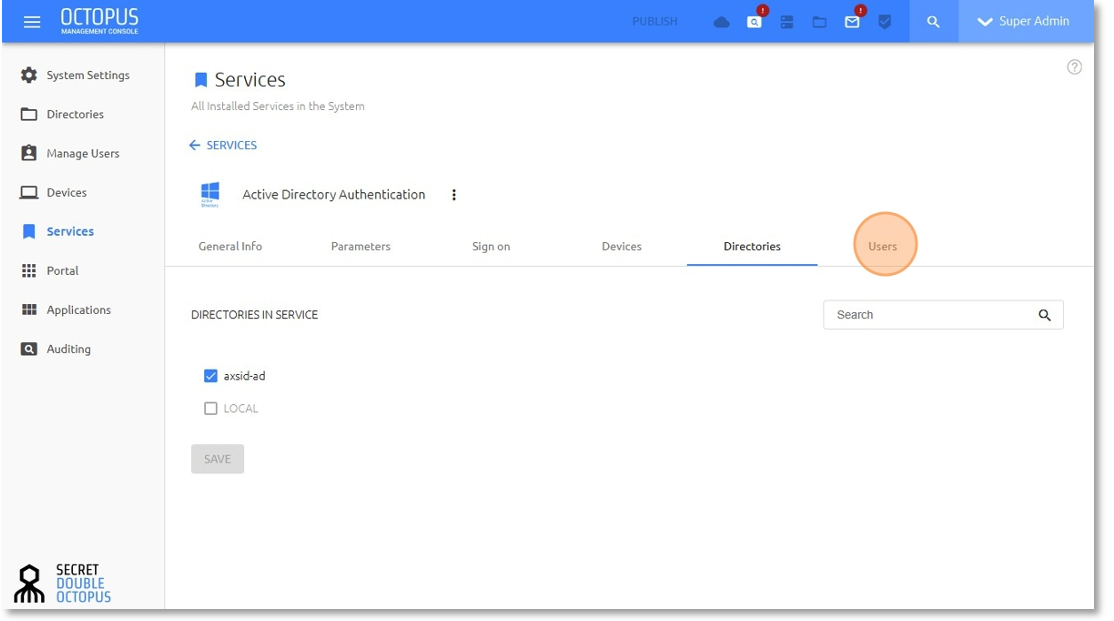
In the service configuration:
- Go to the Directories tab and confirm the correct directory is selected.
- Go to the Users tab.
- Verify that both the shared account (for example,
Shared-Account) and the user(s) who will use it appear in the list.
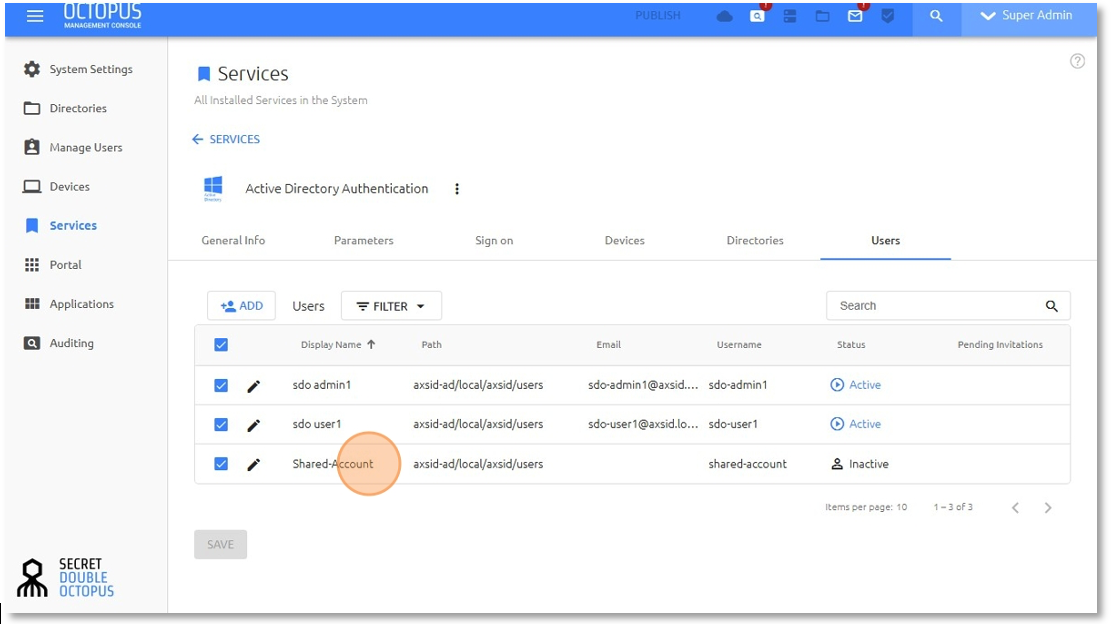
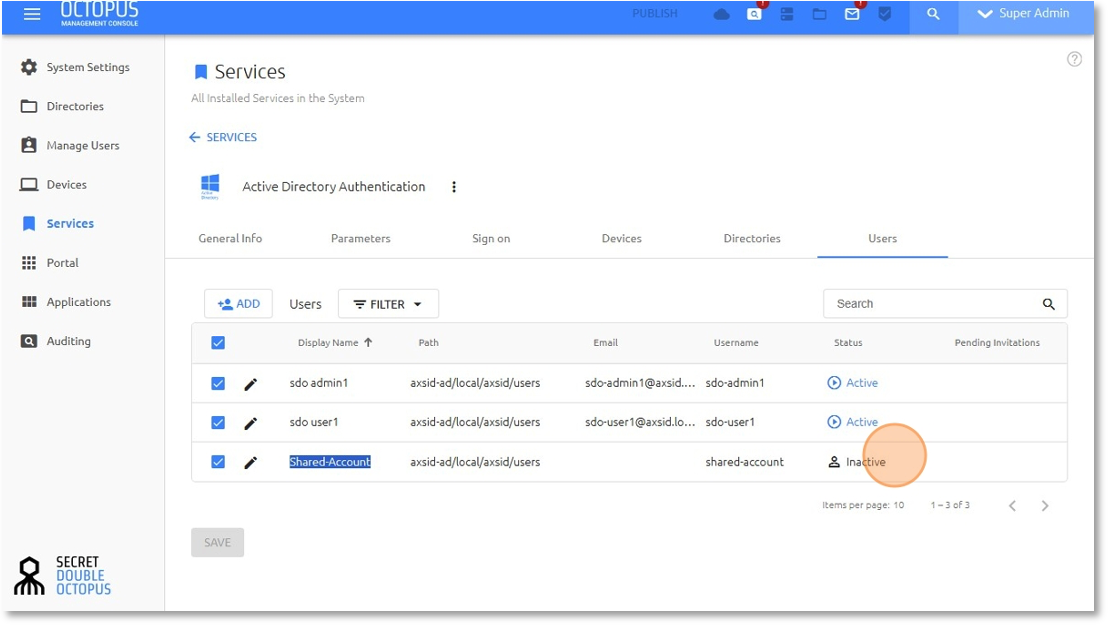 Shared accounts do not need to be enrolled as SDO users.
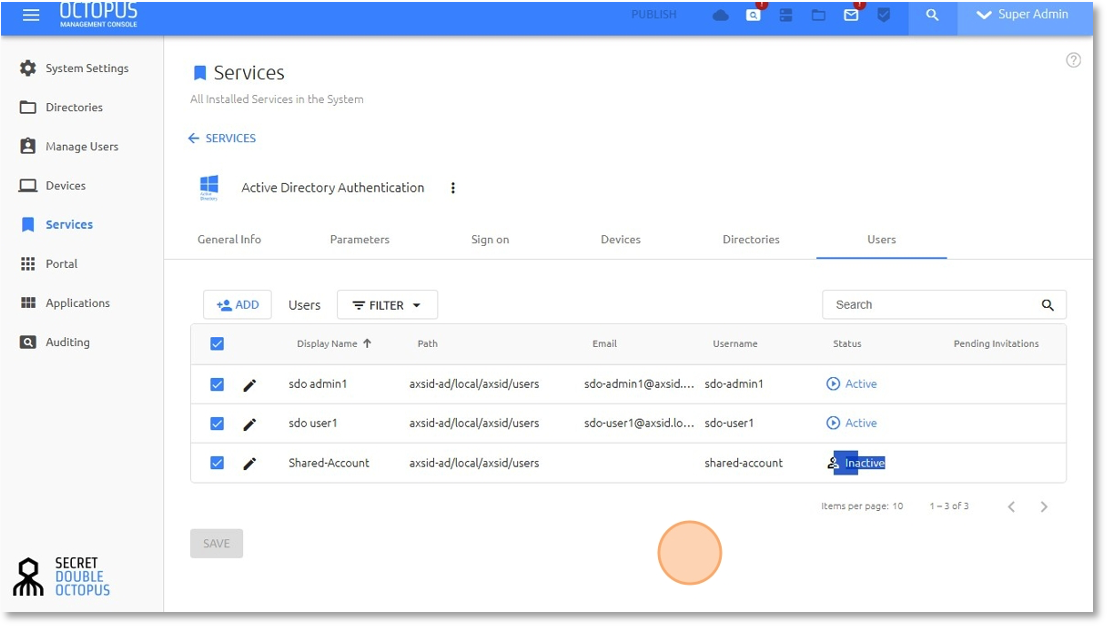
Click SAVE to apply any changes.
Section 2: Enable Account Sharing for the Shared Account
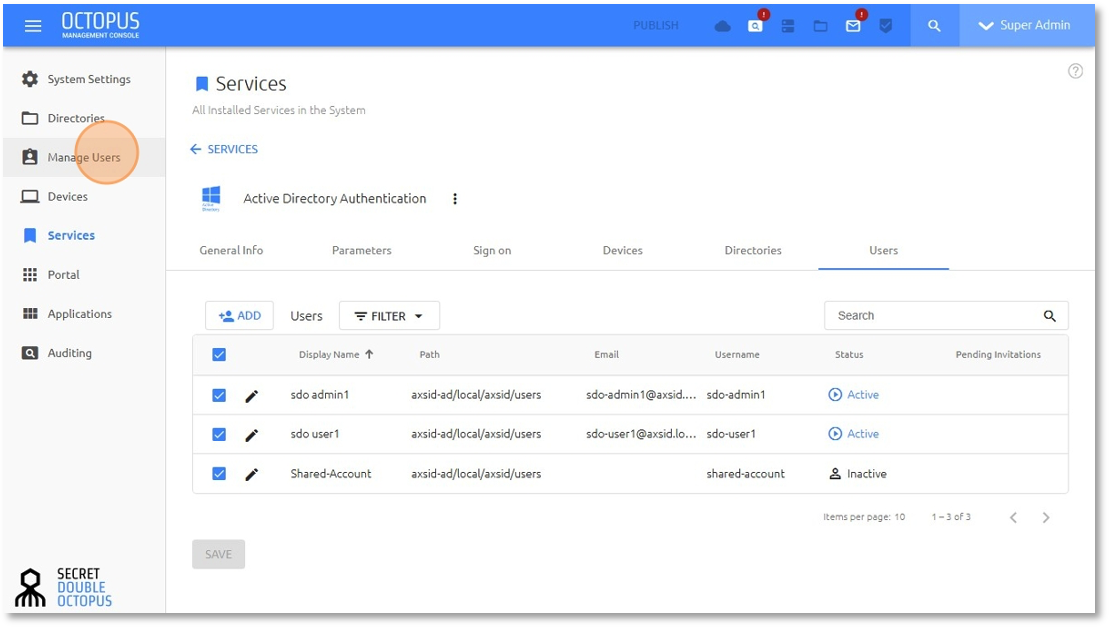
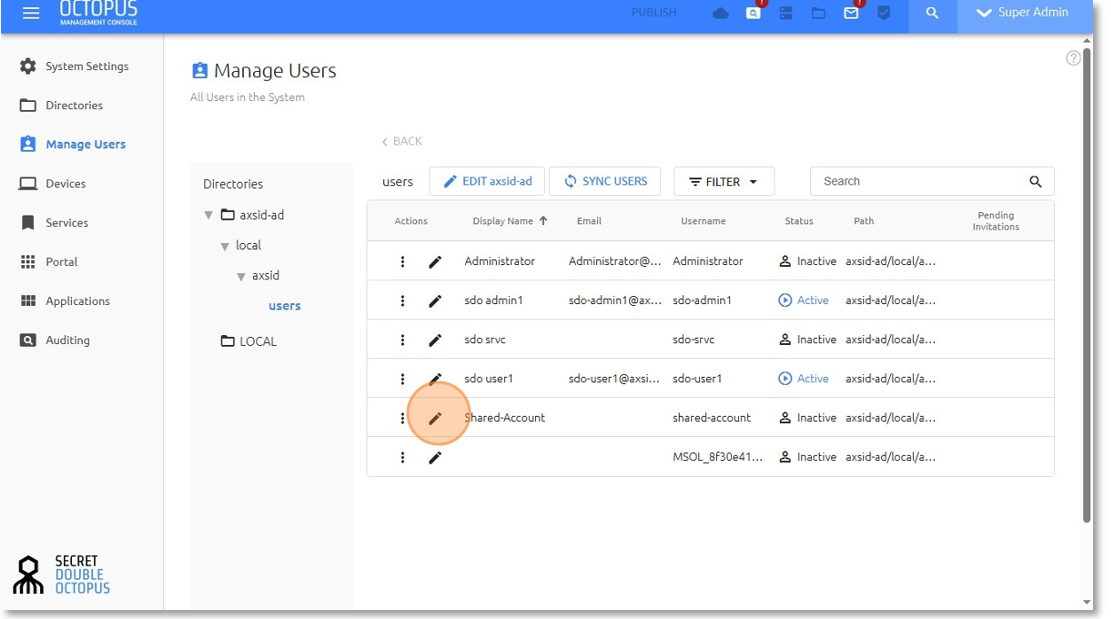
3 Open the Shared Account in Manage Users
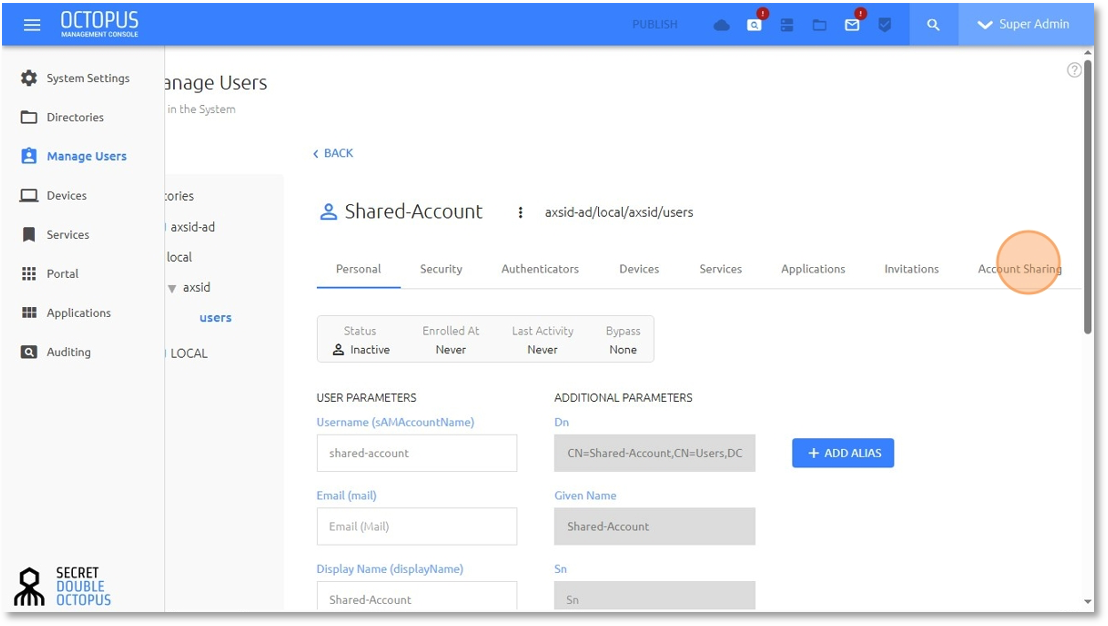
In the SDO Admin Portal, go to Manage Users, search for the shared account and click Edit.
4 Enable sharing and add allowed users
In the shared account properties:
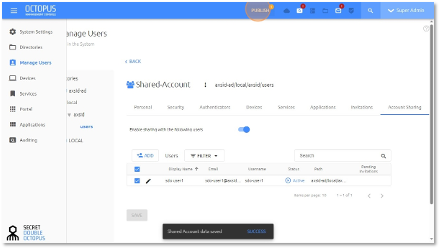
- Go to the Account Sharing tab.
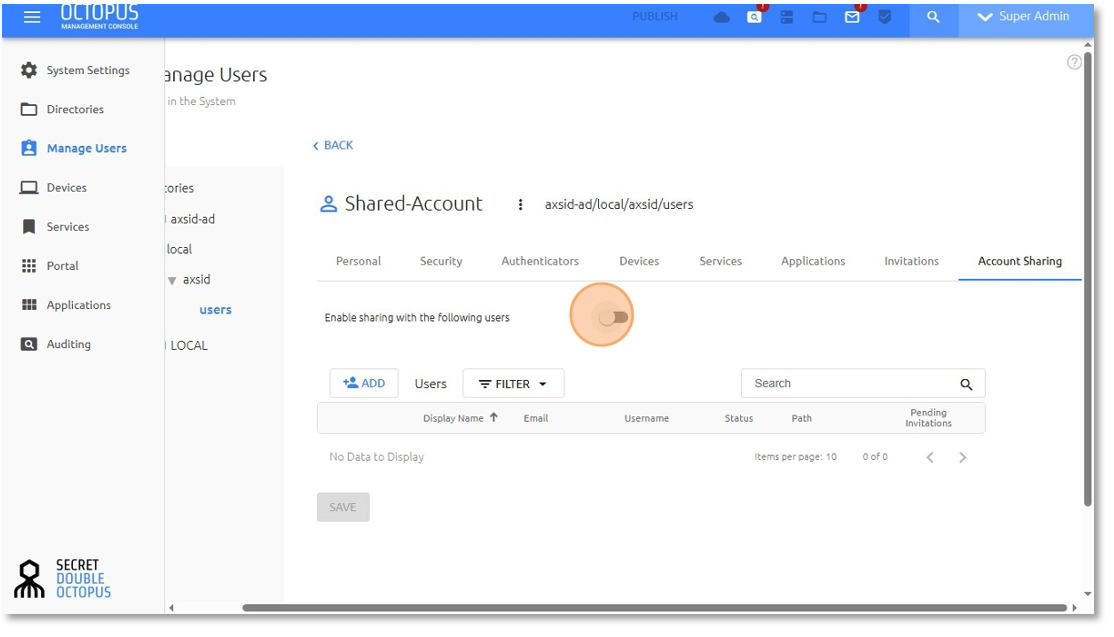
- Select Enable sharing with the following users.
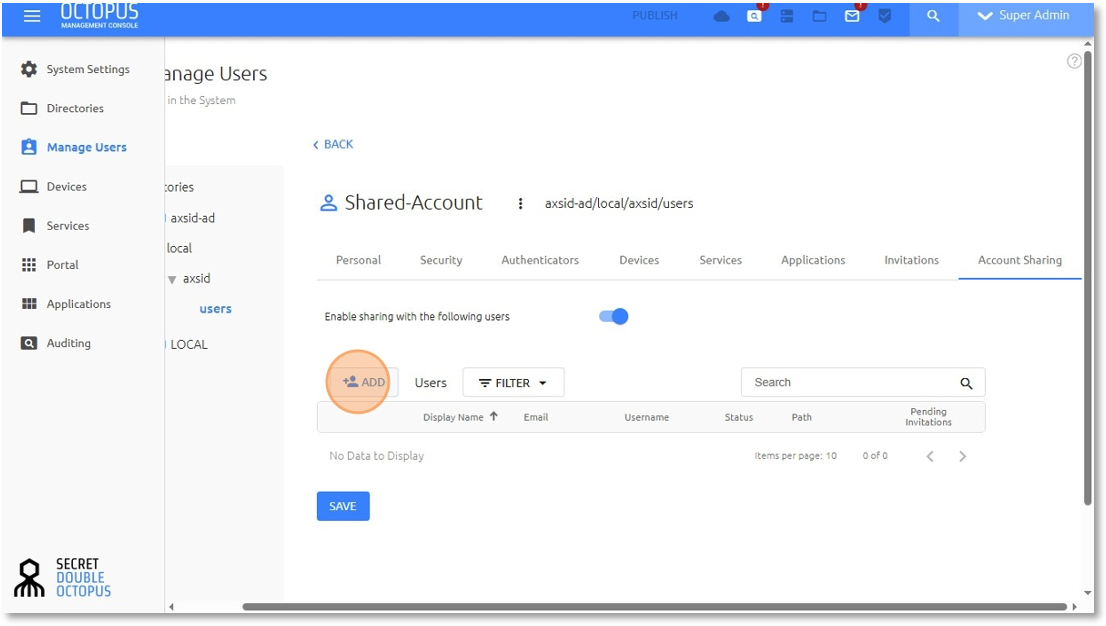
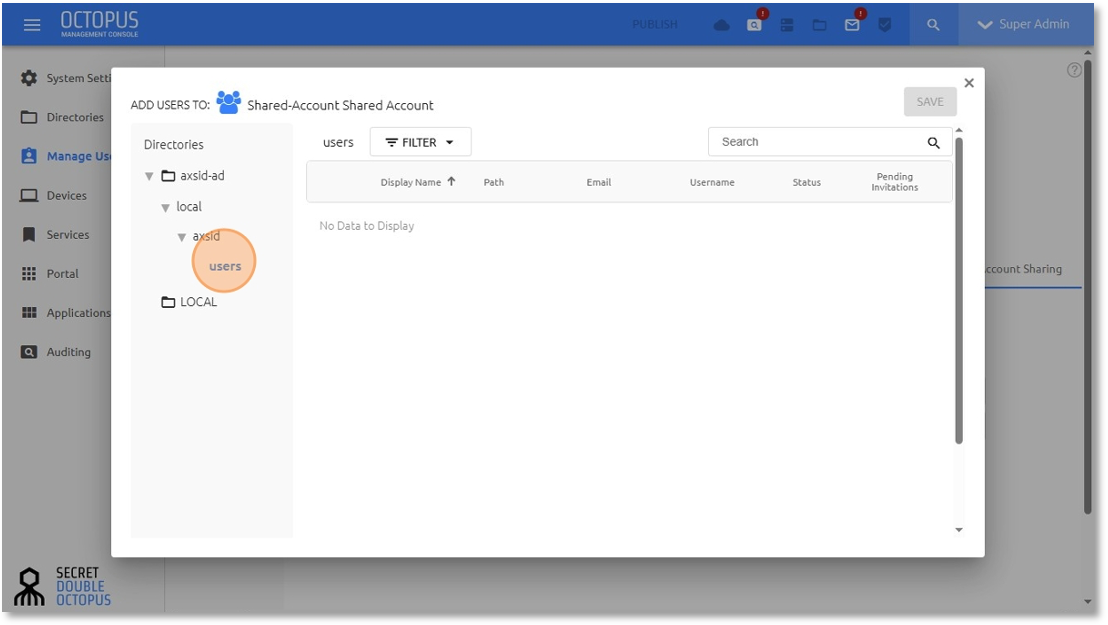
- Click ADD to open the directory tree.
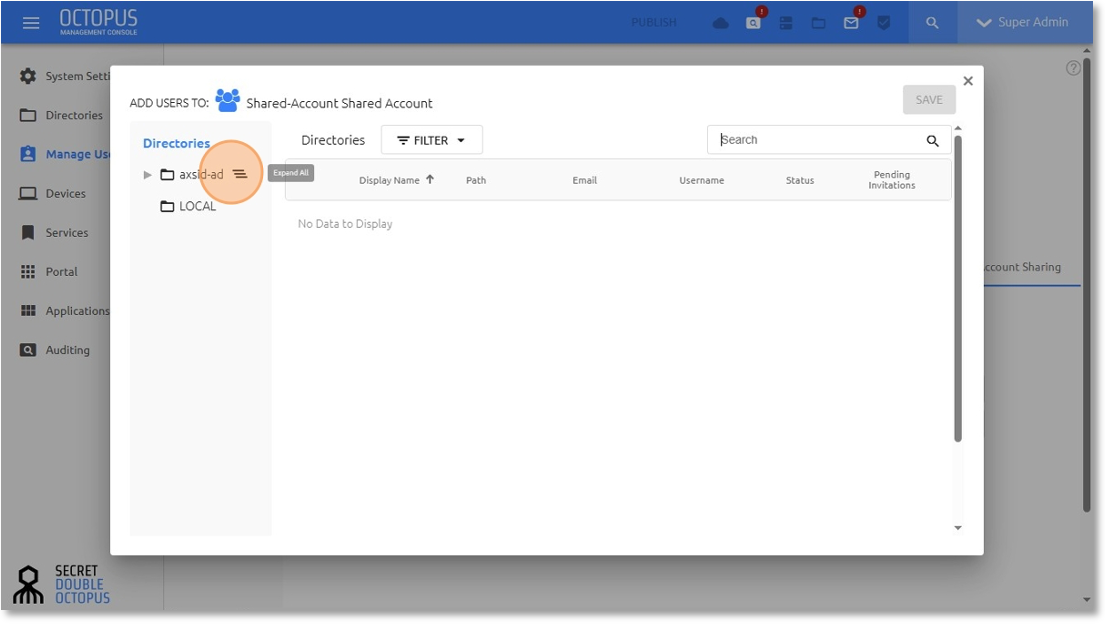
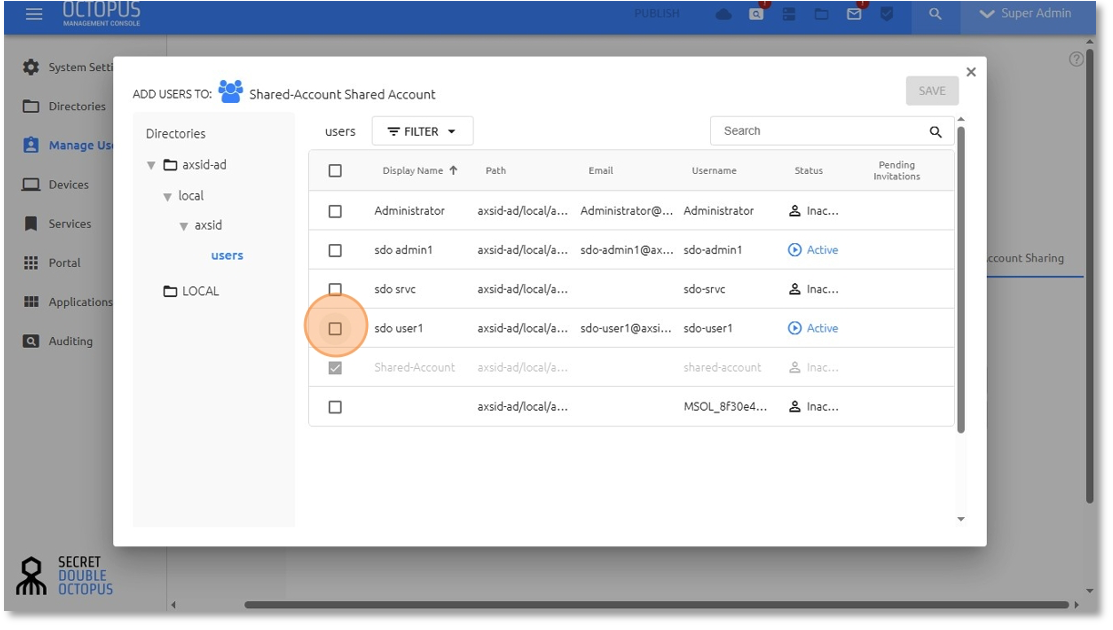
- Expand your directory, click Users and select the users or groups who may use this shared account.
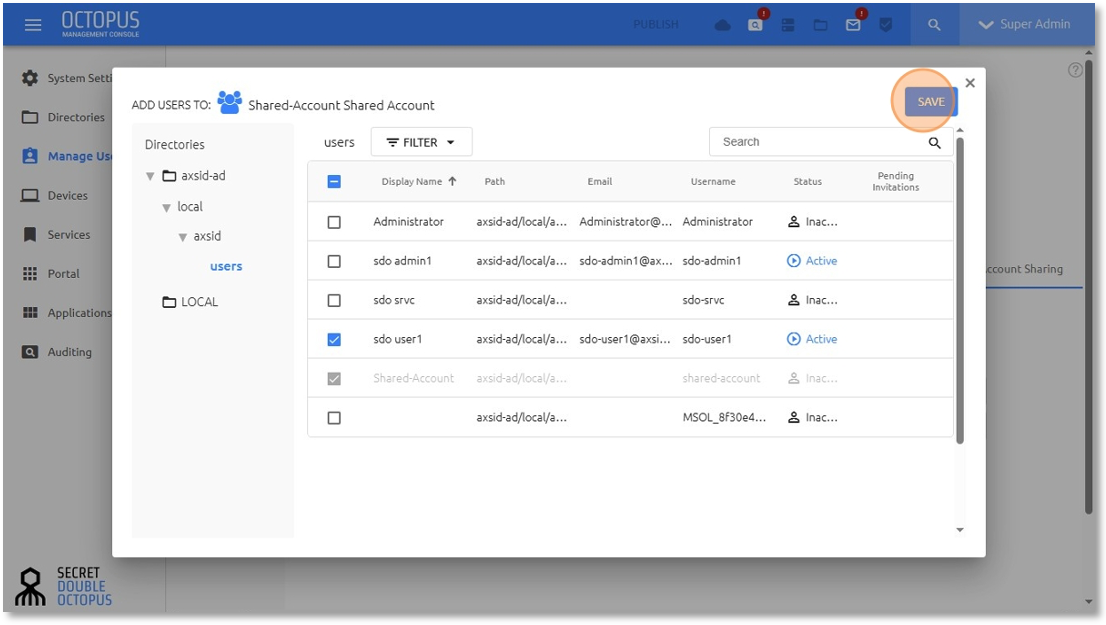
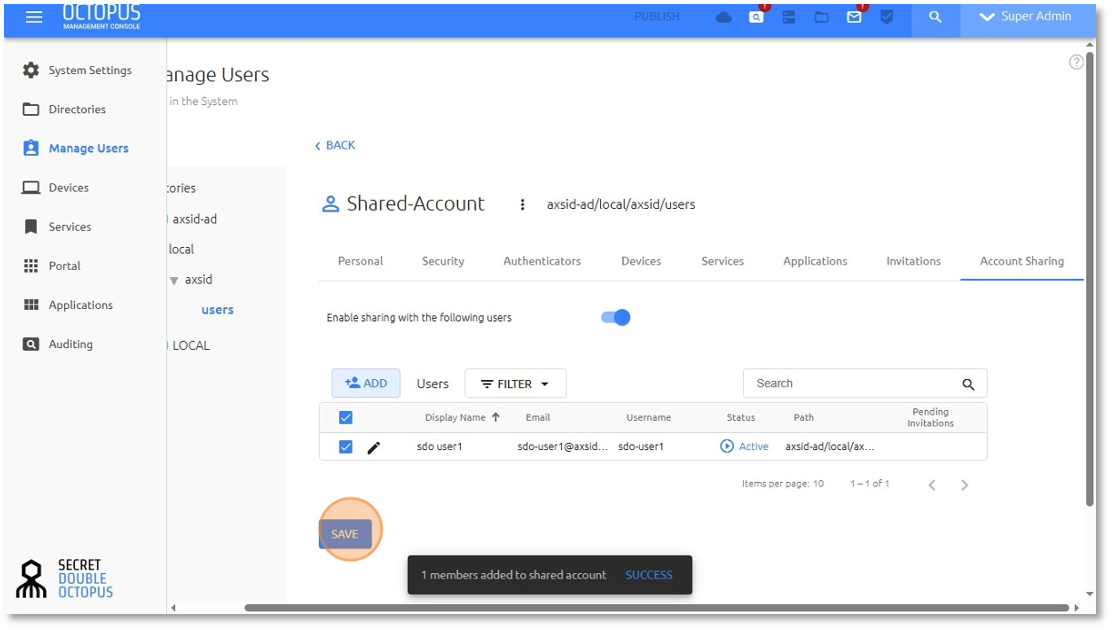
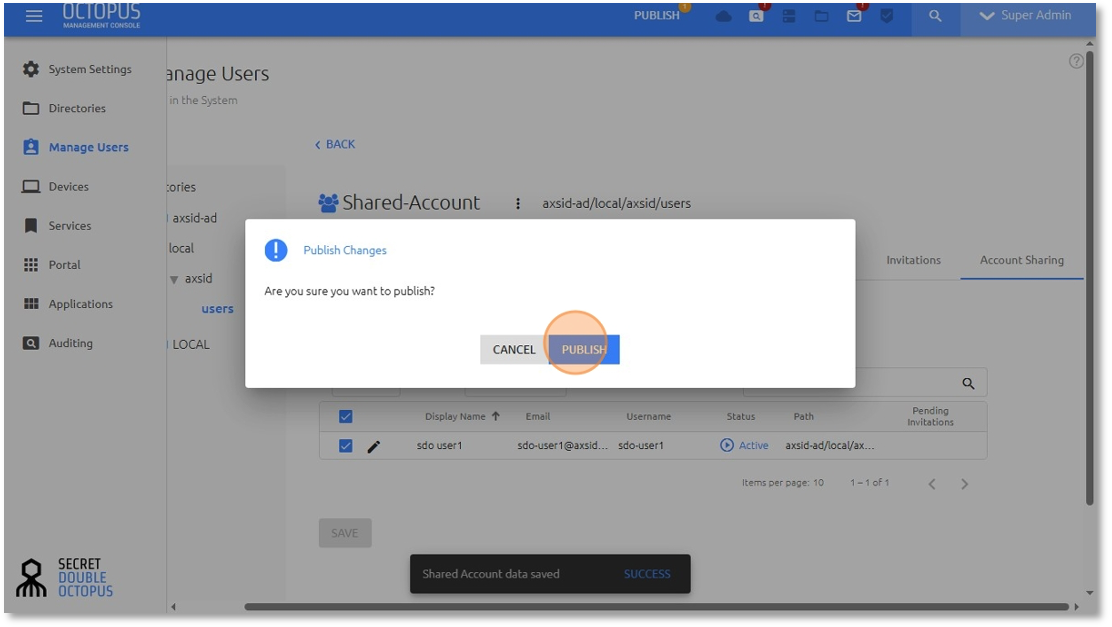
- Click SAVE on the selection dialog, then SAVE again on the shared account.
- Click PUBLISH and confirm to apply the configuration.
Section 3: Test Shared Account Login from a Desktop
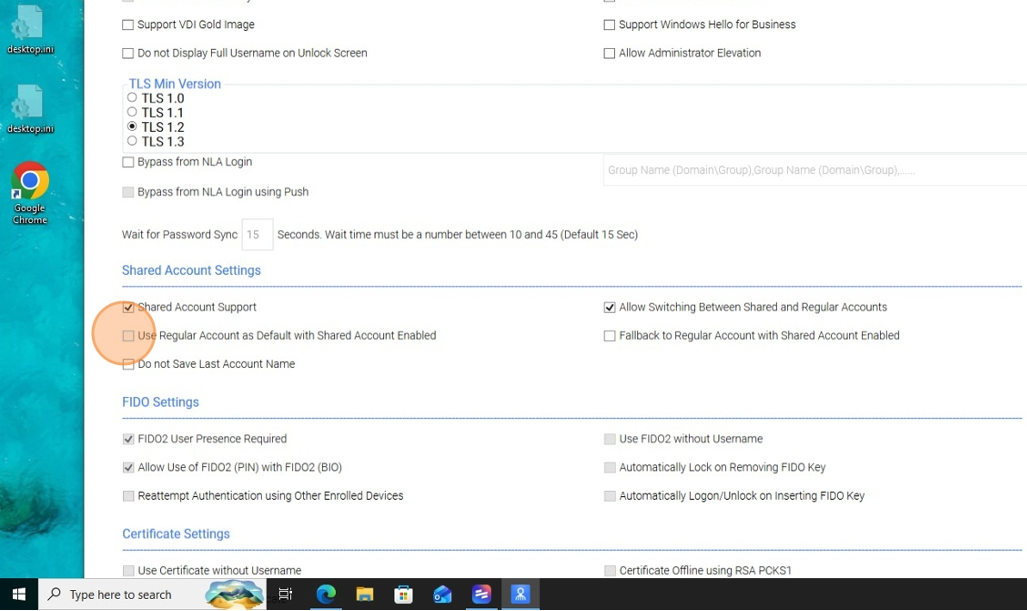
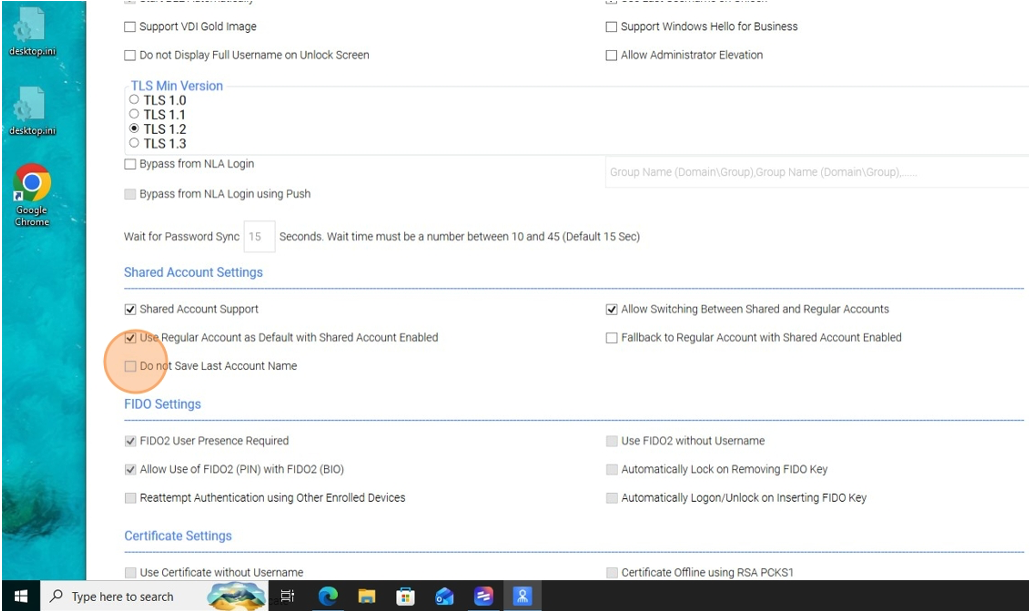
5Configure the Windows agent and enable shared account
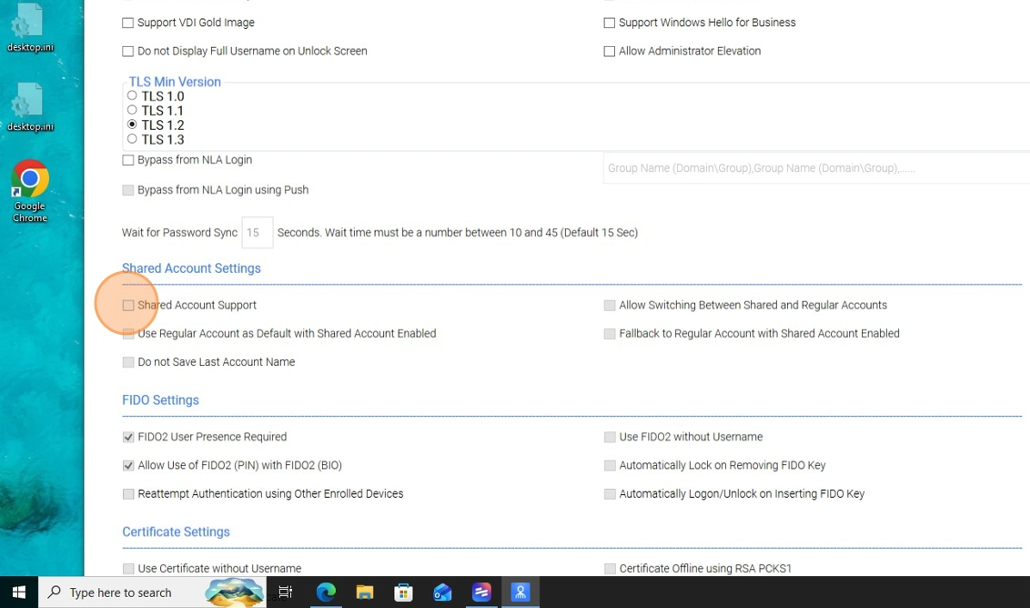
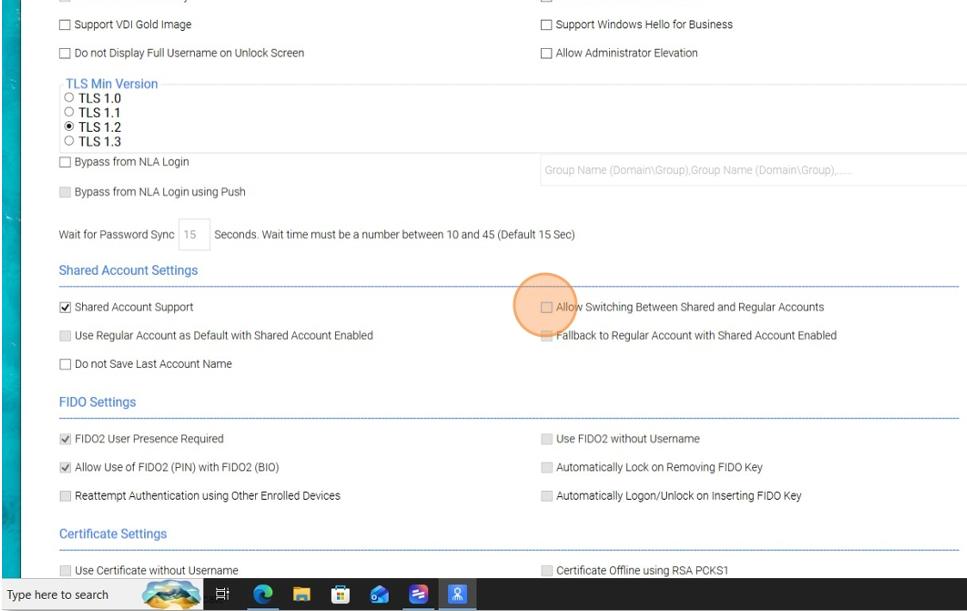
On a MSI updater please check the following options
- Enable Shared Account on MSI Updater
- Allow Switching between Shared and Regular account
- Do not save last account name
- Complete all other windows settings and create an MSI
- Install the MSI on the test machine
Section 4: Test Shared Account Login from a Desktop
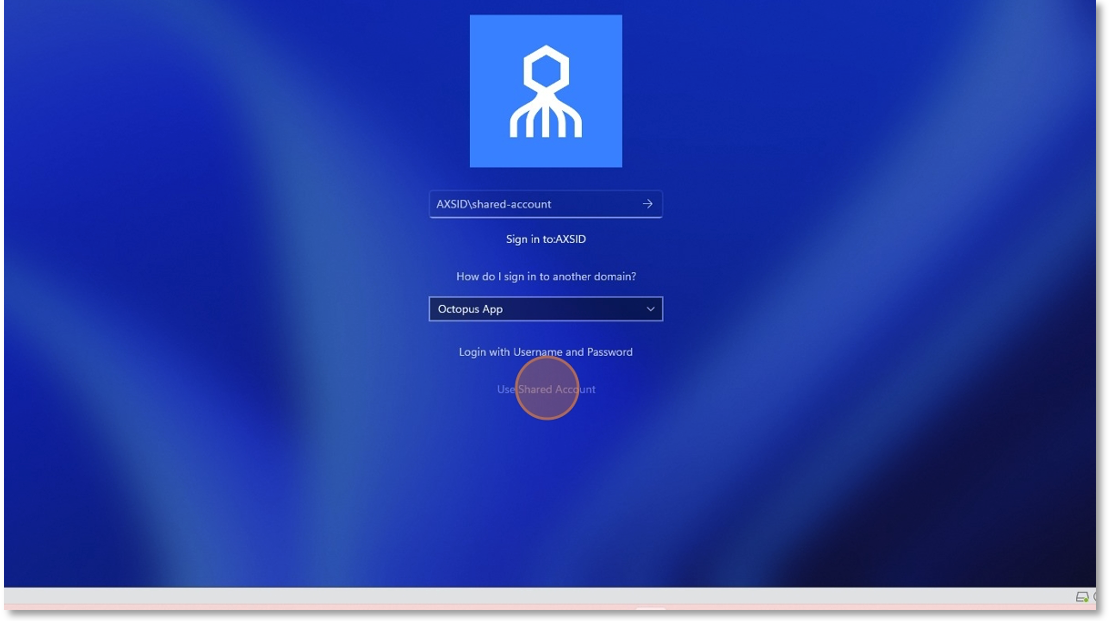
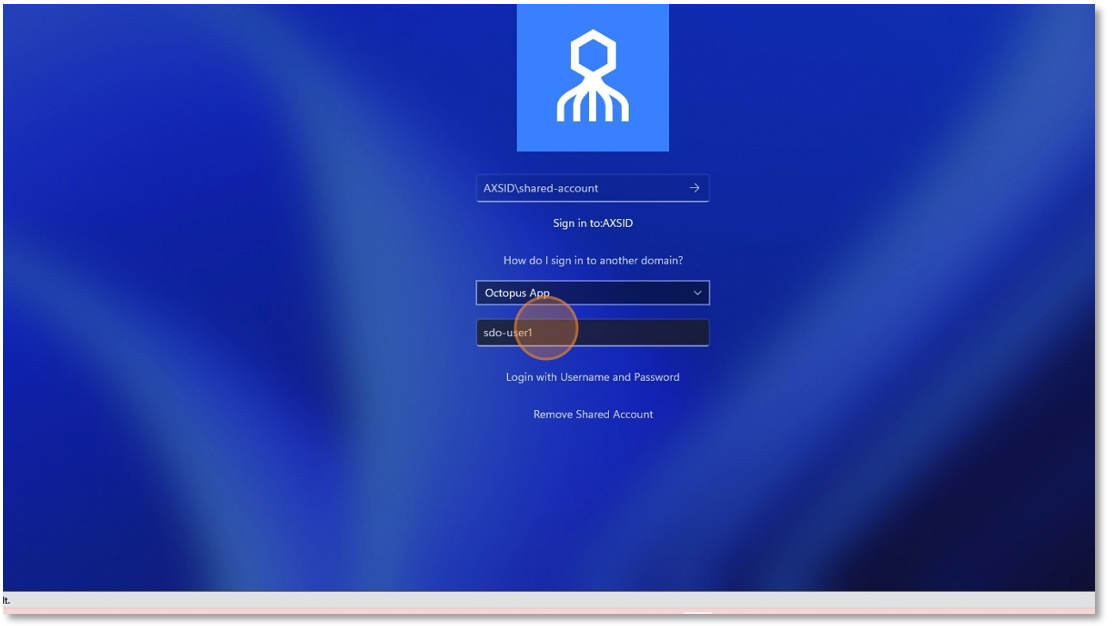
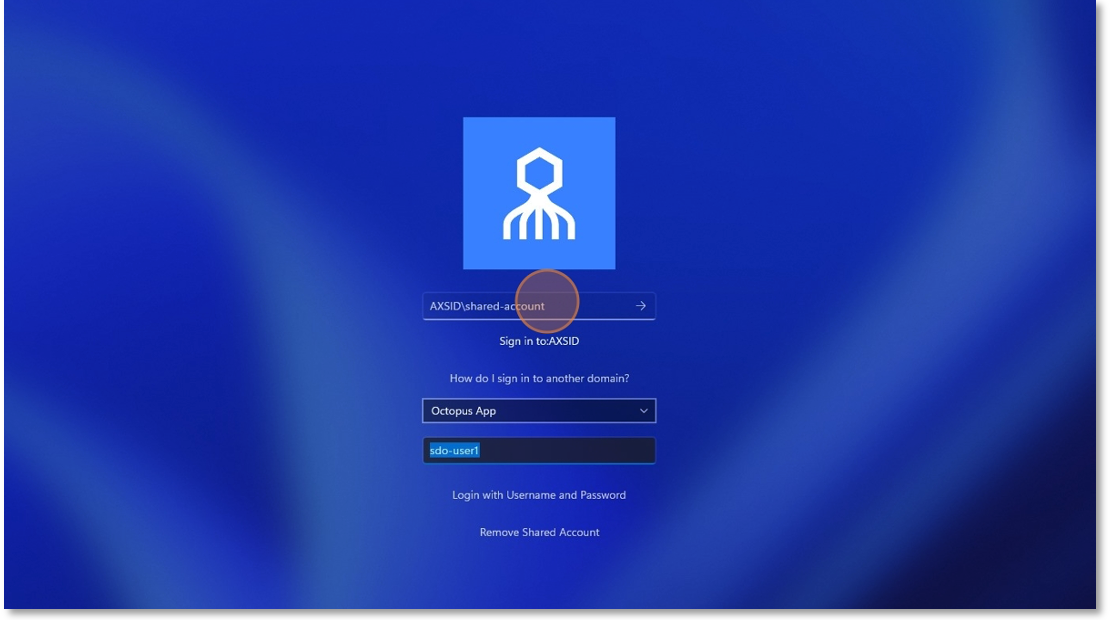
6 Use a test machine to log in with the shared account
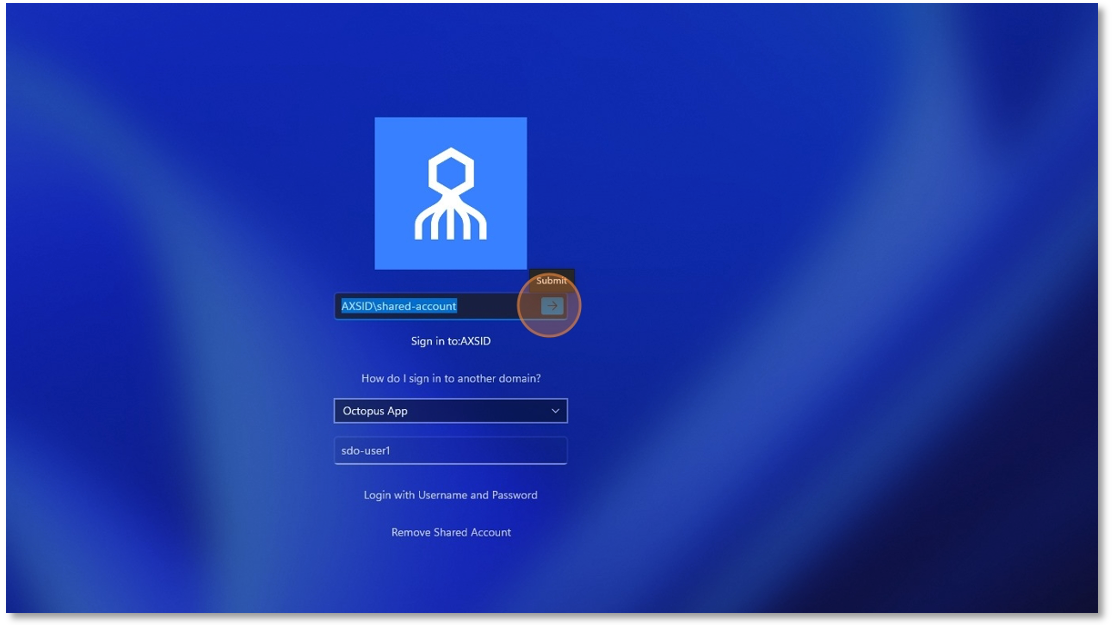
On a desktop that has the SDO agent installed:
- On the login screen, select the shared account you configured.
- When prompted by SDO, enter the user account that is allowed to use the shared account.
- Confirm that the shared account name is displayed correctly.
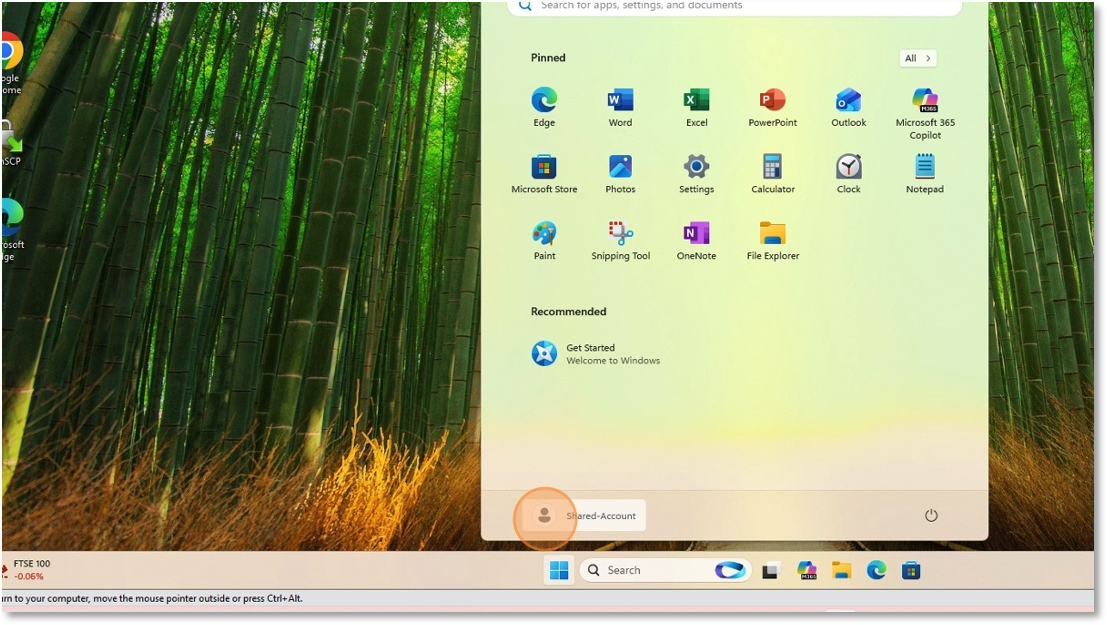
- Click Submit and verify that the session is established under the shared account.
✓ Shared Account Configuration Complete!
Your shared account is now protected and centrally managed by Secret Double Octopus.
All access is auditable, and credentials are no longer directly exposed to end users.
⚙ Troubleshooting Tips
- Shared account not visible at login: Verify the account exists in directory, is synced to SDO, and is published.
- User cannot use shared account: Confirm they are listed in Enable sharing with the following users and republish.
- Session identity is wrong: Make sure the shared account is selected on the desktop and no local policies override the login.
☎ Need Help?
If you encounter any issues during shared account configuration:
- Contact your SDO support team (Support@doubleoctopus.com)
- Review SDO shared account documentation
- Check directory sync and endpoint connectivity
- Submit a support ticket with error details and screenshots
This guide explains the complete flow for configuring shared accounts in Secret Double Octopus.
© 2024 - Shared Account Configuration Guide | Secret Double Octopus