This document presents the procedures required for integrating the Secret Double Octopus solution with Google Directory, enabling passwordless authentication for Google Directory users to all Octopus-protected services, e.g., login to Windows and the User Portal.
 |
Before you begin, make sure that you have:
A Google Workspace administrator account
A Google Cloud Platform administrator account
The integration process involves the following sequential stages:
The first step in the integration process is adding an LDAP client to Google Workspace. The client certificate will be used in a later stage of the integration.
To add an LDAP client in Google Workspace:
In your Google Workspace Admin Console, navigate to Apps > LDAP.
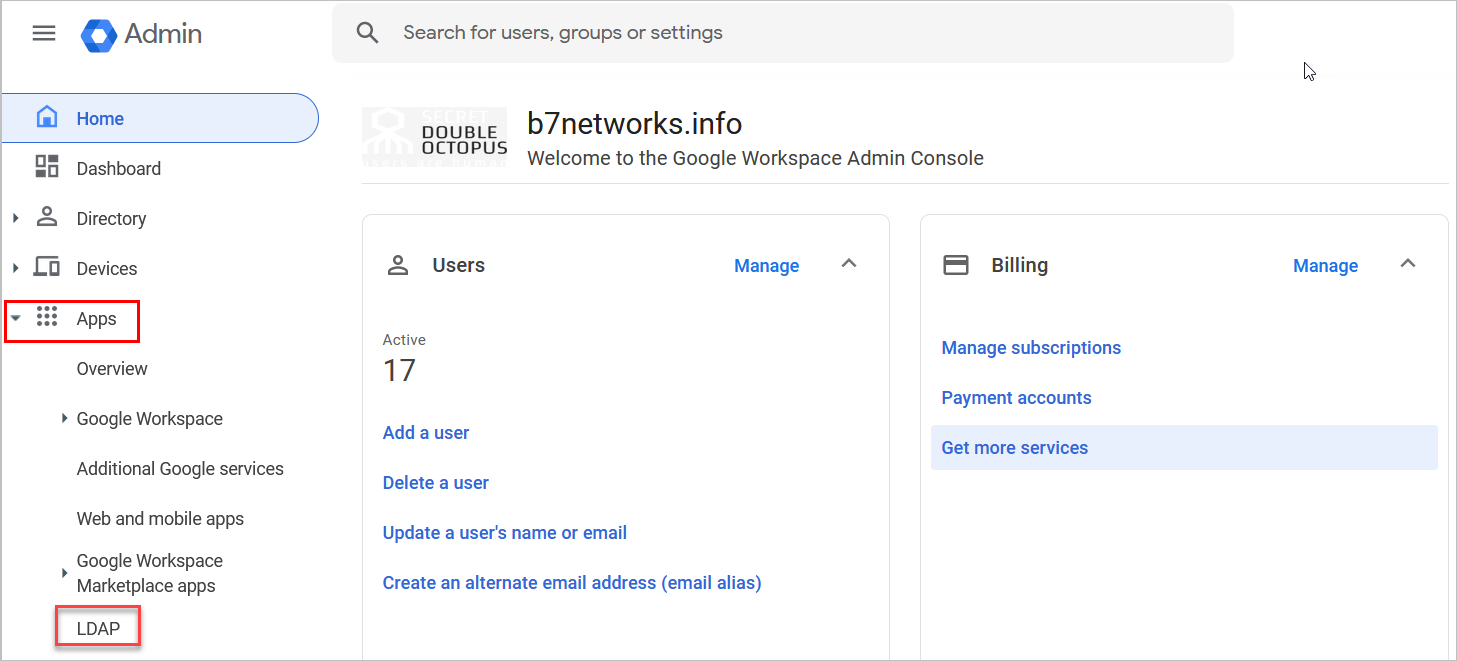
Then, on the page that opens, click ADD CLIENT.
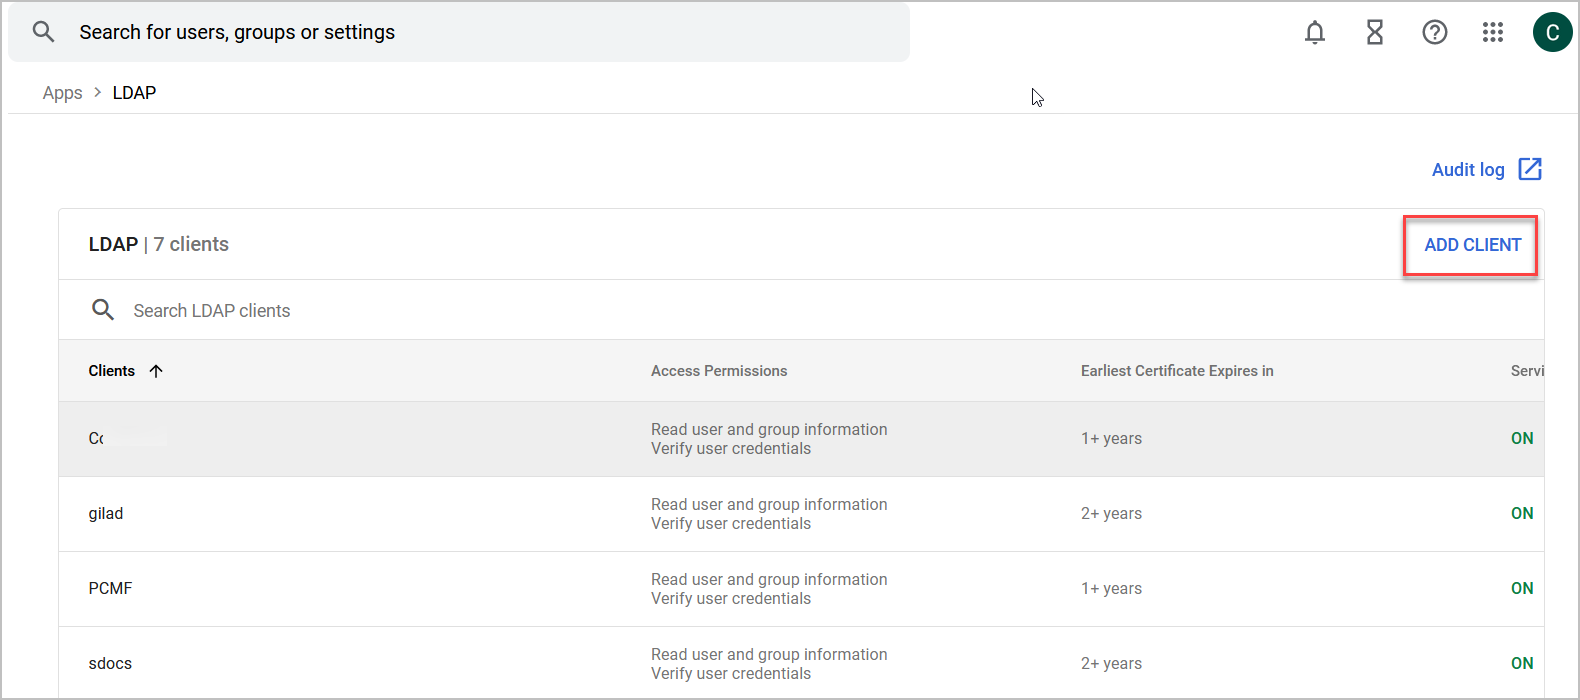
In the window that opens, enter a name for the new client and then click CONTINUE.
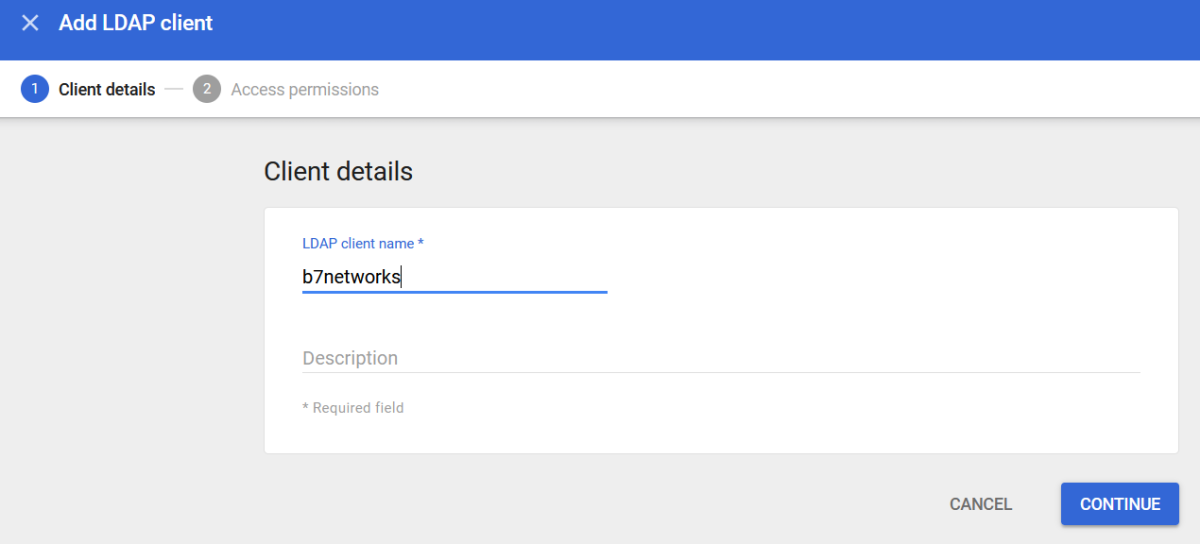
Select permissions for the domain, and then click Add LDAP Client.
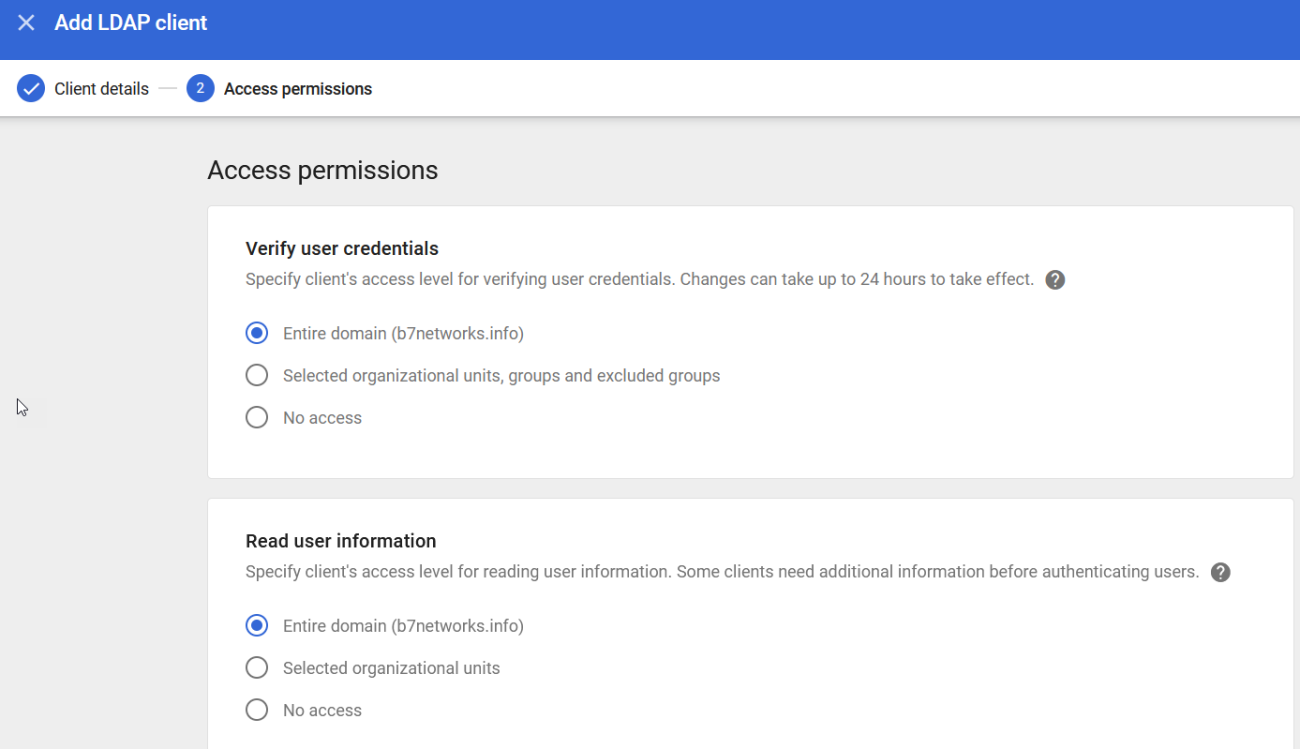
A confirmation message is displayed when the client is successfully added.
When certificate generation is complete, click Download Certificate.
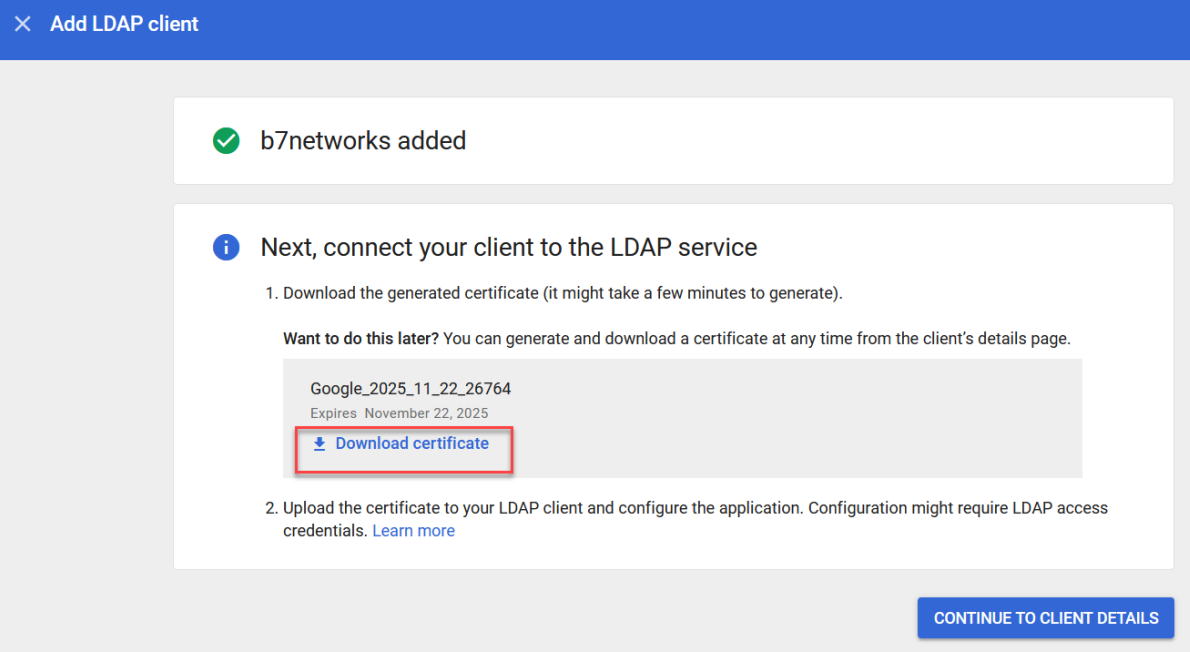
Make sure to save the ZIP file in a secure location. You will need it at a later stage in the integration process.
After downloading and saving the certificate, click Continue to Client Details.
In the Service Status settings, select the ON for everyone radio button, and then click Save.
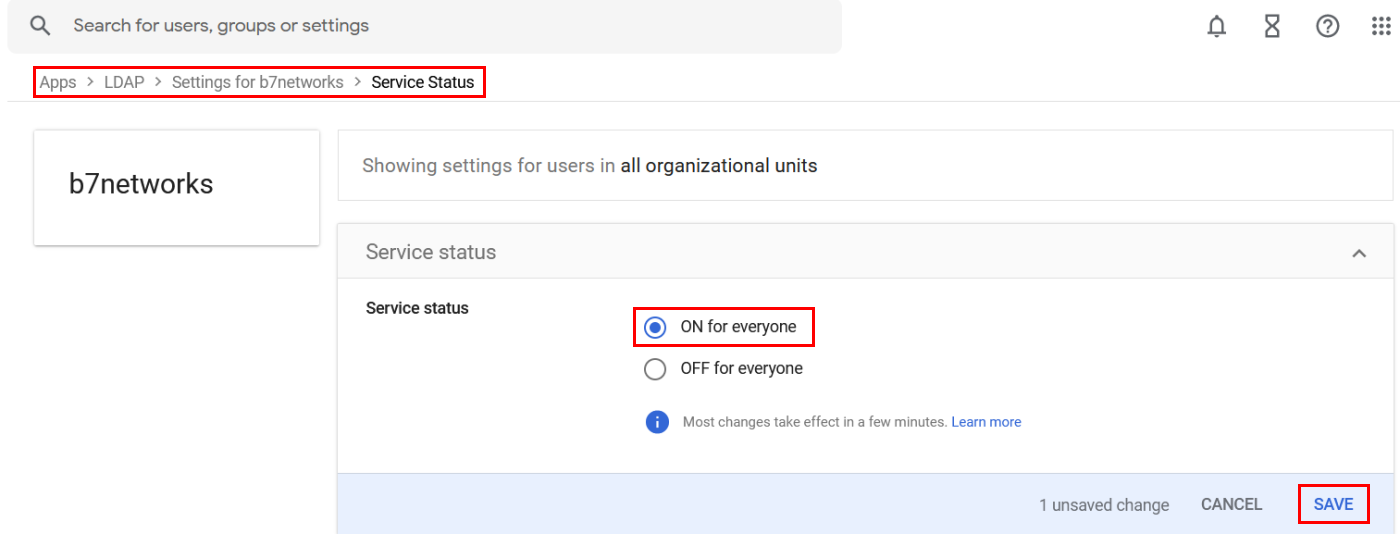
Follow the steps below to create a service account and key in GCP. Components of the service account will be used in later stages of the integration process.
To create a service account in GCP:
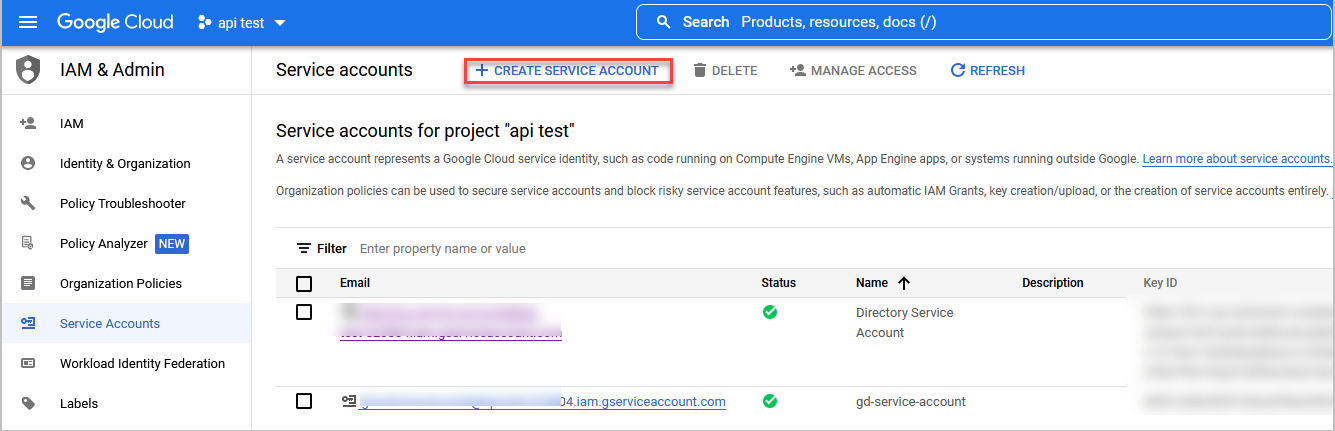
In the GCP Admin Console, navigate to IAM & Admin > Service Accounts.
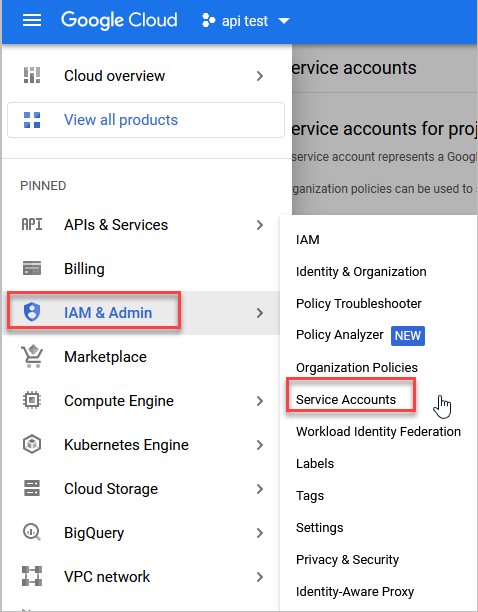
Then, at the top of the page that opens, click CREATE SERVICE ACCOUNT.
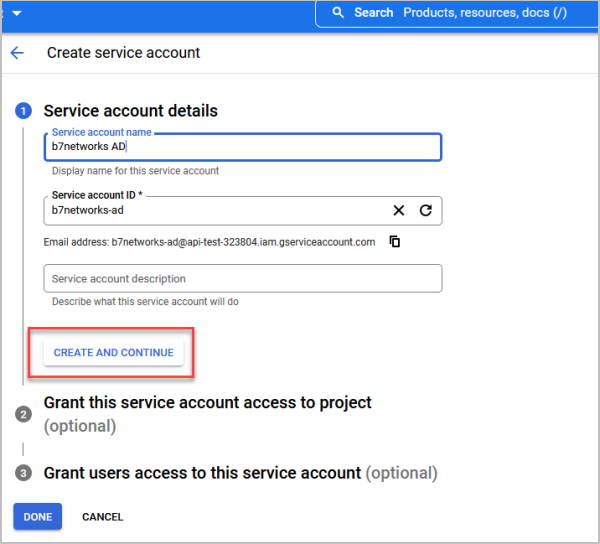
Under Service account details, enter a name for the new service account and then click CREATE AND CONTINUE.
Under Grant this service account access to project, click CONTINUE and then click DONE.
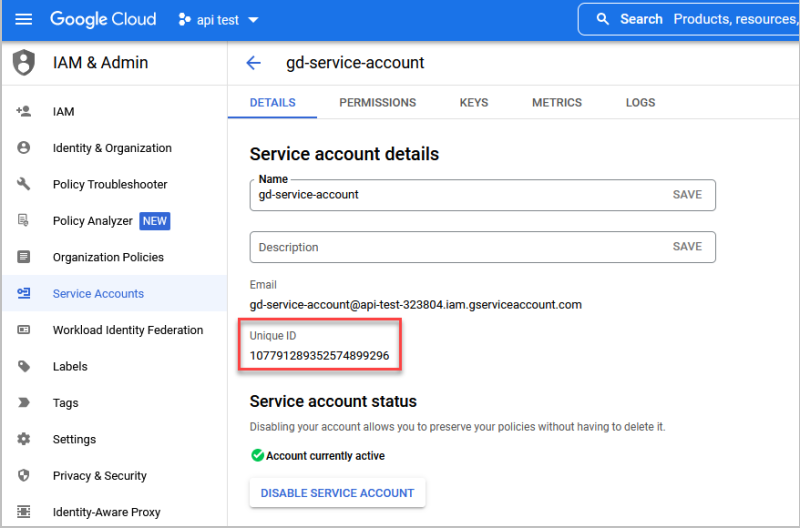
Select the service account you just created. From the Details tab, copy the Unique ID. You will need it in the next phase of the integration process.
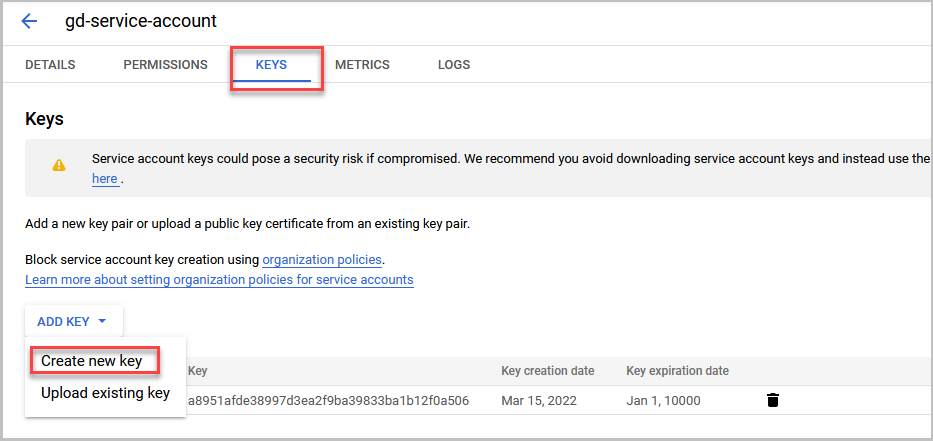
From the Keys tab, select ADD KEY > Create new key.
In the window that opens, select the JSON radio button and then click CREATE.
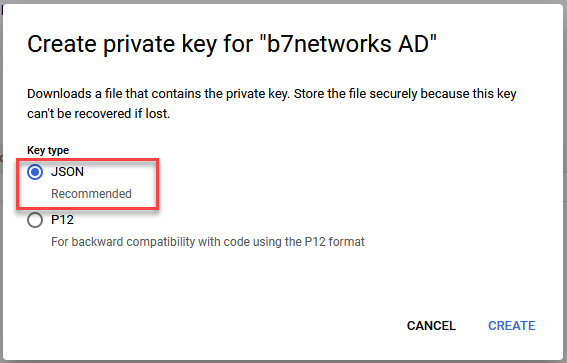
When the JSON file is downloaded, save it in a secure location. You will need it in the final phase of the integration process.
Follow the steps below to add the Unique ID of the service account to the domain wide delegation in Google Workspace.
To update Google Workspace:
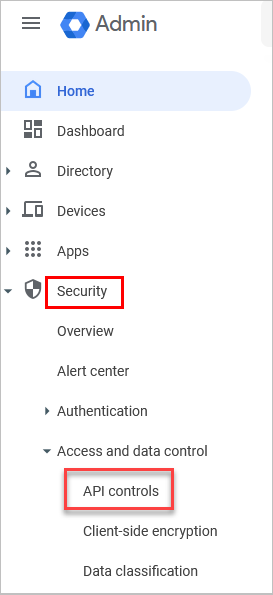
In your Google Workspace Admin Console, navigate to Security > Access and data control > API controls.
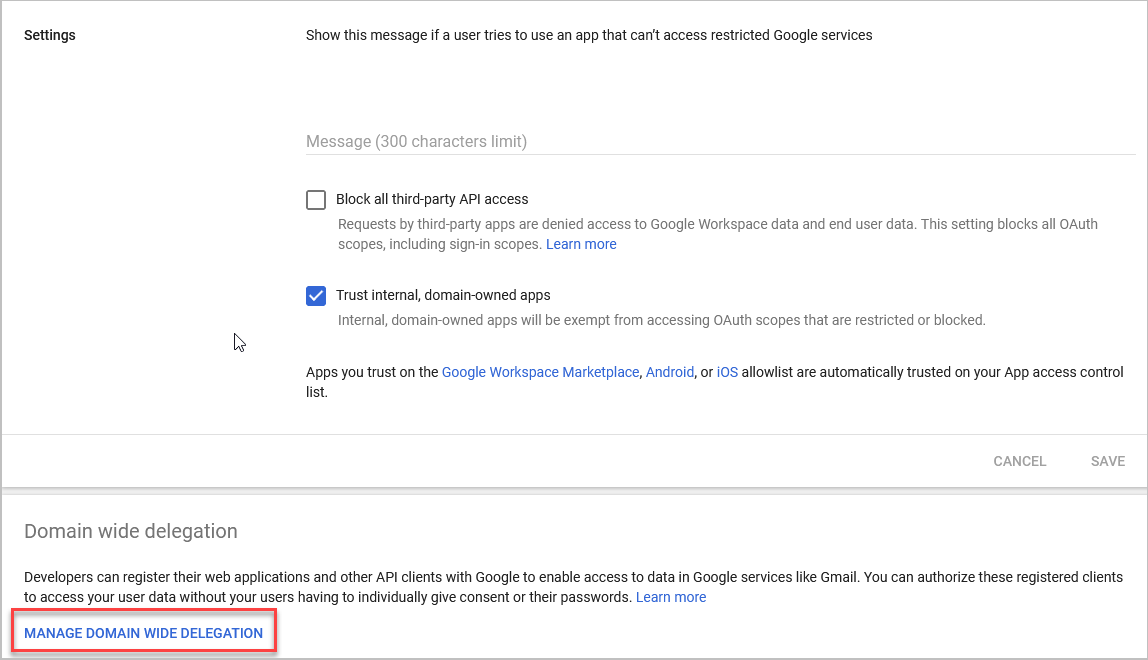
On the API Controls page, scroll down to the Domain wide delegation section and click MANAGE DOMAIN WIDE DELEGATION.
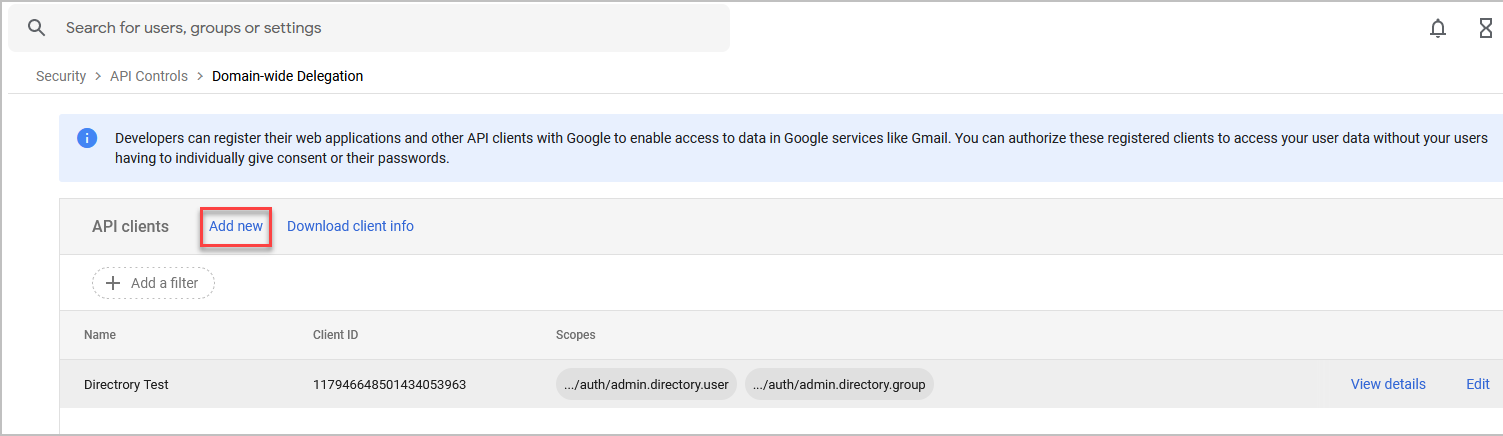
On the page that opens, click Add new.
Enable the Admin SDK API - Log into the Google Cloud and open the menu on the left-hand side and select 'APIs & Services'. Select 'Enabled APIs and services' and click on 'ENABLE APIS AND SERVICES', the API Library will automatically load. Search for 'Admin SDK API' and open it, then click 'ENABLE'.
In the popup that opens, configure the following settings:
Client ID: Paste the Unique ID of the service account you created in GCP.
OAuth scope: Enter https://www.googleapis.com/auth/admin.directory.user
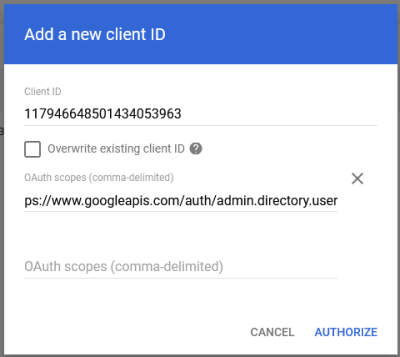
To save your changes, click AUTHORIZE.
The final phase of the integration involves adding your Google directory to the Octopus Management Console.
To add a Google directory to the Management Console:
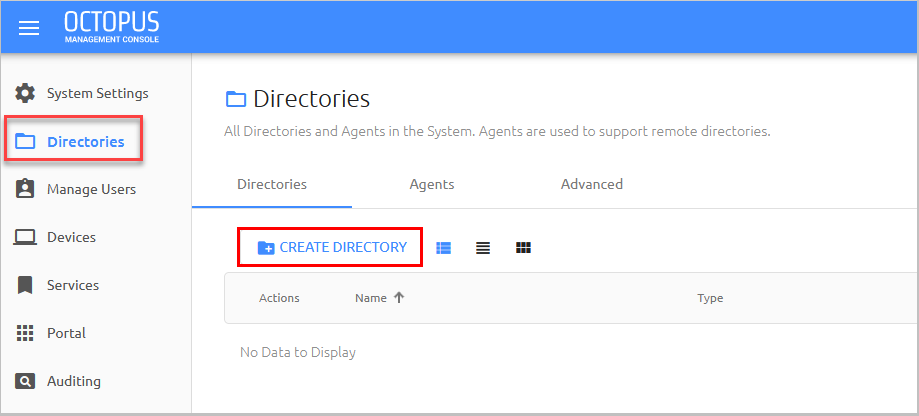
In the Octopus Management Console, select the Directories menu and click CREATE DIRECTORY.
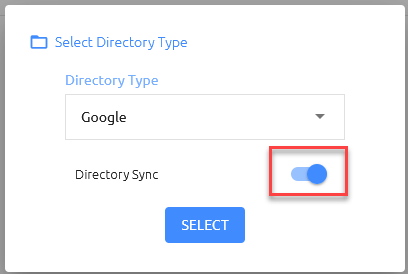
In the popup that opens, select Google from the Directory Type list, and enable the Directory Sync toggle. Then, click Select.
In the Create New Google Directory window, configure the following settings:
Setting
Value
Name
Name of the Corporate Directory Server
Base DN
Directory Distinguished Name; Directory top tree level, from where a server will search for users
(e.g., dc=<AD name>,dc=com)
Password
Password of the Directory Administrator Principal
User DN
Directory Administrator User DN string (e.g., uid=orenm,ou=users, dc=<AD name>,dc=com)
Client Certificate
Upload the ZIP file you saved during the Adding an LDAP Client in Google Workspace procedure
Service Key
Upload the JSON file you saved during the Creating a Service Account in Google Cloud Platform procedure
Email Mapping
Select mail
Domain Admin Email
Enter the email address of the Admin account
Host Name/URL
ldap.google.com
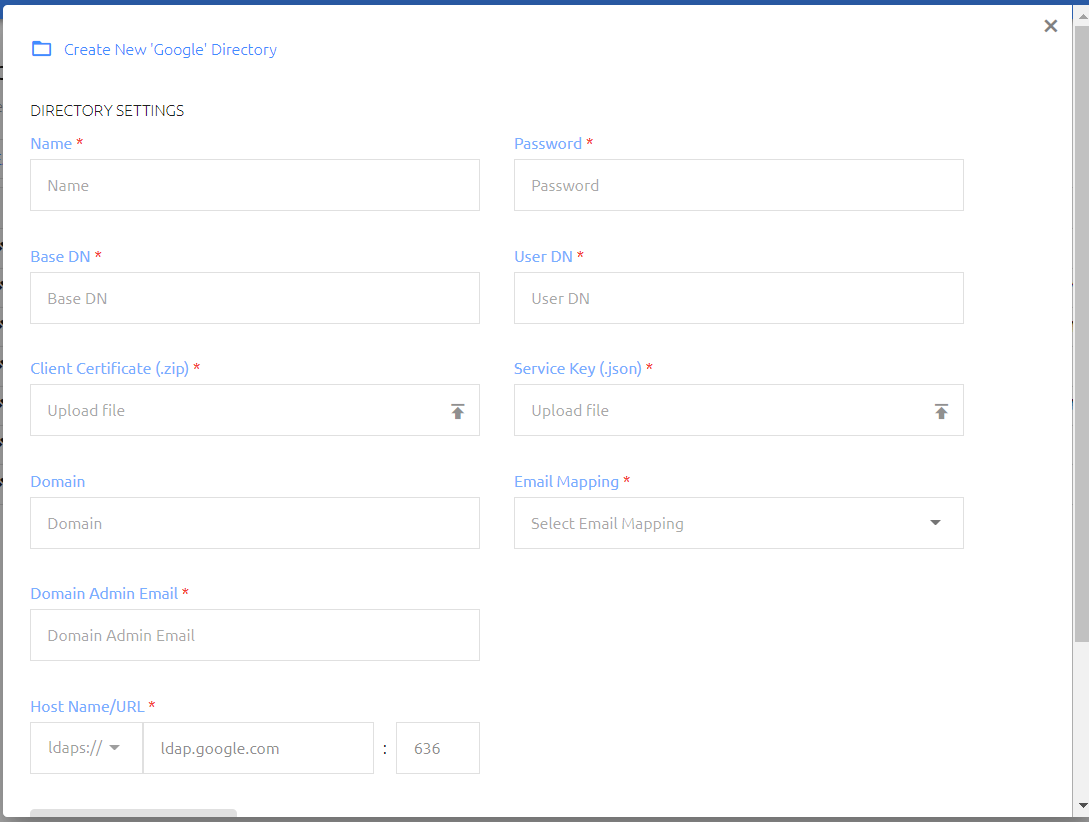
To perform a validity check, click Test Connection.
Click Create.
The directory is added and listed on the Directories page.