This document provides step-by-step instructions for configuring vCenter using the Octopus LDAP service as an identity source. The Octopus Authentication LDAP service provides the ability to integrate any service or application that supports LDAP by adding the Octopus Authentication bind to an Enterprise LDAP Repository (e.g., Active Directory).
In this setup, user authentication for vCenter is configured to use the Octopus Authentication Server LDAP service. This service allows the Octopus Authentication Server to act as an LDAP Proxy and perform authentication against the LDAP Repository (e.g., Active Directory). The Octopus Authentication LDAP service replaces the direct connection to the LDAP Repository Server and performs Octopus Authentication instead of the legacy Username & Password mechanism. (Octopus Authentication can also be configured as MFA.)
The Octopus Authentication LDAP service supports both LDAP and LDAPS connections.
Before beginning the integration, make sure the following requirements are met:
There is a deployed, operational instance of vCenter.
Octopus Authentication Server version 4.8.4 is installed and operational.
Your corporate directory (e.g., Active Directory, Oracle, Zimbra, etc.) is integrated with the Octopus Server and users have been added.
For details about directory integration, refer to Appendix C: Configuring the LDAP Identity Source.
For LDAPS only: Certificates have been copied to the required locations. For more information, refer to Appendix B: Managing LDAPS Certificates.
The integration process involves the following sequential stages:
Creating the Octopus Authentication LDAP Service in the Octopus Management Console
The following procedure explains how to create the LDAP service in the Octopus Management Console. Before you begin, review the Prerequisites and make sure they have been fulfilled.
To add and configure the LDAP service:
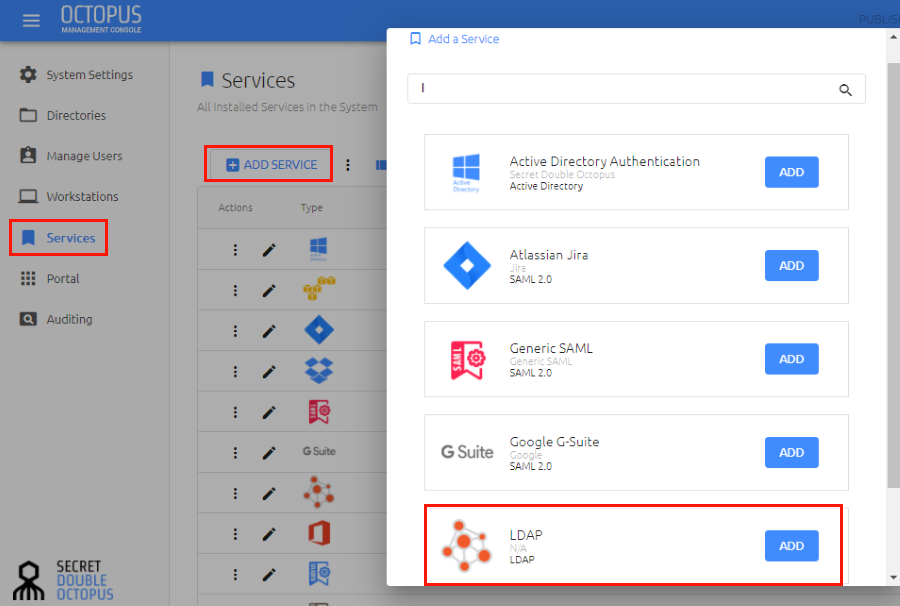
From the Octopus Management Console, open the Services menu and click Add Service. In the LDAP tile, click Add.
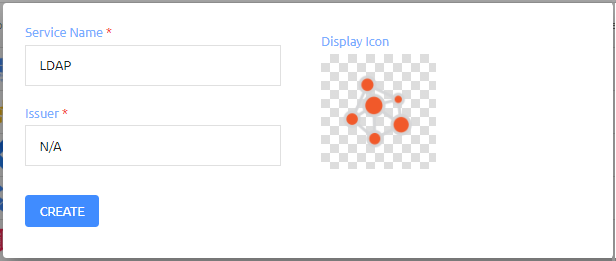
Then, in the dialog that opens, click Create.
Configure the following settings in the General Info tab:
Setting
Value / Notes
Service Name
LDAP
Issuer
Enter the issuer name.
Description
Enter a relevant note about the service.
Display icon
This icon appears on the Login page for the service. To change the default icon, click and upload the image of your choice. (Supported image size is 488x488 pixels.)
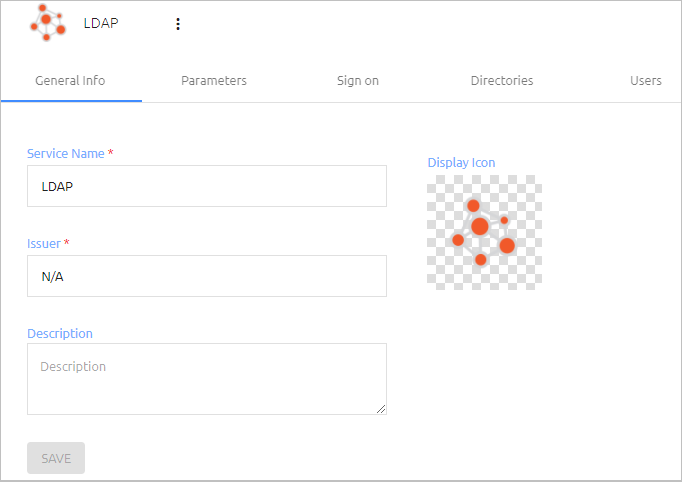
At the bottom of the tab, click Save.
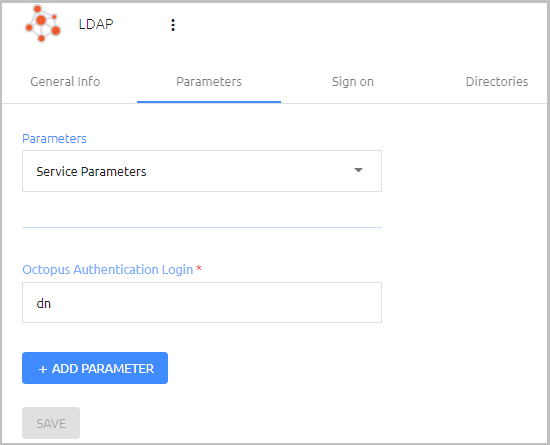
Open the Parameters tab. The Octopus Authentication Login is the login method to the LDAP Repository (Principle’s Username or DN). This parameter is not editable.
Open the Sign on tab and configure the following settings:
Setting
Value / Notes
Check Password
When enabled, users are required to enter a password for MFA authentication.
Bypass Unassigned Users
When enabled, users who are not assigned to the service will be allowed to login with username and password (without MFA). By default, this option is disabled, and unrecognized users are not authenticated.
Sign on Method
LDAP (not editable).
Custom Message
The message displayed to the user upon successful authentication.
Port
Enter a port number matching the LDAP port number of the service provider. Note: This port needs to be enabled in the firewall configuration. For details, refer to Appendix A: Octopus Authentication Firewall Configuration.
Protocol
Select the relevant protocol (LDAP or LDAPS).
Passwordless
When enabled, the user’s password on the AD is rotated transparently, allowing passwordless authentication to all integrated services.
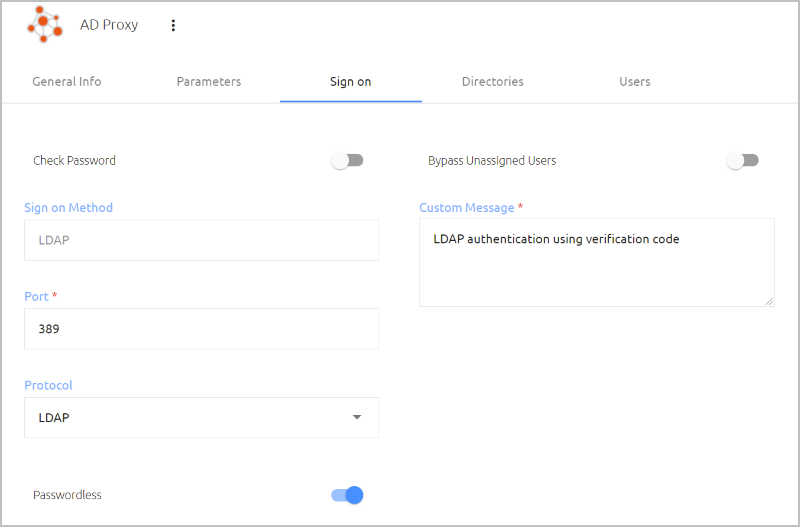
At the bottom of the Sign on tab, click Save.
Open the Directories tab and select the checkbox of the directory to be integrated with the service. (Only ONE directory may be selected.)
Then, click Save.
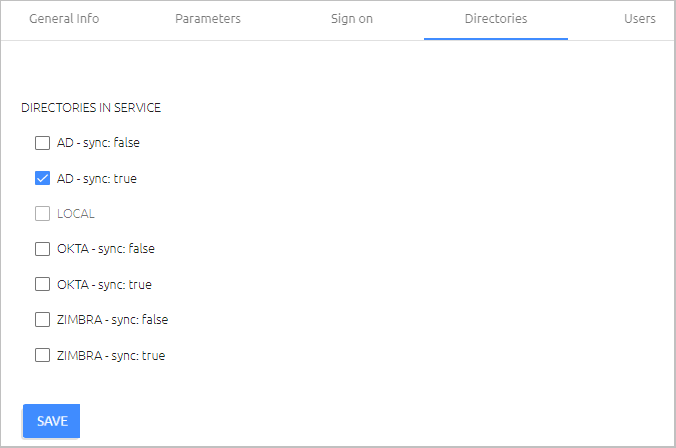
Open the Users tab. In the upper left corner of the tab, click Add.
A popup opens, with a list of directories displayed on the left.
Expand the relevant directory and select the checkboxes of the groups and users that you want to add to the service. Then, click Save to close the popup.
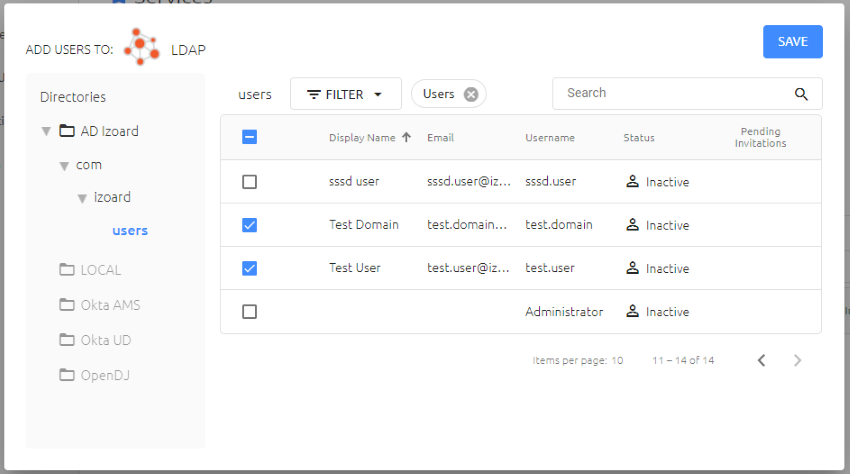
The groups and users you selected are listed in the Users tab.
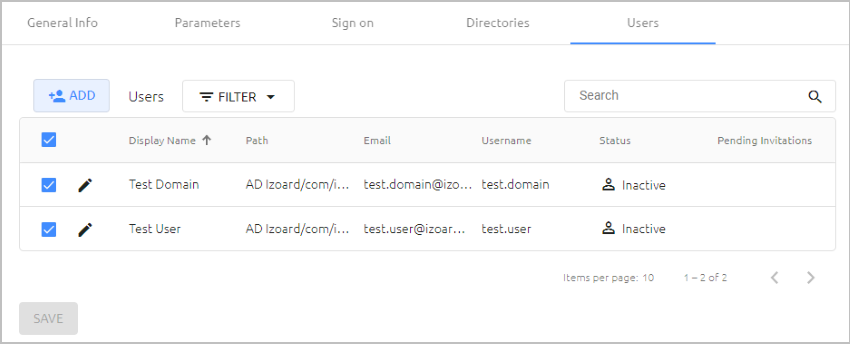
At the bottom of the Users tab, click Save. Then, from the toolbar at the top of the page, click PUBLISH and publish your changes.
This section presents important guidelines to take into consideration when configuring your external LDAP service for integration with the Octopus LDAP service.
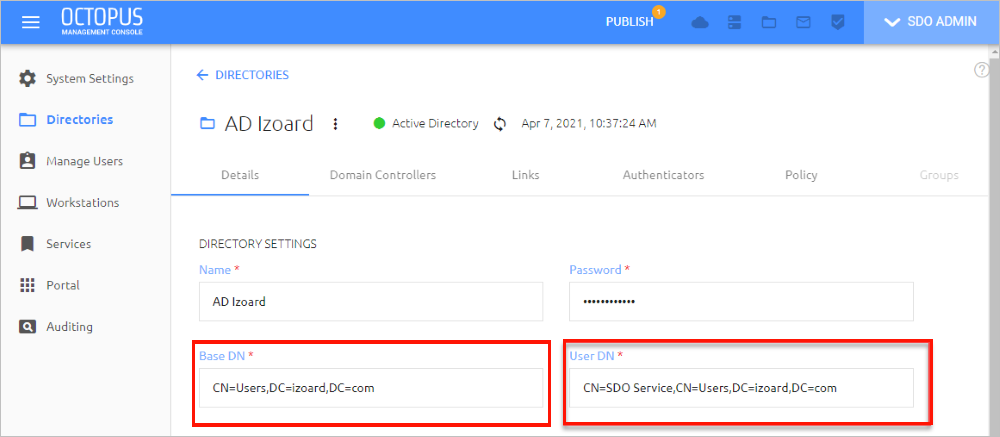
The screenshot below is taken from the Directories menu of the Octopus Management Console. To access the settings for your integrated directory, open the Directories menu and click  in the tile or row of the relevant directory.
When configuring your external LDAP service:
The service should use the same Admin account that is configured in the underlying directory as User DN.
The Base DN should be the same or lower in the directory hierarchy, so the search will focus on the same DN.
 |
The procedure below explains how to configure the identity source in your vCenter environment.
Before you begin, make sure that you have access to the Octopus Management Console. You will need to copy some settings from the Octopus LDAP service and from your integrated directory settings.
To configure the identity source in vCenter:
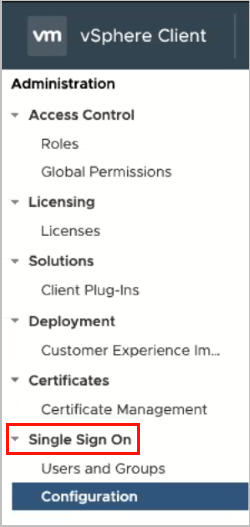
Navigate to Home > Administration. Then, select Single Sign On > Configuration.
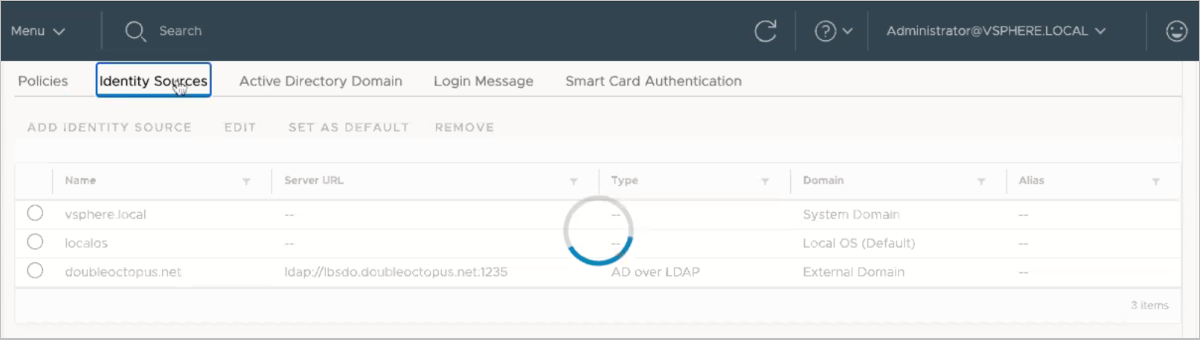
On the page that opens, select the Identity Sources tab and click Add Identity Source.
From the Identity Source Type dropdown list, select Active Directory over LDAP.
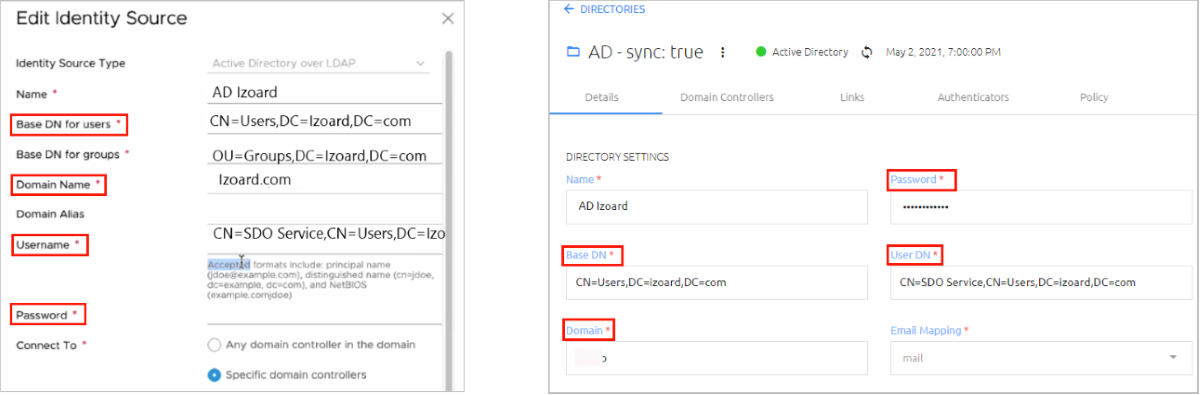
Then configure the following settings, which can be copied from the integrated directory settings in the Octopus Management Console (as shown in the figure below).
Setting
Value / Notes
Base DN for users
Enter the Base DN from the Octopus directory.
Base DN for groups
This setting has no parallel in the Octopus directory.
Domain Name
Enter the Domain from the Octopus directory.
Username
Enter the User DN from the Octopus directory.
Password
Enter the Password from the Octopus directory.
Enter the Primary Server URL using the following syntax:
[protocol]://<Enterprise-Base-URL>:<port>
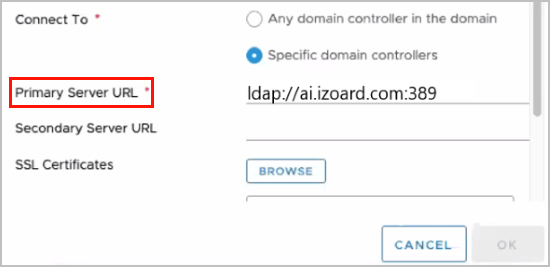
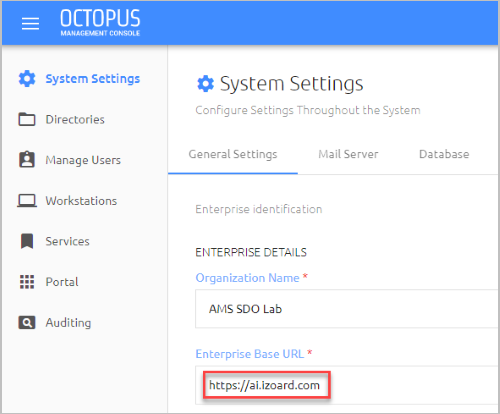
To copy the Enterprise Base URL from the Octopus Management Console, navigate to System Settings > General Settings.
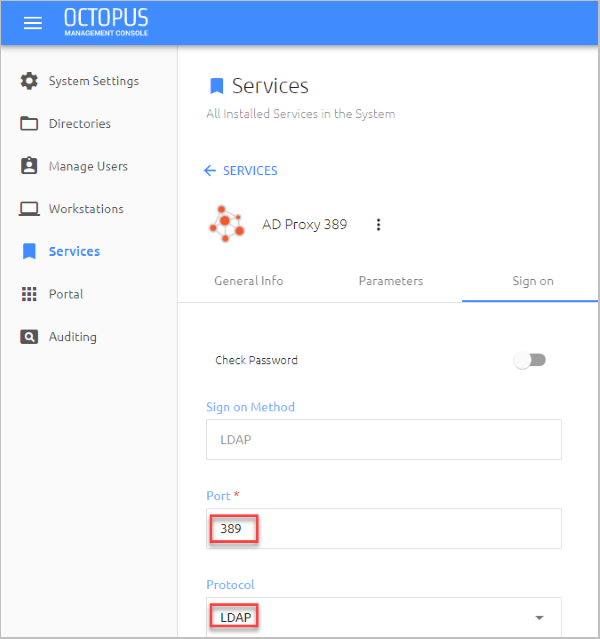
To view the Protocol and the Port, navigate to the Services menu, open the settings for the Octopus LDAP service, and select the Sign on tab.
To save the new identity source in vCenter, click OK.
Follow the steps below to enable the LDAP service port in the firewall configuration.
To enable the LDAP service port:
Establish an SSH session to the Octopus Authentication Server.
Configure the Linux firewall daemon.
Enable the LDAP port on the firewall by running the following command:
# sudo firewall-cmd --permanent --add-port=<LDAP port number>/tcpRestart the Octopus Authentication Firewall daemon with the following commands:
# sudo firewall-cmd --reload
# sudo firewall-cmd -- list--all
Configure the Linux Security Policy (SELinux) Policy by running the following command:
# sudo semanage port -a -t ldap_port_t -p tcp <LDAP port number>
NOTE: If the semanage command is not found, install the policy tool and run:
# sudo yum install policycoreutils-python
When using an LDAPS service, the relevant certificates need to be copied to the appropriate locations. Follow these steps to handle the certificates:
To override the ldaps.crt file, copy the public key to the Authentication Server, at /opt/sdo/authserver/certs
If you have more than one Authentication Server, copy the key to each Server.
To override the ldaps.key file, copy the private key to the Authentication Server, at /opt/sdo/authserver/certs/private
If you have more than one Authentication Server, copy the key to each Server.
After you have replaced the files, restart the sdomon service by running the following command:
systemctl restart sdomon
Follow the procedure below to integrate your corporate directory with the Octopus Management Console. The procedure presented uses Active Directory, but you can follow the same steps to integrate other directory types. The parameters are the same, except for the Domain field, which would be left empty.
To integrate the corporate Active Directory:
From the Octopus Management Console, open the Directories menu and click Create Directory.
The Select Directory Type dialog opens, with Active Directory displayed as the default directory type.
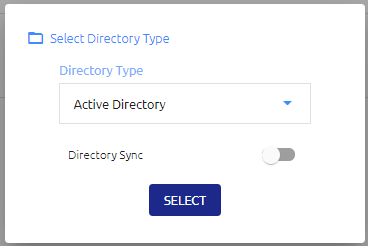
If you want directory users to be synced automatically, enable the Directory Sync toggle button. When Directory Sync is disabled (as in the example above), you will need to import users manually. (For more information, refer to the Octopus Management Console Admin Guide.)
Click Select.
The Create New Directory page opens.
Configure the following parameters, based on your corporate directory settings:
Parameter
Value / Notes
Name
Corporate Directory Server name
Password
Directory Administrator Principal’s password
Base DN
Directory Distinguished Name; Directory top tree level, from where a server will search for users (e.g., dc=<AD name>,dc=com)
User DN
Directory Administrator User DN string (e.g., cn=administrator=users, dc=<AD name>,dc=com)
Domain
IP address or NetBIOS domain name of the domain
Host Name/URL
Corporate Directory URL (LDAP/LDAPS) and port
Upload Certificate (when LDAPS is selected)
Directory LDAPS 64-base encoded root CA. Click the button and upload the certificate file.
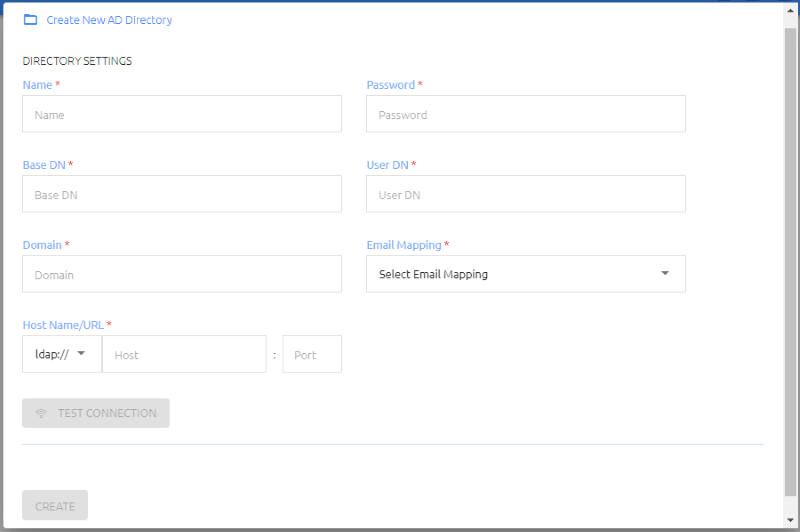
To verify your settings, click Test Connection.
At the bottom of the page, click Create. Then, from the toolbar at the top of the page, click PUBLISH and publish your changes.