Policy Management
Control authentication behavior and enforce security standards
Overview
Policy Management allows administrators to define how users authenticate, which authentication methods are allowed, how security requirements are enforced, and how policies are applied across users, groups, directories, devices, and portal access.
Key Capabilities
Modify Authentication Policies
Adjust authentication requirements and flows, including password requirements, authenticator settings, security protocol behavior, and additional protection mechanisms.
Apply Policies to Users and Groups
Scope and enforce policies across the environment by applying the relevant settings to directories, users, groups, devices, and self-service options.
Before You Begin
- Make sure you have administrator access to the Octopus Management Console.
- Review the organization security requirements before changing policy settings.
- Save changes before navigating between policy sections.
- Validate changes with a limited user group before applying them broadly.
1. Modify Directory Authentication Policies
Directory policy settings allow administrators to define authentication behavior for users associated with a specific directory.
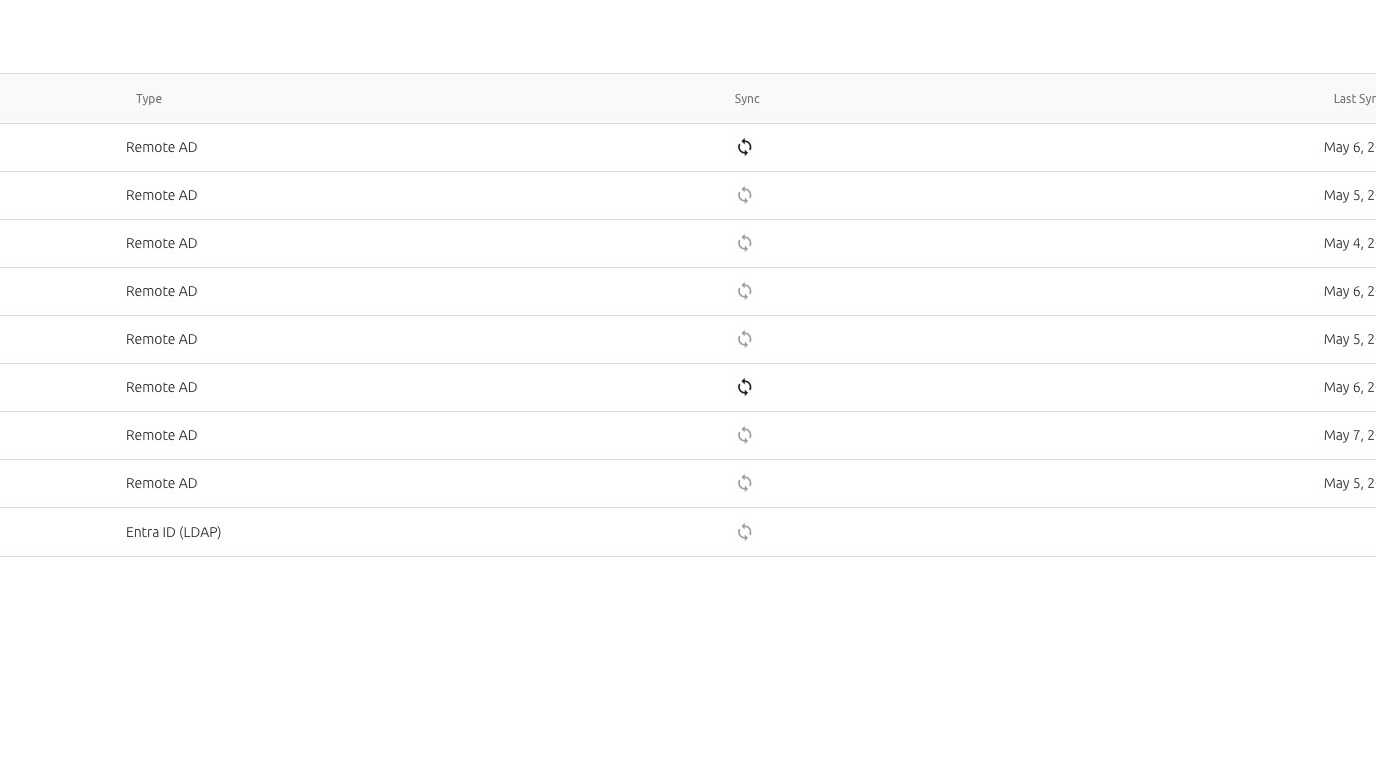
Step 1: Navigate to Directories
Log in to the Octopus Management Console and navigate to the Directories section.
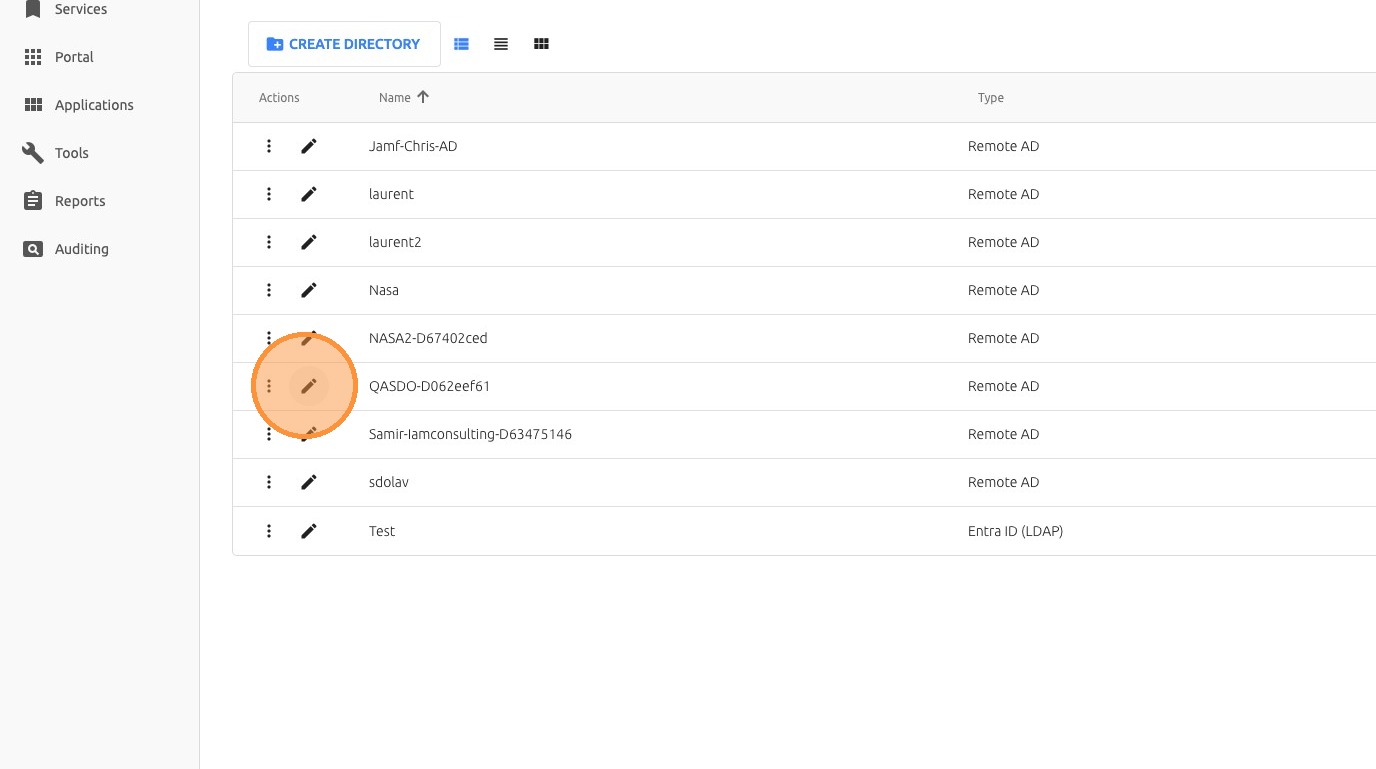
Step 2: Select a Directory
Select the relevant directory from the list.
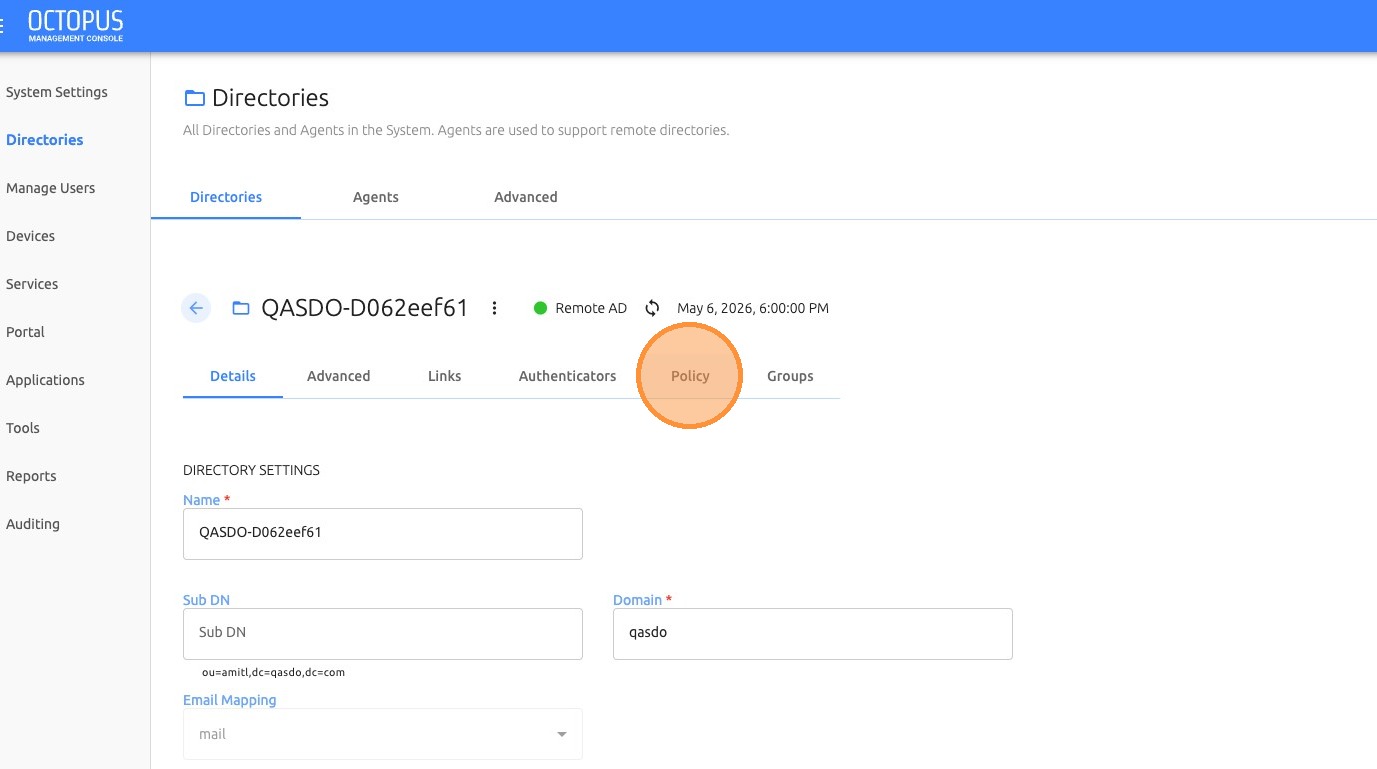

Step 3: Open the Policy Tab
Click Policy to view and modify directory policy settings.
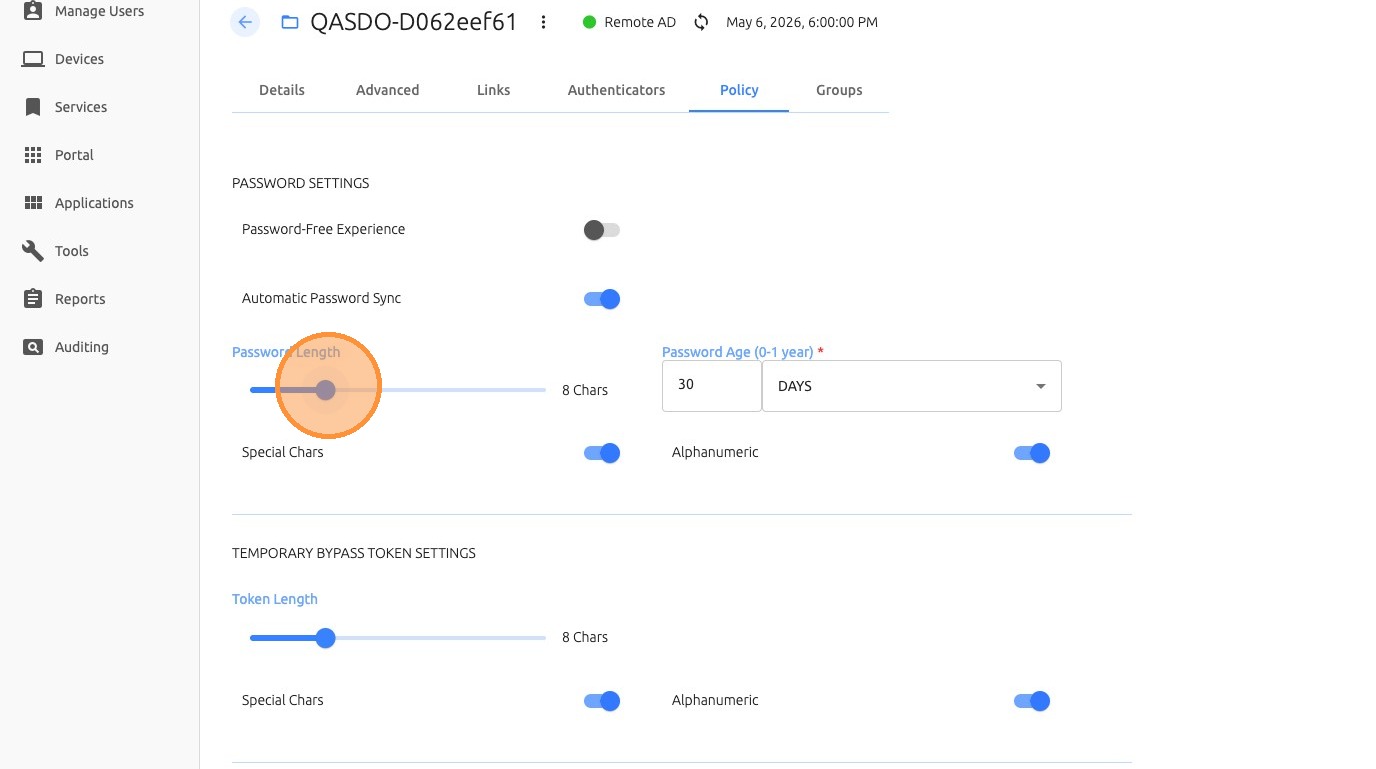
Step 4: Adjust Policy Settings
Adjust the required authentication parameters, such as password length or other policy controls.
Step 5: Save Changes
Save the current policy changes before navigating to another tab or section.
2. Configure Authenticator Policy Settings
Authenticator settings define how authentication methods are configured and enforced for the selected directory.
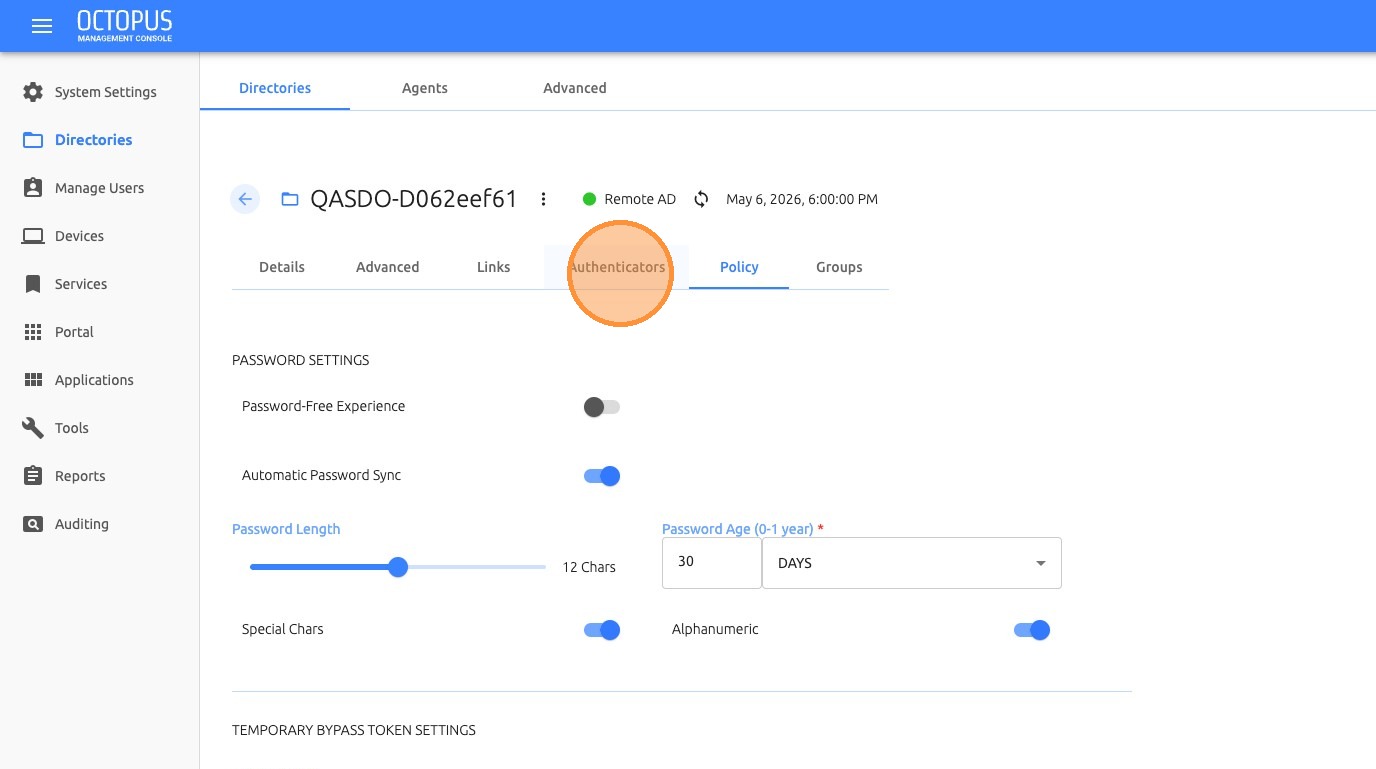
Step 1: Open Authenticators
From the selected directory, open the Authenticators tab.

Step 2: Select Algorithm
Select the required algorithm from the dropdown menu, such as SHA256.
3. Apply Policies to Users and Groups
Policies can be scoped and enforced for users and groups based on directory membership, user configuration, and administrative settings.
Step 1: Navigate to Manage Users
Open the Manage Users section.
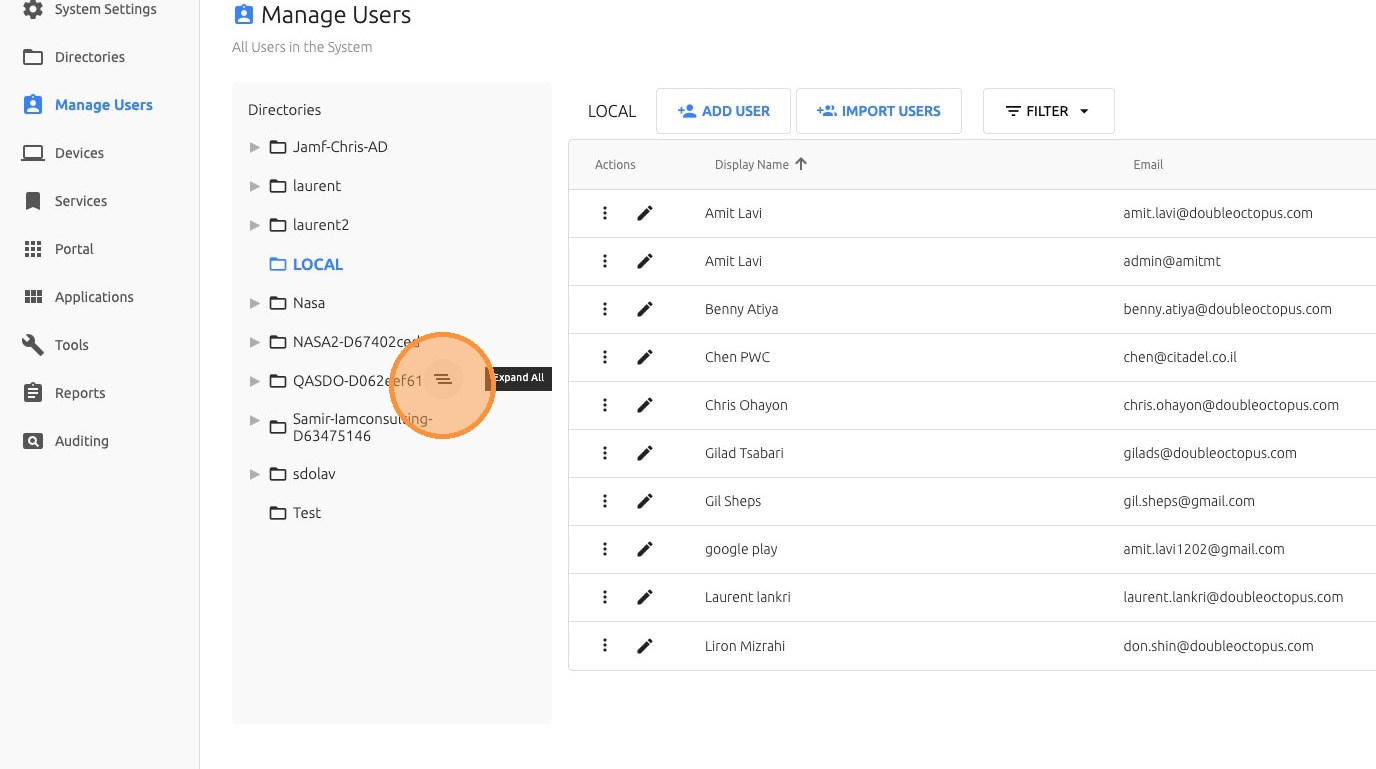
Step 2: Filter by Directory
Filter the user list by the relevant directory.
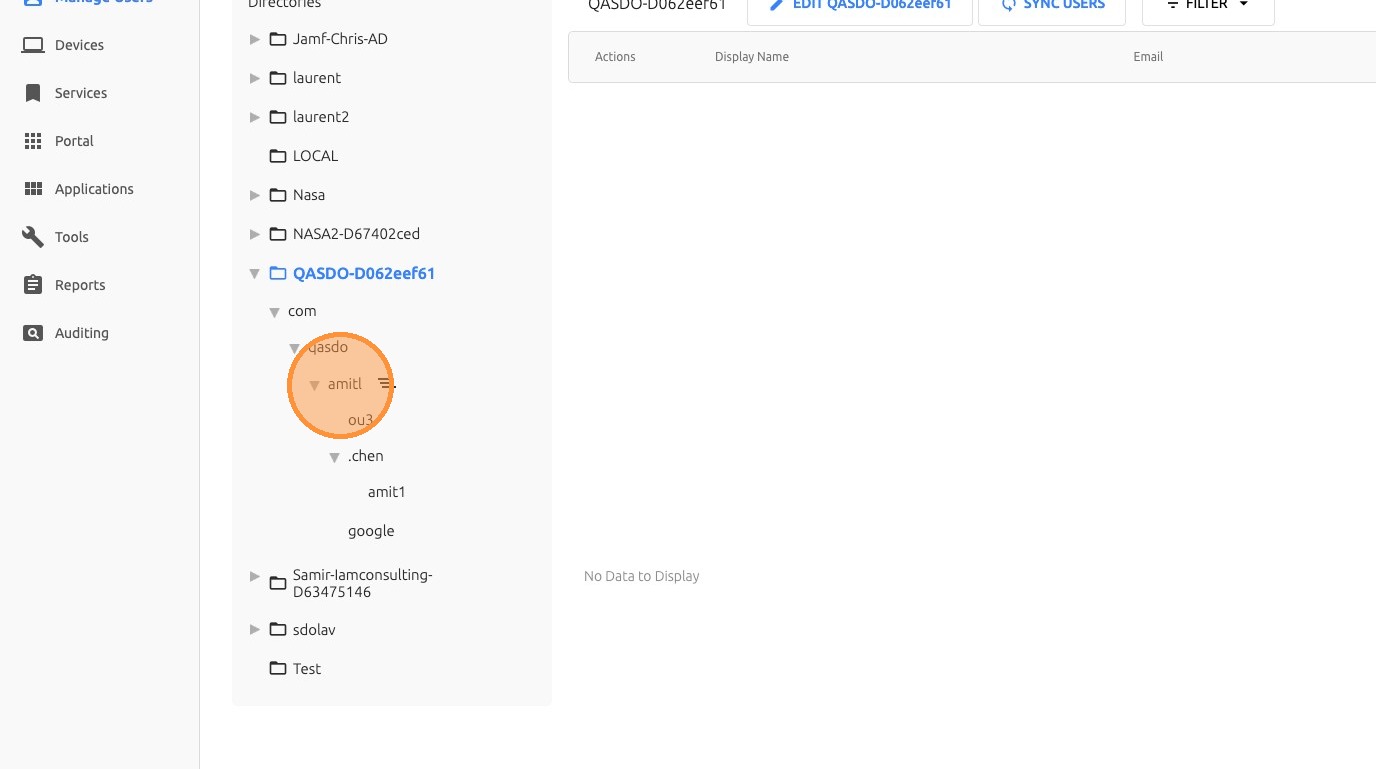
Step 3: Select User or Group
Select the specific user or group that you want to configure.
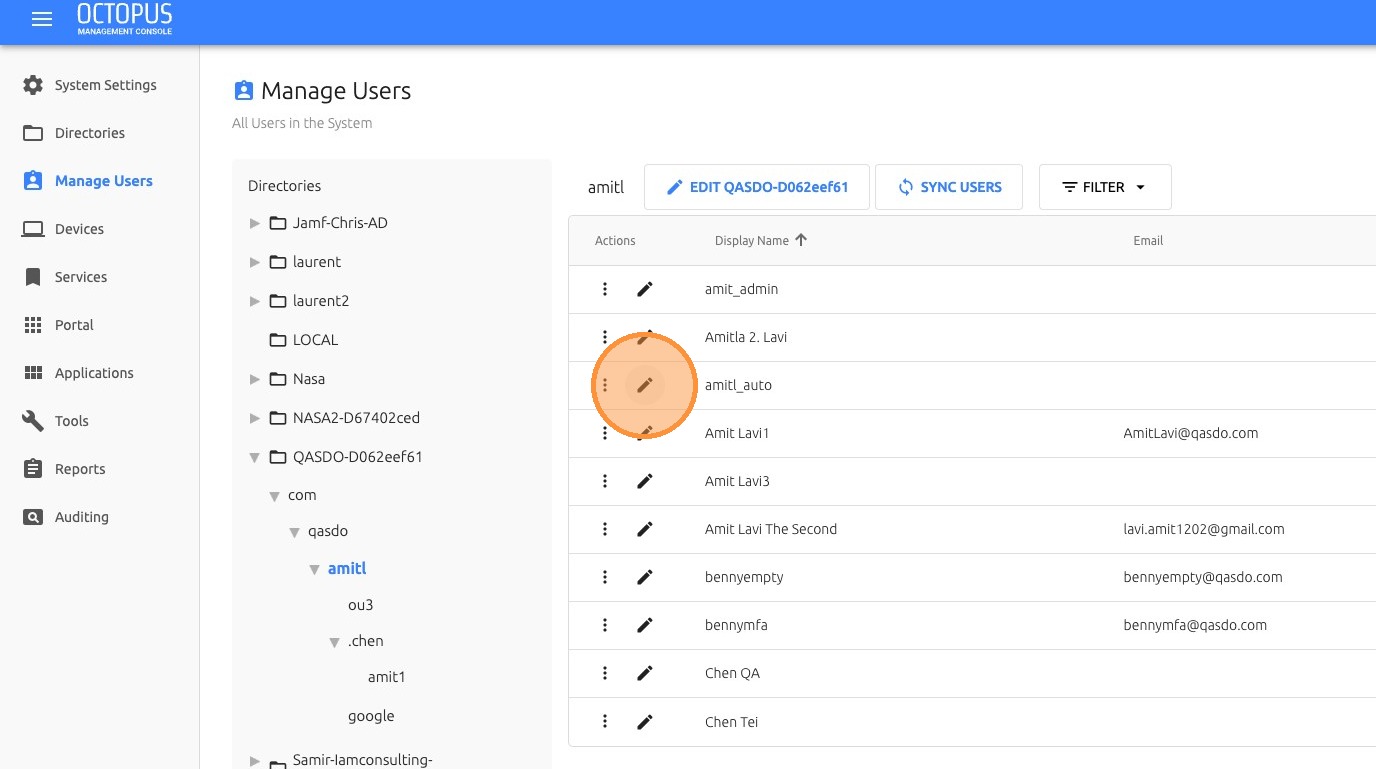
Step 4: Open Settings
Click Settings.
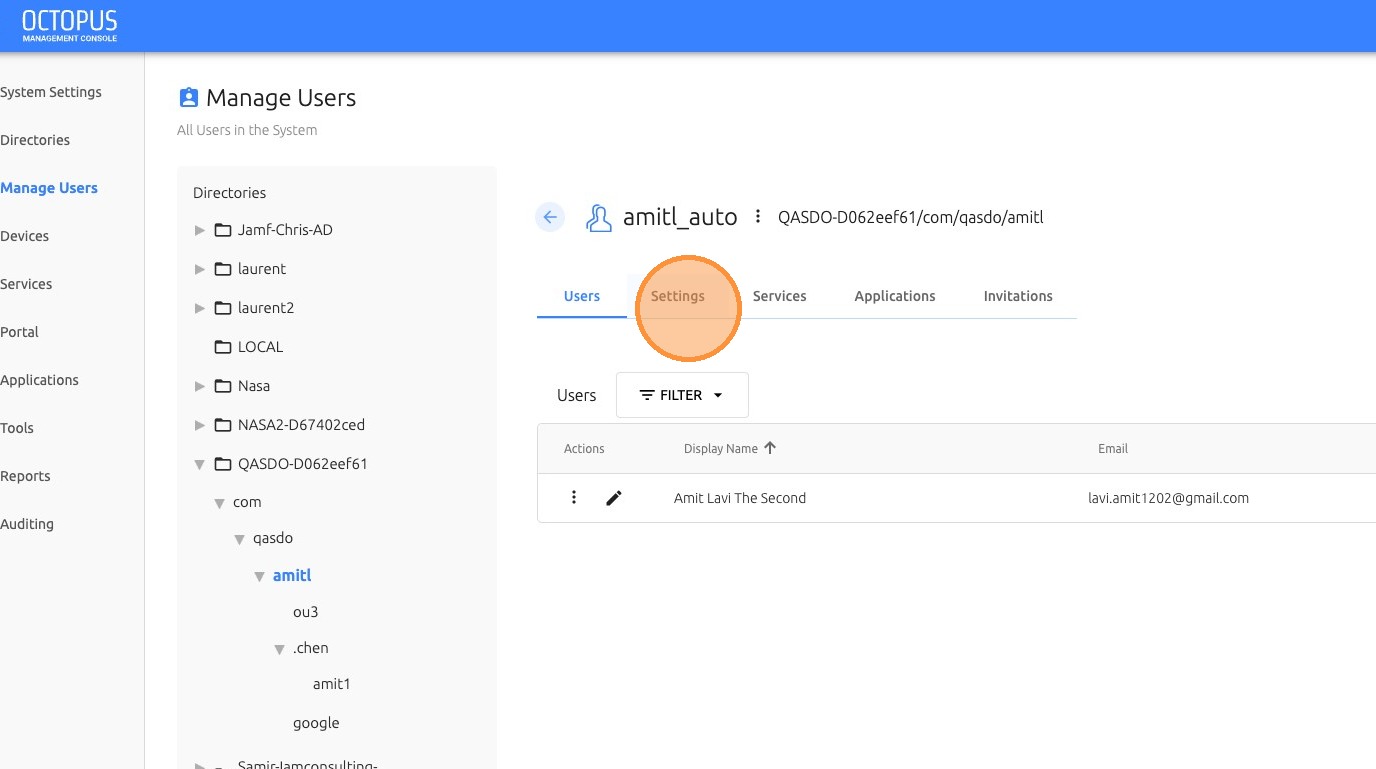
Step 5: Configure Auto-Enrollment
Choose whether to enable Auto-enroll according to the required policy.
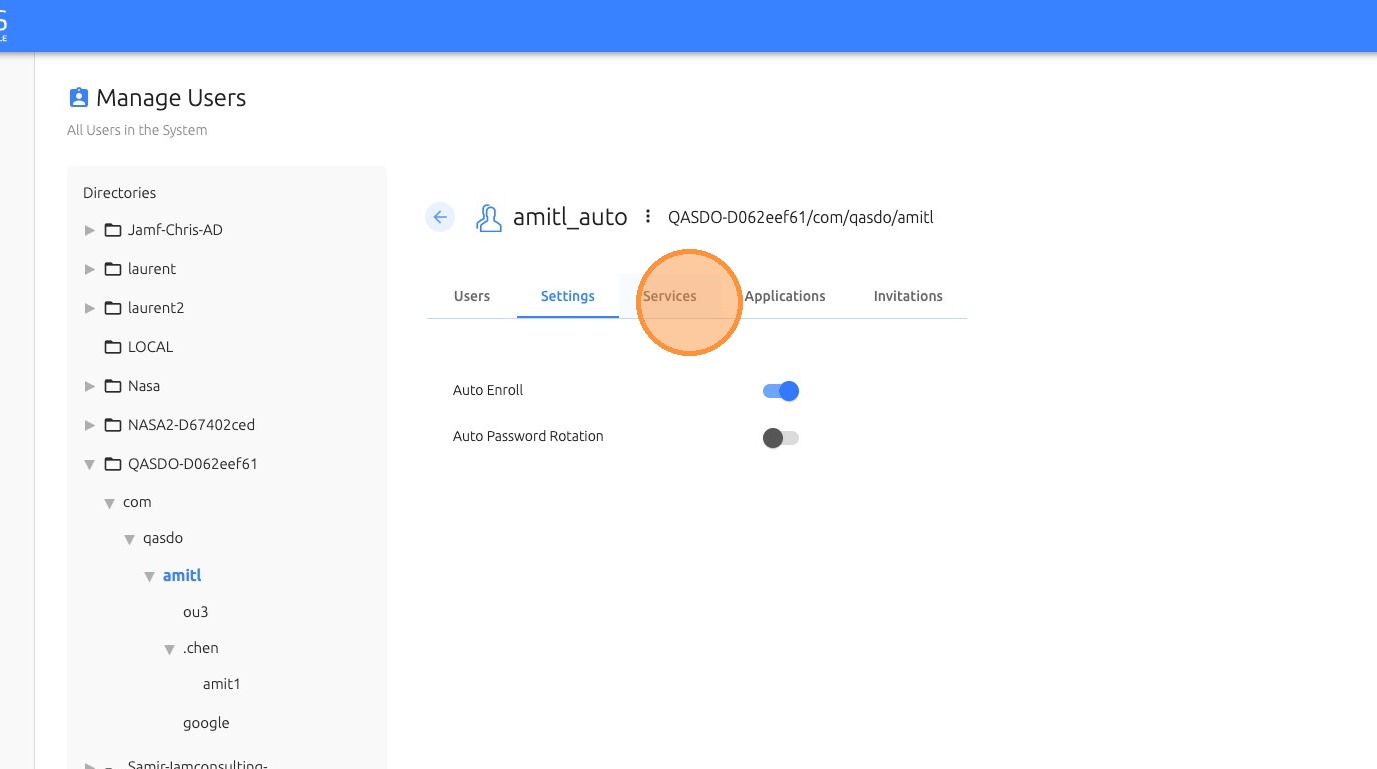
Use Case: Auto-Enrollment
Auto-enrollment can help simplify onboarding by allowing eligible users to enroll automatically based on the applied policy. This should be enabled only when the user population and rollout process are ready.
4. Configure Device Policy Settings
Device policy settings allow administrators to control workstation limits, supported protocol versions, and compatibility behavior.
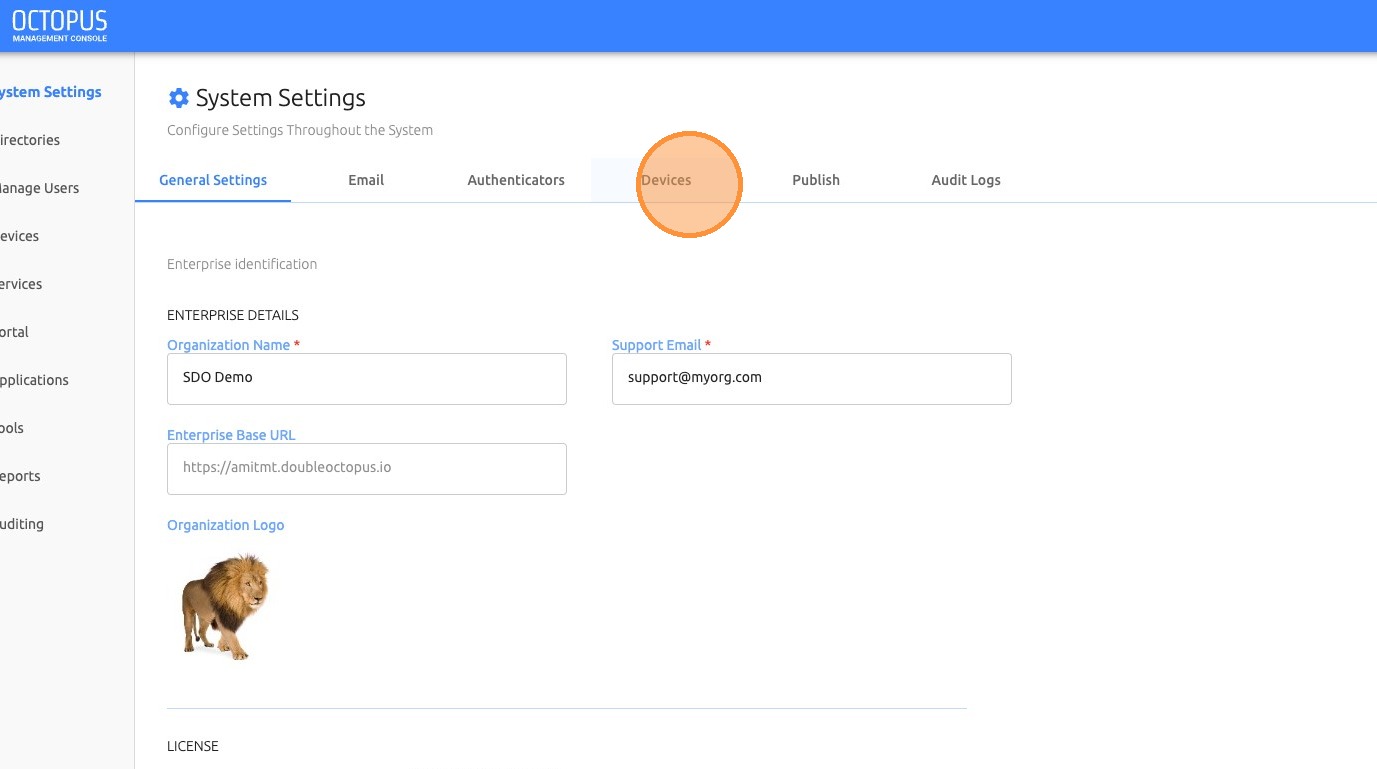
Step 1: Open Device Settings
Navigate to Settings > System Settings, and then click Devices.
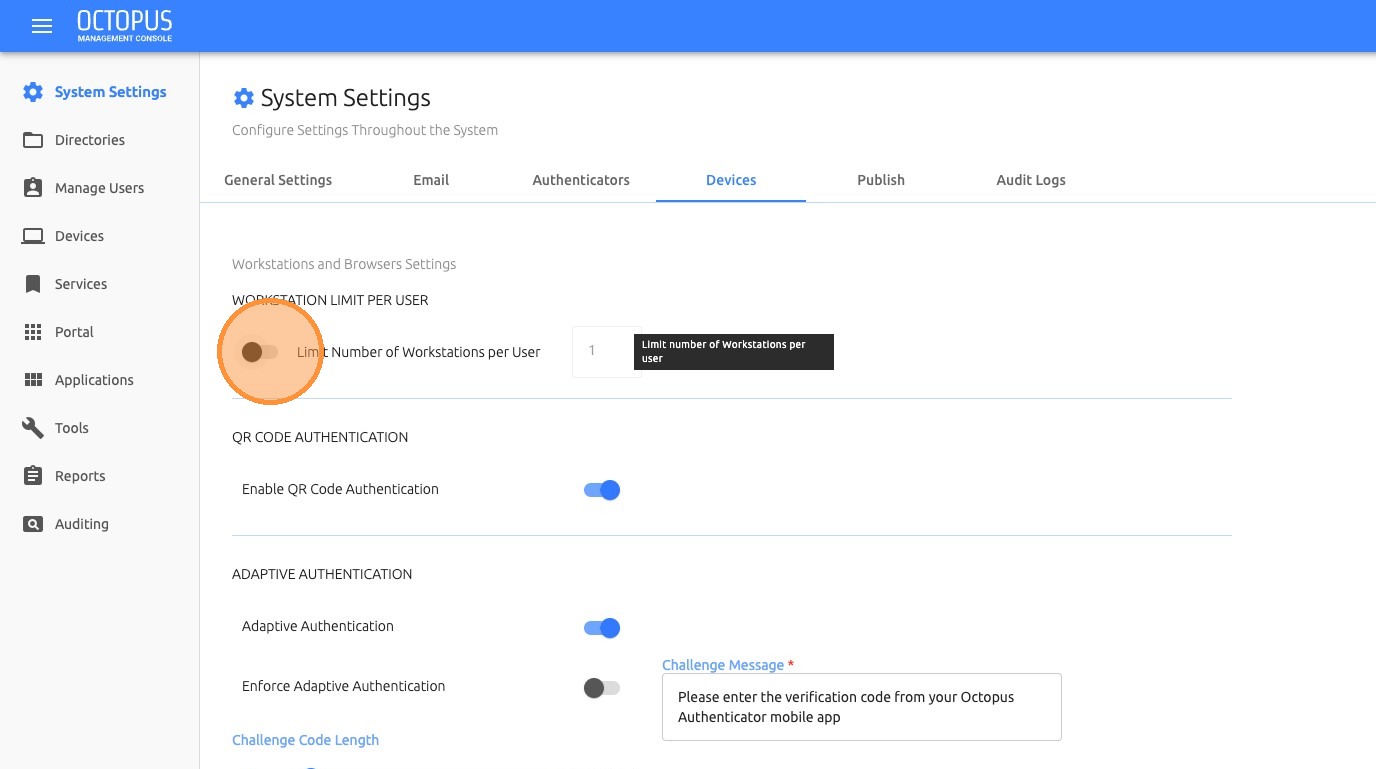
Step 2: Configure Workstation Limit
Choose whether to limit the number of workstations per user.
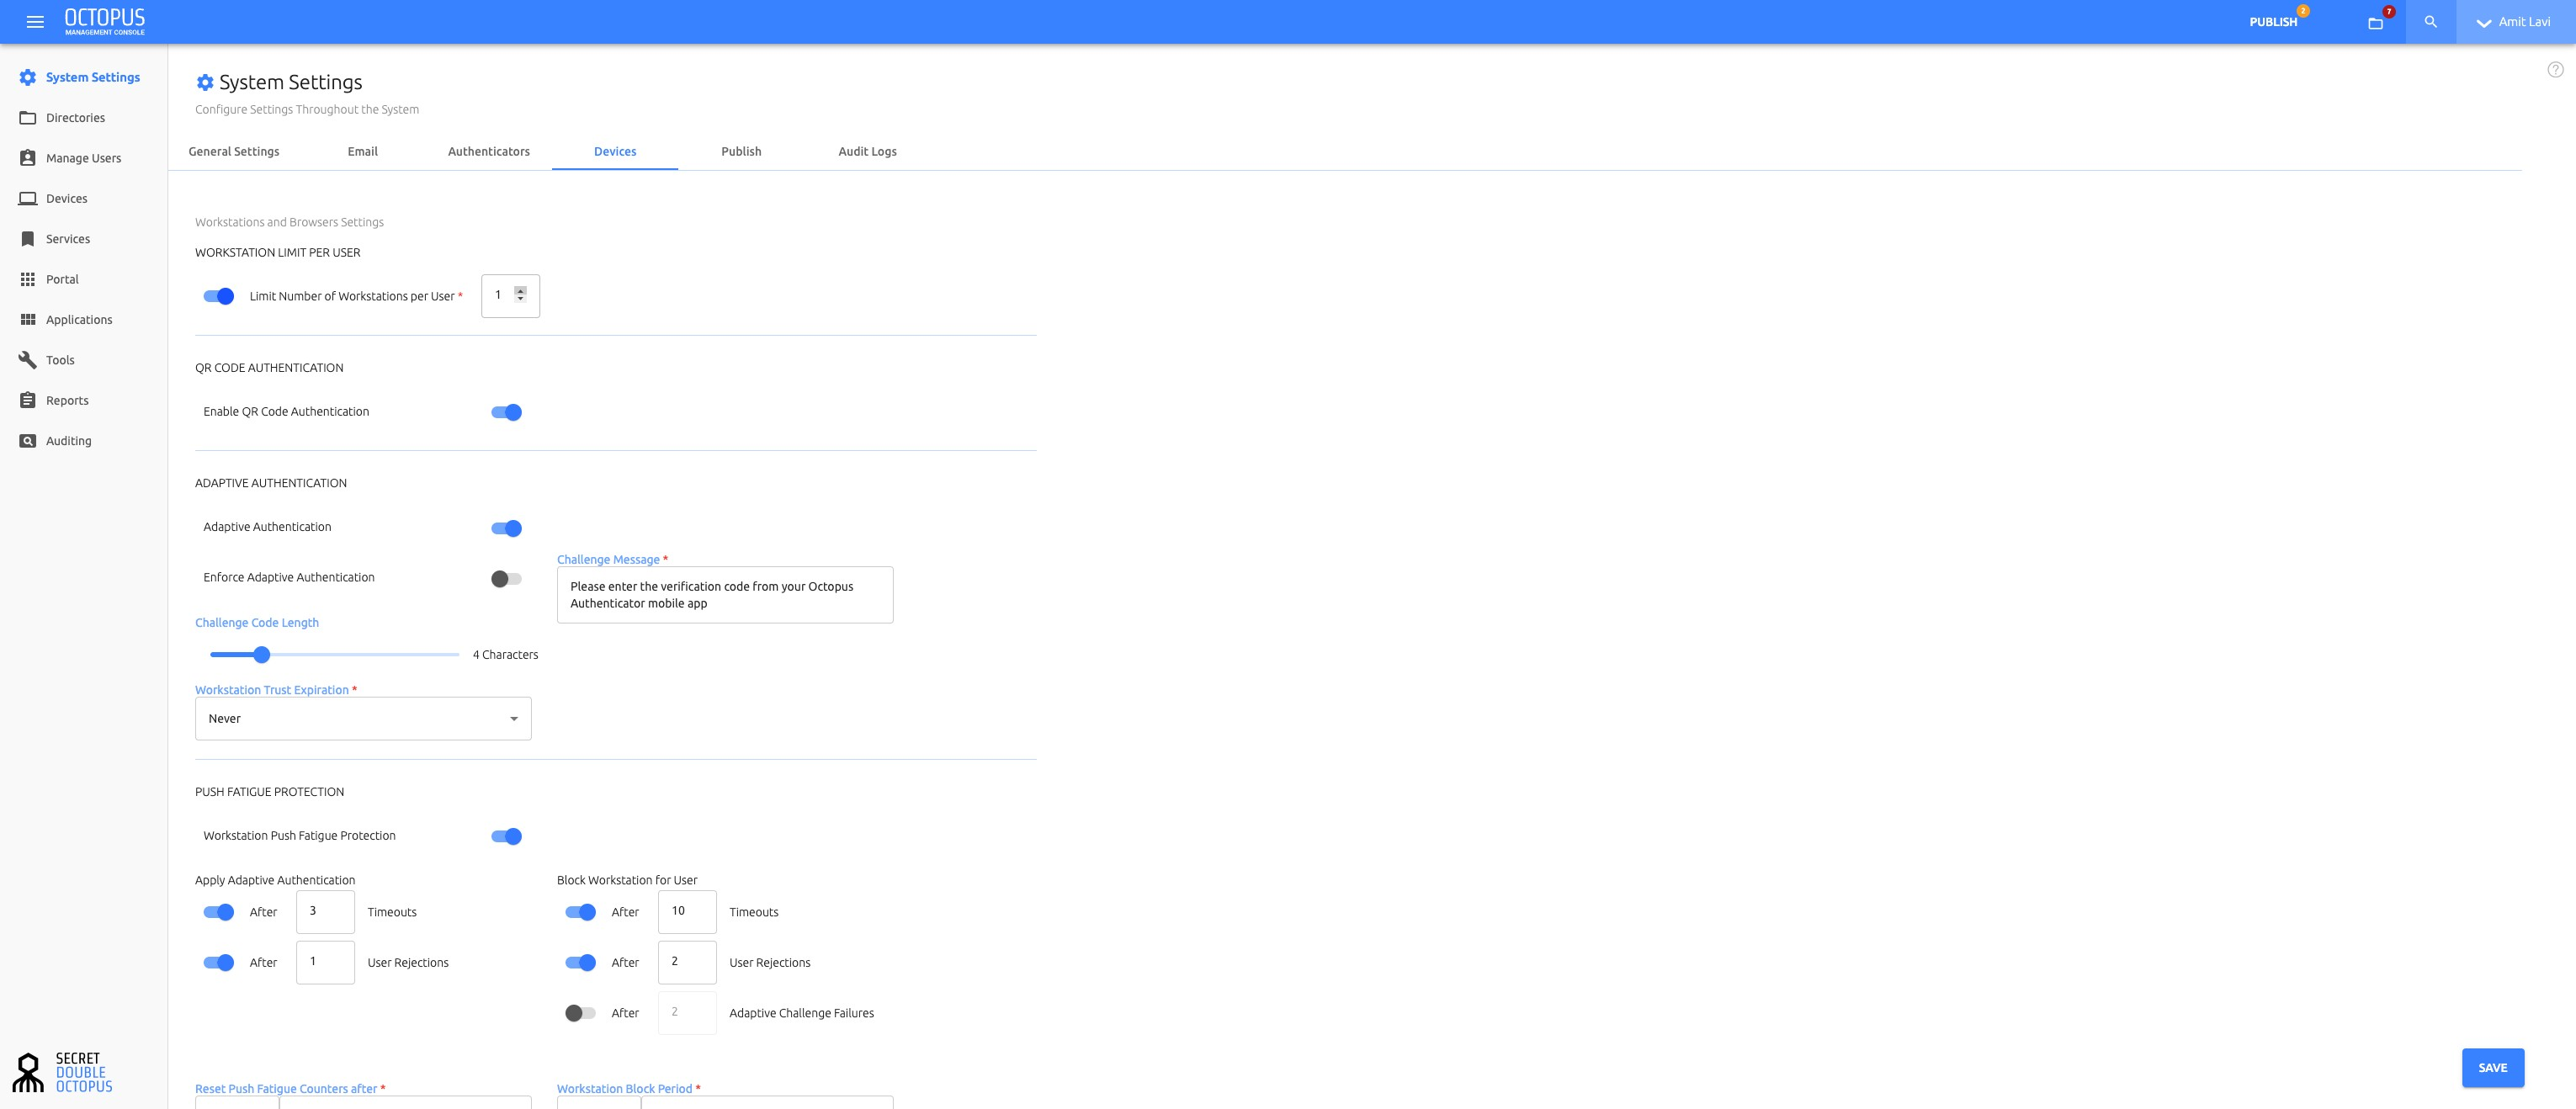
Step 3: Update Workstation Limit per User
If workstation limit is enabled, update the Workstation Limit per User field.
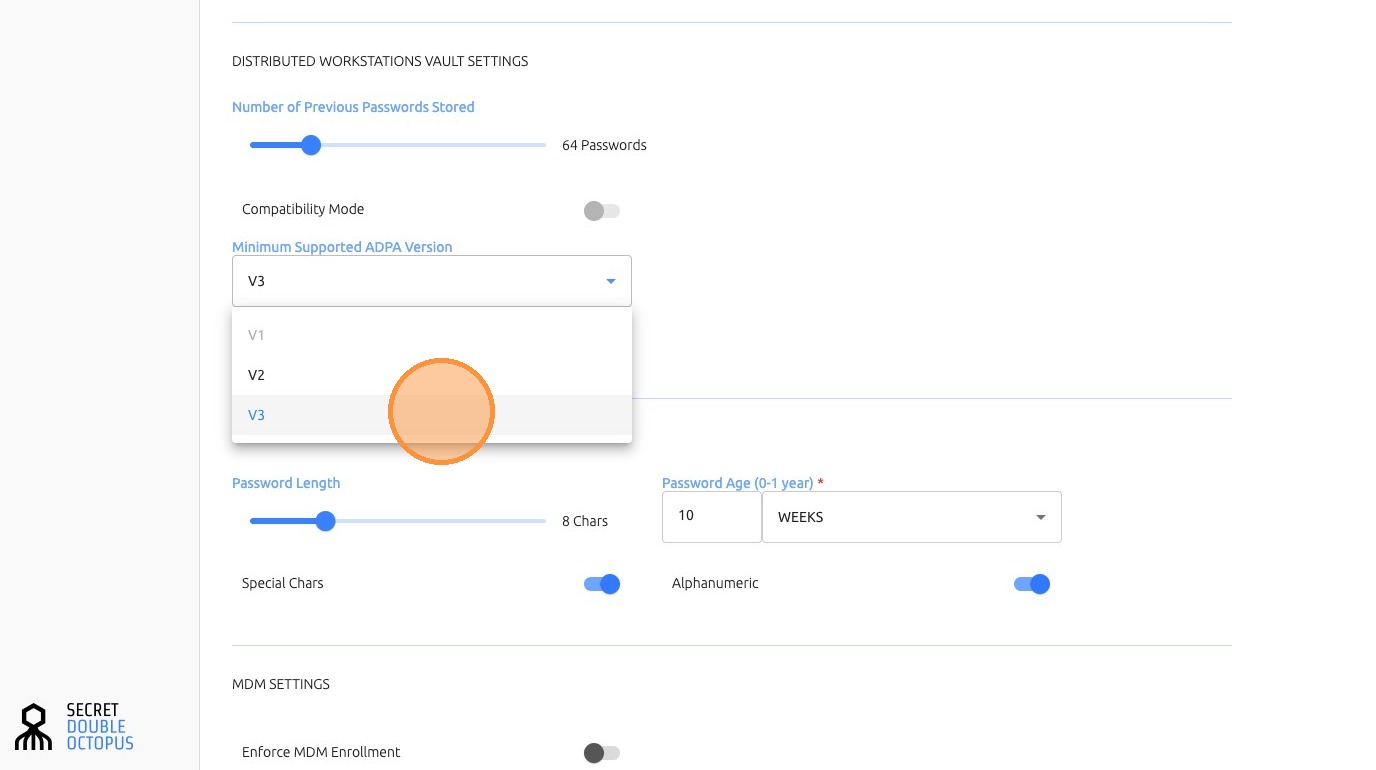
Step 4: Configure ADPA Version and Compatibility Mode
Choose the minimum supported ADPA version. The recommended version is V3, where supported. To strengthen security protocols, disable Compatibility Mode when it is no longer required.
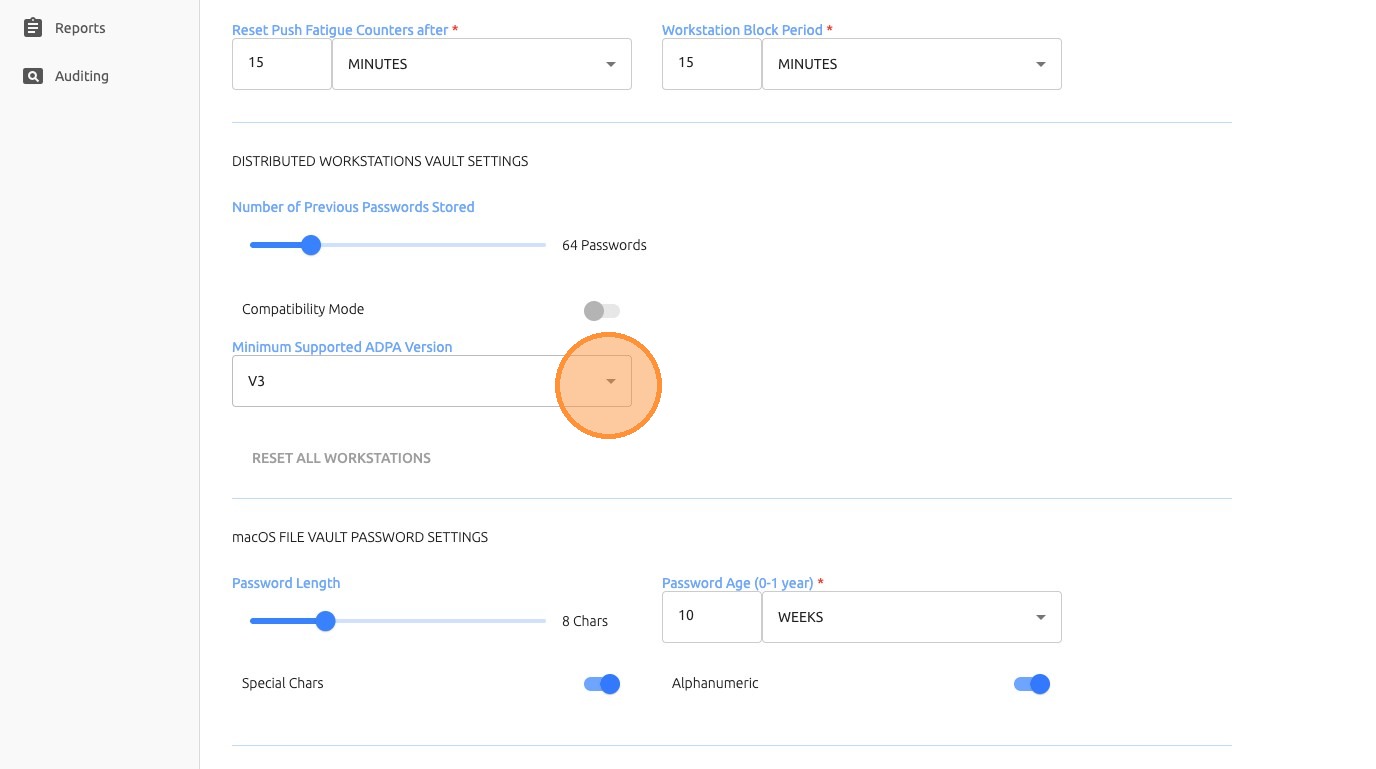
Step 5: Set Minimum Supported ADPA Version to V3
Set the Minimum Supported ADPA Version to V3.
Step 6: Save Device Settings
Click Save to apply the device policy configuration.

Important
Before disabling Compatibility Mode, confirm that all relevant clients and services support the selected ADPA version. Disabling compatibility too early may impact older clients.
5. Configure Push Fatigue Protection
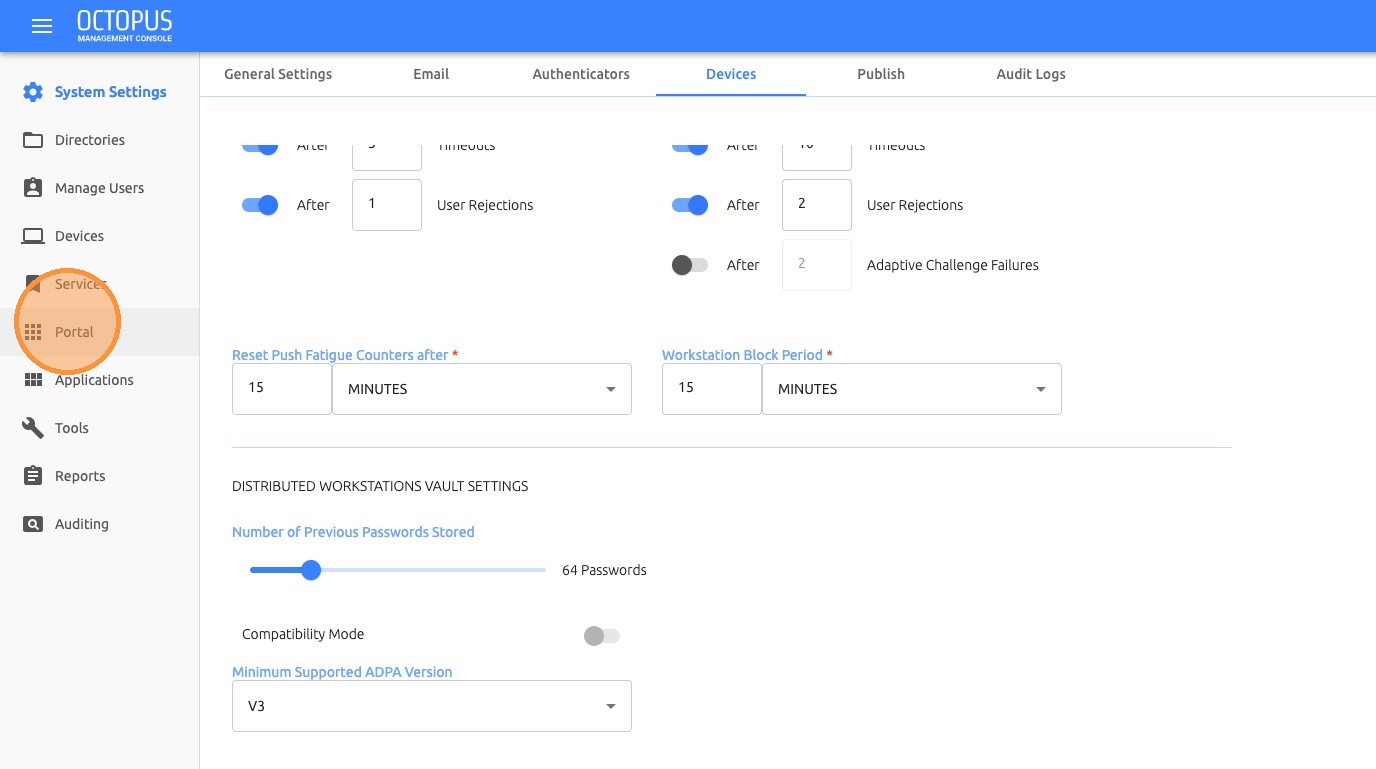
Push Fatigue Protection helps reduce the risk of repeated or unwanted authentication prompts by enforcing additional controls around push-based authentication.
Review Push Fatigue Protection
Check the Push Fatigue Protection settings and align the configuration with the organization security policy.
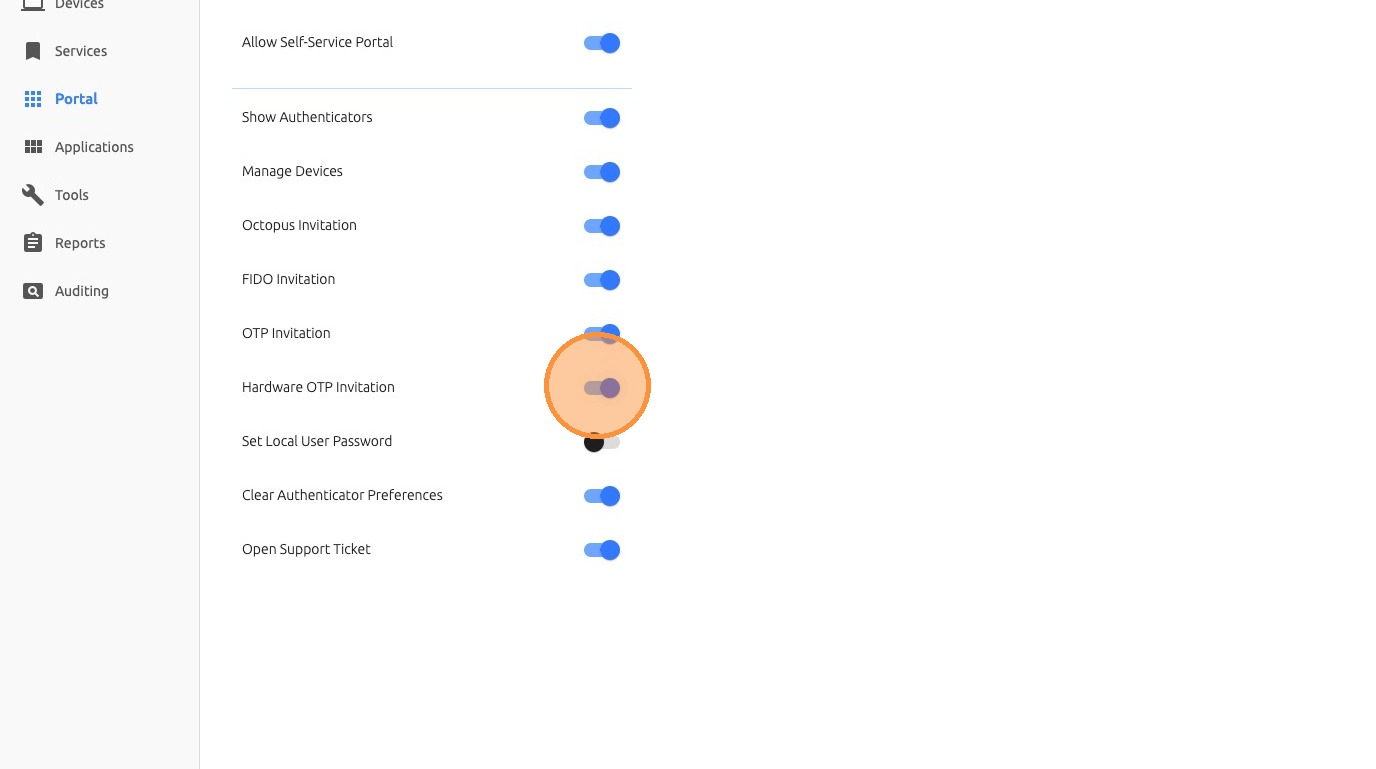
6. Configure Self-Service Portal Access
Self-service portal settings define which services are available to end users through the portal.
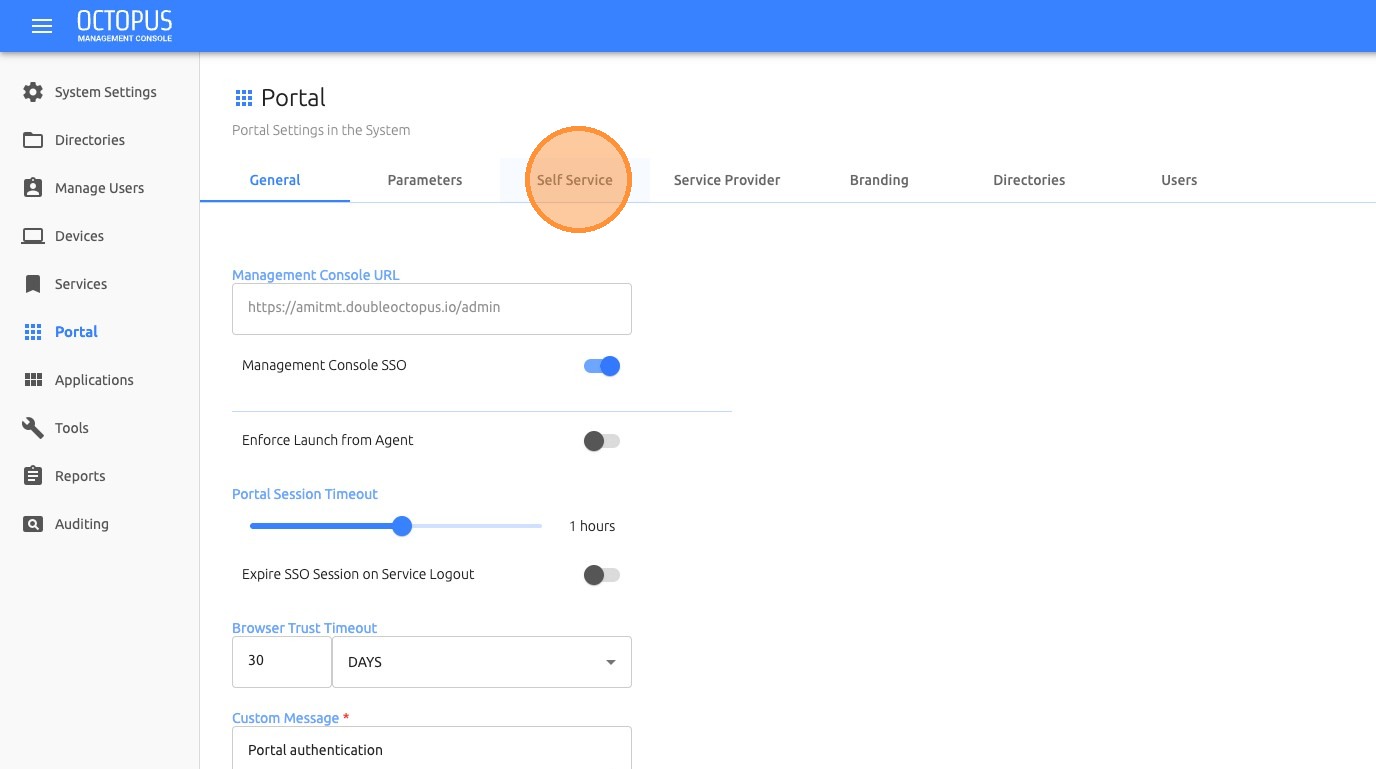
Step 1: Open Self Service
Navigate to Portal, click Self Service, and choose the services to allow for end users.
Step 2: Review Available Services
Review the available self-service options.
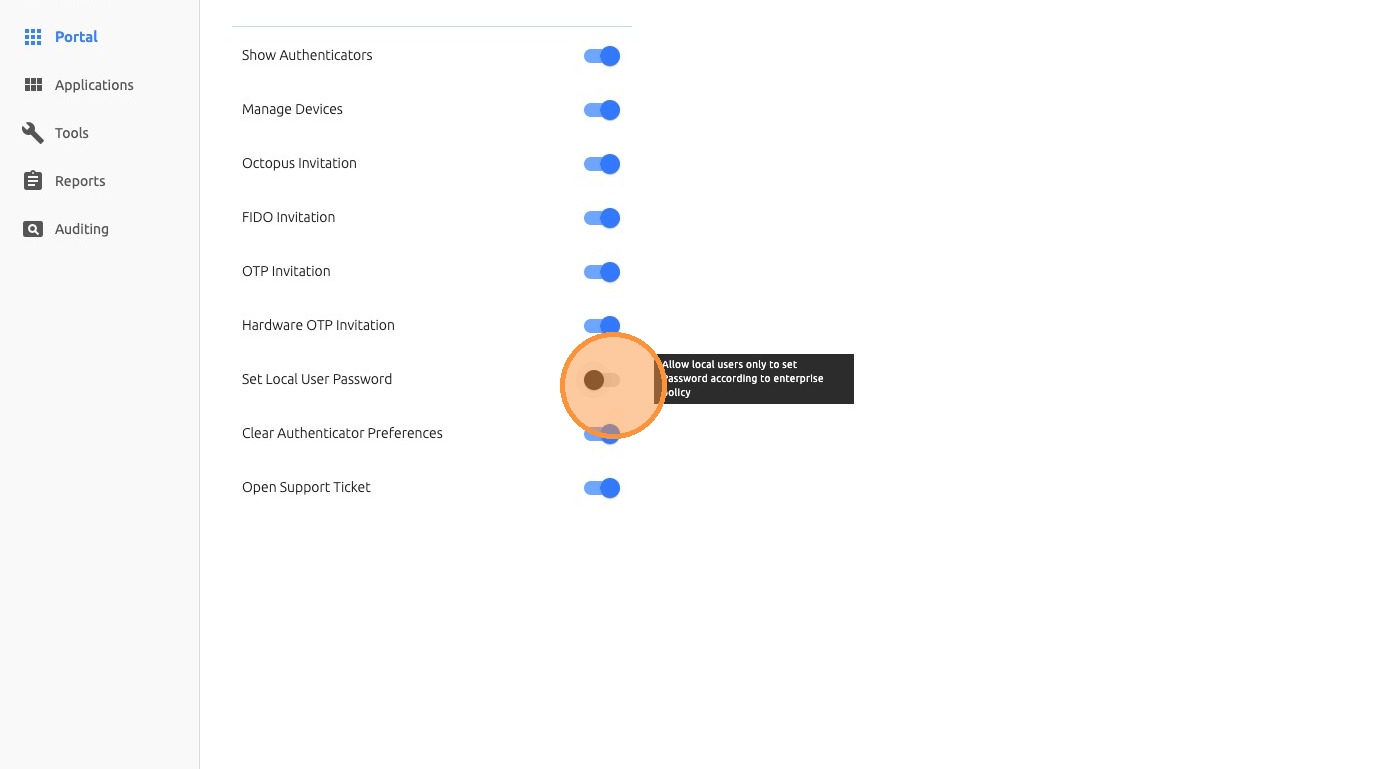
Step 3: Choose Allowed Services
Choose the services that should be available to end users and save the configuration.
Validation Checklist
| Check | Expected Result |
|---|---|
| Directory policy updated | The selected directory reflects the updated authentication policy. |
| Authenticator settings saved | The selected authenticator configuration is active. |
| User or group policy applied | The correct user or group receives the intended policy behavior. |
| Device settings configured | Workstation limits, ADPA version, and compatibility settings are aligned with policy. |
| Self-service options reviewed | Only approved end-user services are enabled. |
Troubleshooting
| Issue | Recommended Action |
|---|---|
| Users are not receiving the expected authentication flow | Confirm the user is assigned to the correct directory, group, and policy scope. |
| Policy changes are not reflected | Verify that the changes were saved and that the correct directory or user group was updated. |
| Older clients fail after policy hardening | Review ADPA version requirements and Compatibility Mode settings. |
| Users cannot access expected portal services | Review the Self Service portal configuration and confirm the required services are enabled. |
Summary
Policy Management is used to control authentication behavior, enforce security standards, and scope authentication rules across users, groups, directories, devices, and portal services. Administrators should review policy changes carefully, save each configuration update, and validate the impact before broad deployment.