MSP Shared Account Configuration
Secret Double Octopus Helpdesk Guide
Configure MSP account sharing, publish the service, and validate delegated access
Download the PDF Guide
Use the downloadable PDF version for offline access or sharing.
Download MSP Shared Account Configuration PDFAfter attaching the PDF in Freshdesk, replace the placeholder URL in this button with the attachment link.
Overview
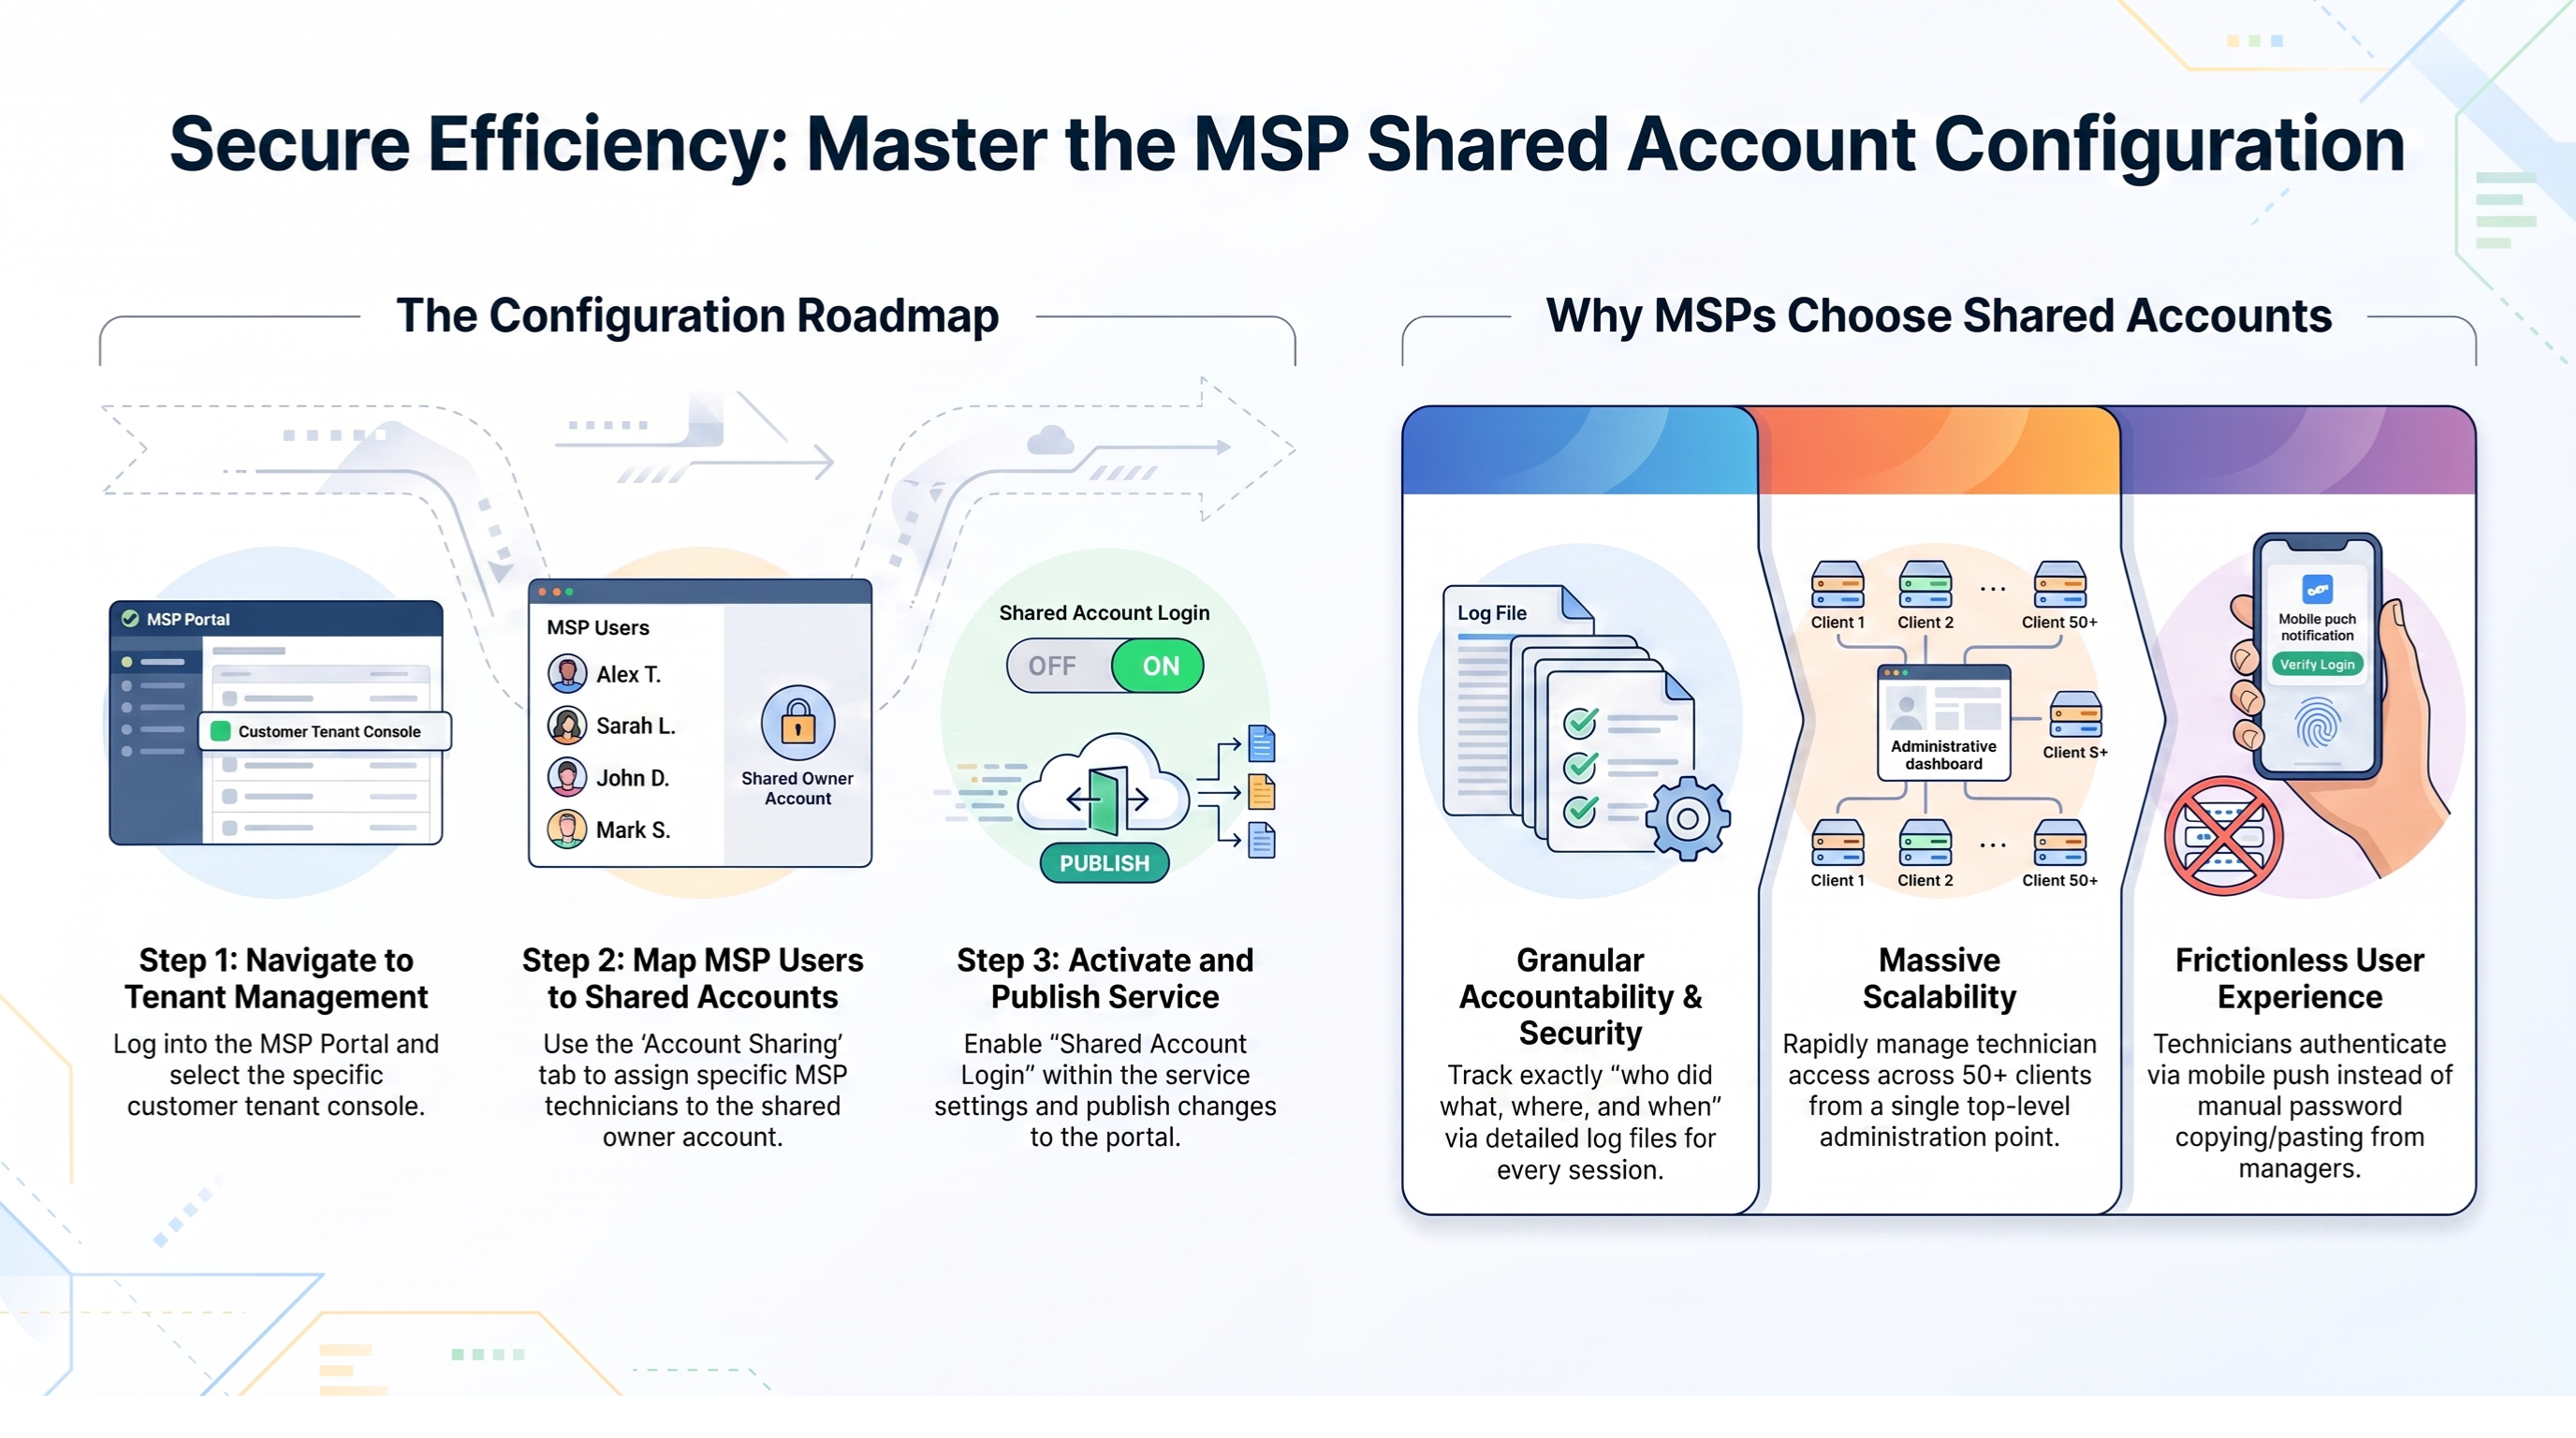
This article explains how to configure MSP Shared Account access in Secret Double Octopus. It covers MSP Portal authentication, tenant navigation, assigning an MSP user to a shared account, updating and publishing the service configuration, and validating the end-user experience.
Prerequisites
- MSP administrator access to the main tenant.
- Access to the relevant customer tenant.
- An existing shared-account owner.
- An existing MSP user with the required permissions.
- A configured application or service.
Resolution Steps
- Sign in to the MSP Portal.
- Open the required customer tenant.
- Launch the tenant Management Console.
- Configure MSP Account Sharing for the required user.
- Add the MSP user and save the user configuration.
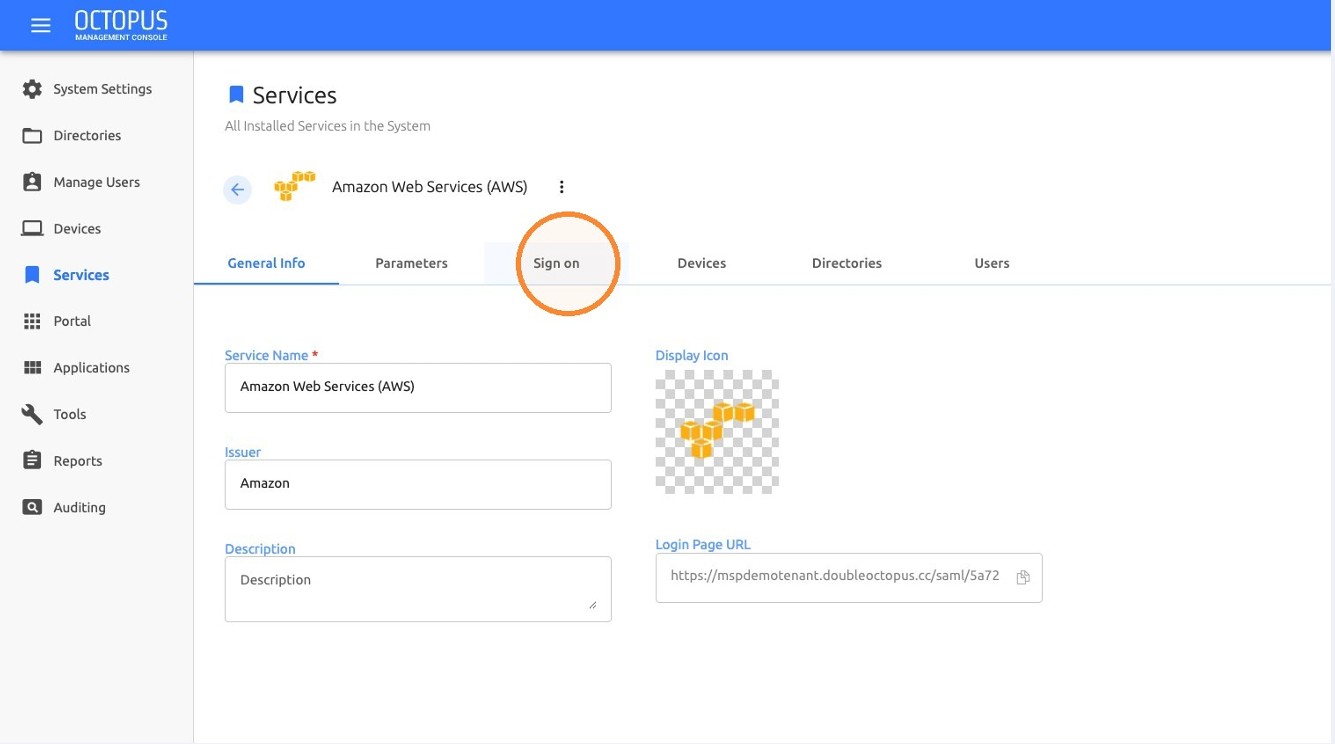
- Open the relevant service and review its sign-on configuration.
- Save and publish the service.
- Validate access from the user portal.
Video Walkthrough
Detailed Step-by-Step Guide
User Authentication
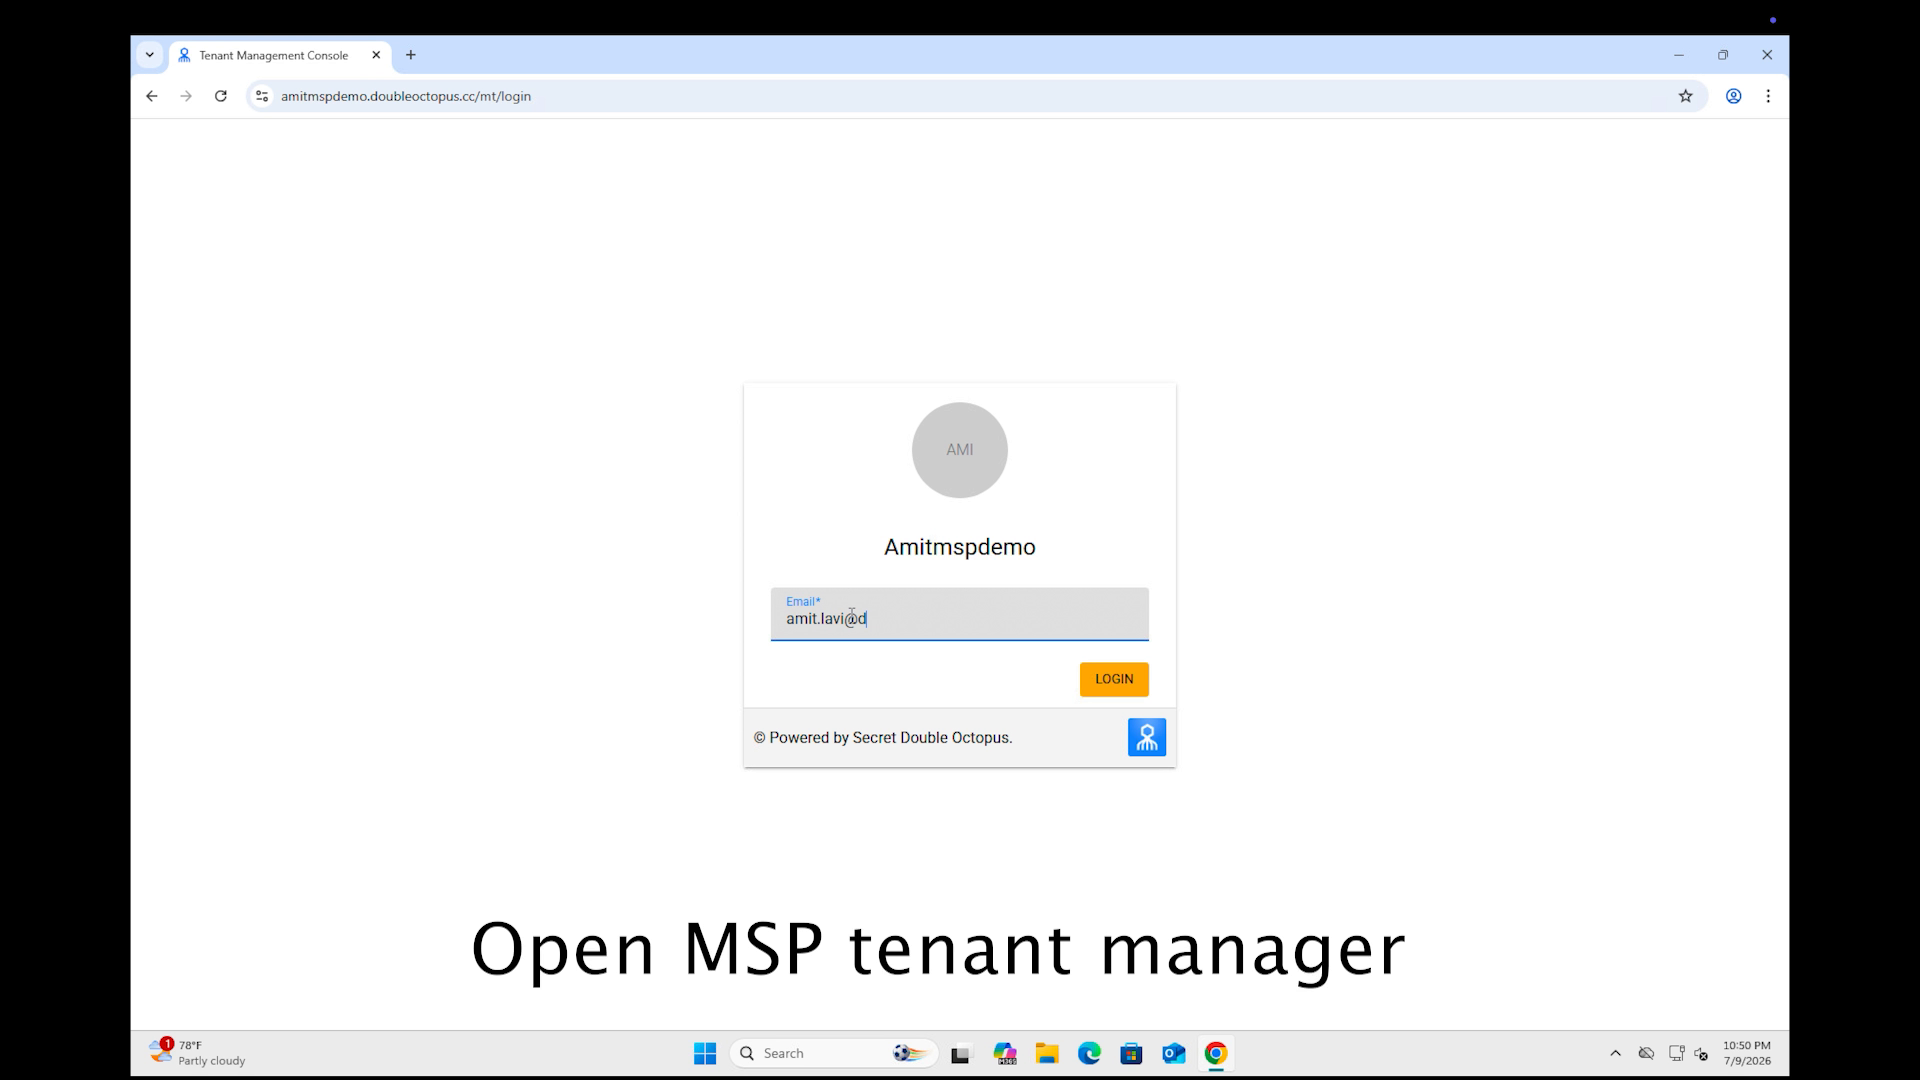
Step 1: Open the MSP Portal
Navigate to https://<main tenant>.doubleoctopus.cc/mt/login.
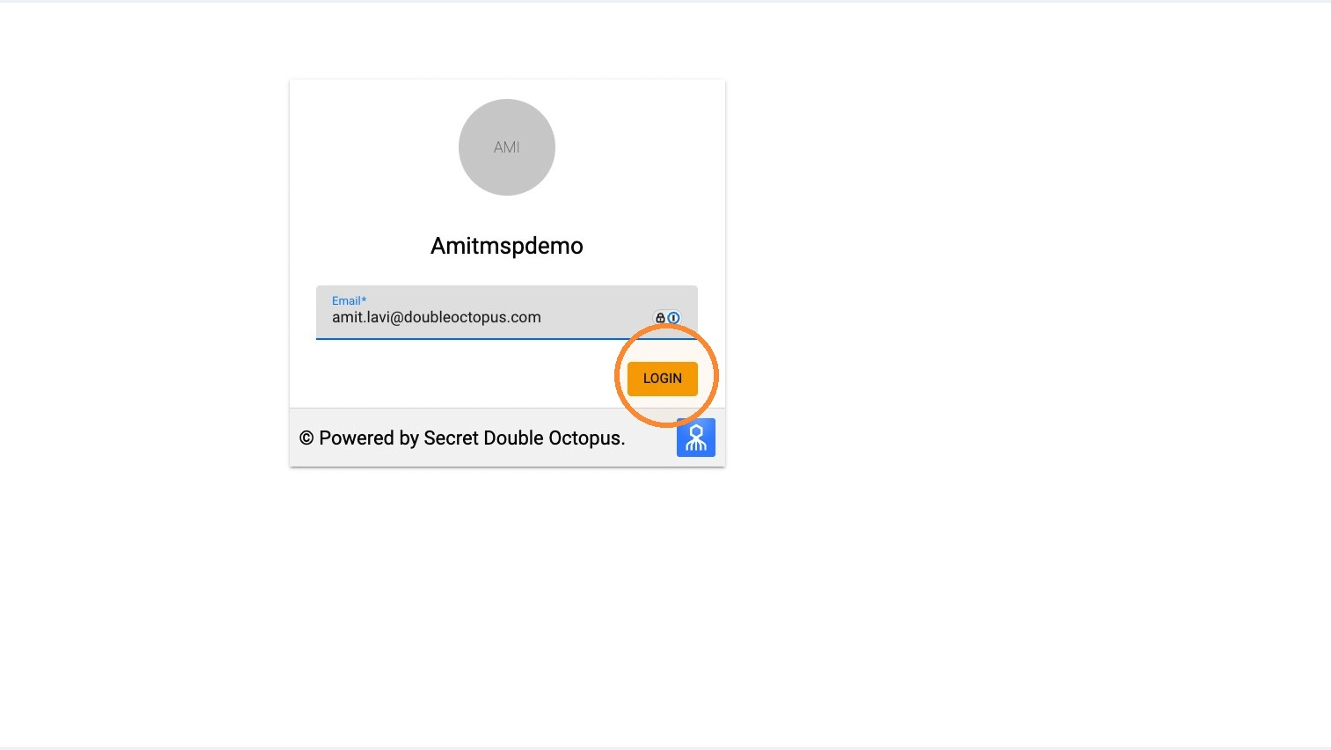
Step 2: Enter the Administrator Email
Enter the MSP administrator email in the Email field.
Tenant and Manager Navigation
Step 3: Select the Manager
Select the appropriate manager from the list.
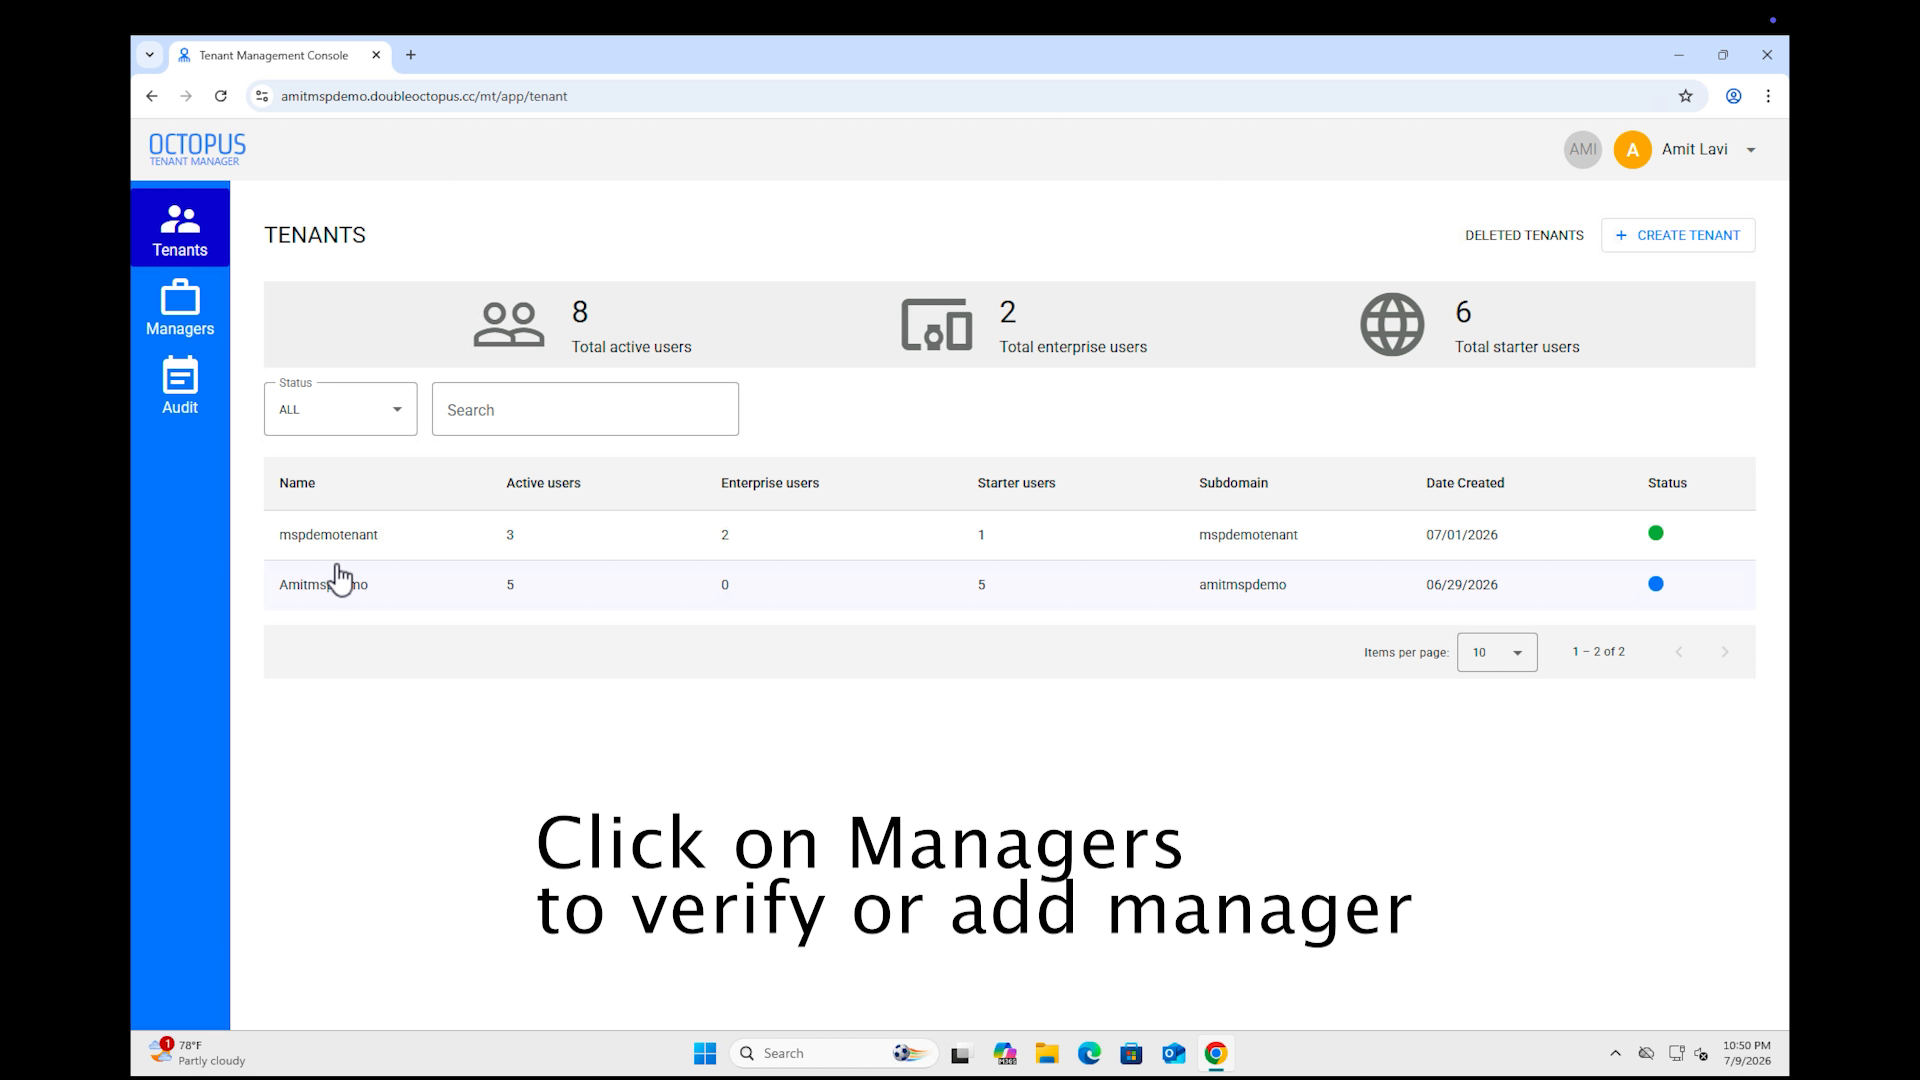
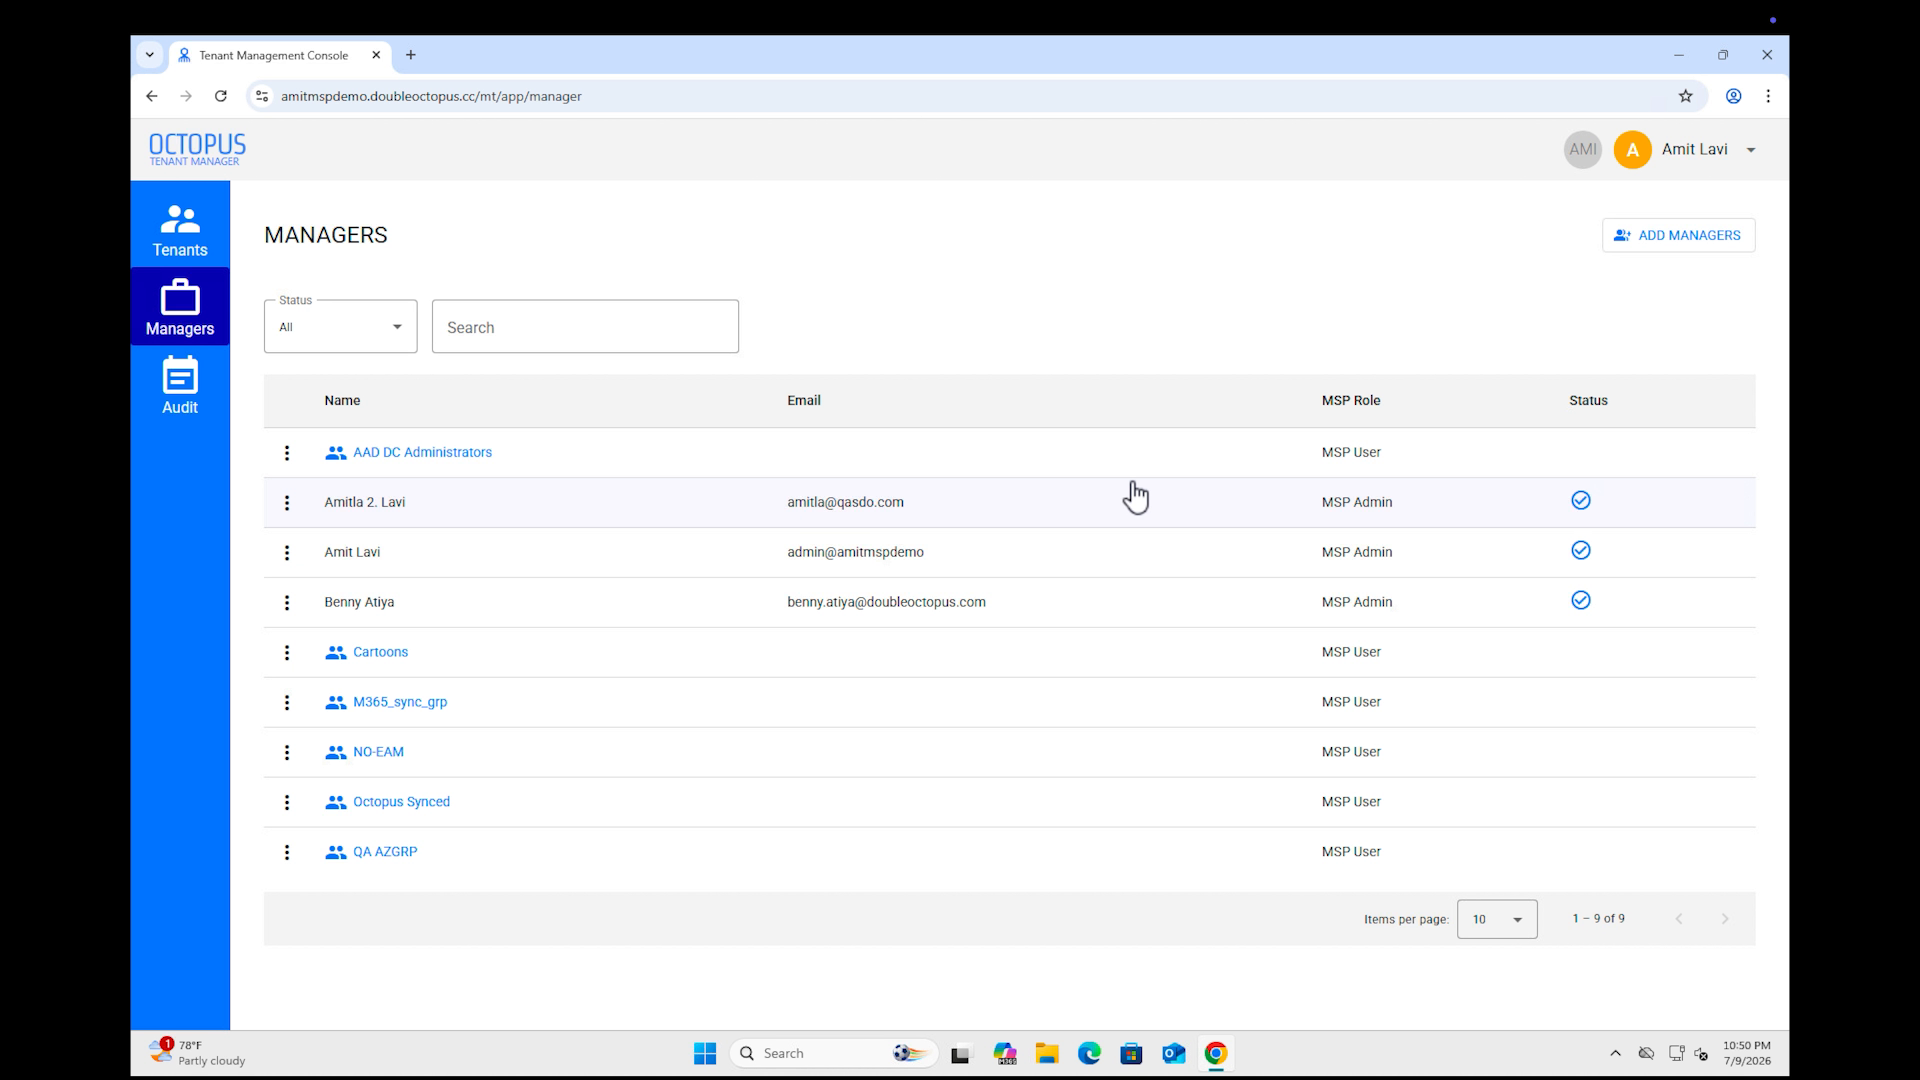
Step 4: Open Managers
Click the Managers icon in the sidebar.
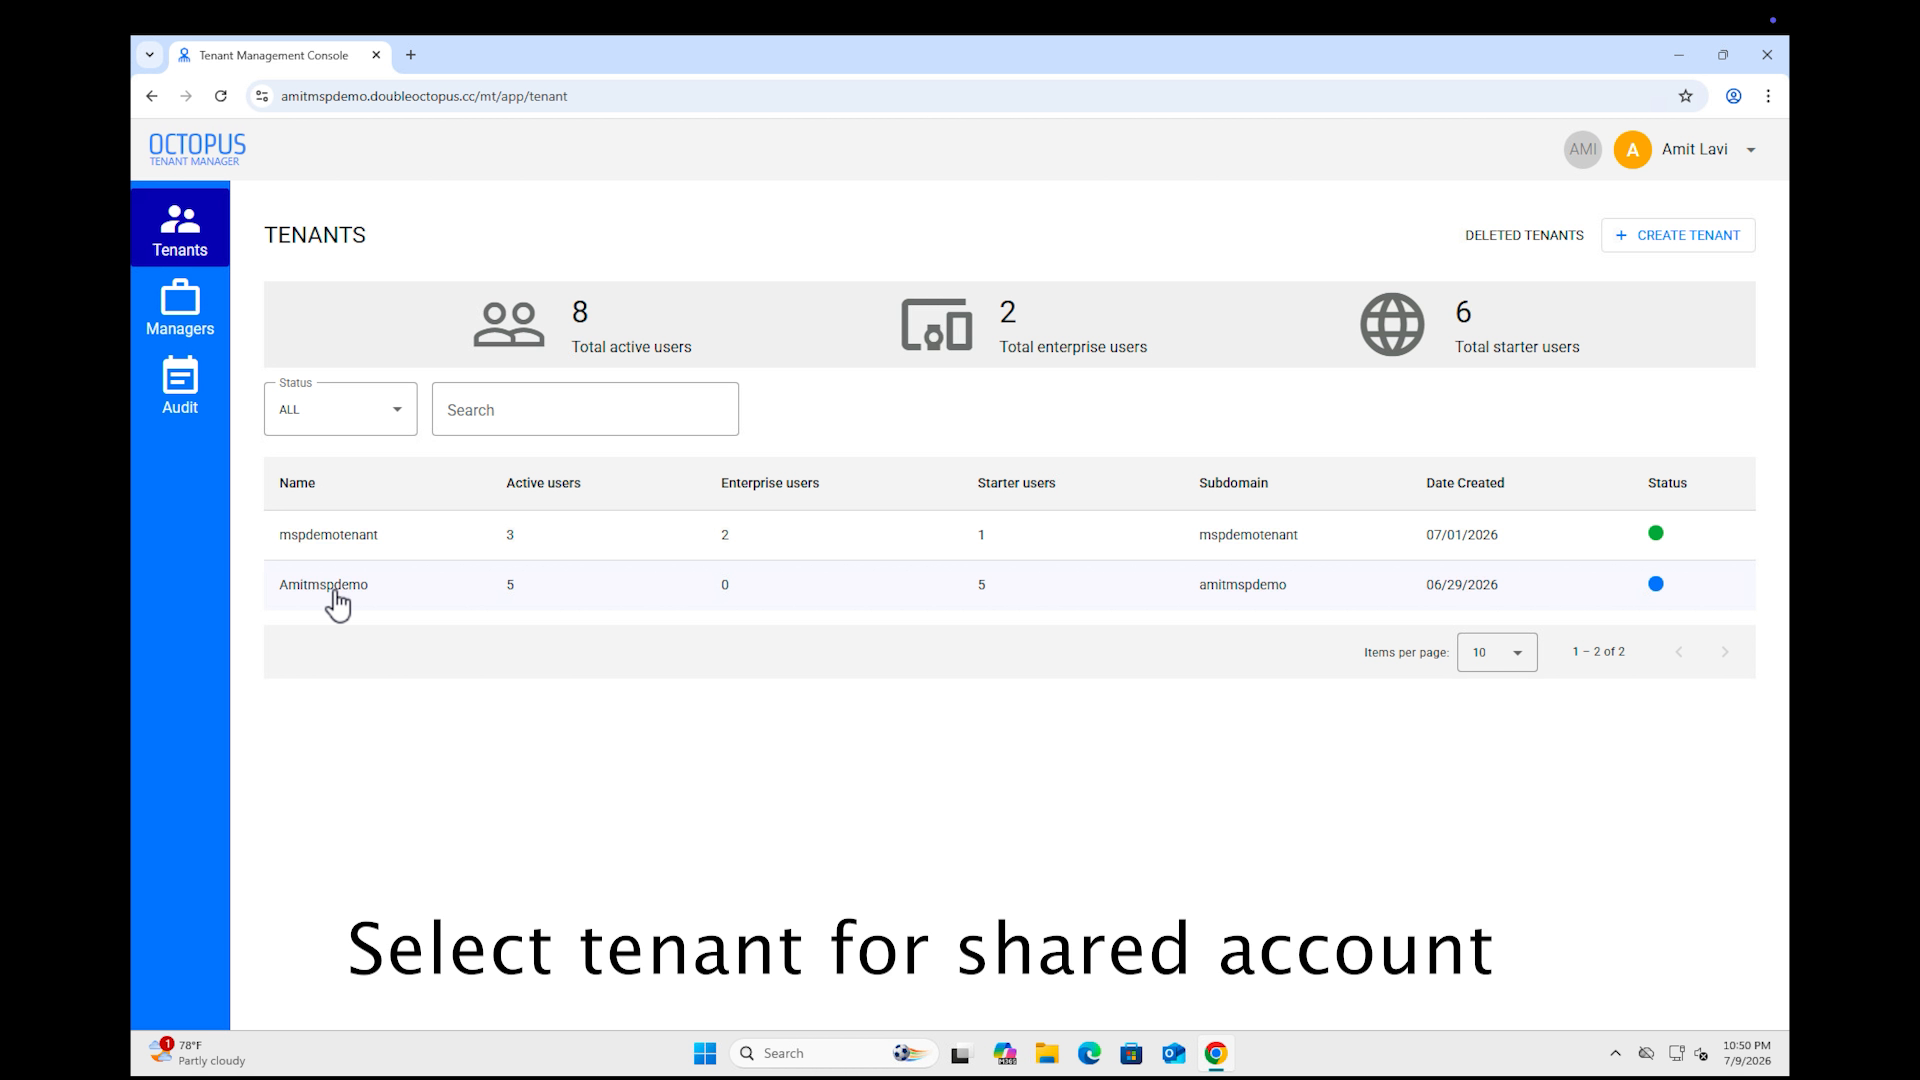
Step 5: Select the Customer Tenant
Select the required customer tenant from the list.
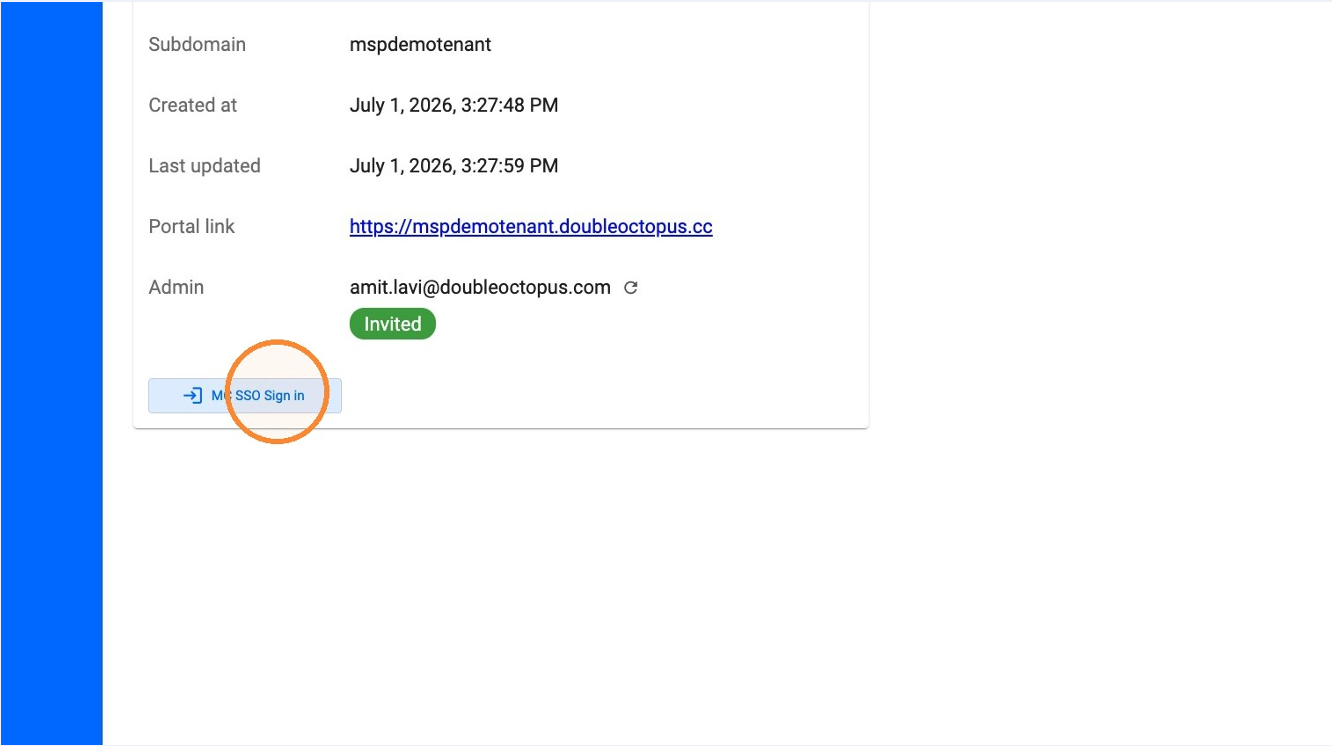
Step 6: Launch the Management Console
Click MC SSO Sign In to access the tenant Management Console.
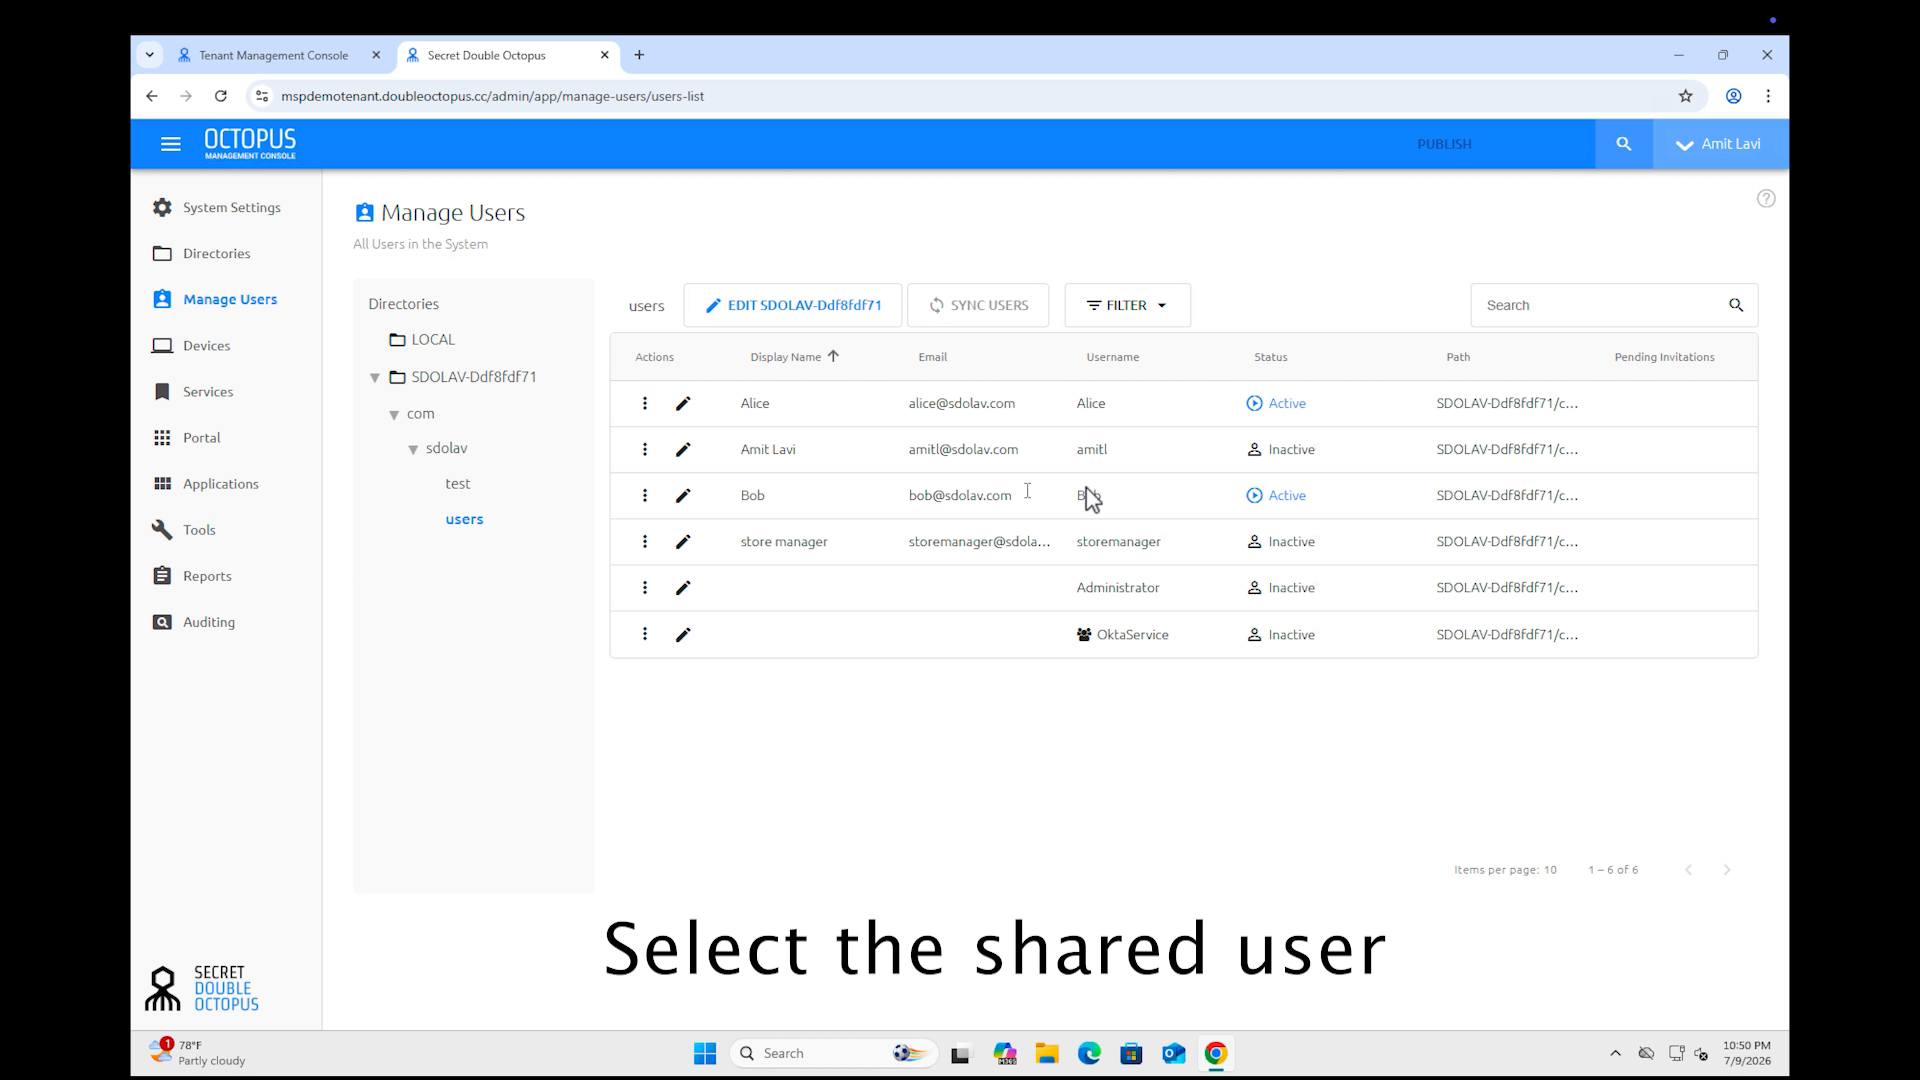
MSP Account Sharing Configuration
Step 7: Open Manage Users
Select Manage Users from the sidebar menu.
Step 8: Select the Shared Account Owner and Open Account Sharing
Select the user whose account will be shared.
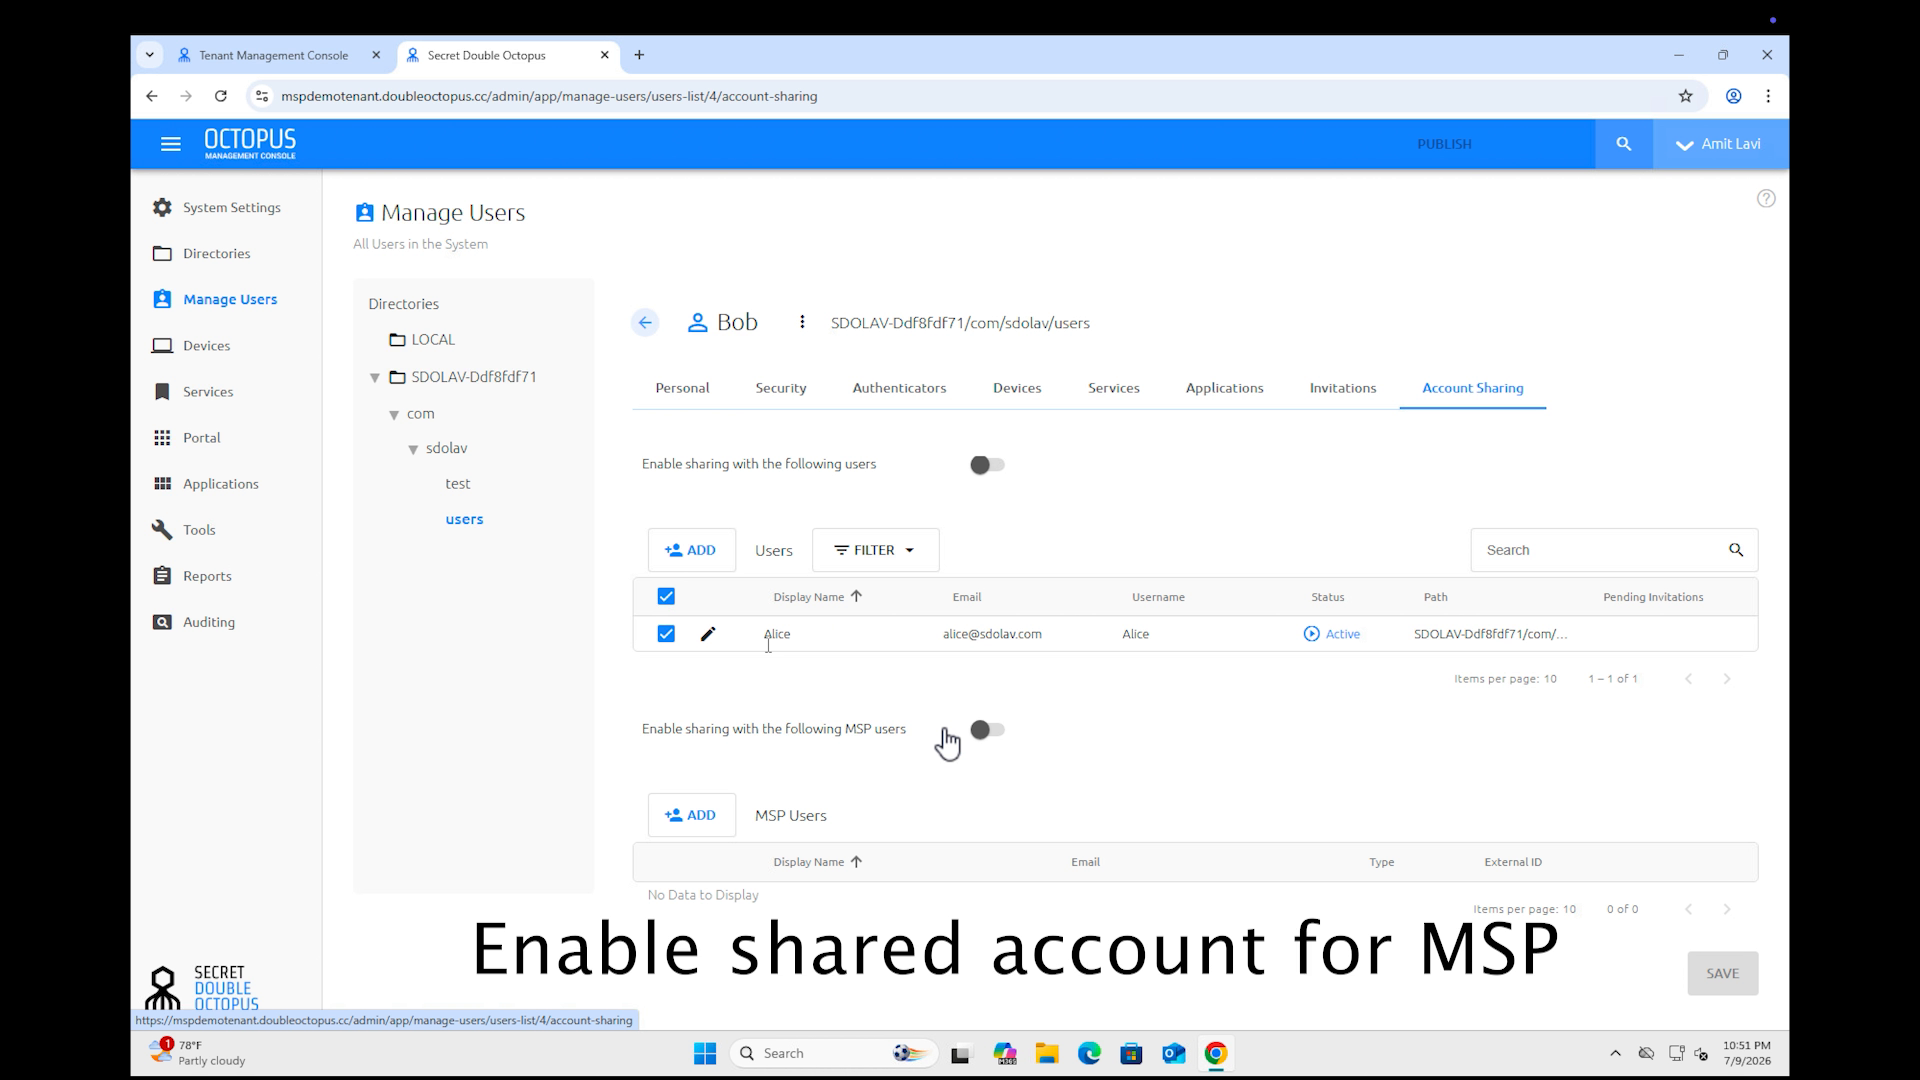
Step 9: Enable MSP Shared Account and Add an MSP User
Click ADD in the MSP Users section.
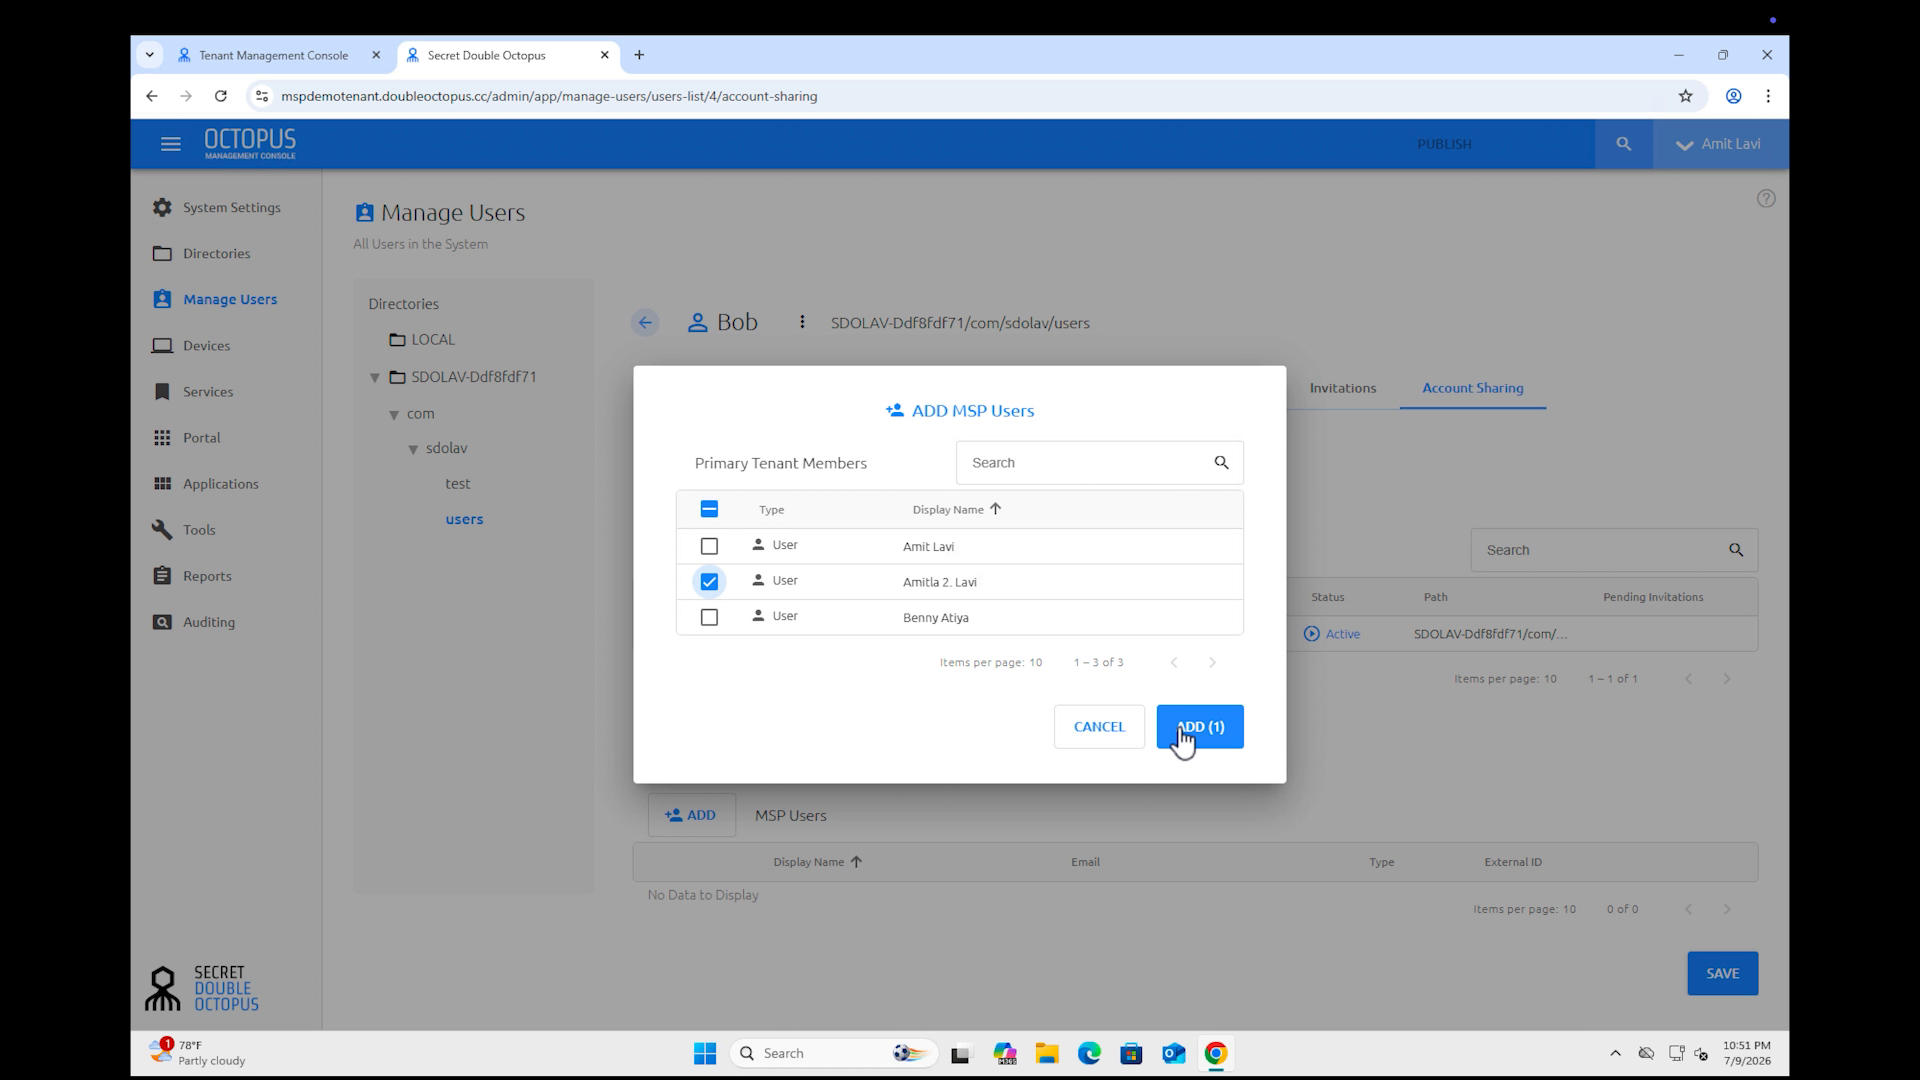
Step 10: Confirm the Selection
Click ADD (1) to confirm the selection.
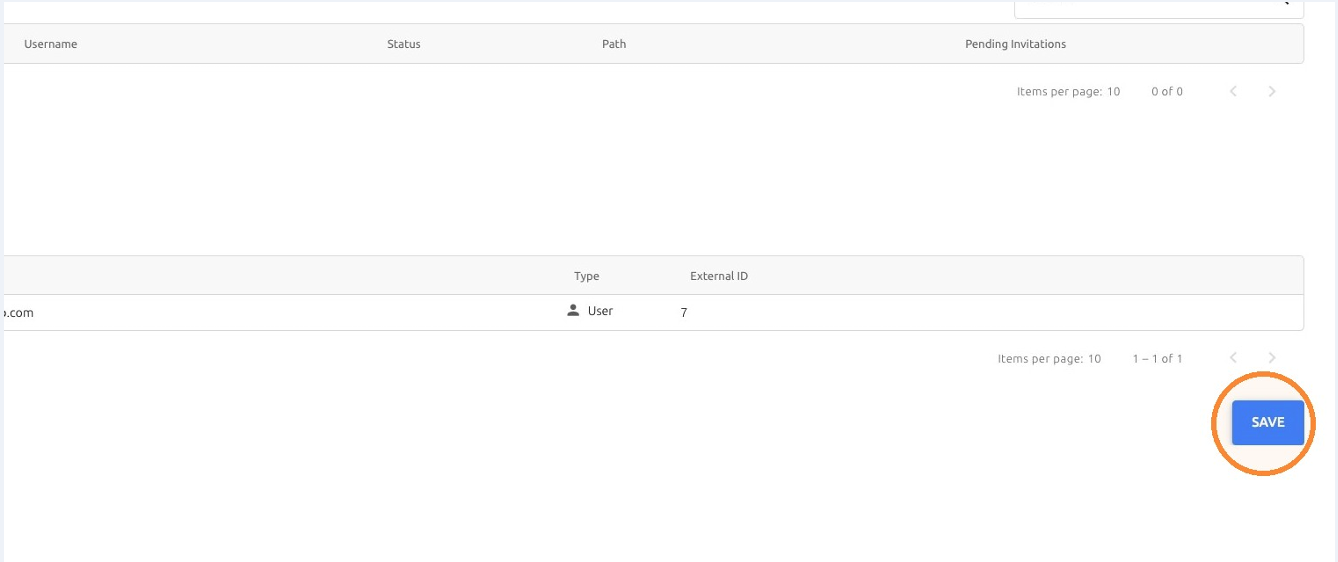
Step 11: Save the Account Sharing Configuration
Click SAVE to apply the account sharing configuration.
Service Settings Update
Step 12: Open Services
Select Services from the sidebar menu.
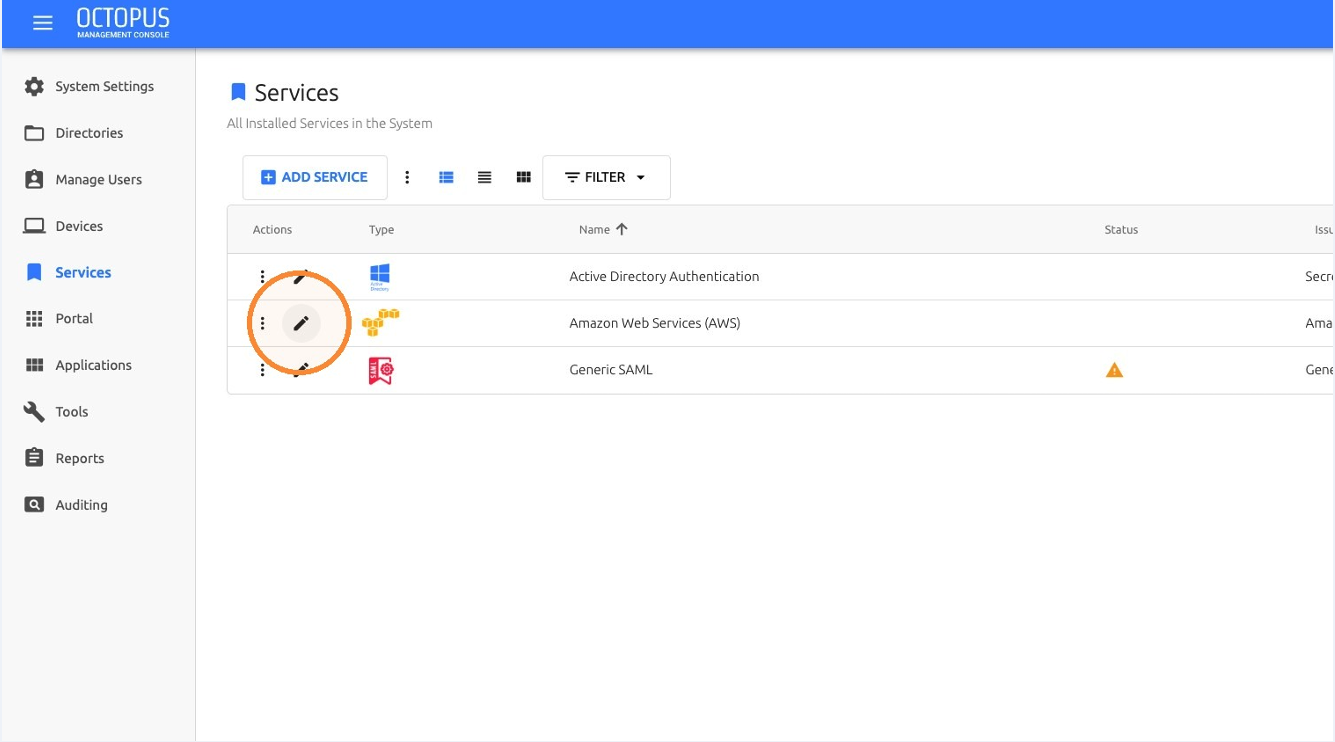
Step 13: Edit the Service and click on Sign On
Click the edit icon for the required service, for example Amazon Web Services (AWS).
Step 14: Save the Service Configuration
Click SAVE to store the service configuration.
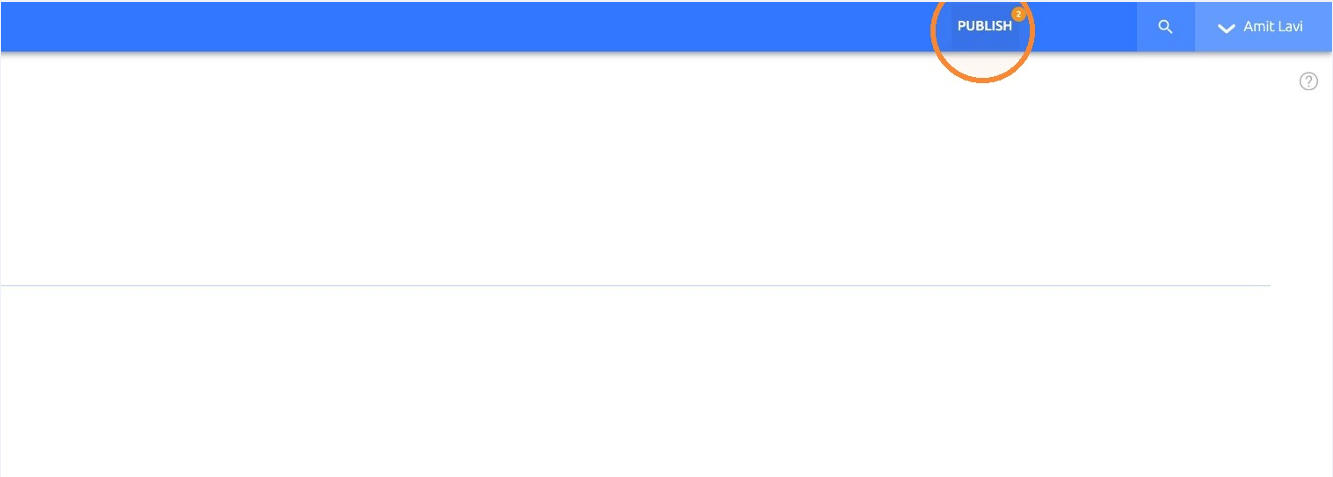
Step 15: Publish the Configuration
Click PUBLISH to finalize and apply the changes.
Validation
Step 16: Sign In as the MSP User
Authenticate as the delegated MSP user.
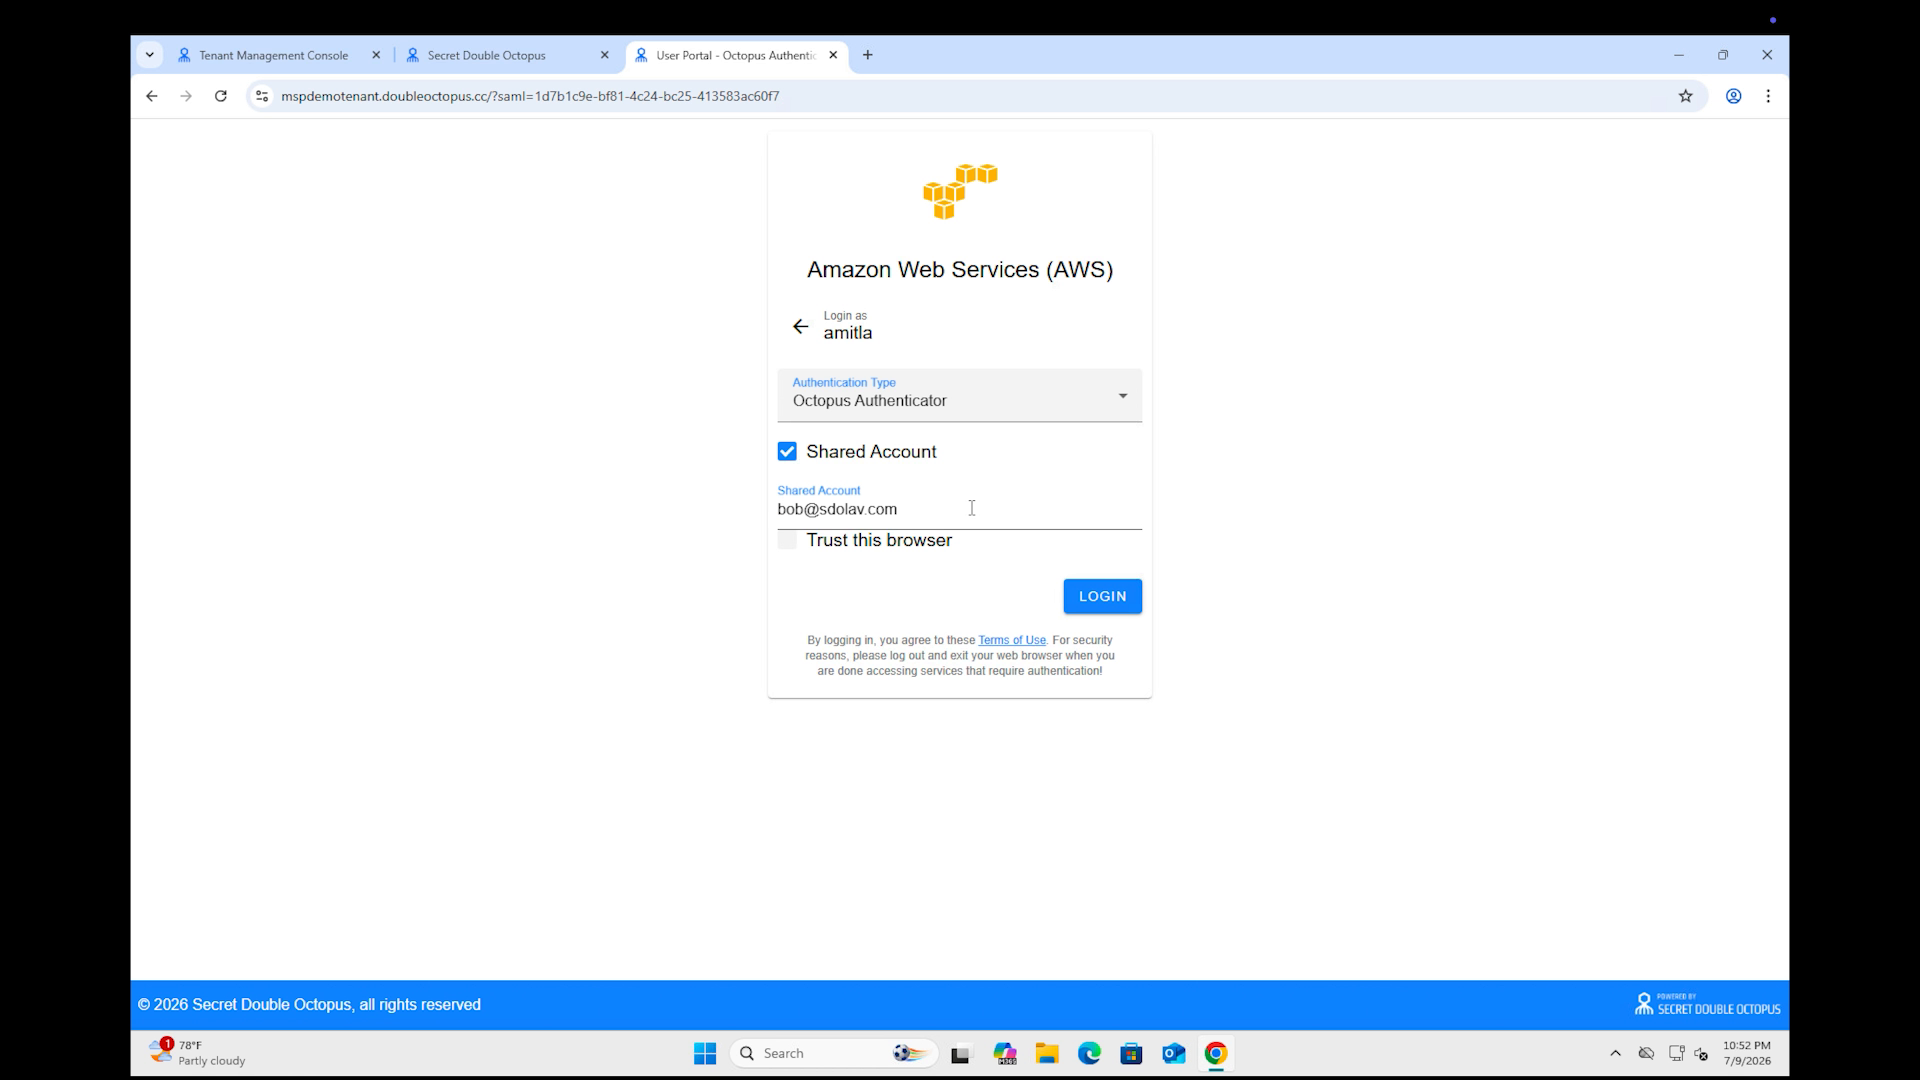
Step 17: Select the Shared Account Application
Select the application configured for shared-account access.
Step 18: Approve Authentication
Approve the authentication request using the configured authenticator.
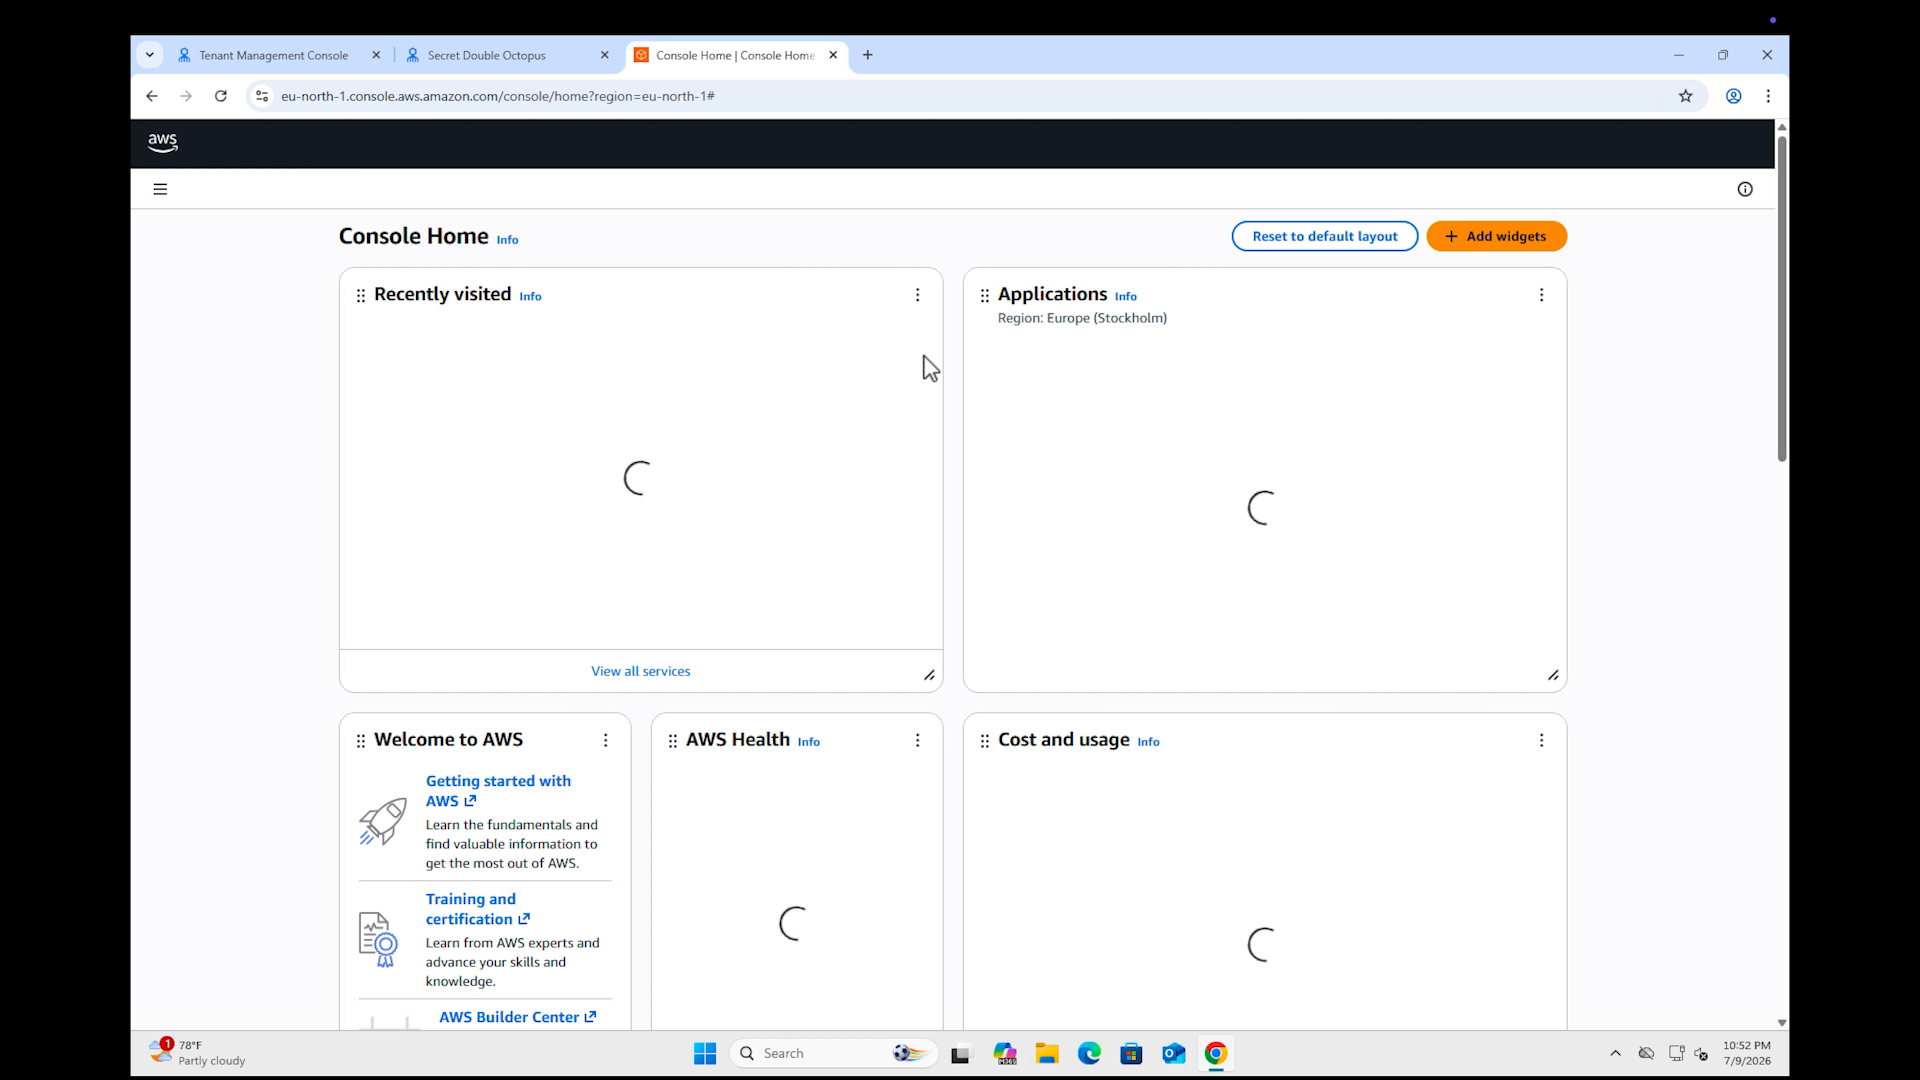
Step 19: Confirm Successful Access
Verify that the MSP user can access the application through the shared account.
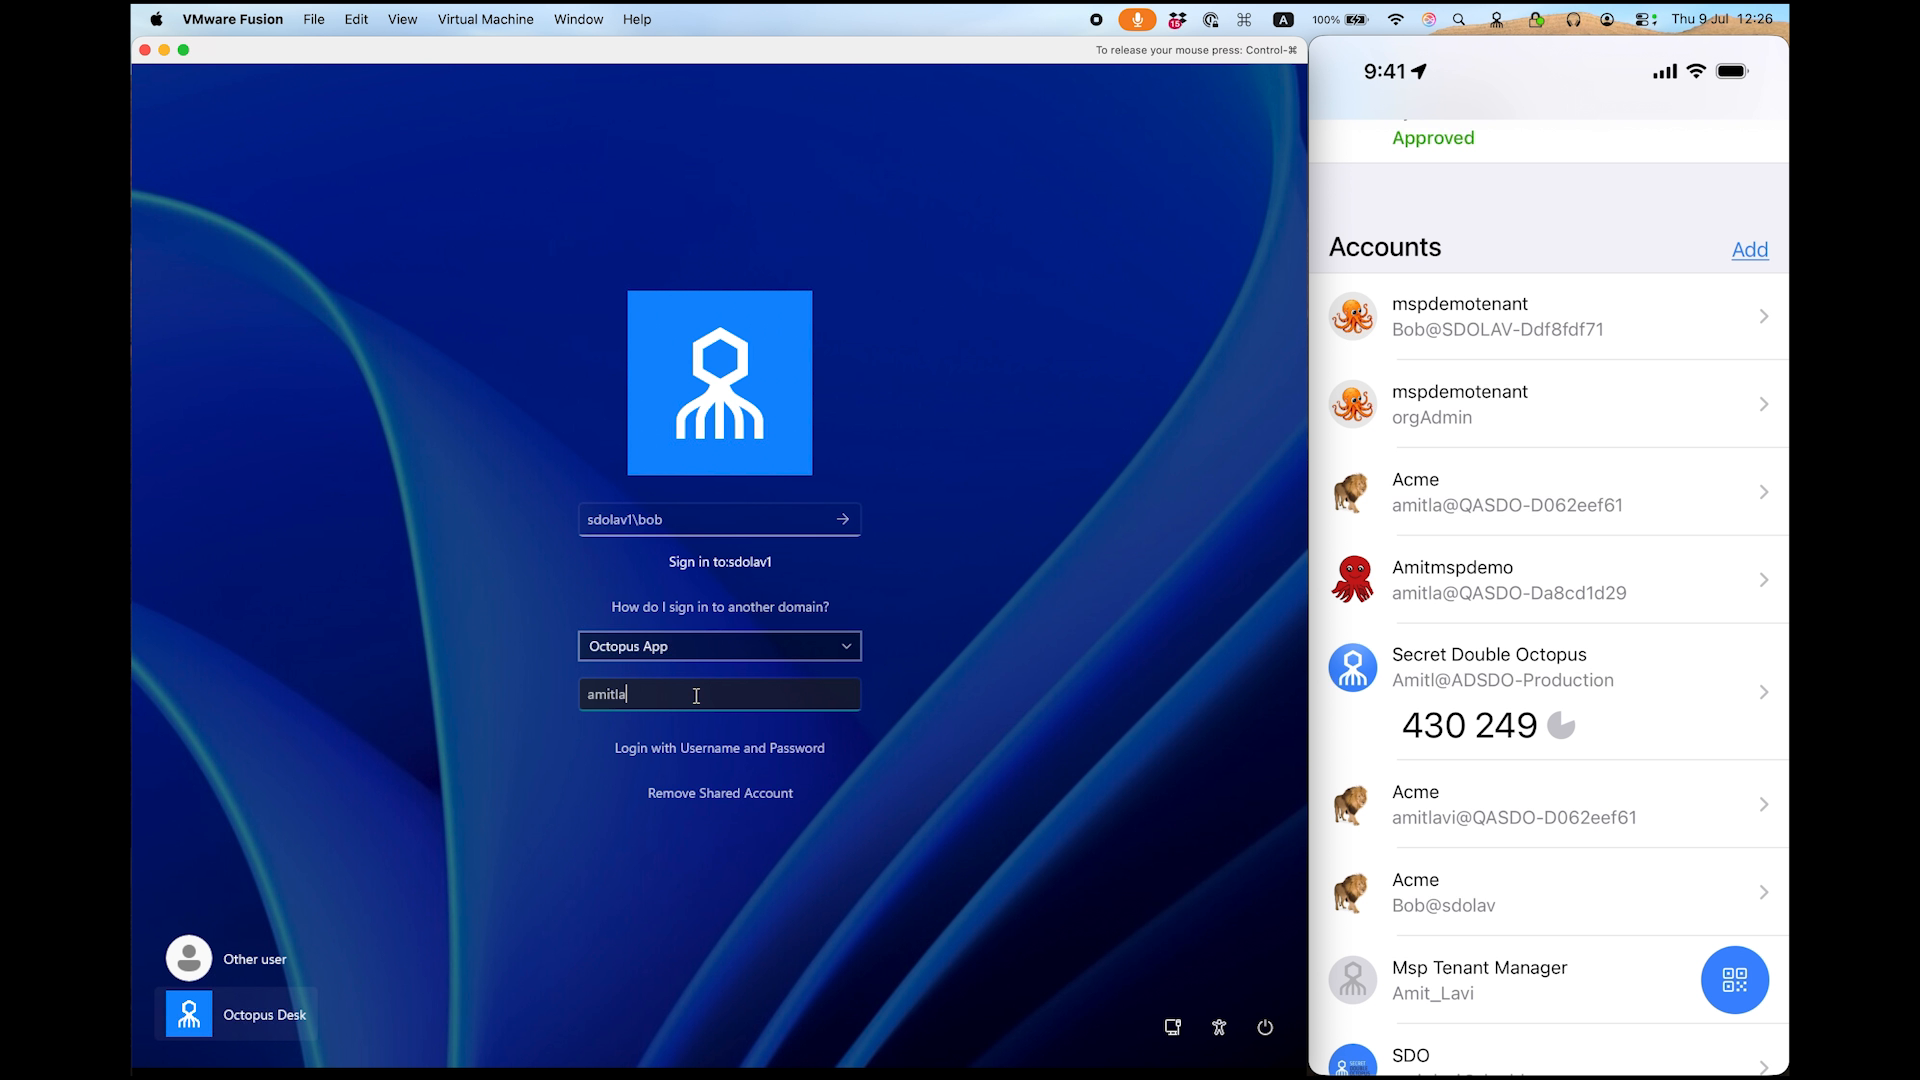
Step 20: Check Windows shared account
Verify that the MSP user can login to windows using MSP Shared Account
Validation Checklist
- The MSP user is assigned to the shared account.
- The Account Sharing configuration has been saved.
- The service configuration has been published.
- The application appears in the User Portal.
- The MSP user can launch the application.
- Authentication completes successfully.
Common Issues
| Issue | Resolution |
|---|---|
| MSP user cannot access the application | Verify that the MSP user is assigned to the shared account and has the required permissions. |
| Application is not visible | Confirm that the service is configured for portal visibility and has been published. |
| Changes are not applied | Save the configuration and publish the service again. |
| Login fails | Review the sign-on configuration, account assignment, and authenticator status. |
| Access denied | Confirm that the selected MSP user has the required tenant and service permissions. |
Escalation: If the issue persists, collect the main tenant, customer tenant, manager, shared-account owner, MSP user, service name, browser and operating system, approximate issue time, and relevant logs before escalating.
Freshdesk image note: Upload each screenshot to Freshdesk, then replace the corresponding filename in each <img src="..."> element with the Freshdesk-hosted image URL.