This document describes the configurations required for SAML 2.0 integration between the Octopus Authenticator and Amazon Web Services (AWS).
The integration process involves the following sequential phases:
Creating the AWS SAML Service in the Octopus Management Console
The following procedure explains how to create the required SAML service in the Octopus Management Console. The service settings will be used later in the AWS configuration.
To add and configure the AWS SAML service:
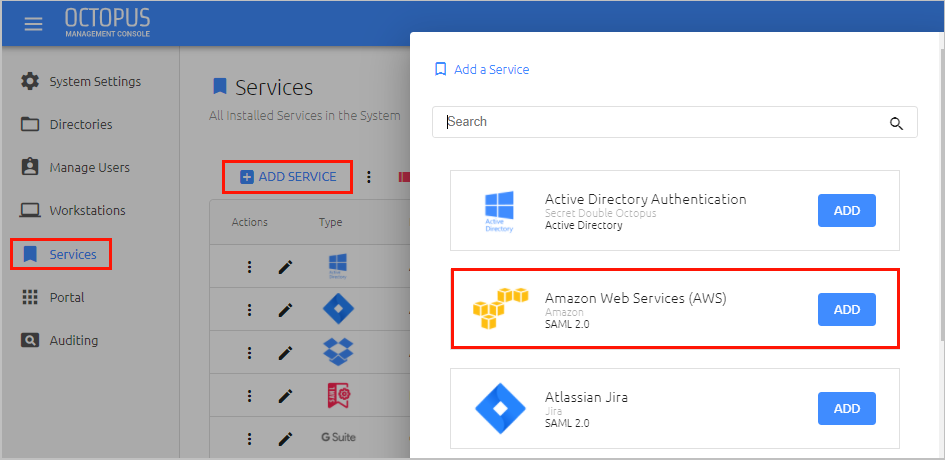
From the Octopus Management Console, open the Services menu and click Add Service. In the Amazon Web Services (AWS) tile, click Add.
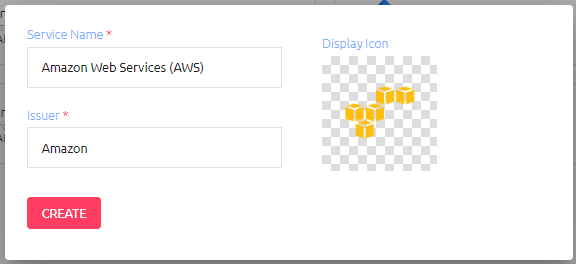
Then, in the dialog that opens, click Create.
Review and configure the following settings in the General Info tab:
Setting
Description
Service Name
Amazon Web Services (AWS)
Issuer
Amazon (default)
Description
Enter a brief note about the service.
Display icon
This icon will be displayed on the Login page for the service. To change the default icon, click and upload the image of your choice (supported size 488x488 pixels).
Login Page URL
<https://<Enterprise Base URL>/aws-saml/<No.>/login>
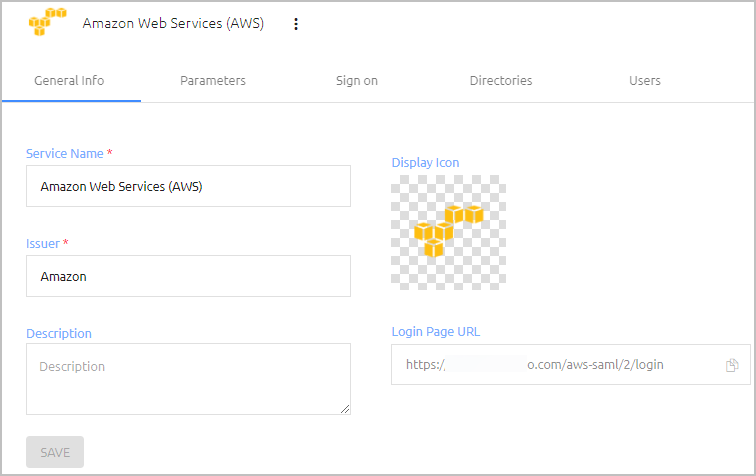
Then, click Save.
Note: You will add the service parameters (in the Parameters tab) later, after configuring the IdP and Role in AWS. (For details, refer to Completing Service Integration.)
Open the Sign on tab and review the following settings. It is recommended not to change default settings.
Setting
Value
Check Password
Disabled (default setting)
Single Sign-on (SSO)
Disabled (default setting)
Bypass Unenrolled Users
When enabled, users who are known to the system but have not yet enrolled a mobile device or workstation will be allowed to login with username and password (without MFA).
Sign on Method
SAML 2.0
Issuer URL
The URL used by the service to connect to Octopus Authenticator, e.g., https://<Enterprise base URL>/ aws-saml/<No>
SAML 2.0 Endpoint (HTTP)
The URL used by the service to communicate with the AWS Login page, e.g., https://<Enterprise base URL>/aws-saml/login
SAML Signature Algorithm
SHA-256 (default)
X.509 Certificate
X.509 certificate for the Octopus Authenticator AWS service
Custom Message
The message displayed to the user upon successful login.
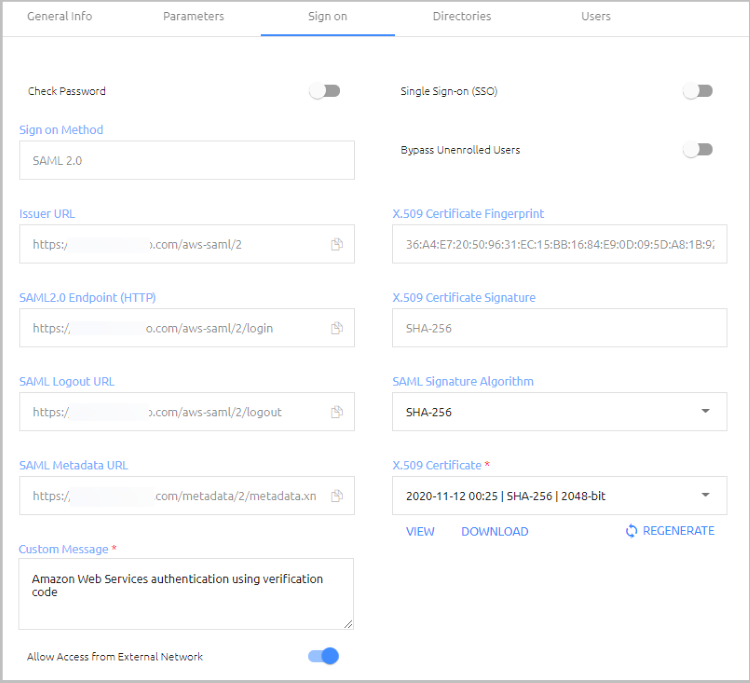
If you updated settings, scroll to the bottom of the Sign on tab and click Save.
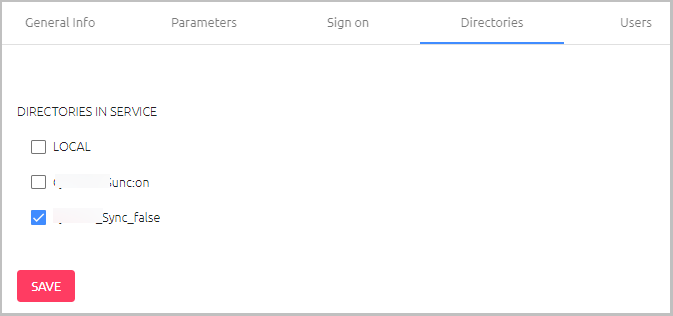
Open the Directories tab and select checkbox(es) of the directory / directories to be integrated with the service. Then, click Save.
Open the Users tab and click Add.
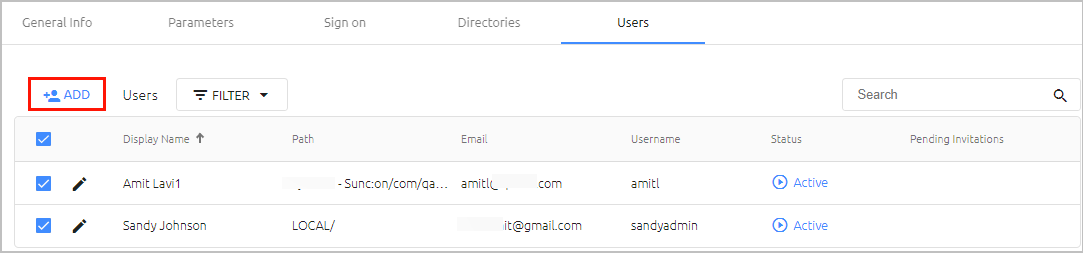
A popup opens, with a list of directories displayed on the left.
Expand the directories list and select the checkboxes of the groups and users that you want to add to the service. Then click Save to close the popup.
The groups and users you selected are listed in the Users tab.
At the bottom of the Users tab, click Save. Then, from the toolbar at the top of the page, click PUBLISH and publish your changes.
For successful integration, the Octopus Authentication Server has to be set as an Identity Provider in your Amazon Web Services account. In order to do this, the following processes need to be carried out:
Follow the procedure below to create the 3rd party IdP in your AWS account.
To create the AWS Identity Provider:
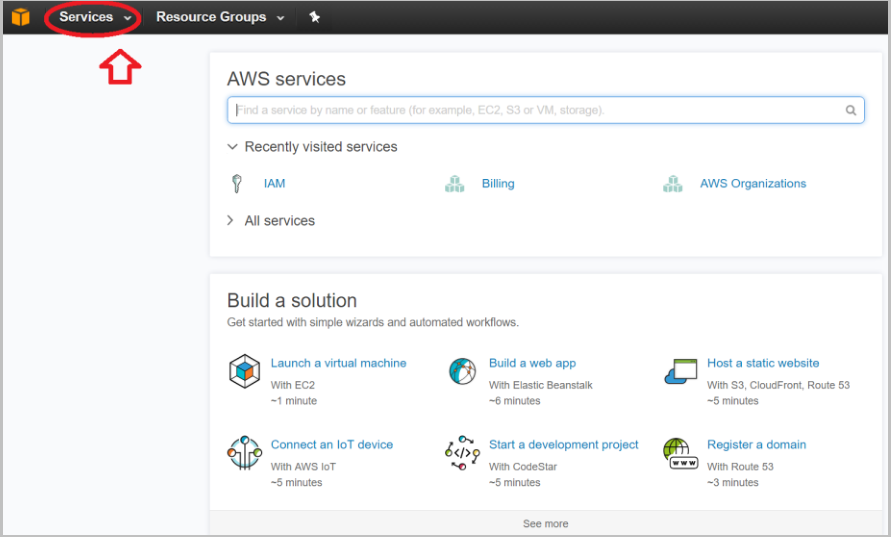
Log into your AWS account and navigate to Services.
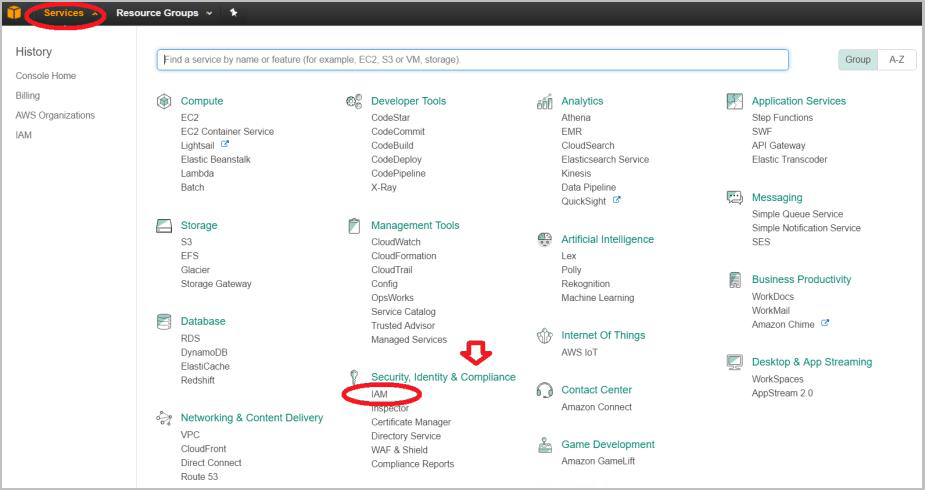
Under Security, Identity & Compliance, select IAM.
On the page that opens, select Identity providers and click Create Provider.
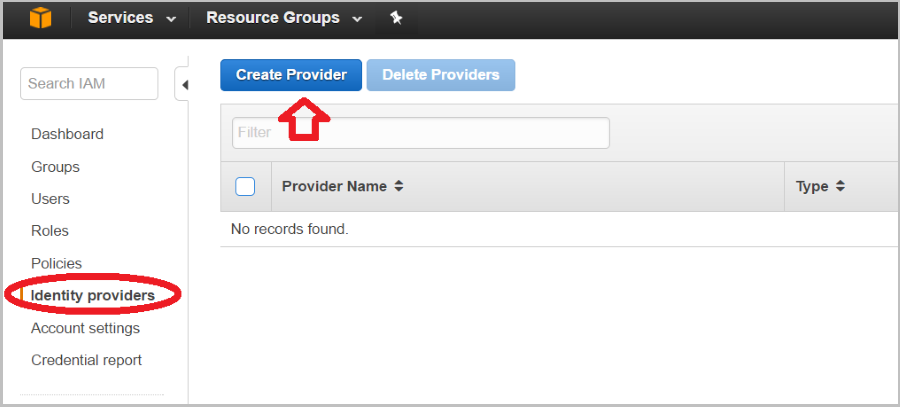
The Create Provider wizard opens.
Continue by configuring the new provider, as described in the next section.
The procedure below explains how to configure the 3rd party IdP that you just created. To complete the procedure, you will need the FederationMetadata.xml file from the AWS SAML service you created in the Octopus Management Console.
To download this file, open the Services menu of the Management Console. In the tile of the AWS SAML service, click  to display the service settings. Then, at the bottom of the Sign on tab, click SAML METADATA.
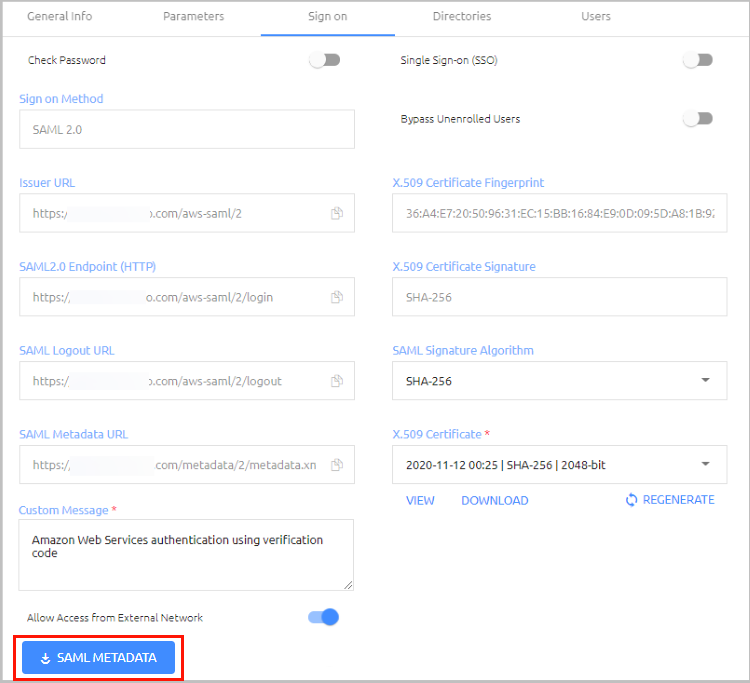 |
To configure the AWS Identity Provider:
On the Configure Provider page of the Create Provider wizard, configure the following settings:
Setting
Value / Notes
Provider Type
Select SAML.
Provider Name
Enter the name of the 3rd party IdP (e.g., Octopus Authenticator).
Metadata Document
Click Choose File and upload the FederationMetadata.xml file that you downloaded from the AWS SAML service.
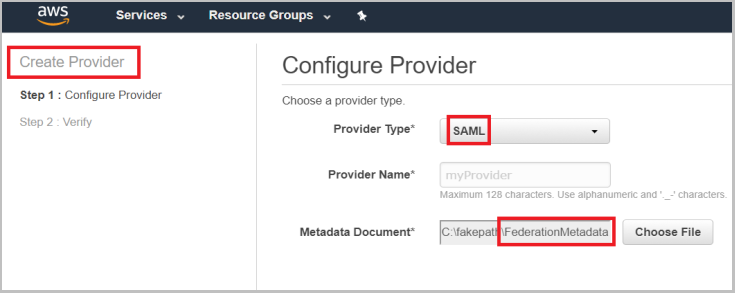
On the Verify page of the Create Provider wizard, review the information displayed.
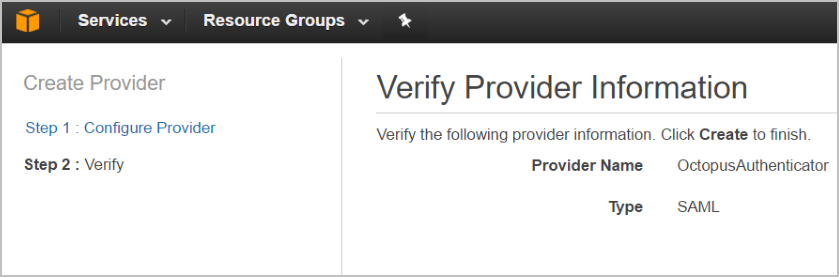
Click Create.
The wizard closes and a confirmation message is displayed.
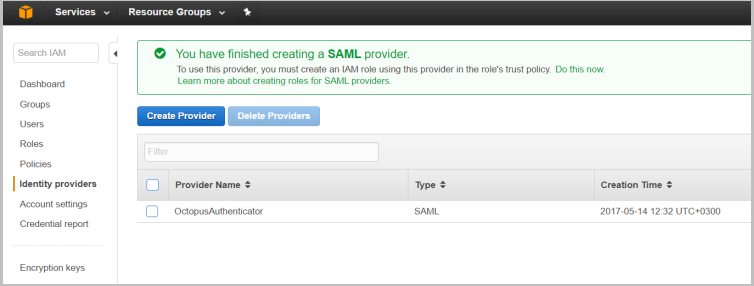
Continue by creating an IAM role using the new provider, as described in the next section.
Follow these steps to create a role for the AWS Identity Provider.
To create the IAM role:
On the IAM page, select Roles and click Create new role.
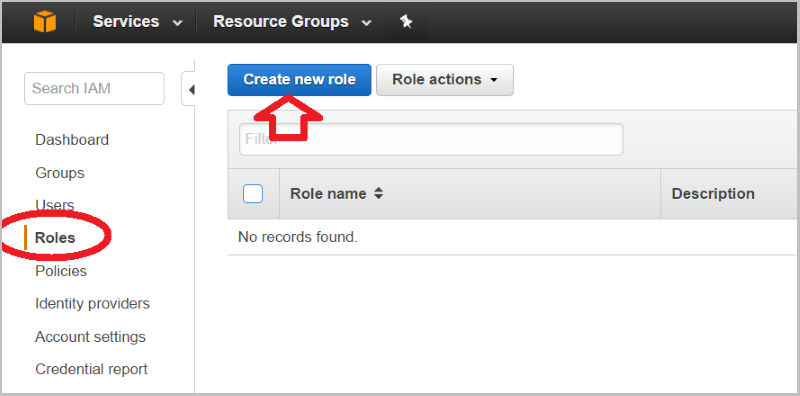
The Create Role wizard opens.
On the Trust page of the wizard, configure the following settings:
Setting
Value / Notes
Type of trusted entity
Select SAML.
SAML provider
Select the SAML provider server (Octopus Authenticator). Then, select the Allow programmatic and AWS Management Console access radio button.
Attribute
Select SAML aud.
Value
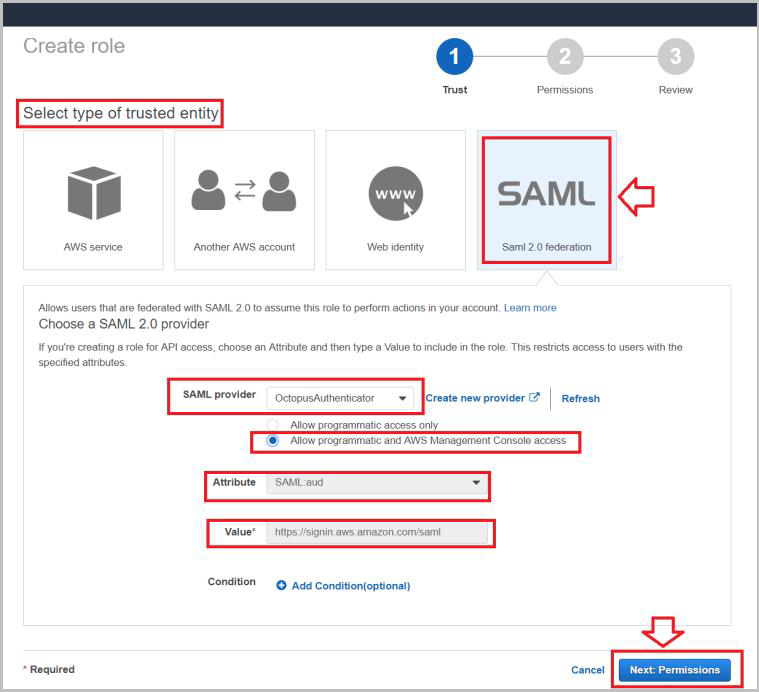
At the bottom of the page, click Next Permissions.
On the Permissions page, select the relevant policy or policies for the role.
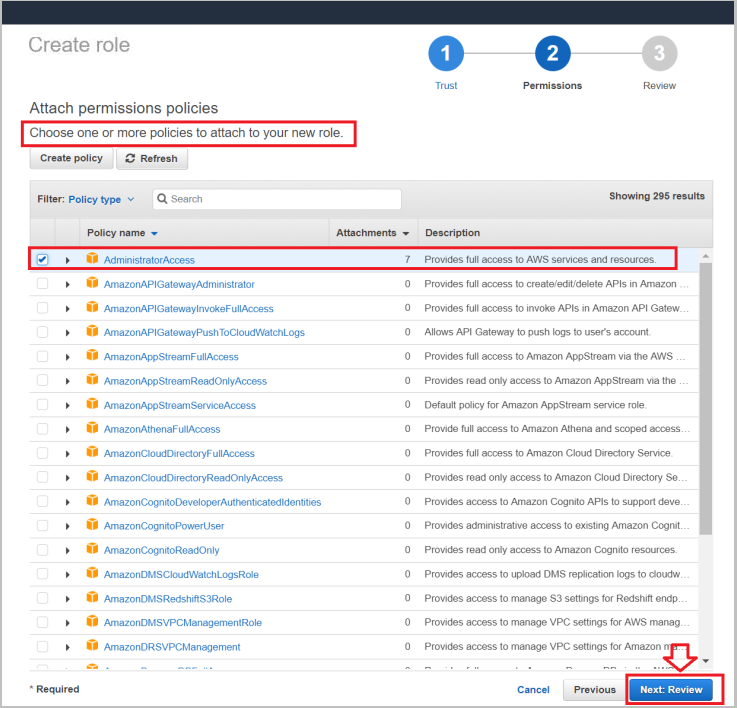
At the bottom of the page, click Next Review.
On the Review page, configure and review the following settings:
Setting
Value / Notes
Role name
Enter a descriptive name for the role.
Role description
Enter a brief note about the role, as in the example shown below.
Trusted entities
Verify that the IdP ARN string is correct.
Policies
Review the policies you selected on the Permissions page.
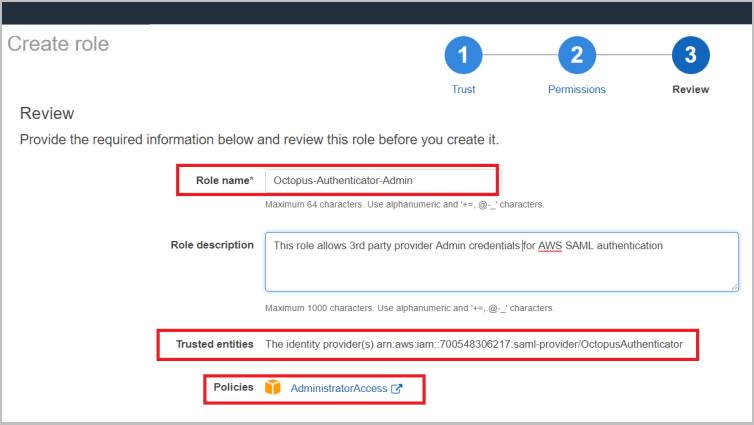
At the bottom of the page, click Create role.
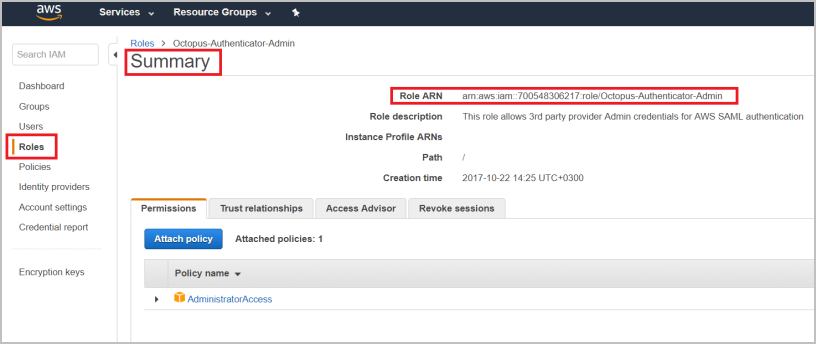
The Summary page opens. Make note of the Role ARN, as you will need it for the last phase of service integration (Completing Service Integration).
To complete the integration, the Octopus Authentication SAML service needs to be configured with the correct service parameters from AWS.
Before you begin the procedure below, make sure you have access to the following values from your AWS account:
AWS Role ARN
AWS Provider ARN
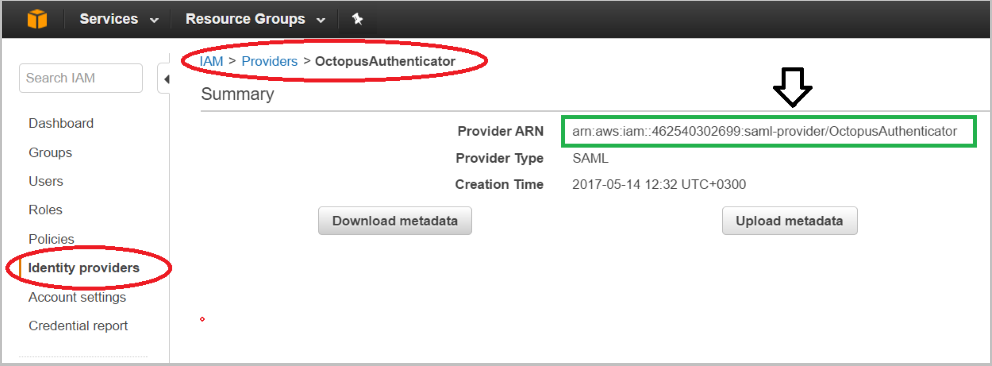
To complete service integration:
Log into the Octopus Management Console and open the Services menu.
In the tile of the AWS SAML service, click
to display the service settings.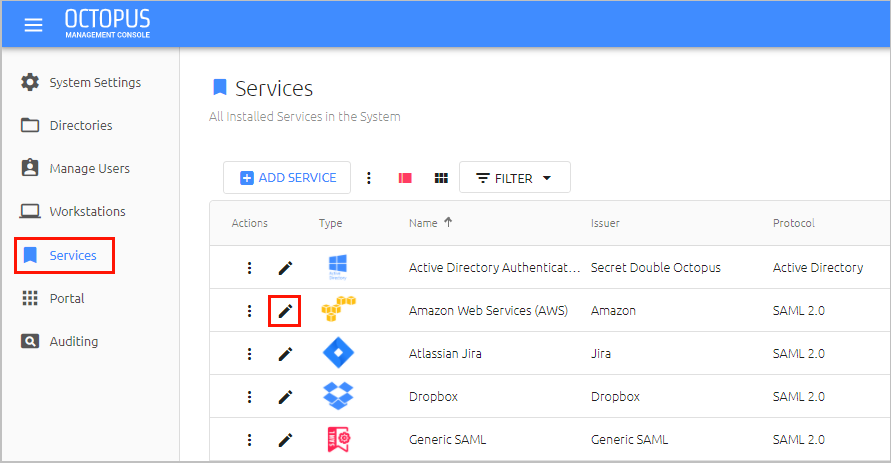
Open the Parameters tab and set the following parameters:
Setting
Value / Notes
Octopus Authentication Login
Select the login method for the Octopus Authentication Server.
Role Session Name
Select Email.
Role ARN
Set the value with the AWS Role ARN string.
Trusted Entities
Set the value with the AWS Provider ARN string.
Session Duration
Set the period of time (in seconds) for which the console can be open before the session expires.
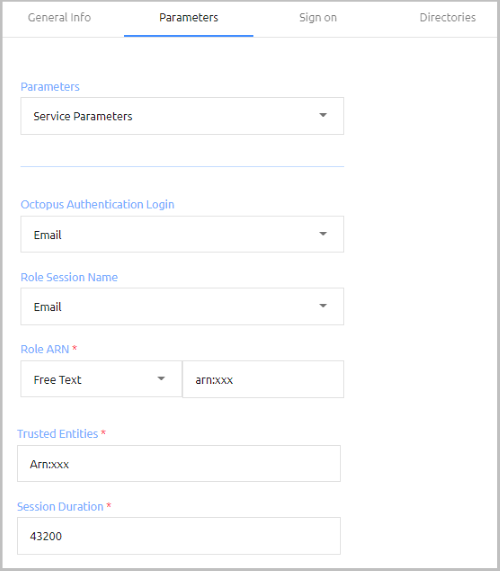
At the bottom of the Parameters tab, click Save. Then, from the toolbar at the top of the page, click PUBLISH and publish your changes.
