Table of Contents
Introduction
This document describes the configurations required for SAML 2.0 integration between the Octopus Authenticator and G Suite web services.
The integration process involves the following stages:
- Creating the G Suite SAML Service in the Octopus Management Console
- Setting Up SSO for G Suite
Creating the Google Workspace SAML Service
Please note - Google G Suite was rebranded to Google Workspace. The integration methdology remains the same, however, Google Workspace will be referenced as G-Suite for the purpoes of this integration guide.
The following procedure explains how to create a service for Google G Suite in the Octopus Management Console. The service settings will be used later when you configure the SSO setup in your Google G suite admin account.
To add and configure the Google G Suite SAML service:
1. From the Octopus Management Console, open the Services menu and click Add Service. In the Google G Suite tile, click Add.
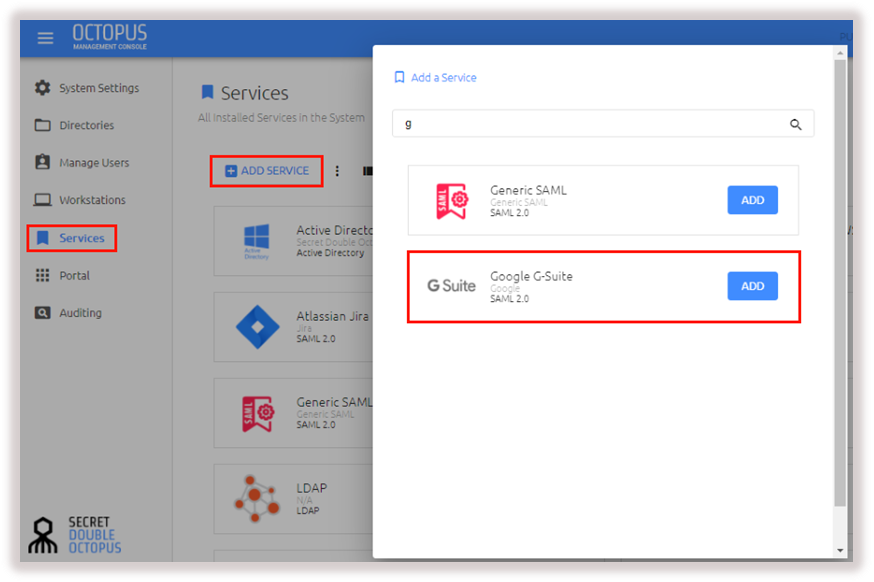
Then, in the dialog that opens, click Create.
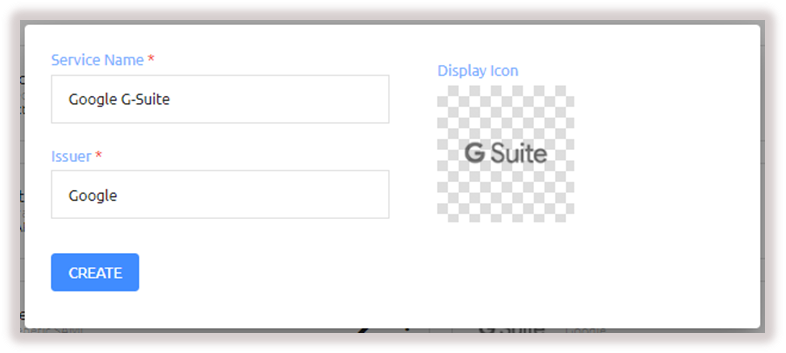
2. Review and configure the following settings in the General Info tab. It is recommended not to change default settings.
Setting | Value | |
Service Name | Google G Suite (default) |
|
Issuer | Google (default) |
|
Description | G Suite Octopus Authenticator password free authentication |
|
Display icon | This icon will be displayed on the Login page for the service. To change the default icon, click and upload a logo of your choice (size 488x488 pixels). |
|
Login Page URL | <https://<Enterprise Base URL>/google-saml/<No.>/login> |
|
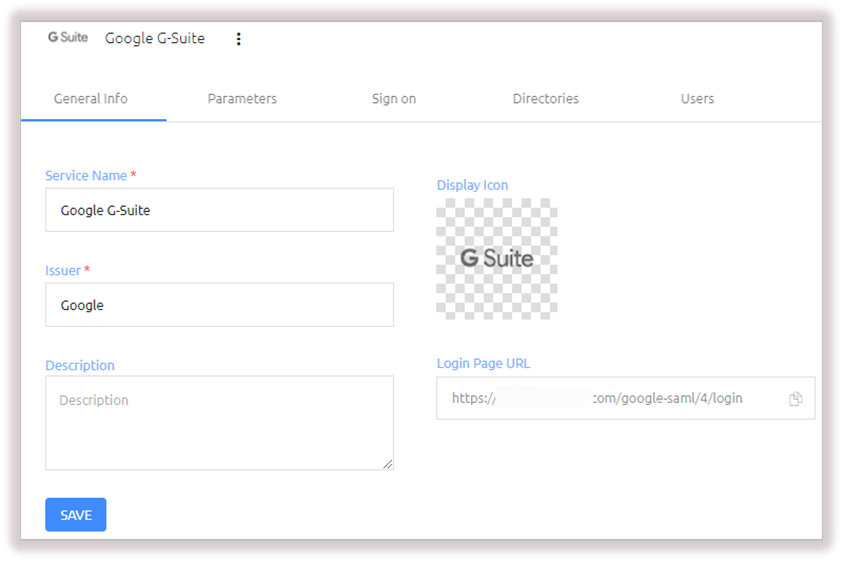
3. At the bottom of the tab, click Save.
4. Open the Parameters tab and configure the following settings. Do not configure any additional parameters.
Setting | Value / Notes | |
Octopus Authentication Login | Login method for the Octopus Authentication Server (select Email). |
|
G Suite Email | Select Email |
|
G Suite Domain | Enter the G Suite organization domain URL. |
|
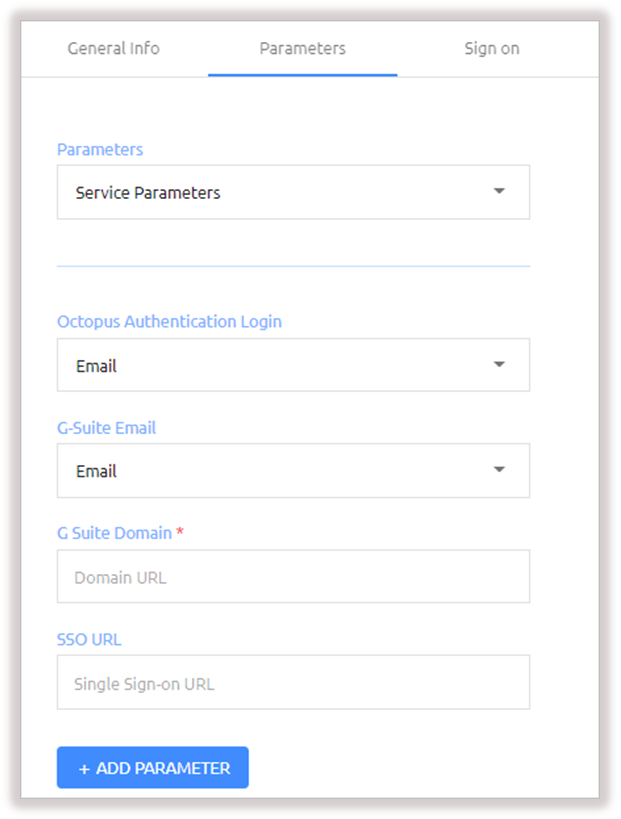
5. At the bottom of the tab, click Save.
6. Open the Sign on tab and configure the following settings. It is recommended not to change default settings.
Setting | Value | |
Check Password | Disabled (default setting) |
|
Single Sign-on (SSO) | Disabled (default setting) |
|
Bypass Unenrolled Users | When enabled, users who are known to the system but have not yet enrolled a mobile device or workstation will be allowed to login with username and password (without MFA). |
|
Sign on Method | SAML 2.0 |
|
Issuer URL | The URL used by the service to connect to Octopus Authenticator, e.g., https://<Enterprise base URL>/ google-saml/<No> |
|
SAML 2.0 Endpoint (HTTP) | The URL used by the service to communicate with the SAML Login page, e.g., https://<Enterprise base URL>/google-saml/login |
|
SAML Signature Algorithm | SHA-256 |
|
X.509 Certificate | X.509 certificate for the Octopus Authenticator G Suite service |
|
Custom Message | The message that is shown to the user upon successful login. Use the %p tag to display the password in the message. |
|
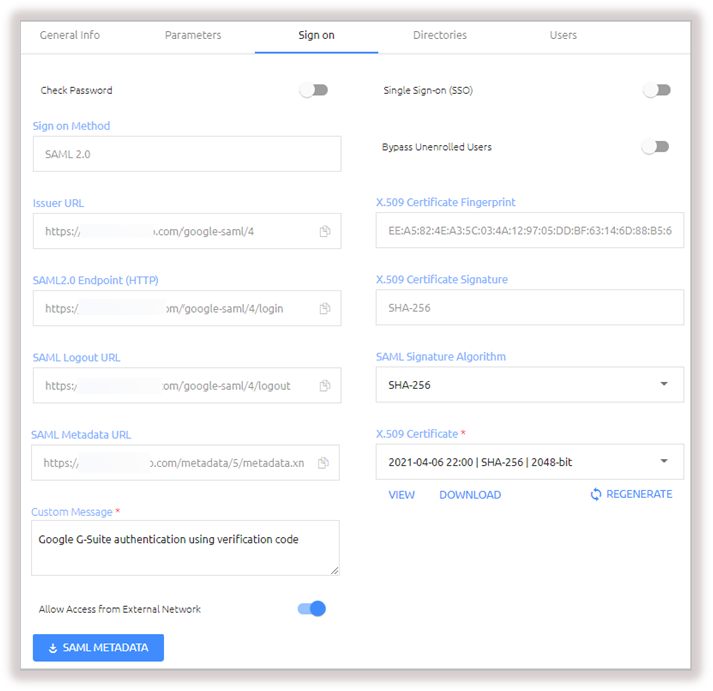
7. At the bottom of the Sign on tab, click Save.
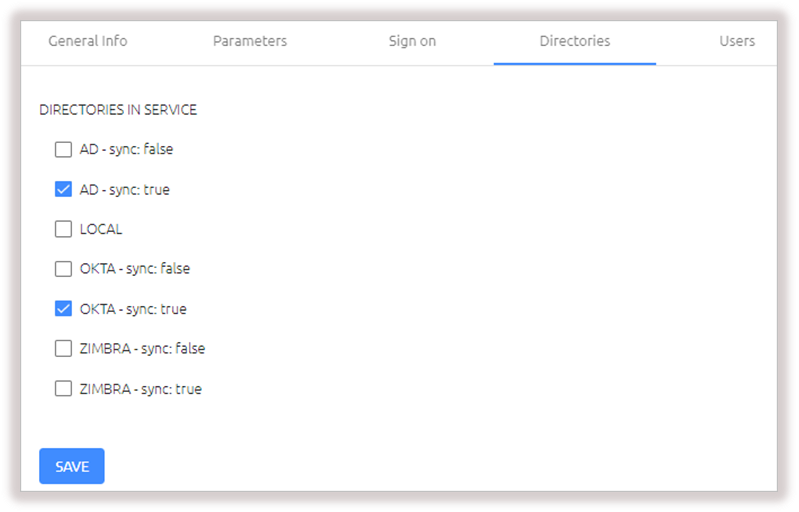
8. Open the Directories tab, and select the checkboxes of the directories to be integrated with the service. Then, click Save.
9. Open the Users tab and click Add.
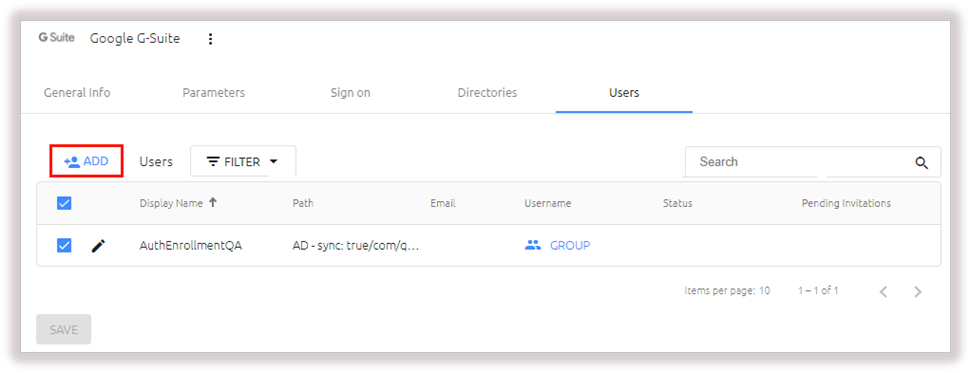
A popup opens, with a list of directories displayed on the left.
10. Expand the relevant directory and select the checkboxes of the groups and users that you want to add to the service. Then, click Save to close the popup.
The groups and users you selected are listed in the Users tab.
11. Click Save. Then, from the toolbar at the top of the page, click PUBLISH and publish your changes.
Setting Up SSO for G-Suite
The procedure below explains how to configure the 3rd party identity provider SSO in your Google G Suite Admin account to support integration with Octopus Authenticator.
Before you begin, make sure that you have access to the following elements. They can be copied or downloaded from the Sign on tab of the Google G Suite service that you created in the Octopus Management Console.
- SAML2.0 Endpoint (HTTP): The Octopus Authenticator G Suite Login page URL to which the G Suite service provider will refer users for Octopus authentication. Click the Copy icon to copy the URL.
- X.509 Certificate: Click Download to download the cert.pem file. You will use the file while configuring the G Suite 3rd party IdP SSO.
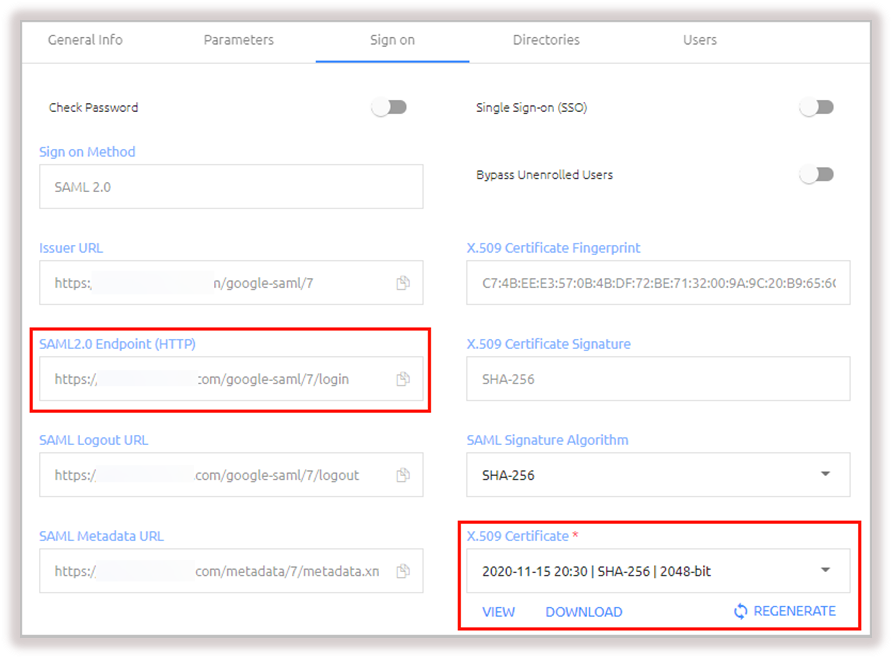
Note: Unlike other SAML configurations, the Issuer URL is not required for G Suite SSO 3rd party IdP setup.
To set up SSO for G Suite:
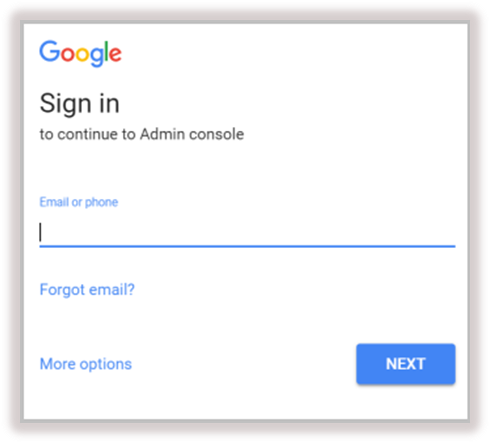
1. Log into your G Suite Admin account.
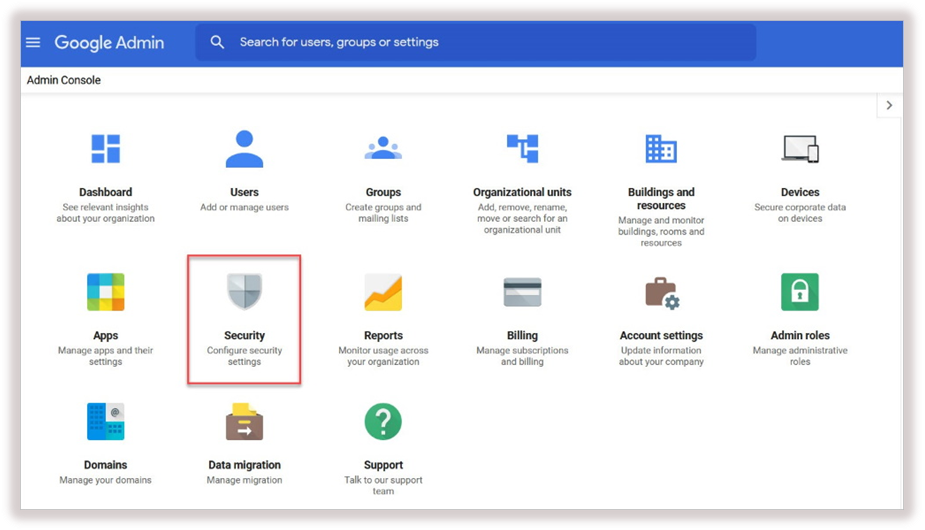
2. From the Admin Console menu, select Security.
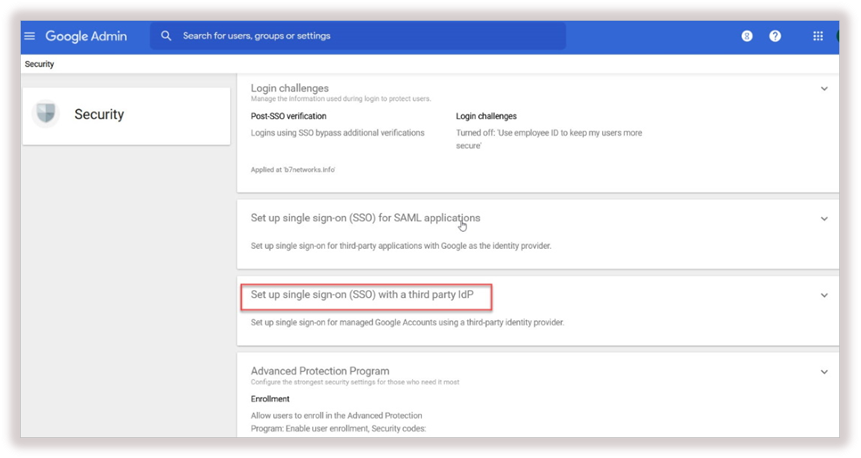
3. On the Security page, select Set up single sign-on (SSO) with a third party IdP.
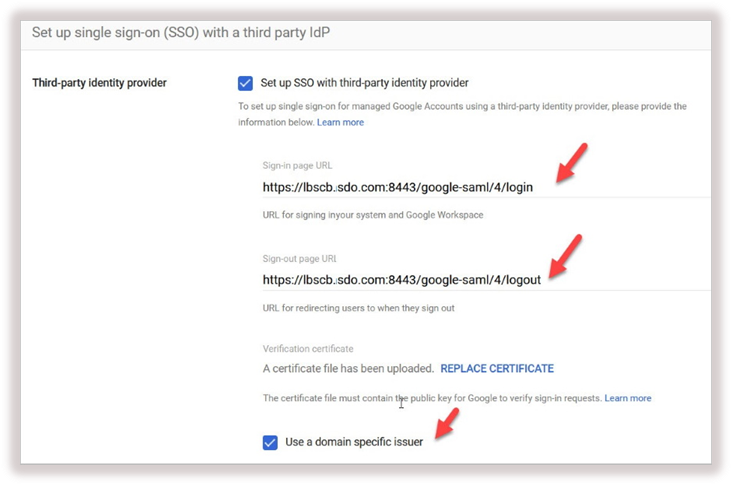
4. On the page that opens, select the Set up SSO with third party identity provider checkbox. Then:
- Paste the SAML2.0 Endpoint (HTTP) in both the Sign-in page URL field and the Sign-out page URL field.
- Under Verification certificate, upload the X.509 certificate file.
- Verify that the Use a domain specific issuer checkbox is selected.
5. At the bottom of the page, click Save.
Note: The Change password URL is not required for the Octopus Authenticator IdP setup. For more details, refer to G Suite 3rd Party IdP and the Password Change URL Option.
G-Suite SSO Known Behavior: Signing in with Super Admin Privileges
Google does not redirect Super Administrators to the 3rd Party Provider SSO sign-in page. This applies to sign-in attempts from browsers, mobile apps (such as the iOS Drive and Gmail apps), the Android account activation flow, and so on.
When Super Admins try to sign into an SSO-enabled domain (with or without a network mask) via admin.google.com, the following requirements apply:
- They must enter their full Google administrator account email address and associated Google password (not their SSO username and password).
- They must click Sign in to directly access the Admin console.
For further information, please go to the Google Support Knowledge Base
G Suite 3rd Party IdP and the Password Change URL Option
If you specify a URL in the Change password URL field, all users (other than Super Admins) who try to change their passwords at https://myaccount.google.com/ will be directed to the specified URL. This setting applies even if you do not enable SSO.
When you select the Setup SSO with 3rd Party IdP checkbox, the Require a change of password in the next sign in checkbox is automatically disabled. (If this checkbox were selected, users would be forced to change passwords upon their next sign-in.) This checkbox is disabled regardless of whether you set the Change password URL option.
For more information, please go to the Google Support Knowledge Base
Troubleshooting
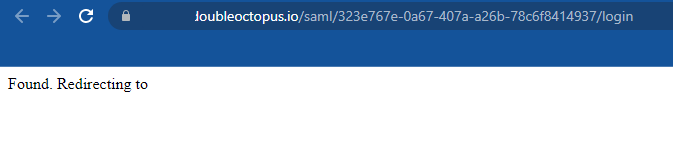
In case you see the error above, "Found. Redirecting to", please add mail address to the sso parameter on service. syntax should be "https://mail.google.com"