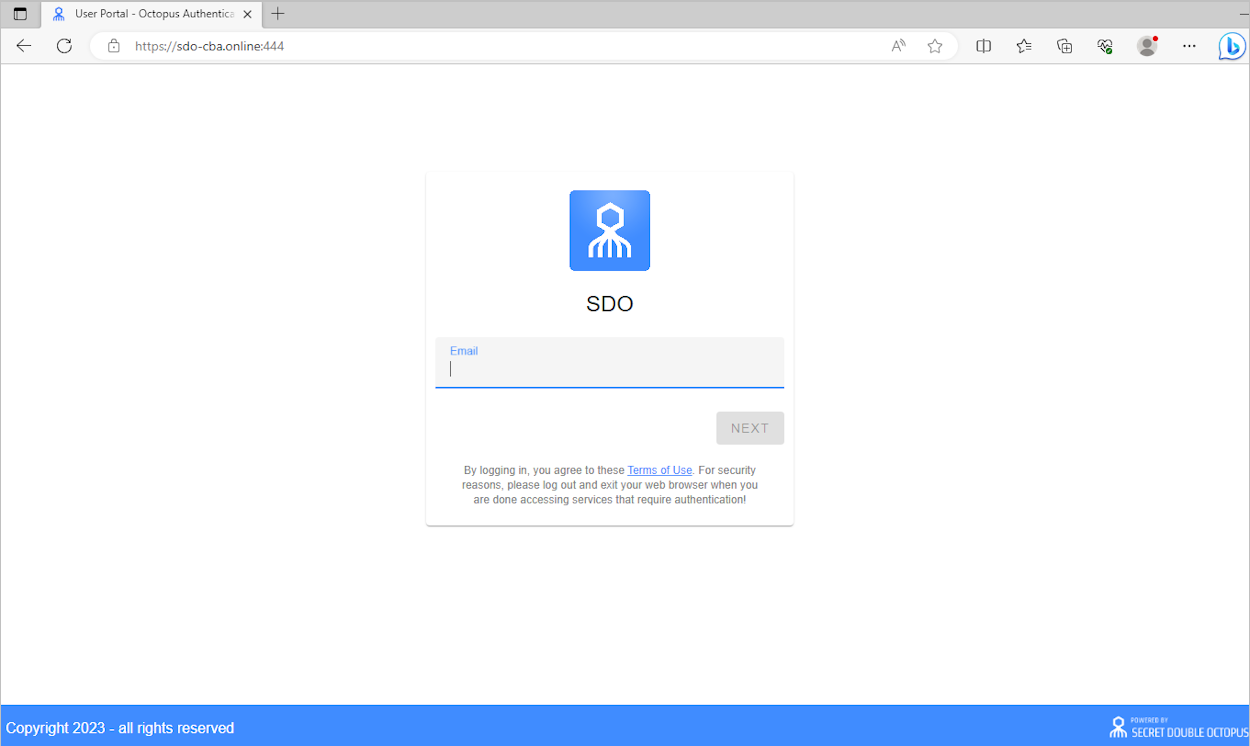
This document describes the configurations required for establishing certificate-based authentication (CBA) with Secret Double Octopus. Following successful integration, users will be able to authenticate to Windows, web apps and other integrated services using a smart card containing a certificate signed by your organization's root Certificate Authority (CA).
Smart card authentication works using the same mechanism as that utilized when users login through the authentication app or by providing a FIDO token. The certificate is NOT meant to be the underlying directory authenticator, but an alternative to the app / FIDO key methods.
The following software versions are required for the integration:
Octopus Authentication Server version 5.4.4 or higher
Octopus Desk for Windows version 3.8.0 or higher
Windows Server 2019 or higher (domain controller)
Windows 10 or higher
In addition, make sure you have a smart card, smart card reader and smart card minidriver available.
The integration process involves the following sequential phases:
Enabling CBA for the Integrated Directory in the Octopus Management Console
Configuring Nginx for Certificate-based Authentication to the User Portal
Configuring the Octopus Windows Agent to Support CBA on Windows login
The following procedure explains how to configure CBA for the relevant user repository (directory) in the Octopus Management Console.
To configure CBA for a directory:
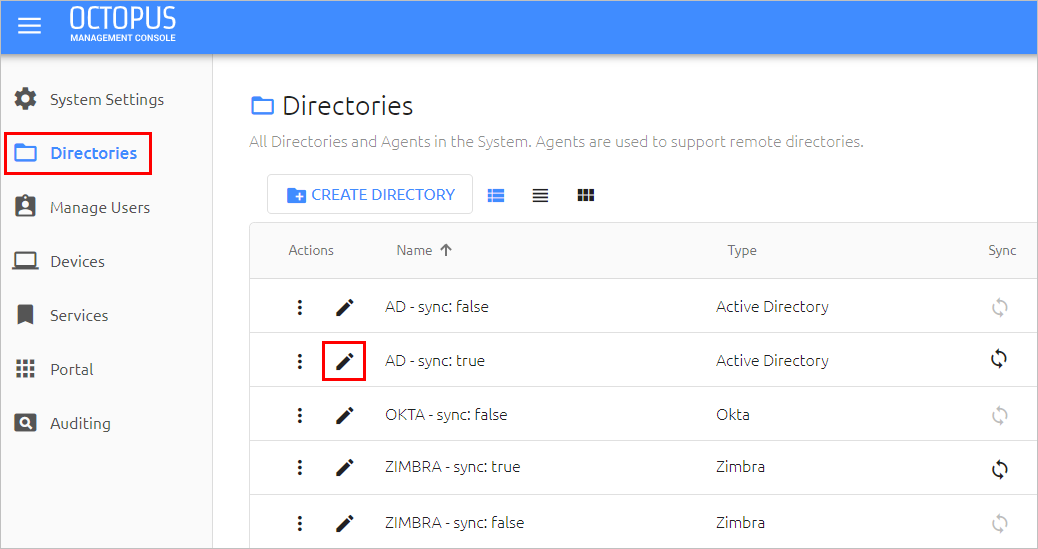
From the Management Console, open the Directories menu. In the card or row of the relevant directory, click the Edit icon to open the directory settings.
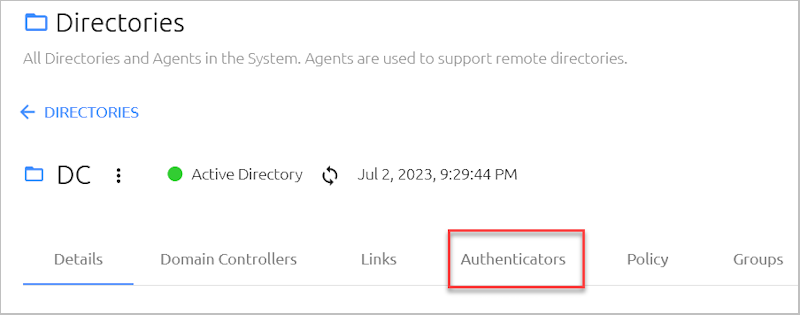
Select the Authenticators tab.
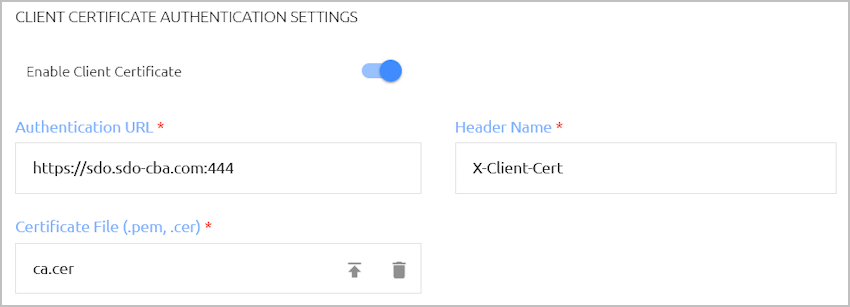
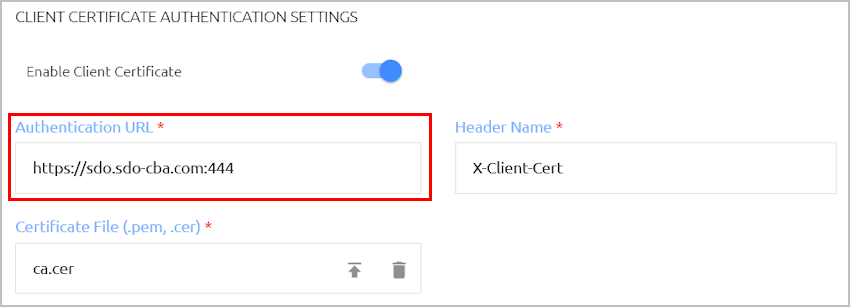
Scroll down to the Client Certificate Authentication Settings section, and configure the following settings:
Setting
Description / Notes
Enable Client Certificate
Click the toggle to enable support of CBA.
Authentication URL
Enter the Management Console Server URL on port 444.
Certificate File (.pem, .cer)
Upload the Root CA certificate.
At the bottom of the Authenticators tab, click Save. Then, from the toolbar at the top of the page, click PUBLISH and publish your changes.
Follow the steps below to configure the Nginx to support certificate-based authentication to the User Portal. All changes must be done on the Management Console Server.
Note: The instructions below are intended for All-in-One installations. They may differ for distributed deployments.
To configure Nginx for CBA:
Establish an SSH connection to the Management Console Server.
Verify that SELinux is NOT in enforcing mode (should be permissive or disabled) by running the following command:
cat /etc/selinux/config | grep SELINUX
Rename the sdomon-client-cert configuration file:
cd /etc/nginx/conf.d
mv sdomon-client-cert.inactive sdomon-client-cert.conf
Copy the Root-CA certificate to the Nginx folder to support portal CBA authentication:
cd /etc/pki/nginx
Override the ca.cer with the root CA certificate.
The following sections describe how to prepare a certificate template and enroll the certificate on the smart card.
Follow the procedure below to configure a user template to be used for the enrollment of the smart card.
To create a user certificate template:
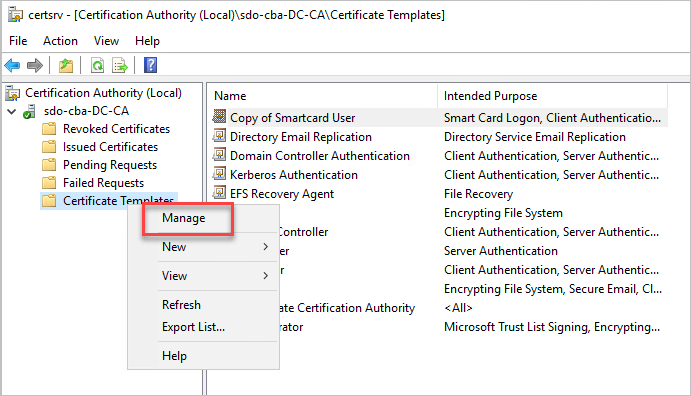
From the Certificate Authority, right-click on Certificate Templates and select Manage.
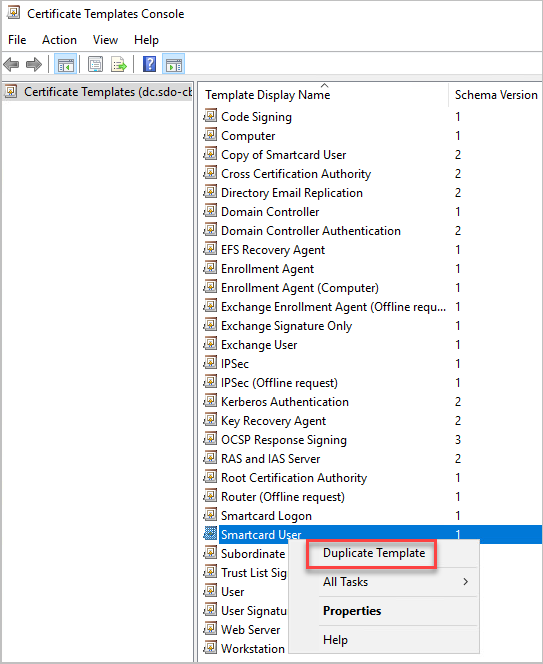
In the Certificate Templates Console, select Smartcard User and click Duplicate Template.
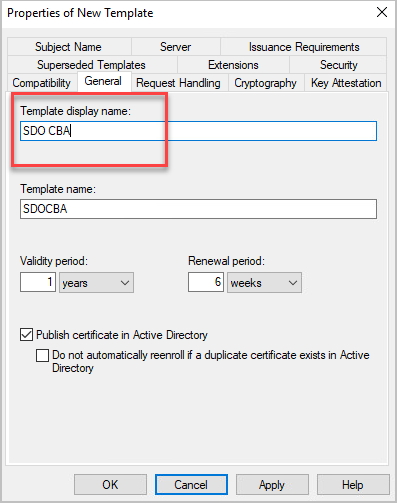
In the dialog that opens, select the General tab and enter a name for the new template.
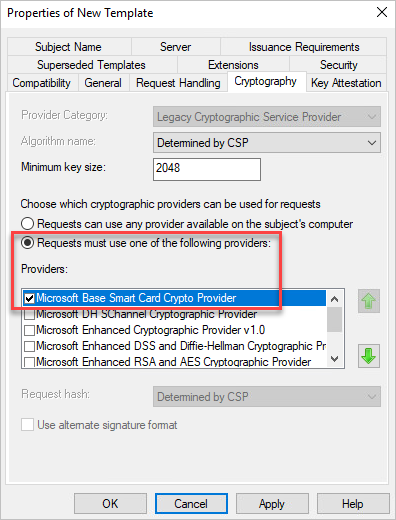
In the Cryptography tab, select the Requests must use one of the following providers radio button.
Then, select the Microsoft Base Smart Card Crypto Provider checkbox.
In the Security tab, assign Read and Enroll permissions to all groups of users that will be using certificate (smart card) authentication.
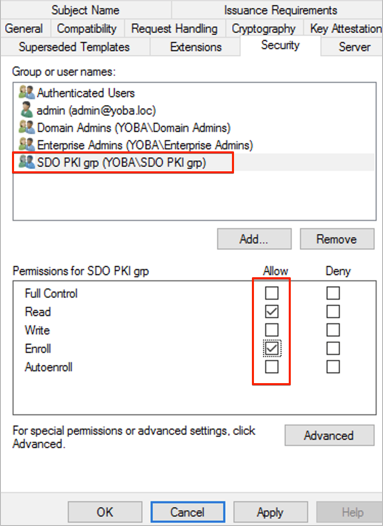
At the bottom of the dialog, click OK.
From the main Certificate Authority window, right-click on Certificate Template, and select New > Certificate Template to Issue.
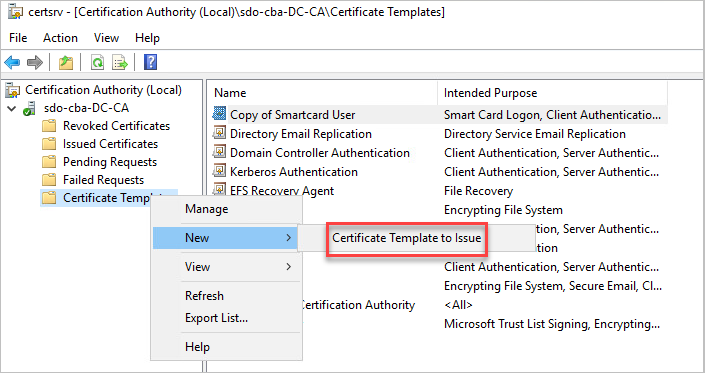
Then, select the template you just added, and click OK.
The procedure below details how to request a certificate and enroll it on the smart card. In this example, the smart card is used with a Windows 10 machine.
To enroll the certificate on your smart card:
Verify that the smart card is attached to the Windows workstation.
From the Microsoft Management Console (MMC), navigate to File -> Add/Remove Snap-in.
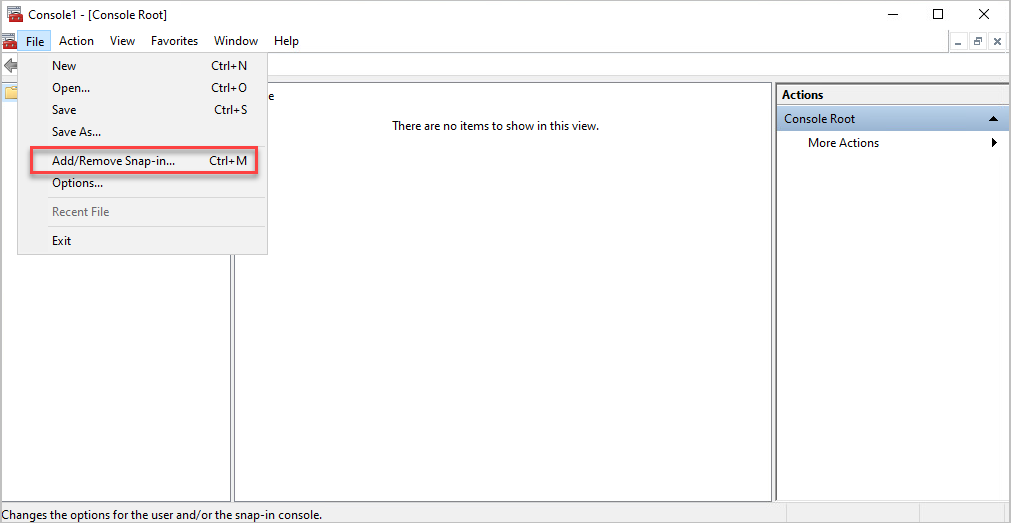
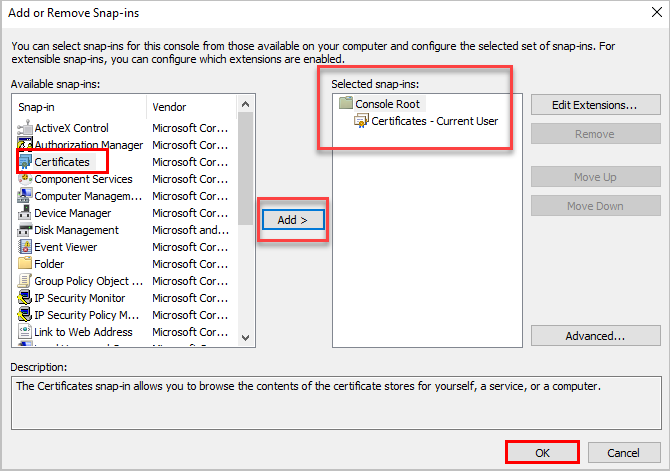
In the popup that opens, select Certificates and click Add.
Then, click OK.
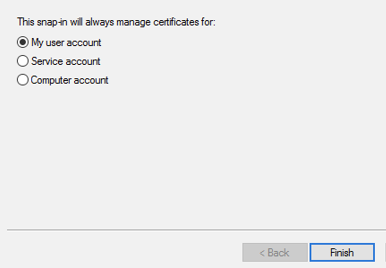
If the following window opens, select My user account. Then, click Finish.
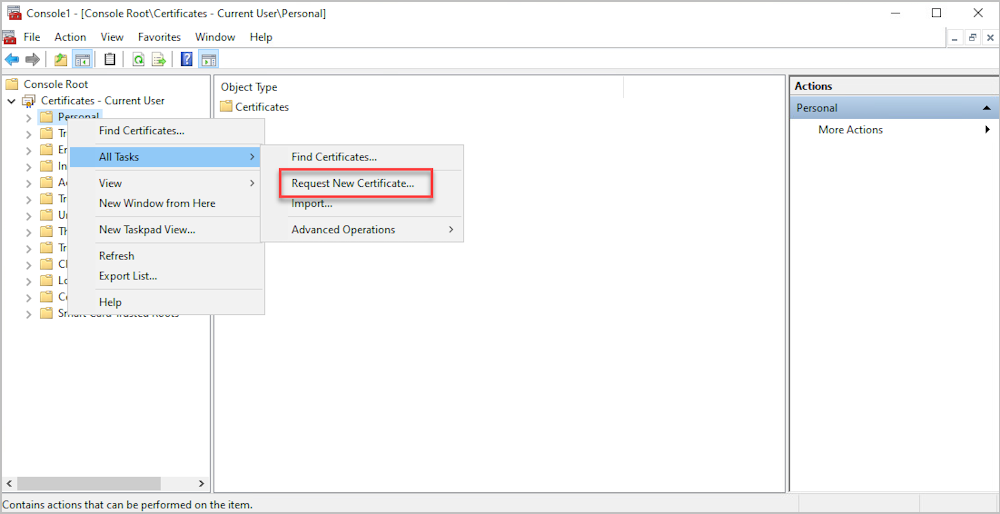
Navigate to Personal -> All Tasks -> Request New Certificate.
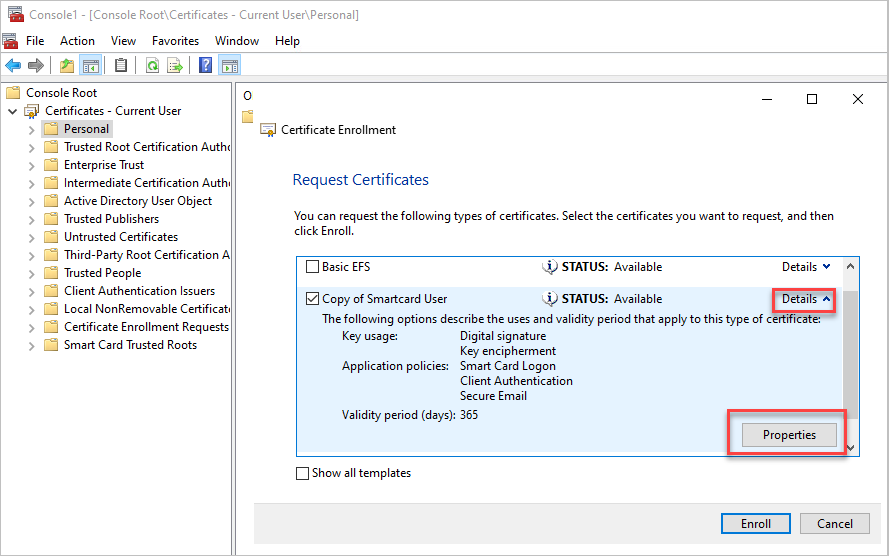
Click Next until the Request Certificates window opens, and select the template you created. Then, expand the Details pane and click Properties.
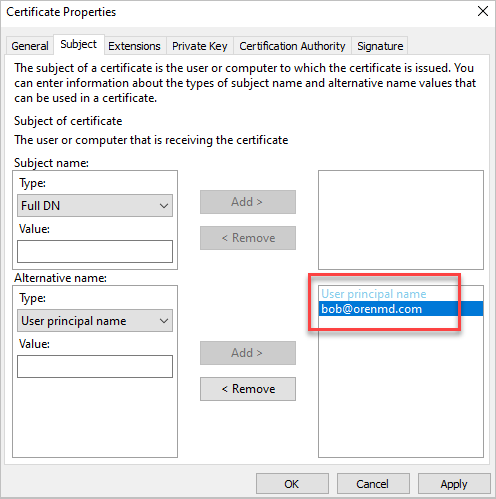
From the Certificate Properties dialog, select the Subject tab and configure the UPN:
Under Alternative name, select User principal name.
In the Value field, enter the user’s UPN.
Click Add, and then click OK.
At the bottom of the Request Certificates window, click Enroll.
You will be prompted to insert your smart card and enter the PIN.
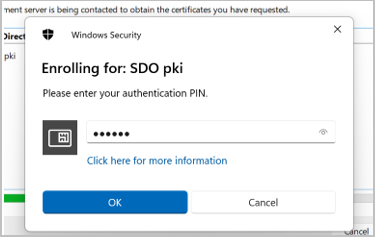
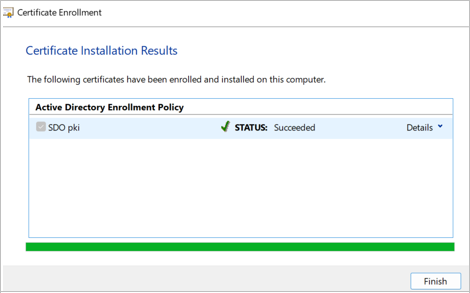
Verify that the enrollment process completes successfully.
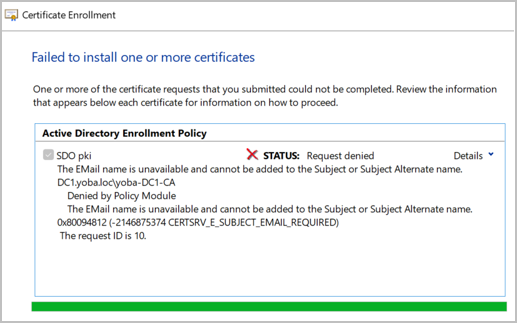
If the following error is generated, make sure the Email attribute has been defined for the specific domain user.
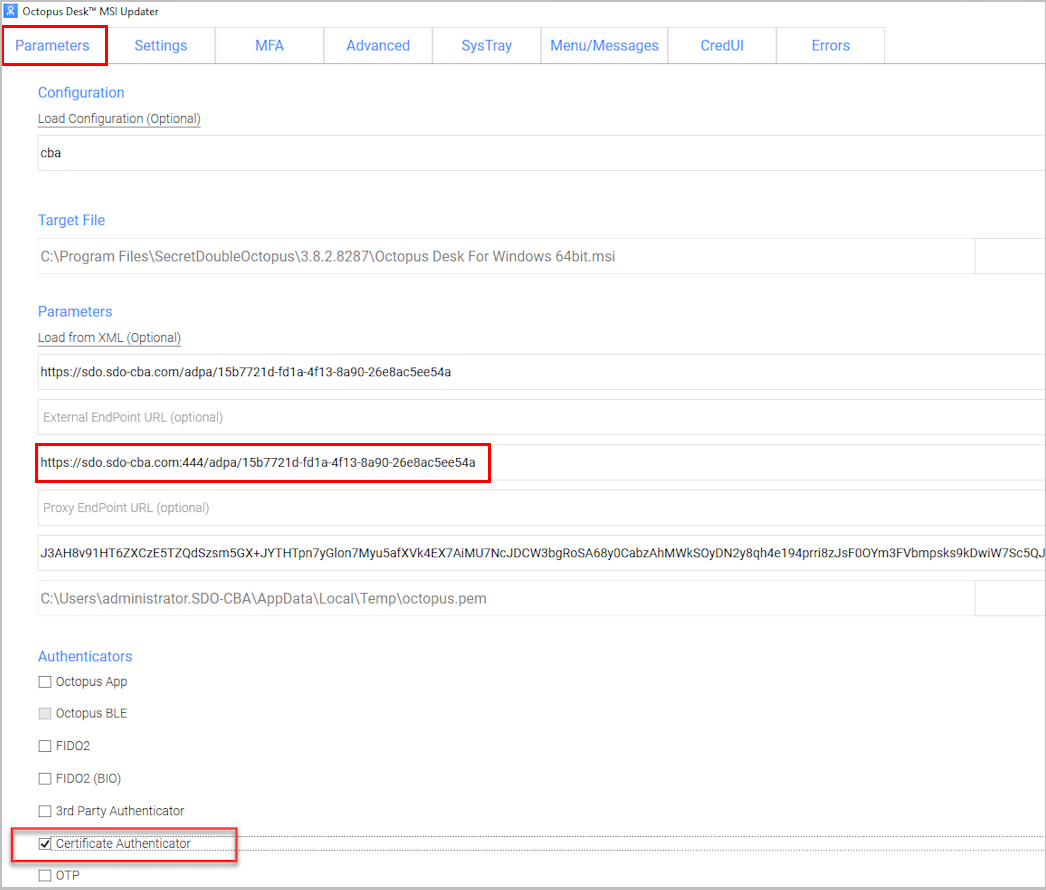
To enable your users to log into Windows using smart card authentication, the Windows agent must have access to your client certificate. This configuration is done in the Windows MSIUpdater.
To support certificate-based authentication to Windows, make sure you complete the following settings in the Parameters tab of the MSIUpdater:
Certificate EndPoint URL: Enter the full address of the load balancer where your root certificate is stored, followed by the listening port.
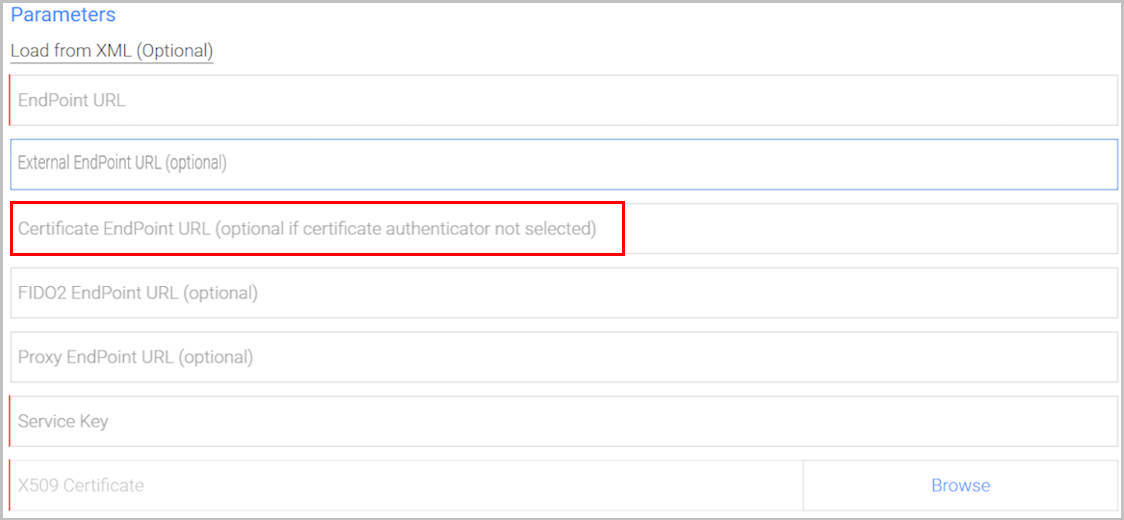
Authenticators: Select the Certificate Authenticator checkbox.
For example:
 |
For detailed information about configuring the MSIUpdater, please refer to the Octopus Desk for Windows Installation Guide.
Follow these steps to validate the certificate authentication URL:
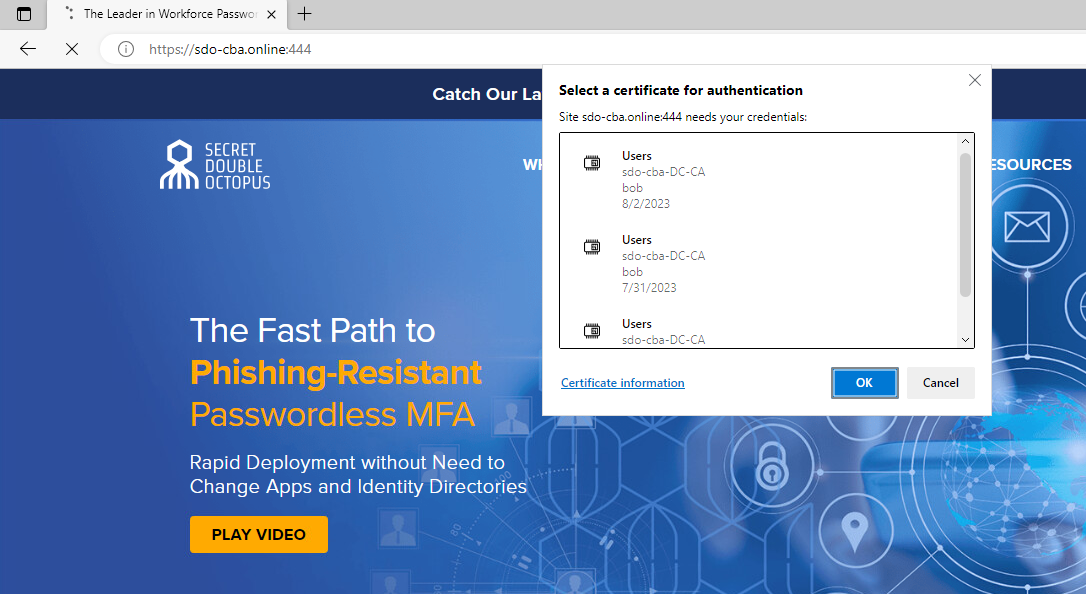
From your browser, go to the Authentication URL you configured in the settings of the integrated directory.
Select the certificate you enrolled and click OK.
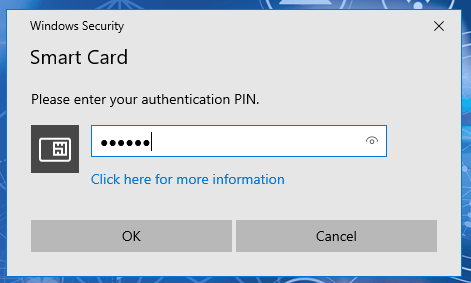
When prompted, enter the PIN for the smart card and click OK.
Following successful login, the Secret Double Octopus User Portal will open.